3D printed lantern
Lantern best 3D printing models・Cults
Messi lantern
€2.99
Candle holder Kit - Den Lantern
€3.75
wind proofed lantern V2 - lasercut
Free
wind proofed lantern
Free
Christmas Disney Lamp Lantern
€3.50
Snowman - constructor.
€5.02 -50% €2.51
x-mas lantern
€2
Naruto Ring
€1.08
New Version Filter Pack
€1.50
PLAYMOBIL - STEAMING MARY - Lantern support
€1. 25
GREEN LANTERN LAMP
€2.38
Christmas Streetlamp with Bows and Garland
€5
Lantern
Free
Give mom a Christmas treat!
€0.50
A little Christmas gift for grandma?
€0.50
Tonberry
€1.01
flexi Jack Skellington Christmas
Free
Kinoko Tea Light Lantern - Soupcan13
€2.82
Alan Scott Logo wall plaque
€4.71
CHRISTMAS LIGHT BOWL LANTERN
Free
CHRISTMAS CHANDELIER LAMP
Free
Snow lantern - candle holder
€2 -50% €1
Atrocitus Print
€12
#XMASCULTS FAROLCANASTA
Free
lantern photophore
Free
Bearded hairy gnome real beard
€1. 50
50
Christmas Lantern - Candle Holder - Photophore
€3
lamp post lamplighter 3D print model
€18
Blue Lantern Corps google home wall mount
€2.82
GREEN LANTERN RYAN BUST 2-PACK
€18.75
Lantern Garden Gnome
€5.69
Chinese lantern lamp
€2.50
SUPER POWERS CLART KENT
€9.41
Incense Burner 3D Model Free 3D print model
Free
halloween
€2
Cassian Andor's Lantern Parts from Star Wars: Andor
Free
flexi Jack Skellington
Free
Flexi Jack O' Lantern
€2. 82
82
Pumpkin Cat Halloween Jack-O'-Lantern Earring/Keychain (no supports)
€1.86
Crystal Lamp
Free
LED Pumpkins
€6.99
Lantern
€4
halloween jack o' lantern 3
Free
Halloween Oil Diffuser Cover Jack O' Lantern
€9.40
Caterpillar Jack O lantern - Carved face
€3.76
Caterpillar Jack O lantern - trans face
€3.76
Pumpkin Surprise (Jack-o-lantern piñata thing)
€1.98
Pumpkin Bot (No Supports, Articulated, Print-in-Place)
€2.31
3d Printed Lantern - Etsy.
 de
deEtsy is no longer supporting older versions of your web browser in order to ensure that user data remains secure. Please update to the latest version.
Take full advantage of our site features by enabling JavaScript.
Find something memorable, join a community doing good.
(674 relevant results)
scariest 3D printable models
Mid-Autumn is the time to be scary and dress up.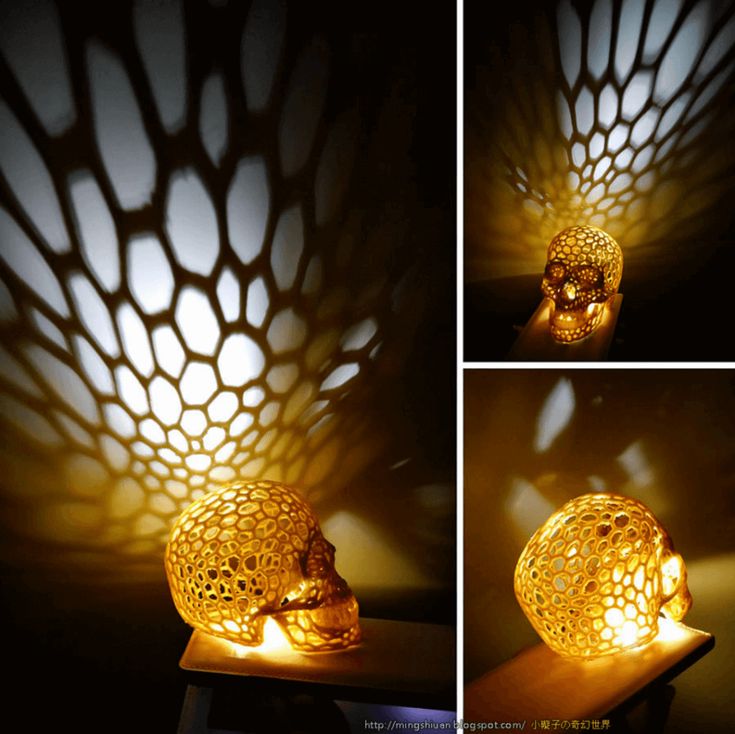 Halloween is pumpkin carving, ghost watching, scaring people, haunted houses, treats and party planning! This is also a great time for 3D printing, which is the perfect way to make props, costumes, pumpkins, and more. Here are some of the most interesting and creepy 3D printed jewelry and accessories.
Jack-o'-lantern
Pumpkin lamps are a long tradition. All you need is a 3D printer and some filament (preferably orange). The design is divided into two components: a pumpkin and a lid. The top hole of the pumpkin has a diameter of 24 mm, so you can put an LED light bulb or an electronic candle inside. For quality results, we recommend printing with a layer height of 0.2 mm and 10% infill. https://www.thingiverse.com/thing:167043
Pumpkin Spider
This 3D printed pumpkin lantern is a spider in disguise. When printing a spider, you can either print the parts in multiple colors or color them after printing to resemble a pumpkin. The manufacturer printed this with a layer thickness of 0.15mm and 10% infill. https://www.thingiverse.com/thing:3129886
Pumpkin of Many Faces
This pumpkin lantern is made up of a base and stem, and various facets that attach to the base. The designer provides 12 different face models. With one base, you can change the face every day to a different theme. https://www.thingiverse.com/thing:25
Jacks
You will need supports for printing eyes and teeth. It can also contain an electronic candle or an LED lamp inside. https://cults3d.com/en/3d-model/art/jackie-jack-o-lantern
Twist-Lock Coffin
The design of the coffin is a secret candy storage box. You can use it to store treats or hide them from prying fingers. Turning the coffin lid is the only way to open it. The manufacturer has uploaded several different models of coffins with different lids and bases. If you want to store more candies or larger items, expand the coffin to the size you need. https://www.thingiverse.com/thing:4967007
Ghost cookie cutters
These cookie cutters give your snacks an extra twist. There are four forms: three ghosts and one pumpkin. The designer printed the models in PETG, a food-safe material. https://www.thingiverse.com/thing:3149156
Candy Dispenser
This clever design includes a hollow cylinder (rod) with a hole in the side. Fill the pumpkin through the rod at the top, twist the rod to open the pumpkin's mouth and you've got candy! One important detail to keep in mind when printing this model is to avoid using automatic supports. https://www.thingiverse.com/thing:2601295
Safe Treater
This model is based on a scan of a real pumpkin; That's why the texture looks so realistic. With a handle added on the side, you can attach the gourd-shaped scoop to a selfie stick, broom, or whatever you have on hand. The design of the model will make the treat safer, as you will be able to keep a decent distance from other people. https://www.thingiverse.com/thing:4618663
Raven
This design is a copy of a raven with red LED eyes. Install it almost anywhere, it will scare people and scare away pigeons. The manufacturer has also uploaded an animated version of this crow that takes it to the next level. You can program the head to move from side to side and the LED eyes to blink at different intervals. https://www.thingiverse.com/thing:1091364
Ghost Bat
This ghost bat gives the impression that it is flying when it dangles. To print the model with minimal support, you will have to rotate it 150° back. For reference: initially the model is in a vertical position. https://www.thingiverse.com/thing:1095980
Scarecrow
This 3D printed scarecrow head looks very convincing and realistic. Even if it doesn't scare away the crows, it will definitely give people a boost. You can print the model to the scale of a real human head or any smaller size. The designer also provided a separate file for the hanging scarecrow. https://www.printables.com/model/75740-scarecrow-head
Frankenstein Monster
The head of this Frankenstein monster has many uses. You can use it to scare kids, store candy, or grow plants. Although the model is closed at the bottom, the author suggests cutting it in a slicer so that it stands better.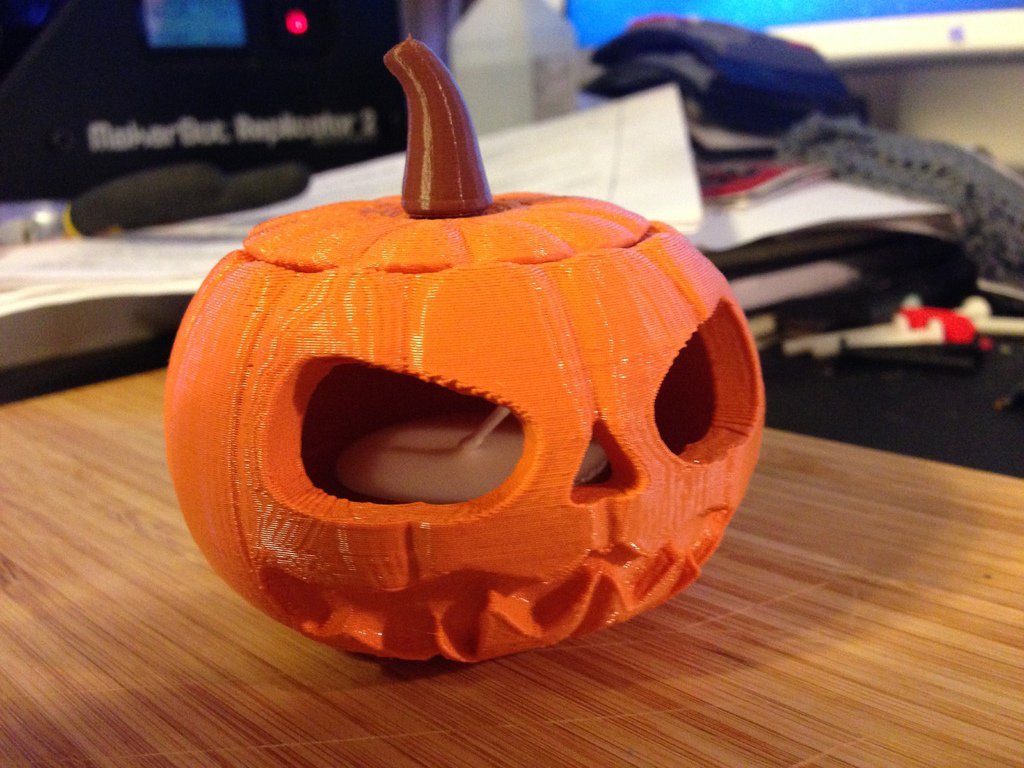 https://www.thingiverse.com/thing:1081535
Coasters
The original creator of these coasters used wood PLA to make them look like they were carved from wood, but you can use any type of thread you like want. Four designs are available, all "carved" into a gourd-shaped coaster. 65% filling is recommended. https://www.printables.com/model/7005-halloween-coasters
Skeleton Lamp
With this cute skeleton lamp, you can turn on some light even when it's dark outside. You will need 17 ultra white LEDs and the color of the light will depend on the color of the PLA used. https://www.printables.com/model/40977-cute-skull-lamp
Hand Vase
While this hand might be a little tricky to print, the results look like the real thing, and what's more, it can stand on fingers or wrist.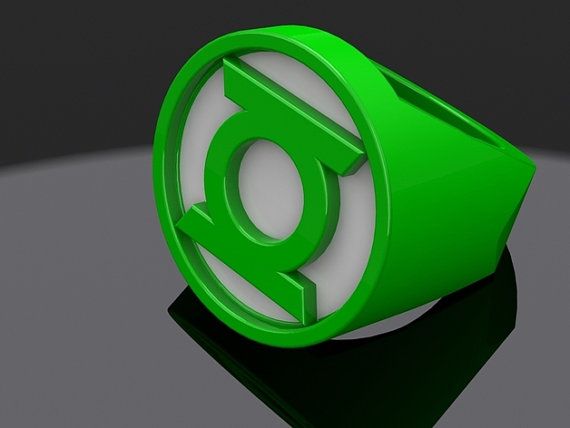 If standing on the wrist, it can be used to hold objects. Or, if he stands on his fingers, on the other hand he has a candlestick. When printing a model, supports are required, and the designer also recommends using a substrate. https://www.printables.com/model/7006-halloween-hand
Skull Vase
Even your plants can create an intimidating atmosphere! You can 3D print a skull planter to make plants part of your decoration! If you have the right type of plant, they can even look like brains. Be sure to use waterproof thread. It might also be a good idea to use food-safe filament so that wet dirt doesn't damage the plant and the plastic of the filament doesn't contaminate the ground. https://www.myminifactory.com/object/3d-print-grim-skull-vase-93070
Tree and Pumpkins
This Halloween decoration features a scary-faced tree with mini pumpkins hanging from its branches. The tree and pumpkin are separate models, so other mini decorations can be hung on it if desired. One manufacturer used glow-in-the-dark filament to print the spheres and then placed them in the eye sockets of a tree, making the tree feel like it was alive. https://www.thingiverse.com/thing:3130227
Boiler
It uses LEDs of different colors, which are stored in a compartment located at the bottom of the boiler. You can put on some candy or a cool smoke effect without risking damaging the electronics. https://cults3d.com/en/3d-model/gadget/circuit-playground-bluefruit-cauldron
graves
complete with a mini-lighting grave, this realistic grave can be printed without any dop . You will need some glue to put the pieces together, and you can also place an LED light bulb inside the coffin to make it glow. It can be a great decoration for your garden! https://cults3d. com/en/3d-model/various/halloween-grave
Outcoming hands
If you enter the room with the lights off and feel it on the wall or on the table, this will probably frighten you a lot! There are four different hand designs. When they are attached to a surface, they look like they are coming out of it. This might just be what you're looking for to take your Halloween decor to the next level!
← SPEE3D introduces XSPEE3D: the world's fastest metal container 3D printer | How to Calibrate a 3D Printer →
Build a Powerful 100W Super Bright Flashlight with Your 3D Printer
After watching a video on assembling a 100W flashlight, I was inspired to build my own super bright flashlight. In an attempt to spend less, I decided to save money and 3D print most of the parts. My version is based on a round fan/heatsink pulled from an old computer, these fans should be fairly common and you should be able to find them easily! nine0009
The light can be fully controlled (on/off, brightness) with a two-handed configuration or simply carried with one hand like old school lights. This guide assumes you have a basic knowledge of electronics, but it can also be a good first project for you if you have access to a 3D printer (you can also print parts in 3D hubs).
Step 1: Components
Before we start assembling, we need parts and tools to work with. Links will not be provided in the article, since everything is very easy to find on sites such as Alliexpress and Ebay. Most of the parts should be available from regular Chinese sellers at a low cost. nine0003
Printed parts for homemade LED light:
Parts can be downloaded from thingiverse here.
If you don't have access to a 3D printer, look for local service providers.
Parts may be printed quite roughly because they have low detail. If you are using a 0.4mm nozzle, then I would recommend a layer height of 0.3mm. Print at 100% coverage. Printing the parts should take about an hour each. ABS or PETG must be used. nine0003
You need:
- 4 adapters
- 1 left handle
- 1 right handle
- 1 battery holder
I would recommend that you don't use my LED Driver Bracket as it can only be mounted to my fan/heatsink.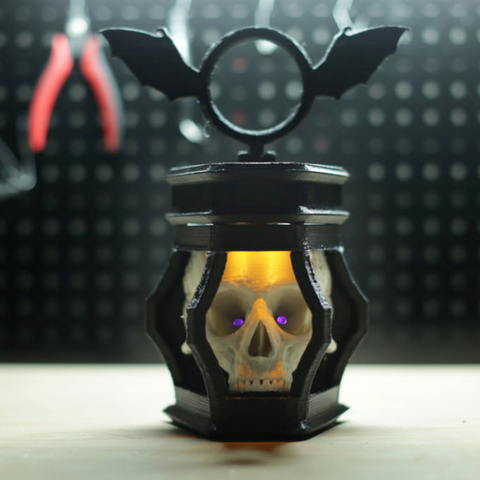 If you don't want to make your own bracket, you can print out an extra battery holder and place the controller board on top of the heatsink.
The pen I used was not designed by me, it can be found here. nine0003
Electronics:
- 1x 100W LED. I would recommend cool white, but warm white (and other colors) work just as well.
- 1x 100W LED Driver is a generic board that is widely available. Both with a single blue potentiometer and with a double one everything will work fine. This part is required because it boosts the voltage from the battery to 32V.
- 1 battery - 8 AA batteries will do, but I prefer lithium ion or lithium polymer batteries. nine0167
- 1x meter of <16awg gauge wire - I prefer silicon insulated wire for high currents, but any other wire will work.
- 1x battery connector - always use a connector. I prefer xt60s.
- 1x toggle switch - I prefer 2 red position switches. They are rated for 5A and should be sufficient for this project.
- 1x ~20awg wire - for control circuit.
- 2x 11k resistors - for control circuit. nine0167
- 1x potentiometer 10k - for control circuit.
Equipment:
- 1x LED lens - must come with reflector, glass lens and metal plate
- 4x 10mm m3 standard screws and nuts - to connect the metal plate to the radiator
- 1x tube of thermal paste - any version of will do
- 1 bag of zip ties - at least 20 pieces, for attaching handles and securing wires
- Other useful parts:
- 1x Velcro - to keep the battery from slipping out
- 1x battery strap - for attaching the battery to the battery holder
- 1x super glue - for mounting control loop
- 1x hot glue - to secure LED
Tools:
- Soldering iron and solder - for soldering LEDs and control circuit
- 3D printer - for printing parts
- pliers - to protect ties
Step 2: Connecting the Electronics
The first thing we need to do is solder the wires to the LED.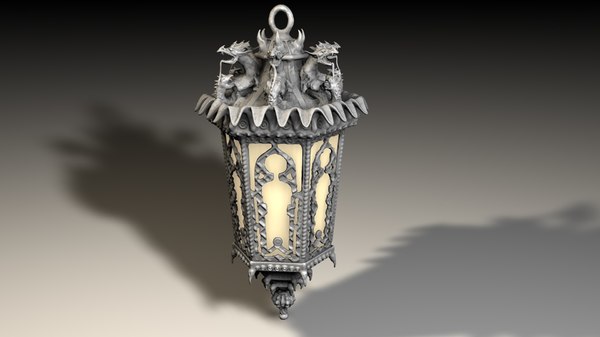 Twist and tin the wires, then insert them through the hole in the protruding tabs on both sides of the LED. I would recommend covering the tabs and exposed wire with hot glue, superglue, or clear nail polish. I prefer nail polish as it dries quickly and can be easily removed if you need to re-solder something.
The next thing to solder is the battery connector. Depending on the battery, you can use different connectors, but I always recommend using a pair of xt60. When working with high output batteries, always have a way to completely disconnect the battery. nine0003
Cut two wires 30 cm long and solder them to the connector of your choice. Seal the open connector with glue or heat shrink.
Cut the positive cable 2/3 from the connector and solder onto the switch (as shown above). Make sure you isolate the switch. Also make sure the fan cables (+ and -) reach the driver board.
Specifications:
- 1A at 30-32v
- 2.5A - 3A @ 12V (via LED driver)
- light at low power - 1600 lux
- light at high power - 22000 lux
Note: lux and lumens are not the same thing, I measured the reading in lux with a light meter.
Step 3: Putting It All Together
Note. As I said in step 2, the bracket I made is specific to my setup, and if you're not 100% sure it will fit, I'd recommend printing a different battery holder instead and sticking your LED driver to it. The second battery holder can be mounted on top of the radiator without modification. nine0003
Attaching the LED
- Glue the reflector to the LED.
- Screw the 3D printed adapter to the heatsink slots.
- Apply some thermal paste to the LED and press it against the heatsink.
- Attach the glass lens and metal plate over the LED and screw the metal plate onto the adapters.
- Make sure the LED is attached under the lens. If the LED is wiggling, apply some glue between the LED and the heatsink. nine0167
Attaching the handles
So now we are going to attach the handles and the battery holder to the heatsink. We will do this by threading the cable tie through the channels of the handles. Start by threading the zip tie through the battery holder and attach the second zip tie to the one you just inserted. Do not tighten it more than a couple of "clicks". Pull this tie through one of the knobs (make sure the potentiometer/switch hole is facing you) and add a third tie. The handle should now be locked with zip ties 2 and 3. Add zip ties 4 and 5 and thread them through handle 2. Now zip 5 should be able to lock with zip 1. Place the heatsink in the middle of the loop and start tightening the zip ties one notch at a time. nine0003
Finish assembly!
You are almost done! Attach the switch and potentiometer to the knobs. Potentiometer on the left, switch on the right. Glue the resistors and the blue potentiometer to the handle.
Connect the battery and try turning on the device! Try not to direct the light at people.
Step 4: Done!
Now you know how to make your own LED flashlight. Hopefully by now you have your own portable sun! This project is not just a powerful LED flashlight, it also works great as lighting for filming/working at night.