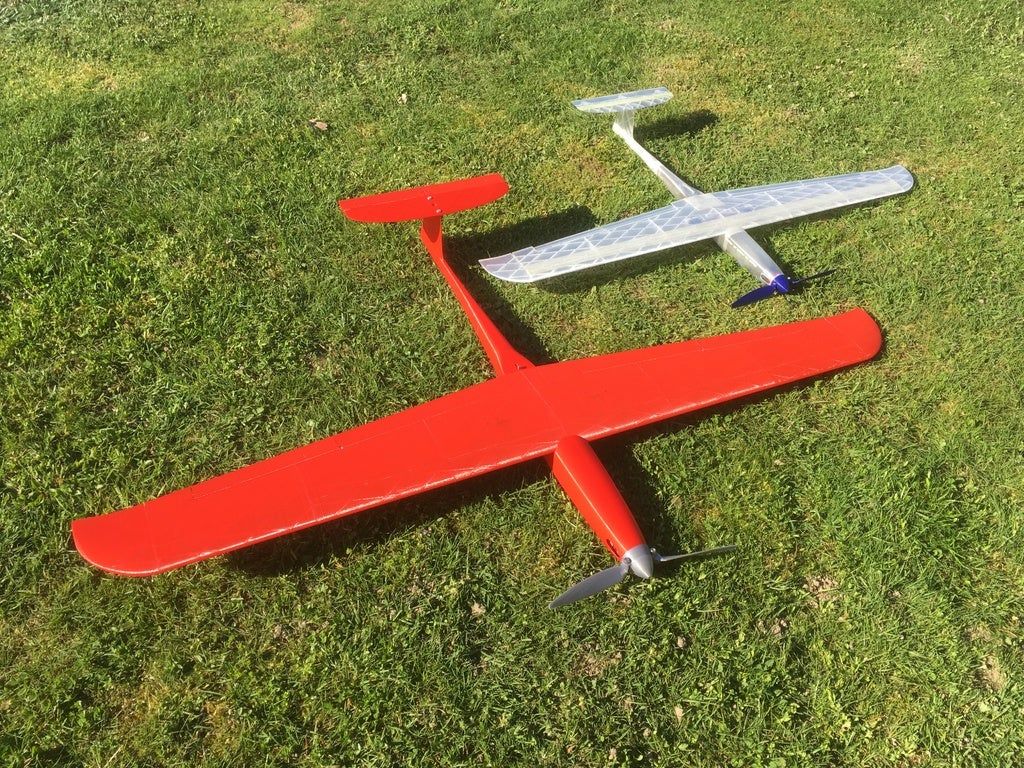
Rc plane 3d print plans
FAQ – 3DLabPrint
You will need:
- 3DLabPrint digital 3D files
- 3Dprinter
- PolyAir 1.0 (highly recommended) or PLA filament
- RC equipment (links provided in our airplane user guide)
Test files
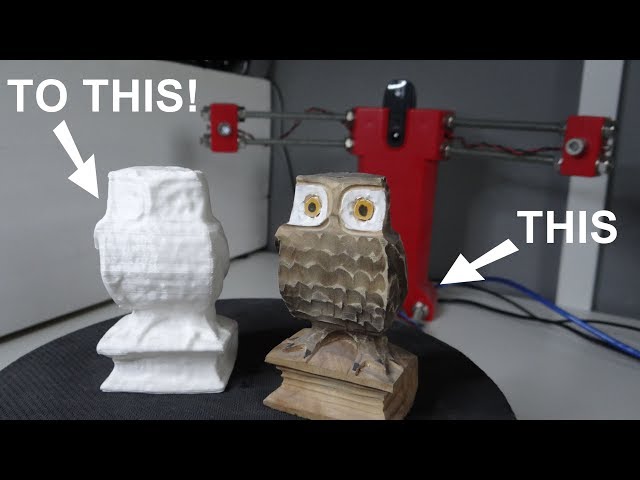
If you want to test your printer before buying the plane, you can find the test files on our Thingiverse profile. You’ll find usually the largest part of some of our planes. We’re using the same technology for all of our models, so once you dial in your printer for any of the test files, you should be able to print all of them.
Printing guide/FAQ
Introduction
Please see the PDF/VIDEO user guide prior to printing our models. A 3DLabPrint Pilots Association Facebook group contains much useful information as well. We’re using some specific features in our STL files resulting in possible errors in some CAD / slicing software. This is the intentional result of extensive development to achieve desired strength-to-weight ratio.
Our STL files are designed for printing in special mode, which some slicers may detect as faulty. We’re including Simplify3D factory files with all settings preconfigured for Direct drive printers. Since version 2.4.0 we also support Prusa Slicer and continuously add preconfigured 3mf files to the downloads. Satisfactory results are achieved with Cura, please check the Help section for more info about slicing in specific slicers. Older Slic3r based or other slicers are not supported and the functionality is not guaranteed.
Please check our Facebook or Discord for recent information.
Included Gcodes are 100% compatible with Prusa i3 original printers (it should work with most i3 family and compatible printers as well)
Please experiment with temperature (for PLA in range 210-260) for proper layer bonding… Usually, for thin wall printing, we need higher temperatures than recommended by filament manufacturers compared to printing standard items.
Outlines/Perimeters/Shells
Most of the parts are printed with only one perimeter/shell thickness (0.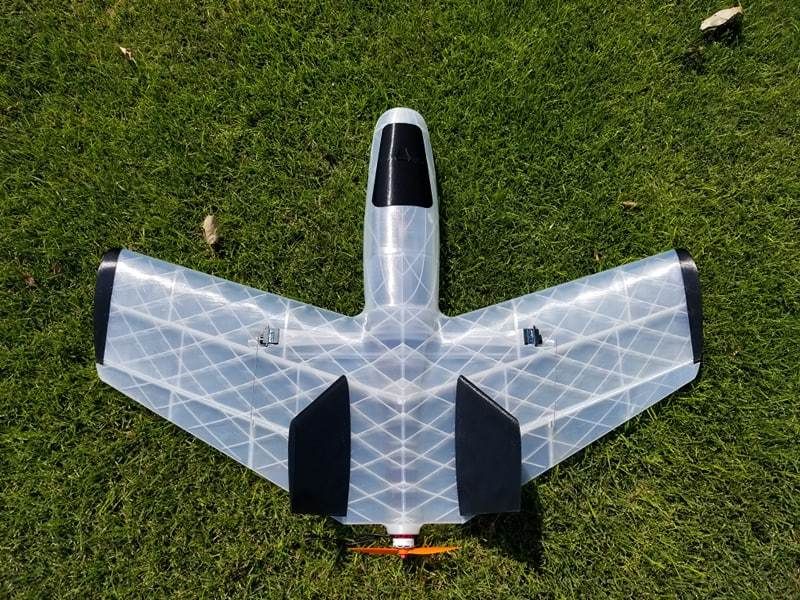 4 mm nozzle gives the best results). Turn on thin wall detection for our slic3r version Thunderbolt. For the first few millimetres of the parts or exposed parts, you can use a separate process with two or more perimeters shell. Please see the VIDEO guide for more information about this.
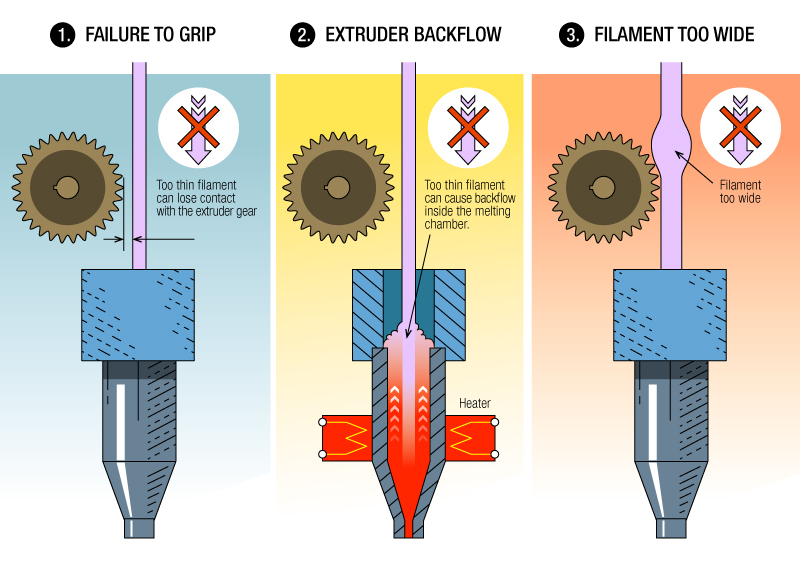
Extrusion multiplier – the amount of filament
Please experiment with the extrusion multiplier. This is very IMPORTANT for successful prints. Increasing extrusion multiplier results in stronger parts with better layer bonding. However, it increases the resulting weight of printed parts. Refer to optimal weights for each part in our PDF user guides to find the optimal multiplier values. The multiplier value can vary depending on your printer and filament diameter. Value 1.02 usually works fine, but sometimes we may need at least 1.15. Always ensure your hot end is in a good shape, provides steady flow, and the right amount of filament. Don’t forget to calibrate your extruder E steps and add measured filament diameter into the slicing software.
Retraction
The Retraction value is very dependent on your printer and filament quality. For non-bowden (direct drive) extruders RETRACTION values of 0.7-1.5 usually work fine. The good starting point is 0.8 and if you find some oozing during the non-print movement try increasing this value. For bowden extruders use values around 4-6 mm. Set retraction for all spots, not just for outer perimeters! In the case of nozzle clogs due to molten filament in heatbrake, decrease the retraction value.
In case of under-extrusion at the layer start point (after retraction), please check your hot end for issues. The “Extra restart distance” value (if your slicing software has this feature) adds an extra amount of filament after retraction. Values of 0.05 – 0.2 usually works. Another option is decreasing the print speed, increasing the movement speed to reduce oozing and adjusting the temperature. Reducing the retraction speed to 15-20 mm/s or placing the parts on the heatbed differently might help fight the under extrusion after retraction as well. Sometimes a drop of vegetable oil applied on filament prior to print could reduce friction, especially in bowden extruders.
If you have tried everything with no success, you can try one last solution:
Change the bottom stock setting to the optimize start point setting. This option causes some minor blobs to airfoil but helps with oozing the filament out of the nozzle and so on… (Simplify3D picture)
The last chance – if you use Prusa i3 clone printer and nothing works.
Your hotend/extruder is not able to print thin walls. Consider upgrading with E3D Prusa i3 Upgrade Kit, you get a 100% working Nozzle/Hotend/Extruder combination. Especially in the case of cheap Chinese printers, this could push your printer to a completely different level.
In general, if you already tried all settings, more than one PLA filament supplier and nothing helps, you will need to check your Nozzle/HotEnd/Extruder. Clear it, replace the nozzle, PTFE tubing or a whole hotend, or upgrade to a better quality extruder.
And just one piece of advice from Philipp Amann (thanks for sharing this):
I have done a lot of testing and discussing with other “printers” and we have found, that the cheaper (or in bad condition) printers can’t really cope with 0,25 layer strength and the necessary restart. When you reduce the layer to 0,2 it works perfectly, even with the cheap printer.
This is a 0.25mm layer
This is the same S3D profile with a 0.2mm layer…
Bed adhesion
The very crucial part of success is proper first-layer adhesion. The first layer must be properly flattened (squished) and it’s essential to decrease the first layer printing speed. Try to find the best sweet spot of your first layer height. For better strength of printed parts and better bed adhesion is vital to set 2 perimeters for the first 1-3 mm of print. You can use a separate process in Simplify3D. In other slicing software, you could at least increase the width to 130-150% and reduce speed for the first layer. HEATED BED is highly recommended.
If you’re printing on glass, we have a great experience with ultra-strong hairspray. On clean, degreased glass apply the hairspray, let dry and scrape with a razor blade to create matte surface. Heat up to 60°C.
PEI, Kapton or other special bed surfaces works well too. Without a heated bed, you can use some PVA glue stick like KORES and add some skirt outlines with 0 mm offset. The most difficult parts tending to warp due to poor bed adhesion are the trailing edge of wings. You could add some pads to these parts to increase adhesion.
If you’re experiencing bed adhesion issues on Prusa MK3 PEI, mostly on trailing edges, you can sand it with fine-grit sandpaper from time to time. It is also vital to degrease the surface using alcohol, sometimes a dishwashing agent (dissolves not only grease but also sugar residues from the fingers) and you can also rejuvenate the PEI sheet using Acetone. Don’t use the Acetone too often as the PEI will get hard and brittle. Adjust the Live-Z using the display of your printer while printing the first layer to nicely squish the laid material. You need to find the sweet spot, so the part sticks well to the bed and doesn’t have the elephant foot effect.
The ultimate adhesive we have the best experience with on any surface including PEI is the 3DLAC spray. The higher price is justified by the ease of use, steady performance and low consumption. One application withstands multiple print jobs.
Temperature/Print cooling
The temperature of the hotend varies with each material. Try to print as hot as possible with the print cooling fan OFF. (while keeping the hotend heatbrake fan ON). Molten plastic flowing from the hotend should be able to melt again the previous layer, so it makes a solid bond. Fit as many parts as possible to the bed to let the other parts cool down and gain some strength before the nozzle gets to the same spot. For PLA the range is 200-260°C. 230°C is a good starting point.
Axes alignment
Having your printer perfectly aligned is very crucial. If you find your printed parts won’t fit, you either have your axes skewed, motor e-steps are off, or you may have scaled the model by mistake. All our STLs are tested to fit spot on.
There’s a printer calibration test benchmark you can print and measure the dimensions and angles to check the axes and e-steps of your printer.
https://www.thingiverse.com/thing:3148790
Layer shifts on Prusa MK3
The Prusa MK3/MK3S has a feature to detect nozzle collisions. Sometimes this feature can lead to intermittent layer shifts though. Therefore we recommend turning this feature off. On the other hand, silent Stealth mode preventing the use of collision detections is well tested, and known to work great.
Filament
For best results, We recommend PolyAir 1.0 our in-house developed and produced “Airplane Grade Filament”.During our development process, we found that also PLA gives very good results. Any standard quality PLA is ok, however, the final quality of print depends on the combination of Filament/Extruder/Hotend. Some colours of filament, due to colouring additions, gives different strength to the resulting parts. Please experiment and find the best possible attributes suiting your need. Less translucent filaments are easier to paint, and reflective colours are less prone to warp in direct sunlight.
Another possibility is to use PETG, however, the result is more flexible. Parts are slightly more temperature resistant, and less brittle, but the flexibility is the major downside for thin features like wings or stabilizers. Again it needs higher temperature and retractions tuning.
ABS is not very suitable to print our planes due to temperature shrinkage during cooldown. You may be able to print using an enclosed printer and keep the cooldown process very slow. Feel free to experiment.
We’re using PolyAir 1.0 or PLA filament.
Printers
The recommended build volume is 200/200/200 mm. Most of our planes fit 195/195/150 mm or 250/120/150 mm. The bigger the better. A heated bed is highly recommended.
Smaller Spitfire MkXVI comes with a version fitting the 150/150/150 mm build volume. The minimal delta printer diameter has to be at least 275 mm (diagonal of 200×200 bed) to fit the wing chord.
Recommended nozzle size is 0.4 mm. With a bit of extrusion multiplier tuning the range of 0.35 – 0.5 nozzle size could be used as well. Always check the proper weights according to the PDF user guides. Direct drive extruders are prefered, however, bowden printers are able to print our planes as well. The hotend and nozzle are the most important parts of the printer to achieve satisfactory results. Check their condition on a regular basis as the thin wall printing is very sensitive to a proper and steady flow of molten filament.
Please calibrate your X/Y/Z steps/mm and ensure your axis are not skewed. If you have some disproportions in your printer, you won’t be able to assemble the plane properly.
Remember: There are many FFF/FMD printers on the market nowadays. 2,
Wing Cube Loading (WCL) : 11.3,
Flight Performance Category : Sport Aerobatic,
Radio Channels : Throttle, Aileron, Flap, Elevator and Rudder,
Length : 1165mm,
Wing Span : 1510mm.
2,
Wing Cube Loading (WCL) : 11.3,
Flight Performance Category : Sport Aerobatic,
Radio Channels : Throttle, Aileron, Flap, Elevator and Rudder,
Length : 1165mm,
Wing Span : 1510mm.
Price Tag $35
How To Purchase Our Models
Go to this page (Click – “PRODUCS/All PRODUCTS”) :
- From main page select “PRODUCTS”.
- Follow by selecting “ALL PRODUCTS”.
- Click “ALL PRODUCTS”.
Select the product and click “Price Tag” :
- Browse models that you would like to purchase on this page.
- Hover your mouse to “Price Tag …” button.
- Click the button.
Review the model and select “Add to cart” button :
- Review the model you would like to purchase.
- Read what you will get.
- Click the “Add to cart” button to put the model in the basket.
Repeat “Add to cart” if you would like to purchase another model and click “Add to cart” when ready to purchase :
- You can repeat to pick another model as you wish.

- To pay, just click the “Cart” as shown in the left picture.
Fill in the form to pay :
- Input your email address where you will get a link to download the files.
- Put “Discount code” when there is available promo.
- You can pay by using your credit card or by PayPal.
- Read the total amount you would like to pay.
- Click the “Pay” button to continue.
After purchasing, you can download the files by one of the following :
- Download your file directly by clicking “View content” button after purchasing, or.
- Open a sent email from Gumroad to your email address on behalf of OWLplane * check your spam folder if you can not get it from your inbox folder, just in case *.
Congratulation !
Now, you are ready to download the files.
✈️ Best Aircraft & Aircraft 3D Printing 3D Files ・Cults
✈️ Best Aircraft & Aircraft 3D Printing 3D Files
Climb with this collection of 3D files perfectly optimized for 3D printing. You can print beautiful airplane models to decorate your home or even do some modeling. As a result of 3D printing and connecting various parts, your aircraft can even fly for real. This is a great way to show your child how an airplane works and talk about the different models: CESSNA, Airbus, Boeing, etc. nine0005
RC plane - Eclipson model A free version by Eclipson
Free
F5 Tiger 1/64 easy to print scale model
Free
Free RC Airplane
Free
Pilot Baby - 3D printed reproduction of a vintage RC sport model.
Free
Build your own aircraft engine
Free
RAF WW II Spitfire
Free
Plane
Free
Easy to print T-38 Talon aircraft scale model (esc: 1/64)
Free
nine0006 RC airplane Wing - Eclipson Model YFree
F117 Nighthawk
Free
MD80 AIRCRAFT SCALE MODEL
Free
Airbus A220-100 - 1:144 - Free
Free
RC plane fuselage - Eclipson model Z
Free
nine0006 Zlin Z-242 frame model (esc: 1/64) (No 3D print, CNC routing)Free
Cessna 172 Skyhawk 1:72
2 €
Turboprop Engine
Free
Ultimate Biplane 10-300S
Free
Easy to print Cessna Citation SII 1/64 aircraft scale model
Free
Porco Rosso Savoia S.
 21 Aircraft
 Free
Aero Commander 500S
Free
Model plane
Free
SOFIA, the Stratospheric Observatory for Infrared Astronomy
Free
nine0006 Das Liddle Stik RC AirplaneFree
Antonov An-225
Free
Aircraft
Free
Easy to print Aero L-39 Albatros aircraft scale model
Free
Lancer B1 Bomber
Free
nine0006 PIPE ECHAPEMENT SPITFIREFree
WW II RAF Spitfire Sliced
Free
A02 C-3D aircraft
Free
P-51D Mustang - Sally AURI
Free
First Take Off of a fully printed (FDM) sailplane.
Free
nine0006 Ercoupe Golden Age AircraftFree
RAF Mosquito WW II
Free
Le Rhone spinning radial dummy engine for RC planes
Free
Little Jet Plane
Free
RAF Lightning
Free
nine0006 Floonda - free 3d printed Freestyle Glider 1335mm Wingspan (Vasemode)Free
Transport Aircraft Toy Puzzle
Free
Mobile device Barron Red
2.36 €
Speedy "Red Mini Wing" RC Plane
Free
"Red Swan" the biggest fully printed Flying Wing
Free
Antonov An-32
Free
Antonov An-124
Free
Touristic plane
Free
EL-39 - RC half-scale jet for 120 mm EDF
17. 06 €
06 €
Skewer Fighter Jet (F-86 Saber)
Free
Bi Plane
Free
A02 C-3D aircraft
Hawker Tempest V WW2 Fighter
Airbus A220-100 - 1:144 - Free
Airbus A220-100 - 1:144 - Free
Here is our selection of best 3D aircraft files , all these great machines from the Cults and 3D file libraries are perfectly 3D printable for .
This collection includes free 3D files of all types of aircraft. There are many aircraft models of the most prestigious brands, such as Boeing , Airbus , Cessna or Antonov .
Professional 3D printing of has gained a lot of development in the world of aeronautics mainly for very specific applications. For example, this technology makes it possible to create very strong and much lighter parts compared to traditional manufacturing processes. nine0005
Of course, you won't find real aircraft parts here, but you will find lots of 3D aircraft models . For lovers of modeling, you can 3D print your own airplane or glider!
How I made my plane / Sudo Null IT News
Hello, dear Khabrovites!
My name is Konstantin Tomarevsky. I am an engineer at Deutsche Telekom IT Solutions. I wanted to share with you my old idea, which I am trying to translate into hardware. nine0005
I am an aeronautical engineer by training. When I entered the University of St. Petersburg State Polytechnic University, I dreamed that I would design airplanes (well, or space rockets), work in some design bureau and spend working days doing mathematical calculations, laboratory stands and field tests. I graduated from the University, having received a lot of theoretical knowledge there, but never having touched real practice. A lot of time has passed, but the idea that my knowledge remained knowledge, and was not embodied in a practical plane, did not leave me, and I decided to try to make an aircraft, albeit not at all large, but actually functioning according to all the rules. nine0005
Initial idea
My university profile is aircraft control systems. I have always been interested in how an aircraft (glider, airplane) behaves depending on its control, that is, on how its control surfaces deviate, how fast and in what configuration. Another interesting point is the efficiency of control planes. At different flight speeds, their deviation acts on the aircraft with different efforts. If you choose deviations for different speeds, you can make soft control of the aircraft. nine0262
The first idea was to purchase a ready-made full-fledged airframe model and design radio control with an integrated automated control system, including an autopilot. On the radio side, I advanced far enough and assembled two identical transceivers to work out the digital control channel.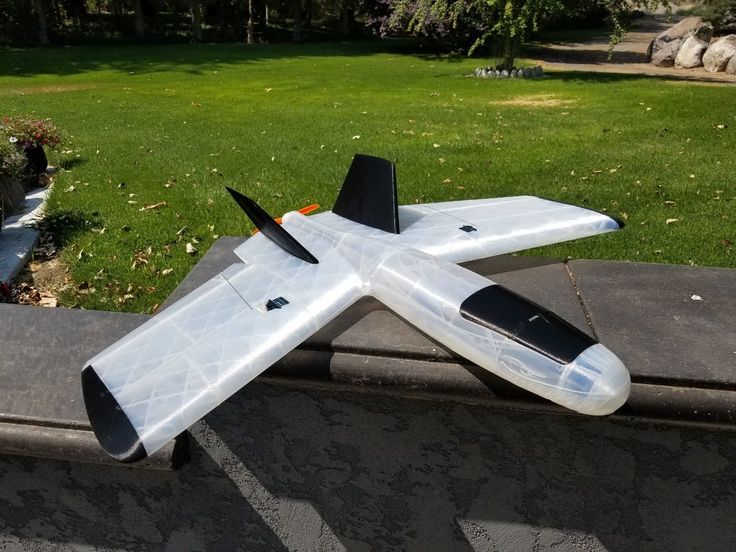 I'll talk about this in another post if you're interested.
After a long search, I realized that I wanted to create from scratch not only the control system, but also the glider itself, so that it would be my glider, unlike any other. It was not very interesting to repeat what had already been created. nine0005
Idea development
Once upon a time, back in school days, I went to the radio club. Next to it, on the floor, there were also a ship model and an aircraft model. I sometimes went to aircraft modelers and watched how they work. When I started working on this project, I scoured the Internet for the technology of creating aircraft models, reviewed a lot of videos on YouTube and realized that this was not enough for me. I don't want to create a single model out of anything. What was needed was real technology, with the help of which, using it once, I could make equally accurate models in any quantity. Like on a conveyor. The choice immediately fell on 3D modeling and 3D printing.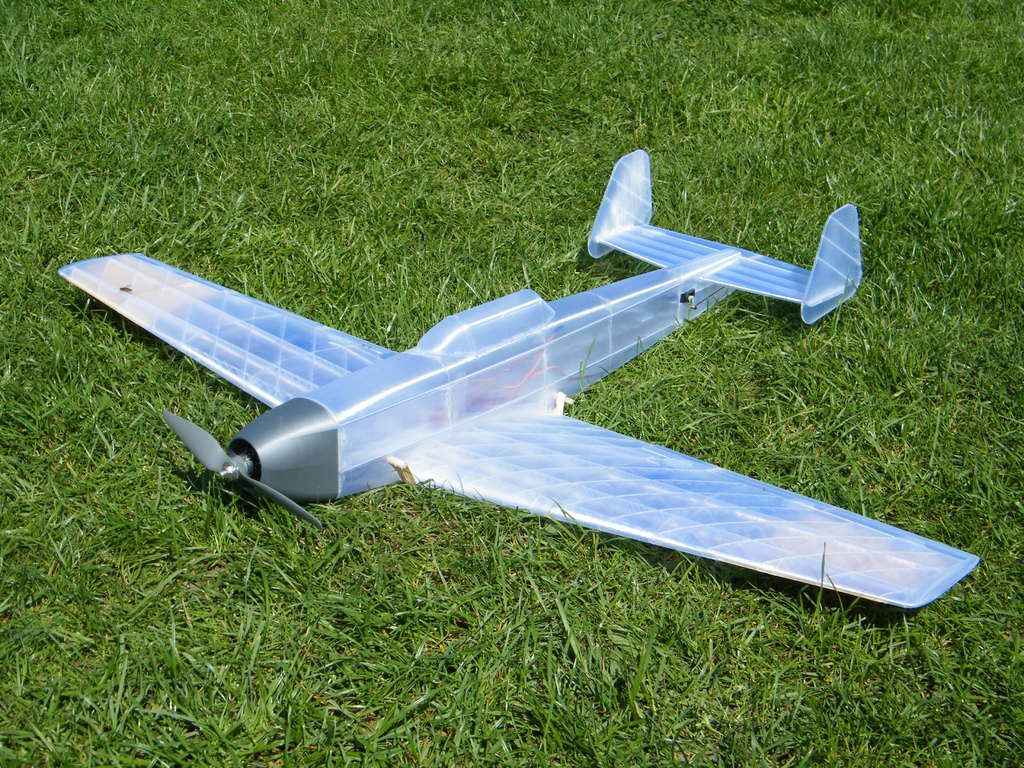 These technologies make it possible to create a wide variety of airfoil shapes with great precision. nine0005
Airframe calculation
That's another problem. First of all, it was necessary to determine the size. Looking ahead, it depended on how the model would have to be cut so that it could be printed on a 3D printer - the print area is not “rubber”. I decided that it would be a narrow-body low-wing aircraft with a classic tail. I entered the following parameters:
- body length: 90 cm
Wing parameters:
- span: 130 cm
- elongation: 7.8
- narrowing 2.5
- area: 2160 sq. see
- geometric twist - 4 degrees
- aero twist - no
- Cross V - 5 degrees
- wing profile - TsAGI-718 14%
Motor:
- brushless electric
- claimed engine thrust ~ 10N
- Two-bladed propeller 10 X 7 nine0278
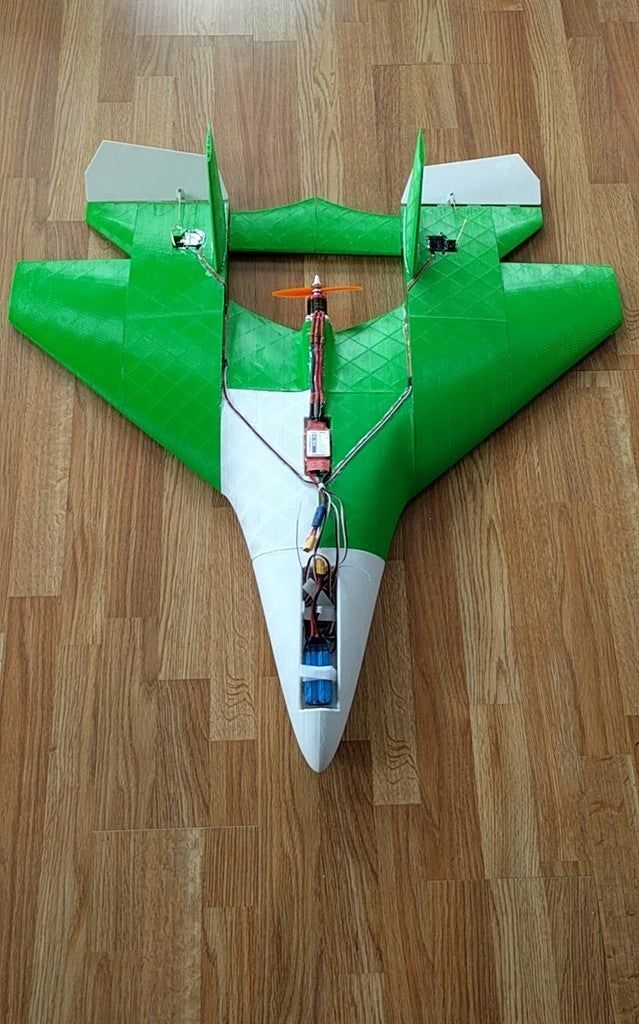
- Engine
- 6000 mAh Lithium polymer battery
- 6 servos
- 3 landing gear
Tricycle landing gear - with main struts under the wings and a nose strut.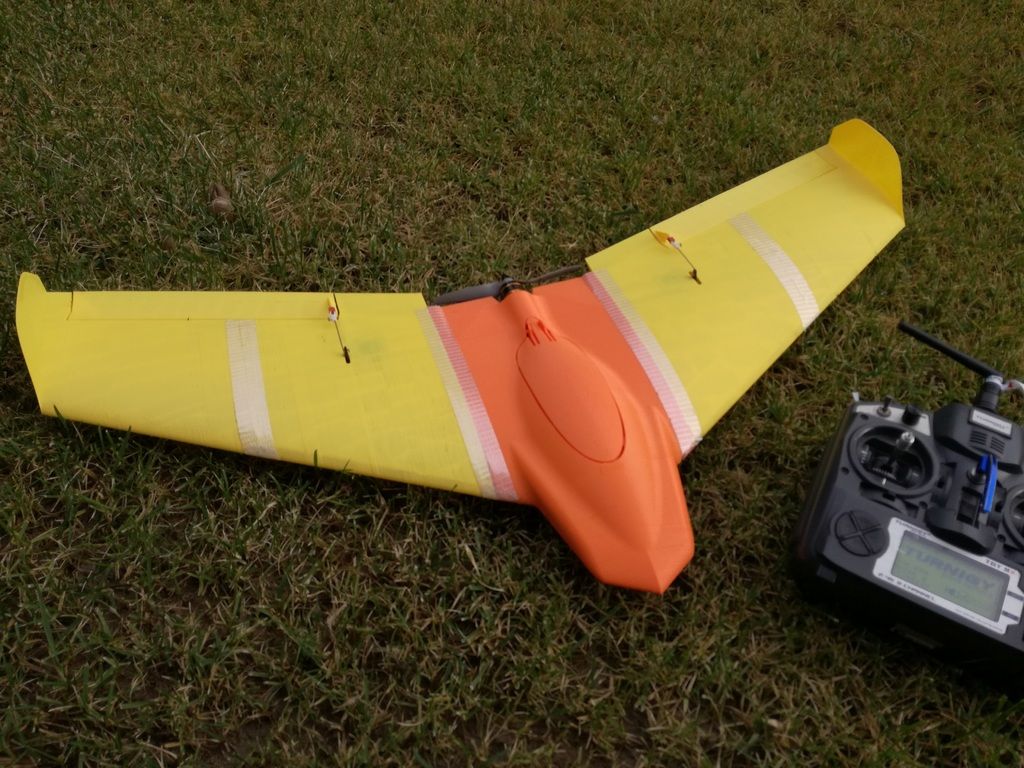 All landing gear is retractable, the front landing gear can be rotated. With a mass of the entire structure with all power and control components and electronics of 1.8 kg, the estimated take-off speed at an angle of attack of 12 degrees is approximately 10 m / s.
Engineering
In the first year of university, we had engineering graphics on a computer in the Compass environment. Therefore, even now the choice of the modeling environment fell on him. Only then we did not go through 3D, so we had to master this area ourselves. And it turned out to be very interesting! Here's what happened:
Or so:
3D printing
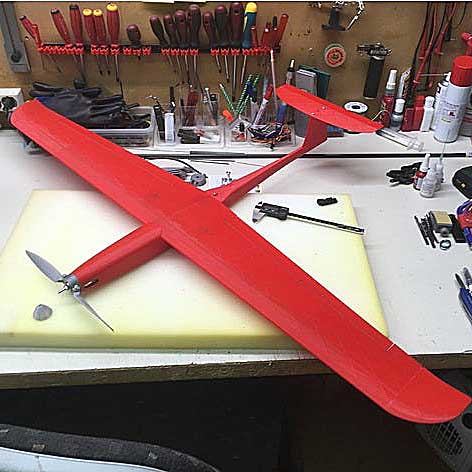
One of the simplest 3D printers was purchased for printing. In fact, airframe calculation, design and printing were closely intertwined. Having reached design and printing at a certain stage, I often had to go back and revise the calculations, the initial parameters. Something was too difficult to implement, given the limited print area of the printer and printing features, something was simply discarded as unnecessary. Some parts (for example wings) had to be redesigned taking into account the strength of the plastic (thicken the walls). Another of the tasks was to make sure that there was not a single glued or soldered joint. I tried to design the model in such a way that some parts could be redesigned and reprinted without affecting the entire model. After much effort and about 230 hours of printing and retyping, this is what came out:
I started designing the model from the tail. The tail was also printed first. From this, the print quality of the tail is not the best. Gradually mastering printing, I brought it to a fairly high quality. The mass of the whole structure turned out to be a little more than 2 kg, which turned out to be slightly more than the design one.
Tail view:
Nose landing gear:
Engine location:
Subtotal
What we have in terms of interior equipment:
Flight tests have not yet been conducted.