3D printed guitars for sale
3d Printed Guitar - Etsy.de
Etsy is no longer supporting older versions of your web browser in order to ensure that user data remains secure. Please update to the latest version.
Take full advantage of our site features by enabling JavaScript.
Find something memorable, join a community doing good.
(390 relevant results)
|
Home Guitars Videos Gallery Buying an ODD About Contact
ODD Blog
|
Atom 3D Printed Bass Guitar
| ||||||||||||||||||||||||||||||||||||||||||
|
copyright 2011, olaf diegel | |||||||||||||||||||||||||||||||||||||||||||

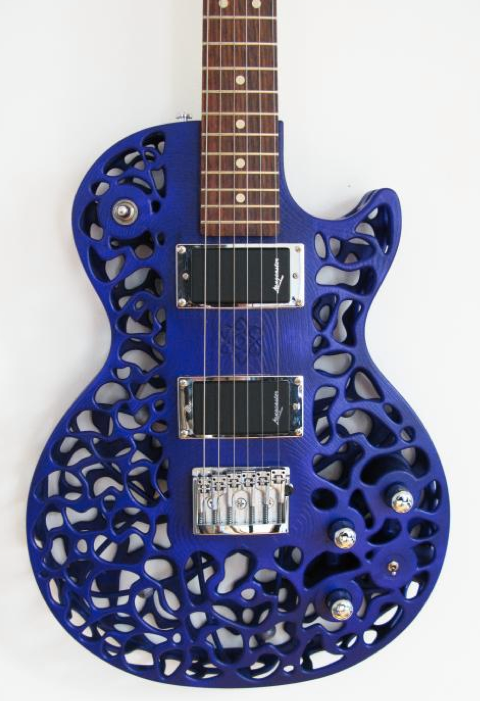
 The bodies are printed, using Selective Laser Sintering, by 3D Systems in the USA, on an sPro 230 SLS system. The material being used for these guitars is Duraform PA which is a very strong form of Nylon. The resolution for the prints was 0.1mm (which means that each layer that makes up the guitar body is 0.1mm thick). The guitars feature a wooden inner core (choices of Mahogany or Maple, etc.) that links the neck to the bridge, which allows us to customize the sustain and tone of the instrument to suit the musician, and a number of options for hardware, etc.
 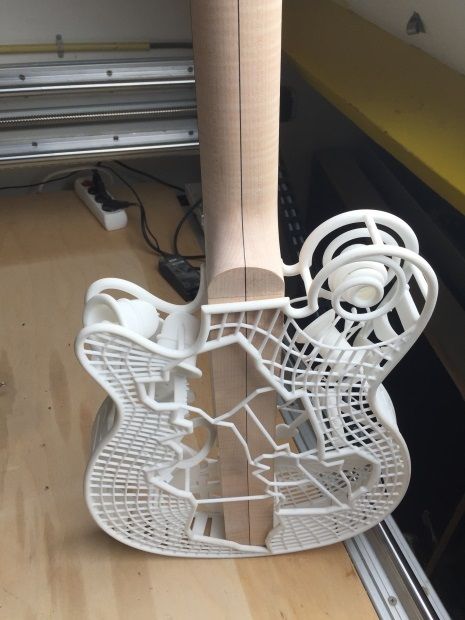 Active pickups available as option
A guitar on a 3D printer or a summer project
Good afternoon, dear readers.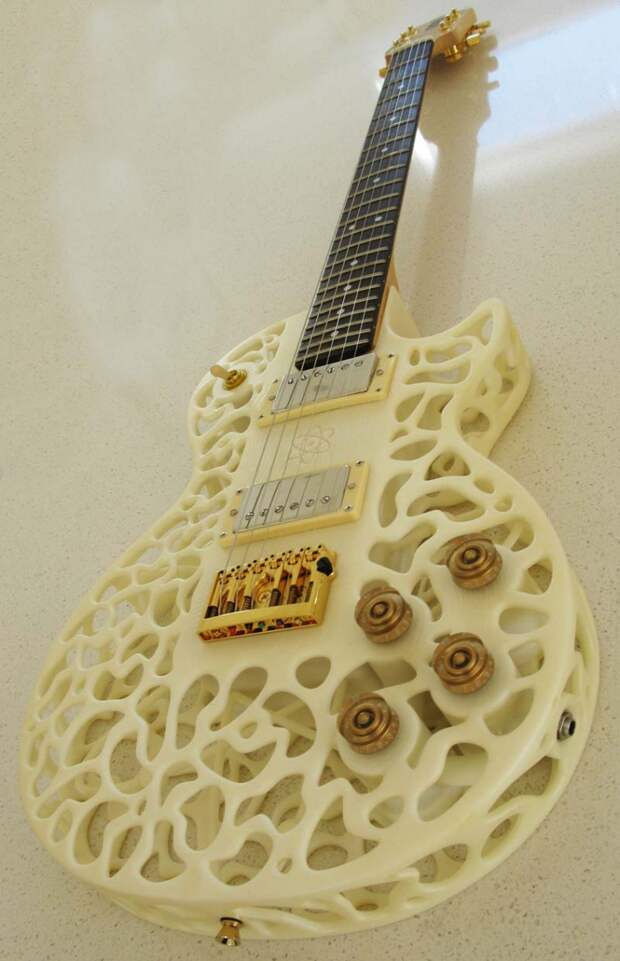 Today's article will no longer be an overview, but a creative and practical one, dedicated to hobbies and hobbies.
Introductory lyrics.
In my student years, I happened to play the rhythm guitar in a musical group whose work was in the style of Heavy / Speed Metal (in a simple way - they played ROCK).
Every year, I and probably many of you think that life flies by, accelerating and accelerating, and somewhere far away there are dreams and there is absolutely no time for their fulfillment. But nostalgia and the desire not to give in to despair sometimes help make dreams come true or return to a long-forgotten hobby. This happened to me as well. I managed to escape from the working routine, and pick up the guitar again. Having acquired a tool, I began to restore long-forgotten skills.
At one fine moment, the instrument became "not enough" and I wanted to buy something else that sounded different. I considered various options, and at some point the thought came - why not assemble the guitar myself. There is a 3D printer, there are filaments, examples of manufacturing are in plain sight. So the idea of a 3D printed guitar slowly began to flicker, until an interesting project caught my eye:
Why not, I said to myself. Found the description of the project on thingiverse. The body of this instrument was based on the design of guitars from the "state" manufacturer Strandberg guitar. Exactly what is needed! But without backlight - it's superfluous.
Preparation
"Wishlist" is not enough to make wishes come true, so a rough list of everything needed for manufacturing was compiled:
3D printer
Picaso Designer Classic. None of them were suitable for the project, because did not have enough printable area for those models that are hosted on Thingiverse. There was no desire to break / saw the finished models, especially the central part of the guitar, to which the neck was to be attached, the pickups were to be placed, and also where the tremolo was installed. This is the most loaded part of the case and should have been printed in its entirety without breakdown.
As a result, after turning and twisting the models in slicers, it was decided to print on Picaso, because in principle, everything was placed at an angle, except for the central part, and the quality of the printed wall on this machine was quite suitable for my tasks. It was decided to print the central part at a printing studio or ask friends with larger printers.
Printable plastic
The author of the project on Thingiverse made a guitar from PLA plastic, but I did not like this option at all, since in this case the guitar would have to be primed and painted. My task was to make a tool without post-processing and painting, so that it could be seen that it was made using 3D printing, but at the same time, it did not have a completely collective-farm look. After looking through the reviews of plastics on 3Dtoday, I decided to focus on composites, especially since I had a shareware promo reel of FormaX composite from REC3D. Once, at one of the 3D printing exhibitions, I happened to turn a part made of this material in my hands, and then I also noticed an interesting visual effect that hides layers and makes the surface of products pleasant to the touch. An additional plus in this solution was the presence of carbon fiber additives in the filament, which should create additional shielding (so that the guitar does not "start" when played).
Donor guitar
Inventing a printed neck is, of course, beyond the bounds, so only the body should be printed, but let's look for the neck, and at the same time all the electronics from the donor guitar will come in handy. There were a lot of options on avito, and in the end, Jackson, who had seen life, was purchased as a donor:
At home, the guitar was immediately dismantled, the neck was washed, polished and put in order. (guitars need to be looked after, of course).
Electronics from the guitar was also included in the project.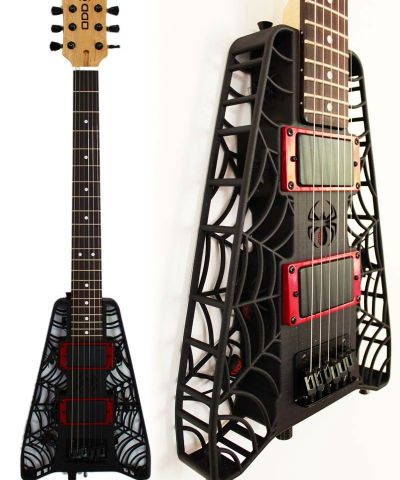 I really liked the black and white combination of pickups. Yes, and FormaX is also black. The only thing that didn't fit the project from the donor was the tremolo bridge - "that iron thing with twists on the body, to which the strings are attached."
In a music store I picked up an inexpensive option + they also gave me cheap Olympia strings as a gift:
Test printing and fitting of the model x). This thermoblock allows you to work at high temperatures with most materials with a working temperature up to 410°C. We install it according to the instructions from the PICASO 3D website - it takes no more than five minutes, calibrate the printer, refill the plastic, get the instruction from REC3D technical support on FormaX printing and run it for test printing - a piece of the rec company symbol. At the same time, we evaluate the wall of the model.
Pleasant enough structure.
Another test - printing a piece of the central part of the guitar to assess the strength with a given infill.
Print settings:
- Nozzle temperature: 280°C.
- Table temperature: 95 °C.
- No airflow
- Table adhesive: PICASO 3D printing adhesive.
- Supports strictly from the table (otherwise the internal communication channels will be flooded)
Nozzle in thermoblock steel: 0.5 mm.
The model shows a defect on the wall. Most likely the reason is in the feed - the material is abrasive and can get stuck in the nozzle. Therefore, we will play with temperatures and retracts during further printing.
Also during the test prints with "formax" it became clear that in order to obtain a better surface, it is better to place the part at an angle. In this case, the top, covering layers (which are the front side of the case) will be just as perfect as the side ones.
Running a little ahead of the story , I show a photo with examples of printing the same part printed at an angle (left) and just on a table (right).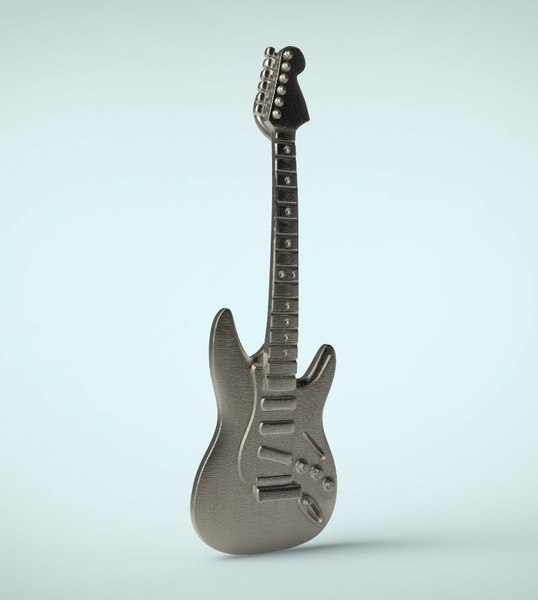 The question of further orientation of the model on the table immediately disappeared.
The right part was printed by the PICASO 3D 3D printer farm on the PICASO Designer XL PRO printer at my request. By my mistake in the TOR - the location of the part was flat on the platform and using supports not only from the surface, which led to the fact that the internal cavities for laying communications were filled with plastic, and the surface itself had an unpresentable appearance. I will write about the left part a little later - but I managed to fit it into PICASO Classic and it was printed at an angle.
As a result of all the trials and tests, it was decided to print all parts at an angle and spend plastic on supports (walk, walk) - I didn’t want to stop the project. To celebrate, another FormaX coil was purchased.
The first quality print result met all expectations:
From different angles, the plastic plays with both color and texture.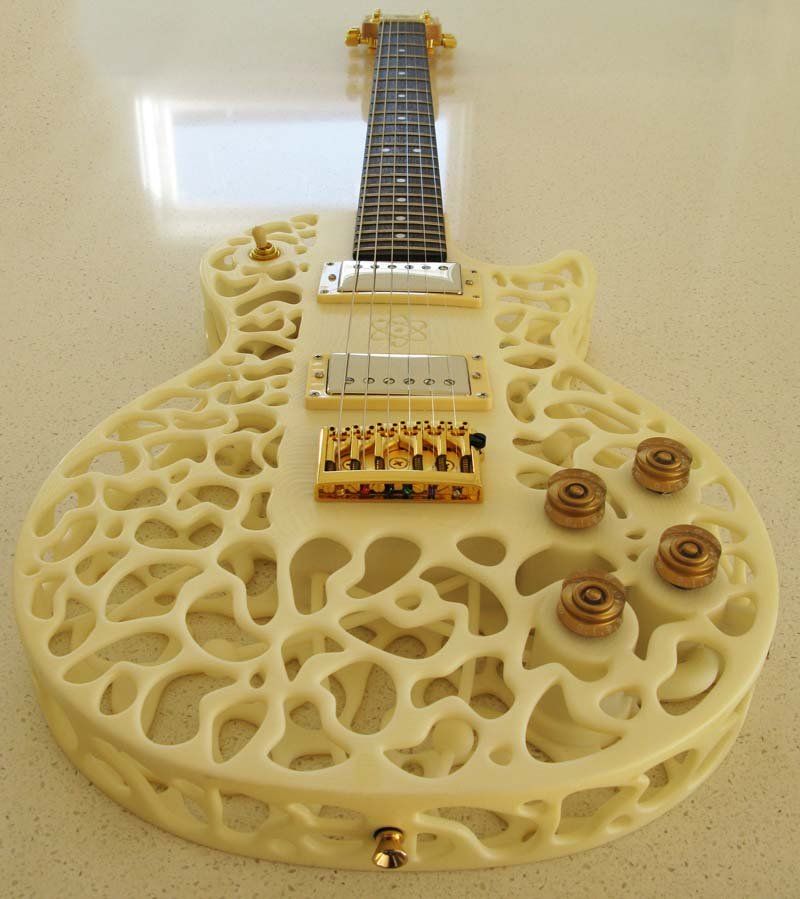
Here are some photos of the rest of the print:
All photos are attached in the original size - you can click the mouse and look closer. The material is absolutely fantastic. After it, I don’t want to look in the direction of PLA and ABS.
I had to stop printing several times due to problems:
As a result, I got parts for assembling as many as two guitars. In the photo below, parts rejected for various reasons.
As for the central part of the guitar - I still managed to fit it on the table in the slicer at a certain angle, but when printing, the corner of the model was "eaten", although everything should have fit.
The problem was found during communication with the representative of PICASO, Kapiton (very competent specialist) . It turned out that with the declared height of the print area, in fact, almost half a centimeter is missing. As it turned out, there was a special revision of the part that protects the coupling under the table screw, and the one that was installed on my printer was larger. They promptly sent me an STL model, I printed it from ABS and replaced it - everything immediately began to fit in height)
Such a stunning surface of parts made from this material. Without post-processing:
While the parts were printed and reprinted, I gutted the donor:
Everything was neatly disassembled, cleaned and set aside for further assembly of the printed version.
During the work, a problem was found in the central part - the neck did not fit into place. He crawled onto the body and covered the part of the pickup with an overlay:
I did not want to cut the neck and it was decided to increase the size of the platform on which it is attached. Since I'm not good at editing STL, I asked Ivan (Plastmaska) for help.
Thanks to Ivan, the printing of the third version of the central part of the body was launched on the same day and the next I had the opportunity to join the parts and evaluate what happened:
Next, the parts were fastened together with using 7 screws M3x10 and 2 screws M3x20 and followed by the assembly of electronics, wiring, installation of the tremolo bridge and neck:
Here I ran into the problem that the power of my "children's" soldering iron for soldering electronics is not enough. I had to call out in 3D chats and Ivan Kashirin (known to many printers in St. Petersburg) came to the rescue. The guitar was carefully transported to Vanya's office and all the electronics were carefully soldered:
After assembly and soldering, it remained to put the strings, set their height, adjust the scale and install printed covers that cover the technological connectors on the back of the case.
Tuning and maintenance of the guitar was handled by Mikhail Marchenko, a professional in his field. I highly recommend those. who needs to put the instrument in order - https://vk.com/marchenko_mikhail.
A few photos:
Surely many people have a question - why did the project take the whole summer. In general, everything could be done slowly in 3-4 days, but summer is vacations, summer cottages, a lot of work for yourself and that guy, and there wasn’t much time to get down to business.
Well, a quick video. Happy listening everyone.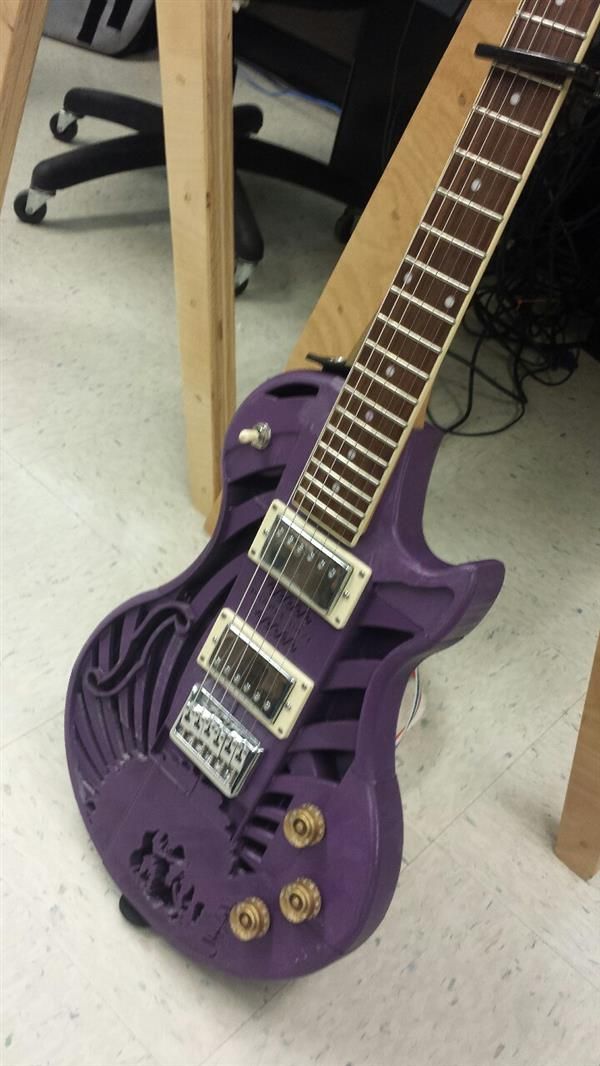
Progress cannot be stopped: guitars will soon be 3D printed
3dtoday.ru portal user Sergey actively shares his experience in creating 3D printed guitars, and the 3D Print Expo team follows the progress of Russians who are not indifferent to additive technologies. That is why we sat down with Sergey to learn about the intricacies of creating his unusual guitar models and his vision for the future of innovative musical instruments.
3D Print Expo: How did you get the idea to use a 3D printer to create a guitar? What was the inspiration for you?
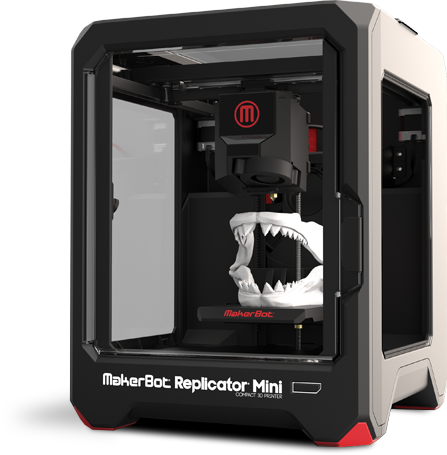
Sergey: In my work I am closely connected with 3D printing: at work we use Picaso Designer printers, and at home I have an old MakerBot The Replicator. Somehow, during the next long holiday vacation, out of boredom, I decided to try to print a balalaika.
Why print? The fact is that the price of this instrument, for some strange reason, is much higher than even guitars and violins.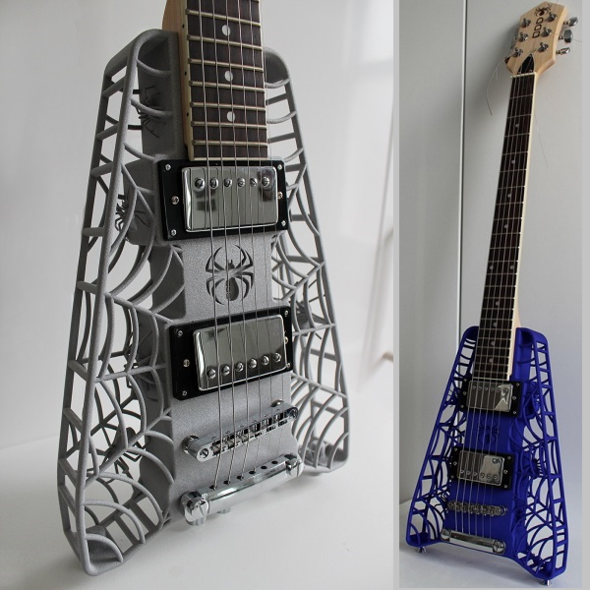
As a result, this creation turned out, I captured the process of creation on video, but, of course, since this balalaika was the first, many technical errors were made during its creation.
Despite this, it still sounded, and this surprised me so much that I decided to try to develop the theme further.
Then a banjo and some guitars were printed. By the 7th guitar, more or less high-quality sound has already begun to turn out. By the way, you could see it at the 3D Print Expo in 2015 in Sokolniki, where visitors played it, and I specifically asked to calculate how many positive and how many negative reviews would be - in the end 95% spoke positively.
Then I made some more models, experimenting with different materials (metal, aluminum, etc.). We managed to improve the sound a little more, the installation of a tambourine (tambourine) inside the resonator of the guitar also gives a good sound: it gives the sound an original banjo shade and adds a duration of sound (sustain).
After I more or less figured out the sound in pure acoustics, experiments with built-in amplifiers began. The idea of making a guitar that could play a backing track was there from the beginning, but the first amps I used didn't do it very well. They made it possible to get loud mid-quality sound in clean sound and overdrive, but, to be honest, this did not impress any serious musicians.
Without going into enumeration of all subsequent models, as a result, just model 15.2 was made, which has already been assembled on a fairly high-quality BelKat amplifier. She has a separate mp3-input, and she finally managed to implement the ability to play along with the backing track. So far, not professionals have paid attention to this, but just novice musicians, such as me.
In the video, I tried to show this moment. Those. even with my, to put it mildly, minimal guitar playing skills, you can give out such a professional sound. What a professional can do with it, I don’t even know.
3D Print Expo: We were very impressed with the 3D MIDI guitar model 15.2. Was it difficult to print the details? What seemed difficult, and what, on the contrary, was given easily?
Sergey: All the latest guitars I try to do in such a way that the assembly process is minimal. They do not need to saw separately plywood decks, fasten a bunch of everything. You just need to print about 20 parts on a 3D printer and assemble them on an aluminum pin that is inside the guitar and gives it rigidity. To assemble it, you need 15 nails, a tube of superglue and an aluminum profile 12 * 25 (sold at any hardware store). Well, a 3D printer, of course.
3D Print Expo: How long did it take to create the tool?
Sergey: Electric guitar printing time - 3-4 days, assembly - about 2-3 hours. For acoustic - about a week to print plus assembly 1-2 days. There you already have to tinker: sawing, varnishing decks, etc.
3D Print Expo: Tell us more about the materials. What subtleties in the creation process should be taken into account by someone who wants to repeat your experiment?
Sergey: I posted the most successful models on the Internet and briefly wrote assembly instructions there. Several people have already assembled similar guitars, but since everyone has their own amplifier and their own vision of the process, everyone has assembled their own guitar.
They had a variety of questions, but they themselves solved all the problems during assembly. At the same time, no one came to make a guitar 1 in 1 according to my models, everyone somehow made their instruments. I myself am also not interested in collecting the same guitars - that's why I haven't had a single one repeated yet. As for the assembly process, there is nothing complicated in it. It's just a guitar: "stick and 6 strings".
3D Print Expo: What about guitar design? What opportunities do 3D technologies offer in this direction?
Sergey: This question is very interesting. On the 5th guitar, I began to study special literature in order to achieve a high-quality sound. I read several textbooks for vocational schools, several articles by guitar masters, some of these authors referred to the book by Hazrat Inayat Khan "The Mysticism of Sound", written over 100 years ago. It tells about the ancient Sufi and Brahmin traditions for making stringed instruments.
Since this topic is interesting for me in itself, I carefully mastered the meditation practices that the author writes about and began to apply them in the manufacture of guitars. Those. before you make a guitar, you need to perform certain procedures and only after them start designing a future instrument, and in the process of working on each part and during any assembly operation, you also need to think about certain things.
When I did all this, each subsequent guitar - as stated by the author of the technique - began to turn out "charismatic". I do not presume to say that it is bright, but unusual - that's for sure.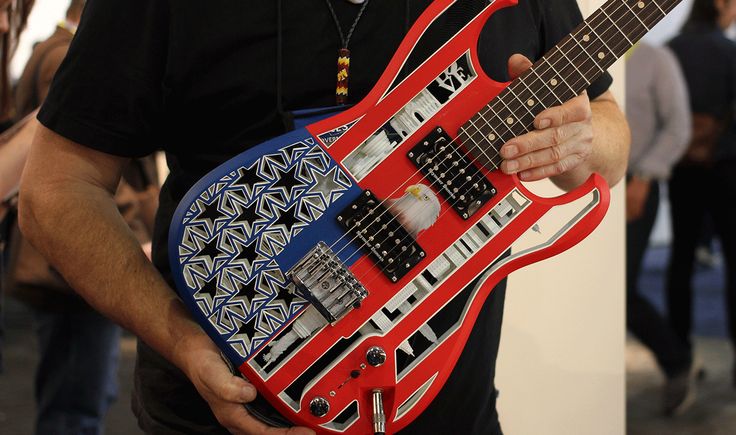 Everyone who has played these guitars since then also confirms that they have their own "character". And the fact that the tool is printed on a 3D printer, and not cut by hand, does not in the least prevent it from being created in the mystical tradition.
3D Print Expo: What is the main idea of a 3D printed guitar and how does it differ from a classical instrument?
Sergey: To be honest, I have crooked hands. If I made a guitar the way guitar makers make it, it would be such a crooked monster that no one would even look at it. A 3D printer allows you to draw everything on a computer and print it with high accuracy. Especially this moment has a positive effect in the manufacture of the neck.
All guitar textbooks describe a bunch of tricks, how to get an even neck, how to accurately mark the frets, etc., it feels like this task is difficult to solve. On a 3D printer - drawn, printed - ready, not a single guitar had any even minimal problems with the neck.
Due to the high precision of manufacturing, it was possible to lower the strings as low as possible only on expensive guitars with ground frets. Accordingly, the strings are very easy to clamp, do not rattle. In general, those who played Soviet guitars will appreciate this neck.
3D Print Expo: Will professional musicians be able to use this guitar? Is the level of sounds they produce high enough for them?
Sergey: Acoustics still needs work. I have some ideas, but I need time to test them all. So far, the acoustics, let's say, play at the level - a little worse than inexpensive Chinese models. In electric guitars, the sound reproduced through the built-in small speaker does not make much of an impression. But if you connect, for example, headphones or a good speaker, the sound is very good.
In addition, a 3D guitar, like everything made on a 3D printer, implies that the owner of the device prints it himself, so each musician can make what he needs.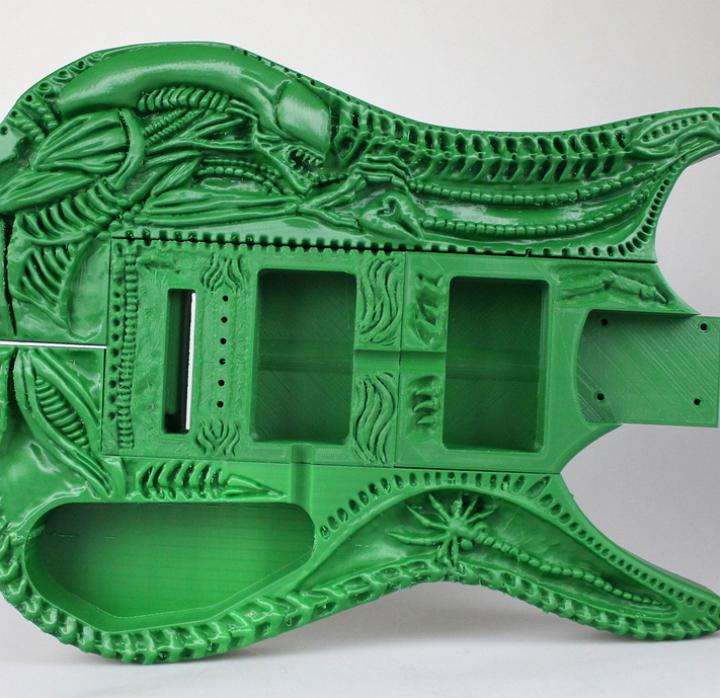 Someone wants an additional pickup, someone wants a different shape of the soundboard, etc.
3D Print Expo: Have you thought about further expanding the possibilities of 3D printing in the creation of musical instruments? How do you see it?
Sergey: I can talk about this topic for a very long time. Briefly I will try to put it this way. 3D printers are revolutionizing the manufacturing industry at breakneck speed. Soon the number of milling, turning, erosion and other machines will be reduced tenfold. In the mass production of guitars in the factory, these devices are now used. Conclusion: 3D printers will displace them in the same way as from other segments of the manufacturing industry. In any case, guitars will be printed soon.
I hope that the simplicity of their design will lead to the fact that people will develop their own tools and again there will be a variety of types and models. After all, now go to any music store - everywhere a guitar of the "western" type, as if there were no other types of resonators.