Fortify 3d printing
Photopolymers & Composite Materials for 3D Printing
Search
Search
HTS: High Temperature & Strength Photopolymer
HTS delivers material properties similar to engineering plastics like PEEK, Vespel®, Radel® and Torlon® via additive manufacturing. Unlike many other high-performance photopolymers, HTS is a one pot system leading to higher productivity and less waste.
Key Material Properties:
- HDT: >300 C
- Ultimate Tensile Strength: 90 MPa in Z
Digital Tooling Photopolymer
High strength, HDT, and stiff ceramic-fiber reinforced photopolymer tuned for use in tooling applications such as injection molding or thermoforming. Exhibiting an HDT greater than 300 degrees °C, this material can withstand shots of aggressive plastics such as polycarbonate or ULTEM.
Key Material Properties:
- Heat Deflection Temperature (@ 0.
455 MPa): > 300 °C
- Tensile Strength: 90 MPa
Radix™ 3D Printable Dielectric Materials
Developed in collaboration with Rogers Corporation, this low-loss dielectric material is used for 3D printing components and devices used in wide bandwidth, high-frequency communication, and sensing systems. Specifically tailored for microwave and mmWave applications, this material can also be metalized through post-processing.
The dielectric constant of devices 3D printed with these materials is tuned using additives and through the use of spatial latticing.
Key Material Properties:
- Dielectric Constant: 2.8
- Dissipation Factor (@ 24 GHz): 0.0046
High Purity Alumina (99.8%) Photopolymer
Developed in collaboration with Tethon 3D, High Purity Alumina is an alumina-filled photopolymer that sinters to a final part purity of 99.8% alumina with only 12% shrinkage. This material is a great selection for applications that require high reliability, dielectric strength, corrosion resistance, biocompatibility, or thermal isolation hardness.
Key Material Properties:
- Chemical Purity: 99.8%
- Operating Temperature: 1750 °C
Low Shrink Aluminum Silicate
Developed in collaboration with Tethon 3D, this mid-grade ceramic is designed for general industry use. This ceramic exhibits a remarkably low 5% shrink upon sintering to deliver high tolerance for both large and small parts that feature high geometric complexity.
Key Material Properties:
- Post-sintered Shrink Factor: 5%
- Operating Temperature: 1450 °C
ESD High Temperature Resin
A photopolymer that prevents static charge build-up on parts in operating conditions up to 284 °C. Electrostatic Discharge (ESD) of small voltages is enough to destroy sensitive electrical components or ignite flammable vapor.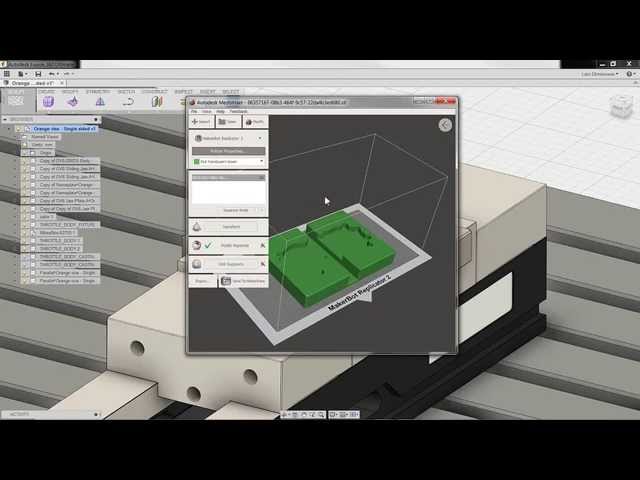 16 Ω·cm
ESD-Elastomer Resin
Fortify’s ESD-Elastomer is the lowest durometer resin available in the 3D printing industry with electrostatically dissipative properties. Electrostatic Discharge (ESD) of small voltages is enough to destroy sensitive electrical components or ignite flammable vapor. With a Shore Hardness of 70A and surface resistivity of 105 – 107 Ω/sq, the ESD-Elastomer provides superior protection with the most scalable and highest resolution 3D printing platform. (DLP).
Key Material Properties:
- Electrical Resistivity (Ω/sq): 105 – 107
- Hardness Shore A : 70
Standard Materials
Fortify is currently qualifying a range of popular Open Source materials for use on Fortify 3D printers. If there is a particular resin you are interested in, please let us know.
3 Ways Publications Can Maximize Revenue While Staying Ad-Free
Subscribe to Entrepreneur for $5
Subscribe
Innovative content platforms are diversifying income streams to spark conversation and support freedom of speech.
By Simonetta Lein
Opinions expressed by Entrepreneur contributors are their own.
It's fascinating to see how publications are evolving in ways to maximize their revenue while prioritizing a clear, dignified and captivating ad-free experience for their readers. No one wants to look like a sellout in 2020. The internet provides millions of opportunities that can help media companies to better connect with the masses, and readers are gravitating towards websites that include them in the experience. Over the years, I've learned that you can't talk at your audience. You have to ignite conversations.
SEAN GLADWELL | Getty ImagesIt's hopeful to see platforms that support freedom of speech and let individuals share their first-hand experiences, anonymously.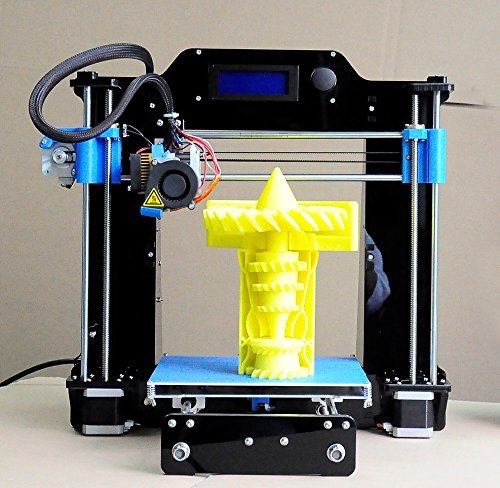 When I started The Wishwall, it gave users a platform that valued freedom of expression and lent voice to the voiceless and marginalized. We generated revenue through fundraisers for social causes and made wishes come true.
I recently spoke to the founder of The Doe, Milan Kordestani, who unpacked how his team strategically diversified revenue streams to stop chasing ad money. Milan shared, "The Doe allows users to post first-hand experiences and unfiltered content anonymously, promoting freedom of speech and civil discourse and fostering thought-provoking conversations. Knowing that quick-fix forms of revenue streams were not a good fit for the platform, The Doe opted against traditional paywalls and pay-per-click ads."
I found it interesting that the publication aimed to harness the power of merchandise, customized subscription models and supports freedom of speech via user-generated content. As we look to the future of digital media, here are three ways online publications can maximize revenue while staying ad-free.
Related: 5 Ways Brands Can Reinvent Their Digital Marketing Strategy
MerchandiseBy fostering a connection with the readers, online-content platforms can increase brand awareness and leverage their audience by giving them something to wear, gift or take with them. The merchandise takes the conversation from the online screen to real-life, offline, and ignites discourse wherever the readers might be.
I like that The Doe is harnessing the power of merchandise by offering items readers can integrate into their own lives to tell a story. The platform has a critical mission to change the face of online narratives and connects a high number of consistent readers who are invested in that goal. The readers bond with its content on a personal level, while each piece of the merchandise acts as a conversation starter for its monthly themes (the first one being Love).
In my opinion, a solid merchandising strategy turns digital publications into a full-scale brand while generating revenue from every single piece sold.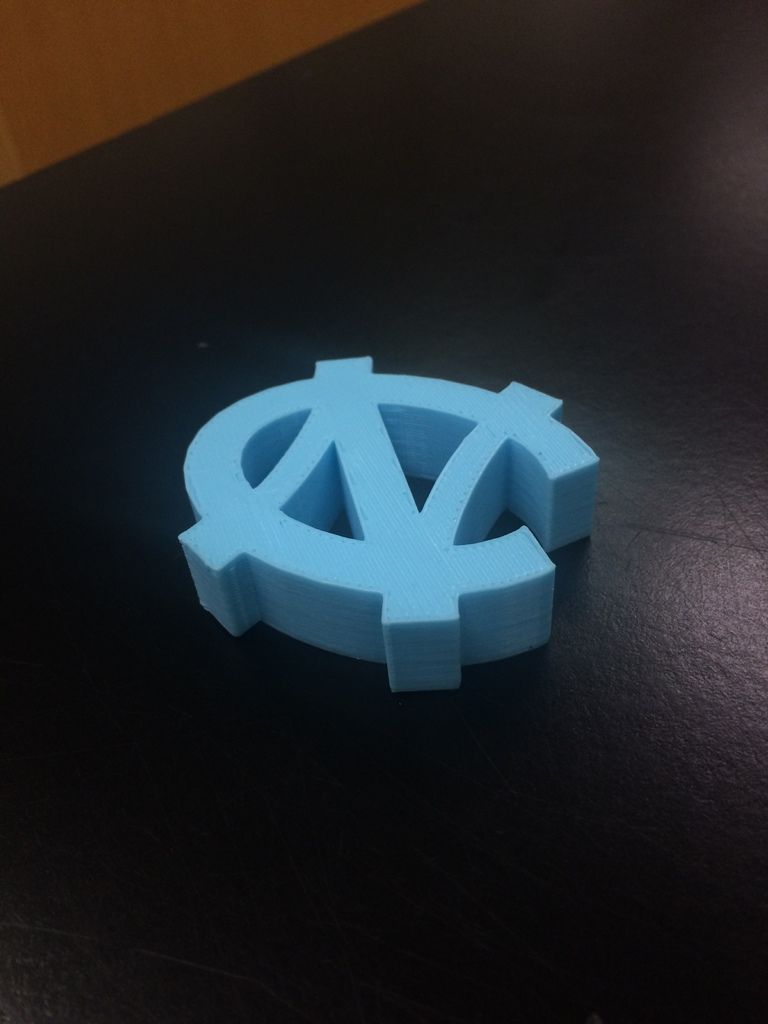
Today readers come from a variety of socioeconomic backgrounds, and making a one-size-fits-all subscription model seems ineffective. Instead of paywalls, The Doe, for instance, decided to put the power of subscriptions in the readers' hands. As the online-content platform increased in popularity, its readers united on topics, ideas, motivation and experiences. They discovered they had an audience united in thought and not demographics.
Another fine example is Vice, which opted to forgo paywalls and instead generate content ranging from TV shows to podcasts to Facebook videos and even Snapchat shows. They knew early on that audiences were looking for exciting and inspiring content and were willing to pay for it in ways they felt appropriate.
Websites that have experimented with pay-what-you-can or -want models have found an increase in sustainable revenue because they aren't capping their worth or locking out subscribers by price. The model that The Doe follows is innovative, as it understands that revenue can be achieved in tailored ways.
Today, audiences prefer flexible, subscription-based models as opposed to fixed paywalls.
User-Generated ContentReaders are aligning themselves with publications that offer raw, first-hand accounts of topics that matter. There is massive potential for online content platforms to monetize such audiences without inhibiting user experience with ads.
Original stories make for great reads and act as magnets to attract new subscribers. While generic articles around the same topics are available on various websites, unique content and narratives lend exclusivity to publications and help increase revenue via subscriptions.
Related: 11 Entrepreneurs Who've Defied the Odds
All of this underscores my strong sense that modern audiences are leaning toward first-person stories that reveal honest experiences without implicit bias. It will continue to be interesting to monitor how publications expand their horizons to render an ad-free user experience that still delivers valuable content.
-
This Founder Took Her Jewelry Blog From Side Hustle to Multimillion-Dollar Company. Here's How She Made The Clear Cut.
-
Forget Pride Month. Here's When You Should Actually Be Marketing to LGBTQ Consumers.
-
This Black Founder Was Gaslit By Her Doctor During Pregnancy. The Experience Drove Her to Create a Community for Expectant Moms.
-
How to Tell If Someone Is Manipulating You Based on Their Body Language
-
This Duo Struck Franchise Gold With Drybar. Now They're Out to Conquer an Entirely New Industry.
-
10 Keys to Avoiding Bad Client Experiences
-
Feel Awkward? Struggle to Make Friends? This Founder Wants to Fix Your Social Anxiety.
Living
How to Tell If Someone Is Manipulating You Based on Their Body Language
Don Weber
Living
Avoid These 3 Tempting Habits For Remote Work Productivity
Elizabeth Rider
Business News
'I Had Throw Away Your Pizza': Cake Boss Pizza ATM Slammed on TikTok for Steep Price Tag and Poor Taste
Sam Silverman
Read More
Processing of 3D printed models
One of the problems that all fans of FDM 3D printing, without exception, encounter is the ribbing of external surfaces. Since the technology itself is based on the sequential application of layers of plastic, this effect cannot be avoided. You can, of course, make it less noticeable by increasing the vertical resolution of the printer (i.e. applying thinner layers), but you won’t be able to completely get rid of the ribbing.
PLA 3D model before and after torch treatment. The internal structure is visible under the sagging outer layer
Almost from the very first days of the RepRap project, the search began for methods of processing finished models in order to smooth surfaces. Emphasis was placed on two features of thermoplastics: the ability to melt when exposed to high temperatures and soften on contact with the appropriate chemicals.
As a rule, heat treatment does not give good results - it is difficult to control the heating of the surface, and this eventually leads to plastic boiling, sagging or simply releasing toxic fumes. However, this method can be tried on solid PLA models.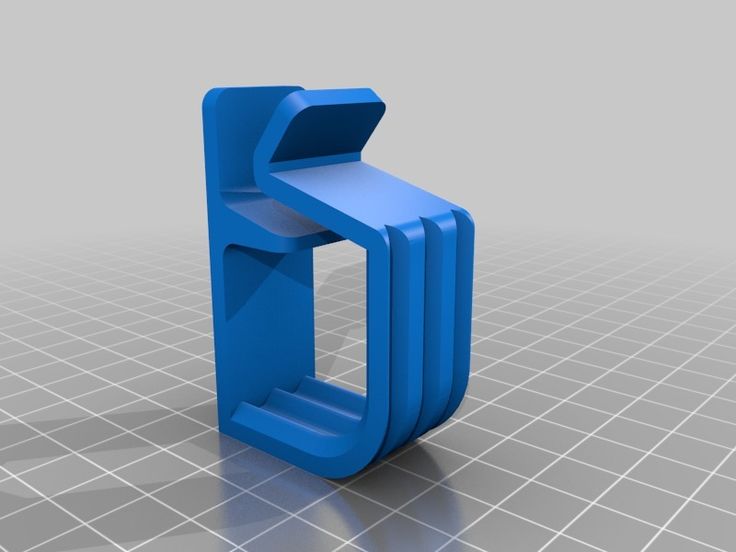
Chemical treatment is more promising, but it also comes with its own set of challenges. In addition to technological problems, the problem of reagents is relevant - different plastics react with different solvents. If acetone perfectly dissolves ABS plastic, then it has almost no effect on PLA plastic. With limonene, everything is exactly the opposite.
The main chemical smoothing techniques still revolve around ABS plastic due to its high popularity and low cost of suitable solvents.
A typical ABS solvent is acetone. Its good dissolving power allows it to be used as an adhesive for component parts of ABS models, although a homemade mixture is usually used for this, produced by dissolving ABS chips in acetone. The same glue (only a thicker consistency) is often used to repair delaminations or cracks.
Along with increased aesthetics, an important factor in the development of smoothing methods is increased strength. The monolithic outer shell reinforces the models, preventing delamination and ensuring their tightness.
Hand shaping
Makeraser - a combination tool designed to also work on the outside of models models. However, processing with a brush is a laborious task, and even requiring a certain skill. After all, already softened plastic is easy to deform with the brush itself, that is, the hairs will leave a mark on the plastic, which may not even out before the acetone evaporates. It is possible to equalize pronounced irregularities with this method, but it is quite difficult to achieve a smooth surface.
The advantage of this treatment is the selective application of acetone, which avoids smoothing sharp corners. After all, a pyramid was built for Cheops, not a cone, right?
An attempt to create a special tool for manual processing was a device called Makeraser. Basically, it's a simple felt-tip pen with a reservoir filled with acetone or acetone glue and a built-in scraper to remove models from the platform. From a practical point of view, this tool is best suited for gluing parts of a model or applying ABS/Acetone glue to the build bed just before printing to combat underlayer curl.
Acetone dip
Failed surface leveling by dip
A more promising and simpler method is acetone dip. Exposure of the ABS model in undiluted acetone for about 10 seconds is sufficient to dissolve the outer layer of the model. The specific exposure time may vary depending on the quality of the original model and the concentration of acetone. Since the sale of pure acetone is regulated, a technical solvent can be used.
After exposure, the model must be exposed to air until the acetone has evaporated. The process may take about half an hour.
Although this method is quite fast, it is difficult to control the process. With excessive exposure, the model will simply begin to dissolve, quickly losing small features. In addition, contamination of acetone with plastic of the same color can lead to streaks on subsequent models dipped in the same solution. A more controlled process is acetone vapor treatment.
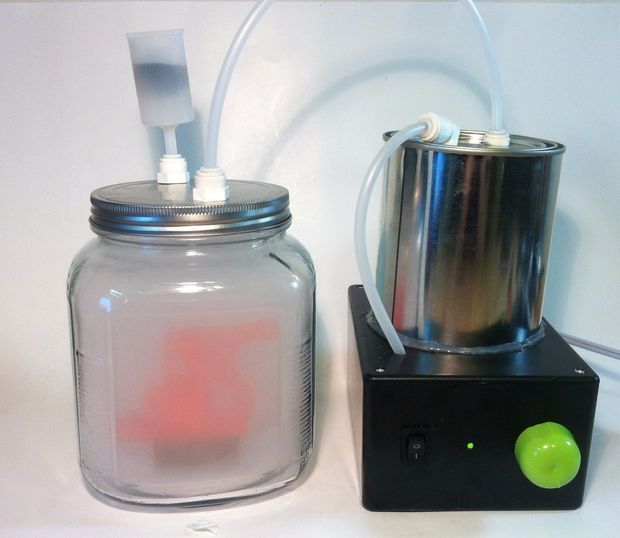
Probably the most efficient way to get glossy ABS models. This method requires placing the model in a container with a small amount of acetone at the bottom. The model itself should not come into contact with acetone, so the model should be placed on a platform or hung above the surface of the solvent. When installing on a platform, the material properties of the stand should be taken into account. Wood is not suitable for this task due to its porosity: the bottom surface of the model will stick to the wood, and it will be quite difficult to separate it. The best option is to use a metal stand.
It is advisable not to use wood as a platform
After placing the model, the container must be heated to increase the temperature of the acetone. Acetone also evaporates at room temperature, but too slowly. Please note that boiling acetone is not recommended, as this will cause condensation to accumulate on the model, which in turn can cause streaks. Thus, for best results, do not exceed the temperature threshold of 56°C.
A safe, homemade steamer that uses boiling water in an external pot to heat the acetone in an internal one.
Holding time varies greatly with the temperature of the acetone. So, when boiling, only a few seconds can suffice, while experiments at room temperature required up to 40 minutes of exposure. Fortunately, using a transparent container, you can determine the readiness of the model "by eye".
As with dipping, the completed model should be aired out before the outer surface hardens, avoiding unnecessary physical contact.
Both when immersing models in acetone and when working with steam, the wall thickness of the models must be taken into account. The shell must be thick enough to withstand the inevitable loss of the outer layer. In addition, especially subtle features may simply dissolve, and sharp corners will be smoothed out.
Safety Instructions
Successful Acetone Vaporization of an ABS Model
Acetone is not considered to be highly toxic, but care must be taken nonetheless. Inhalation of vapors can lead to pulmonary edema and pneumonia. A sign of poisoning is a feeling of intoxication, accompanied by dizziness. In addition, acetone causes irritation of the mucous membranes. When working with acetone, do not neglect personal protective equipment - goggles and gloves.
Particular attention should be paid to the flammability of acetone. Air mixtures with an acetone concentration of up to 13% by volume are explosive - when processing with acetone vapors, it is strongly recommended to work in a well-ventilated room and, if possible, use an exhaust hood. Do not use an open fire to heat acetone: since solvent vapors are heavier than air, they will displace air from the vessel, and once outside, they will cool and come into direct contact with the fire with all the ensuing consequences. It is also not recommended to tightly close the vessel, especially with strong heating, in order to avoid destruction under pressure.
Commercial options
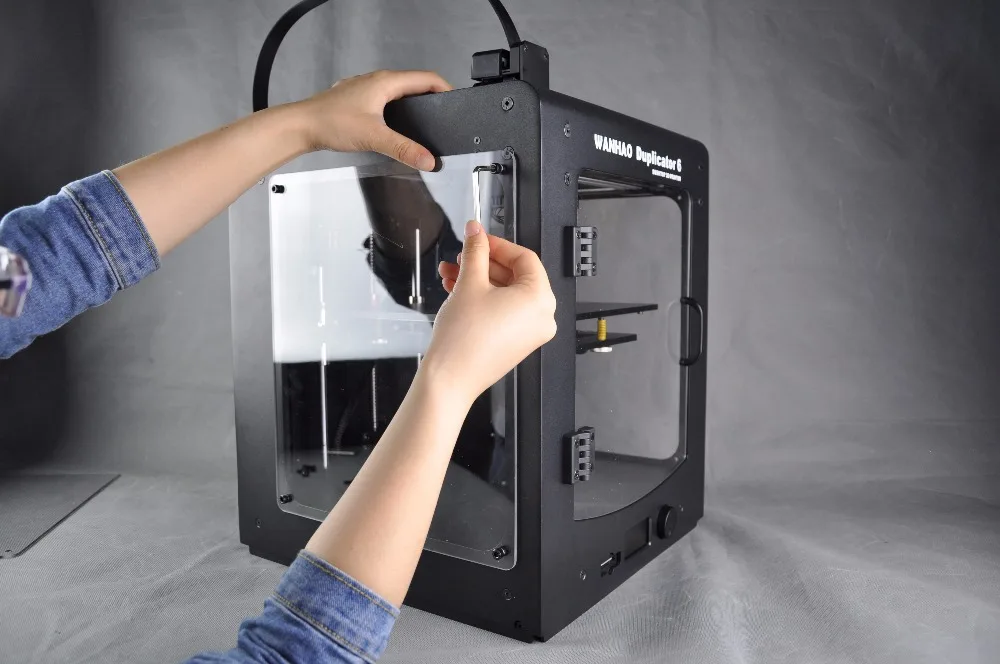
Stratasys Finishing Touch Smoothing Station
In addition to the Makeraser described above, there are commercially produced units for steaming both acetone and other solvents - dichloromethane, butanone, etc.
Stratasys manufactures a little-known but successful Finishing Touch that can process any variation of ABS to a quality virtually indistinguishable from injection molded models. The process is facilitated by the presence of a recirculation system, which saves on solvent and prevents air pollution by potentially hazardous fumes.
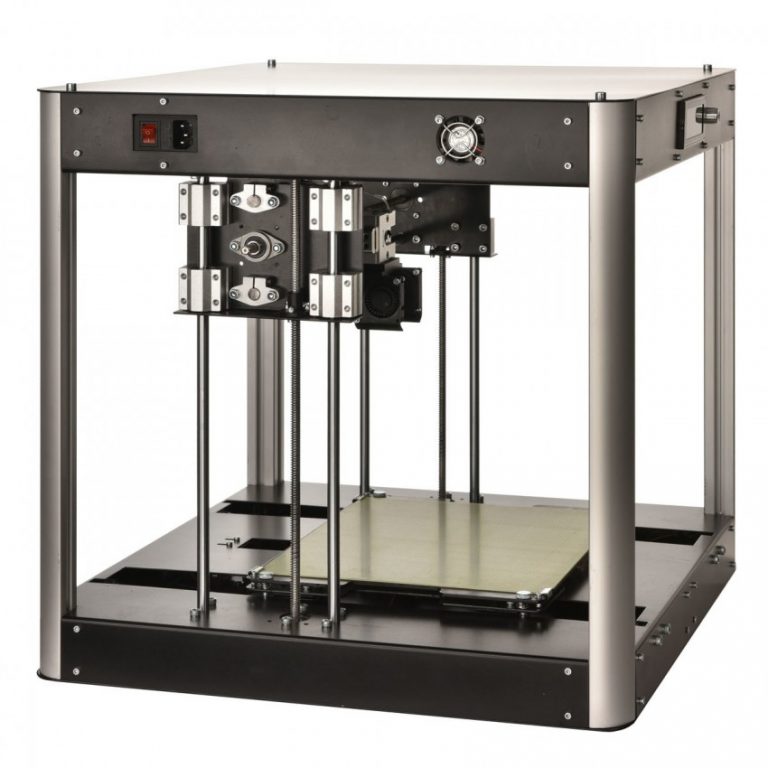
Future installation Sky Tech MagicBox
The developers of the new Sky Tech MagicBox device promise compatibility of their device not only with ABS plastic, but also with PLA. True, they intend to achieve this using the same acetone, despite the low solubility of polylactide (PLA) in this solvent. However, even with the ability to work only with ABS, the new device will be a good tool, especially for companies using FDM 3D printing for small-scale production.
Go to the main page of the Encyclopedia of 3D Printing
How to make 3D prints more durable. Technical name "vacation"
Nobody likes the smell of hot plastic - always print and temper in a well ventilated area
It has happened more than once: you spend time designing an object, trying to make it meet certain requirements, you carefully select the slicer settings to optimize the process, you select the material that would best suit the purpose of the object. .. The printing itself goes well, the result also looks like it should look, but despite all the care and work, when you start using the object, everything goes wrong, because the printout is not strong enough and rigid.
Depending on what kind of part you are creating and what its purpose is, sometimes it can be difficult to achieve the desired strength and rigidity. Even in those solutions in which the object is not subjected to high loads, additional strength will not be superfluous. Do you always think about how strong the object will be?
Is it possible to “strengthen” it somehow?
One of the best ways to increase strength and stiffness is to harden it. In this article, we will take a general look at the hardening process, find out what it is and how it affects strength and deformability. We then look at the specifics of tempering the most popular print materials, so you can then temper your 3D prints to make them stronger.
Although the process is relatively simple, you can turn a standard material like PLA into one of the strongest 3D printing filaments.
What is hardening?
Tempering is an ancient process, originally used in metallurgy to increase the strength of metal objects. Hardening is only one of the heat treatment methods that is used to change the physical properties of the metal without changing the existing shape. In particular, hardening increases the required characteristics of the available metal.
The principle of the hardening process is adapted to plastics, so that they also become stronger after the object has been formed. Initially, finishing was done using the same processes as for industrial plastics, but in general, hardening 3D prints for strength can be done by anyone with access to a kitchen oven.
How does hardening work?
In metallurgy, the initial process of casting and shaping a metal results in the formation of crystalline structures inside it, called grains. The grains are usually large. As a result, the metal is brittle and breaks along the grain boundary under load.
Tempering a metal involves reheating it to a temperature below its melting point and then slowly cooling it down. As a result of reheating, smaller crystals are formed inside the existing large grains. The denser the crystal lattice, the stronger and more ductile the metal. The shape of the metal object does not change, but the desired characteristics are improved.
In the case of plastics, the process is practically the same - there are only slight differences. FDM printing involves heating the material so that it can be extruded. After extrusion, the material solidifies into the shape of the printed object. Plastic is a fairly poor conductor of heat, which means that heated plastic generally cools unevenly. Uneven cooling leads to stresses inside the object. Let's take a closer look at the nature of these stresses.
As you probably know, most of the plastics used for FDM printing are polymers. A polymer is composed of two or more substances. Each of these substances consists of long molecular chains. These chains are intertwined with each other, forming a polymer.
At the microscopic level, the structure of the plastic usually appears disorganized and rather amorphous. Heating the plastic, extruding it and cooling it, transforms the structure into a more organized crystalline form. Quite large crystals are formed, very similar to those that appear in the metal after its initial heating and cooling.
The coarse crystalline structure of the plastic forms problem areas along the lines between each of the crystals. In addition, uneven cooling caused by poor thermal conductivity causes the polymer to shrink differently at different locations. This, in turn, leads to the emergence of different stress and compression forces inside the polymer structure.
Plastic tempering involves gently heating a substance to a temperature above the glass transition point, but below its melting point, and then slowly cooling it down. As with hardening metal, this heating and cooling increases the amount of crystal structures inside the plastic.
In addition, when the polymer approaches or reaches the glass transition temperature, the molecular chains have enough energy to become amorphous. In this state, they can rotate, move, stretch, etc. This relieves some of the tension and compression forces that were caused by uneven cooling. Both of these effects, in turn, make the plastic stronger, stiffer, and more resistant to mechanical stress.
Now that you know what hardening is and how it works to harden 3D printed materials, let's take a look at specific techniques you can use to harden some of the most common plastics.
How to temper PLA
PLA is generally strong but somewhat brittle. It also has a relatively low melting point. Both of these circumstances make it an excellent candidate for tempering. The low glass transition temperature of this plastic makes it even easier to harden. In addition, by increasing the ductility of PLA, hardening reduces the tendency for PLA objects to become brittle.
Hardening is actually the best way to make PLA stronger.
The glass transition temperature of PLA is 60-65°C. The melting point is 173–178 °C. Therefore, when tempering regular PLA, the oven temperature should be set to about 100 °C.
Note that our PLA has a lower melting point, so tempering is best done at around 70°C. In general, if your PLA requires a higher print temperature, it is of lower quality. Different ovens have different accuracy thermostats, so it's always worth testing on some unnecessary printout.
The temper temperature is high enough for the PLA to soften and become amorphous, releasing some of the stress caused by printing and building up its crystal structure. At the same time, it is small enough so that the PLA does not melt and flow, losing its shape.
Let the oven reach the desired temperature, then forget about it for about an hour. This time is required so that the temperature inside is distributed as evenly as possible, so that there are no cold and hot "spots" that can adversely affect the hardening process. Before placing your PLA printed object in the oven, use an accurate thermometer to make sure the temperature is correct.
It should be noted that when tempering PLA or any other filament, convection (fan) ovens give the best tempering result for the same reason they make great bread. The heat in them is not radiated from one direction, but the heated air circulates around the object due to convection, providing heating from 360 °, which leads to a uniform result.
Never attempt to temper printouts in gas ovens. The thermometer may read X degrees, but the flame is much hotter, which can cause the printout to melt and ignite. Only temper in an electric stove or oven and always make sure the heating element is turned off before you place your object inside. Once again: the heating element can be much hotter than the thermometer reading.
When the oven has reached the right temperature, place your PLA object or objects on a baking sheet, place everything inside and leave to cool. Repeat the process a few times, heating the oven (with no prints in it) and turning it off when you place the object to be hardened inside. Do this until the total hardening time for your object is about an hour (or more for larger prints).
This time is sufficient for the object to absorb such an amount of thermal energy that will allow the polymer chains to move, stretch, rearrange and recrystallize, forming a stronger internal lattice. Do not open the furnace during the tempering process, because any loss of heat can lead to an inferior result.
As the oven gradually cools down, the object will gradually cool down as well. The gradual cooling process avoids the reoccurrence of internal stresses that occurred during the rapid cooling after printing. Gradual cooling also reduces the possibility of warping, which can also occur at the tempering temperature.
When the oven reaches room temperature, remove the object or objects from the oven. You may notice that the printouts have shrunk slightly along the print layer line. Also, you may notice some expansion perpendicular to the print layers. In other words, the dimensions along the X and Y axes have become smaller, and along the Z they have increased.
These changes are due to a change in stresses, or rather, the release of internal stresses and compressive forces, which we talked about above. On average, the compression along the corresponding axes is about 5%, and the expansion is about 2%. If this kind of expansion-compression is a problem, you will have to compensate for it in advance when designing and printing.
After tempering, you will get a significant increase in the strength of your PLA object. Often, strength and wear resistance increase by 40%. You can also get significant improvements in stiffness. It happens up to 25%. Finally, the stability of tempered PLA at elevated temperatures is also much better. So if you need a tough, high strength PLA part with good heat resistance, tempering is the right choice.
How to harden ABS
ABS is generally stronger and less brittle than PLA. It also has a higher melting point than PLA. Regardless, ABS is also an excellent hardening candidate. While ABS, due to its higher glass transition temperature, needs to be tempered at a higher heat than PLA, the tempering process will provide ABS with the same improvement in required material performance as PLA.
The glass transition temperature of ABS is 105°C. Melting point - from 210 to 240 °C. Therefore, the oven temperature should be set to approximately 110 °C. This temperature is high enough for the material to soften, release stress, and build up its crystalline structure. If you wish, you can try tempering the ABS at a higher temperature, however, some warping and deformation may occur. Similar to PLA, the tempering temperature should not be so high that the material melts, runs, or deforms significantly.
Again, let the oven reach the desired temperature, then leave it out for about an hour so that the heat is evenly distributed. Before placing your ABS printed object in the oven, use an accurate thermometer to ensure the temperature is correct. As with any tempering, a convection oven is always preferable.
When the oven is at the correct temperature, place your object on the baking sheet for approximately 30 minutes plus 15 minutes for every 3 mm cross-section of the object. In this case, similar to PLA, this time should be enough for the object to absorb enough thermal energy to allow the polymer chains to move, stretch, rearrange and recrystallize, forming a stronger internal lattice. As always, do not open the furnace during the tempering process.
After the required time has elapsed, turn off the furnace, leaving the object inside. Gradual cooling will reduce distortions and the reappearance of internal stresses caused by sudden cooling.
When the oven reaches room temperature, remove your object from the oven. Again, you may notice shrinkage and increase in size along the axes. As with PLA, compression can be compensated for during the design and print phase. The hardened object should become stronger, stiffer and more stable, as well as more heat resistant.
How to temper NYLON
Nylon is much stronger and less brittle than PLA and ABS. Its melting point is lower than ABS and comparable to PLA. Like PLA, the low glass transition temperature makes it easier to temper. In addition, as a result of hardening, the temperature of thermal deformation increases significantly. Given its high strength, Nylon proves to be an excellent choice for applications where heat and wear resistance are key issues.
Nylon's glass transition temperature is surprisingly just 41°C. However, the melting point at the same time commands respect - from 178 to 181 ° C. Therefore, the oven temperature should be set to 130-140 °C. This temperature is high enough for the material to soften, release stress, and build up its crystalline structure.
As always, the quench temperature should not be so high that the material melts, runs or deforms significantly.
In this case, too - when the oven reaches the desired temperature, let it stand for an hour so that the heat is evenly distributed.