3D printed coil winder
▷ coil winder 3d models 【 STLFinder 】
coil winder
grabcad
coil winder for guitar pick-ups.Using self generated and imported components.I built an analogue version with a cam activated linear wire guide for about $100. I designed this one with a servo linear guide.estimated total cost of $175. ... Products...
coil winder
thingiverse
this is my open source wire coil winder project. the same parts can be used for a hand winder or a nema 17 can be bolted in place of the one 42mm cube. then you can make an automated winder. it has a face plate with a magnet spot. the magnet triggers...
Tesla Coil Winder Jig
thingiverse
Jig for a tesla coil winder
Automatic coil winder
thingiverse
STLs for my automated coil winder https://www. youtube.com/watch?v=GJcQfJ6JTZg
Magnet wire coil winder
myminifactory
Added a coil winder head that fit an M3 screw to hold coil cores Update...As I used it with a little spool of wire it was not very stable, so I added some blocks to fix the THING to a board of plywood or something heavy enough to hold it still while...
Sable 2015 Coil Winder
thingiverse
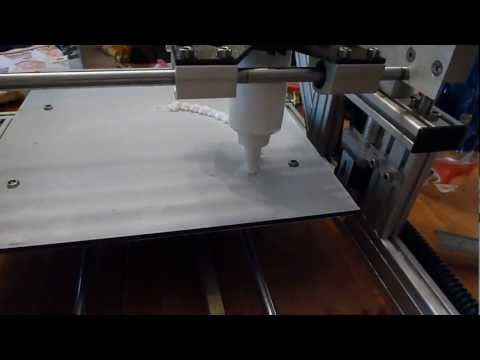
Turn Sable 2015 CNC machine into a coil winder. Using Gcoil to generate nc file, assign X-axis as feeder and Z-aix as winder GSuite download URL : Site 1 : http://www.mycncuk.com/threads/1372-Gsuite-V1-2-free-gcode-tools Site 2 :...
Magnet wire coil winder
myminifactory
You can add bearings on the spool holder axles if you like, I prefer just an alu tube without bearings because it gives a bit of friction to hold the wire in tension. The axis holes in the parts that fit on the coil winder axle are shaped for M5 nuts...
automatic coil winder
thingiverse
this is my current project, an automatic coil winder. It's controlled by an arduino uno, so you just have to choose your number of windings and start it. What you need is an Arduino Uno (or similar) and a SainSmart LCD Keypad...
Magnet wire coil winder
thingiverse
The axis holes in the parts that fit on the coil winder axle are shaped for M5 nuts so when everything is tightened, there is no need of set screws, everything turns as a whole. The width of the assembly depends solely on the length of the threaded. ..
..
coil winder-enrouleur des bobines
thingiverse
coil winder-4x1
ENDACAP for Tesla Coil Winder
thingiverse
Designed for Tesla Coil Winder that can be downloaded here: https://www.thingiverse.com/thing:4931100
Coil winder Counter Drill Attachment
thingiverse
Two rings that turn a dewalt drill into a coil winder that counts turns. Watch the video to see it in action. ...
...
Coil Winder with wire guide
thingiverse
## Coil Winder We needed to make some custom solenoids, that's why we designed this coil winder system to do so. ## Design The contraption has two main parts: * The winder itself * Guide for the wire ### Winder A stepper with which we are able to...
Bobbin / Coil winder
cults3d
Rather than making a separate design or device for each coil, it is more logical to wind the coils you want with a single design. You can print the holder in the size you want and quickly wind the coil you want. Only change size of bobbin support...
Tesla Coil Winder
thingiverse
Brackets, crank and coil holders to wind Tesla coil secondary coil by hand. Is especially made for using Everbuilt extension drain pipe as a former for the coil. Home Depot Store SKU #1000050266 .
Just enlarge the holes with a 5mm or 7/32"...
Is especially made for using Everbuilt extension drain pipe as a former for the coil. Home Depot Store SKU #1000050266 .
Just enlarge the holes with a 5mm or 7/32"...
Manual ETD59 Coil Winder
thingiverse
This is a simple and manual ETD59 core winder I have used to make the main transformer of my x-ray machine: https://hackaday.io/project/162928-3d-printed-x-ray-machine and it's driven by my Piernas's fast ZVS:...
copper coil winder stator motor build diy
thingiverse
Hi,I am Interested in building a 3 phase axial flux wind generator motor,i haven,t made this coil winder yet,so i hope that my scaling is ok?,required x1 length 100mm bolt, 6mm in diameter x2 washers,inserted through the centre to hold it all.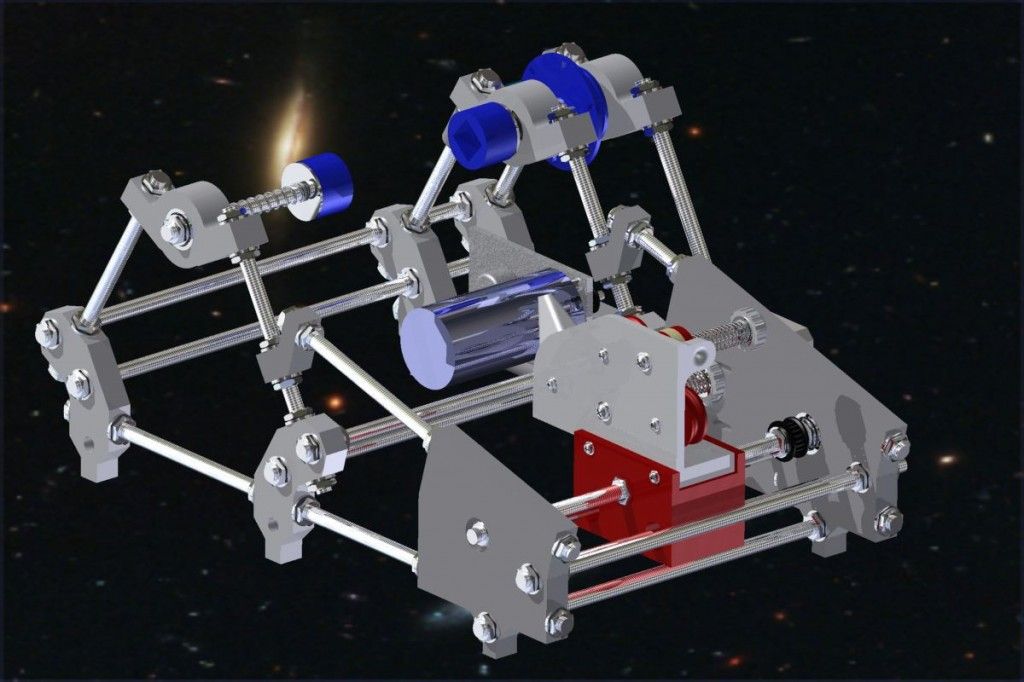 ..
..
Electromagnet coil winder counter manual
grabcad
3d Printable winder to wind small electromagnet coils for motor & solinoid projects
Bare Air Coil Winder Tool
thingiverse
Tools to wind bare air coils Rotate by 180 degree for print :-)
Rodin Coil Winder Revision 1
grabcad
This was modelled by Will Green, and it is at this point incomplete. ...It is designed to automate the windings of Rodin Coils.
Coil Bobbin Winder
thingiverse
Neat coil winder, I used Arduino micro, Photoelectric-Interrupt-Sensor,motor speed controller and a 4 segment display. A bit of a tight fit but works fine. Need improvement on the Arduino sketch . It cant keep up with speed. I used a button counter...
stator coil winder
thingiverse
This thing was made with Tinkercad. ...Edit it online https://tinkercad.com/things/2mdDODhaNpV
Automatic Coil Winder
myminifactory
Made for use in conjunction with https://3dprint. nih.gov/discover/3dpx-012514
Made for use with a nema17 form stepper motor. ...3x bearings needed, which I used https://www.thingiverse.com/thing:53451 due to not being free floating, as the magnet...
nih.gov/discover/3dpx-012514
Made for use with a nema17 form stepper motor. ...3x bearings needed, which I used https://www.thingiverse.com/thing:53451 due to not being free floating, as the magnet...
Coil Winder Filament
thingiverse
https://www.youtube.com/watch?v=BuV14j8JOZI&t=3s
Coil Winder (vape heater)
prusaprinters
small spool holder for my coil winder
thingiverse
. .. my special made 3D printed winder, which you can find here on thingverse. http://www.thingiverse.com/thing:760322find the stl file for the thumb nut there, as well as the winder stl files this is part of my research into Stan Meyer and his work.
ARDUINO controled coil winder with nema 17
pinshape
PARTS NEEDED- arduino control board i have used LEONARDO but any board will do the job push on/off switch and conected to power + 12v of the nema poloulu controler stick 100 k potenciometer to graduade the velocity of the stepper motor 100mf 60v...
bobbin plate winding machine tool - uk_cnc mini coil winder
cults3d
Here is a pretty usefull tool i've designed for the excellent UkCNC mini coil winder. it's a plate for fixing every kind of bobbin of guitar pickup. All you need is take five M3 (2.2mm height) hex nut and glue them in the hex holes, to the back. You...
bobbin plate winding machine tool - uk_cnc mini coil winder
thingiverse
Here is a pretty usefull tool i've designed for the excellent UkCNC mini coil winder. it's a plate for fixing every kind of bobbin of guitar pickup. All you need is take five M3 (2.2mm height) hex nut and glue them in the hex holes, to the back. i...
Coil Winders for clearomizer/tank
myminifactory
3D printed coil winders for clearomizer / tank the leading brand of electronic cigarette 2.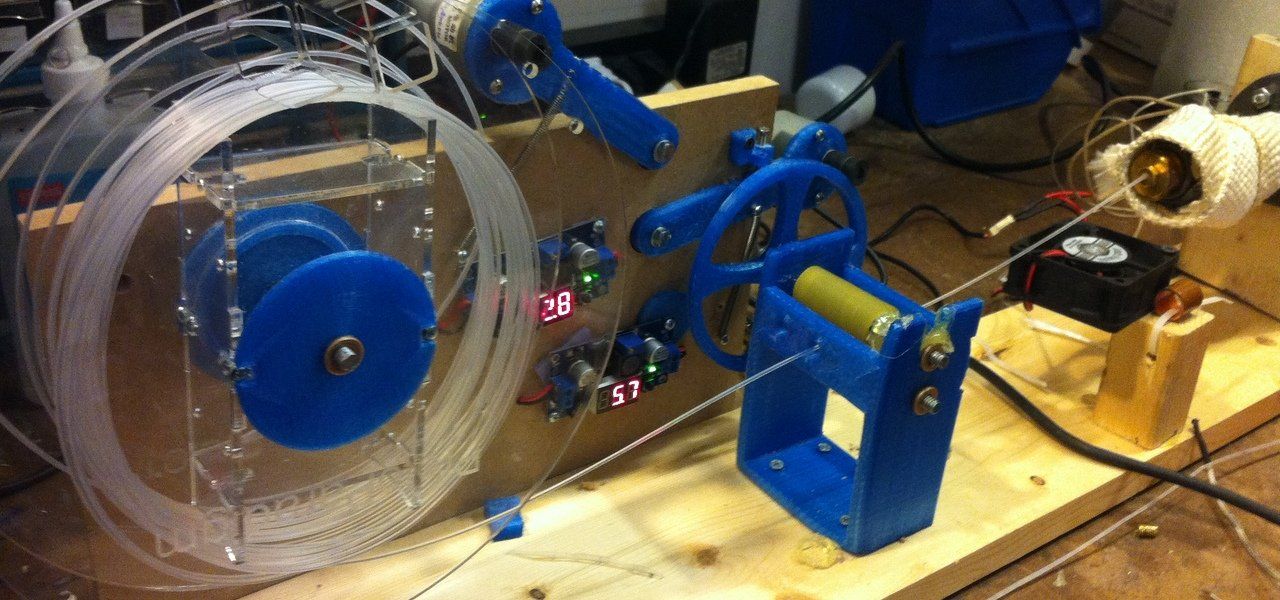 00mm 2.50mm 3.00mm.
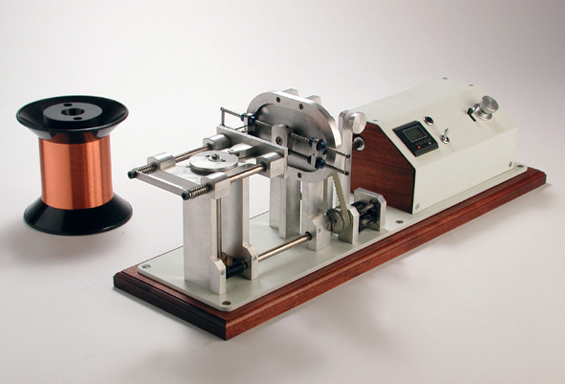
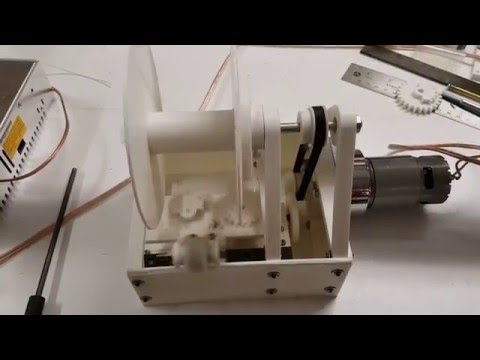
WinDIYingThing - Automatic coil winder
I started this as a sideproject to build the coils for the "Nerdiskerator" (a 3D printed disk generator: https://hackaday.io/project/172445-nerdiskerator-a-3d-printed-disk-generator) that im using with "WinDIY" (a 3D printed wind turbine: https://hackaday.io/project/172328-windiy-hawt-wind-turbine).
During that i came across a problem: winding the coils by hand is very time-consuming. Not only the windings must be correct. The positions of the individual windings should also be as uniform and parallel as possible on the 3D printed coil core.
After I tried this manually, it became clear to me that it would be faster, easier and of higher quality if i would let a machine do this.
More in the details. :)
Details
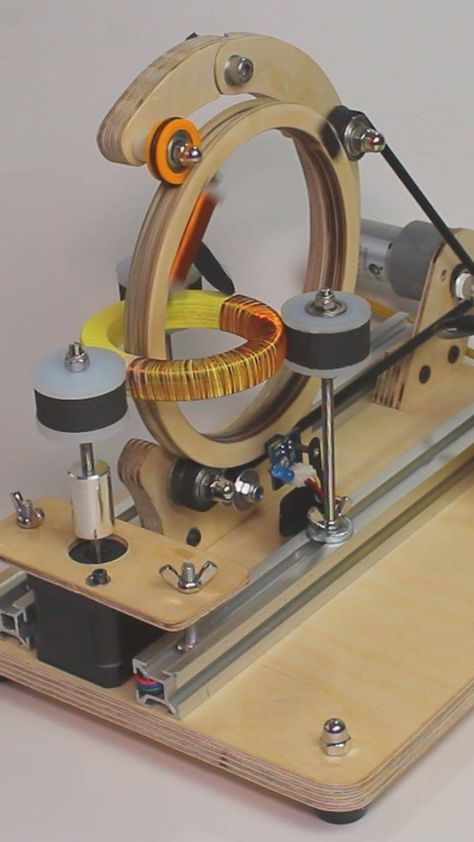
WinDIYngThing at work
Why build yourself?
Very simple: At the time when I started with WinDIYngThing there were no comparable machines for the small budget. Of course there were professional machines, but they were well above the budget that I wanted to spend. Also, I didn't really understand what has to be so expensive on such a machine? So I started building my own and that's how it came out. :)
The actual state
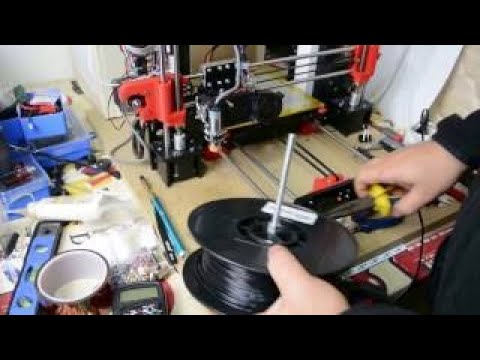
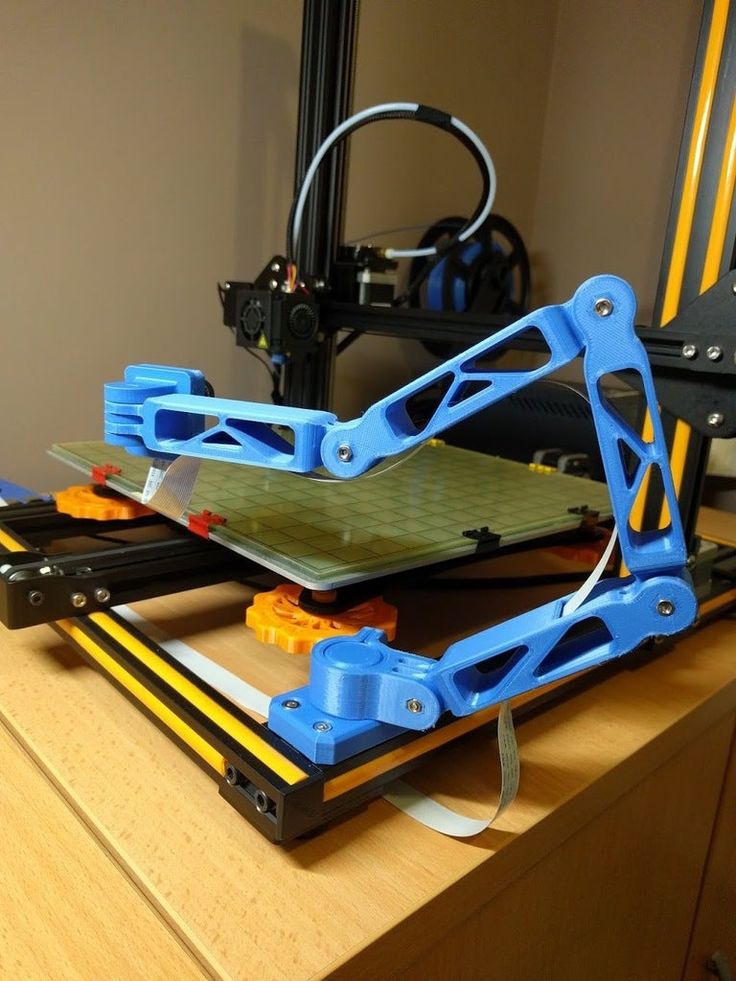
Here you can see the current status. Two NEMA17 stepper motors are installed. One of the stepper motors is responsible for guiding the wire guide to the correct position on the winding. The other stepper motor winds the wire on the screwed winding insert.
Since the "winding stepper motor" sometimes "lost" steps in the past and the number of turns became too small, it is also equipped with an "MKS Servo42" controller. This continuously checks whether the stepper motor has also carried out the "commanded" steps. If it detects a difference, it is adjusted accordingly and, if necessary, the winding current (of the stepper motor) is increased to catch up with the step.
The whole thing is controlled via a small circuit board that I created recently. It includes an ESP32, a stepper motor driver, an OLED, two buttons and a rotary encoder. In the final version, all parameters should be set and started automatically.
A closer look at the setup during the prototype phase. (When everything was still on an MDF board)
Here you can see the "wire straightening mechanism".
ToDo:
- Test PCB
- Design housing for electronics
- Design a new base plate
Licenses:
Content that is not based on software/code: Unless otherwise stated, all works presented here that are not based on software/code are subject to the CC BY-NC-SA 4.0 license (attribution – non-commercial – dissemination under the same conditions 4.0 international).
You can find a summary here: https://creativecommons.org/licenses/by-nc-sa/4.0/deed.de
You can find the complete legal text here: https://creativecommons. org/licenses/by-nc-sa/4.0/legalcode.de
Software/code-based works Unless otherwise stated, all software/code-based works presented here are subject to the GNU Affero General Public License v3.0
You can find a summary here: https://tldrlegal.com/license/gnu-affero-general-public-license-v3-(agpl-3.0)#summary
The complete legal text can be found here: https://www.gnu.org/licenses/agpl-3.0.de.html
-
The controller PCB
Fab • 06/24/2020 at 14:02 • 0 commentsI may have already mentioned it somewhere, but I created a board to control WinDIYngThing. I wanted to briefly present them here. There is space for three stepper motor drivers, an OLED, two buttons, a rotary encoder, voltage converter and an ESP32.
In the pictures you can see the first prototype. On this I soldered the components with pin headers. As soon as I know that everything works, the individual components can be soldered more compactly (closer to the PCB).
The third stepper motor driver is actually not necessary. But I thought it was better to have another one than to need it. :) One purpose I could imagine is to use the stepper motor to unwind and wind up the wire spool. In this way, if the winding itself was incorrectly wound up, the wire could be quickly and easily rewound onto the original spool.
What do you think? Have I forgotten anything important?
View project log
Enjoy this project?
ShareHomemade plastic winder
Z hello dear friends!
I think each of us has encountered such a problem as plastic overlap in the reel, when we did not have time to grab the end of the plastic rod, or the filament was wound 'in bad faith', although not everyone may, but I'm sure many have met with this problem.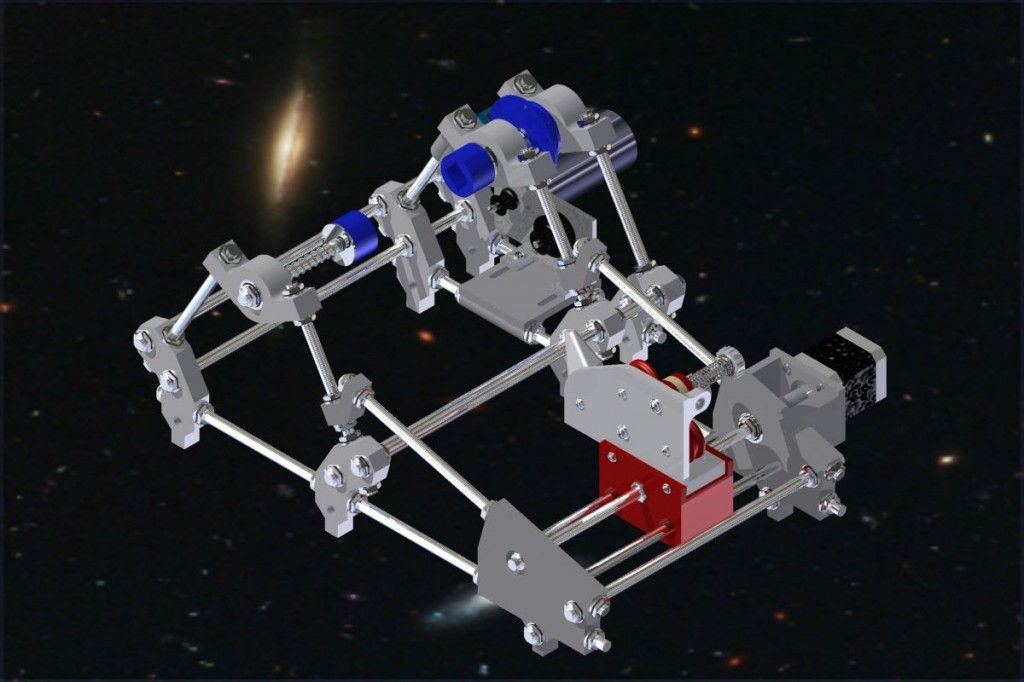
And so, today I would like to tell you how I solved this problem. So, we will talk about a home-made machine for winding plastic onto a coil.
What do we have to do when we get something like this:
or like this:
We have to take the spool out, unwind it, and rewind it, and that's the best case.
And what if you have purchased, for example, a skein of plastic 400 meters long?
I don't think I'll be able to do it without outside help, and winding hundreds of meters of plastic by hand is somehow not very good.
In my case, the last time I purchased this spool of filament without a spool, I did the following, cut the empty spool in half, printed a plastic insert, put on the skein, and connected the two parts of the spool together.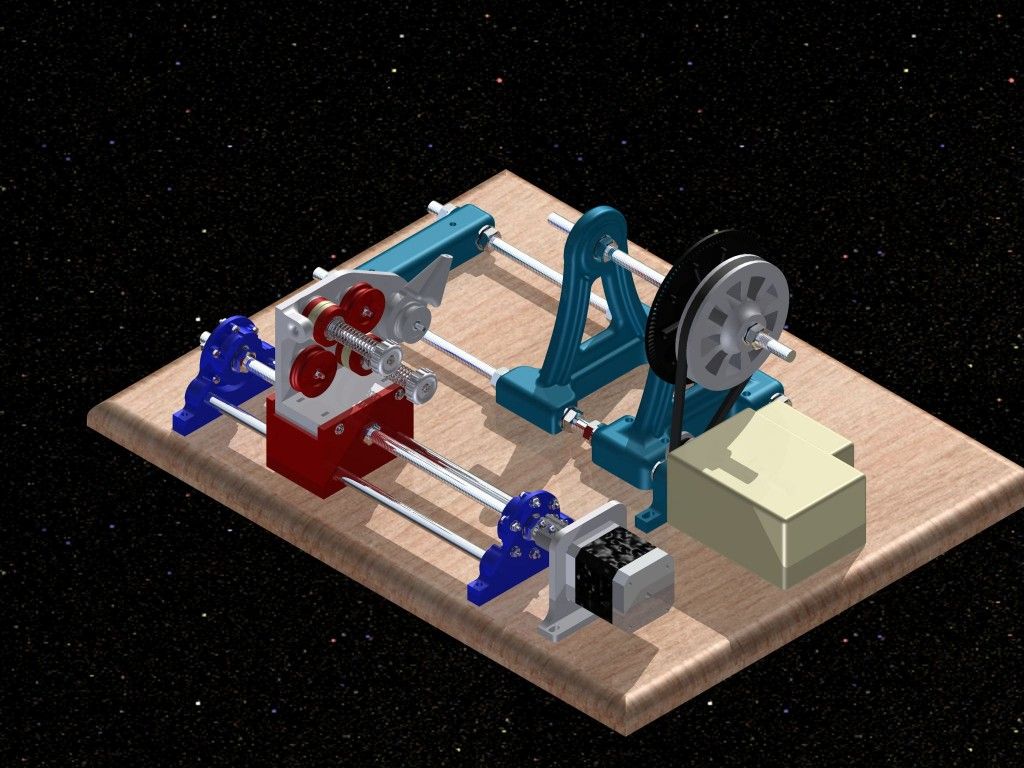
However, I did not really like this option, the plastic was spinning freely on the reel, no, during printing it did not create any problems at all, I just did not like the freedom of action of the plastic :-) .
And then it dawned on me, why not make a machine yourself, with which you can wind plastic on an empty reel, or rewind plastic from one reel to another, in case of overlap, or divide plastic of the same color, available only on one spool, two spools to print simultaneously on two printers.
In short, I realized that I needed this machine :-)
Well, like all ordinary people of the present, I tried to 'google' .... however, I did not find such a machine, or the ability to search on the Internet me below average, but that's not the point).
I decided to invent the machine myself, although it is loudly said ... what is there to invent, because the very principle of operation of such a machine has long been known - two shafts on which the coils are located, and gears with which this mechanism is driven.
The main criteria for the creation of my machine should be ease of execution and availability of assembly materials!
Taking into account these criteria, I decided to make from what was at hand. I decided to make the base from chipboard (chipboard '16 mm thick, and the shafts from metal chrome-plated tubes with a diameter of 16 and 10 mm, such tubes are sold in any furniture store. I had both at home.
Dimensions 680x130 mm and 160x130 mm
Pipe length 200 mm.
After spending a few hours in Solid, the following parts were obtained, which were immediately printed on 3D printers ZAV-MAX-PRO and ZAV-L :
MAX-PRO, which I purchased more than a year and a half ago, lay with me unnecessarily.
This is the fastening material that was used when assembling the machine (m3 and m5 screws, euro screws, and ordinary screws).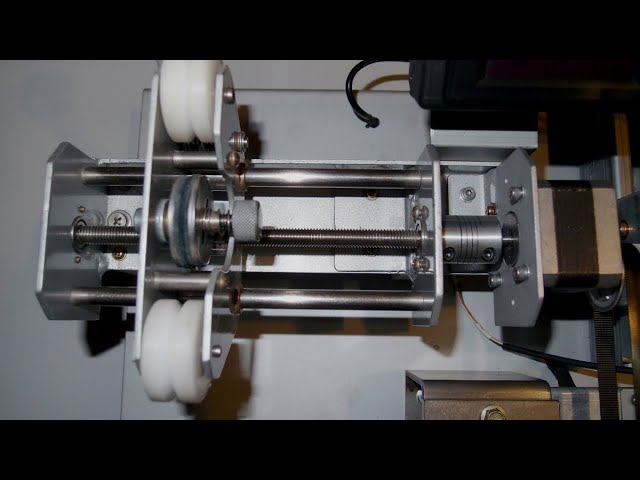
After assembling the base, I decided to cover it with paint to make it look more aesthetic.
After assembly and the first start, the mechanism worked surprisingly well.
The result is a very functional and practical machine.
I have no doubt that many will now shout and throw stones, calling this 'what kind of collective farm?!' to which I will answer in advance: 'Yes, maybe a collective farm, but a working collective farm!'
For example, I wound about 400 meters of plastic on a reel for 5 minutes.
I also want to add that this project is not final, this is just the first experimental model, in the future I plan to place a tensioner and a bar stacker in the center so that the bar lies layer by layer, but for now the role of the stacker and tensioner is performed by a free hand.
By the way, I posted the files for printing in free access to thingiverse.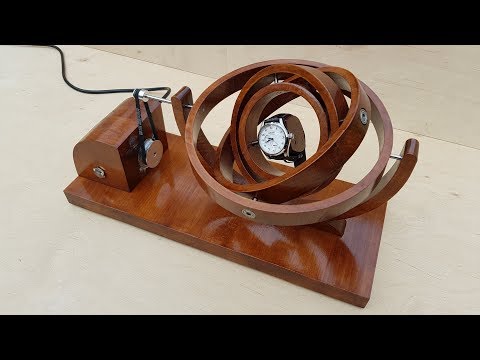 com.
com.
Here is the link: https://www.thingiverse.com/thing:2883014
If you have read the article to the end, I want to express my gratitude and recognition, and I will be very pleased if at least someone will benefit from my work.
Good luck to everyone and bye!
Free STL file Cable winder・3D printing design to download・Cults
Frame Mounted Creality 3D Ender 3 Tool Holder
Free
Marble Run
Free
Torture Lattice Cube
Free
Creality CR-6 SE Cable Support with PTFE clamp
Free
Lara Croft Toon Figurine - manifold hollow
Free
Parametric Bearing
Free
Modular Desk Tidy
Free
Strutted Z-Beam - tetrahedrons
Free
Best 3D Printer Files in Home Category
Deactivated
Sink Scouring Sponge Holder
Free
Bender Alexa - stand holder Echo dot (Futurama)
5,54 €
PS4 Controller Holder
0. 95 €
95 €
Mike the Tiger Bookends
Free
Lamp "Snitch"
8,23 €
Pot for growing ice cream cones
2.23 €
Five-sided Vase
Free
Bestsellers in the Home category
Modular storage box system with quick print
€5.65
Pencil with dinosaur gluttony
1.49 €
Toilet paper holder with middle finger
6,50 €
Wall shelf "Amanita mushroom"
2,40 €
TOILET PAPER ROLL HOLDER MOAI EASY PRINT
€2. -20% 1.89 € 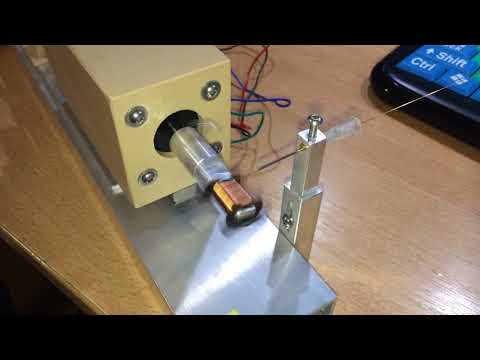 36
36
Another quick-change toilet roll holder
1 €
Ornament "Valentine's Heart" without supports
2,36 €
Pop-up cat key holder
2.83 €
chicken keychain
1 €
Keychain for cassettes 📼
1.89 €
Wall shelf "Oyster mushroom"
2,40 €
Modular desktop organizer with quick print
2.82 €
1/14 LOADER - Vulpa L102
61.16 €
Venus and Aphrodite
3.