3D printed bladeless fan
▷ bladeless fan 3d models 【 STLFinder 】
bladeless fan
grabcad
bladeless fan
Bladeless Fan
thingiverse
Just playing around with bladeless fan designs. Can be printed in one piece. ... Need improvements working on them.....
Bladeless Fan
thingiverse
D style Bladeless Fan Used 35mm x 10mm Mini Fan (So Low, But Cool) fan_blade_less.stl , fan_transper.stl between must glue gun. ...Print Settings Printer: Marv . ..
Bladeless fan
thingiverse
I made this bladeless fan because it's hot. ... There are some things you need for this project: * 4x 6m bolt and nut (30mm long) * 80x80 mm fan * some switches and other electronics
BLADELESS FAN
thingiverse
This is a portable bladeless fan. Safe and easy to make. Have a fun hobby. ... Material - Charging module - 18650 li-ion 3.7v - switch (10x15mm) - mini gear motor Link : https://youtu.be/faq3EWDH6Mo
bladeless fan
thingiverse
this is a remix of the bladeless fan from here: https://www. thingiverse.com/thing:2685544 this is been altered to allow the base to print WITHOUT supports , the hole for the switch was removed and replaced with a gap for a longer wire and switch set...
Bladeless Fan
thingiverse
You will have to upload the following program to the Digispark ATtiny85 in order to make it work: https://github.com/EliteWorm/Bladeless_Fan/blob/master/Bladeless_Fan_V_1_0_0.ino Connections: - The Digispark ATtiny85 must be powered with 12 V DC...
Bladeless Fan
thingiverse
A bladeless fan, powered by 120xx fan. I am curious of whether an Air Amplifier fan can create more air flow than the original fan itself. So I decide to make one bladeless fan. I choose 12038 fan because it can create more air flow at lower rpm,...
Bladeless Fan
thingiverse
English I have completely revised the following bladeless fan : https://www.thingiverse.com/thing:2685544 Additionally I have integrated a customized FanBooster from this link: https://www.thingiverse.com/thing:3009239 - For printing this bladeless...
bladeless fan
thingiverse
Bladeless fan using a 40mm x 40mm axial fan. Print Settings Printer: self made printer Rafts: No Supports: No Resolution: 0,2mm Infill: 20% Post-Printing Components Fan: Select a powerfull 40mm x 40mm fan. The thickness can be up to 25mm. Use a...
Bladeless Fan
thingiverse
Bladeless fan similar to the Dyson ones in the shops. Obviously there is a fan but t's in the base to compress the air into the ring. Sometimes called an Air multiplier fan. In this version I used the bones of a 12v 90mm radial fan as the motor...
Bladeless Fan
grabcad
... part of the fun project ) . ...I have always wanted to make a leafless fan. When I saw this beautiful picture, I couldn't wait to do it.I will start to do it soon, Project address: https://ilikeilucky.com/apple-bladeless-fanhttps://b23.tv/D6szjA
Bladeless Fan
thingiverse
Made for a 60mm server fan
bladeless fan
thingiverse
printed in pla 30 procent infill when printing the housing use support mounted a fan of 40 mm inside the housing inspired by dyson fan
Bladeless Fan
grabcad
-A reverse-engineered Dyson blade-less fan-Group Project, made with members: Christopher Endres Faisal Alsayed Nicholas O'Connell
Bladeless Fan
thingiverse
I used a small fan from a decommissioned server in the base which is super loud and powerful. the fan works very well and is pretty easy to print. the inner part shouldn't need supports and the outer portion requires supports only for the base. I...
Bladeless Fan 60mm
grabcad
Bladeless fan
bladeless fan model
grabcad
its nothing but a youtube DIY project of bladeless fan
Desktop Bladeless Fan
thingiverse
-Update- Version 2: https://www.youmagine.com/designs/desktop-bladeless-fan-v2 Desktop bladeless fan. Individual pieces need to be joined using glue. ...(superglue recommended) Things you'll need: +/- 400g filament 140mm PC fan (1000+ RPM recommended)...
Bladeless Fan Head
thingiverse
This is the head to a bladeless fan I am building. The lower portion actually houses the fan motor and blade and the air is then ducted through this head. ...The design is such that you can easily customize this into your own design
Bladeless Fan Concept
thingiverse
A concept for a bladeless fan. I've tested it with various propellers/impellors but have not yet been able to get it to work. It has been designed for FDM printing without support material. ...I have used 50° as the minimum angle as I find it offers...
Bladeless Fan 3D model
cgtrader
BLADELESS FAN ======================- Modeled in Blender. - Preview image rendered using cycles. - All scene are included in .blend files. - Poly count are before sub division - Great for close up render. ...- All parts and materials are logically...
Dyson Bladeless Fan
thingiverse
Bladeless fan remixed for a 120mm PC fan (no need to resize which modify the out put) Fit snuggly for me so no nuts or bolt needed. ... Top part in one piece (for those who can print it like that (240,4mm high) or
2 part top for smaller printer. ..
..
Triangular Bladeless Fan
thingiverse
A unique triangular design of the popular bladeless fan. The "bladeless" design uses an airfoil shape to suck and capture additional air, thus increasing overall air-flow and cooling. <b> Triangle 120mm.STL and STAND 120mm.STL have been updated...
Bladeless Fan - SgaboLab Prototype
thingiverse
https://youtu.be/n67suzLlb6w more dettails http://www.sgabolab.com/2016/12/3d-printing-bladeless-fan-prototype.html#links For the test that you see in video, I use a pc fan and an adapter to boost static pressure of the fan, not the conic adapter. ..
..
Bladeless Fan - Prototype
pinshape
Valentine Bladeless fan, here little test with smoke where you can see how air move around it - If you think to buy from Gearbest and want support me, use my affiliate link, thanks https://www.gearbest.com/?lkid... If...
Mini Bladeless Fan
thingiverse
I found some good information here: https://www.researchgate.net/publication/288180188_Numerical_investigation_of_geometric_parameter_effects_on_the_aerodynamic_performance_of_a_Bladeless_fan with cross sections and charts that show what parameters...
Desktop Bladeless Fan V2
youmagine
Summary: Desktop bladeless fan, Version 2! Uses a custom designed impeller to move the air instead of a normal fan. Airflow is much higher on this Version 2. Things you'll need: Filament; RS-380 motor; (Don't use this motor higher than 8000...
Bladeless fan (With Yaw)
thingiverse
Updated the Base for the no YAW configuration (3 Screw Halls) Bladeless Fan With yaw This is provided as is. I haven't tried printing it. Parts: Control Circuitry (Arduino (Mini, Pro mini, etc, or any other micro) with IR sensor or wifi or bluetooth...
Fantasy Themed Bladeless Fan
myminifactory
This fantasy themed bladeless fan was designed, sculpted, SLS printed, and hand-painted to showcase the advanced capabilities of SLS printing technology, exclusively for the MyMiniFactory Sinterit Lisa design challenge. *** VIDEO ***
[These are...
*** VIDEO ***
[These are...
Possible Controversy on Thingiverse? « Fabbaloo
By Kerry Stevenson on May 22nd, 2018 in models
Tags: legal, thingiverse
A 3D printed bladeless fanI found an interesting 3D model at Thingiverse, but then something happened.
I first saw this model referenced in a Reddit thread, and became immediately interested. The model was a project for a bladeless fan, designed by Thingiverse contributor Helix3D.
This multi-part project requires not only some 3D printed components, but also an electric fan, wiring, rubber feet, power supply and a switch.
What attracted me to this project was the uncanny resemblance to the famous (and pricey) Dyson Bladeless Fan that I’ve often seen for sale in stores. I’ve never bought one myself simply because their price is usually far above what I would pay for a fan. Sure, it’s a terrific looking unit, but in my mind it is overpriced.
Some actual Dyson bladeless fansThen there was this project on Thingiverse that could, in theory, produce the same kind of fan at far lower cost. And with the fun of building the project, too.
An inspection of the Thingiverse page showed the fan and several downloadable part files. But there was a notice saying “Hey! This thing is still a Work in Progress. Files, instructions, and other stuff might change!” Perhaps there was another version?
There was indeed. A section of the entry says:
Version 2 here: http://www.thingiverse.com/thing:1665610
Excellent! I immediately proceeded to the apparently new and improved version.
Where I saw this in a prominent red box:
Looks like a problem with this 3D modelThis Thing is currently under moderation: due to a Notice of Claimed Intellectual Property Infringement. Files and images for this Thing are currently unavailable.
Oh oh.
It seems that someone has filed a complaint with Thingiverse regarding the 3D model’s design. Who could that be? Perhaps Dyson themselves? We cannot know, as Thingiverse isn’t saying.
But in retrospect it is not surprising, as Dyson no doubt makes significant coin on their unique bladeless design, and having a free version anyone could make probably isn’t the greatest idea for them. Worse, if they don’t actively protect their design they could be setting a legal precedent that suggests the design doesn’t deserve protection.
This is one reason companies often come down very hard on what might be insignificant uses of their intellectual property. They’re not so much interested in nailing the first offender, it’s instead they’re interested in preventing oceans of subsequent infringers, and larger ones in particular.
Thus Thingiverse has disabled this particular design and there is no ability to download the 3D model files for printing.
Except for one thing.
The original version is still up, alive and distributing the 3D model files.
In this case it appears that Dyson, or whoever filed the complaint, somehow missed the earlier version, or considered it too “far away” from their own design to bother. But I think that latter scenario is unlikely.
The more likely thing is that they simply missed it. And that’s not surprising given the number of 3D model repositories and millions of entries, with countless daily changes.
Searching for infringers must be quite difficult. In this case the poster never used the word “Dyson”, so that would make it more challenging to find. They could search for bladeless, but that could refer to many other things.
Some posters of infringing 3D models disguise their posts through careful management of the descriptive text, and perhaps that happened by accident here. We’ll never know for sure.
Meanwhile, you may enjoy the original bladeless fan design.
Via Thingiverse and Thingiverse
Kerry Stevenson, aka "General Fabb" has written over 8,000 stories on 3D printing at Fabbaloo since he launched the venture in 2007, with an intention to promote and grow the incredible technology of 3D printing across the world. So far, it seems to be working!
View all of Kerry Stevenson's posts.
How to make your own fan without blades on a 3D printer
Fans without blades blow air through a ring on a stand. Dyson is the company that created the fan without blades and without noise. However, the very term “bladeless” misleads everyone; in fact, they still have blades. A small fan is installed in a stand and pushes air through a thin ring - this is the principle of operation of a bladeless fan.
I'm going to build a simplified version of the original with my own hands. Of course, it will not work as efficiently, but the price is several times less. And you can take a small fan with you anywhere.
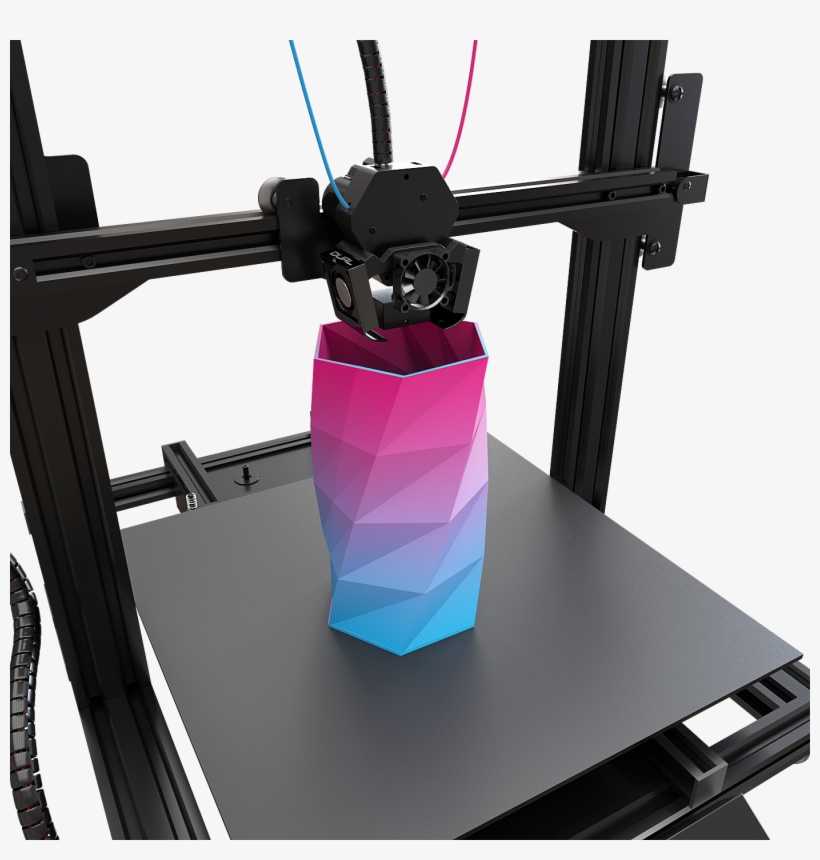
Printed on Monoprice Maker Ultimate in PLA, 0.4mm nozzle diameter, heated bed.
Step 1: Product Design
I created a parametric model of my fan in Autodesk Inventor with 3D printing capability. It must be remembered that all the details will eventually be printed. Based on this, I decided to make 3 interconnected parts with a minimum overhang and a large base, so that possible printing or modeling errors would not affect the result. By measuring the diameter of the fan, I got the internal diameter of the base. After finishing designing the parts, I ran a virtual simulation of the assembly to make sure the air intake and exhaust would be unobstructed.
Step 2: Printing Parts
The design of the parts is simple enough that printing went smoothly. This was my first print on a heated bed and I am delighted with the result. The entire printing process took almost ten hours. Due to the fact that one of the parts has a far protruding part, it was necessary to make supports under it. The first photo shows that one of the supports could not stand it and broke. Luckily, my printer can print these protrusions. Trial assembly gave excellent results.
Step 3: Power
Instead of a power cord, I decided to install a connector so that I can power it from the mains and from the battery. Adding a connector hole to a parametric model is easy, but I wasn't sure about the location of this hole and decided to make it on the finished part. Making a hole in the filament is very easy - I just warmed up the soldering iron and melted a hole of the desired diameter in the wall of the part.
Step 4: Fan
Now you need to prepare the fan for installation in the base. I removed parts of the fan housing with a file, leaving only the motor support arms on the impeller (they need to be longer than the blades to leave space between the blades and the wall).
Added later: I used a 5cm computer cooler, but later came to the conclusion that it has too weak a motor, I plan to make a new bladeless desktop fan more powerful.
Step 5: Installing the fan
To properly install the fan in the support, I glued a temporary foam holder to the motor to hold it without fear of breaking while I try on the installation site (the cooler should not block the air intake and touch the walls of the case supports). Then I glued the support arms to the walls with hot glue. When the glue was dry, I removed the temporary holder from the fan and turned it on to see if the gap was still there. After making sure that everything was in order, I connected the wires to the connector and again checked the operation of the engine.
Step 6: Finishing touches
After connecting the wires, I installed the remaining parts in place. Details made according to my layout fit snugly together. But if you want to be sure of the strength of the structure, put them on glue. I then covered the fan with colored vinyl tape to add a pop of color. I am very pleased with the result - the fan is 12.7 cm high, it took only 130 g of filament to manufacture.
Now I'm looking for something to replace the computer cooler. Although it works fine, a simple electric motor has a much higher number of revolutions.
Thank you for taking the time to read my article.
Step 7: Improving the fan
I did replace my weak motor with a more powerful electric motor. The gear from the native motor sat tightly on the shaft, I glued the impeller to it. On the reverse side, I glued a thick washer and inserted the fan back into the base. Now the engine is under the blades, and, accordingly, the old connector is now in the way. While I sealed the hole from him, and brought the reins out through the air intake holes. Later I plan to add an engine holder.
I also think a bigger air intake is needed. I want to either widen the old holes or just drill more holes. Such an upgrade led to the fact that the fan vibrates and "walks" on the table. For depreciation, I applied a layer of hot glue to the bottom. Then I plan to replace the glue with a rubberized material, similar to what mouse pads used to be made of.
Step 8: Drawing files
Above are my part drawings. When converting files to the .stl format, my scaling settings went wrong, which caused the size of the parts to greatly decrease. You will most likely have autoscaling and all sizes will be saved. Compare them with the drawings.
Consider my comments on improving the model. I plan to redo the base based on my notes.
I immediately apologize for the names of the files, the first parts were rejected and deleted by me, and I simply forgot to rename the rest. Please do not forget that this is not a professional model, but a smaller version.
Files
- Part3Print.stl
- Part4Print.stl
- Part2Print.stl
How to make a DIY fan without blades on a 3D printer
Fans without blades blow air through a ring on a stand. Dyson is the company that created the fan without blades and without noise. However, the very term “bladeless” misleads everyone; in fact, they still have blades. A small fan is installed in a stand and pushes air through a thin ring - this is the principle of operation of a bladeless fan.
I'm going to build a simplified version of the original with my own hands. Of course, it will not work as efficiently, but the price is several times less. And you can take a small fan with you anywhere.
Printed on Monoprice Maker Ultimate in PLA, 0.4mm nozzle diameter, heated bed.
Step 1: Product Design
I created a parametric model of my fan in Autodesk Inventor with 3D printing capability. It must be remembered that all the details will eventually be printed. Based on this, I decided to make 3 interconnected parts with a minimum overhang and a large base, so that possible printing or modeling errors would not affect the result. By measuring the diameter of the fan, I got the internal diameter of the base. After finishing designing the parts, I ran a virtual simulation of the assembly to make sure the air intake and exhaust would be unobstructed.
Step 2: Printing Parts
The design of the parts is simple enough that printing went smoothly. This was my first print on a heated bed and I am delighted with the result. The entire printing process took almost ten hours. Due to the fact that one of the parts has a far protruding part, it was necessary to make supports under it. The first photo shows that one of the supports could not stand it and broke. Luckily, my printer can print these protrusions. Trial assembly gave excellent results.
Step 3: Power
Instead of a power cord, I decided to install a connector so that I can power it from the mains and from the battery. Adding a connector hole to a parametric model is easy, but I wasn't sure about the location of this hole and decided to make it on the finished part. Making a hole in the filament is very easy - I just warmed up the soldering iron and melted a hole of the desired diameter in the wall of the part.
Step 4: Fan
Now you need to prepare the fan for installation in the base. I removed parts of the fan housing with a file, leaving only the motor support arms on the impeller (they need to be longer than the blades to leave space between the blades and the wall).
Added later: I used a 5cm computer cooler, but later came to the conclusion that it has too weak a motor, I plan to make a new bladeless desktop fan more powerful.
Step 5: Installing the fan
To properly install the fan in the support, I glued a temporary foam holder to the motor to hold it without fear of breaking while I try on the installation site (the cooler should not block the air intake and touch the walls of the case supports). Then I glued the support arms to the walls with hot glue. When the glue was dry, I removed the temporary holder from the fan and turned it on to see if the gap was still there. After making sure that everything was in order, I connected the wires to the connector and again checked the operation of the engine.
Step 6: Finishing touches
After connecting the wires, I installed the remaining parts in place. Details made according to my layout fit snugly together. But if you want to be sure of the strength of the structure, put them on glue. I then covered the fan with colored vinyl tape to add a pop of color. I am very pleased with the result - the fan is 12.7 cm high, it took only 130 g of filament to manufacture.
Now I'm looking for something to replace the computer cooler. Although it works fine, a simple electric motor has a much higher number of revolutions.
Thank you for taking the time to read my article.
Step 7: Improving the fan
I did replace my weak motor with a more powerful electric motor. The gear from the native motor sat tightly on the shaft, I glued the impeller to it. On the reverse side, I glued a thick washer and inserted the fan back into the base. Now the engine is under the blades, and, accordingly, the old connector is now in the way. While I sealed the hole from him, and brought the reins out through the air intake holes. Later I plan to add an engine holder.
I also think a bigger air intake is needed. I want to either widen the old holes or just drill more holes. Such an upgrade led to the fact that the fan vibrates and "walks" on the table. For depreciation, I applied a layer of hot glue to the bottom. Then I plan to replace the glue with a rubberized material, similar to what mouse pads used to be made of.
Step 8: Drawing files
Above are my part drawings. When converting files to the .stl format, my scaling settings went wrong, which caused the size of the parts to greatly decrease. You will most likely have autoscaling and all sizes will be saved.