3D printed 35mm camera
Creating 3D Printed Lenses and a 3D Printed Camera with Stereolithography
The idea for a fully 3D printed camera—a machine with many complex components—has been floating around Formlabs since we first experimented with creating 3D printed lenses.
Our applications engineer Amos Dudley took on the challenge and created the first fully 3D printed, interchangeable lens camera, produced entirely on a Formlabs SLA 3D printer.
The first fully 3D printed, interchangeable lens camera was produced entirely on a Formlabs SLA 3D printer.
Formlabs Clear Resin and stereolithography (SLA) 3D printing can create transparent objects that, with some post-processing, can be made optically clear. Formlabs' latest SLA 3D printer, the Form 3+, takes clarity one step further by using a flexible resin tank that reduces peel forces, resulting in clearer parts with smooth surface finish.
A camera lens is an exciting test case for the possibility of optically clear prints because the results are so easily seen and measured on film.
Read our guide for a list of finishing methods to create clear 3D printed parts for a variety of applications, from optics to light pipes to fluidics.
Making a functional lens starts with proper lens design. Optical design software helps lens designers predict the behavior of a lens and the constraints the lens will place on a camera.
Professional lens designers use optics packages such as Zemax and Code V, but these programs can cost thousands of dollars. Free, open-source software packages like Optical Ray Tracer are suitable alternatives.
Commercial camera lenses use multiple elements to correct for the optical distortions that commonly affect spherical lenses, such as spherical aberration, coma, and field curvature. For the sake of simplicity, the 3D printed camera is designed around a single spherical lens element.
The lower image shows how a smaller aperture increases focus.
Each side of a spherical lens is a section of a sphere with a given radius. Inserting the refractive index value for Clear Resin (1.5403) into Optical Ray Tracer shows that a symmetrical lens with a spherical radius of 50 mm focuses at approximately 47.5 mm from the center of the lens.
A single objective lens for a camera needs to balance optical power with distortion. A low-power, long focal length lens will have less distortion, but a narrow field of view. It is difficult to aim a camera if the field of view of its lens is too narrow. Reducing the aperture size helps to eliminate some coma distortion, as seen above.
A good compromise between these factors is a focal length of 50 mm, which is wide enough to position a subject within the frame.
The lens is modeled as the intersection of two spheres and a cylinder.
Once the lens is designed, it can be modeled in a CAD program. Since the lens is symmetrical, this is as simple as intersecting two 50 mm spheres at the right distance. The distance defines the radius and thickness of the lens, but doesn’t radically affect the optics.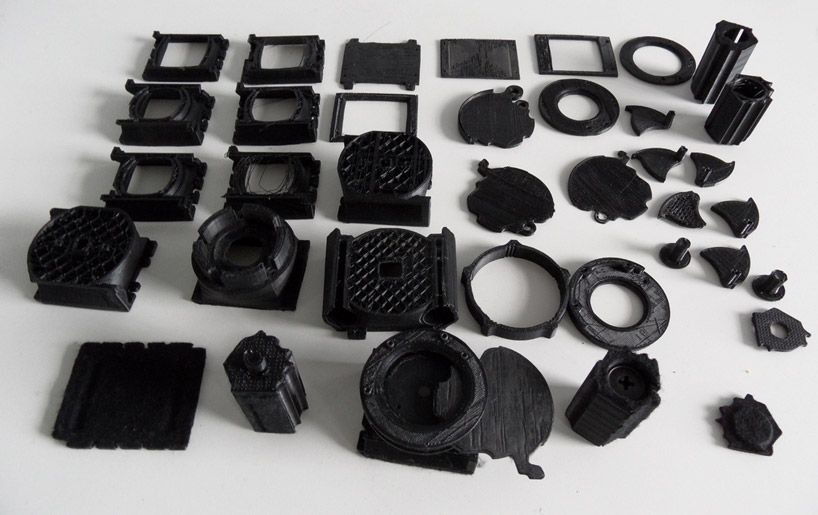 The lens was designed to be 40 mm in diameter with a 2 mm cylindrical edge.
If 3D printing on a Formlabs SLA 3D printer, consider different orientations and resolutions for 3D printing your lenses:
- A lens 3D printed horizontally may have layer line artefacts toward the center of the lens’s axis.
- A lens 3D printed perfectly vertically may be subject to some distortion caused by the additive process.
The clearest lenses were printed at a 30° angle relative to the build platform, with supports placed only along the edge to prevent support marks on important lens surfaces.
Testing different methods of polishing lenses, including hand sanding and machine polishing.
We tried three methods of polishing lenses to optical clarity: manual sanding, automated sanding, and dipping.
We used a range of sandpaper and micromesh pads with grits from 400 to 12000, in increments of 200, and polished lenses to a very smooth finish. This was done slowly and with a lot of care to clean the lens between grit levels and to eliminate scratches from the previous level before moving on to the next.
At around 3000 grit, SLA 3D printed lenses become glossy and very smooth to the touch. By 12000 grit, they are reflective.
To make an optically clear 3D printed lens, all layer lines need to be completely eliminated, which wasn’t possible by hand. Even though the lenses were smooth to the touch, reflections still appeared blurry, and there were still micro-scratches visible when holding the lenses at a shallow angle to the light.
The lens was clear as a magnifying glass, but as a focusing lens it wasn’t accurate enough.
It was hard to control the amount of material sanded off in the early stages of hand sanding, where the bulk of the layer lines were being removed. The next step was to try an automated method for reducing layer lines.
Amos designed and printed a lens polishing machine in hopes of reducing some of the error.
The speed of the lens’s rotation in the lens polishing machine is controlled by an Arduino.
Within the lens machine, the lens is rotated against the inside of a dish with the same spherical radius.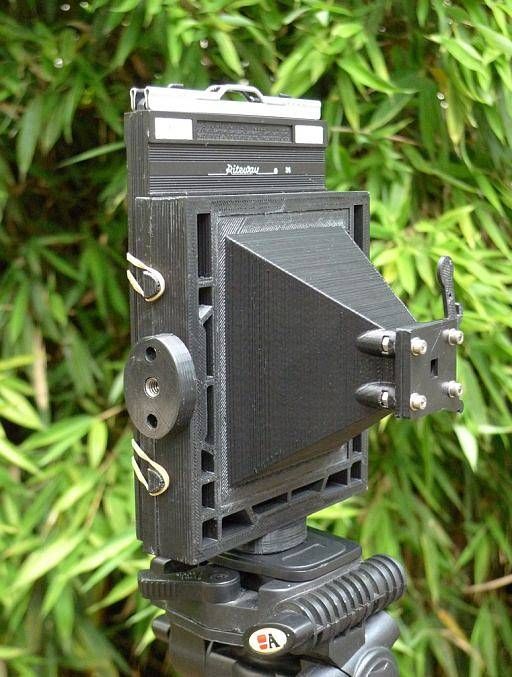 The dish also rotates, but off axis to the lens by 45 degrees, and at a different speed.
The lens is connected to a servo motor with a kinematic coupling that combines 3D printed parts, springs, and small rivets. The coupling keeps the lens firmly, but flexibly pressed against the dish and allows it to “wobble” as it rotates. The dish holds a small amount of water and diamond lapping compound as an abrasive, and is made of the same Clear Resin as the lens.
The machine quickly reduced layer lines, but it couldn’t easily be used for the whole process. The dish would have to be replaced between polishing layers so grit wouldn’t be transferred to finer levels of polishing.
Unfinished 3D printed lenses rest on a build platform after being washed in isopropyl alcohol.
While gluing some prints together, Amos noticed that 3D printed lenses became significantly clearer when coated in a viscous material like epoxy, and decided to dip the lenses in liquid resin and then post-cure them under UV light.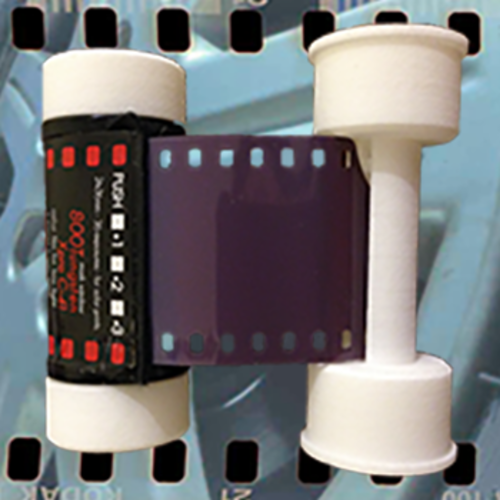 The viscous resin filled layers and scratches, forming a completely smooth surface.
Resin has a tendency to form bubbles when agitated, such as by dipping a lens, but these can be removed by turning the lens upside down over the resin tank and letting the resin gather and drain from the center.
The layer of resin should be as thin as possible while still eliminating layer lines. The last remaining bubbles were pulled of with a syringe, and the lens was post-cured completely under a UV lamp before dipping the other side.
Three stages of resin-dipped lenses, with the final lens on the left.
Resin-dipped 3D printed lenses are extremely smooth, with clear and sharp surface reflections. This technique can be used for other SLA prints as well to give them an even smoother finish, although it does tend to reduce detail.
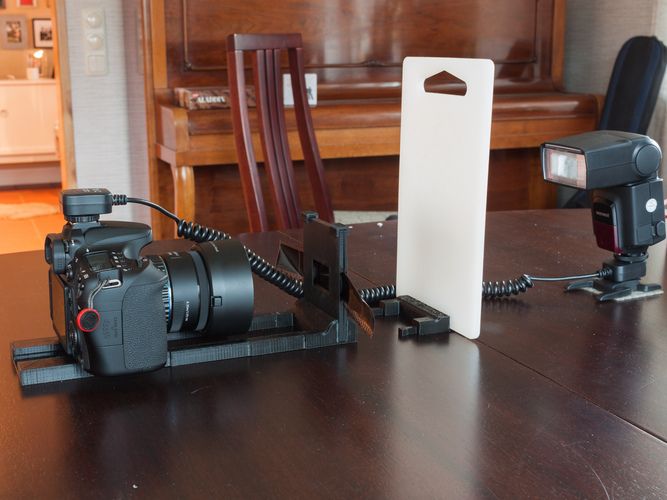
The dipping process also alters focal length slightly, so Amos designed and printed a lens testing device. The device has screw threads that allow the lens to move closer and further from the imaging plane by turning the wheel, and experimentally check the focal distance of the lens.
The 3D printed lens tester mounted to a digital camera for instant feedback.
Is it possible to make 3D printed optics and lenses with multiple elements and more functionality? Try 3D printing your own lenses and lens tester, or a whole camera if you’re adventurous!
Download the 3D printed camera .STL files on Pinshape.
Learn more about Amos’s process for designing the entire 3D printed camera on his blog, and see the camera in action in our blog post featuring photos taken by the world’s first 3D printed, interchangeable lens camera.
Curious the see and test 3D printed SLA parts firsthand? Request a free 3D printed sample part to your office.
Request a Free Sample Part
3D-printed 35mm movie camera | Boing Boing
Yuta Ikeya designed and 3D-printed his own 35mm movie camera. The motor is Arduino-powered and it uses spliced photographic film for economy's sake.
In an interview with Super8.tv, Ikeya said that the project took him about 18 months. Coincidentally, Ikeya's camera works at 18 frames per second, as he was motivated by David Hennen's 18 fps LomoKino footage. In fact, Ikeya first tried to build a motorized version of a Lomography LomoKino with a viewfinder, reflex system and lens mount. However, these modifications were difficult, so Ikeya decided to start from scratch. Following his experience building his 18 fps 35mm analog movie camera, Ikeya now wants to work on a 24 fps – or faster – camera with stabilization, an improved viewfinder and a more compact form factor. When asked about his choice to use 35mm film, Ikeya replied, 'The biggest reason is that I can use widely available photographic film stock. Back in Japan where I started this project, the lab to process ECN-2 is not common, so the choice was limited first of all.
16 mm seemed difficult for its availability of film stock as well. Also, it looked like so much hassle for me to achieve a high quality scan from Super 8. If it is 35mm film, the bigger image area can compensate for some imperfection of the result.'
-
For those who played Traveller, the classic sci-fi RPG in your youth (or still play today), you are intimately familiar with the Free Trader class Beowulf starship. This was way before interior plans for starships were readily available. There were the Star Trek Blueprints (1975) and that was about it. So, basic deck plans depicted… READ THE REST
-
Felix Steele designed a 3D-printable 164mm, f/2.5 lens that costs $13 to make. It's the first thing out of his new website, Pixels and Prisms, with more to come. [via PetaPixel, which posted some tests] Anyone can assemble the Pixels and Prisms lens. It has no fasteners or screws and parts are bonded using household… READ THE REST
-
Bobby Fingers made an exquisitely detailed recreation of Mel Gibson's 2006 DUI arrest in Malibu, and he explains it thoroughly in his lovely Irish brogue.
 Some of the things said that night were spicy, to say the least, and I wanted the diorama to capture the energy of the moment. A wonderful elaboration of artistic… READ THE REST
 -
We thank our sponsor for making this content possible; it is not written by the editorial staff nor does it necessarily reflect its views. DIY projects sound so fun when you first dream them up, but once you start them you realize just the smallest mistake will lead your project astray. You need the best… READ THE REST
-
We thank our sponsor for making this content possible; it is not written by the editorial staff nor does it necessarily reflect its views. Traveling abroad is amazing for so many reasons. But whether you're in another country for a quick visit or the long-term, there's one major disadvantage. You can't watch all your favorite… READ THE REST
-
We thank our sponsor for making this content possible; it is not written by the editorial staff nor does it necessarily reflect its views.
 By the looks of your selfie game, it's clear you're no award-winning photog, and neither is anyone in your office (the trick is to move your thumb away from the camera).… READ THE REST
📷 Best Camera 3D Print Files・Cults
📷 Best Camera 3D Print Files
Free Download Camera Accessories 3D Files
printer accessories for your camera. You can find handles, cases, protective cases, straps, tripods for your Canon, Nikon, Leica, Sony, Panasonic cameras, etc. 3D printing will help you get the most out of your camera.
Lens Cap Holder
Free
Lens Hood
Free
Camera Gimbal
Free
Made with Love Bokeh Kit
Free
LiftPod - Multipurpose Foldable Stand
Free
Bokeh Kit
Free
SD Card Holder
Free
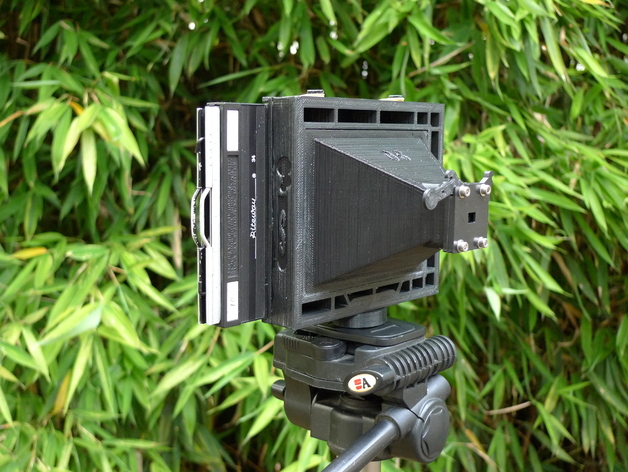
Professional DSLR slider V4.
 0
0 Free
Flip Lens Cap
Free
Electric_Driver_Upgrade_For_Slider_V4.0
Free
LiftPod - Easy Lock Edition
Free
Adapter thread M42 to Sony E (NEX)
Free
Shoulder rig
Free
Smartphone teleprompter - tripod adapter
Free
Foldable Mini Tripod
Free
3D printed pinhole camera
Free
60 NeoPixel Ring Camera Mount
Free
SD and micro SD holder 1-10 elements
Free
DSLR Camera FollowSlider V2.0
Free
Camera hot shoe - Universal phone holder
Free
3D Printed Pinhole 35 mm
Free
Camera Lens Cap Holder - 62mm
Free
Canon EF Eyecup
Free
Canon lens hood
Free
Simple Camera Slider
Free
Tripod Ball Head
Free
Sony A6000/A7 Hot Shoe Cover
Free
Sony E-mount Rear Lens Cap
Free
Proteus LED Light Panel - DIY and Expandable
Free
Cage modular DSLR
Free
Rollei QAL-40 Camera Mounting Plate (C4i, C5i, C40i, C50i, Compact Traveler No 1, Compact Traveler No 10, CT-4A, CT-5A, CT-5C, M5 Mini, PGA-584, PGA-484, TT-1, T2S)
Free
Tripod Leveler
Free
Smooth Q Gimbal - Camera Attachment (Sony RX100 & Others)
Free
Shoulder rig for DSLR (NOT just for Canon 5D)
Free
Adapter m43 (m4/3) to canon FD lens
1,50 €
Mini Tripods
Free
Hand held Camera Rig
Free
Lens cap 55mm SONY camera
Free
Camera speedlight umbrella flash holder
Free
1-Wege-Stativneiger, 1 Way Tilt Head
Free
Sony A-Mount Overhead Lens Mount
Free
Motorized Camera Slider MK3
Free
Sony E-Mount body to Nikon F-Mount Lens adapter
Free
Protective cage for cage modular DSLR
Free
Digital Camera Pinhole Adapter
Free
Handle for Cage modular DSLR
Free
Lens Cap
Free
Trekking Pole Monopod with Quick-Release
Free
Here is our selection of best STL files for camera , all these accessories are taken from Cults STL file library and available for 3D printing .
This collection includes free 3D files accessories for cameras. Many 3D models of have been created by members of our community of 3D designers as well as photographers. Therefore, they are fully aware of the operating limitations of each camera. They have designed a very wide range of 3D printed camera accessories for cameras for owners of Canon, Nikon, Leica, Sony or Panasonic cameras. All brands of cameras are represented here.
Many camera parts are made of plastic, as are accessories such as tripods, sun visors or shutters. In this context, it is quite logical to think about 3D printing. Therefore 3D designers compete in ingenuity, creating truly ingenious models, such as gambling or time-lapse automatic accessories.
The designer made a film camera on a 3D printer
A camera on a 3D printer
Contrary to expectations, digital technologies in photographic equipment could not completely replace the classical methods of shooting, although they considerably surpassed them in popularity.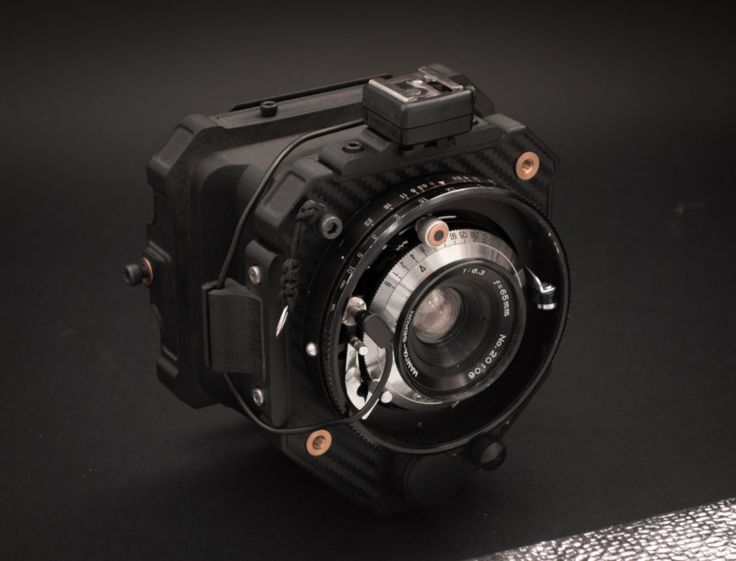 Film photography is now a rarity, something like an unusual hobby that maintains its position in certain circles no matter what.
Someone will say that analog photography will never die, another will start arguing the opposite with fervor, and a third will start looking for ways to preserve the technology. This is exactly what a designer named Amos Dudley did, who wants to preserve the authenticity of the art of photography at all costs. And he did a very unusual thing for this: he printed a film camera on a 3D printer.
He solved this problem with the help of innovative 3D printing technology, thus combining established traditions and current techniques. The goal was to produce a film camera that would be fully functional and not inferior in performance to similar devices.
According to Dudley, additive manufacturing and film photography complement each other perfectly, forming a new, unique device at the intersection of design and photography. It may seem that making a camera on a 3D printer can be problematic, but Amos approached the problem with all seriousness. The designer has been interested in 3D printing for a long time, having appreciated the possibilities of this technique. In his own words, the 3D printer transforms ideas and thoughts into real forms, making it the ideal working tool for a variety of creative projects. One of them, bold and unusual, is today's news.
3D printed camera
Amos faced a difficult task - the decision to use 3D printing to create each element of the camera on the one hand limited, and on the other hand facilitated the search for new solutions. The 3D printed camera was supposed to be the quintessence of the traditional and the innovative. To begin with, Dudley compiled a list of all the parts of a 35mm film camera, including the film winder, shutter, diaphragm, light-tight camera body, and even the lens. To simplify the task, the designer decided to optimize the camera body in order to speed up the 3D printing process and reduce material consumption. The camera on the 3D printer was supposed to be as simple as possible, but to perform all the necessary functions.
This was followed by a long process of 3D modeling, at various stages of which Dudley created prototypes of the future camera. Upon reaching the most suitable variant of the design of the device, it was possible to start printing. As a working tool, the designer used a Formlabs SLA 3D printer and several different types of resins for individual parts of the camera. This decision was caused by the type of elements that differ in strength and flexibility, which required different approaches for their manufacture. In order to properly align the parts in the finished device, they were printed with a tolerance of ±0.75 mm and gaps of 0.25 mm. This ensured the smooth running of all moving parts.
3D printing of the camera lens
The most difficult part of the whole project was the 3D printing of the camera lens. The desired result cannot be achieved using a standard FDM printer, and in the case of using a device with SLA technology, a long processing of the printed parts will be required.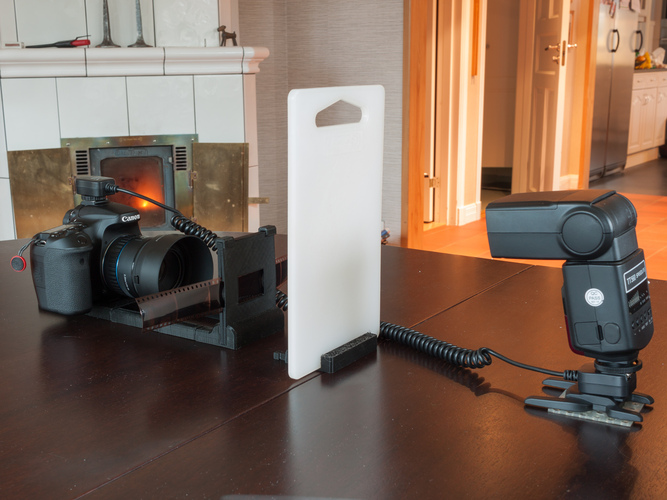 Since there was no other way out, the designer armed himself with a set of fine polishing pads and 12000 sandpaper. It took Amos about six hours to grind each lens, but the result still did not satisfy him.
To solve this problem, Dudley built his own grinder from scratch. Its work is based on the principle of industrial polishing devices complete with a special abrasive suspension. The final processing of the lenses took some more time, after which the next question arose: “How to design a shutter?”. The designer revised and discarded several different designs before settling on the 1885 camera mechanism. Yes, it turned out that the design of almost two centuries ago is ideally suited to the modern version of the film camera. Thus, a camera on a 3D printer combined several technologies at once, from the origins to the present.
After some tweaks, the 3D model of the shutter has been completed and is ready to be played. The assembled camera on a 3D printer pleased the creator with full compliance with all expectations and a nice picture.