3D printer not sticking
Not Sticking to the Bed
Not Sticking to the Bed
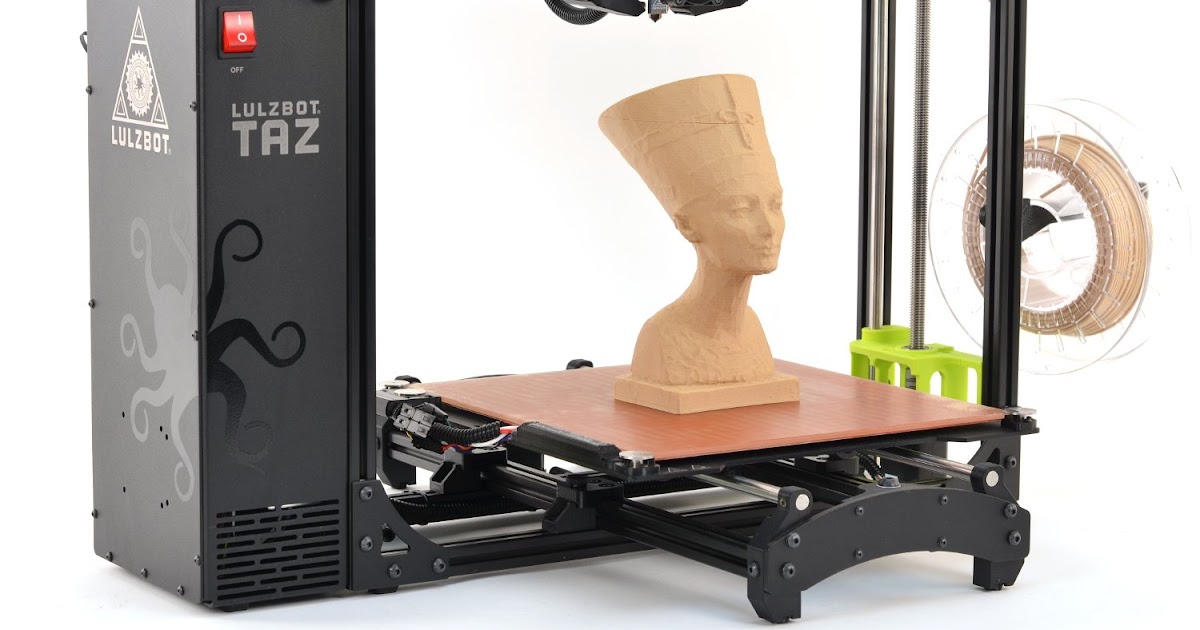
It is very important that the first layer of your print is strongly connected to the printer’s build platform so that the remainder of your part can be built on this foundation. If the first layer is not sticking to the build platform, it will create problems later on. There are many different ways to cope with these first layer adhesion problems, so we will examine several typical causes below and explain how to address each one.
Common Solutions
Build platform is not level
Many printers include an adjustable bed with several screws or knobs that control the position of the bed. If your printer has an adjustable bed and you’re having trouble getting your first layer to stick to the bed, the first thing you will want to verify is that your printer’s bed is flat and level. If the bed is not level, one side of your bed may be too close to the nozzle, while the other side is too far away. Achieving a perfect first layer requires a level print bed. Simplify3D already includes a useful bed leveling wizard that you guide you through the bed leveling process. You can find this wizard by going to Tools > Bed Leveling Wizard, and following the on-screen instructions.
Nozzle starts too far away from bed
Once your bed has been properly leveled, you still need to make sure that the nozzle is starting at the correct height relative to the build platform. Your goal is to locate your extruder the perfect distance away from the build plate — not too far and not too close. For good adhesion to the build plate, you want your filament to be slightly squished against the build plate. While you can adjust these settings by modifying the hardware, it is typically much easier (and much more precise!) to make these changes from Simplify3D. To do this, click “Edit Process Settings” to open your process settings and then go to the G-Code tab. You can use the Z-Axis global G-Code Offset to make very fine adjustments to your nozzle position. For example, if you enter -0.05mm for the Z-axis G-Code offset, the nozzle will begin printing 0.05mm closer to your build platform. Be careful to only make small adjustments to this setting. Each layer of your part is usually only around 0.2mm thick, so a small adjustment goes a long way!
First layer is printing too fast
As you extrude the first layer of plastic on top of the build platform, you want to make sure that plastic can properly bond to the surface before starting the next layer. If you print the first layer too fast, the plastic may not have time to bond to the build platform. For this reason, it is typically very useful to print the first layer at a slower speed so that the plastic has time to bond to the bed. Simplify3D provides a setting for this exact feature. If you click on “Edit Process Settings” and go to the Layer tab, you will see a setting labeled “First Layer Speed”. For example, if you set a first layer speed of 50%, it means that your first layer will print 50% slower than the rest of your part. If you feel that your printer is moving too fast on the first layer, try reducing this setting.
Temperature or cooling settings
Plastic tends to shrink as it cools from a warm temperature to a cool temperature. To provide a useful example, imagine a 100mm wide part that is being printed with ABS plastic. If the extruder was printing this plastic at 230 degrees Celsius, but it was being deposited onto a cold build platform, it is likely that the plastic would quickly cool down after leaving the hot nozzle. Some printers also include cooling fans that speed up this cooling process when they are being used. If this ABS part cooled down to a room temperature of 30C, the 100mm wide part would shrink by almost 1.5mm! Unfortunately, the build platform on your printer is not going to shrink this much, since it is typically kept at a fairly constant temperature. Because of this fact, the plastic will tend to separate from the build platform as it cools. This is an important fact to keep in mind as you print your first layer. If you notice that the layer seems to stick initially, but later separates from the print bed as it cools, it is possible that your temperature and cooling settings are to blame.
Many printers that are intended to print high-temperature materials like ABS include a heated bed to help combat these problems. If the bed is heated to maintain a temperature of 110C for the entire print, it will keep the first layer warm so that it does not shrink. So if your printer has a heated bed, you may want to try heating the bed to prevent the first layer from cooling. As a general starting point, PLA tends to adhere well to a bed that is heated to 60-70C, while ABS generally works better if the bed is heated to 100-120C. You can adjust these settings in Simplify3D by clicking on “Edit Process Settings” and then selecting the Temperature tab. Choose your heated build platform from the list on the left-hand side and then edit the temperature setpoint for the first layer. You can just double-click on the value to change it.
If your printer has a cooling fan, you may also want to try disabling that cooling fan for the first few layers of your printer so that the initial layers do not cool down too quickly. You can do this by clicking “Edit Process Settings” and going to the Cooling tab. You can adjust the fan speed setpoints on the left-hand side. For example, you may want the first layer to start with the fan disabled and then turn on the fan to full power once you reach the 5th layer. In that case, you will need to add two setpoints into that list: Layer 1 at 0% fan speed, and Layer 5 at 100% fan speed. If you are using ABS plastic, it is common to disable the cooling fan for the entire print, so entering a single setpoint would suffice (Layer 1 at 0% fan speed). If you are working in a breezy environment, you may also want to try to insulate your printer to keep the wind away from your part.
The build platform surface (tape, glues, and materials)
Different plastics tend to adhere better to different materials. For this reason, many printers include a special build platform material that is optimized for their materials. For example, several printers use a BuildTak sheet on the top of their bed that tends to stick very well to PLA. Other manufacturers opt for a heat treated glass bed such as Borosilicate glass, which tends to work very well for ABS when heated. If you are going to print directly onto these surfaces, it is always a good idea to make sure that your build platform is free of dust, grease, or oils before starting the print. Cleaning your print bed with some water or isopropyl rubbing alcohol can make a big difference.
If your printer does not include a special build platform material to help with adhesion, you still have options! Thankfully, there are several types of tape that stick well to common 3D printing materials. Strips of tape can be applied to the build platform surface and easily removed or replaced if you want to print with a different material. For example, PLA tends to stick well to blue painter’s tape while ABS tends to stick better to Kapton tape (otherwise known as Polyimide film). Many users have also had great success using a temporary glue or spray on the top of their build platforms. Hair spray, glue sticks, and other sticky substances tend to work very well if everything else has failed. Feel free to experiment to see what works best for you!
When all else fails: Brims and Rafts
Sometimes you are printing a very small part that simply does not have enough surface area to stick to the build platform surface. Simplify3D includes several options that can help increase this surface area to provide a larger surface to stick to the print bed. One of these options is called a “brim.” The brim adds extra rings around the exterior of your part, similar to how a brim of a hat increases the circumference of the hat. This option can be enabled by going to the “Additions” tab end enabling the “Use Skirt/Brim” option. Simplify3D also allows users to add a raft under their part, which can also be used to provide a larger surface for bed adhesion. If you are interested in these options, please take a look at our Rafts, Skirts, and Brims tutorial which explains things in greater detail.
Related Topics
3D Print Not Sticking to Bed: 6 Easy Solutions
Jun 12, 2020
3D print not sticking to bed? It happens. You’ve planned, calibrated, and tested, but your 3D print just won’t stay put. Don’t worry; we’ve compiled the 6 easy solutions to the problem that will most certainly get your parts back to printed perfection.A good first layer adhesion is essential because it sets the foundation for the rest of your print. Unfortunately, first layer bed adhesion is a common 3D printing issue, especially with ABS and PLA. Luckily, there are a few quick solutions you can use to stop this from happening.
In this video and article, we’ll review 6 ways to fix a 3D print not sticking to the bed.
1. Bed LevelingIf your printer has an adjustable bed and you’re having issues with sticking, check to make sure your bed level is flat.
An uneven bed could mean that one side is closer to the nozzle while the other side is too far, creating a difficult print environment. Additionally, if your bed is uneven it can result in your print warping or breaking.
The process for leveling your bed depends on your printer. For example, BCN3D printers are equipped with automatic bed leveling, but you also have the option to manually level your bed. Alternatively, if your 3D printer does not have auto-leveling, you will need to level it yourself.
2. Nozzle to Bed DistanceThere is a certain sweet spot between the bed and the nozzle. It’s like Goldilocks’ porridge – not too close, and not too far, but just right.
- If your 3D print is not sticking to the bed, check the distance between the bedplate and the nozzle.
- If the nozzle is too close to the bed, then the filament will not be able to come out, or the extruder could damage or drag the previously printed layer.
- On the other hand, if the nozzle is too far the filament will not properly place on the bed and will not be able to adhere.

You will have to experiment to see what works best for the filament you are printing. Ideally, the nozzle should be close enough to the bed so that the filament is slightly squished onto the bed’s surface. This allows the filament to get a bit of grip onto the bed.
Learn all you need to know about fiber-filled materials for FFF 3D printing!
3. Nozzle SpeedNozzle speed can also play an important role in your 3D print not sticking to bed. Similar to nozzle distance, you must find a certain sweet spot for the nozzle speed, especially when printing the first few layers.
Slowing down the nozzle’s speed gives the plastic more time to bond to the bed and get a better grip. If you print too quickly, the filament may not stick to the bed because the plastic cools off too quickly. After you have laid down your first few layers and feel confident in your print’s bed adhesion, you can resume the nozzle to a normal speed.
The final thing you can look at is the temperature of your bed. If you are using a heated bed on your prints, double-check that you are using the proper temperature for your specific filament. Different 3D printing materials require different bed temperatures.
It may also help to slightly increase the bed’s temperature by just a few degrees to help the first layer stick. After the print has established a good grip, you can then lower the temperature to maintain a normal heat.
5. AdhesivesIf you’ve double and triple-checked all of your bed and nozzle settings and you still have bed adhesion problems, then it’s time to bring in some backup tools so that the print keeps sticking to bed. If you still cannot get your 3D print to stick to the bed, use an adhesive right on the bed where the filament will land.
There are a few different options you can consider, including:
- Glue sticks,
- Painters tape,
- Hairspray,
- Or 3D printing specific adhesives like Magigoo.

Using an adhesive specifically designed for 3D printing ensures that you will be able to properly wash off the adhesive from your print once it is finished.
This common practice is both quick and cost-effective and can save you a lot of headaches. You only have to apply a thin layer to the bed. Different filaments will adhere to different adhesives, so experiment to see what works best for you.
6. Brims and RaftsIf you don’t want to use adhesives but the 3D print not sticking to bed remains a problem, then printing a brim or raft might be your best option.
- A brim is a layer of filament that surrounds the print and attaches to the first layer of your printed object. It is similar to a hat’s brim. It does not sit under the part, but just simply adds an extra layer around it.
- A raft, on the other hand, is a thin layer of filament that is laid down before the rest of your print.
 This creates a flat filament base for the rest of your print to build upon. Both rafts and brims are removed from the final object once it is done printing.
These are especially useful when creating very small prints or prints that need more support in their first few layers. For instance, both will help to anchor the print and allow it to adhere better.
3D print not sticking to bed: Final ThoughtsNon-optimal first layer adhesion is a common problem in 3D printing, especially with PLA and ABS. But, luckily it has a few different solutions available. If you are really struggling with 3D print not sticking to bed, don’t be afraid to try a combination of a few of them to get your print to stick.
The first layer does not stick when printing on a 3D printer?
Home » Articles » Problems with 3D Printing » First layer not sticking when printing on a 3D printer?
First coat not sticking?
This problem needs to be urgently solved, since the quality of the model construction depends on the first layer serving as the basis, or rather on the reliability of its fastening to the desktop.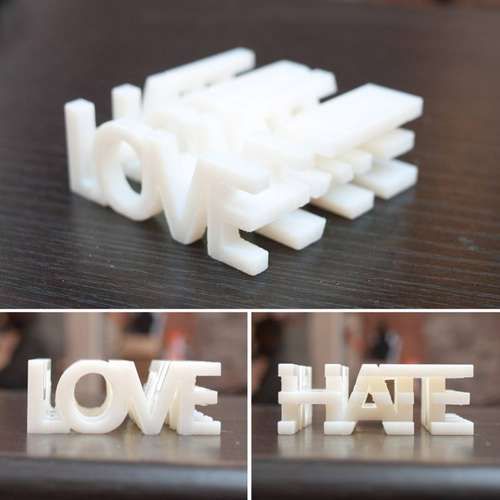 There are several reasons for its appearance, consider the most common of them.
1. Skewed print platform.
The print platform must be in an absolutely flat horizontal position before starting the 3D printer, otherwise the distance between the nozzle and it will be uneven. To align it with the design of the printer, screws and handles are provided, as well as a special function - the "Bed leveling wizard". It can be found in the "Tools" menu and can be used to step-by-step configure the platform by setting the required parameters.
2. Wrong working distance calibration.
Leveling the worktable is only half the battle, it is important to place the extruder nozzle over it correctly so that there is enough free space for the filament to exit, but at the same time the filament seems to be pressed into it. To do this, you need to use the calibration function of the working platform, which most modern models have. If your 3D printer does not have this feature, then you will have to manually calibrate the desktop - fix the print head in a static position and stop the motors, and then adjust the distance by moving the print unit.
Another way to calibrate the 3D printer desktop is software adjustment, which is highly accurate and easy to use. You will find all the necessary parameters for it in the menu. All you need to do is to correct the indicators in the slicer G-Code. Initially, it is better to set small distance values, and then control them by test printing and, if necessary, make changes to them.
When calibrating the 3D printer desktop, please note the following:
- If the nozzle is at a considerable distance from the build platform, there will always be a risk of the filament coming off during printing due to insufficient pressure on it.
- Insufficient clearance between the build table and the nozzle can cause damage to them and poor print quality due to lack of space for the filament to exit and form a 3D model.
- A normal distance between the nozzle and the work table will ensure that the layers are formed correctly over the entire surface area and that they adhere well to each other.

Consider the above recommendations and do not ignore the need for calibration.
3. Print speed selected incorrectly.
An incorrectly selected print speed can break the adhesion between the layers of the model being grown. This is especially true for the output of the first layer. Its insufficient adhesion to the working surface indicates too high a print speed. The output of the filament thread can and should be slowed down using the corresponding First Layer Speed function from the Edit Process Settings menu. When printing the first layer, reduce the speed settings set by the program by half.
4. Wrong operating temperature setting.
A 3D model may warp if it cools quickly. High-temperature ABS plastics “sin” with this, which need to be given more time to cool than other materials. Cooling models provide special fans. They have their own operating parameters, which users can change on their own. With rapid cooling, there is a risk of plastic peeling off the desktop, which provokes deformation of the 3D model. Switching off the fan is usually enough to prevent this. This will allow the first layers of the model to cool slowly and reduce the risk of deformation to zero. To turn off the fans, the Cooling function is provided from the Edit Process Settings menu. Some models even allow users to specify a different fan speed for the first layer and each subsequent layer. When printing a 3D model with high-temperature ABS plastics, the fan can be completely turned off and the platform heating turned on, which eliminates the risk of deformation of the first layer. This feature is found in the Edit Process SettingsTemperature menu. To turn on the platform heating, you need to specify the temperature parameters of the first layer of the future model. In order not to make a mistake with them, we recommend using the established material heating standards that are used for 3D printing. In the presence of drafts, additional protection of the working platform from cooling is required.
5. Incorrect material selection for platform protection.
For both professional and amateur 3D printing, different filaments are used, so their reaction to the consumables used - tape, glue, etc. difficult to predict. To avoid poor quality printing, you should use a material that is ideal for covering the work surface, which can be purchased at a specialized store. It is allowed to perform 3D printing directly on the desktop without auxiliary materials, provided that it is perfectly clean. To enhance the adhesion of 3D plastic to the desktop, it is allowed to use pieces of tape, glues, sprays, hair sprays and other similar materials.
6. Printing a model with a small bottom surface.
If you want to grow a 3D model with a small bottom surface, use the brim function from the Additions ---> Use skirt/brim menu, which will allow you to artificially enlarge it by printing a "hat" around it. An alternative would be to use a previously printed substrate, which will serve as the basis for a future 3D model.
The model does not stick to the 3D printer table: What should I do?
Adhesion of the model to the working surface of the 3D printer table - ways to increase it
FDM 3D printing technology involves the fulfillment of a number of conditions to obtain the best printing result. One of these necessary conditions is a high adhesion rate, that is, reliable fastening of the lower printed layer of the product to the working platform of the device. In the case where the first layer does not adhere securely to the table, there is a high probability of occurrence of such troubles as deformation of the product. This is especially true of ABS plastic, in relation to the protruding parts of the product and corners.
Every 3D printer needs to be calibrated before printing. In this case, the height of the printed layer along the Z axis will be adjusted. Everyone knows that there should be a gap of about 50-75% of the thickness of the selected layer from the nozzle to the hot layer. Implementing this is very simple. You need to take a regular sheet of A4 office paper. The leaf density index should be 80 mg/m 3 . The nozzle should fit snugly against the table, but the sheet should pass with little effort. In this case, the calibration is considered correct. For those new to 3D printing, there are also videos illustrating proper desktop setup.
3D printers can be supplied with an aluminum or glass work platform, depending on the model. Some 3D printers prefer to print directly on the platform without using any additional tools. But in any case, there are some rules that must be followed.
Rule #1: A smooth surface must be free of dust and grease before printing. For this, isopropyl alcohol is used. If this rule is neglected, then you will definitely encounter deformation of the first printed layer, and, accordingly, the entire product will be of lower quality.
Rule #2: To improve adhesive performance, special products must be used: kapton tape, heat resistant tape, heat mat, ABS solution, garolite, borosilicate glass, 3D printing adhesive, PEI film. The choice is quite wide and you can choose the best option.
Let's take a look at the most popular options for these products in more detail ...
Blue 3D printing tape or heat resistant tape
This is one of the popular options for increasing adhesion. The advantages of this material are convenience, low cost, ease of application, ease of removal of the finished product. The disadvantages include the disposability of this material, although this is not always the case.
The most popular type of heat resistant tape is blue 3D printing tape. Masking tape can be attributed to this category with a stretch.
Method of application: Degrease and clean the surface of the platform before using the adhesive material. The tape is glued back to back so that there are no defects on the finished product. It is necessary to make pasting the platform as evenly as possible.
Applicability: Heat Resistant Tape is recommended to improve adhesive performance when printing with filaments such as PLA, ABS, Nylon, PETG.
3D Printing Adhesive
This adhesive is a bottle of clear liquid. The material can be used on both glass and aluminum platforms. It can also be used over masking tape or kapton.
The advantages of 3D printing adhesive are ease of application, low cost, compatibility with most 3D printed materials.
Method of application: The adhesive was evenly applied to the degreased platform or material with a foam sponge.
Applicability: 3D printing adhesive is compatible with almost all materials. It is recommended to use it when printing with ABS plastic, ABS+, FLEX, RUBBER, PC, as well as PLA and other materials.
ABS solution
This adhesive is a solution of ABS plastic in acetone or ethyl acetate. To prepare such a solution, 15-20 cm of ABS plastic thread and 60-90 ml of ethyl acetate are used. The viscosity of the solution should be intermediate between milk and water, and the mixture should not resemble a resin or paste. This option is the most reliable, allowing to prevent deformation and bending of the corners of the product. But it will be important to maintain the correct consistency of the solution.
How to use: The prepared mortar is applied in a thin and even layer on a degreased working platform.
Applicability: This adhesive will be most effective on ABS plastics, it is also applicable to ABS.
Kapton tape or Kapton
This material is similar to tape in many ways. Kapton tape is a golden translucent material with an adhesive layer. Kapton is made on the basis of a heat-resistant polymer. Thanks to the use of this material, the lower part of the finished product has a smooth and even glossy appearance.
Method of application: Similar to blue adhesive tape - it is necessary to paste over the working platform as evenly and end-to-end as possible, having previously degreased it.
Applicability: It is recommended to use kapton tape when working with the following types of plastics: ABS, PLA
Thermal mat
This material is one of the most popular to increase adhesion. Its advantage is reusability and versatility. The use of a thermal mat allows you to achieve maximum adhesiveness of the printed product, as well as to protect the working platform itself, its surface from scratches and other damage. Thermal mat is a sheet of polymer. It can be magnetic or sticky.
Method of application: If the mat has an adhesive base, the platform must be degreased before applying it. The protective film is removed from the mat, and it is evenly glued to the platform. To improve adhesion, the platform can be preheated to about 50 degrees. Calibration of the platform is carried out after gluing the thermal mat.
Applicability: Thermal mats are universal, that is compatible with all types of filaments.
Garolith
Garolith, also known as LE sheet, is a coating based on glass fiber or epoxy resin. There are several varieties of harolith.
How to use: The sheet is applied to the printing platform.![]()