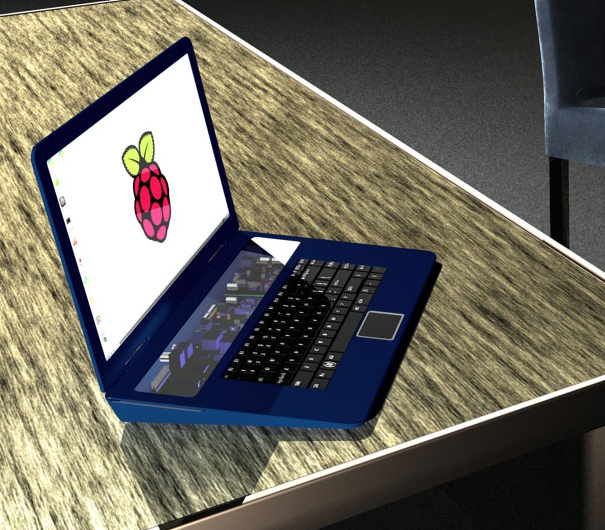
3D print laptop
How To Make 3d Printed Laptop
Hardware components
| Arduino UNO | x 1 | ||
| Audio / Video Cable Assembly, Mini HDMI Type C Plug | x 1 | ||
| Raspberry Pi Keyboard | x 1 | ||
| Raspberry Pi Touch Display | x 1 | ||
| Raspberry Pi 3 Model B | x 1 |
Hand tools and fabrication machines
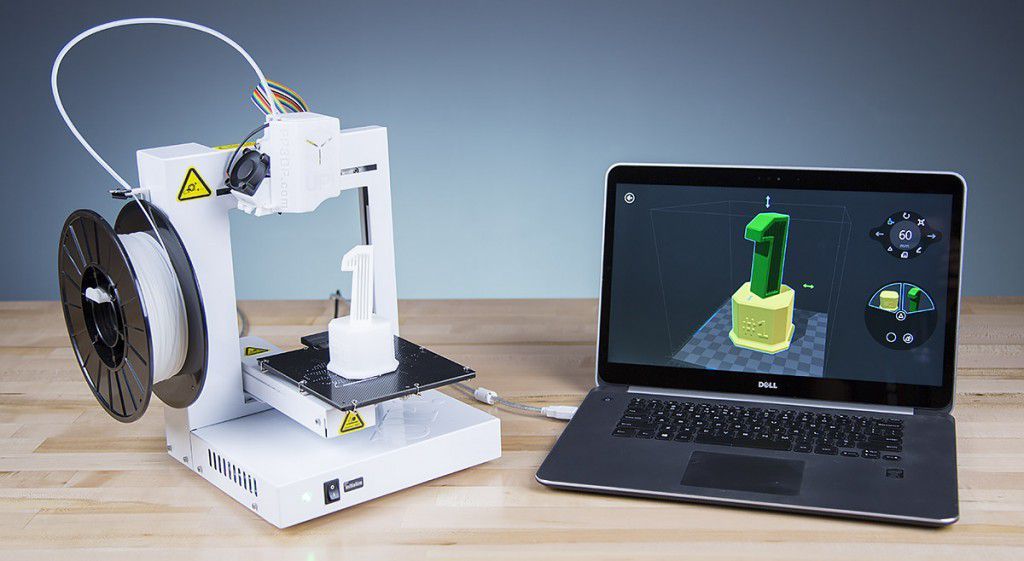
| 3D Printer (generic) | x 1 |
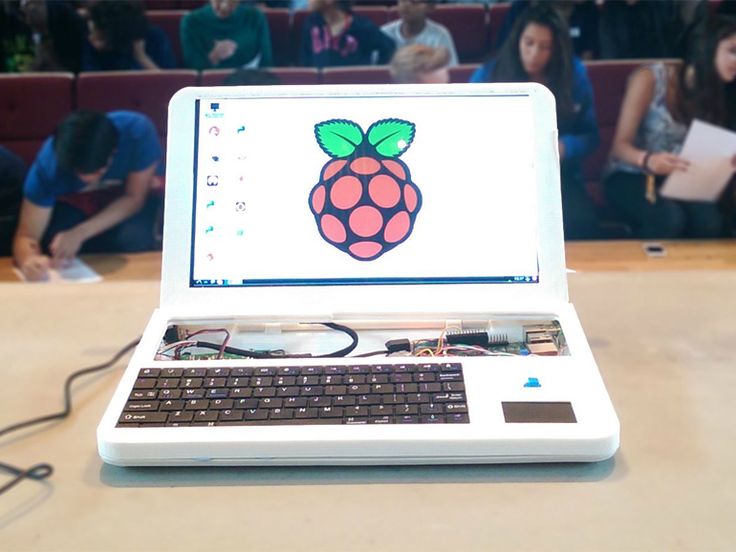
Hello Guys Whats up, In this blog, I am making an Awesome 3D printed Laptop using Raspberry PiIt's very interesting project for any electronics hobbyist & Engineers. You can use this Laptop to watch movies, video, pictures, Browser etc..Thank You NextPCB:This project is successfully completed because of the help and support from NextPCB. Guys if you have a PCB project, please visit their website and get exciting discounts and coupons.Only 0$ for 5-10pcs PCB Prototypes:https://www.nextpcb.comRegister and get $100 from NextPCB: https://www.nextpcb.com/registerSee more info about PCB Assembly Capabilities: https://www.nextpcb.com/registerHere are mid-summer sales at NextPCB :1. Up to 30% off for the PCB orders2. Up to 20% off for the PCBA orders.Let me start out by saying that this is not an easy project you will need a basic understanding of electronics and soldering.You will also need to remove some parts from the raspberry pi and lcd driver board so they can fit in the case. This will void the warranty of the parts.I accept no responsibility for any damages you may cause during this process.
Here's the Full Video Tutorial Video
Parts and Tools
1 / 5
These are the parts I used for this project.
You will also need some basic tools like a soldering iron, screw drivers and wire cutters.
Raspberry Pi 3
- Raspberry Pi Display
- HDMI Cable
- Keyboard
- Lithium Ion Battery
- Voltage regulator
- 3D Printer
- Filament
- screws
- Soldering Iron
- Solder
- Heat shrink and wires
- Wire Strippers
- Needle Nosed Pliers.
I included some links from amazon, so you guys can go purchase the correct parts. If you do not have access to a 3D printer, you can send the STL files to a service or a local hackerspace/library.
Raspberry Pi4
let’s talk about the pi, Raspberry is one of the best and powerful single-board Computer at cheap price segment.
Specifications
- Processor- Broadcom BCM2711, Quad core Cortex-A72 (ARM v8) 64-bit SoC @ 1.5GHz
- RAM – 2GB, 4GB or 8GB LPDDR4-3200 SDRAM (depending on model)
- WiFi – 2.
 4 GHz and 5.0 GHz IEEE 802.11ac wireless
 - Bluetooth- Bluetooth 5.0, BLE
- Ethernet – Gigabit Ethernet
- USB Ports- 2 USB 3.0 ports; 2 USB 2.0 ports.
- GPIO Pins- Raspberry Pi standard 40 pin GPIO header (fully backwards compatible with previous boards)
- Display Ports- 2 × micro-HDMI ports (up to 4kp60 supported)
- Display connector- 2-lane MIPI DSI display port
- Camera Ports- 2-lane MIPI CSI camera port
- Audio Ports- 4-pole stereo audio and composite video port
- Graphics – H.265 (4kp60 decode), h364 (1080p60 decode, 1080p30 encode)
- OpenGL ES 3.0 graphics
- Storage – Micro-SD card slot for loading operating system and data storage
- Power Support- 5V DC via USB-C connector (minimum 3A) GPIO Power-5V DC via GPIO header (minimum 3A)
- PoE – Power over Ethernet (PoE) enabled (requires separate PoE HAT)
- Temperature- Operating temperature: 0 – 50 degrees C ambient
- A good quality 2.
 2
2 - Operating voltage- 12V (current requirement 1A-2A)
- Rated power- 6-7W
- Signal input- AV + VGA + HDMI (HDMI 1.2)
- Resolution- 1280* 800, Plug and Play- Support
- Contrast ratio- 800:1 (Min.)
I have made a custom design for the 10.1 inch
3D Printing
1 / 4
3D printing can either be frustrating or extremely exciting. Well at least thats how it was for us. We had many failed prints, and had to constantly mess with the settings and details to be successful. Thanks to our teacher Mrs.Berbawy, we were able to emerge victorious. So a quick word of advice, always consult with someone who is experienced with 3D printing before printing, it saves so much time and will prevent you from making mistakes.So for this project you need to 3D print four things:
- Case
- Keyboard Case
- Back Cover
You can download all the STL Files here.
The recommended settings for all the parts are:
230 Celsius Extruder Temperature
3 shells
3 top/bottom
50mms print speed
10% infill
Feel Free to tweak the settings depending on your situation and results. Be patient!
We used PLA filament for our prints. That does not mean you cannot use materials like ABS or bamboo etc..
Soldering and Circuit
1 / 4
- The PAM8302 amplifier connects to the + and - sides of the mini speaker. Route power by connecting VIN to 5V on the Power Boost 1000C and then Gnd to G.
- Power Boost 1000C hooks up to pins #2(5V) and #6(ground) on the Pi.
- Unfortunately the diagram failed to show the average person where the #2 and #6 wires must be soldered and it is really vague. After some looking into raspberry pi circuits we discovered that the powerBoost 1000C hooks up to pins #2(5V) and #6(ground) on the Pi. We provided you guys with another diagram that gives you the specifications for each pin.
1 / 3
- Finally the Battery connects
Extra Tips:
Add heat shrink to any exposed wire to prevent short circuits.
MAKE SURE YOUR SOLDERING CONNECTIONS ARE SOLID AND STRONG.
I cannot stress this enough, our connections broke a few times since we did not check them properly at first.
It is very annoying to fix a disconnected wire after you have everything assembled.
1 / 10
Assemble all the parts by Following this images
I will not go over every step of this build but I will try and give you a basic idea of how it goes together.
You will need to remove the usb port on the lcd driver and the two dual usb ports on the raspberry pi (the usb ports on the side of the case are wired straght into the board).
The first thing you want to do before you start putting all the components into the enclosure is to bend the header pins on the raspberry pi touchscreen. The small space created by this action lets you store the lithium ion battery, allowing you to fit all the components into the enclosure.
To assemble the laptop you will need 9 m3 x10mm bolts and 2 M3 x 25mm bolts with 4 nuts. The lid screws onto the lcd with 4 M3 x 10mm bolts and the base is screwed onto the keyboard holder with 5 M3 x 10mm bolts. To hold the hinges together I used 2 m3 x 25mm bolts with 2 nuts on the end to lock it in place.As always if you have any questions or ideas on how to improve this project please comment or send me a message.
Operating System
One of the most confusing parts of DIY raspberry pi projects is configuring software properly. It can be intimidating to newbies (us a few months ago) but don't worry we have some very helpful links and tips to make the process easier.
In our project we use a special touchscreen made specifically for the raspberry pi. Despite its unique specifications, its just like any other peripheral, it needs kernel support and drivers to function properly
I have tried so many operating Systems for the pi, all Os are Great but My personally Favorite is Twister OSWhich has Cool Interface and Windows10 and Mac theme Interface, You can Use any of this theme just one Click
Installation Process
Step1 – Download the Twister OS (You have to Download the Latest version of Twister OS from the Official Website)
Step2 – Download the balenaEtcher
You can Download balenaEtcher for flash the OS, which has cool interface and simplistic
Step3 – Inject your SD Card to the Computer and Open balenaEtcher
Now Select your img.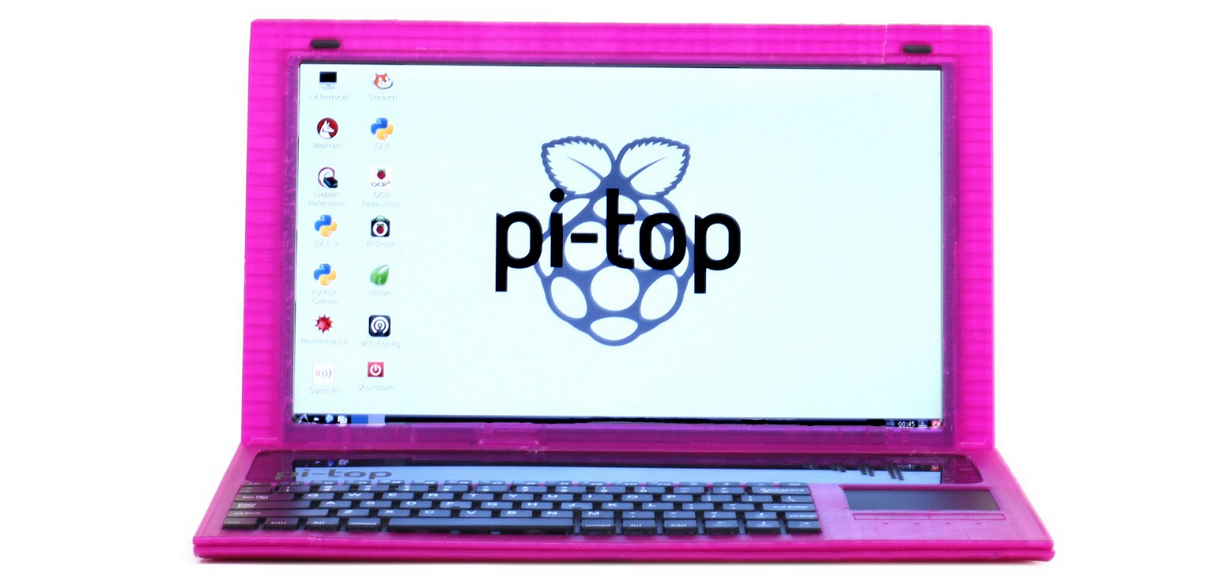 xz file, select SD Card and Select Flash.
Final
1 / 4
At this point the laptop is fully functional, i've been using mine almost everyday for taking notes.At this point the laptop is fully functional, i've been using mine almost everyday for taking notes.
It also connects to WiFi and Bluetooth networks really easily making watching YouTube and other webpages really easy and to make it even better there are lots and lots of games that will run on the raspberry pi with anything from minecraft to classic old NES games making great fun with a long battery life.
Overall this is a really fun project and I really recommend trying it.
If you have any questions please comment or send me a message and ill try my best to get back to you.
f7oo0x6inklpv7k_sZszcpSOoR.jpg
Projects
Privacy and Cookies
Cookies are tiny data files stored in your web browser when you visit a website. At www.electromaker.io we use cookies to personalise your experience and help us identify and resolve errors.
The use of cookies and similar technologies have for some time been commonplace and cookies in particular are important in the provision of many online services. Using such technologies is not, therefore, prohibited by the Regulations but they do require that people are told about cookies and given the choice as to which of their online activities are monitored in this way. (Information Commissioners Office)
Our Cookies Policy
To make full use of www.electromaker.io, enjoy the personalised features and ensure the websites works to its full potential, your computer, tablet or mobile phone will need to accept cookies.
Our cookies don’t store sensitive information such as your name, address or payment details: they simply hold information about how you use our site so we can improve your experience and resolve any errors.
If you’d prefer to restrict, block or delete cookies from www. electromaker.io, or any other website, you can use your browser to do this. Each browser is different, so check the ‘Help’ menu of your particular browser (or your mobile phone’s handset manual) to learn how to change your cookie preferences.
Here’s a list of the main cookies we use, and what we use them for:
- Electromaker – Login session
- Google Analytics – Analytics
- Twitter – Twitter Feed
Managing Cookies
Each web browser handles cookie management differently, please follow instructions for your chosen browser:
- Chrome
- Firefox
- IE
- Opera
- Safari
Apply a Filter
Category
Difficulty
Platform
Category
Difficulty
Platform
Upload your projects
Lowcost Wireless Rocket Launcher
This project allows to launch gunpowder rockets safely and with a lot of fun. (coutdown display with access code and sound).
Anti-anime-automata
This Discord-Bot rejects users with Anime Profile Pictures
Eurocircuits Pcb Design Competition Entry: Vidor Expansion
This board is used to get access to the FPGA I/O from the PCI-e edge connector on the Arduino Vidor 4000 board. Some of these signals are fed into three stereo 16-bit DACs to give 5.1 or 6 channels of audio. This board plus a Vidor 4000 will make an extremely versatile electronic musical. instrument.
Learning Board - Embedded Controller
It is a general purpose LEARNING BOARD similar to arduino microcontroller. I have designed it using ATMEGA328P IC. Using this board we can interface analog and digital sensors and used for multiple applications. Moreover, in addition with functions of arduino microcontroller Motor driver, Bluetooth, sensor ports are separately
Easyflash 1cr Cartridge For Commodore 64
The EasyFlash 1CR is a cartridge for the Commodore 64 that implements the EasyFlash format. Many modern Commodore 64 titles are released in the EasyFlash format and the EasyFlash2CR allows you to build a dedicated cartridge for a game. It can be built from industry standard through-hole components.
Smart Power Monitoring And Conserving Using Nodemcu
Energy saving is the most important and challenging issue. Smart power meter is used in domestic electric power distribution system. The integration of the Node-MCU,PZEM sensor, Relay and provides the system as Smart Power Monitoring system. Smart power meter provides data for optimization and reduce the power consumption.
Neozoon - This Lamp Sucks!
Thanks to its big suction cup, you can attach the Neozoon lamp to almost any surface within a matter of seconds and remove it just as fast, totally residue free. Neozoon is powered by a rechargeable battery to provide its user with a maximum of freedom and flexibility. One lamp, endless possebilies!
Ecscope
The hardware and software used to measure current and voltage in electronic circuits.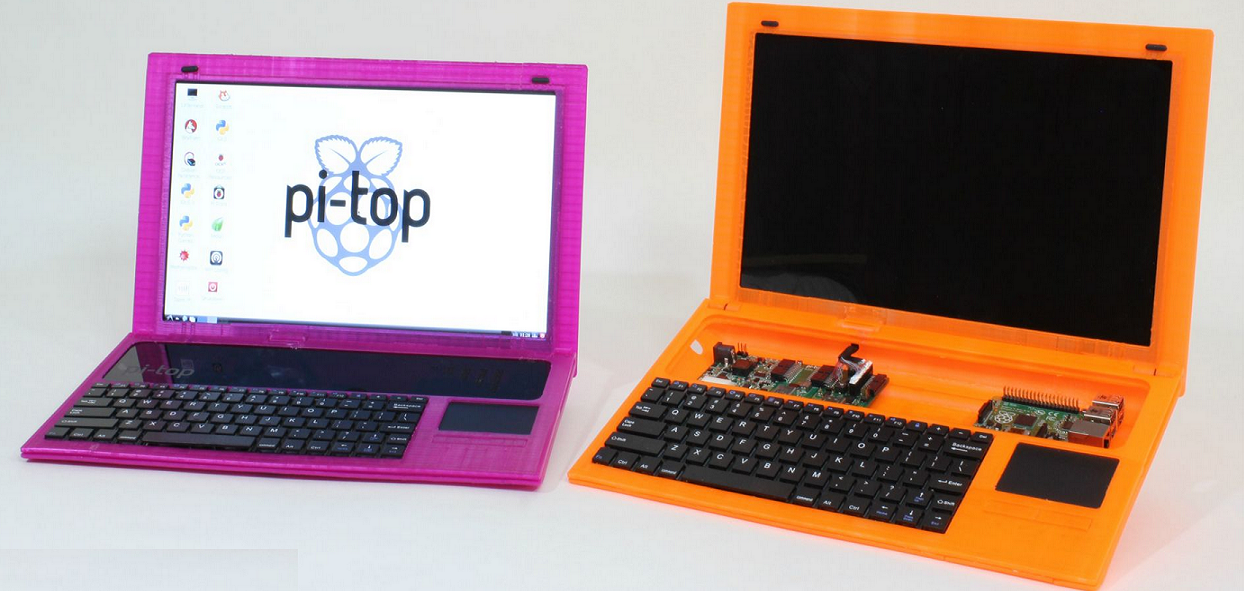 It could be used as an easy and cheap tool to investigate your PCB and find issues. The next advantage of the project is the remote management of it through the internet. Added software is used, like an easy oscilloscope GUI.
Learning Board (embedded Controller)
It is a general purpose LEARNING BOARD similar to arduino microcontroller, but more features than Arduino microcontroller. I have designed it using ATMEGA328P IC.Moreover, in addition with functions of arduino microcontroller Motor driver, Bluetooth, relay ports are separately given in the board.
Iot Based Smart Shopping Cart Using Rfid Reader
I have developed a lot based smart shopping cart using RFID reader.In this project, I used nodemcu esp8266 microcontroller,LCD display,em-18 reader module, and Arduino IDE. When people go shopping they have to wait in a queue for the billing process. This solution allows people can make a bill for their purchases by themselves.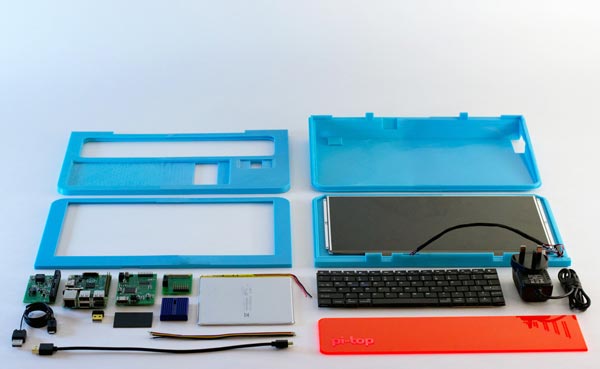
Rfid Based Attendence System
An RFID based attendance system can be a great solution to overcome such challenges as it automates the students' attendance process & enables teachers and parents to track & monitor students' activities effortlessly
Shamrock Sixnav: Low-cost Compatible 6dof Space Mouse
Sixnav is a low-cost alternative to 3Dconnexion's line of "Spacemouse" products users of CAD are familiar with. It keeps track of movement in 6 degrees of freedom (6DOF) It enables you to manipulate objects as if you were holding them in your hand. Sixnav is based on expired patents and aims to be driver-compatible.
Online Payment Soundbox
An ESP32-based device that can receive SMS regarding payments, print it on the LCD display and also call out the amount loud. The device includes a DFPlayer Mini module that has an SD card attached to it.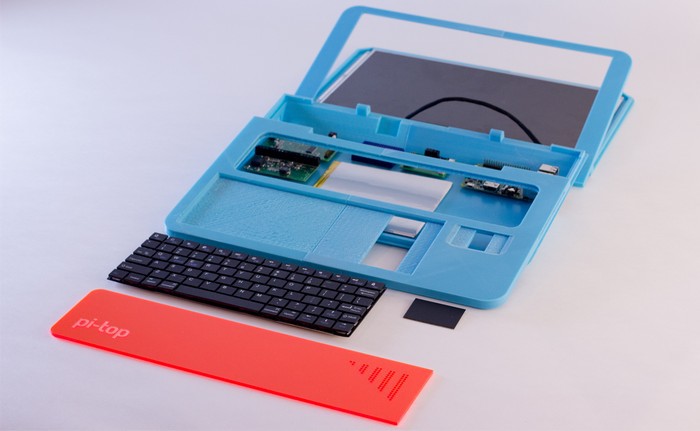 Based on the amount received, the specific number is called out using the speaker.
Home Security System
The system includes, apart from the home alarm board, our own RF transmitters in the form of remote controls for ease of use, magnetic switches for door and window protection, and a standalone RF RX module that is mostly used to adapt transmitters to other alarm systems, but can be used for home automation.
Lora Based Soil Moisture Sensor
Smart Soil Moisture sensor based on LoRa technology. It will detect the moisture, temperature and humidity of the soil and send those values in a string to the receiver. It is low power, highly efficient module which can be used in Smart agriculture (The communication range is up to 10km wirelessly).
instruction how to work from scratch for beginners and dummies, how
looks like Three-dimensional printing has become increasingly introduced into our daily lives. Thanks to new technologies, it has become possible to easily print from a small detail to a large building. The range of products is also pleasing - today you can find a lineup that includes both affordable devices and more expensive ones. But how to work with a 3D printer? This is a completely normal question that any beginner will have, it is for this reason that we will try to answer it as simply and accessible as possible.
What is a 3D printer and how does it work?
The 3D device consists of the printer itself and a computer that controls all processes. The principle of operation of such a design is to create 3D models by superimposing layers of liquid material. There are a large number of printer models - from large industrial ones to compact ones, but they all have the same principle of operation and component parts:
- Extruder - the print head through which the thread passes. The head heats the thread to a semi-liquid state and evenly supplies the material to the working surface.
- Work surface - a printing platform on which a 3D model is formed.
- Motors - mechanisms responsible for the accuracy of movement and speed of printing.
- Sensors are electronic devices that limit moving parts to specified coordinates.
- The frame is the structure that connects all parts of the printer.
How a 3D printer works: features
Work with the aim of building a three-dimensional model begins with a sketch, which is created in a special program. After that, the software independently generates a plan for the movement of the print head and a print sequence. The 3D model is reproduced by strongly heating the plastic and distributing it evenly.
3D printers are used in many areas. Let's list some of them:
- Architecture - creation of models of buildings.
- Medicine - dental prosthetics, making models of organs for study.
- Construction - production of houses using 3D printing technology.
- Education - a visual aid for learning 3D printing.
- Automotive - creation of tuning parts, prototype layouts and other products.
This is a small list of industries where 3D printing is actively used. Today, almost every entrepreneur and just an enthusiastic person can afford a printer.
The following printers are distinguished by design features:
- RepRap - self-reproducing printers that can create their own copies.
- DIY-kit - the device comes disassembled with instructions, the assembly of which will take a sufficient amount of time.
- Completed - Models are delivered assembled and ready to use.
- Commercial and Industrial - devices capable of printing metal, concrete, polymers and other materials.
How to use a 3D printer: tips for beginners, where to start
Mastering the technique of 3D printing is not difficult if you follow the recommendations and tips. Especially for those who plan to learn the basics of 3D modeling, an up-to-date list of questions and detailed answers to them has been prepared.
Printer Installation
To begin, you will need to carefully unpack the box and remove any stops. The next step is to install the printer on the surface using the building level. This will allow you to place the device as evenly as possible, which will provide better printing.
Note. Some 3D printers come with a level for installation.
Next, you will need to connect the printer to your computer and install the necessary drivers. The software disc comes with the 3D device.
Preparation for work
To get started, you need to calibrate the working surface - without this, printing quality products is impossible. This process is carried out automatically or manually. The attached instructions have detailed information on how to perform manual calibration.
Extruder patency test
The next important step is setting up the extruder.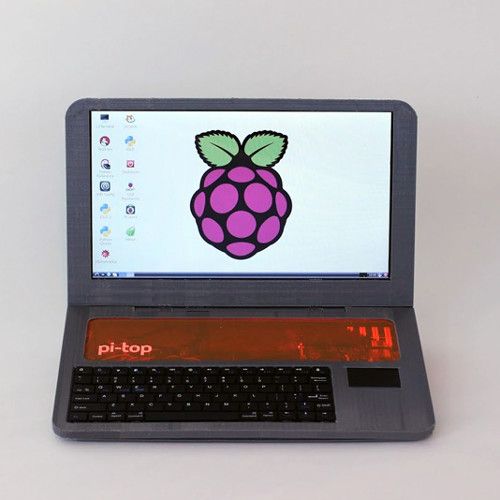 First of all, you will need to check its nozzle. If the printer has already been used, the nozzle should be cleaned of solidified particles that will interfere with the throughput of the material. Refueling the 3D printer The thread is fed into the extruder directly from the spool. But there is one caveat - for this you must first warm it up. To thread the thread, you will have to make a small effort in order to loosen the presser mechanism.
Working with models
Models can be created using a variety of 3D modeling programs. The process of manufacturing three-dimensional parts is creative, requiring careful preparation. The better and more detailed the model is drawn, the better the 3D layout will be at the output.
Start printing
After creating the model in the program and preparing the printer for work, you need to send the file for printing and wait for the result. The print speed varies depending on the printer model and specifications, as well as the media used.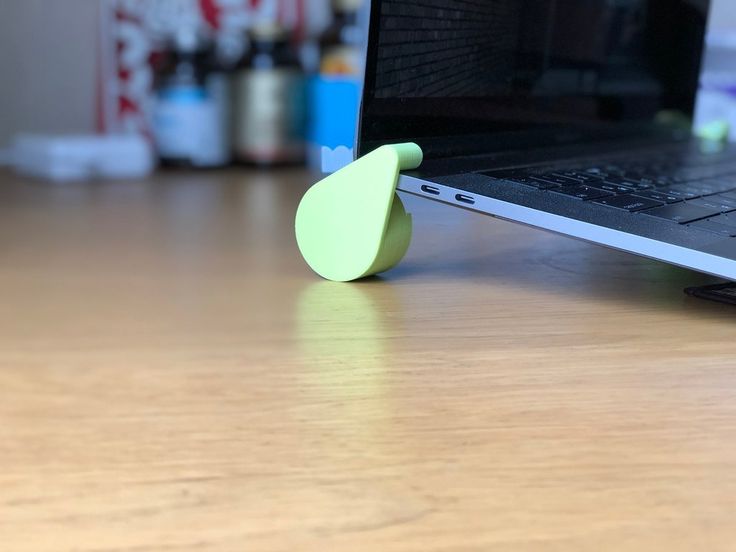
Processing the finished product
3D printed products usually do not please the user with an ideal appearance: the parts have an uneven surface. But this is typical for models of 3D printers on FDM, SLA and DLP devices, which are distinguished by higher print quality. Owners of FDM printers should not despair - a simple processing of products will give products an attractive appearance and make the surface smooth.
Several powerful ways to post-process 3D printed parts:
- Mechanical - carried out by sanding the surface with sandpaper or a special sponge for grinding.
- Chemical - Surface treatment with aggressive solvents such as acetone and dichloroethane.
- Mixed - In this case, the above two processing methods are used.
What are the possible errors and how to avoid them?
Even a novice can master the technology of 3D printing, but, despite this, the production of the first products causes excitement for the user. Simple operation, detailed instructions and recommendations on the Internet will allow everyone to deal with almost any printer model. But there are a few useful life hacks, the knowledge of which will help you avoid typical beginner mistakes:
- Calibrate and test the 3D printer before starting work.
- Be sure to use the correct file extension for quality printing.
- Do not remove the finished product from the printer immediately after it has been processed: this may damage the part and cause defects.
- If errors occur during the 3D printing process, try restarting the device - this usually helps.
- If restarting the printer still does not help, try changing the settings or re-entering the model.
- When assembling the 3D printing devices, follow the enclosed instructions carefully.
- Use only the correct materials for your 3D printer.
- Subscribe to useful 3D printing channels and articles.
Following the above tips will allow you to set up your 3D printer, get it ready for operation and, most importantly, print your first 3D products. Choose a model according to your budget and capabilities, and it will not be difficult to master the basics of 3D modeling and get the first details if you follow the instructions and recommendations.
- March 21, 2021
- 6160
Get expert advice
Home - InfoConnector.ru
Welcome to InfoConnector.ru
Useful tips and instructions for setting up Windows and Android operating systems. Information about connection interfaces, cables, adapters and adapters. Repair, care, setup and upgrade of home computers and laptops. Articles about 3D printing. 3D models for printing. Radio controlled models.
Angle Adjustable Stand for GOPRO HERO 6/7
Projects 156
Designed and 3D printed a simple tilt-adjustable stand for a GoPro action camera.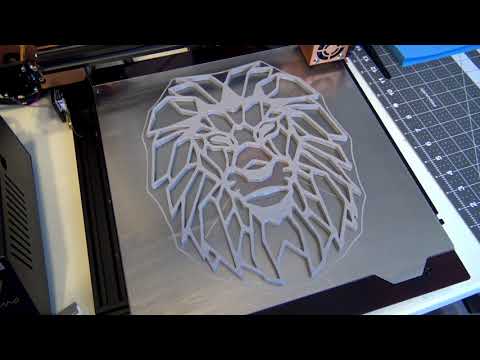
Read more
Installing BIQU h3 V2 on 3D printer UNI250 (UNI2.3)
Projects 198
We have been using the purchased printer UNI250 (UNI2.3) in production for about half a year. The printer is good for everyone, but there is no limit to perfection, so it was decided to transfer it to the BIQU h3 V2 direct extruder.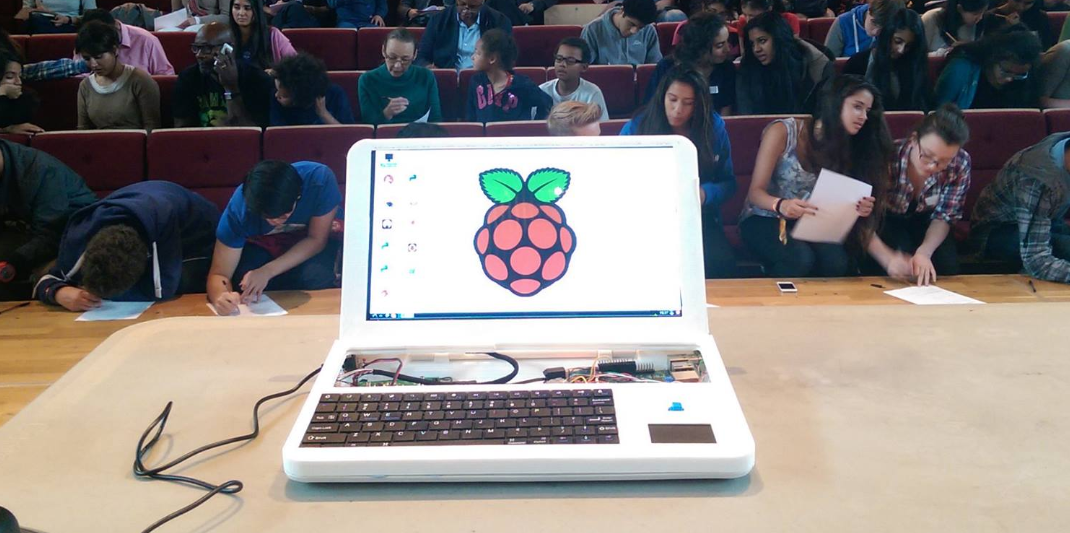 Design, installation and commissioning work has been completed, the test period of operation has passed. It's time to put the project to the masses.
Read more
3D printing. Holder for tubes and bottles on the wall
Projects 198
A tube of adhesive glue is constantly lying around the printer.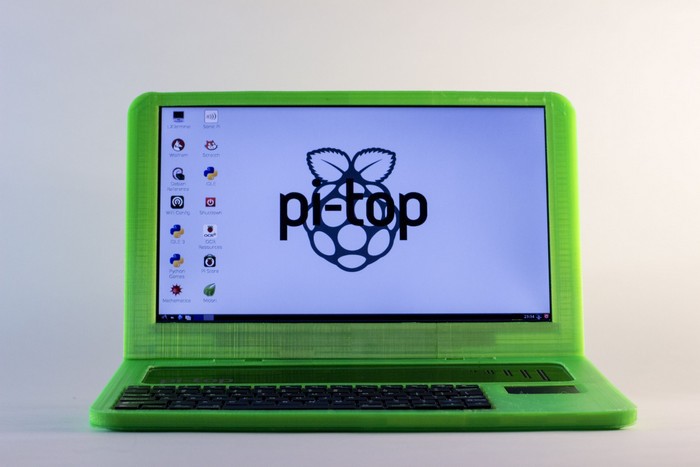 I decided to make him a special mount on the wall. This will add order, and the printer will not be allowed to stand in vain.
Read more
Installing the BIQU h3 V2 extruder on "ender-like" printers (CR-10, CR10S, CR-10 4S, CR-10 5S, CR-10 MINI, CR-20, ENDER-2, ENDER-3, ENDER-3 PRO, ENDER -3 V2).
Projects 351
Decided to upgrade my Creality CR10S home printer with a new BIQU h3 based DI system. On this occasion, I designed and printed the extruder mounts. The project is suitable for owners of the ENDER printer, because. The Creality CR10S 3D printer is structurally identical to it, the only difference is in the area of printing.
Read more
- DIY Video
- RC Video
- 3D Models
- 3D printing
-
3D Model
3D Printer
This channel is dedicated to modeling and printing on a 3D printer.
 Here you will find lessons on building parametric models in SolidWorks and my projects related to 3D printing.
 -
YouTube: RC InfoConnectorRC CAR
RC Drone
On our channel you will find instructions for assembling and setting up radio controlled models. RC models are my hobby. I do it in my spare time from my main job. Sometimes I make videos that I post on my channel.
-
Models for 3D printing
Every week I design and 3D print something new. I share my achievements in a special section of the site.
Quadcopter project
Rocket 3D models
phone stand 3D models
Dice 3D models
-
3D printing
3D printer is my new hobby.