How to make cookie cutters 3d printer
How to Make 3D Printed Cookie Cutters Successfully – 3D Printerly
Making 3D printed cookie cutters is something that many users want to learn how to do, but it doesn’t seem so simple at first. I decided to look into the best techniques on how to make 3D printed cookie cutters and share it with you guys.
To make 3D printed cookie cutters, you can easily download a cookie cutter design from Thingiverse or MyMiniFactory, then import the STL file to your slicer to create a 3D printable file. Once you create the file, you simply send the G-Code file to your filament 3D printer and 3D print the cookie cutters.
You can make some high quality cookie cutters by using certain techniques, so keep on reading through this article for some great tips.
Can You Make 3D Printed Cookie Cutters out of PLA?
Yes, you can make 3D printed cookie cutters out of PLA and is a great choice that many people are using. PLA has easy printability, comes from natural sources, and has a decent amount of flexibility and rigidity to make effective cookie cutters.
Other materials you could use for 3D printed cookie cutters is ABS & PETG. I wouldn’t recommend using a material like Nylon because it can absorb acids.
ABS works good for cold foods but not ideal for hotter foods, but people usually don’t recommend using ABS either because of the composition of the material.
One user made cookies with cookie cutters made out of PLA for his family and friends and it worked out very well. He did mention that it could be a good idea to use natural PLA since many types of PLA can have additives that aren’t necessarily food safe.
Here is a really cool Bulbasaur 3D printed cookie cutter made out of PLA.
3D printed cookie cutters are a gamechanger from 3Dprinting
Are 3D Printed Cookie Cutters Safe?
3D printed cookie cutters are generally safe due to the fact that they only come into contact with the dough for a short period. Additionally, the dough is baked thus killing all the remaining bacteria. Bacteria can build up in small crevices and gaps in the 3D printed cookie cutter if you try reusing it though.
There are some factors that you’ll want to consider in terms of safety when it comes to 3D printed cookie cutters though. Many 3D printed materials are food-safe as a plastic, but when we introduce the 3D printing layer-by-layer process, it can compromise safety.
The first thing to know is that a brass 3D printed nozzle may have trace heavy metals like lead that can transfer to a 3D printed object. Stainless steel nozzles are more appropriate for food safe 3D prints.
Another thing to know is whether your filament was branded as food-safe, as well as any filaments that were previously used on your 3D printed nozzle. If you’ve previously 3D printed non-safe filament on your 3D printer with the nozzle, you’ll want to swap it out for a fresh nozzle.
The next factor is how 3D printing leaves several small gaps, crevices and holes between your layers that are pretty much impossible to clean completely, and these are potential breeding grounds for bacteria.
A lot of filament is water-soluble, so if you end up washing your 3D printed cookie cutters, it could create a porous surface that allows bacteria to pass through. When using the cookie cutters on dough, the dough will get into those small spaces, and create a non-safe food environment.
The main way around this is to try to limit using your 3D printed cookie cutter just once and not reusing it after trying to wash it.
Some people have thought of ways to combat this though, doing things such as sealing the outer surface of the cookie cutter with a food-safe sealant like epoxy resin or polyurethane.
To improve the safety of your 3D printed cookie cutters, do the following:
- Try to use the 3D printed cookie cutters as a one-time item
- Use a stainless steel nozzle
- Seal your 3D prints with a food-safe sealant
- Use food-safe filament, ideally natural filament with no additives & FDA approved.
A tip that one user shared is potentially using cling film around your 3D printed cookie cutter or on the dough so it is never actually in contact with the dough itself.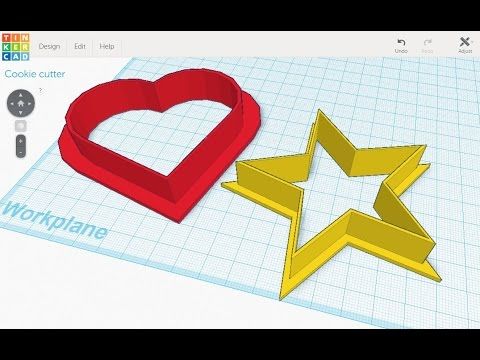 You can sand the edges of your cookie cutter so it doesn’t cut through the cling film.
This would work well for really basic designs, but for more complex designs, you’ll likely lose a lot of detail doing this.
How to Make 3D Printed Cookie Cutters
Making 3D printed cookie cutters is a fairly simple process that most people can successfully do with basic knowledge.
To make 3D printed cookie cutters, you’ll need a few basic things:
- A 3D printer
- A cookie cutter design
- Slicer software to process the file
Ideally, you want to have an FDM 3D printed when creating cookie cutters because they are more preferable with making these types of objects.
The build volume is larger, the materials are safer to use, and it’s easier to work with for beginners, though I’ve heard of some people making 3D printed cookie cutters with an SLA resin printer.
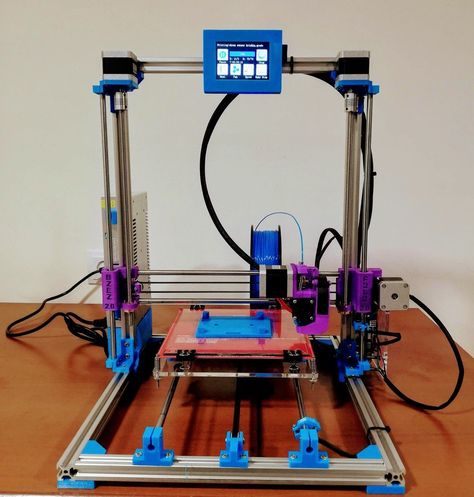
I’d recommend a 3D printer like the Creality Ender 3 V2 or the Flashforge Creator Pro 2 from Amazon.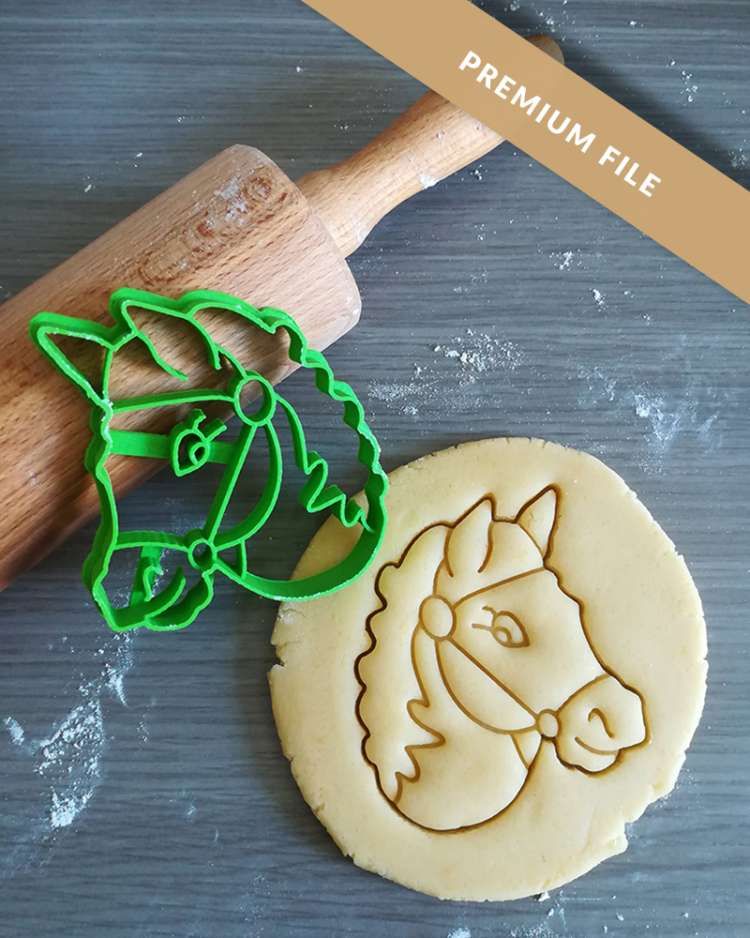
In terms of the cookie cutter design, you can either download a design that has already been made, or create your own design through CAD software. The easiest thing to do would be to download a cookie cutter design from Thingiverse (cookie cutter tag search) and import that into your slicer.
You have some really high quality designs such as:
- Christmas Cookie Cutter Collection
- Batman
- Snowman
- Rudolph the Reindeer
- Superman Logo
- Peppa Pig
- Cute Llama
- Easter Bunny
- SpongeBob
- Christmas Bells
- Golden Snitch
- Heart Wings
Once you find a 3D printed cookie cutter design you like, you can simply download it and import the file to a slicer like Cura to create the G-Code file that your 3D printer understands.
You don’t need any special settings to create these cookie cutters, so you should be able to slice the model with your regular settings with a standard layer height of 0. 2mm with a 0.4mm nozzle.
One user who did print Batman cookie cutters found there was a lot of stringing in his print due to a lot of travel movements. What he did to fix this was to reduce the number of walls to 2, optimize the printing order, then changing the “fill gaps between walls” setting to “Nowhere”
As previously mentioned, you’ll want to have a stainless steel nozzle, food safe filament, and if it’s not a one-use case, then spray it with a food-safe coating to seal the layers.
How to Design Your Own Custom 3D Printed Cookie Cutters
To design 3D printed cookie cutters, you can convert an image into an outline/sketch and create cookie cutters in a CAD software like Fusion 360. You can also use online tools like CookieCAD which allows you to create cookie cutters from basic shapes or imported photos.
If you want to design your own 3D printed cookie cutter, I’d recommend watching the video below.
He uses GIMP and Matter Control which are two completely free software to create custom cookie/biscuit cutters.
In the video below, Jackie uses a different method which involves converting an image into an STL file, then importing that file into Cura to 3D print as usual. She uses a website called CookieCAD which allows you to turn artwork or pictures into cookie cutters.
You can also upload sketches that you have created to make a nice STL file that’s ready to 3D print.
One cool tip from someone who has experience with making cookie cutters mentioned that you can create a two-piece cookie cutter to make more complex cookie designs.
You’ll create an outer shape and then an inner shape that you can stamp on the cookie, perfect for making intricate and unique cookies. What he does is uses a CAD program like Fusion 360 to create the STL file, along with Inkscape to create the image.
He uses a photo, an online stencil converter, uses software to trace the outlines along with the details of the face, then saving the resulting design as an STL file to 3D print.
Best Slicer Settings for 3D Printed Cookie Cutters
The slicer settings for cookie cutters are generally pretty simple and you should be able to create fantastic cookie cutters using standard settings.
There are some slicer settings that can improve your cookie cutter design, so I decided to put some information together to help.
The settings we’ll look at will be:
- Layer Height
- Wall Thickness
- Infill Density
- Nozzle & Bed Temperature
- Printing Speed
- Retraction
Layer Height
The layer height setting determines the thickness of each layer your 3D printer prints. The larger the layer height, the faster it will be to print your object, but the lesser the amount of detail it will have.
A standard layer height of 0.2mm works well for 3D printed cookie cutters. Generally, people choose to layer heights anywhere between 0.1mm to 0.3mm depending on how detailed the cookie cutter design is.
For cookie cutters with intricate designs and fine details, you’ll want a smaller layer height like 0.12mm, while simple and basic cookie cutters can print successfully with a 0.3mm layer height on a 0.4mm nozzle.
Wall Thickness
Every printed object has an outer wall which is referred to as the Shell. The printer begins its operation from the shell before going to the infill.
It greatly influences how strong your object will be. The thicker the shell, the stronger your object will be. However, complicated designs don’t need thick shells. For cookie cutters, the default .8 mm should work just fine.
The only thing you may want to change is the Bottom Pattern Initial Layer which can be set to Lines. This improves the adhesion of your 3D printed cookie cutters to the heated bed.
Infill Density
Infill percentage is the quantity of material that will go into the shell of the 3D printed object. It is usually expressed as a percentage. A 100% infill means that all the spaces within the shell will be filled up.
Since the cookie cutters are going to be hollow and will be used to cut dough which is soft, you can leave the infill percentage at the standard 20%.
Nozzle & Bed Temperature
Your nozzle and bed temperature will depend on what material you are using. For a standard PLA filament, nozzle temperature usually varies between 180-220°C, and a bed temperature of 40-60°C.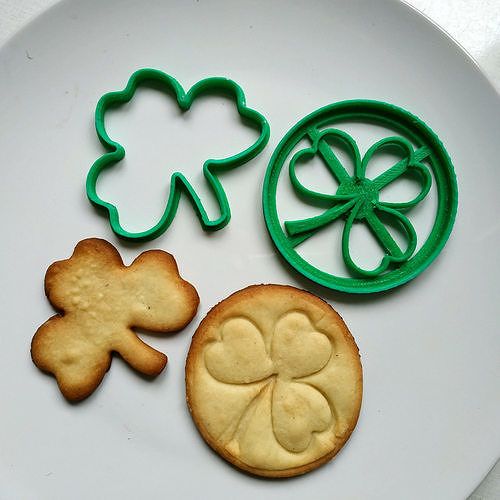
You can test different temperatures to see what works best for surface quality and bed adhesion. After some testing, one user found that a nozzle temperature of 210°C and a bed temperature of 55°C worked best for their particular filament for 3D printed cookie cutters.
Printing Speed
Next is the print speed. This is the rate of travel of the print head while it extrudes the filament.
You can use a standard print speed of 50mm/s for your 3D printed cookie cutters successfully. There are recommendations to use print speeds of 40-45mm/s to improve the quality, so I’d try out lower speeds to see if it makes a significant difference.
Using a high print speed like 70mm/s can definitely negatively affect the output of your 3D printed cookie cutters, so check that you aren’t using printing speeds that are above 60mm/s or so.
Retraction Settings
When the print head has to shift to a different position on the printing plane, it slightly pulls the filament back in, this is called retraction.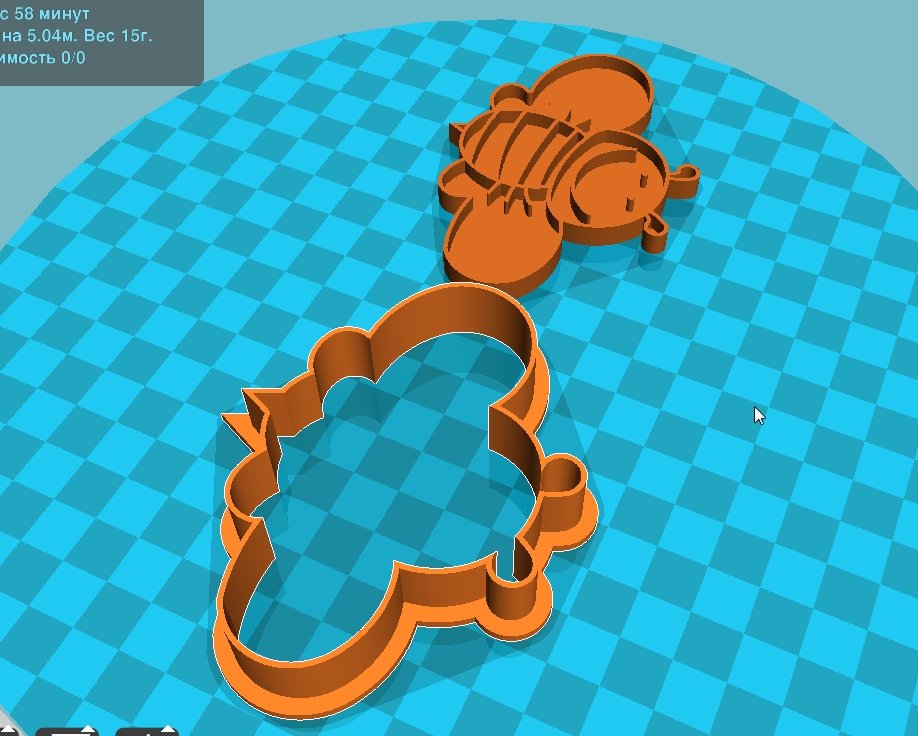 This prevents strings of the material from getting all over the place.
Retraction settings for 3D printed cookie cutters usually depend on your filament and your 3D printer setup. The default settings in Cura of 5mm for Retraction Distance & 45mm/s for Retraction Speed is a great starting point to see if it stops stringing.
If you still experience stringing with the default settings, I’d recommend increasing your Retraction Distance and lowering your Retraction Speed. 3D printers with a Bowden setup require high retraction settings, while Direct Drive setups can do with lower retraction settings.
You can print a Retraction Tower directly from Cura to test the effects of retraction settings on your print quality. Check out the video below by CHEP to do this.
Similarly, in the “Travel” settings which include retraction settings, you also want to look at the “Combing Mode” and change that to “All” so the nozzle doesn’t hit any walls as it is travelling on the inside of the model.
The video below gives a nice visual example of a user going through his cookie cutter settings that works nicely.
How Much Does it Cost to 3D Print a Cookie Cutter?
3D printed cookie cutters use around 15-25 grams of filament, so you could make 40-66 cookie cutters with 1KG of PLA or PETG filament. With an average price of $20 per KG of filament, each cookie cutter would cost between $0.30 and $0.50. A 3D printed Superman cookie cutter costs $0.34, using 17g of filament.
Guides Make your own 3D Printed Cookie Cutters – with or without a printer
We hear a lot about 3D printing being used in industrial applications and prototyping, however, many hobbyists, DIY lovers and tinkerers use desktop FDM printers for their diverse needs. One of the popular 3D printed objects is cookie cutters. They are relatively simple to design and print in plastic even on a regular FDM 3D printer, resulting in ready-to-use cutters within hours.
- Is it safe to use 3D printed Cookie Cutters?
- How to design a custom Cookie Cutter?
- Libraries with ready to use cutter designs
- Tips for 3D printing
- Get custom cookie cutters without a 3D printer
Products that are printed on regular FDM machines used for versatile parts, can’t be called 100% food-safe. That is purely due to the machine’s printing head and extruder being exposed to particles from various filaments and not cleaned after each run. However, finished plastic parts are rigid and stable, they don’t emit anything until exposed to high temperatures or excess moisture.
For PLA (more commonly used) parts the transition temperature is around 122-176°F (50-80°C). Thus, for cookie cutters, 3D printing is a suitable way of getting safe custom parts.
3D Prints by Randolf Leipnitz, Holger Kuznik GbR
3D printing starts with a 3D design file of the part you need. There are several ways of making your own 3D model for cutters for different skill levels.
Experienced: Fusion 360
If you are familiar with 3D modeling or feel brave enough to try 3D design software, there are many open-source and free step-by-step tutorials for creating cookie cutters. One of the most common programs for handling such modeling tasks – Fusion 360. It is relatively simple to import an image into the software and then trace it with a Spline tool. After that, you’ll need to make an outline of the created contour and extend the wall created.
For cutters that also have some details inside (not just the outer shape) you will also need to extrude those ones as well, keeping them at a lower height, so they don’t cut the details out but rather just emboss them onto the dough. They also require being connected to the outline and combine and that, pretty much, all. Check out more detailed instructions for working with Fusion 360 in this guide by Nikus.
If you are planning to try modeling your cutter yourself manually, we also recommend you have a quick look at FDM 3D printing tolerances and numbers for minimal details to make sure your cutter will be printable.
Medium: TinkerCAD + SVG file
For first-time designers, a simpler way of getting a DIY cookie cutter is to use .svg files or design software like Adobe Illustrator to create ones. Then, it is down to simply importing the cutter shapes, re-sizing and combining the parts in free-to-use and beginner-friendly TinkerCAD. We highly recommend a tutorial below for more details.
Newbie: customizing apps
If you aren’t friendly with design software or don’t want to invest a lot of time into this, no worries! There are apps that can generate a cutter model from your picture or customize preset shapes.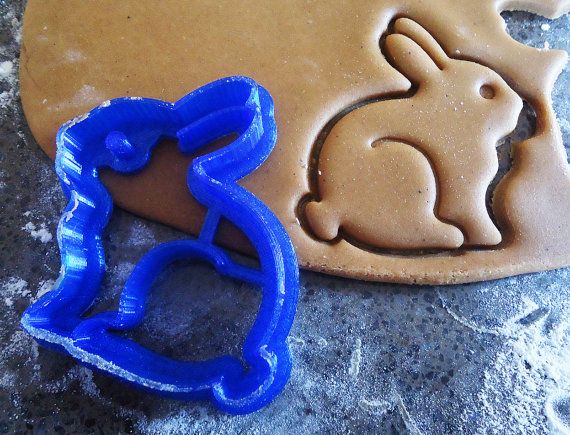 Currently, the most popular one is CookieCAD.
3D printed cookie cutters are a popular item to experiment with. Thus, there are many diverse 3D models both free and purchasable, which are ready to use and tested by others. Check out the popular STL files libraries, and the chance is high that you’ll find something close to what you need.
- Cults3D
- Thingiverse
- Treatstock
- Turbosquid
Browse Cookie Cutters
With a suitable model 3D printing a cookie cutter should be relatively simple. Among all filament types available, we recommend sticking to basic PLA filament as it is pain-free to use and has great detail transition. For the design itself general rules for FDM printing are:
- Model design details to be larger than 1.15 mm or at least 0.5 mm;
- Ensure a model's wall thickness of 1.2 mm at least;
- For text, prefer thicker fonts and opt for 1 mm depth/height for it;
- Remember to have the text mirrored, so it comes out correctly on the cookie;
- Place the model in the file with the “cutting” side up, so it’ll be printed from the flat and wide base.
Don’t own a 3D printer? It’s not a problem. You can use a 3D printing service to order your custom cookie cutters made and delivered. Simply drop your file into the widget, choose a quantity, select material and color for your cutter to instantly see the price.
Cover image by Marco Verch under Creative Commons 2.0 License
DIY cookies / Sudo Null IT News
You may have read the post "Prodlenka" about the children's acquaintance with the profession of a programmer - As we explained to children who a programmer is (I remind you, "Prodlenka" makes interesting free events for children with the best Russian and foreign specialists. And broadcast freely throughout the country).
The next lecture (February 22) was about confectioners. An idea came up - is it possible to make a "bundle" between programmers (IT-specialties) and confectionery? I talked with the organizers - it turned out that there are enough intersections: there are 3D printers that print with sugar, you can 3D model molds for pouring chocolate, there are delta 3D printers for creating pastries, there are chocolate 3D printers.
But we stopped at the simplest - this is the creation of 3D cookie cutters.
It was necessary:
- to create a 3d model of the form,
- 3d print,
- make cookies,
- treat the guys at the event
There were only a few days left before the start of the event, and there will be a story about how everything was - from idea to implementation.
Find/make a cookie shape
Cookie molds are not something new, I remember there was a post about them on Habré, and we printed a mold in hackspace, and the participants baked, and this is what happened:
.
But I wanted to make them themed cookies - by February 23 (the event about confectioners was on February 22). I immediately thought of making a star, but this is somehow not original, so I decided to make a mold for an airplane.
After a short search, I settled on this - meet the T-50, a 5th generation fighter:
Here is his model:
Based on this model, using the free and open graphic editor GIMP, a mask was made:
The mask for the shape is ready, now you need to make a 3d model.
Make a 3d model of a cookie cutter
The question of where to do it was solved simply - the cookiecaster.com service. This is a free specialized service for creating cookie cutters:
The principle of operation of the service is simple - with the mouse we click on the working area, and lines are created between the points where we clicked, after completing the shape (clicking on the starting point) - the shape is displayed on the right above is a preview.
For example, let's make a simple shape, a triangle:
We see on the right the display of the shape created by the program (in addition to the outline, the program creates a small frame at the initial level - this increases the strength of the model). It is also possible to edit the "nodes" of the model, and we can click on the "edges" and make convex / convex contours.
Below the preview screen are the settings for the size of the created 3D model:
- the maximum size of the form (Large 4") - (4 inches = 10 cm)
- height (0.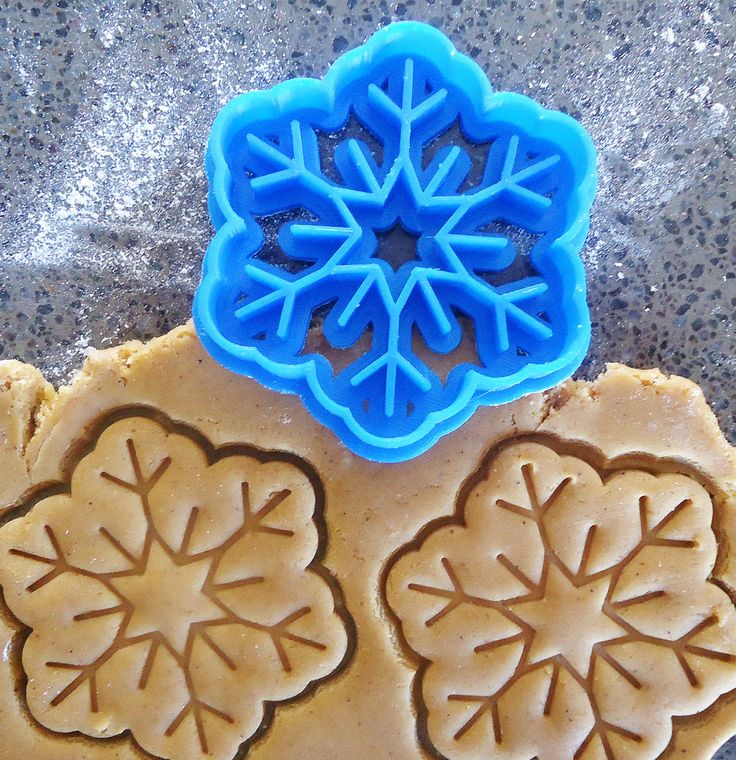 65") approx. 1.5 cm
- wall thickness - 2mm
You can change these settings to obtain molds of different sizes.
And below is the button to download the cookie form - Download 3D File . Click and get cooke.stl file (3d model in STL format).
The service has the ability to upload a picture - Trace . In this case, you can "circle" the contour in the picture.
Let's load our template. And we can “click” along the contour.
But to automate the contour tracing, the service provides the function "Magic trace" - this function allows you to find the contour of an object. We click on it, and after that we click on the “body” of our airplane contour, and the system itself creates the contour. Here's what happened:
3D models were made - for different sizes of cookies. STL files can be downloaded from here.
This is how the created STL models look like in the Cura 3D printing program:
You can read more about printing time estimation in the Cura program here (no 3D printer required).
Print the 3D model on a 3D printer
The guys from the Moscow hackspace Neuron agreed to help in printing the molds (3D printing laboratory, thanks to Ivan).
This is what it looked like:
Printing process:
And the finished mold:
Making cookies
Julia (prodlenka project manager) helped in making cookies.
Here are her photos of the making process, based on the recipe:
Dough is made, rolled out, and with the help of molds we make cookies on it:
And after that we bake in the oven:
Result
Here is a story about 3D cookies at the event:
And Yulia demonstrates the result:
A fragment of the broadcast about 3D cookies.
Bonuses
If you want to make a 3D form using the cookiecaster service, then there is a bonus for you.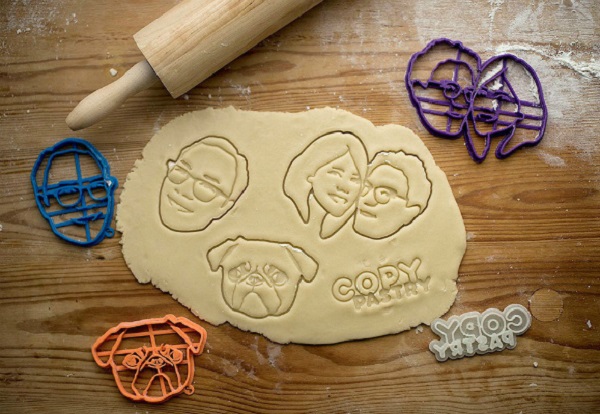
I talked to Ivan (Moscow) from the 3D printing laboratory, and they provide 15% discount all March for printing 3D cookie cutters (the average price is from 150 rubles/form).
Also, we, in Yekaterinburg in the MakeItLab hackspace, provide a 15% discount for printing cookie cutters throughout March.
Maybe someone will make cookies by March 8th :)
You can find a lot of ideas for 3d models on the Thingiverse service, for example, the query "cookie cutter" - returns more than 1000 options.
Let me remind you that you can look for 3D printing in your cities - in hackspaces, fab labs, CMITs, and simply in companies providing 3D printing services. It is recommended to print cookie cutters from PLA plastic.
BeffanaCraft
Admit it, would you like to receive a delicious gift with a unique design? It's not as difficult as it might seem at first glance! All you need is a little imagination and a 3D printer. Meet Ekaterina Zotova , a girl who has many unusual hobbies, one of which is the development and printing of original cookie cutters.
Hello to all printer lovers! My name is Katya and I want to tell you one of my stories :) This is a story about my love for sweets!
In general, I'm sort of like a digital artist, I draw for myself and for work, I paint and paint different things, interesting and not so much.
There are so many things in the world that you can easily get carried away that I never have a problem with what to do today.
A few months ago my brand new PICASO 3D Designer 9 came to me0025 , which I planned to use for creativity. Since I love to draw and model, and I'm also crazy about a lot of games and cartoons, 3D printing for me is an opportunity to turn my ideas into real objects.
Of course, I couldn't help but share the news about the purchase of the printer with my friends! I know a lot of very talented people, I'm really lucky.
Literally a few days after the arrival of the printer, she wrote me Tatiana Koshantaeva , my friend, gingerbread magician and confectionery master. Tanya does incredibly cool things.
She invited me to take part in the production of her gingerbread and cookies. What happens in the end can be seen in her Vkontakte group. I was the proud owner of several gingerbread sets, though not for very long. Due to the fact that I love sweets, they did not live long. I think that after watching you will also want to drink a cup of tea, or maybe even a couple, and eat something delicious! In this case, we have a delicious bonus =)
Beginning craftsmen carve each gingerbread by hand, which is commendable for perseverance, but when producing a large number of goodies, it absolutely makes no sense. Therefore, we decided to "automate" its production process: we printed forms for cutting out the contour of gingerbread cookies (cookie cutters), and also made several prints for testing on the test.
For example, I like to make cookies based on different cartoons, and Tanya does whatever the soul of the gingerbread customer wishes.
There are three options to get a unique mold for cookies - print ready-made models by downloading them from one of the sites with models in the public domain, make models yourself (in one way or another) or buy ready-made, interesting molds, for example, at the Masters Fair. In the Russian-speaking region, this direction of 3D printing is still very new, but in the same America it is quite common, so it is not difficult to find ready-made interesting models or order similar forms from someone.
If you have your own printer, then a self-made form will definitely be cheaper than a purchased one, and the more complex the form, the more benefit you will get - the cost may differ by 3-5 times.
If you do not have a printer and you order the production of molds from a private master, then the price will depend on the complexity of the work. Most often, if you want to get many forms at once, the masters, as a rule, make discounts. In the end, you get unique forms for the price of purchase.
It is worth noting that both purchased and home-made forms have their pros and cons.
If you want a simple and common form, you can just go to the store and buy it. As a rule, purchased forms, especially metal ones, are more expensive than hand-made ones.
The advantage of own forms, first of all, is uniqueness. This form can be reprinted if required. Another plus is the lack of restrictions for the culinary imagination.
Let's take a look at the steps involved in creating one of these forms.
My colleague loves cats, which is not surprising, everyone loves cats. At the same time, she did not want something very ordinary, and she turned to me with a request to help her realize the idea.
- She sent me a picture with a cat's skull (the authorship of a certain EXM, we did not find more accurate information about the author) and said that she wanted to bake such cookies.
- In Photoshop I made some black and white alpha masks to extrude the geometry I wanted. We take into account that the more complex the form and the more small details it contains, the more jambs you can get on the print. We try to simplify everything to the maximum, if we have such an opportunity.
- After that I opened Zbrush and extruded all the necessary masks from the plane.
- Usually makes 2, 3, 4 or more parts. I adjusted them to the height I needed, combined them into one model, and exported the already merged object for printing in the size I needed.
- You can render a model for a nice preview. For example, in KeyShot!
- Next, I opened Polygon, added our STL model and calculated its printing with PLA plastic, because it is considered to be environmentally friendly. For printing molds, medium print quality is sufficient, with a layer thickness of 0.2 mm. Printing time was about an hour.
Learn more