3D print glass bed adhesion
Improve Glass Bed Adhesion (Ender 3 & other Printers) – 3D Solved
If there’s one thing that takes a lot of time to learn when getting into 3D printing, aside from leveling the bed which is also very closely related to the topic at hand, it’s getting the prints to stick to the bed and to keep them from detaching halfway.
In this article, I will provide you with a couple of tips from my own printing experience, some more general and some more niche, which should help you keep the prints stuck to the bed without any issues.
So, without any further ado, let’s get started!
If you don’t want to have to go through all the trial and error that we did in order to find the Ideal Settings for creating high-quality prints on your Ender 3, then definitely check out our own Cura Profiles tailored specifically for the Ender 3 Printer Series.
1. Properly level the bed
Leveling the bed of your 3D printer ensures that the nozzle will always be at the same distance of the bed, be it in the center, the sides or the corners of the bed, and this ensures a good first layer which improves bed adhesion and the chances of achieving a successful print.
If your printer doesn’t have automatic bed leveling, then check out this article I wrote about the best affordable printers that come with it already built-in since this will make your life a whole of a lot easier, but otherwise just take some time to learn how to properly level the bed of your 3D printer using a piece of paper or a feeler gauge.
- Full guide on how to level the bed of a 3D printer here (demonstrated on an Ender 3).
2. Clean the bed
After multiple prints, the build surface of your 3D printer will start to accumulate dust and other particles which can interfere with bed adhesion. However, the main culprit here is your own finger grease from touching the build surface when removing prints.
Always clean the bed using IPA (Isopropyl alcohol) and a piece of cloth to wipe the bed clean. I wouldn’t recommend using a paper towel since some particles of the paper may be left on the bed.
As far as how often you should do this, it really depends; I clean the bed only after every 5-10 prints and I generally don’t run into any issues, but you need to find out what works for you. If you have to clean it after every print, so be it.
- Full guide on how to clean the bed of your 3D printer here.
3. Set the right bed temperature for the filament you’re using
ABS bed temperature set to 100°C in this example.This is something that I don’t see too many people talking about, especially on other blogs/forums, but it’s one of those things that really made a huge difference in my experience printing.
There is this study that was conducted about how bed temperature affected adhesion, and the conclusion is this; “This study shows a significant increase in adhesion forces when printing parts at a bed temperature slightly above the glass transition temperature of the printing material”.
What does this mean? Essentially, if your prints are warping or detaching from the bed, then you need to find out what the glass transition temperature of your filament is (PLA is 60°C, PETG 80°C, ABS, 100°C, etc.), and set the bed temperature slightly above it.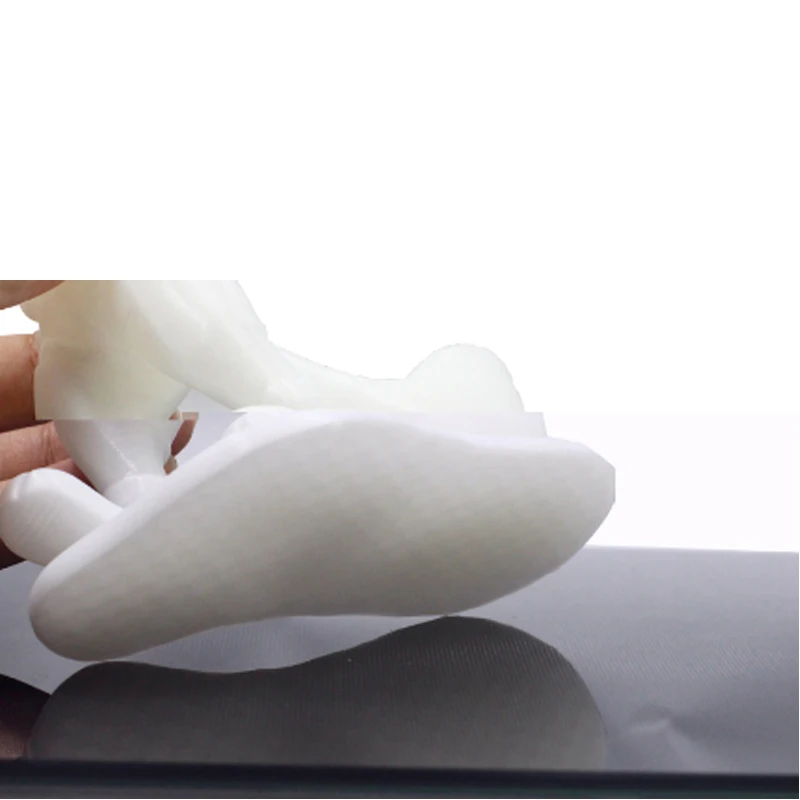
With PETG I found the strongest adhesion to be at 85°C and with ABS it was 110°C. PLA, on the other hand, sticks very well to the bed at 60°C and even lower.
Full guides on how to print PETG and ABS successfully here:
- How to Print ABS on an Ender 3
- How to print PETG on an Ender 3
4. Switch off the fan for the first layers
Turning the fan off while the printer is laying down the first couple of layers will help a lot in keeping those layers stuck to the bed since they don’t cool down too fast before they can create a nice bond.
In most slicers, this setting is always enabled by default and the fan won’t be running during the fist layer/layers, but you should make sure that this is the case with your slicer as well and check the settings.
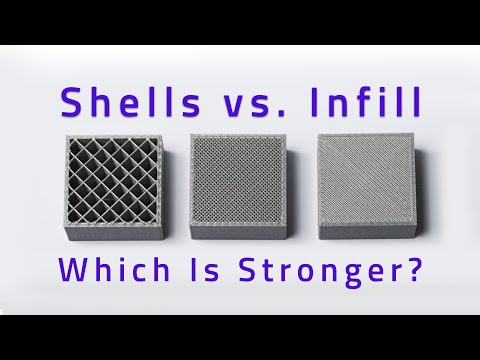
5. Print using a brim or a raft
PETG model printed with a Brim.A brim is a series of extrusions made around the model to further increase the contact surface area to improve adhesion. It’s, essentially, a wider first layer.
A raft, on the other hand, is a base that’s printed first where the model will then be printed upon.
Both improve bed adhesion by a lot; however, I almost never recommend using a raft since it uses more material, and removing it leaves a lot of unwanted marks on the model, whereas the brim also improves adhesion without being hard to remove and leaving very few marks, if any, on the model.
- Learn the difference between a Skirt, Brim and a Raft here, as well as how they affect print speed, filament usage, and more.
6. Apply Glue Stick to the build surface
ABS printed on stock Ender 3 with glue stick applied (no warping).Applying a small amount of glue stick to the bed before printing improves bed adhesion drastically, and I mean drastically.
I tested printing ABS on an Ender 3 without using an enclosure, which is generally not recommended when printing ABS since it warps, and got near perfect results with it since the glue stick kept the models stuck to the bed really well (I used a brim for better adhesion as well).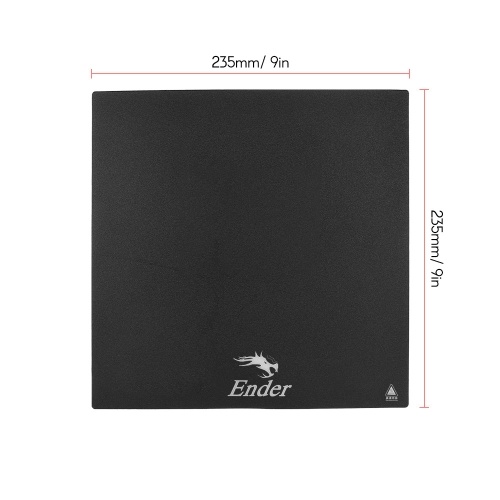
Now, since the glue stick helps the print to stick to the bed, removing it, especially while the bed is hot, can be near impossible. However, if you let the bed cool down to room temperature, removing the model becomes really easy.
So, always let the bed cool down completely before removing then print.
To remove the glue from the glass bed, wash it with hot water and soap and then let it dry completely before installing it again.
7. Apply Hairspray to the build surface
Applying a small amount Hairspray to the bed has a similar effect to the glue stick, since improves bed adhesion by quite a lot.
As far as which one is best, in my experience the glue does perform slightly better, especially when printing ABS.
One thing to note though is that, as I mentioned earlier, with the glue stick you only need to let the bed cool down and the print comes right off, with the hairspray, however, this is not the case and even after letting the bed cool down to room temperature it’s going to be harder to remove the print.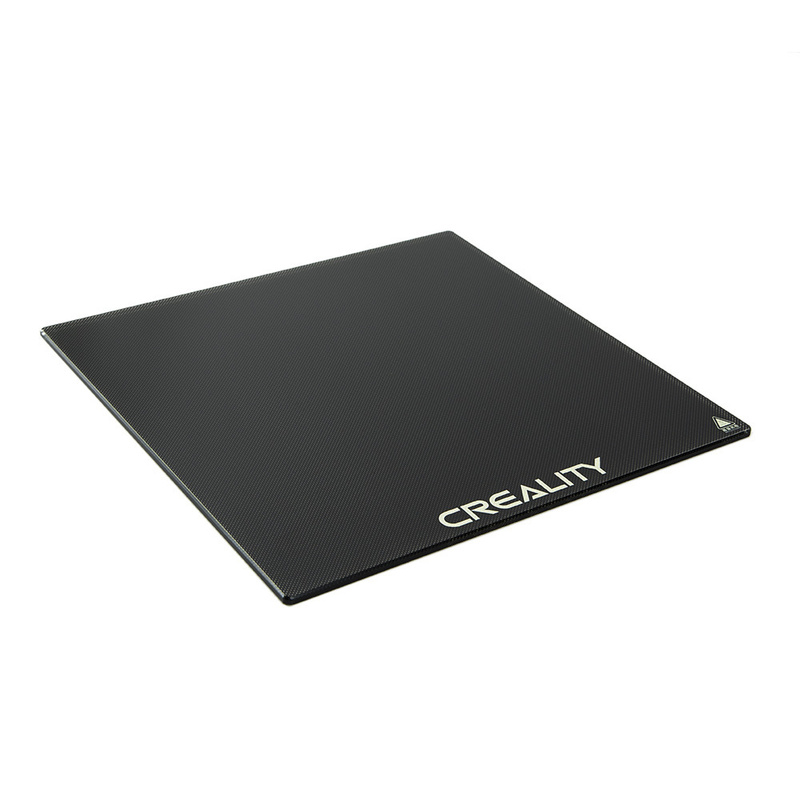
To completely remove the hairspray from the bed, use Isopropyl alcohol or Acetone (Acetone works a little better).
8. Use Painter’s tape or blue tape
Applying a couple strips of painter’s tape or blue tape to the bed may help improve bed adhesion, you need to make sure to not leave any gaps between the strips, however.
I tested this when printing ABS and the filament stuck really well to the tape and it also made removing the print a breeze since you only need to grab the tape and start peeling it off the bed, and the print will simply follow.
Now, even though the print did stick really well to the tape, I did run into the issue once of the tape not adhering to well to the bed, and the warping force of ABS pulled on the tape so hard that it detached.
9. Use an enclosure (mostly for ABS)
One of the main reasons that prints don’t stay stuck to the bed, aside from a badly leveled bed, wrong bed temperature, greasy bed, etc., is that all thermoplastics contract once they start to cool down, and this exerts a pulling force upwards which can result in warping, cracking of the print, and may also cause the print to become loose and detach from the bed.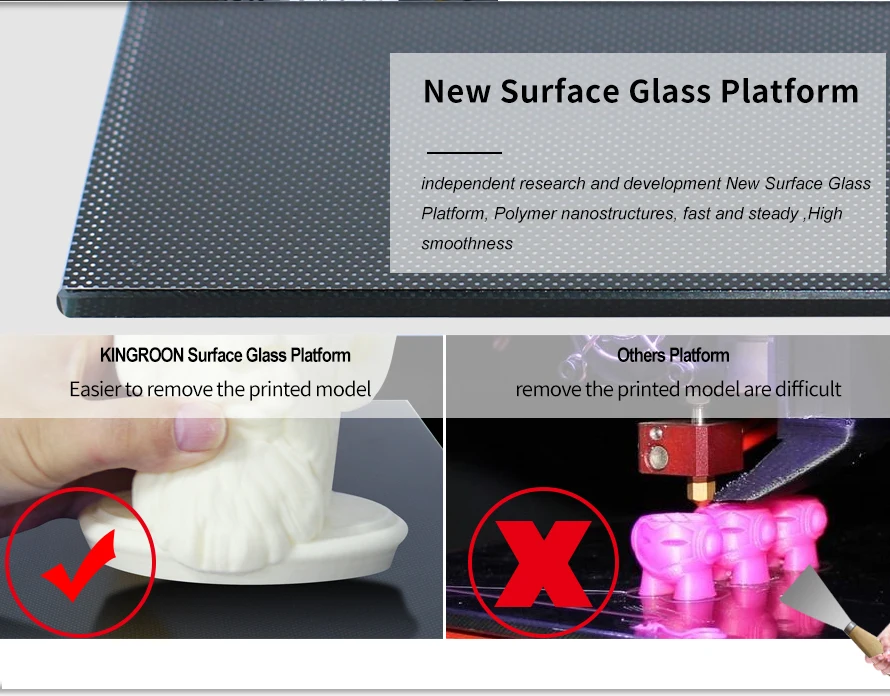
To prevent this, you need to keep the temperature inside the printer (around the model) as high and consistent as possible since you want it to cool down slowly and evenly. This is especially true with filaments such as ABS which contracts a lot more when cooling down than other filaments, like PLA.
The easiest fix is to get an enclosure since you put the printer inside of it, start the print and close it (some printers come with one already built-in). This will ensure that the printing temperatures inside of the printer stay consistent and well above room temperature, keeping the model from warping, detaching from the build plate, and even from cracking.
There are plenty of affordable enclosures out there, and you could also build your own or even throw a cardboard box over the printer (absolutely not recommended since it’s flammable), but the one that I’d recommend getting is this one made by Creality which is non-flammable and extremely affordable.
10. Tape down the part
If none of the above work, then you could certainly McGyver it and use the tools at your disposal to get the print to stick to the bed.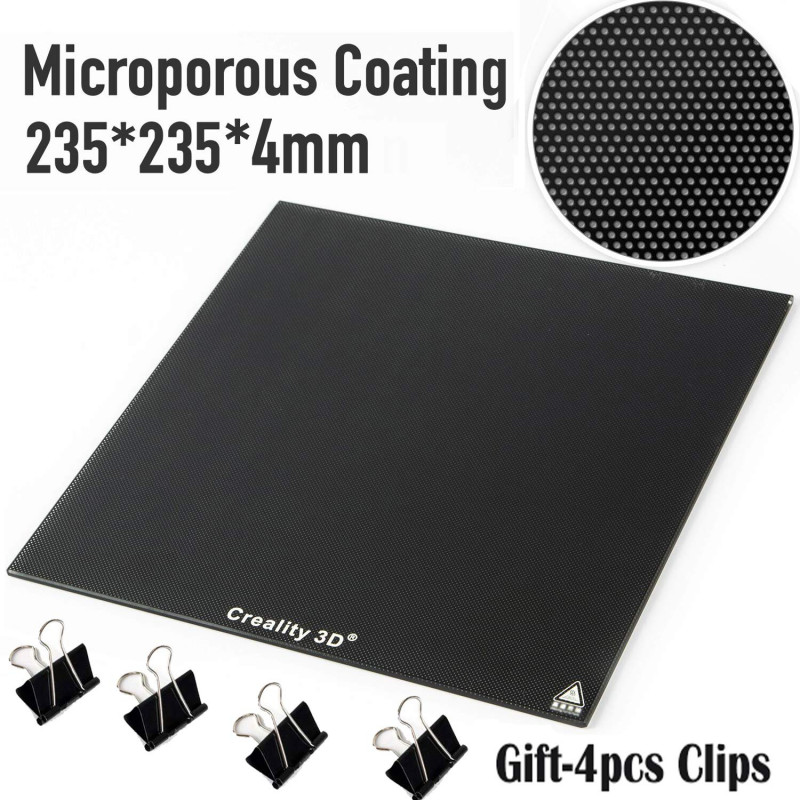
In this specific case, I’m talking about grabbing that same Painter’s tape or blue tape I mentioned earlier and taping down the edges of the print once the printer is done with those lower layers.
Of course, you don’t want to apply tape to any part of the print that’s unfinished since the printer would need to keep printing there, but this is definitely a valid method and it does work (I’ve done it with one or two prints that started to come loose after a couple of hours since I didn’t want to restart the whole process).
If you don’t want to have to go through all the trial and error that we did in order to find the Ideal Settings for creating high-quality prints on your Ender 3, then definitely check out our own Cura Profiles tailored specifically for the Ender 3 Printer Series.
Conclusion
The most effective steps of this entire guide are; Leveling the bed properly, setting the right bed temperature (slightly above the glass transition temperature for better results), print using a brim, apply glue stick or hairspray, and if you’re printing with ABS, ASA, etc. , using an enclosure.
I hope this information was useful, have a great day!
We created a recommended products section that will allow you to remove the guesswork and reduce the time spent researching what printer, filament, or upgrades to get, since we know that this can be a very daunting task and which generally leads to a lot of confusion.
We have selected just a handful of 3D printers that we consider to be good for beginners as well as intermediates, and even experts, making the decision easier, and the filaments, as well as the upgrades listed, were all tested by us and carefully selected, so you know that whichever one you choose will work as intended.
How to Optimize Ender 3 Glass Bed Adhesion
- Author
- Recent Posts
Martin
Martin has a M.Sc. in physics and has gained many years of experience in industry as a lab manager and quality assurance manager. He has now tested dozens of 3D printers and is happy to share the collected experience with each new article.
Latest posts by Martin (see all)
Disclosure: Links marked with * are Affiliate Links. I earn from qualifying purchases if you decide to make a purchase through these links – at no additional cost for you!
The Creality Ender 3* offers a wide range of features, promises an excellent print image and is also available at a very fair price.
Due to the uncomplicated construction of the already pre-assembled printer components, this 3D printer is also optimally suited for beginners. If you want to optimize the included printing bed, Creality offers you the option of a hardened glass printing plate*, which you can place on top of the heating bed of your Ender 3 and fix it with clamps.
Durability is not the only argument for adding a glass plate to your Ender 3. Other reasons are the easy handling and the much better adhesion of your 3D print.
Initially, however, problems can occur exactly at the latter point. Especially if you are already used to working with a conventional printing bed, there are often problems with the adhesion of the 3D print on the glass plate.
There are three main reasons why there can be complications with the adhesion of your 3D print to the glass plate:
- distance between nozzle and printing bed too large or too small
- Temperature variations on the printing plate
- not or insufficiently performed leveling of the printing bed
In the following text, you will learn how exactly the problems mentioned above are manifested and how you can fix them so that your 3D print will stick to the glass plate in the future.
You’ll also get valuable tips on how to get the best performance out of your Ender 3 and turn it into a showcase for 3D printing.
Ender 3* + BLTouch Sensor + Glass Bed = Perfect Prints! (source: reddit)Table of Contents:
- 1 The Main Reasons for Incorrect Adhesion of the 3D Print on the Ender 3 Glass Bed
- 2 Effective Tips to Improve the Adhesion of the Ender 3 Glass Bed
- 3 Further Measures to Optimize Adhesion to the Glass Bed
- 4 Related Questions
The Main Reasons for Incorrect Adhesion of the 3D Print on the Ender 3 Glass Bed
A high-quality printing plate is especially important for creating the very first layer of a 3D print.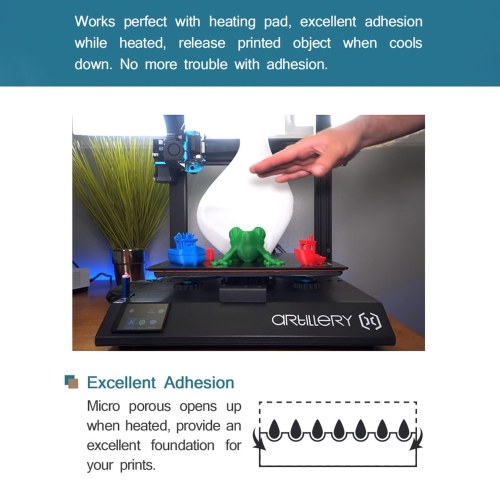 The company Creality has therefore developed a glass plate as an extension for the Ender 3, which promises a clearly optimized adhesion due to its silicone carbon coating.
Especially if you want to print with volatile materials, such as ABS plastic, it is recommended to purchase this glass plate.
Ender 3 Glass Bed Upgrade*Check Price at:
Amazon*
The Correct Adjustment of the Distance Between Nozzle and Printing Bed
If you create a 3D print with a thermoplastic material, it is melted, then pressed through the nozzle and finally pushed out onto the printing bed.
It is necessary for the plastic to adhere to this construction platform in a liquid state. Theoretically, a greater distance between the liquid plastic and the printing bed means stronger adhesion between the two.
Many printing beds have a rough texture, which is supposed to grip the molten plastic better. This also applies to the printing bed supplied with the Ender 3.
Glass plates on the other hand are flat, smooth and very stiff. The background is that the even and coherent contact to the surface should optimize the further development of the 3D print.
However, if adhesion problems occur, these can be remedied by correctly adjusting the distance between the nozzle and the glass plate, thus improving the adhesive properties of the plastic.
Temperature Variations on the Printing Plate
The Ender 3 has a heatable printing bed whose temperature can have a decisive influence on the adhesion of the 3D print. Without a heated printing bed, freshly printed layers cool down too quickly and there is a risk that they will detach from the surface and deform. This can result in faulty or even unusable 3D prints.
With the correct temperature setting, it is important to ensure that the layers of the 3D print can cool down sufficiently quickly for the subsequent layers to adhere smoothly. Proper heating of the printing bed of your Ender 3 is therefore the key to excellent adhesion of the material to the glass plate.
Leveling of the Printing Bed
As already mentioned, the correct distance between the nozzle and the printing bed is crucial for optimum adhesion of the material to the building board. However, this is completely useless if the printing bed is uneven and therefore there is no even distance to the nozzle.
For this reason, it is important that you regularly check the leveling of the printing bed.
You can use the visible printing bed leveling knobs, which allow an uncomplicated adjustment of the construction panel. Unfortunately, these do not stay in their adjusted position but have to be readjusted regularly.
Even a small change to the knobs can affect the overall balance of the Ender 3 printing plate. So if there are adhesion problems, the correct alignment of the printing bed should be checked using the printing bed leveling knobs.
Effective Tips to Improve the Adhesion of the Ender 3 Glass Bed
In the following, you will learn how you can improve the adhesion of your glass plate considerably by implementing simple steps and thus optimize the quality of your 3D prints.
Check the Flatness of the Glass Plate
It may sound stupid, but a high-quality printing bed must be completely flat and even.
If you encounter adhesion problems, you should therefore first check that the glass plate is not warped. With the help of a straight ruler, you can check the flatness of the glass bed. If the printing surface is uneven, the first layer of the 3D print may not adhere properly, which may lead to misprints.
Align the Glass Bed Correctly
As already mentioned, the correct alignment of the printing bed is crucial for the successful creation of your 3D prints. If one side of the printing plate is closer to the nozzle than the other side, the result is that while one part of your 3D print may be perfectly layered, the other side will be anything but stable and pretty.
So in the end you will only get a misprint. Make sure that each point of the printing plate is at the same distance from the nozzle by correctly adjusting the printing bed leveling knobs under the building platform.
Clean the Glass Bed Regularly
A well maintained and clean working material is a basic requirement for a successful work result. This also applies to 3D printing and your 3D printer.
Especially the glass plate of the Ender 3 attracts dust, dirt and oil, which not only impairs the adhesion of the material on the plate but can endanger the entire print.
If you want to optimize the adhesion of the glass plate, clean it regularly with a clean cloth and some isopropyl alcohol.
Before and After Using Isopropyl Alcohol on a Glass Bed (source: reddit)Select the Correct Distance Between the Nozzle and the Printing Bed
You already know how important it is for a good quality of your 3D print that the print bed with its glass plate has an overall even distance to the nozzle.
However, it is just as important to generally set a correct distance between the nozzle and the printing bed to ensure optimum adhesion of the plastic to the glass plate.
If the nozzle is too far away from the printing bed, the molten plastic cannot adhere. On the other hand, too short a distance between the nozzle and the printing bed can damage both components as well as damage the first layer of the 3D print, as the plastic has no space to flow evenly under these circumstances. The optimum situation is when the plastic is pressed lightly and evenly through the nozzle onto the glass plate without obstructing the flow. You can either adjust the distance between the nozzle and the printing bed manually or by using the slicer or firmware settings.
Unfortunately, you will not be able to get a guarantee to get a perfect first layer. However, in order to reduce the negative effects of an incorrect print bed alignment or distance between the nozzle and the print bed, you should print the first layer at a slightly higher height than the rest of the model.
For example, for a printer with a nozzle of 0.4 millimeters, a layer height of 0.3 millimeters is a suitable value.
Use an Adhesive
To avoid insufficient adhesion of your 3D print to the glass plate, you should consider using an additional adhesive that is applied to the plate.
Traditional glue sticks are often used for this purpose, but many 3D print beginners also choose to use hairspray.
However, special 3D printing bed adhesives are also available. I only use glue sticks from Magigoo.
Regardless of which adhesive you choose: If you have problems with the adhesion of your 3D print on the glass plate, it is generally advisable to choose one of these options instead of working completely without the addition of glue. In general, a heated glass plate has good adhesion, but especially defined corners or even small details of a model tend to warp or even completely detach from the plate.
Simply apply a thin, even layer of the adhesive of your choice and look forward to an immediate improvement in the adhesion of your glass bed.
Adjust the Temperature of the Printing Bed
As described above, adhesion problems of the 3D print to the glass plate can occur if the first layer of the glass plate cools down too quickly during the printing process.
In such a case, there is a risk that the entire model will shrink and not be able to adhere to the plate. The Ender 3 has a heated printing bed, so you usually do not have to deal with such problems.
If you still find that your 3D print does not stick to the glass plate, you should gradually increase the temperature of the printing bed by five degrees. This usually already helps to prevent parts of the model from warping during the printing process or from completely coming off the glass plate.
However, if you are working with PLA filament, you should be aware that a temperature of more than 65 degrees can cause the first layer to be applied too thickly.
Know Your Slicer Software
If your slicer software only allows you to set one speed for all layers, you should orientate yourself on the first layer whose speed is then the speed for the rest of the model.
While this may take more time to complete your 3D print, it’s still a better option than ending up with a faulty model and having to start the printing process all over again.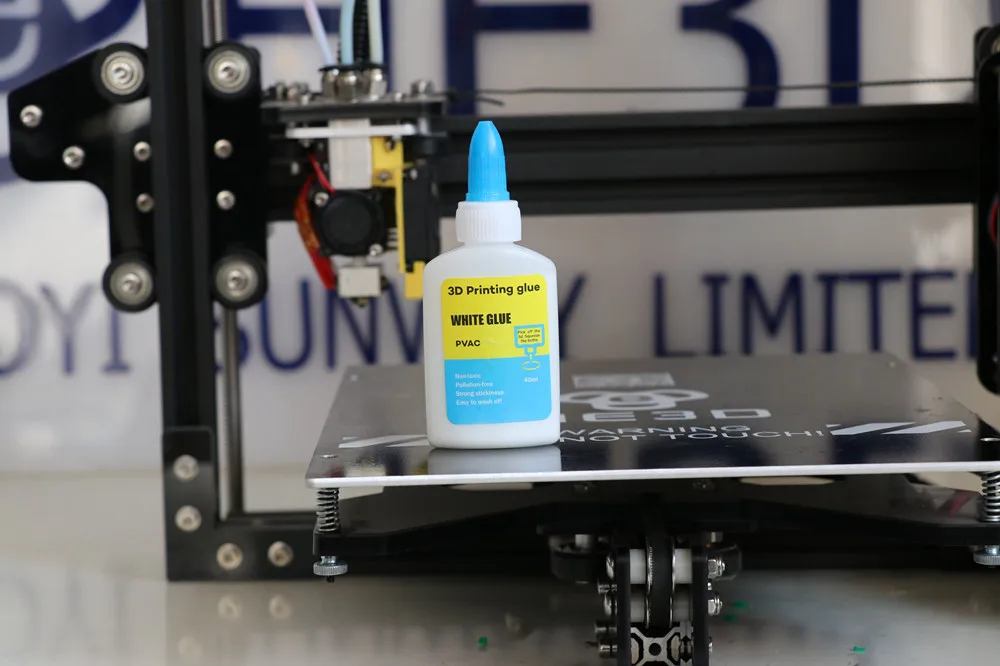
However, if your slicer software allows you to print the first layer of the 3D print at a speed that is independent of the rest of the model, then it is a good idea to set it a little lower. Depending on the selected print model, this value can then be adjusted individually.
Switch Off the Fan
Another useful measure to optimize the adhesion of the glass plate is to switch off the printing fan while the first layer is being printed. This ensures that it does not cool down too quickly and warp.
To turn off the fan, check the advanced setting of your slicer software. As soon as the first layer has been printed and adheres well to the glass plate, turn on the printing fan again to print the following layers.
Further Measures to Optimize Adhesion to the Glass Bed
Now you know the conventional measures which can help you with possible adhesion problems of the glass plate of your Ender 3. You are wondering what you can do if all this advice has no effect? In this case, you can try the following two tips:
Roughening of the Surface of the Glass Plate
A slightly roughened glass plate can provide better adhesion of the first layer of your 3D print. It is recommended to use fine-grained sandpaper with which you can give your glass plate a light texture by careful sanding.
This facilitates the adhesion of the first layer to the glass. By the way, such sandpaper is also excellent for removing stubborn lumps or stains from the glass plate.
Fixation of the 3D Print with Adhesive Tape
The use of adhesive tape (“Blue Tape“) can be helpful not only in retail, engineering or even in the fashion industry, nowadays adhesive tape is even considered extremely useful for 3D printing.
Scotch Blue Tape*If your model continues to warp despite all measures taken or even detaches completely from the glass plate, secure the problem areas of the 3D print with adhesive tape on the glass plate.
This may not sound like a professional solution, but it works and allows you to successfully complete your model. Remember, however, that you will have to readjust the height after you have glued your model since the tape is also thick.
With the measures described above, your Ender 3 now has the optimal conditions to create a first layer that adheres perfectly to the glass plate. However, if you are still struggling with inferior 3D prints, the reason may be that you have used an inadequate 3D model as a template.
Related Questions
Can I Print any 3D File or 3D Model?
Theoretically, any 3D file or model can be printed. However, the prerequisite for this is a complex post-processing and inspection with additional suitable software.
Usually, a 3D model is built only for the visualization of the architecture, the representation in a video or also for screenshots. The relation to reality is not so important here, the density and orientation of the individual surfaces of the model are not important either.
A common beginner’s mistake is that although the design of the 3D model looks correct on the monitor, it is useless for 3D printing. The reason for this is that only the visible surfaces are processed, but the connection of triangles or individual objects is neglected just as much as the correct alignment of the surfaces.
However, all this is necessary to obtain a flawless 3D print that can also adhere to the printing bed.
What does “Warping” Mean?
The term “warping” is used to describe the tendency of a component of a 3D model to bulge or warp during the printing process. As a result, this will partially or, in the worst case, completely detach from the 3D printer’s build plate.
This effect is often observed especially when using ABS and HIPS* filaments. PLA on the other hand is less susceptible to this problem.
Warping is basically a consequence of an uneven distribution of residual stresses in the filament used, which in turn is caused by different cooling rates of the individual layers in a 3D model.
The molten plastic shrinks during the cooling process. The greater the temperature difference between the individual layers, the greater the shrinkage and the associated warping effect.
Since PLA shrinks only very slightly, there are fewer problems with a warping effect here than is the case with ABS.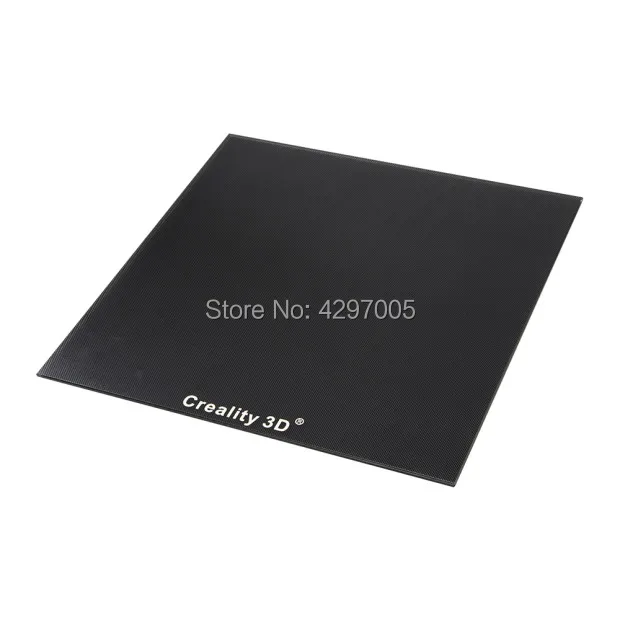
What can be done if the Layers of the 3D Model become detached during the Printing Process?
In 3D printing, a slicer software cuts the three-dimensional object into ultra-fine slices and then transmits them as a print job to the 3D printer. The printer implements the print job by conveying the filament to a hot end, where it is liquefied and pressed through the nozzle.
The travel movements and the distance between the print head and the print bed are responsible for bringing the liquefied plastic into a new form, which then cools down again. In order to obtain a solid printed 3D object, a firm bond must be created between the individual layers.
Without this connection, the layers separate from each other and the 3D object falls apart or splits.
To avoid this, the first step is to set a suitable layer height. As a rule of thumb, the layer height should be 20 percent smaller than the diameter of the nozzle. The layer height can be adjusted using the Slicer software. The lower the layer height is set, the finer the outer shell of the finished 3D print appears. However, a very low layer height also means a longer printing time.
The second step is to check the temperature settings. If the layer height is not too high, but the individual layers still do not bond with each other or do not bond sufficiently, the reason may be that they cool down too quickly.
Hot plastic generally bonds better than cold plastic. The temperature settings recommended for the respective filament should therefore be followed and, if necessary, gradually increased by 5 degrees in each case to achieve better bonding of the individual layers.
Disclosure: This website is the property of Martin Lütkemeyer and is operated by Martin Lütkemeyer. Martin Lütkemeyer is a member of the Amazon Services LLC and other Affiliate Programs. These are affiliate advertising programs designed to enable websites to earn advertising revenue through advertising and linking to Amazon.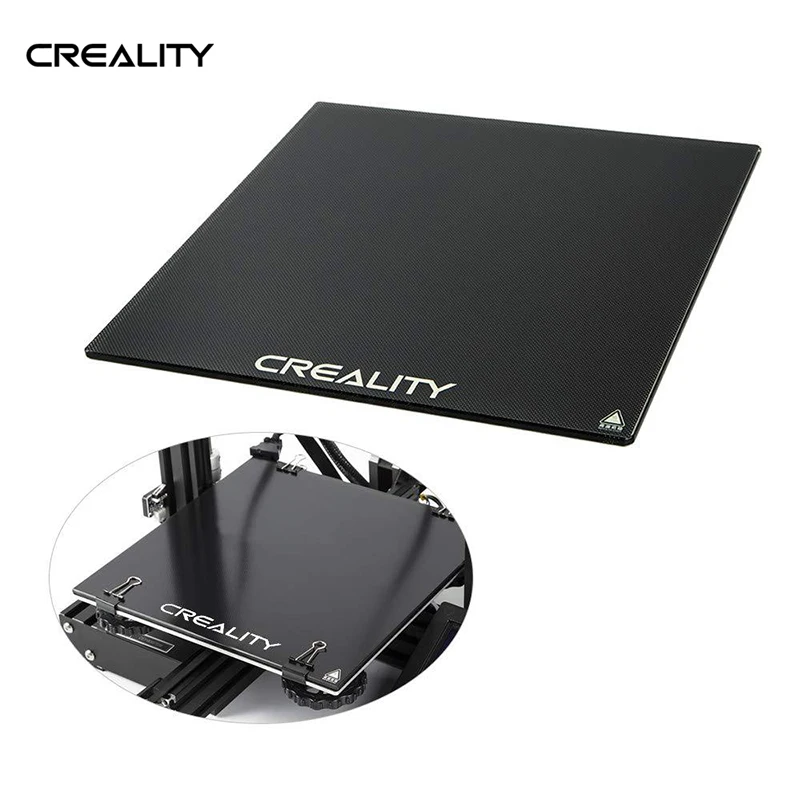 com and others. Links marked with * are affiliate links.
everything you need to know
Many 3D printer owners experience parts coming off the table during 3D printing. Let's take a look at the causes and solutions.
What is adhesion?
The very concept of "adhesion" means the adhesion of surfaces of dissimilar bodies. In 3D printing, platform adhesion is the ability of the plastic that a part is made of to adhere to the surface of the stage during printing.
If the adhesion is insufficient, then the manufactured parts may be deformed or even come off the table. During 3D printing, the part must be firmly attached to the platform, and after completion, it should be easy to remove. Filament manufacturers typically recommend adhesives for their filaments, and 3D printer manufacturers offer worktables in aluminium, glass, stainless steel, or even with specialty coatings. All this helps the plastics stick better during printing, but there are no working surfaces that are equally well suited for all types of plastics.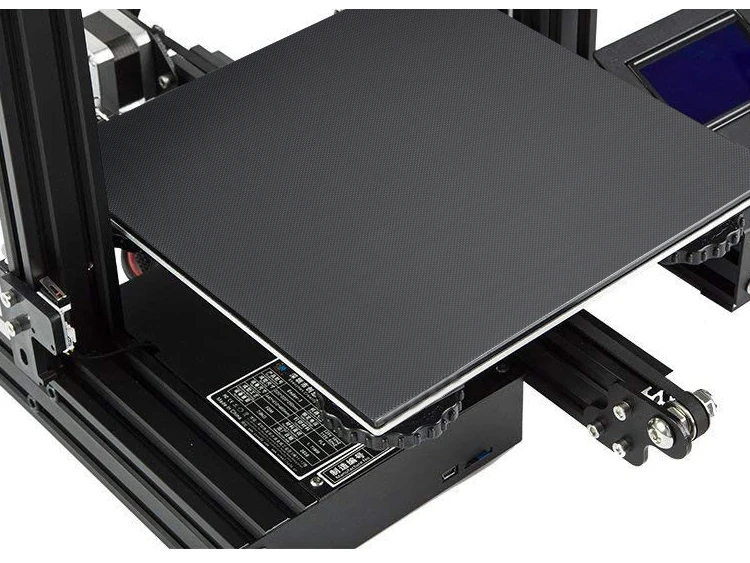
Also, do not forget about thermal expansion, which causes a change in the dimensions of manufactured parts at different temperatures. The difference in temperature between the bottom and top of a part can cause the edges of the part to peel off during 3D printing. This mainly applies to materials such as ABS, which require a heated worktable to work with. When printing with these materials, the layers need to cool down a bit to be able to build a 3D object at all, but not so much as to cause peeling at the edges.
In this article we will look at what affects adhesion and how to solve many problems in terms of adhesion of products to work surfaces.
3D Printer Enclosed Chamber
For printing on materials with high heat shrinkage, the best option is to use 3D printers with an enclosed chamber that prevents drafts and retains heat. Many printers are equipped with an active chamber heater that maintains the desired temperature and does not allow the parts to cool.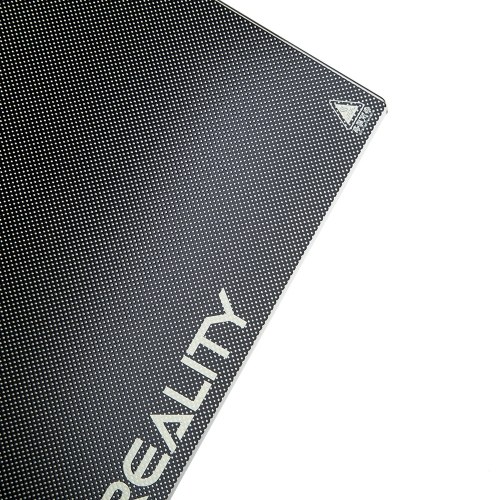 A uniform background temperature during 3D printing reduces warping and ensures better adhesion.
Owners of open printers are left to come up with various devices (for example, boxes) that cover the 3D printer to keep heat, or build heat-retaining walls around the printed model, which increases printing time and filament consumption.
First coat adhesion
The first thing you should pay attention to is the adhesion of the first layer. This is one of the most common problems faced by almost all printers. If the first layer is laid unevenly, then the percentage of rejects for the rest of the part increases very much, so it is very important to solve the issue of adhesion of the first layer before 3D printing. In most cases, the problem is solved by calibrating the work table and adjusting the distance between the nozzle and the work surface.
It is important to correctly set the distance between the nozzle and the stage surface
Brim and Raft methods
For better adhesion of the product to the working surface of the table, in the print settings it is often necessary to create additional elements - the substrate or the frame of the model, which help to keep the manufactured part on the table. Brim or Raft increase the contact surface of the plastic with the work surface around the lower layers and thereby increase traction.
Underlays or Rafts consist of several layers and are horizontal grids of filament located under the model. The raft is used as a base for the first layers of the product and is designed to increase the level of adhesion. In addition, the raft helps to level the surface of the table: if there are irregularities on the surface, they are leveled to a certain extent by the substrate, and the model is printed already on a flat base. Another advantage of rafting is that it reduces the chance of problems due to too much or too little gap between the nozzle and the table when laying the first layer.
Brim is used to stabilize small patterns or "islands" (separated areas of the printed product). Brims increase the contact area and help the model stay on the table if it comes into contact with the surface in small areas.
Worktable temperature and adhesion promoters
After calibrating the platform and adjusting the gap between the nozzle and the table surface, let's move on to the next question. The next reasons for poor adhesion may be the wrong stage temperature (if the 3D printer has a heating option) and the wrong selection of adhesion promoters for a particular filament.
Working stage temperature selection
One of the common causes of poor adhesion is the wrong stage temperature selection for a particular material. When the molten filament is applied to the table and then cools, deformation occurs. If the temperature of the stage is incorrectly selected, the outer edges of the printed product are compressed, and we get warpage: the edge of the product comes off, clings to the nozzle, and the product completely comes off the platform.
Usually, 3D printing filament manufacturers list the recommended heating temperature for the stage on their website or boxes.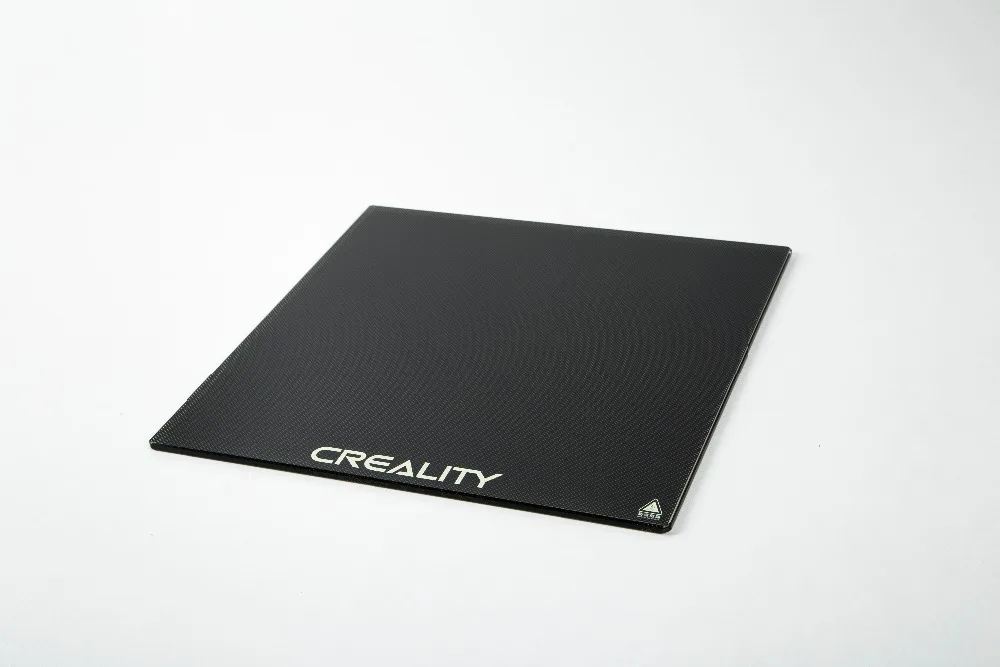 For the most common materials, you can use average values.
Examples of worktable temperatures for some materials:
- PLA: 60°C
- ABS: 100-110°C
- PETG: 85°C
- Nylon: 100°C (depending on material composition) )
- Polycarbonate: 110°C (the higher the temperature, the better)
Worktable temperatures for each manufacturer's plastic may vary. You can choose the optimal temperature only empirically.
Adhesion agents
To increase adhesive properties and reduce the risk of damage to the glass surface of the desktop, additional agents are often used, such as varnish or glue for 3D printing, PVA glue, stationery glue stick, dissolved ABS plastic (so-called "ABS juice" ), blue tape, etc. One tool for printing all types of plastics will not be enough. In our article, we will not consider such folk remedies as beer or sugar syrup, but will focus on more traditional methods.
Basic adhesives:
Varnish or adhesive for 3D printing
The days of hair sprays are long gone, and now almost no one uses them due to low efficiency.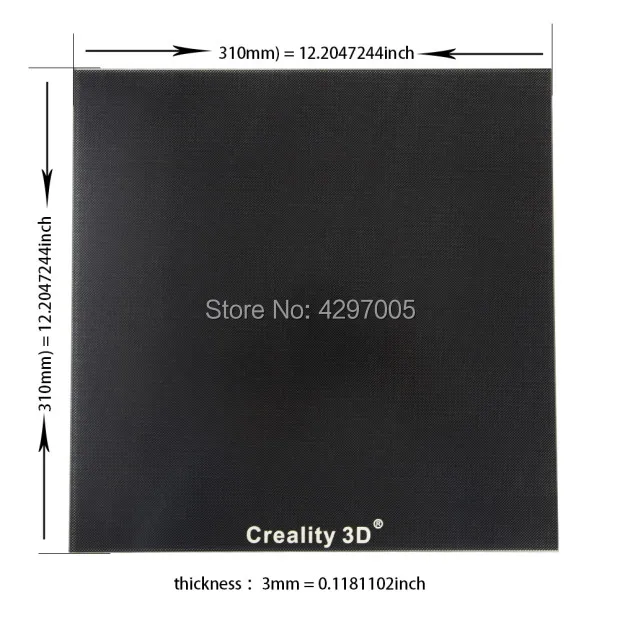 More effective adhesives for 3D printing have come to replace.
Typically, 3D printing lacquers and adhesives are formulated to take into account the properties of different filaments and allow the first layer of the printed model to be reliably adhered to the worktable. Simply put, these are universal tools suitable for working with multiple types of filaments.
There are already quite a few manufacturers of 3D printing varnishes and adhesives on the market in various volumes and for any budget. It's not worth saving - one bottle will be enough for several months of printing, and you will save your nerves and time spent on reprinting damaged parts.
Easy to use: spray varnish or glue on the platform and spread it evenly over the surface with a clean, soft cloth.
ABS juice
Composition for those who like to save money or who do not have glue or varnish on hand. It is made simply: finely chopped ABS rod or the remnants of a previous printing with ABS plastic are immersed in acetone and after a few hours a thick solution is obtained that can be applied with a brush even on a cold platform.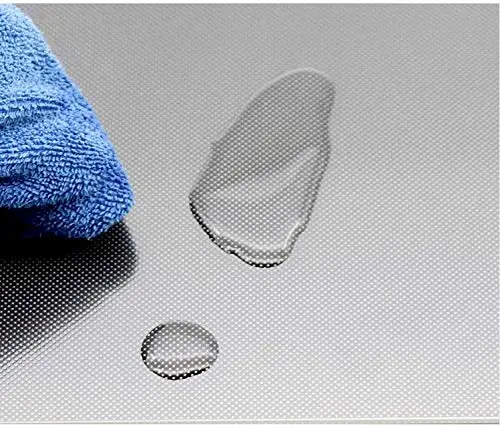
This method is very reliable as an additional adhesive, but acetone evaporates during 3D printing and creates an unpleasant odor.
PVA glue, stationery glue stick
PVA glue is applied to the work surface with a brush and rubbed until a uniform thin layer is obtained. As a rule, when hardening, the glue becomes transparent. After drying, you can start 3D printing. The method is not bad, but the reliability of such a method is doubtful due to the fact that not all PVAs work well.
Stationery glue stick is mainly used when there is nothing else at hand. The most popular option is Kalyaka-Malyaka glue. The glue is applied in one layer, after the platform cools down, the part is easily separated, and the glue itself is easily washed off the glass and from the printed part.
Kapton film, blue masking tape and Lomond film
Masking tape is more suitable for 3D printers without platform heating. The adhesive tape is carefully glued to the entire area of the table and allows you to print small details without heating the table.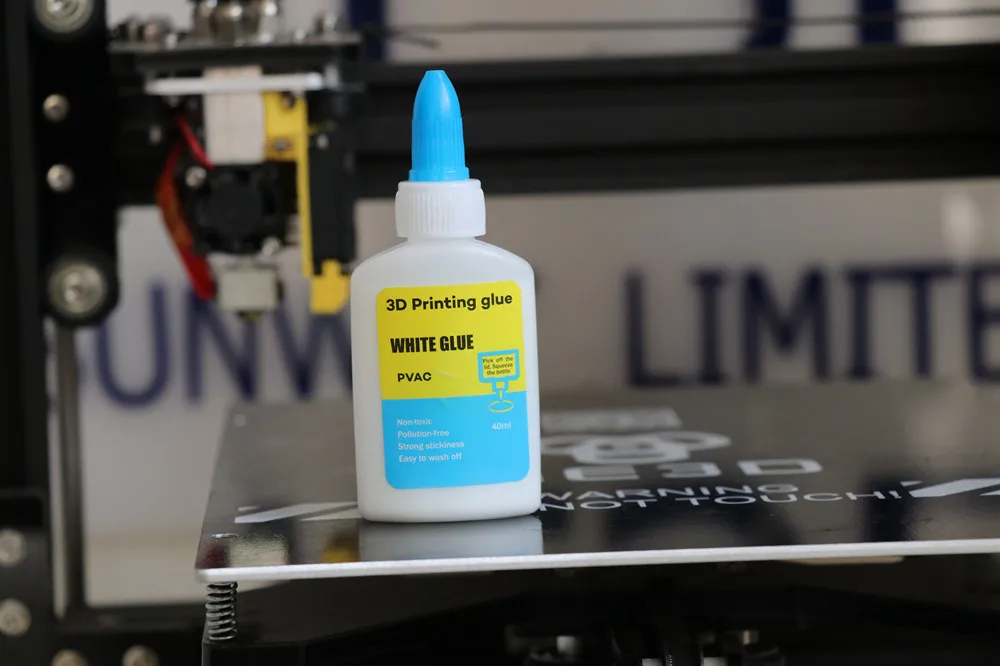 This option is especially suitable when working with PLA plastic, however, with an increase in the area of \u200b\u200bproducts, the edges of the parts can come off along with the adhesive tape, so the relevance of this method is limited. Kapton tape or Lomond film is more commonly used.
On Kapton tape, the lower surface (the sole of the product) is very smooth, the parts are well separated after cooling, but you can’t leave the product on the cooled table, as the plastic pulls the tape together, and air bubbles form under it. When 3D printing on Kapton tape, it is necessary to heat the platform and additionally smear the adhesive tape with glue. Suitable for 3D printing of medium-sized products.
Lomond film was popular until various adhesives appeared. After gluing, the top layer on the film itself must be washed off for better adhesion. Details after printing on such a film are quite difficult to tear off. Over time, bubbles also form under the film, so the film must be changed regularly. Suitable for 3D printing large items.
Additional Points to Remember
PLA is the least demanding polymer. For stable printing with polylactide, it is not necessary to treat the surface of the table with additional adhesives, a clean glass surface is sufficient. A prerequisite is that the platform is heated to 60°C. If the platform is not heated, then it is better to print using adhesive agents - varnish, 3D printing glue or blue tape for small parts.
PLA also loves airflow, so keep the fans on full.
ABS is highly shrinkable and needs help to better adhere to the surface. The main types of additional tools are varnish or glue for 3D printing, ABS glue, stationery glue stick, PVA glue.
When working with ABS, the platform must be heated to 100-110°C. It is advisable to use 3D printers with closed cameras that support high background temperatures. When 3D printing on open printers, it is necessary to use a heat-retaining cocoon around the model. Many slicers already offer this feature. Blowing of products made of ABS plastic is highly undesirable, as cracking of parts in layers and detachment from the working surface due to shrinkage can occur.
PETG is a very easy to work material that does not require high temperatures or fine print settings. Plastic has excellent adhesive properties and adheres very strongly to clean surfaces. On the other hand, high adhesion can lead to separation of pieces from glass tables when products are separated, so it is advisable to apply separating layers on the work surface - the same glue or varnish for 3D printing. This will help both separate products and prevent damage to the glass.
Flex has high adhesive properties, bonding well not only between coats, but also to work surfaces. Again, it is advisable to use 3D printing varnish or glue to avoid damaging the glass. Film coatings are not recommended.
In the case of composite materials , the choice of adhesive agents is mainly determined by the type of material serving as the basis. Usually recommendations for preparing for 3D printing with composites can be found on the manufacturer's website. If not, please contact technical support for advice.
For example, the FormaX composite from the X-line range is based on ABS plastic, but the properties of the composite material differ from pure ABS due to the presence of carbon fiber filler. Formax is not characterized by cracking in layers, but the composite requires the use of additional adhesive agents, so the manufacturer recommends using varnish or glue for 3D printing
Material storage and drying
The effect of moisture on filaments can be both cosmetic and functional. The most innocuous result of high humidity is a change in the textures of 3D printed products, although this is rarely limited to roughness alone (and haze when it comes to transparent plastics) and is usually accompanied by a decrease in interlayer adhesion and adhesion to the substrate. A more serious effect can be an uneven supply of plastic: water in a sufficiently wet filament boils when passing through the hot end, and the resulting steam leads to the appearance of bubbles in the material being laid and even to jerky extrusion with all the ensuing consequences in terms of quality and poor adhesion. Detailed instructions for storing plastics are available at this link, and for drying plastics - here.
That's all for now.
The Wiki on our site has separate, detailed articles about each of the filaments. How to print and with what settings. Come read here.
If you have additions or comments - we are waiting for your answers.
Regards, REC3D team.
Photos from the blogs of Sergey and akdzg are published in the article.
Cleaning the 3D printer table. Tips and Tricks.
3D printing is a very unstable process, I think everyone who is at least slightly familiar with plastic filament printing technology will agree with this. Unpleasant crashes in the 3D printer can occur for various reasons, and one of the most common reasons is the detachment of the model being grown from the desktop surface. And as a rule, this happens in the middle of printing, when you are already convinced of the stability of the press and are distracted by another activity. It is precisely for this reason that ensuring good adhesion of the first layer to the platform is very important for the successful completion of 3D printing.
Today there are many ways to improve the adhesion of the first layer to the bed. A lot of articles and recommendations have been written about this, so we will not talk about them. It is worth noting one of the simplest methods - is keeping the desktop of a 3D printer clean . Regular and thorough cleaning of the platform will not only improve adhesion, but will make printed models more beautiful and smooth.
In this article we will look at the best way to clean the 3D printer table, using the example of popular coatings:
Remember to use caution when using the methods below, as spilled liquid may damage the 3D printer. We recommend removing the bed from the printer before cleaning (if possible).
PEI sheet surface cleaning
Lately, PEI sheet has become a very popular material for improving adhesion in 3D printers. It provides excellent adhesion to various materials, and when it cools down, the printed model lags behind it very easily. The sheets are very simple and not fussy to use, and most often it does not require additional application of glue or adhesive tape.
Unfortunately, in order to achieve maximum efficiency, the PEI surface also requires regular and high-quality cleaning. If PEI is touched frequently, it can develop greasy spots that reduce adhesion to the material. Rough cleaning can also damage the surface and reduce sticking. Regular cleaning and maintenance of PEI will ensure that your models do not come off.
How to clean the surface of PEI
To clean this surface, we recommend using isopropyl alcohol (Chemical pure, odorless) with a concentration of more than 70%. You can use it with a smell, but it is very caustic and unpleasant, the room will need to be ventilated.
Wait for the platform to cool, then liberally soak a dry cloth or paper towel with alcohol and wipe the surface. This will remove a significant portion of the fats and oils from the bed.
Acetone is also good at dissolving plastic residues on the surface. In the same way, liberally moisten the cloth with liquid, then gently wipe the surface of the 3D printer desktop. We strongly recommend doing this work in a well-ventilated area, as acetone is highly flammable and its vapors can penetrate the electronics of the device
If you have been using PEI sheet for quite a long time, and its resource is visually exhausted, then we recommend using fine grit sandpaper (1500+). With gentle, circular motions, sand the surface until light scratches and depressions are removed.
When should I clean?
Most manufacturers recommend cleaning the surface with isopropyl alcohol every 2 to 3 prints. After a few months of use, sand the surface and wipe thoroughly with acetone. If it is no longer possible to restore the surface by the listed methods, then replace it with a new sheet from PEI. The lifespan of such material varies depending on the brand and frequency of use of the 3D printer.
Cleaning the glass surface
Glass is another very common 3D printer desktop material. Much more durable than PEI and similar surfaces. The glass plates provide a smooth and level surface at the bottom of the model.
This surface is usually used in combination with other aids (eg glue stick or hairspray) to improve the adhesion of the first layer. Such products are especially popular on tables that are not equipped with heating. Therefore, regular cleaning of the glass is necessary to prevent adhesive or varnish from sticking.
How to clean the glass platform
The easiest way to clean a glass plate is to use a scraper or a non-metal spatula.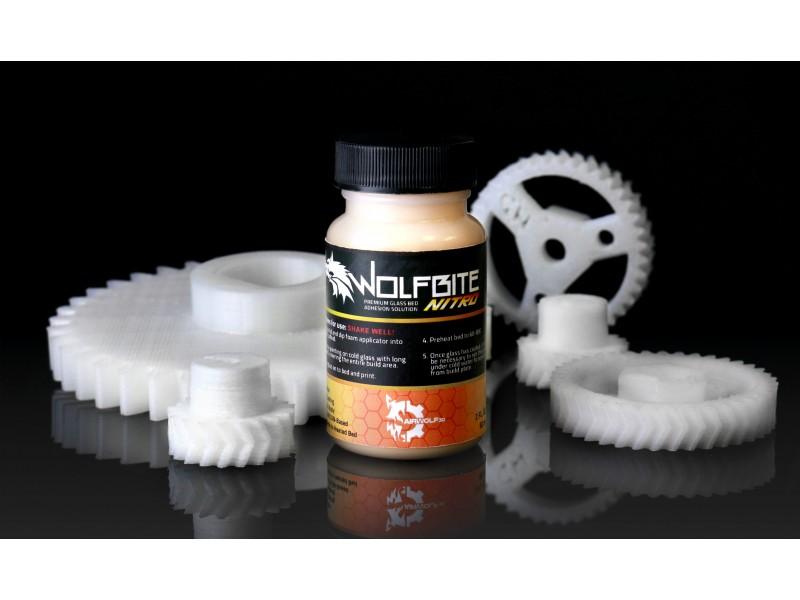 If the table is heated, then heat it until the material remains soft, after which they should be easily removed with a scraper.
Be careful when scraping. Depending on the scraper, the blade can be very sharp, so be careful not to scratch the surface. We recommend that you put your hand on the handle of the scraper, and with the other hand press down on its middle, so that the greatest force is directed downwards.
If this does not work, try wiping the glass with warm soapy water. Although simple, this method is very effective for removing hairspray, glue, and other adhesives. Keep in mind that this method is only recommended if the 3D printer allows you to remove the platform. Spilled water can seriously damage the heating element, power supply or other electronics of the device.
Dirt can also be removed with specialized cleaning agents. For example, wet alcohol wipes, window cleaner, isopropyl alcohol will also effectively wash away adhesive residue and restore the glass surface. However, do not take too strong cleaners. Such substances can severely damage the surface or even the 3D printer. In order to be sure to select a cleaning agent for your particular 3D printer, it is best to contact its manufacturer. Most often, they willingly make contact with users and willingly give advice.
When to clean the glass surface
Again, this will depend on how often you use the printer. We recommend cleaning the surface after each print to prevent buildup of glue or varnish. Such a procedure will not take much time, but the print will be more stable, and the resulting prints will have a beautiful and even surface. Once the models stop sticking (usually after a month), try washing the surface with soap and water. After about two to four months, you will have to resort to isopropyl alcohol or other specialty drugs. substances.
Cleaning adhesive tapes
Adhesive tape is another proven way to increase adhesion to the print bed. Today, this method is more common on 3D printers without the function of heating the desktop. Masking tape is the most common remedy, but so are Kapton and others.
One of the reasons for the popularity of such linens is their ease of use and relatively inexpensive cost. They are easy to stick to the surface and are available at almost any hardware store. However, there are also disadvantages: the tape quite often peels off when the printed model is removed, so it must be reapplied regularly.
How to clean?
Unfortunately masking tape is one of the most difficult to clean due to its fragility. however, we have found that gentle scraping is one of the most effective ways to clean it. With light pressure, evenly scrape off the remaining plastic thread from the surface, being careful not to tear it.
If the tape does break during cleaning, replace this area with a new strip. The main thing is not to overdo it and do not apply a thick layer, this can adversely affect the quality of the print.