Two up 3d printer review
Q3D ThreeUp Version 2 3D Printer Kit Full Review 2022
The Q3D ThreeUp Version 2 3D Printer is one of the best entry level 3D printers on the market.
With both dual and synchronized z-axis motors, its secure screws and nuts allow for rock-solid performance at incredibly high printing speeds.
Not only that, but the X gantry in the 2nd version has been reinforced to help improve printing quality to the next level.
The build area comes at 175 length x 175 width x 210 H in mm, which is definitely the largest among all entry-level printers.
Improvements include bolted on linear brackets equipped with additional rigidity in order to eliminate sag and shorten build time. In short, you’ll notice a huge difference in build quality with an increase of ease in calibration.
The initial setup of electronics has been replaced with replaceable stepper drivers and a more robust system which allows for higher printing speeds.
Customization and installation is much simpler and instructions make assembly a breeze.
What trumps all of these new features is not only is it more accurate when printing in fine detail, but the v1 nut is self-lubricating eliminating any squeaking sound.
A Great Introduction
The Q3D ThreeUp Version 2 3D Printer is a great introduction to 3D printing and is made for those looking to get into the industry or just want to use it for personal use.
As for speed, it has been comparable to the Makerbot for a fraction of the price with less amount of desk space taken up.
One difficulty that new users may find it’s slightly difficult to get the extruder dialed in, but with a flow rate of around 102% you’ll see a drastic increase in print quality.
This could be due to a slightly undersized filament, however. We’ve tested our prints with Hatchbox filament, and it was hardly different from the 10-foot sample that came included in the Q3D kit at a considerably cheaper price.
We recommend setting aside a minimum of 4 hours on a weekend in order to get everything together and setup.
Calibration may take an additional hour, but it’s definitely needed to perfect your prints.
Instructions are well-put together and make assembly a breeze.
While we wish that the software that comes with it is a little bit better designed, it does serve its intended purpose and the same software tends to be the same for most entry-level printers.
It’s recommended that Simplify 3D is one of the best softwares on the market, but with its high price it’s not really necessary.
The Details
The Version 2 is different from Version 1 in many areas, but we’re going to be covering the main ones. First of all, this is one of the lowest-priced 3D printers that you’ll find on the market that comes with a decent and detail-oriented print quality.
A step below the ThreeUp is the TwoUp 3D printer which adds 75mm on both the X- and Y- Axes in the building area, with the Z-axis maintaining the same dimensions at 125mm.
If you’re looking to get started and don’t want to pay as much, this may be a good choice.
Yet if you really want to get serious about 3D printing with an entry-level model, we recommend going straight for the featured ThreeUp since you don’t end up buying two different printers.
Version 2 comes with a much better power supply due to the fact that the bed is basalt-heated with a silicone rubber heater and different electronic connectors.
This allows printing with ABS and Nylon material to reduce warping when plastic cools down.
You’ll see this when you initially build the device, and most reviews state that it’s usually a good idea to build your first one in order to get a feel for how it works.
This will make calibration that much easier, and thus improve the print quality dramatically.
While some may be opposed to this, our testers actually found this part one of the funnest part about the ThreeUp 3D Printer.
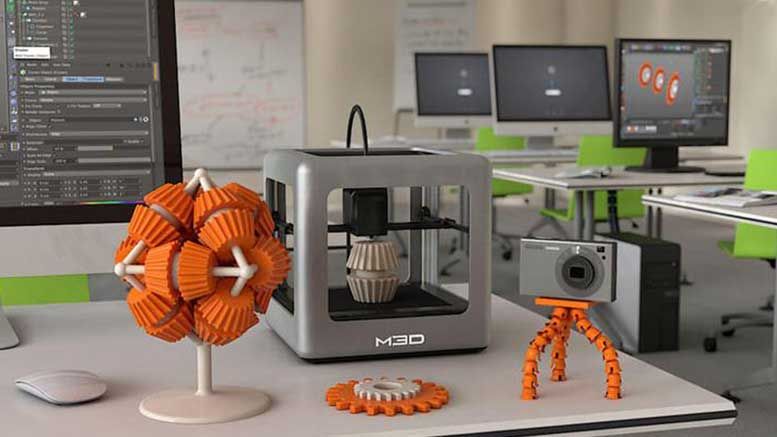
What we’re featuring in this review is a full self-assembly kit that includes a reliable extruder, instructions, tape, and a manual for starters who are new to the 3D printing world.
Other than the factors mentioned in the introduction and the heated bed, most other aspects between the OneUp, TwoUp, and the ThreeUp printers are essentially the same.
This is great, as we had little troubles with previous versions.
Other Notes
The printer is made of mdc coated in melamine, containing a very limited lifetime if you constantly tweak it.
This is why we recommend doing a thorough and detailed job the first time you assemble it. The quality of parts you receive with the printer are of incredibly high-quality for its price tag.
After we tested over 2 pounds of tape, we never had a single issue. However, the slight sag is noticeable on the printer, yet it doesn’t reflect print quality as long as everything is tight, motors are calibrated, and the bed is level.
When you first get the printer and have it assembled with everything working properly, we highly recommend printing replacement parts and upgrades.
You must understand that while this is great for an entry-level printer, you do get what you pay for and sometimes parts may need to be replaced.
Surprisingly enough, the heated bed doesn’t take away from the build area with the screws. One thing that we did notice is that taping the screws down in place sometimes increases print quality as well as reduce noise and cut down on tilting.
Make sure to slow down speeds until you get upgrades, as you don’t want to exert the printer on your first try and damage it right out of the box.
A final note is that you should measure the thickness of your paper when leveling the bed.
This can also be used to zero out your Z-axis for the first layer of height. All of these notes make the learning curve a little bit steep, but this is the case with most 3D printers.
By taking care of your product and taking all necessary precautions, it will have a long life, prints will come out perfect from the get-go, and you’ll be pleased with how much money you ended up saving.
Final Thoughts
Again, we recommend the Q3D ThreeUp Version 2 3D Printer Kit for those who are new to the 3D printing world. Those with experience will want something with more features and a longer-lasting life.
Any other printer that you want to start off with with such a large bed will cost you up in the thousands.
You’ll be amazed at the incredible print qualities that you can obtain with this device along with its ease of use and the ability to support both PLA and ABS tape.
When it comes to cheap products, you usually get something that’s of poor quality and limited use, but that’s not the case with the ThreeUp.
Tags:Q3D, ThreeUp
[mc4wp_form]
a plug-n-play 3D printer under $1,000
Introduction
Priced at $699, the Tiertime UP mini 2 ES is a mid-range desktop 3D printer for beginners. It boasts several features that make this 3D printer cost-effective and user-friendly: automatic calibration, heated print bed, touchscreen, closed frame, HEPA filter, material detection, etc. The UP mini 2 ES is a follow-up to the UP mini and UP mini 2.
The Tiertime UP mini 2 ES is a desktop 3D printer made by Tiertime, a manufacturer based in Beijing, China. This 3D printer is an upgrade of the UP mini 2, a best-seller on the market.
Contact manufacturer Add to comparison
French retailer Machines-3D lent us the UP mini 2 ES so that we could test it. This 3D printer e-shop is based in Valenciennes, France, and ships 3D printers and consumables to France, Belgium, Switzerland, Germany, Spain, and the UK.
Pros
- Easy calibration
- Automatic material detection
- Excellent 3D printing quality
- Interchangeable build plates
Cons
- UP Studio software lacks options
- Small build volume
Unboxing
Packaging
The Tiertime UP mini 2 ES is unsurprisingly packed inside a box, which Machines-3D inserted inside another box for increased protection during shipping.
Inside the original Tiertime box, the 3D printer rests tightly and safely inside styrofoam blocks. There’s also foam inside the 3D printer to prevent the build plate from sliding or jittering. The UP mini 2 ES’ filament holder is placed in a dedicated slot within the styrofoam padding.
Machines-3D also sent us a 500g spool of white Tiertime ABS filament to test the 3D printer with. This ABS filament was delivered in a small, separate package.
Unboxing the Tiertime UP mini 2 ES.Instruction manual
The instruction manual– or quick-start guide– that comes with the 3D printer is simple, well-illustrated, and easy to read. The manufacturer’s website offers some additional information via their YouTube channel. More information is also provided on their website.
Accessories
Apart from the quick-start guide, the following accessories are included in the box:
- The closed filament spool holder
- Filament guide tube
- Pliers and gloves
- Set of tools
- Good-quality USB cable to connect the 3D printer to a PC
- Calibration card
- Two extra build plates
On the manufacturer’s website, it says that the UP mini 2 ES comes with a scraper as well, but we didn’t receive one in the box.
Overview and setup
Software
Users can download UP Studio, Tiertime’s proprietary slicing software, from the manufacturer’s website. For MacOS users, there is a link to the Apple App Store in order to download the software as an app. As we were using a MacBook, this made the download really easy and there were no installation steps required.
Upon launching the software for the first time, we saw that UP Studio was quite simple, organized, and intuitive to navigate.
The main screen on Tiertime’s UP Studio slicing software.Hardware
This plug-n-play 3D printer’s design has a very sleek and modern appearance. The outer shell is made of white plastic, and there’s a useful handle atop the 3D printer to easily lift it or move the Tiertime UP mini 2 ES from one desk to another.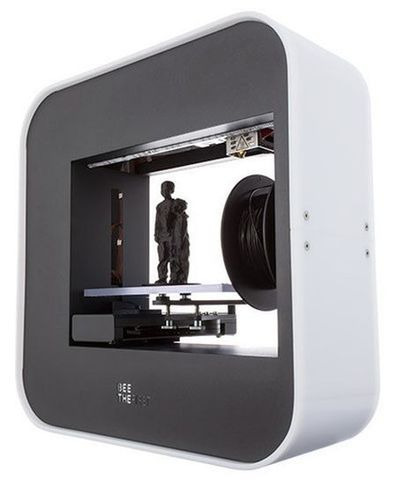
On the front of the 3D printer, there is a large color touchscreen. The power input, power switch, USB port, and Ethernet port are all placed on the back. On the 3D printer’s right-hand side, there’s a square button with a green or red backlight depending on the 3D printing status.
The UP mini 2 ES 3D printer features various openings to access its interior:
- One front door
- One back door
- Two magnetic pieces above the print head
Inside the desktop 3D printer, below the print bed, there is the air filtration system (HEPA) to reduce particle emissions.
The UP mini 2 ES viewed from above with open doors.Getting started
The touchscreen takes about 20 seconds to load the main menu, which is neatly organized in six square buttons:
- Material (automatic recognition or manual input)
- Print (choose a preloaded file)
- Calibrate (auto-leveling or manual)
- Information
- Initialize
- Config (lighting on/off, sound on/off, preheat, Wi-Fi setup)
Each time the 3D printer is turned on, it must be initialized. The build plate and print head are homed, and then users can choose to 3D print a small test cube.
Only then it is possible to access the 3D printer’s other options, such as Wi-Fi setup. We, unfortunately, weren’t able to test the latter, as there wasn’t enough character room to enter our entire, lengthy password (which, long story short, we didn’t have the option to change while we had access to the UP mini 2 ES).
A small cone, our first print on the UP mini 2 ES.Hence, we had to connect the 3D printer to a computer via USB for each 3D print job. The 3D printer sat on a desk next to the computer anyway, so in our case, it wasn’t particularly problematic. Also, we couldn’t test the mobile app since the 3D printer wasn’t connected.
We got started with a simple test cone after calibrating the print bed and we encountered no problems, resulting in a smooth test print.
Experience
Software
Tiertime’s UP Studio software is intuitive and easy to use, but the tradeoff is a lack of settings, especially in comparison with Ultimaker Cura. Even beginners may quickly want to go beyond what’s available and tinker with different parameters.
There’s a small window for basic settings, and the possibility to expand to “Advanced print settings”. These “advanced” settings were disappointing, especially in contrast with unimportant options such as choosing the color theme of the interface. We think that the developers’ efforts could have been of better use elsewhere.
For example, users can only choose between starting the first layer directly or inserting a raft. There is no option to include a brim or a skirt. It isn’t possible to choose a specific print speed either, there are just three presets: normal, fine (slow), or fast.
Basic settings (left-hand side) and advanced settings (right-hand side) on UP Studio software.
On the upside, the software automatically adjusts temperature settings according to the detected material, given that it is from the Tiertime range of filaments. There’s also a selection of basic shapes (cones, cubes, letters…) to 3D print.
Plus, there’s the possibility to import a 2D photo to 3D print (lithophane). We tested the lithophane photo functionality with a family portrait. It’s a fun feature and users may choose the thickness.
Overall, UP Studio isn’t incomplete considering that this desktop 3D printer is designed to be easy to use and plug-n-play. The software achieves its primary function– it goes straight to the point, which is to slice STL files into GCode. Therefore, in its context, UP Studio is a decent piece of software to access basic 3D printing functions (it isn’t bad, it isn’t great, but it does the job).
We tried UP Studio’s “2D to 3D photo” feature.3D printing
The UP mini 2 ES is relatively quiet, emitting about 60 dB when 3D printing. Also, unless the sound option is manually deactivated in the configuration menu, the 3D printer beeps for each step of the process (calibrating, launching a print, finished print, etc.). It isn’t vital but can be pretty useful especially if the 3D printer is in a separate room.
Furthermore, the enclosed design and HEPA air filtration system do a great job of reducing the smell of melted ABS (although this doesn’t exempt users from ensuring the room is well-ventilated). The closed structure is definitely one of this affordable 3D printer’s strong points.
That being said, it makes it more difficult to observe the 3D printing process as the door is tinted. We had to make sure to turn on the LED light manually in the configuration menu before launching a 3D print. Otherwise, it lights up for the first minute or so and then turns off automatically.
When it comes to actual 3D printing, we found that the UP mini 2 ES was fast and accurate, and we didn’t run into any filament jams, layer shifting, or other problems that can be associated with more affordable 3D printers.
Warping and calibration
In the beginning, though, we did encounter some warping issues. It took a few warped prints and some time trying to tweak the few slicing settings available to finally realize that the print head wasn’t close enough to the build plate. We hadn’t initially thought of looking into this as the cause, because we used the automatic calibration function. After manually raising the bed (with up and down buttons on the touchscreen), we resolved the warping issues.
Apart from this calibration-related issue, the UP mini 2 ES does a really impressive job at 3D printing ABS material, which is famous for warping if it is not 3D printed at the right temperatures (among other variables).
It’s a shame that the automatic function isn’t highly accurate, but “manual” calibration is so easy that it doesn’t really matter. As the manufacturer clearly states and warns, it’s important to wait until the nozzle is cooled down. Otherwise, it can accidentally damage the build plate. This happened to us at one point; after releasing the “up” button, the touchscreen didn’t detect that there was no longer finger pressure applied. Thus, the build platform kept moving up and ran into the hot nozzle, which caused some slight damage to the plate’s surface.
3D printing results
Overall, we obtained very good quality 3D prints. All of the models were 3D printed in white Tiertime ABS filament.
Benchy
It’s almost a crime to not 3D print a Benchy when testing a new 3D printer. But we are diligent 3D printer reviewers and 3D printed the famous little boat.
The outer layers are neatly stacked upon each other and the overall detail is pretty satisfying. There are a few imperfections in overhang areas but zero oozing, scars, or blobs. We are happy with the result.
Designer: Creative Tools
Free STL file on Cults.: #Benchy – The jolly 3D printing torture-test
Wavey Love
To take part in the #WaveyWednesday Twitter movement, we 3D printed one of FerJerez’s “Wavey Love” vases. The result is extremely smooth and almost mesmerizing, with absolutely zero imperfections.
We had one small issue with it though. When removing the raft, the base of the bowl came off with it, but the model still looks great as a shelf or desk decoration.
To avoid this problem, users can increase the number of full bottom layers in UP Studio, or 3D print the object without a raft (but beware of warping!).
Designer: Fernando Jerez (a.k.a. FerJerez)
Free STL file on Cults: Wavey Love
Flexi Rex
We have fallen in love with this cute, articulated dinosaur model. The Tiertime UP mini 2 ES 3D printed it with ease and speed, and the critter looks wonderful.
It’s a bit tricky to remove from the build plate though, and we didn’t have a scraper to help. This is where we truly appreciated the fact that the build plate is removable and flexible! Otherwise, we imagine it would have been very difficult to remove the model.
Designer: DrLex
Free STL file on Thingiverse: Flexi Rex with stronger links (an adaptation of Kirbs’ original design)
Business card holder
We stumbled upon this model and appreciated its design. We 3D printed two of the business card holders side-by-side and there was no oozing, which can often happen when 3D printing multiple tower-like objects. The cardholders turned out nicely and with great detail.
Designer: YSoft_be3D
Free STL file on Thingiverse: BUSINESS CARD CASES
Value
Globally, this desktop 3D printer offers a good price-to-performance ratio. It is easy to use and boasts a wide range of features that various more expensive 3D printers lack, and that are quite rare in the UP mini 2 ES’ price range.
The main downside of this desktop 3D printer is the software that accompanies it, but it is possible to use alternative software to slice files and import them. There are also a few occasional touch recognition problems (touchscreen), but nothing that would dissuade a user from considering the UP mini 2 ES a good 3D printer to buy.
Tiertime’s UP mini 2 ES is ideal as a 3D printer for beginners, but could just as well suit basic professional needs thanks to its closed frame, small footprint, and 3D printing quality.
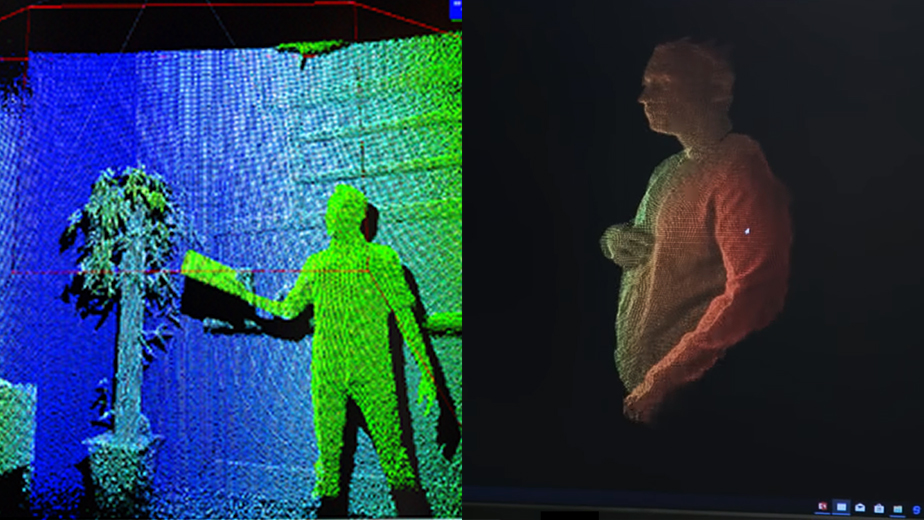
unpacking, calibration, parsing and first printing / Sudo Null IT News
The first rule of working with Up! Plus 2: warm up platform
Second rule: make sure you warm up the platform
The third rule: check again if you have warmed up the platform
The Chinese company PP3DP has closed the production of printers of the first version (Review on Habré of the first model: Up! Plus) and now it’s really possible to buy only UP on the Russian market! Plus 2.
In this topic I will try to highlight differences from the first version (why did it cost 70.000 before and now 83.000?)
I’ll look at “ under the hood of ”, say a few words about the Surface mode, print a shield from World of Warcraft (is really 1-click printing? ) and give a couple of recommendations for using a 3d printer.
(35 photos under the cut)
Improvement number 1: soft platform lowering mode - now you don't have to jump from the clanging sound of a falling platform.
Feature: design feature of the extruder with a shortened feed tube allows you to easily and easily change the plastic thread during printing, that is, print in different colors. (together with the "pause" mode, although if the agility is pumped enough - you can do without it)
Platform size comparison:
Beige - from Up! plus 1, black - Up! plus 2
Comes with 3 platforms. Teflon coated.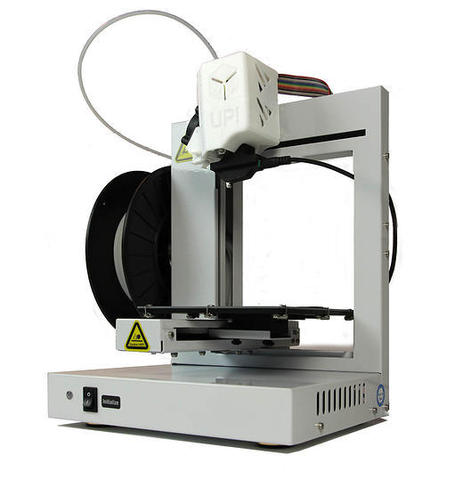 Cleaned with acetone. (Some stock up on a special needle ... for meditation).
You no longer need to buy in a stationery store to fix the platform - convenient clips are included:
Platform calibration nozzle:
Auto-calibration of the platform Auto Level - a sensor is hung on the head with a magnet and it probes the distance by poking at 9 points.
Platform height sensor:
If earlier it was necessary to adjust the height of the nozzle, then this was done manually. Now it is enough to connect the sensor on the platform with a cable to the connector on the back of the printer and run program Auto Nozzle High
New connector for calibration sensors (coloured/green-blue):
Fixed what was a lot of complaints - the head bracket (now you won't bend or loosen!):
Before the platform heaters were frayed, now the issue is resolved - the cable is flat:
The board has been improved:
The board is a new textolite. New quality of harassment and track optimization. Multi-colored molexes are used (blue to blue, yellow to yellow). All wires are braided.
New 8000 processor, softer/smoother movements programmed.
Photo of the old board for comparison
Grounding (taking into account the “stability” of the Russian
voltage in the network, grounding is a thick bolt on the board):
2-pin printhead - you can put either an additional fan or backlight:
(left Up! Plus 2, right Up! Plus 1)
Power supply (19.5V, 9.5A) has become a little smaller, but still huge:
On the left is the power supply of a regular laptop, on the right - Up! Plus 1, centered Up! Plus 2
Mode
Surface(picture from the manufacturer's website)
Surface mode prints only the outer wall of the model, ignoring the inner padding. for example, if it is a closed cylinder model, a “tube” will be printed with a wall thickness equal to the layer resolution. For example 150 with a thickness of 150 and so on. In principle, with a tricky arrangement, you can print closed balls. That is, models where the overlap of layers is less than 90 degrees not including. The trick is that this mode allows you to best see the general shape of the future model and print it in full size, compare it with the rest, much faster than with normal print settings. Of course, the model will turn out to be more fragile. Plus, the quality of laying layers will in some cases be even higher than that declared by the manufacturer. I have seen samples of printed parts where the layer thickness reaches 100 microns instead of the declared 150.
Auto-calibration and automatic level detection
Selecting in the car -caliber menu:
Nazading on the print head applies to the platform at 9 points:
Dimension data entered in the program:
Auto -riverbread is completed:
Automatic determination of the height of the print head relative to the platform:
Print head nozzle touches platform sensor:
Height detected:
Printing a shield from
World of Warcraft Let me remind you that, like Up! Plus 1 and Up! Plus 2 is its own software, which lacks the brain-breaking “slicer” stage.
Step 1. Download the model from the Internet (http://www.thingiverse.com/thing:48069), or save from WoW itself
Step 2. Load the model into the print program (scale and rotate if necessary)
Step 3. Warm up the platform
Step 4. Print
Estimated print time and plastic weight:
The beginning of the seal of the auxiliary layer, which will place the part:
9000 9000 9000
A few words about
soft There are 2 kinds of printers: those who use "open software" and those who use their own software.
Both of them have their own advantages.
Open software claims to be universal, to be able to improve the code itself and to set up "9000" parameters. Open software gives complete freedom (in binding - full responsibility) to the user. If you are a fan of settings with an accuracy of microns and fractions of a degree, then this is a godsend for you.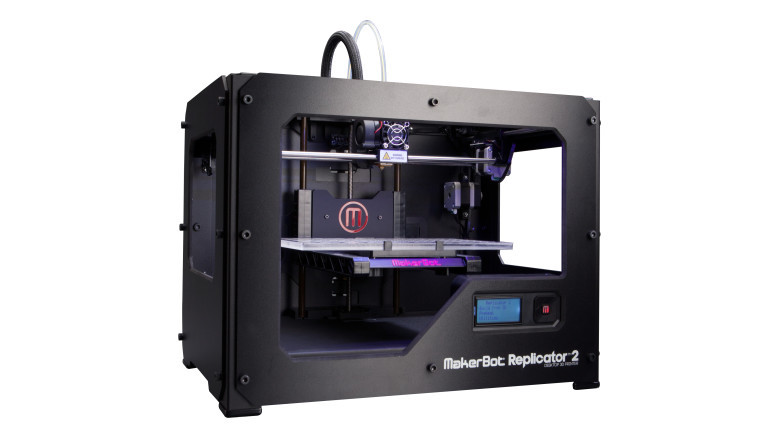 But you can insert plastic from any manufacturer and get the optimal printing temperature for it in some time.
Proprietary software from the manufacturer guarantees 100% matching of hardware and software. Also, the manufacturer's own software assumes that 95% of the "9000" parameters have already been debugged by professional technicians, and the company is responsible for this (in some way). Software from the manufacturer allows you to avoid installing additional programs, several (tens, hundreds) hours of configuration, and makes it possible to “unpack and print” . There is no need to think about the form of filling and the minimum wall thickness, because. There are presets verified by the manufacturer. With software from the manufacturer, it is more difficult to spoil the printed part than with "open software". Printers with software from the manufacturer have recommended suppliers of consumables (coils), which will be covered by a “guarantee” that this printer will print optimally with this material.
Only large companies (3d systems, Makerbot, PP3DP, etc.) or some startups that make a special bet on software can afford to develop their own software.
Help from technical support
1. Remove the nozzle only for hot,
2. We print only on a heated platform
3. Keep an eye on the reel, because not only fishermen have a “beard”
Conclusion:
- Printer - home. Small, handy, manual.
(Although I saw how it is perfectly used on an “industrial scale” - a dozen of these brave guys stand in the room and print an order from architects)
- Saving time on auto-calibration / height determination
— Easy and convenient to send a model for printing
UP 3D Printer Review! Plus 2 - the gold standard for home printing
Legendary household 3D printer Up! Plus 2 surprised few people by winning the title of best in class according to Make magazine. Up! printers, manufactured by the Chinese corporation Tiertime, were among the first printing devices that can rightly be called "household". Actually, the production of printers is carried out by a subsidiary of Tiertime called PP3DP, and in the USA these popular devices are manufactured under license under the Afinia trademark.
After the success of the original Up! Plus, also known as Afinia 479, the company has released an upgraded version of the Up! Plus 2 (Afinia 480), which has become the new flagship and completely replaced the original as unnecessary. Outwardly, these two printers are almost indistinguishable from each other, but the new device has become more convenient compared to its predecessor. In fact, this is a high-quality "finishing with a file" of an already successful design.
Printers of this family are made according to the L-shaped scheme, well known to enthusiasts of third generation Prusa RepRap printers. But unlike homemade versions, UP! equipped with a closed chassis (the working area remains open), hiding the wiring and the maximum possible number of moving parts. This is done for one purpose - user safety.
At the same time, the printer can be considered a "RepRap", because many of the plastic parts included in the design can be printed on the printer itself. Additional connectors on the board leave the possibility of modifications: additional fans, a temperature sensor, a special NinjaFlex extruder for printing, backlighting, etc. The design was so successful that it served as a model for unrestricted copying by Weistek and even 3D printing industry giant 3D Systems, who offered their own version called Cube.
Cube is the main competitor of Up! Plus and Up! Plus 2 printers, but PP3DP printers have several undeniable advantages: they do not require the use of proprietary filament, as is the case with Cube, but at the same time they allow you to print both PLA and ABS plastic and are equipped with an automatic platform calibration system.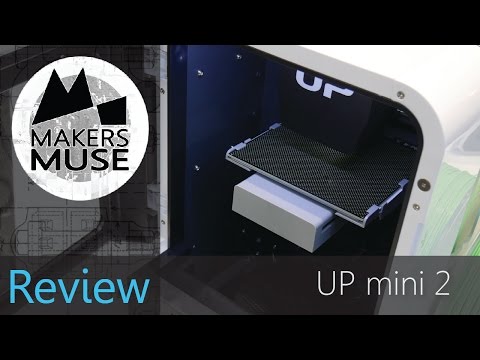 The use of chipped cartridges, required for 3D Systems printers, not only limits the range of consumables available, but also forces users to purchase plastic at exorbitant prices. Thus, users of Up! Plus 2 win both in terms of the possibility of experimenting with the latest materials, and in terms of the cost of consumables. True, PP3DP also produces its own high quality filaments, but the choice is up to the user.
Usability Up! Plus 2 becomes obvious from the first step, i.e. calibration. Auto-calibration remains a fairly rare feature among desktop printers, and manual adjustment can take quite a long time. Designers Up! Plus 2 equipped the device with Tiertime's proprietary development - a sensor attached to the extruder that allows automatic calibration. Feel free to throw away your set of old business cards. I am also glad that in the updated version, the platform, at the end of printing or calibration, descends smoothly, without clanging, as in the original version.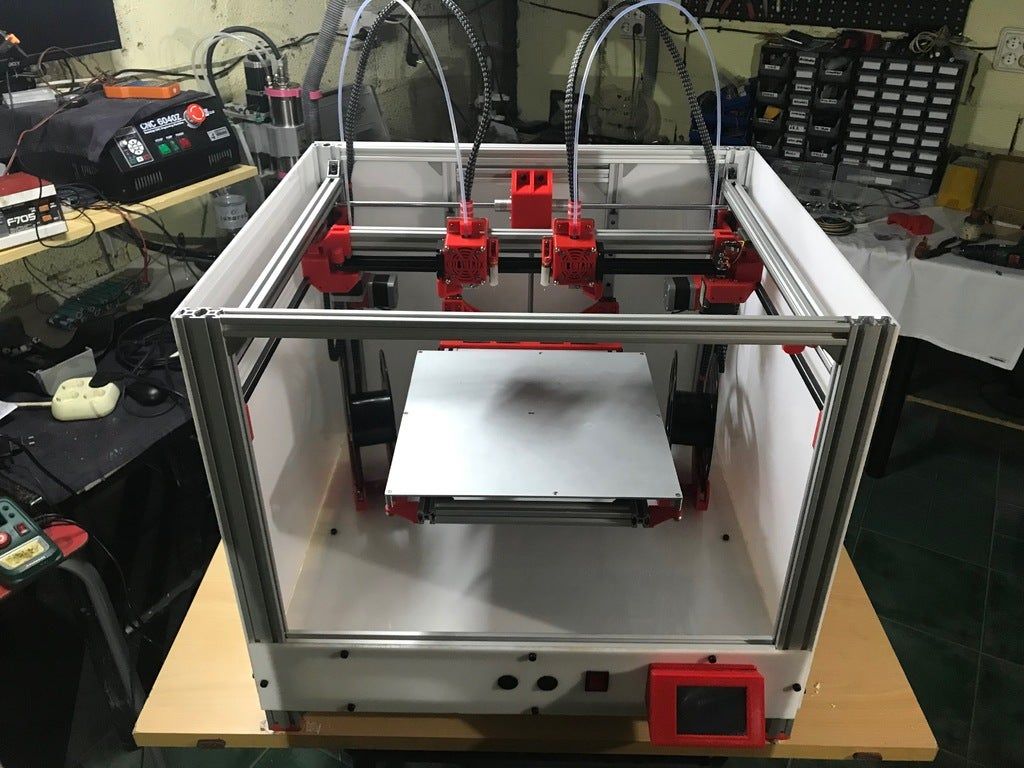 A trifle, but nice.
Print speed and maximum Z resolution are the most controversial features. On the one hand, the minimum layer thickness is 150 microns. This is far from the highest figure among FDM printers, but here it is worth making the first caveat: the thinner the layers, the longer the print takes. And if you consider that the printer was created for domestic use, and not ultra-precise modeling, then 150 microns should be quite enough to print, say, a spare towel hook. And now it's time for the second disclaimer: the fact is that the typing speed is Up! Plus is also relatively low. The irony is that lower print speeds tend to result in higher visual quality for models.
Thus, the 150 micron models printed on Up! The Plus 2 looks just as good as the 100 micron models made on faster printers. Moreover, the printer uses a nozzle with a diameter of only 0.35 mm, which is the main reason for the relatively low speed, but contributes to a higher print quality. In any case, for printing small household appliances or toys, both resolution and speed are enough. If desired, the build speed can be increased to 100 cm³/hour.
The construction area of the printer is relatively small, amounting to 140x140x135 mm. On the other hand, the printer itself is very compact and lightweight. The dimensions of the device are some 245x260x350 mm, so finding a place to install will be much easier than if you were dealing with a “suitcase” like the good old MakerBot Replicator. In addition, as practice shows, successful printing with ABS plastic to a large extent depends on the “imprint” of the model: if the area is too large, then even rafts may not help. And you can glue small models from ABS with simple acetone. The weight of the device does not exceed 5 kg. By the way, the feed tube is very short, which, with minimal skill, allows you to change the bar to a different color by pausing the print - the corresponding function is provided by the designers.
Actually, the ability to print with popular ABS plastic is one of the main advantages of Up! Plus 2. Speaking of "possibility", we mean the presence of a heated platform, without which the probability of twisting the first layers or deformation and cracking of models at later stages increases many times over. The shrinkage of this plastic during cooling is painfully significant. One of the interesting features of Up! in general, is the presence of a perforated working table with Teflon coating. It is clear that this solution was used specifically to optimize the work with ABS and other plastics that are prone to shrinkage and subsequent deformations.
In combination with rafts, these tables allow you to ensure even application of the first layers without twisting and tearing the model off the table. Yes, the holes will clog, there's nothing you can do about it, but a couple of hours of soaking in acetone allows you to dissolve the residual ABS plastic and use the platform again. By the way, spare tables are prudently supplied in the kit, so you don’t have to interrupt the workflow. If you prefer to work only with PLA, then you can always change the table for a glass sample of a suitable size. The table is firmly attached to the platform with convenient clips. Accordingly, the dismantling of the table and the installation of a new one do not present any problems.
Up! Plus 2 uses proprietary software "Up! Software”, which is quite easy to use, but has all the necessary functions: automatic construction of support structures, adjustment of the degree of filling, speed and quality of printing, slicing, etc. The "Surface" mode, in particular, allows you to print models with very thin walls. The program is compatible with both Windows and Mac OS X.
The presence of a memory card port is also important, allowing you to print offline without fear of computer crashes and freezes, as is the case with direct data transfer during printing via USB connection .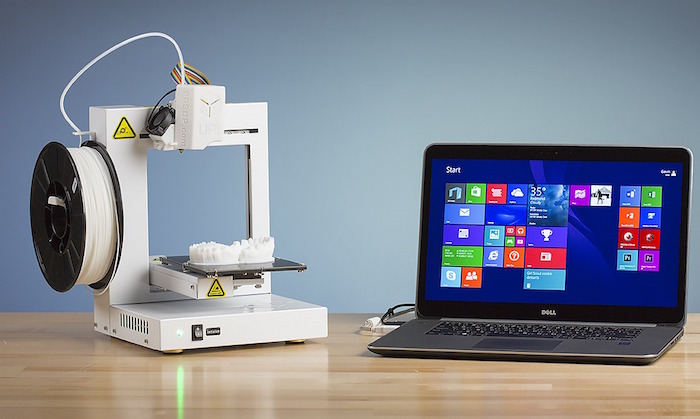 The updated board and processor, together with improved positioning algorithms, make it possible to achieve smoother operation of mechanisms and, as a result, increased quality and speed of construction. The software itself is Russified and is constantly updated.
Printers in general Up! Plus 2 can be considered the benchmark for home printing devices and a kind of preparation device for enthusiasts due to the ability to print not only PLA, but also ABS, and almost any material with a suitable extrusion temperature, including all kinds of composites imitating wood, stone and metals. The printer is used even in professional circles: Artem Lebedev's studio actively uses these devices for prototyping, as can be seen on the example of such a heatsink for LED lamps:
Automatic calibration, high reliability, print quality and a wide range of consumables make Up! Plus 2 is an even more attractive choice in its class.