3D micro printer review
M3D Printer Review 2022 - Is This 3D Printer Worth The Money?
2.2
See Price
Usually, when you see a seemingly great product for a very low price, alarm bells start ringing. However, every once in a while, you’ll find a product that genuinely lives up to the hype. Today, we’re taking a look at the M3D (Micro 3D) – an extremely compact, budget 3D printer.
We’ll be looking out for any areas it excels, but won’t shy away from mentioning any flaws we uncover. This way, you’ll know our coverage is balanced and impartial. This not only benefits us but lets you decide if a given printer is right for your needs. With that said, let’s begin.
| Filament Diameter | 1.75mm |
| Extruders | 1 |
| Supported Materials | PLA, ABS, Nylon |
| Connectivity | USB only |
| Printing Speed | Up to 55mm/s |
| Build Volume | 4. |
Table of ContentsShow
Design
This printer comes in five bold shades: red, blue, green, grey, and black. It’s cube-shaped, 7.3” in every direction, meaning it’s among the most compact 3D printers on the market – perfect for sitting atop a standard desk. The whole thing weighs just 2.2lbs, too, thanks to its lightweight, carbon fiber frame.
As you might expect, the build area is fairly small. It’s not uniform either, as it’s a little wider than it is deep. Still, this offers enough flexibility for most small projects, and larger models can always be printed in several parts. That said, the print speed isn’t fascinating, so it might take slightly longer this way.
Notice the lack of a filament spool – it’s actually contained underneath the print bed! Now, this printer can only fit about half a spool at a time, so you’ll have to either buy smaller rolls or re-spool half of it each time. This isn’t a huge problem, but it’s definitely worth bearing in mind.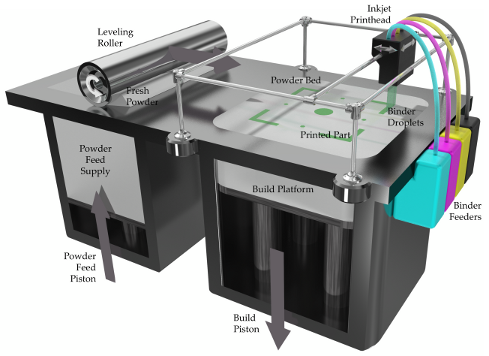
Printing
For its size and price, the M3D actually produces decent-quality prints. It has a layer resolution of between 50 and 350 microns, so you can reproduce fairly detailed models. However, it does have a tendency to produce loose threads and extra hanging material, particularly on areas with an overhang.
The edges come out crisp and well-defined, although supporting structures are often wispy. A quick buffing with a cloth will remove most of these imperfections after the fact, though, and supports are intended to be removed, so as long as they do their job, there’s no problem. All in all, not bad.
Usually, entry-level printers only support a handful of different materials, but this one is capable of printing with a whole host of different filaments. With the right nozzle upgrade, you can even use carbon fiber, if you’d like – something very few budget printers support.
Features
One of the best things about the M3D is the lack of fuss. Normally, there are several things to check before getting started, but the M3D does a whole range of checks and calibrations automatically.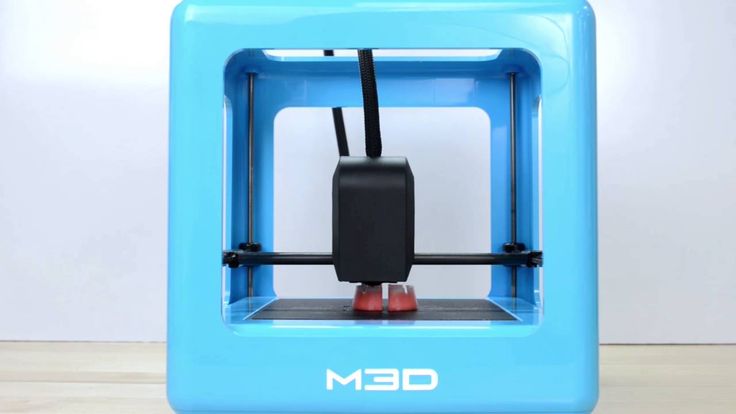 Everything is taken care of, leaving you free to get the good bit: the printing itself.
This printer comes with its own, specially-designed software, which is available for Windows and Mac. There’s no Linux support, unfortunately. This software is easy to use, although it does have to be left running for the entirety of the print. There’s a handy little percentage notice, though, to give you a vague idea of when it’ll be finished.
You can, of course, use different software if you’d like. However, for new users, the M3D application allows you to hit the ground running. It’s straightforward but allows for a good degree of versatility and control over your models.
Cost
Considering this model retails for less than $300, its print quality is astounding. This is among the least expensive printers available, yet it outperforms some far more expensive models. Sure, it’s likely not going to be enough to satisfy pro users, and it absolutely can’t stand up to commercial use, but for beginners, it’s perfect.
This unit doesn’t offer any upgrades or variants (other than the color), plus the software it uses is included for free. As such, there are no hidden costs beyond those of the proprietary, smaller spools of filament. These are entirely optional, though, and third-party filament can be used if you spool them manually.
As far as pricing goes, there’s nothing to complain about. What you see is what you get: a low-cost, compact printer with no additional charges.
Support
Micro 3D provide a good range of support options in case you run into trouble. There are tutorials, a Discord-based user forum, and even a dedicated area where you can log in and raise a support ticket. This is how you’re supposed to do customer support: as simply as possible.
That said, the warranty period is pretty short at just three months. You can extend this by a year or two for a price, but at the time of writing, the page to do so returned a 404 error. Still, we’d expect the price to be fairly low given the cost of the printer. We’ve seen printers where the extended warranty costs more than a brand new M3D though, so don’t take it for granted!
The knowledge base is pretty extensive, with guides covering everything from the basics of 3D printing to advanced tips for the software. Really, just about any issue you could face will be addressed in here somewhere, so in all likelihood, you’ll never need to request help from support.
Summary
Update: As of May 2019, we can no longer recommend this 3D printer.
The M3D was once a powerful and versatile printer, but it is no longer recommended due to its substandard customer service. It won’t do in 2022. If you want to buy a 3D printer but don’t know where to start, you could do far better than the M3D.
M3D Micro 3D Printer Review
Skip to main contentWhen you purchase through links on our site, we may earn an affiliate commission. Here’s how it works.
The M3D Micro is a basic 3D printer that offers value for the money, but lacks the flexibility and speed of more expensive models.
Tom's Guide Verdict
The M3D Micro is a basic 3D printer that offers value for the money, but lacks the flexibility and speed of more expensive models.
Pros
- +
Cute, compact 3D printer
- +
Simple-to-use software
- +
Attractive price for beginners
Cons
- -
Some prints had surface blemishes
- -
Prints left behind lots of filament whiskers
- -
Slow print times.
Why you can trust Tom's Guide Our expert reviewers spend hours testing and comparing products and services so you can choose the best for you. Find out more about how we test.
Today's best M3D Micro 3D Printer Starter Kit deals
No price information
For more information visit their website
The less expensive end of the 3D-printer market is very competitive, with lots of printers vying for the attention of the first-time user.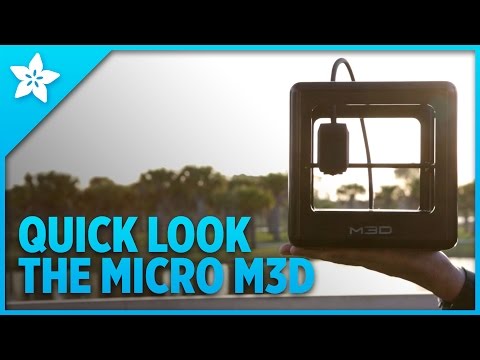 One of the latest (and most interesting) entrants is the M3D Micro, a $349 printer that offers the same features as many larger and more expensive models.
The M3D Micro produces acceptable 3D prints and has easy-to-use software. There are compromises, though: It is slow, the prints sometimes had surface blemishes and the printer's open-frame design means it wouldn't be good for younger users. But these are compromises you should expect with printers at this price, and the M3D Micro is a good pick for casual users who want to see what this 3D printing thing is all about without breaking the bank.
Photo: M3DNot to put too fine a point on it, but the M3D Micro is cute. It's a small 3D printer in a 7.3-inch frame, made of light plastic. Our review unit was an attractive pale blue, but the printer is also available in black, white, green, orange, clear or silver.
The only bit that pokes out of this cube is the tube that feeds the print material from the reel, through the back of the frame and into the top of the print head. On the front, an LED-illuminated M3D logo shows you the printer is turned on. There are no buttons or controls on the printer itself: everything is controlled from your computer via the USB connection that plugs into the back.
Inside the frame is the printing mechanism, made of a number of rods and belts that move the print head left and right, forward and back, and up and down. The print bed is made of slightly textured plastic called BuildTak that the print material sticks to, and the entire print bed can be removed by sliding it backward and lifting it. This removable print bed has two purposes: It makes removing the completed print off the print bed easier, and it reveals the cavity where the print material is stored on a small reel, which holds about 0.5 pounds of filament.
Given the size of the printer, you can produce surprisingly large prints: the M3D Micro offers a print volume of 4.2 x 4.4 x 4.6 inches, for a total of 85 cubic inches. As the entire cube is just over 7 inches on each side, that's an impressive print volume.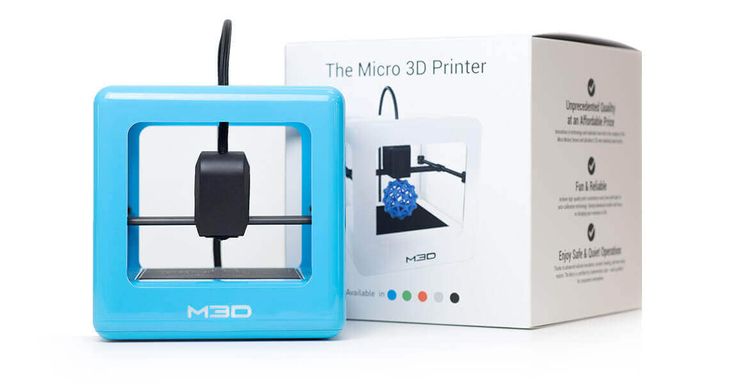 While it's less than what you'd get from larger, more expensive printers like the Polar 3D (which has a cylindrical print volume of 400 cubic inches) or the LulzBot Mini (223 cubic inches), it's still large enough to print many objects.
Print Materials: PLA Works Best
The M3D Micro uses unique 5-inch reels to hold the printing filament, called 3D Ink, which the company sells directly for between $14 (PLA and ABS) and $28 (new ABS that changes colors depending on the temperature of the print head). That works out to between $56 and $112 a kilogram — a little more expensive than most print materials.
Given the size of the printer, you can produce surprisingly large prints: the M3D Micro offers a print volume of 85 cubic inches.
Fortunately, you are not restricted to buying from M3D. The Micro will work with 1.75-mm filament from any manufacturer, but you will have to find a way to mount the larger reels that most 3D filament is supplied on.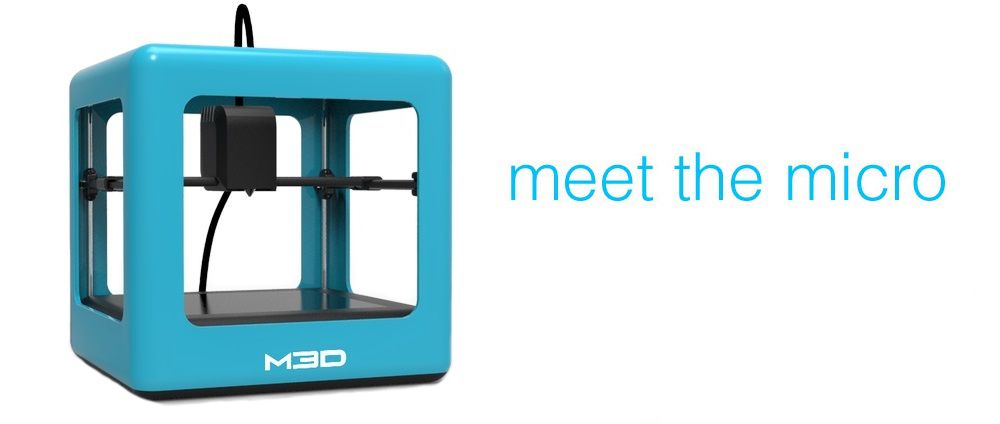 When it's running from one of these larger reels, the filament feeds directly into the print head — a much messier and less aesthetically pleasing solution than the hidden approach of the smaller M3D reels.
MORE: 8 Awesome 3D Printing Trends to Watch
The M3D Micro's print head and bed also support a wide range of material types, including PLA, ABS, nylon and other materials. We tested it with both PLA (polylactic acid) and ABS (acrylonitrile butadiene styrene) filament, and had the most success with the former material. With PLA, we made large 3D prints that covered much of the print bed and stuck well to the bed while printing. We had less success with ABS. It's a tougher material, and prints with bases that were larger than a couple of square inches tended to warp, bending as they cooled. Sometimes, the ABS prints didn't stick to the print bed — the base lifted from the print bed and the whole print fell off and failed.
Setup: Simple to Get Started
Almost all you have to do to set up the M3D Micro is unbox it, remove the foam and plastic shipping clamps, install the software onto a Mac or PC, plug the printer in and connect the USB cable. Our printer came loaded with a reel of PLA filament, and it was ready to print.
The only major bit of setup we had to do was to run the calibration feature of the M3D app, which makes sure the print head is correctly set just above the print bed. This is an automatic process: The print head detects when it is in contact with the print bed.
Interface: Controlled from an App
The M3D Micro is controlled solely by the M3D app, which is available as a free download for Windows and Mac. There are no mobile or tablet versions of the app, as it requires a USB connection to the printer.
The M3D Micro produces decent-quality 3D prints, though we saw some odd printing glitches.
The M3D program is simple to use, presenting you with a number of options to load a 3D model or reload a recently used one. Once the model is loaded, you get a preview of the printed model with options to move, scale and rotate it. There is no way to build a new model or otherwise modify one; you'll need a separate 3D modeling program to do that.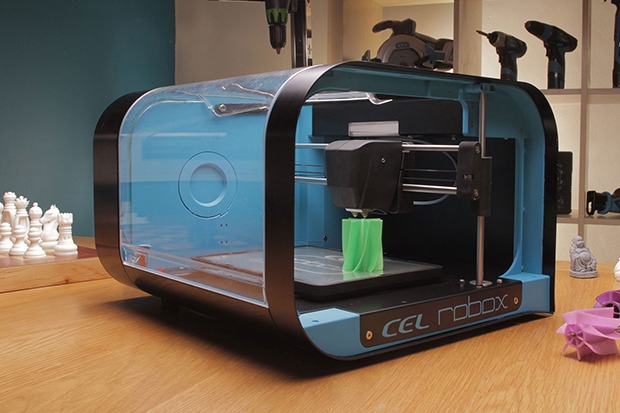
MORE: How to Buy a 3D Printer
Once the model is ready, you hit print, and the program processes the model for 3D printing and starts the print process. You get a few options to control the print process, such as determining the print quality and the fill density (how much of the print is filled with supports). More advanced controls, such as for turning off the supports that hold a print in place, are available from a More Options button. You can't control more advanced features, such as the number of supports the processing adds to the model while building, or the type of internal fill used — features that can, when used properly, make it quicker and more efficient to make a print.
Print Process: Straightforward, But Not Glitch Free
(Image credit: First, you load the model into the M3D program, scale and move it, then click on print. Credit: Richard Baguley)While the print is in progress, a simple dialogue box in the program shows a percentage meter. It doesn't tell you how much time remains in the print process, and the estimates the program gives when starting a print were rather optimistic: a print estimated to take 16 hours ended up taking more than 25 hours. While a print is running, you can't use the M3D program: it has to remain running until the print is complete.
The M3D Micro printer is quiet. You'll hear only a slight fan noise and the buzzing of the motors moving the print head. Because it is not enclosed, you do get the smell of the melted printing material — a popcorn-like smell for PLA and a burnt-plastic smell for ABS. Sensitive noses might find these unpleasant, especially after many hours of printing.
(Image credit: The print being printed on the print bed of the M3D Micro. Credit: Richard Baguley)We did have several failed prints during our tests. In particular, we had problems with the print head jamming, in which melted material either got caught in the nozzle, blocked the nozzle or the motor that pulls the material into the print head didn't pull hard enough to keep the filament pushing through the extruder and out of the nozzle. When this happened, the printer didn't notice, and the print head kept moving, even though no material was extruded and the print stopped being formed. This happened with both filament mounted inside the printer and on an external reel. This happened only intermittently, however, but it was definitely annoying when a 24-hour print failed most of the way through.
Most printers use a heated print bed, which keeps the bottom of the print slightly molten so it will stick; the M3D Micro doesn't. Instead, it relies on the stickiness of the BuildTak print bed, which doesn't work well with larger ABS prints. It might be possible to use other methods to make the ABS stick (such as blue painters' tape or a slurry of ABS dissolved in acetone), but the location of the print spool under the print bed makes these approaches difficult: liquids would flow over the edge of the print bed and onto the reel and mechanism below.
Print Speed: Sloooooow
The M3D is a very, very slow 3D printer. We test print speed by printing a number of standard-size models in each of the print-quality modes the printer offers, and the M3D was one of the slowest printers we have ever seen.
MORE: Best 3D Printer
Printing a 4.2-inch version of our Thinker test model using PLA filament took 13 hours and 54 minutes in the low-quality mode (with a layer height of 0.3 mm), while the high-quality version, using a layer height of 0.1 mm, took an achingly long 25 hours and 34 minutes. That's more than twice as long as the Polar 3D, which took 5 hours and 19 minutes to produce a draft print and 6 hours 51 minutes to produce a medium print.
Print Quality: Acceptable, But Some Glitches
The M3D Micro produces decent-quality 3D prints, but it has a few issues that detract from the quality: It was prone to leaving whiskers of print material behind, and we saw some odd printing glitches that detracted from the quality of the final prints. Our geometric sculpture model tests the ability of the printer to produce sharp and straight edges, and the M3D Micro did well here: Our test prints had mostly clean edges with only moderate stair stepping from the print layers. We did find that the edges of the sculpture had a lot of whiskers stretched between edges as the print head moved over gaps.
These were also accompanied by occasional clumps of the print material on the edges themselves, caused by odd lumps of melted material gathering on the print head and sticking to an edge as it was printed.
(Image credit: Richard Baguley)The M3D did a decent job printing our Thinker test model, which has lots of smooth edges and organic curves that test the ability of the printer to control the movement of the print head and the flow of molten printing material. Most of these were well-reproduced, with the smooth curves of the Thinkers' head and shoulders having a smooth, organic look.
However, we did see an odd, almost camouflage pattern on the sides of the print, which wasn't present in the original model. This hasn't shown up in other printers, and is rather a problem. It makes the Thinker look like he has some sort of unpleasant skin condition.
The M3D Micro is a neat little 3D printer with a lot of good features. It has decent software and produces acceptable print quality. And let's not forget, it is cheap — at $349 for the printer alone, or $449 for the retail version that includes a roll of PLA filament, it is one of the cheapest 3D printers out there.
The downside is the speed: the M3D Micro is much, much slower than others. And although it can use ABS filament, it struggled to produce prints with it that larger, more expensive printers had no issues with. But, if you don't mind sticking with PLA and waiting, the M3D Micro is a decent introduction to 3D printing that shows what a basic printer can (and can't yet) do without breaking the bank.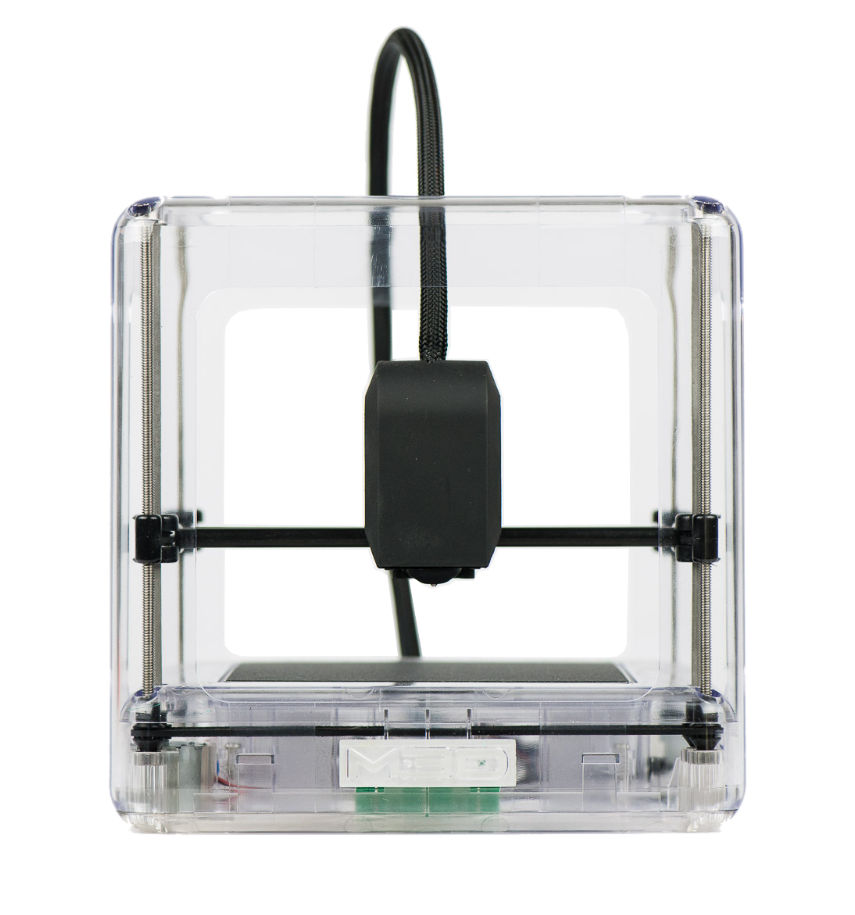
Today's best M3D Micro 3D Printer Starter Kit deals
No price information
For more information visit their website
Richard Baguley has been working as a technology writer and journalist since 1993. As well as contributing to Tom's Guide, he writes for Cnet, T3, Wired and many other publications.
Tom's Guide is part of Future US Inc, an international media group and leading digital publisher. Visit our corporate site .
© Future US, Inc. Full 7th Floor, 130 West 42nd Street, New York, NY 10036.
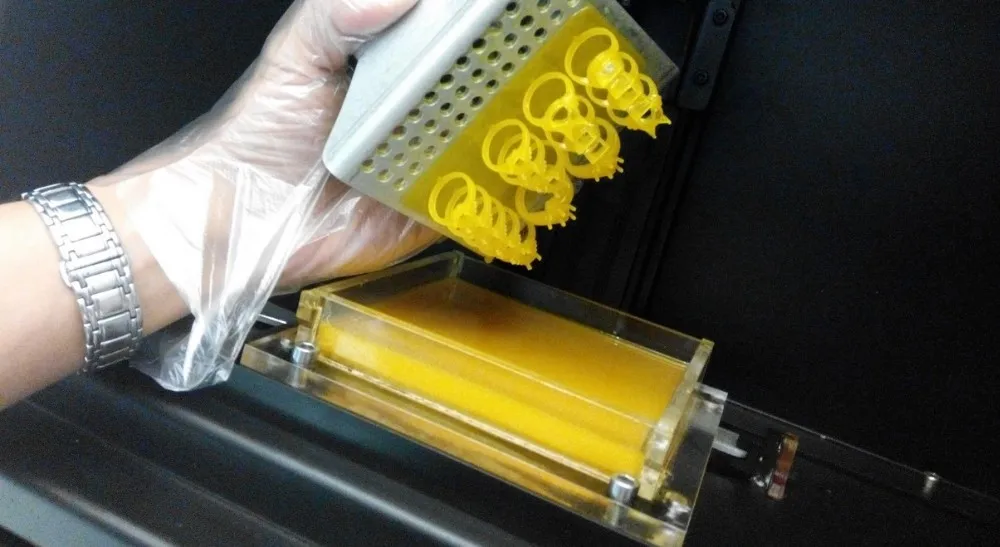
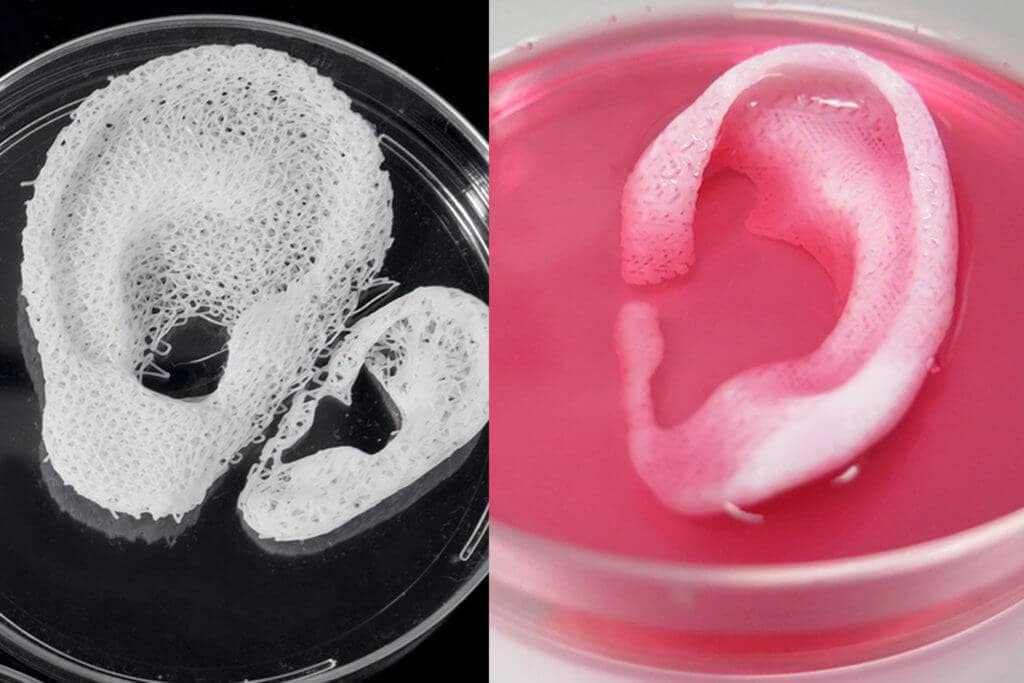
Miniaturization boosts demand for small 3D printed parts
This 3D printed 4 mm gear is made from 25 layers of 5 micron powder metal.
With many industries demanding ever smaller parts, it's no surprise that 3D microprinting is growing in popularity. Today, various microprinting technologies make it possible to obtain parts with dimensions measured in microns. And for more complex tasks, modern printing systems can create even finer details. nine0006
Of course, microprinting is not the only way to produce very small parts. Alternative options are microscale machining and injection molding.
But these processes can be more expensive than additive manufacturing, according to Juan Schneider, CEO of Montreal-based Nanogrande Inc, a developer of 3D printers for small parts.
Consider injection molding. The prototyping tools for this process are usually made from aluminium. However, microcasting requires expensive, high-precision steel tools that take months to manufacture, said Pierre Wyaud-Murat, founder of Qualified3D, a service bureau in Southfield, Michigan that prints small parts. nine0006
On the other hand, with microprinting, you don't have to wait for expensive production tools to be made, says Wiaud-Murat. The use of microprinting in the prototyping process allows you to check the actual geometry of the part, even though the material of the part is not correct.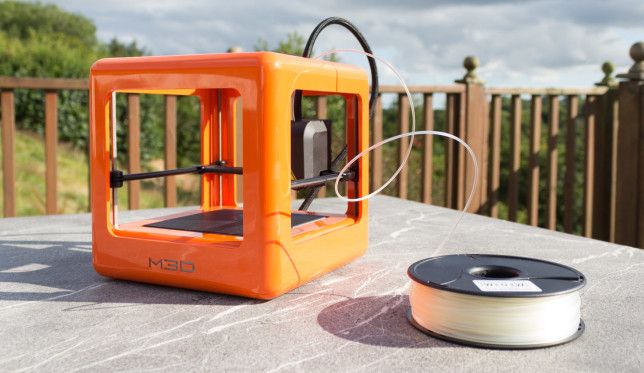
He also reported on the growing interest in microprinting for low volume systems. This trend is partly driven by smaller companies introducing new products. These companies usually have limited funding for trials and testing and don't know how big the demand will be, Viaud-Murat said. "It's a big step to invest several hundred thousand dollars in a set of production tools." nine0006
Microprinting is also appealing to companies that know they only need a limited number of specific parts. For them, microprinting makes more sense as no upfront investment in tooling is required. "You pay as you work," says Viaud-Murat.
In some cases he has seen, microprinting has been found to be a better manufacturing option than microinjection for production volumes of up to several hundred thousand parts per year.
There are also cases involving complex product designs for which microprinting is the only option due to the limitations of conventional manufacturing methods. As an example, Viaud-Murat cites the work his company does for the microfluidics (microfluidics) industry, which has historically been limited to 2D component geometries.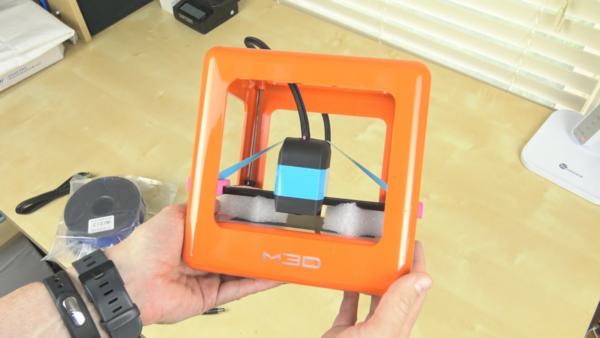 Microprinting allows this industry to produce 3D geometries, opening up additional opportunities for microfluidic chip design. nine0006
This fiber connector was made on a BMF Precision P140 nanoArch printer.
Along with its impressive capabilities, microprinting has had to overcome a number of challenges. For example, in the past, according to Wyaud-Murat, the resolution provided by microprinters was significantly inferior to the resolution provided by microforming. However, today there are printers on the market that can work in the nanoscale range.
Among the most accurate printers currently available are those based on two-photon technology, which involves firing a laser at photosensitive material. According to Schneider, the two-photon process can produce sub-millimeter details with sub-micron resolution. Examples include optical parts such as waveguides and lenses, as well as connectors and scaffold components for cell growth. nine0006
On the other hand, two-photon printers are very slow and expensive, Viaud-Murat said. "The initial investment is at least five times the cost of the printers we use, and some parts can take weeks to print."
Instead of trying to achieve the highest possible resolution and thus increase print time and cost, Viaud-Murat decided that printing at 10 micron X-Y resolution and 20 micron layer thickness would be a good compromise. nine0006
These parameters are achieved by nanoArch™ printers from BMF Precision Technology. The printers use the same digital light processing technology used to print larger parts, Viaud-Murat said, except that the software, optics and motion control have been coordinated to improve accuracy.
Typical parts produced by these Qualified3D printers are approximately 10 by 15 by 5 millimeters, with smaller part sizes ranging from 40 to 50 microns. In addition to microfluidic chips, commonly printed parts include either small medical equipment components with geometries that cannot be achieved by injection molding, or parts made in such low volumes that the cost of a mold cannot be justified. nine0006
To limit vibration that can destroy small parts, BMF printers weigh about 300 kilograms and are mounted on a dampened table. Viaud-Murat recommends printing small parts in a climate controlled environment to minimize the effect of temperature and humidity on the mechanical behavior of the print media.
Difficult situation
Another important issue with microprinting is the special properties of fine material particles. For powders with a particle size of 20 microns or less, cohesive forces have a greater effect on the process than gravity. According to Schneider, the cohesive forces acting on particles as small as 17 microns are 100 times stronger than the gravitational forces acting on particles. nine0006
According to him, it is "very difficult" to create uniform layers with these sticky particles. In response, Nanogrande has developed a fluid-chemical approach that masks cohesive forces during application. The technology allows these forces to reassert themselves after a few seconds, so that the particles become very sticky again.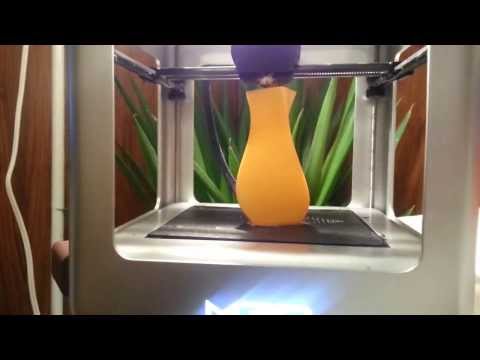 This re-emerging stickiness eliminates the need for support structures common in 3D printing, which account for up to 60% of the cost of printed parts in the steel industry, Schneider says. nine0006
According to Schneider, Nanogrande's MPL-1 printer can produce single-particle layers as thin as 1 nanometer. However, the MPL-1 does not currently print nanometer-thick layers for customers and operates primarily at 1 micron scale.
Examples of parts made with the MPL-1 include watch faces, gears and inserts, as well as electronic connectors, fasteners, mobile phone and medical components. The length of the parts is from 1 mm to 1 cm, the thickness is up to 300 microns, and the dimensions are up to 20 microns. nine0006
Materials currently 3D printed by the MPL-1 include stainless steel, titanium, and copper. Overall, Schneider says the process has been tested with more than 50 materials, including exotic ones such as graphene, carbon nanotubes and nanodiamonds.
3D printed microfluidic chip.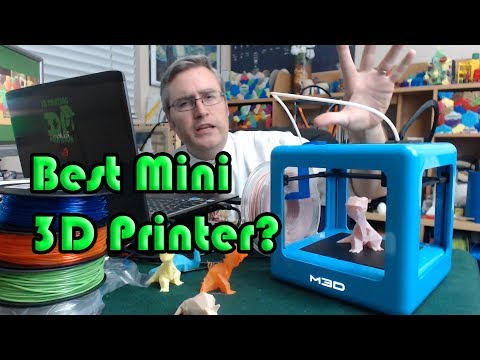
Finishing problems
Some of the biggest problems microprinters face come after the printing process. "We're still learning about post-press operations," says Wyaud-Murat. nine0006
Key post-press questions to answer include:
- What are the customer's expectations for adequate detail control?
- How can these expectations be met despite the difficulties involved in precisely controlling such small details?
- How should miniature and fragile parts be packed and transported to prevent damage?
"These issues need to be discussed with clients," says Viaud-Murat. nine0006
We advise you to read articles published earlier on our blog: "The Complete Guide to 3D Printing [Part 1]" and "3D Printable Star Wars Stormtrooper Action Figure - Printable Files Included!".
If you liked the article, please like, share it with your friends and leave comments!
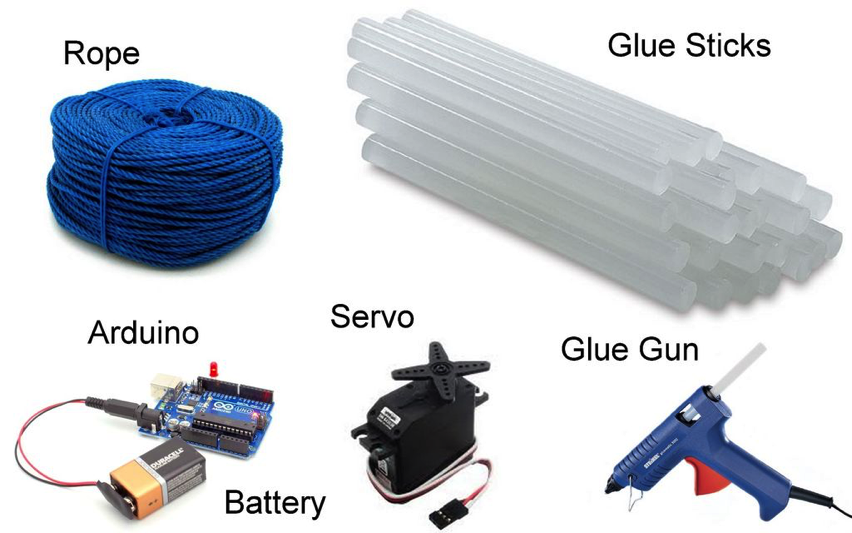
Cheap Arduino 3D Printer||Arduino-diy.com
This article describes the construction of a 3D printer that costs around $60-70 (probably the cheapest concept in the world).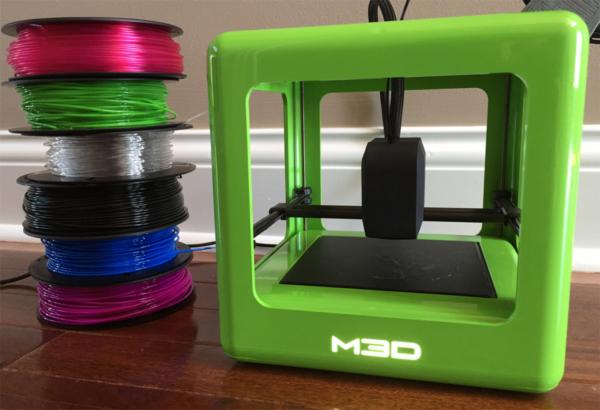 nine0006
This 3D printer works with the cheapest motors on the market - 28Byj-48, Electronics - Ramps 1.4 controlled by Arduino.
The author of the project is a 16 year old boy from Germany.
3D printer specifications:
Working space: 10x10x10 cm;
Speed: 20 mm/s;
Resolution (accuracy): 0.2 mm.
P.S. Under each section, in accordance with the table of contents of the article, photos are posted as a visual instruction
Mechanical
MDF boards:
-1x 30x34 cm (Base).
-2x 6x4 cm.
-1x 34x6 cm.
-1x 15x4 cm.
- 2 GT2 pulleys + 1 m GT2 timing belt.
-10 bearings 624.
-1 pulley Mk8 for drive.
-1 PTFE tube.
Smooth rods for 8 mm guides:
- 2 length 22cm.
- 4 x 17.5 cm long.
Local hardware store:
- 1 shaft with M5 thread, which you will cut into 2 pieces.
-2 M5 hex nuts.
- 8 screws M3x16 mm.
-6 screws M3x 25 mm.
-4 screws x M4x45 mm.
-2 screws M4x60 mm.
-4 screws M4x20 mm.
-20 M4 hex nuts.
-10 M3 hex nuts.
-12 small screws.
Electronics
-1 Arduino Mega 2560 board + Ramps 1.4 + 4 A4988 stepper motor drivers.
-4 stepper motors 28byj-48.
-3 optical limit switches.
-1 Nema 17 stepper motor (we also order from Ali or Ebay. Such drives cost about 10 dollars).
Extruder tip:
-1 E3D-V5 Aliexpress extruder
or more expensive but with cooling
-1 E3D-V6 Aliexpress extruder.
Parts to be printed on a 3D printer
You can download the latest versions of 3D models of nodes that need to be printed from the link: Thingiverse
.
2 "Z-Motor" parts
2 "Y-End" parts
2 "X-End" parts
1 "X-Carriage" part
1 "Motor" part
1 "Hotend" part
1 piece "Hotend Clamp"
Download mechanism for extruder here: Thingiverse.
28BYJ-48 Stepper Motor Modification
In order to convert the 28BYJ-48 stepper motor from unipolar to bipolar, you need to open the plastic cover. nine0006
Then remove the red cable and open the contact track from it as shown in the figure.
Now at the other end is the output that you will connect to the Ramps, arrange the pins as follows:
blue--yellow--orange--pink on shield for Arduino Ramps 1.4
Y axis
First you need to glue two wooden boards. nine0006
Then place the printed parts "Motor", "Z-Motor" on the wooden boards.
Then fix the printed parts with the screws.
Next step: fit the motors into the slots and then the LM8UU bearings.
Install the pulley on the motor and the 624zz bearings next to it.
Use plastic ties to secure LM8UU bearings.
Next - install two guide rails 17.5 cm long with a diameter of 8 mm.
Finally, pull the belt through the "Y-ends" and install the limit switch. nine0006
X-Axis
For X-Axis you need:
Install two M4x45mm bolts in the "X-End" part.
Connect the motor as shown in the illustrations.
Tension the belt and install the limit switch.
Mount the extruder with two M3x25 bolts and tighten with nuts.
Z Axis
In order to assemble the Z axis, you need:
Install LM8UU bearings in "X-Carriage" + "X-Ends".
Post install "X-Ends" + "X-carriage" on rails 17.5 cm (X-Axis) and 21cm (Z-Axis). nine0006
After that it is necessary to connect the threaded shaft with the motor
Printing table
We drill four holes with a diameter of 3 mm in a wooden plate 20x13 cm.
After that, tighten 4 bolts M3x25.
We assemble the entire 3D printer
We assemble it in accordance with the figures below. There is no point in giving additional explanations. The main thing is that the previous steps are correctly implemented. In this case, there should be no problems.