Dlp projector for 3d printer
In-Vision targets industrial DLP 3D printing with new 4K UV light engine
0Shares
In-Vision, an Austria-based developer of high-precision optical devices, has launched its first 4K UV light projector for use with resin-based DLP 3D printers.
Named Phoenix, the high-performance light engine is designed specifically for applications that require high light intensities and rapid cure times. Also sporting a high resolution and excellent operational reliability, Phoenix is built to satisfy the needs of industrial 3D printer OEMs around the world.
“We are constantly striving to improve the optics on our projectors, especially the light transmission, because the light intensity is very critical for our customers,” explains Florian Zangerl, CEO of In-Vision. “I have to admit that I’m proud of what we achieved with Phoenix.”
Christof Hieger (CTO) and Florian Zangerl (CEO) holding Phoenix. Photo via In-Vision.The Phoenix DLP light engine
The concept of a 4K DLP projector is not a novel one, but the performance levels of existing systems on the market are often limited by their chipsets. In-Vision initially attempted to integrate these readily available chipsets into their own 4K test rigs, but observed a drastic drop in light intensity after just a few hundred hours of operation, along with an abundance of stuck pixels.
Phoenix is reportedly the first DLP projector to be based on Texas Instruments’ DLP670S chipset, which has already outperformed its consumer counterparts in an In-Vision field test. The light engine is capable of delivering up to 6.5W of output power, a figure the company claims is “remarkably higher” than similar UV projectors on the market. With a micromirror array size of 3840 x 2160 XRP and an image size of 195.84 x 122.4mm, the device is capable of projecting up to 8K images thanks to an integrated four-way actuator.
Christof Hieger, CTO at In-Vision, adds, “Our DLP projectors maintain a stable high intensity for more than 10,000 hours of operation, and they’re designed to avoid unusual damages to the DMD, so our customers can trust their reliability in the field.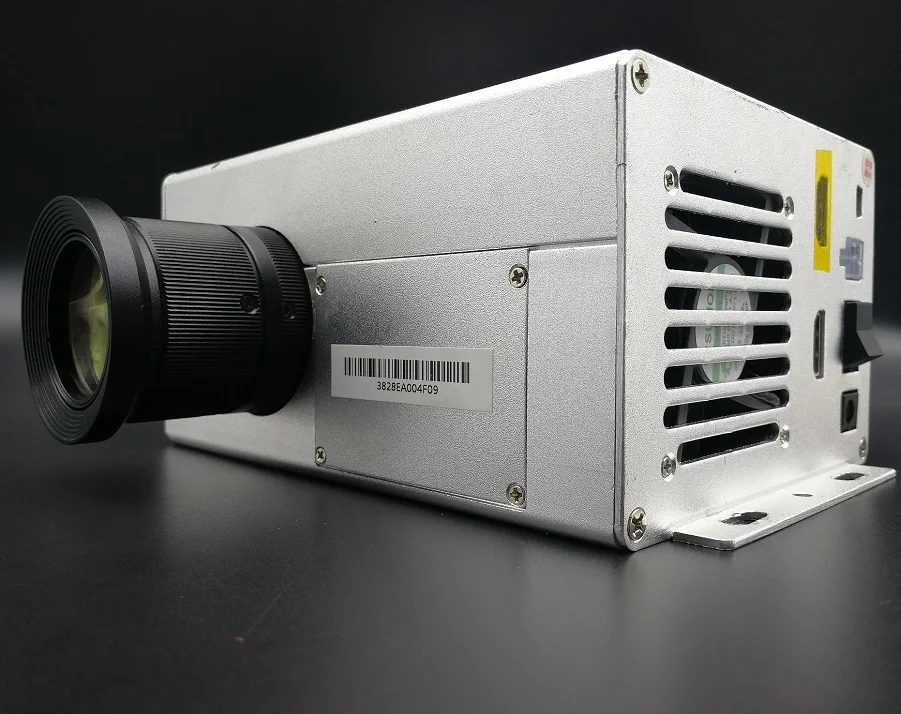 That’s why we waited for the industrial version of the chipset to launch our own version of the 4K projector for additive manufacturing.”
An option for the long run
Designed for long-term use, Phoenix aims to offer a competitive price point for its value. A set of pre-series units are currently undergoing testing at a customer facility, while the first serial units are expected to be available from May 2021 with a 385nm LED and a 76.5μm lens. A 405nm variant will be made available shortly after, and In-Vision is also offering custom lenses that can be designed and produced on-demand.
“Reliability is a key focus area for us,” concludes Zangerl. “Our projectors are a key component of 3D printers spread out in production facilities, labs and R&D departments around the globe. Our goal is to remove maintenance headaches for our customers: We make sure that our light engines provide the same light quality print after print over several years of operation, so our customers don’t have to worry about anything else than the regular LED replacement. ”
”
With ongoing advancements in resin technology, the industrial DLP market is quickly becoming a lucrative one. Over the past few months, 3D printer OEM Stratasys has acquired Origin and RPS, two key manufacturers of large-format DLP 3D printers. The Origin deal, worth $100 million in cash and stock, could provide Stratasys with annual revenue rises of $200 million by 2026, strengthening its position in the medical and industrial sectors.
Elsewhere, metal 3D printer manufacturer Desktop Metal recently acquired DLP system producer EnvisionTEC for a total of $300 million in cash and stock. The agreement represented Desktop Metal’s first move into the DLP market, and provided it with access to the growing additive dental, jewelry, and bio-fabrication industries.
Subscribe to the 3D Printing Industry newsletter for the latest news in additive manufacturing. You can also stay connected by following us on Twitter and liking us on Facebook.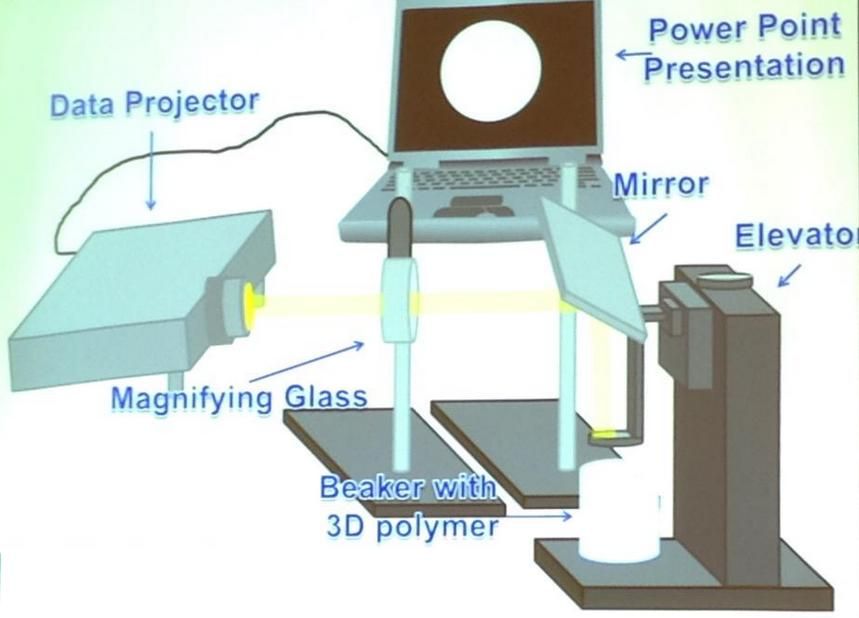
Looking for a career in additive manufacturing? Visit 3D Printing Jobs for a selection of roles in the industry.
Featured image shows Christof Hieger (CTO) and Florian Zangerl (CEO) holding Phoenix. Photo via In-Vision.
Tags Christof Hieger Florian Zangerl in-vision Phoenix Texas Instruments
Kubi Sertoglu
Kubi Sertoglu holds a degree in Mechanical Engineering, combining an affinity for writing with a technical background to deliver the latest news and reviews in additive manufacturing.
In-Vision Announces Industrial 4K UV DLP Projector for 3D Printing - 3DPrint.com
As 4K technology has become mainstream, it is now trickling into other markets where the benefits of high resolution is applicable. This includes 3D printing, where digital light processing (DLP) has potential advantages in improving the detail of 3D printed objects. Longer 3D has already developed a 4K UV LED projector for its Orange 4K 3D printer. Now, Austrian firm In-Vision is announcing a 4K UV LED light engine for 3D printing it calls Phoenix.
Phoenix 4K UV DLP projector. Image courtesy of Joshua & Xaver Haiden for In-Vision.
Phoenix is meant to provide stable, high-intensity and high-resolution light for 3D printing that In-Vision claims was previously unavailable due to the lack of proper chipsets. So, though 4K DLP projects have been on the market, the company wasn’t happy with the quality of the chipsets. It wasn’t until the release of Texas Instruments’ DLP670S chipset that In-Vision was satisfied with moving forward with their 3D printing light engine. The company said that the DLP670S chipset already offered improved optical performance in comparison with the consumer version of the Digital Micromirror Device (DMD).
“We had tested 4K projectors on our test rigs and had observed a lot of stuck pixels and a significant drop in light intensity already after hundreds of hours of operation,” explains Christof Hieger, CTO at In-Vision.
“Our DLP projectors maintain a stable high intensity for more than 10,000 hours of operation, and they’re designed to avoid unusual damages to the DMD, so our customers can trust their reliability in the field. That’s why we waited for the industrial version of the chipset to launch our own version of the 4K projector for Additive Manufacturing”.
The Phoenix provides up to 6.5W of output power, higher than other 4K UV projects commercially available, though In-Vision says this does not increase the price of the system. They are meant to work for long periods of time with just the LEDs being replaced. Pre-series systems are now being evaluated by a customer before serial systems will be released in mid-May with a 385nm LED and a 76.5 μm lens. A 405nm version will then be released thereafter and other lenses can be designed and made on-demand.
Phoenix 4K UV DLP projector. Image courtesy of Joshua & Xaver Haiden for In-Vision.
Compared to something like the light source for the Orange 4K, this is surely more industrial in terms of quality. The fact that Phoenix is, according to the company, “the first industrial 4K UV DLP projector for Additive Manufacturing” may represent a new shift in DLP overall, meaning higher resolution across the board as 4K technology is adopted. It’s also interesting to note the manufacturers of individual components that are benefitting from the increased adoption of 3D printing, such as Texas Instruments.
CEO Florian Zangerl and CTO Christof Hieger with light engine Phoenix. Image courtesy of Joshua & Xaver Haiden for In-Vision.
Moreover, the use of DLP may expand beyond photopolymers, as is the case for In-Vision competitors Visitech, which recently launched a DLP engine for powder bed fusion (PBF). Interestingly, Visitech’s machine is based on Texas Instrument’s DMD designed specifically for PBF. And In-Vision has seen its light engines used for bioprinting, meaning that an improvement in the quality of DLP isn’t just an improvement for DLP, but progress for many areas of 3D printing and beyond.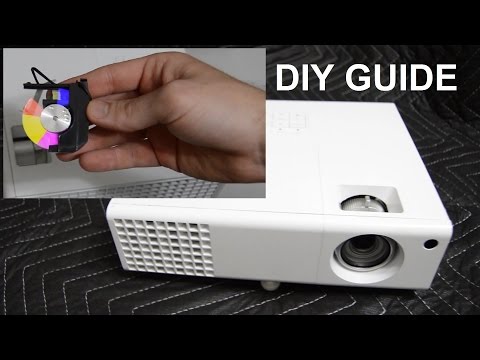
Stay up-to-date on all the latest news from the 3D printing industry and receive information and offers from third party vendors.
Tagged with: 4K • 4K DLP • dlp • dlp 3d printing • In-Vision • light engines • projector • texas instruments • uv led • uv led light engine
Please enable JavaScript to view the comments powered by Disqus.
Building a DIY DLP printer. Introduction. Projector selection. (translation of an article from Instructables).
Translated article from Instructables.com. Author: TristramBudel.
http://www.instructables.com/id/DIY-high-resolution-3D-DLP-printer-3D-printer/
and typos.In the introduction, the author provides basic information about the world of 3D printers, photolithography and argues for the use of a DLP projector.Also notes important characteristics when choosing it and argues for the choice of the direction of movement along the Z axis from bottom to top.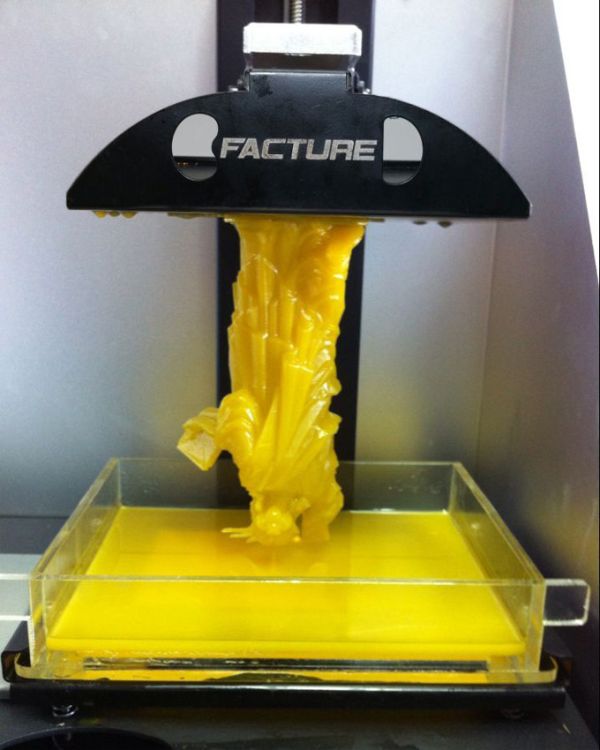 Suggests building with a mirror to reduce the size printer.). nine0003
Introduction.
Why did we work on a 3D printer?
As you know the world needs more printers, more creative platforms, more freedom. More ways to show off your epic creativity. And most importantly, the world needs the freedom to design, to produce exactly what you want without any restrictions. In short, 3D printers are cool and there are never too many of them. nine0003
Why choose Direct Light Processing (DLP)?
3D printers are different. There are printers that use Fused Deposition Modeling (FDM) technology. A large part of the RepRap community is fond of such printers. These are your Makerbots and Ultimakers, using a heated nozzle that melts the filament and transfers it to the right place on the print bed. There are powder sintering printers that use a laser or glue to combine powder particles. And also there are various photolithographic methods of 3D printing.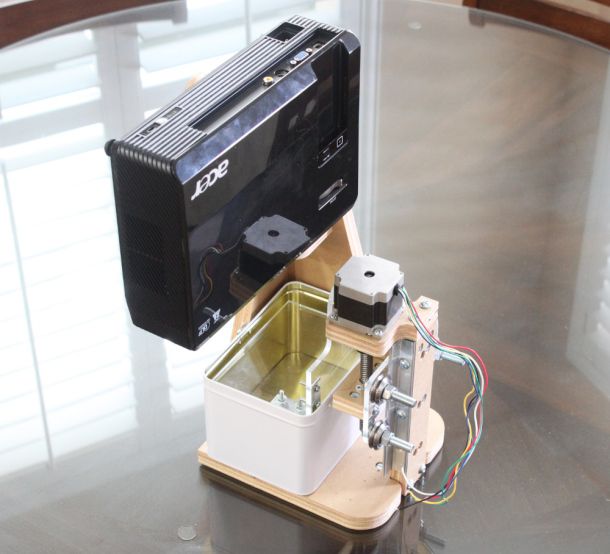 Lithography uses special polymers that are cured with light. This method is good because the non-exposed polymer remains liquid. nine0003
We found out that there are only 2 ways available when creating your own 3D printer - FDM and photolithography. Googling, we found a lot of examples of FDM printers that work on roughly the same principles and produce roughly the same results.
And besides, stereolithography is now truly accessible to the community, thanks to Michael Joyce of B9Creator. This is an awesome achievement. For us, this means that the world needs more different open source projects. Photolithography is a very precise manufacturing method. An accuracy of 100 nm has recently been achieved. I can't say exactly how much it is in inches, but if you squeeze your palms, the distance between them will be a little less than 100 nm. In other words, it's amazing detail. We would like to make very accurate printouts. So , our choice is based on the potential detail of such a printer, the availability of materials and ease of manufacture, and the fact that few before us have taken this route.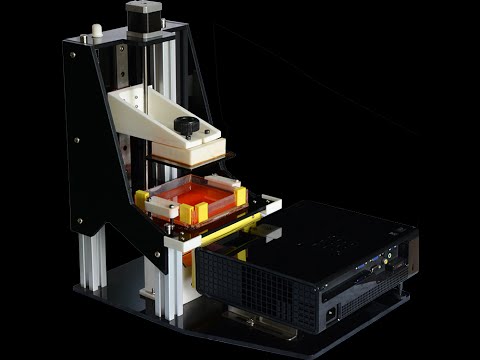
Step one.
Basic project details.
Here are some things to consider:
I find that doing lists like this before every new project really helps me and the people I work with develop a subject that really meets our expectations. This printer will be a prototype, we plan to build a cooler, more advanced version in the future. We hope to have it completed by the end of 2013. Maybe even put it on kickstarter. (probably - http://www.atum3d.com/ - p.p.)
The printer must have the following properties (in any order):
1) Availability.
2) Open source.
3) Compact.
4) High resolution.
5) Compatibility with a wide range of materials.
6) Easy to use.
7) Speed.
Process Basis:
This is how a photolithographic printer works. Photolithography is very simple. Light is projected onto the polymer, causing it to harden. More precisely, a certain amount of light falls on the polymer, and if
enough energy is transferred, it provokes photopolymerization.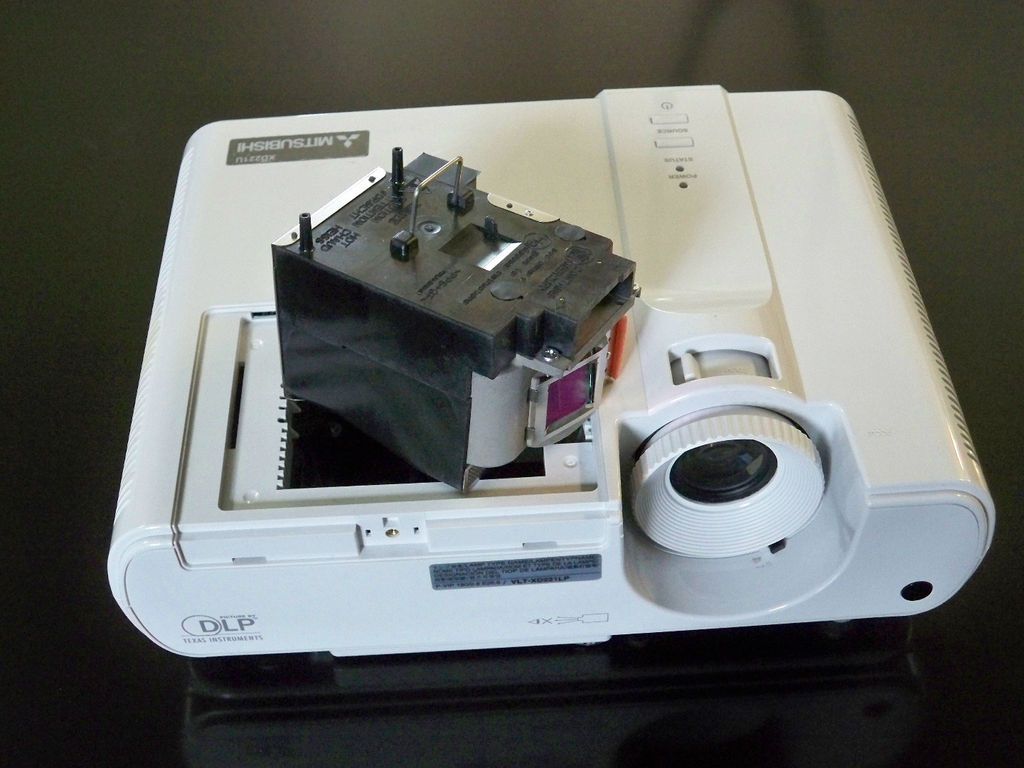
The first thing to decide is which light source to use:
The key is the amount of light energy or dose, a term borrowed from radiology.
Dose is measured by three vectors - photon energy, light intensity and duration of exposure, which together constitute the dose of energy.
Usually, when materials are exposed to ultraviolet light, the dose is measured in a specific spectrum. The rest of the light is reflected or absorbed and converted into heat. nine0003
Only photons with a sufficiently high energy level will take part in photopolymerization. This means that, depending on the polymer used, we will be interested in a certain part of the light (electromagnetic) spectrum. Most photopolymers react to ultraviolet radiation (light with a wavelength between 365 and 420 nm). Some polymers cure at longer wavelengths, but these are usually rare and expensive.
1) One of the things to consider in order to be able to print with a wide range of resins is that we need as much UV as possible.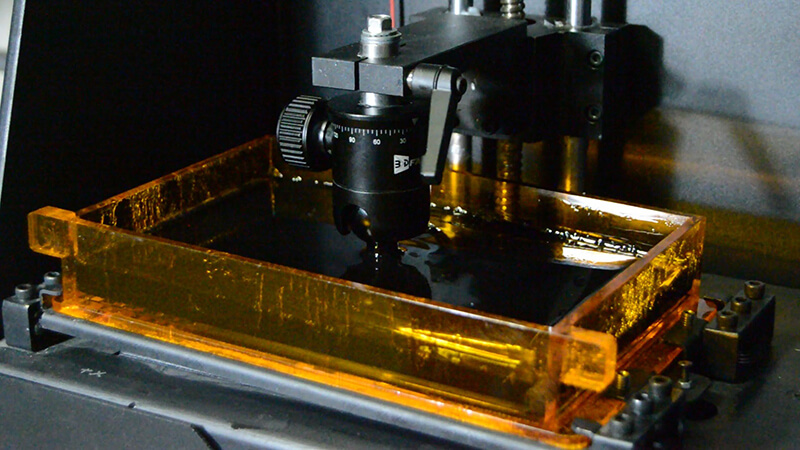 I will explain this later when I design the bathtub, mirror and anti-adhesive coating. nine0010
Exposure time and intensity are also important. Illumination intensity or luminous flux is the number of photons per unit of time that are emitted by a light source. The longer you illuminate the resin, the deeper the light penetrates and the harder and thicker the printed layer becomes. This is a unique property of stereolithography - exposure time is another factor that determines the thickness of the layer.
2) The light source should be of high intensity so that the illumination time is as short as possible, thereby increasing the printing speed. nine0010
3) It is also necessary that the light source is well controlled and easily switched between on and off.
The technology of photolithography assumes that everything illuminated polymerizes, while the unexposed remains liquid. This means that the resolution or print detail is determined by the minimum dot size.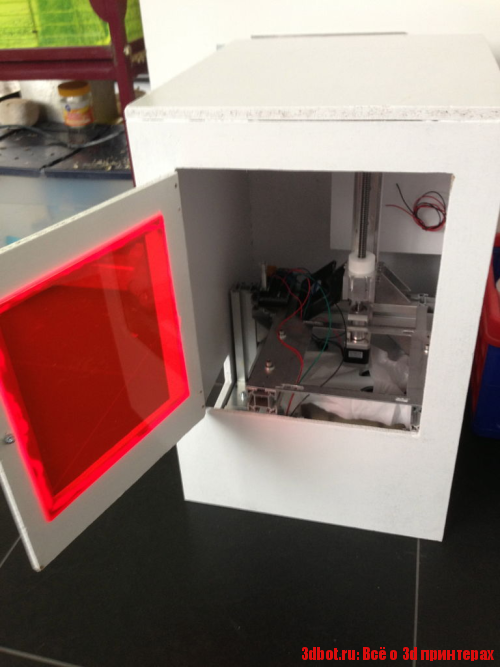
4) Another parameter of the light source is its ability to illuminate as small a point as possible. nine0010
Googling, we found that there are two suitable light sources that satisfy these conditions. Blue/UV laser with good optics for small dots and galvo or DLP projector. Lasers are cool, but we felt that achieving a small point with a galvo system was far beyond our capabilities. Since we didn't have any experience in setting up a laser, laser optics and galvo system, as well as the guys from Form 1 (patent issues) as an example, driven by the dream of one day offering our printer assembly kit to the world, we decided to choose way with DLP projector. nine0003
There is a whole world of DLP projectors.
The light emitted by the source passes through a rotating color wheel and falls on a surface with active micromirrors. These mirrors, in sync with the color wheel, either reflect light into a lens or some other place. Together, a plurality of micromirrors form an image.
Based on the considerations made earlier, it is easy to determine what properties the projector should have:
1. High UV radiation (indicates the extent to which the projector is able to affect the resin).
2. High radiation intensity (provides shorter curing time).
3. High contrast level (increases resolution and reduces highlights in unwanted areas).
4. High resolution (contributes to increased detail). nine0010
Last but not least we have only 1000 euros per projector. I understand that this is not a small amount for a decent projector, but if the project fails, you can always watch a movie on it.
We decided to use the Acer 7077365 Acer H6510BD DLP FHD 1080p with a resolution of 1920x1080 pixels.
Once we choose a light source, we can decide how to use it in our printer:
Hey hey wait, yes I understand we're only designing a 3D printer, but let's do a quick google of what resins are available on the market. We found out that they are not cheap. So it's cancels the top-down approach (Z-axis movement). In conventional stereolithography, the light source acts on the resin bath from above. As subsequent layers are formed, the platform sinks deeper into the polymer.
- This means that the height of the part cannot exceed the depth of the tub.
- This also means that no matter how big your model is, you always need to have a full bath of resin.
So if you want the largest object you'll be printing to be the size of a shoe, you need to keep the resin volume constant at about 3 liters. Given the cost of a liter of about 80 euros, 240 euros will always be in the tub. It's too much for us. So it's decided, we'll use the bottom-up approach.
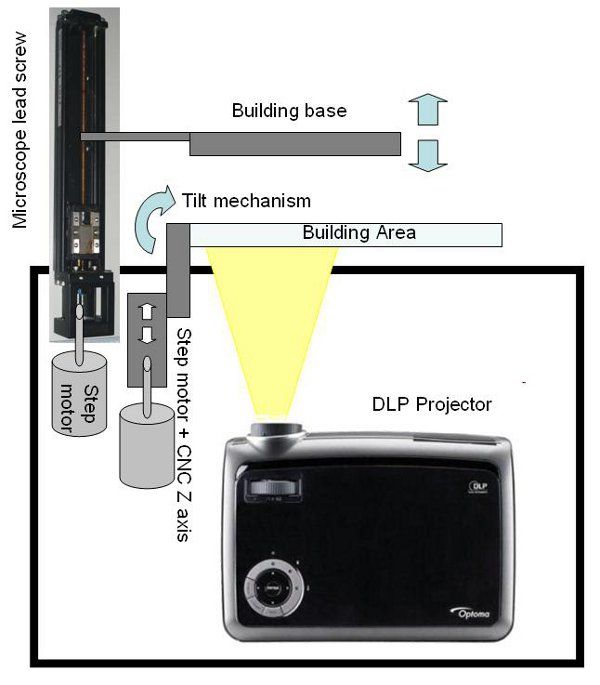
There are two reasonable configurations for a bottom-up DLP 3D printer. We can either project the image directly onto the build area or use a mirror and position the projector at an angle to the build area.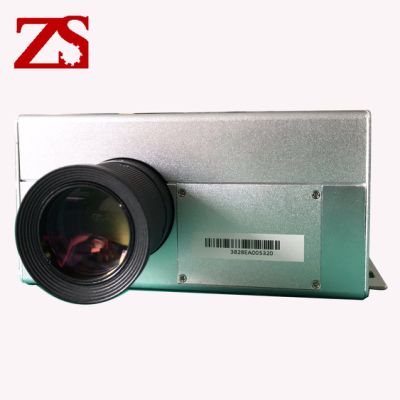 nine0003
We decided to mount the projector at a 90 degree angle and use the one-way mirror to project a clear image onto the build area, because we want to create a desktop printer that will actually fit on a table , i.e. be as compact as it is possible.
To be continued...
Possibly with own building experience.
So far ordered a Dell 2400MP projector for 8000 with delivery from Ebay. Will arrive at the end of January 2017.
DLP 3D printing | Description and features of the methodology
What is DLP 3D printing?
DLP 3D printing is an additive manufacturing technique that uses liquid photopolymer resins to build objects that are cured by light waves. “Yes, this is an SLA print!” - exclaim those who are already familiar with the methods of additive manufacturing. Indeed, the principle of operation of these two technologies is almost identical. However, the curing of the object in DLP printing occurs under the influence of a different light source.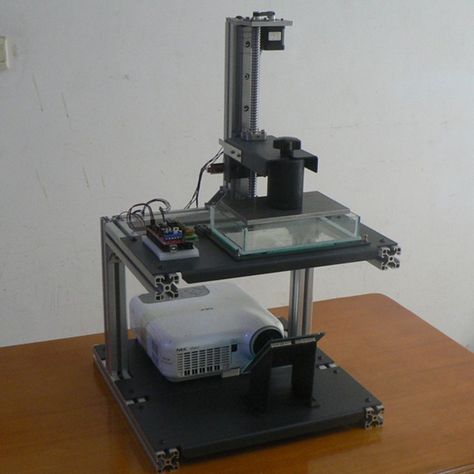 nine0003
In general, DLP 3D printing can be described as a direct analogue of SLA 3D printing, in some aspects even superior to it. For example, the print speed in DLP 3D printers is an order of magnitude higher than in SLA devices. And the difference in fidelity varies depending on the specific equipment and consumable, and is generally small. Now let's move on to the technical aspects and talk about the principle of operation of DLP technology.
Technology Description
As with all 3D printing technologies, the first step in manufacturing a physical object is to create a 3D digital model of it. We will not delve into the details of this stage, you can read more about 3D modeling for 3D printing here. The finished 3D model is loaded into a slicer program designed to set print settings and “cut” the model into layers. This step also generates supporting structures under the overhanging elements of the object. The received settings are saved, the model is converted into a control code for a 3D printer. Now you can start printing. nine0003
Above we mentioned the similarities between DLP and SLA 3D printing. It's time to talk about their difference and how DLP printers work. Instead of a laser machine (as in SLA), DLP 3D printing works with a special projector as a light source. This technique is not new: you can also find such DLP projectors in other, more common devices, for example, in TVs. Here they are also used for curing liquid consumables - photopolymer resins.
As in SLA printing, there are two options for DLP 3D printing devices: in one, the object is built from the bottom up (the working platform goes down), and vice versa (the working platform goes up). In our article, we will consider DLP 3D printing using both types of devices as an example.
Reverse DLP 3D printing
So, a special container of a 3D printer is filled with photopolymer resin to a certain level. The building platform is lowered into the container so that the gap between it and the bottom is equal to the height of one layer. Under the tank is a DLP projector. Light corresponding to the section of the first layer of the model is projected onto the platform. After its curing, the platform rises and the illumination of the second layer begins. nine0003
So, step by step, a physical object is created. Upon completion of printing, the platform rises above the level of the photopolymer, the product is removed and cleaned of the remnants of the consumable. After that, it is necessary to perform the final illumination in a UV lamp for complete curing of the material.
Direct DLP 3D printing
Unlike reverse printing, the DLP projector is located on top, above the resin tank. In this case, the working platform is located directly in it. To build the first layer, the platform rises so that the gap between it and the surface of the consumable corresponds to the height of the first layer. nine0003
The cross section of the first layer is projected onto the platform, curing the photopolymer, after which the platform is lowered down to the height of one layer.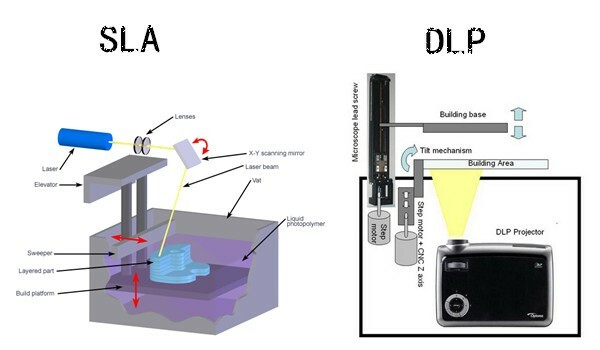 These steps are repeated until the complete construction of the product. Further actions are identical to those described in the previous paragraph: the object is removed, cleaned of consumables and subjected to additional illumination.
Benefits
Why is DLP 3D printing so interesting? What features of it help this technique to gain more and more popularity every day? Let's watch:
- Faster print speed than SLA 3 D printers. In contrast to laser stereolithography, DLP 3D printing projects an entire layer onto the photopolymer at once, and does not gradually pass through its sections with a laser. Due to this, the speed of creating products increases several times;
- High print precision. In terms of the accuracy of the created objects, DLP 3D printing is in no way inferior to SLA 3D printing: the layer height in this technique can reach 15 microns! However, it all depends on the type of 3D printer and the specific material; nine0256
- Large selection of consumables.
 As for photopolymers, their range in the 3D printing market is so wide today that it is sometimes difficult to decide. Moreover, often DLP 3D printers can work with the same consumables as SLA printers;
 - Affordable equipment price. DLP projectors are much cheaper than laser systems, which affects the cost of 3D printers for DLP printing for the better. Technology is developing rapidly and many today are opting for digital LED projection. nine0256
Among the shortcomings, it is worth highlighting only the rather high cost of consumables.
Materials used
DLP 3D printing works with liquid photopolymer resins (much the same as SLA 3D printing). Some consumables are even suitable for both methods. It depends on the wavelength of illumination and consumables. However, even specifically for digital LED projection, excellent professional lines of photopolymer resins have been developed. nine0003
So, today in the 3D printing market you can find flexible and rigid materials, transparent photopolymers and resins of a wide variety of colors.