How much filament does a 3d printer use
How Long Does a 1KG Roll of 3D Printer Filament Last? – 3D Printerly
I’ve been 3D printing this same roll of 1KG PLA for a while now and I was thinking to myself, just how long does a 1KG roll of 3D printer filament last? There are clearly going to be differences from person to person, but I set out to find out some average expectations.
The average 1KG spool of filament lasts users just over a month before it needs replacing. People who 3D print on a daily basis and create larger models could use 1KG of filament in a week or so. Someone who 3D prints a few small objects from time to time could stretch a 1KG roll of filament for two months and more.
There’s some more information below which is relevant to answering this question such as the amount of common objects you can print and how to make your filament last longer. Keep reading to find out!
If you are interested in seeing some of the best tools and accessories for your 3D printers, you can find them easily by clicking here (Amazon).
How Long Does a 1KG Roll of Filament Last?
This question is quite similar to asking someone ‘how long is a piece of string?’ If you have a long list of items that you have been wanting to print and they are of a bigger size, infill percentage and you want large layers, you can go through a 1KG roll pretty quickly.
The timing for how long a roll of filament will last really depends on how often you are printing and what you are printing. Some will tell you a roll of filament lasts them a few days, others will tell you one 1KG roll lasts them a few months.
Some big projects such as costumes and props can easily use over 10KG of filament, so 1KG of filament won’t last you barely any time at all.
If you have one big print, you could technically use up a whole 1KG roll of filament in just one day, with a big nozzle such as a 1mm nozzle.
It depends on your flow rates and the models you are printing. Your slicer software will show you exactly how many grams of filament it will take to complete.
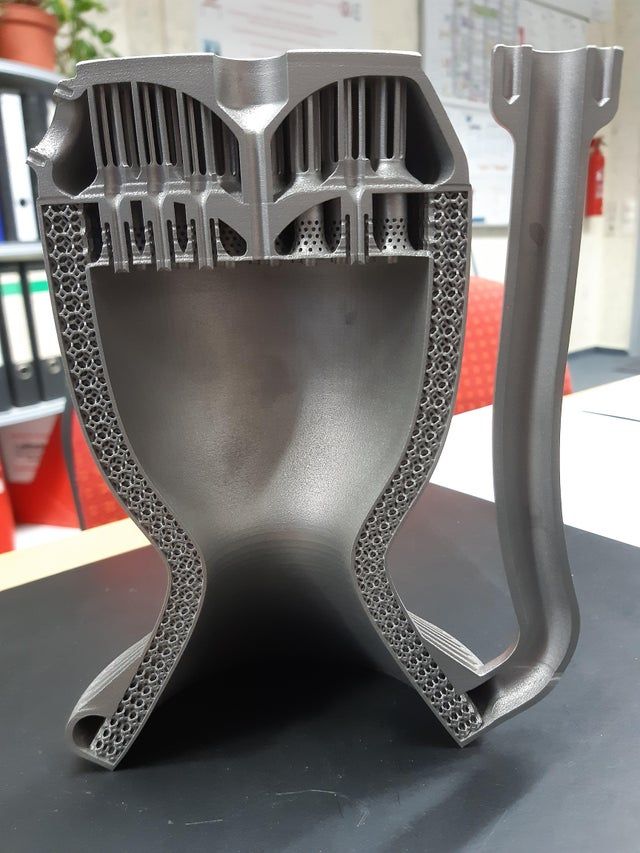
The piece below is almost 500g and lasts around 45 hours of printing.
When the same piece has the nozzle size changed from 0.4mm to 1mm, we see a drastic change in the amount of printing hours to just under 17 hours. This is around a 60% decrease in the printing hours and the filament used even increases from 497g to 627g.
You could easily add settings which use tons more filament in less time, so it’s really about your flow rates out of the nozzle.
If you are a low volume printer and like to print smaller items, a spool of filament can easily last you a month or two.
A high volume printer on the other hand, who likes to print bigger objects will go through that same filament in a few weeks or so.
A lot of people are involved in the D&D (Dungeons and Dragons) game, which are primarily made up of miniatures, terrain and props. For each print, it can easily take around 1-3% of your 1KG spool of filament.
One 3D printer user described that in 5,000 hours of printing in the past year, they had gone through 30KG of filament with near constant printing. Based on those numbers, that is 166 printing hours for every KG of filament.
This would measure up to about 2 and a half 1 KG rolls per month. It is a professional field that they are in so it their large filament consumption makes sense.
Using a bigger 3D printer like an Artillery Sidewinder X1 V4 (Review) compared to a Prusa Mini (Review) is going to make a big difference in how much filament you use. When you are limited in your build volume, you have no choice but to print smaller items.
A 3D printer with a large build volume leaves more room for ambitious, larger projects and prints.
How Many Things Can I Print with 1KG Spool of Filament?
For a rough picture on what it can print, you would be able to print somewhere between 90 calibration cubes with 100% infill or 335 calibration cubes with just 5% infill.
Some extra perspective, you could print around 400 average sized chess pieces with a 1KG spool of filament.
If you measure how long your 3D printer filament lasts in printing hours, I’d say on average you could get around 50 printing hours.
The best way to determine this would be to download some slicer software such as Cura and open a few models that you can see yourself printing. It will give you direct estimates for how much filament will be used.
This chess piece below in particular uses 8 grams of filament and takes 1 hour and 26 minutes to print. That means my 1KG spool of filament would last me 125 of these pawns before it ran out.
Another take away is that 1 hour and 26 minutes of printing, 125 times would give me 180 printing hours.
This was at a speed of 50mm/s and increasing it to 60mm/s changed the time from 1 hour 26 minutes to 1 hour 21 minutes which translates to 169 printing hours.
As you can see, a fairly small change can decrease 11 printing hours, technically making your 3D printer filament last less time but still printing the same amount.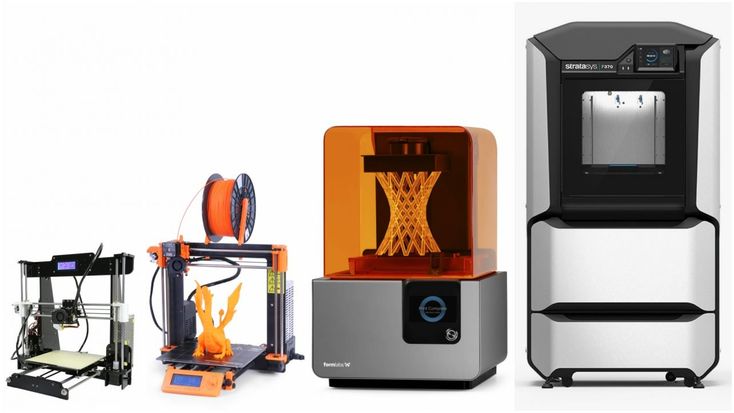
The goal here is not about increasing or decreasing printing hours, but being able to print out more objects for the same amount of filament.
The average for a miniature is less than 10 grams per mini so you could print over 100 minis before your 1KG spool of filament will run out.
You could also technically account for prints that fail, since there’s always potential for that to happen and be of no use to you. If you’re lucky most of your failed prints happen at the initial first layers, but some prints can go wrong a few hours in!
Check out my post on Great Ways to Stop 3D Prints Moving While Printing, so your prints fail a lot less!
How Do I Make My 3D Printer Filament Last Longer?
The best way to make your rolls of filament last longer is to slice your objects in such a way that it uses less plastic. There are several ways to cut down on plastic production which over time can save you a substantial amount of filament.
Many factors affect how long a roll of filament lasts, such as the size of your prints, infill density %, use of supports and so on. As you’ll realize, a 3D printed part such as a vase or pot uses very small amounts of filament because the infill is non-existent.
Play around with the settings to lower your filament usage per print to make your filament last longer, it will take some trial and error to really get good at this.
Find Ways to Reduce Support Material
Support material is widely used in 3D printing but models can be designed in such a way where it doesn’t require support.
You can also make use of 3D printing software to efficiently reduce support material. You can create custom supports in a software called Meshmixer, the video below by Josef Prusa goes into some nice detail.
I found out about this awesome feature by researching the Best Free 3D Printing Software, which is an epic list of slicers, CAD software and more.
Reduce Unnecessary Skirts, Brims & Rafts
Most 3D printer users will use a skirt before each print, and this makes a lot of sense so you can prime your nozzle before printing. You can remove the number of skirts you set if you do more than 2, even one can be enough a lot of the time.
If you don’t already know, skirts are the extrusion of material around your print before it gets to printing the actual model, though skirts use such a tiny amount of filament it doesn’t matter.
Brims and rafts, on the other hand, can usually be reduced or removed altogether in many cases, as they do use up more filament. They can be very useful for certain prints, so balance out the savings with the benefits carefully.
If you can figure out where you can remove them, you can save a lot of filament in the long run and a nice amount for each 1KG roll of filament.
Make Better Use of Infill Settings
There’s a massive trade-off in using high infill percentages versus 0% infill and it will allow your filament to go a long way.
Most slicers will default to an infill of 20% but many times you’ll be fine with 10-15% or even 0% in some cases. More infill doesn’t always mean more strength, and when you get to very high infill settings, they can even start to become counterproductive and unnecessary.
I printed a 3D model of Deadpool with just 5% infill using the Cubic pattern, and it’s pretty darn strong!
Infill patterns can definitely save you filament, the honeycomb, hexagon, or cubic patterns are usually good picks to do this. The fastest infills to print are going to be the ones that use the least material and the hexagon infill is a great example.
You’ll not only save material and time, but it’s a strong infill pattern. The honeycomb pattern is widely used in nature, main example being the honey bee.
The fastest infill pattern is probably the Lines or Zig Zag and are great for prototypes, figurines or models.
Print Smaller Objects or Less Often
This is an obvious way to make your 3D printer filament last longer. Simply scale your objects down if they are non-functional prints and don’t necessarily need a larger size.
I understand wanting larger objects but you have to understand there will be a trade-off, so keep that in mind.
For example, if you only print items that use up 10g of filament at a time and you print twice a week, a 1KG roll of filament would last you 50 weeks (1,000 grams of filament/20g per week).
On the other hand, if you’re into projects that use up 50g of filament at a time and you print every day, that same filament is going to last you just 20 days (1000g of filament/50g per day).
Another simple way to make filament last longer is to print less often. If you print a lot of non-functional items or a bunch of items that collect dust (we’ve all been guilty of this) maybe dial it down a bit if you really want to make your filament roll to go a long way.
Imagine over one-year span, you managed to save 10% of filament using certain techniques, if you use 1KG of filament per month and so 12KG of filament per year, a 10% saving would be just over a whole roll of filament, at 1. 2KG.
2KG.
You might think there are drawbacks of doing this such as making weaker parts, but if you use proper methods you can actually strengthen parts as well as save filament and printing time.
How Much Filament Do You Need for a Print?
How Long in Meters/Feet) is a 1KG Roll of Filament?
According to Rigid Ink, based on PLA having a density of 1.25g/ml a 1KG spool of PLA would measure up at around 335 meters for 1.75mm filament and 125 meters for 2.85mm filament. In feet, 335 meters is 1,099 feet.
If you wanted to put in a cost per meter of PLA filament, we have to assume a specific price which I can say on average is around $25.
PLA would cost 7.5 cents per meter for 1.75mm and 20 cents per meter for 2. 85mm.
85mm.
If you love great quality 3D prints, you’ll love the AMX3d Pro Grade 3D Printer Tool Kit from Amazon. It is a staple set of 3D printing tools that gives you everything you need to remove, clean & finish your 3D prints.
It gives you the ability to:
- Easily clean your 3D prints – 25-piece kit with 13 knife blades and 3 handles, long tweezers, needle nose pliers, and glue stick.
- Simply remove 3D prints – stop damaging your 3D prints by using one of the 3 specialized removal tools.
- Perfectly finish your 3D prints – the 3-piece, 6-tool precision scraper/pick/knife blade combo can get into small crevices to get a great finish.
- Become a 3D printing pro!
3 ways to estimate how much filament you will need for 3D printing
The question of how much filament to keep on-hand is one that bugs every FDM 3D printer user at one point or another. Most of us usually just limit our prints to how much filament we have. Or we reschedule any bigger project based on when we would buy a new spool.
There is a better way to go about this though. And that is what we will discuss here today.
While both weight and length are useful ways to gauge filament consumption, the simple fact that 99% of filament purchases are in terms of weight of the filament means that it is a better ballpark to use when estimating 3D printer filament usage.
Most slicers automatically calculate an estimated weight of the 3D print on the basis of the type of material (PLA, ABS, HIPS, PETG etc.) upon slicing an STL file into G-Code. Look for “sliced information” or some similar information dialog within the slicer.
For simplicity, we’ll be talking about the weight of 3D prints in PLA. If you use another type of filament as a daily driver, then simply adjust the weights given in this article according to the difference in density between your type of filament with the density of PLA.
By “general use” we mean 3D printing parts, tools and thingamabobs every now and again, but not too often, nor on a daily basis. Basically, anything short of a full-blown project.
In this case, most 3D prints would not exceed 50 grams of filament (PLA). You can easily get away with keeping 2 or 3 spools of 1KG filament on-hand. If you use a 3D printer capable of printing with 2 or 3 filaments at the same time, then your requirement would also increase accordingly.
At the very least, every user should have 1 spare spool – recommended to be a neutral color – as a fail-safe reserve.
If you routinely take up entire 3D printing projects, then you would go through filament much quicker than the general user. You would also probably need different materials or at least different colors on-hand to ease out your post-processing.
In this case, it is much better to stock your filaments on the basis of your running project needs.
But how exactly does one go about accounting for all the filament that a particular project would use? If you had a final STL file ready to go, then of course you could simply slice it to find out the estimated weight of the filament.
Speaking for the broad majority of tinkerers and 3D printing enthusiasts, however, reaching a final STL file isn’t something that one does on the first day of the project and is only near the final stretch that the STL is also set in stone. Of course, the answer to this problem is, we estimate!
Estimate based on prior experienceOne of the easiest ways to go about estimating the amount of filament you would need is to compare it to previous projects already completed.
For example, your current project requires you to 3D print a hexagonal container of some sort. By prior experience you know that a similar sized round container would use up 76 grams of PLA filament when printed with 20% infill.
Now a hexagon has more defined edges than a round container and perhaps you’d like to use 40% infill to make it extra sturdy, so as a rough estimate we increase the expected weight of the hexagonal container by 20% and add an extra 5% to account for the difference in shape.
Increasing the 76 grams by a total of 25%, we’d get a ball-park estimate of around 95 grams. Since this 95-grams is estimated from the consumed material of the prior project, this method has the added advantage of accounting for things such as failed prints, support structures, varying levels of in-fill as well.
Approximation (order of magnitude estimation)The more mathematically inclined readers would be familiar with this concept named after famed physicist Enrico Fermi.
A fermi approximation only considers the order of magnitude or for our purposes, weight in grams rounded to 1, 10, 100 and so on to reach a close enough estimate of the weight of the filament.
Say, for example you want to 3D print a cosplay helmet for your own head size, but are unsure exactly how much filament it would take. A good starting point would be to consider the size of the helmet in comparison to say a 10 cm3 3D printed cube at 100% in-fill with PLA.
Surely the helmet would not be only 10 cm3 or 100 cm3, and it cannot possibly be a 1000 (10,000 cm3) times the size of the cube as well. So as the only reasonable selection, we will say that the helmet would be around 100 times the size of the cube.
Since the density of PLA is 1.25 grams per cubic centimeter, our 100% in-fill cube would weigh exactly 12.5 grams. So, our helmet at an order of magnitude of 100 times more should be around the ballpark of 1250 grams at 100% in-fill. If we are printing at 20% in-fill, then it would reduce that weight to 250 grams.
Now you may be thinking; “surely such a simple guess couldn’t be accurate?”. And you’d be right. But as an estimate goes, the Fermi approximation is a great way to reach an accuracy of within one order of magnitude or one power of 10 of the actual answer. So, the actual helmet could only be 100 grams, or it could be 400 grams, but you can be sure that you wouldn’t needmore than one 1 kg spool of filament for it.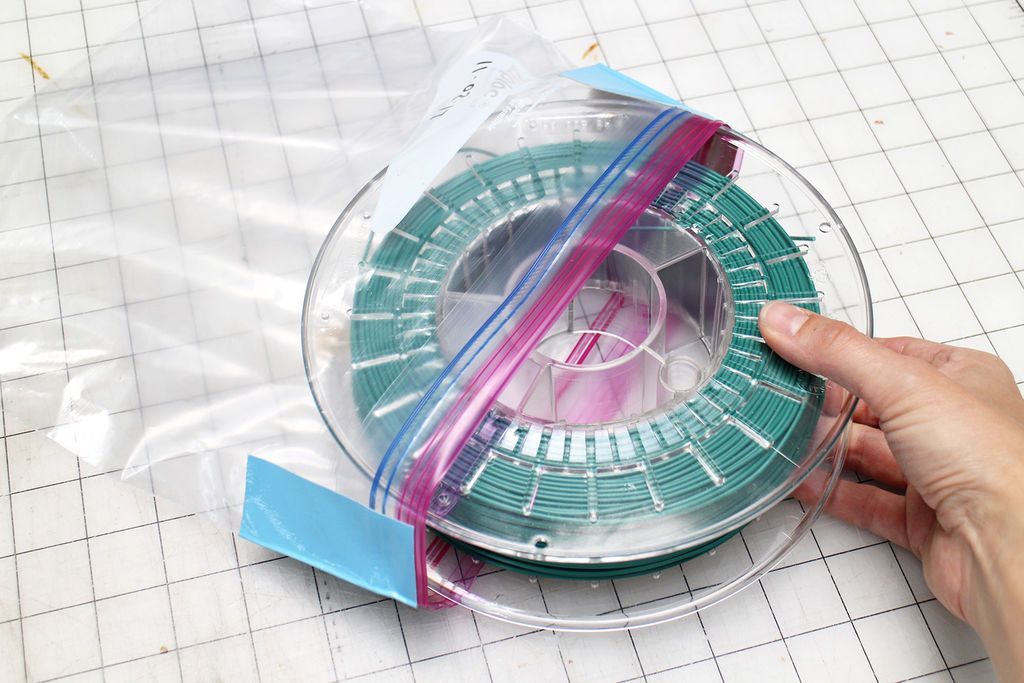 And that is what we needed to estimate: How many spools of filament you would need for the project.
As a pro-tip, we would recommend you steer clear of using a geometric volume as fine way to calculate weight of the 3D print.
Firstly, most 3D prints are of a unique shape and unless you are brilliant at math, their volumes would need to be estimated by simplifying the design to Minecraft-style cuboids.
You are already uncertain of the final details of the 3D print, so you’d be making multiple guesses as to the volume of the resultant cuboids. This increases the uncertainty as the complexity of the 3D print increases.
Secondly, a volumetric approach usually would fail to account for the support structures, failed prints and other technical losses that you may face, so more often than not, you would wind up under-estimating your project requirements.
Lastly, it is human nature to make conservative guesses when faced with the unknown. In terms of estimating the required filament, this would invariably mean that the person guessing the volumes of the various parts would also under-estimate.
Since not running out of filament for the duration of the project is the entire goal of the estimation, the end-result of the geometric volume approach is time spent doing nothing worthwhile in most cases. However doing so may give a better estimate on how many spools of filament to inventory over time.
Since 3D printing is an additive manufacturing process there is very limited material waste involved. With a 1 KG spool of filament, you would probably 3D print ~990 grams or so of the material.
Factors that affect this of course, is the quality of the filament. If the filament keeps breaking or keeps getting jammed, this would reduce the effective amount of filament you could 3D print with.
The other factor is the age and degradation of the 3D printer itself which would lead to increased jams, more failed prints, and more process loss at the hot end.
The biggest contributor to wasted filaments is not the hardware nor the filament, but complex 3D print design, improper filament storage or incorrect 3D printer settings is what lead to excessive waste of material.
Support structures are arguably the bigger contributors to willful wastage of materials when it comes to complex 3D prints. Support structures can be avoided by either breaking the complex design into multiple simpler units and then attaching them in post-processing, or by incorporating the support structure into the 3D print itself; grids, interlocks, beams and scaffoldings have been a part of architecture for centuries, so consider incorporating one or more of them in your next project.
Improper filament storage is perhaps one of the biggest reasons that leads newcomers to have to buy new spools frequently. Remember, proper storage of 3D printer filaments is somewhere dry, away from sunlight, properly spooled (not tangled), and preferably in an airtight container.
Failed prints are another major culprit that waste precious filament. The best way to minimize the risk of failed prints is to learn about your material and the optimal 3D printer settings with a few test prints before doing any actual 3D printing. Learning from others’ mistakes is the best way to avoid making those same mistakes yourself.
Tags: 3D printingFilamentMaterialsPLA
How much electricity does a 3D printer consume?
Author Kirill Sokolov Reading 8 min. 353 views Posted by
While 3D printing is certainly a fun hobby, there's no doubt that it can also get quite expensive. Apart from the cost of the printer and filaments, you could easily spend a few hundred dollars just to get started. Another recurring cost that we should not ignore is the cost of electricity consumed by a 3D printer. nine0005
Whether you're 3D printing for fun or business, the money you spend on electricity is what you need. keep in mind. How much electricity does a 3D printer use and what can you do to reduce your energy bills?
Table of Contents
- Step One: Check Your Printer's Power Rating
- What Factors Affect How Much Power 3D Printing Uses?
- Hot end heating
- Heating of the printed platform
- Heating losses
- Step engines
- Control board
- Comparison of energy consumption of various models of 3D printers
- Tips for reducing the costs of 3D printer
- 1.
 Use the printer with the building 9
 - 3. Print with high temperature fibers only when necessary
- Final Thoughts
Step One: Check Your Printer's Power Rating
Like any electrical device, your 3D printer must be rated. For example, a 3D printer that requires 30A 12V consumes up to 360W of power (power = current x voltage). This is a very high figure, but only because it is the maximum power that this particular 3D printer can draw.
There can be a very significant difference in power consumption if you print at high temperatures. , high speed settings or heated beds. However, between different models, you can expect printers with larger platforms to use more power, as well as printers that can print at higher temperatures. nine0005
What factors affect how much energy 3D printing consumes?
If you're interested in the exact amount of power your 3D printer requires, then the best way is to use a power consumption monitoring tool.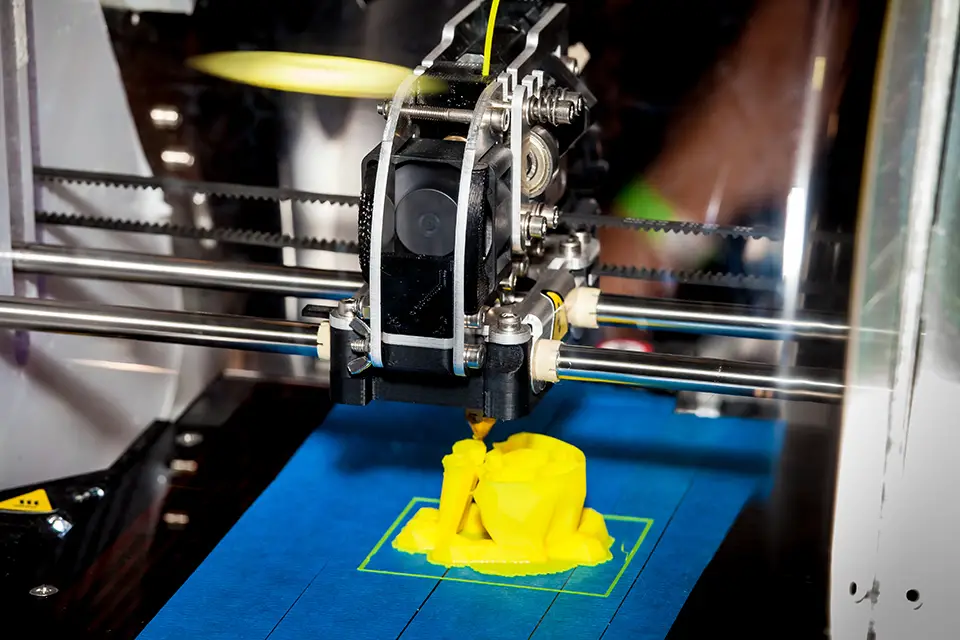 These tools act as an interface between your 3D printer and an electrical outlet, giving you an accurate measurement of the volts, amps, and power your 3D printer draws. A good example is Kill A Watt Electricity Usage Monitor by P3. nine0005
It would be impossible to isolate any particular part of the 3D printing process and test how it affects the power consumption of the printer. Instead, we can sum up these factors and infer how much electricity they consume.
Heating at the hot end
One of the most energy intensive drain parts of a 3D printer is the hot end, specifically the part of the nozzle that melts the filament. How much energy this process consumes depends on the temperature you set as well as the type of filament you are working with. If you're working with a lot of high temperature fibers like nylon or ABS, then you're probably using a lot of electricity for just that part. nine0005
Print bed heating
The print bed temperature depends on the nozzle temperature. This is a measure that improves adhesion to the layer and prevents warping, which is one of the constant problems when working with high temperature fibers.
There are two factors to consider when evaluating the energy consumption of a heater. bed – temperature setting and bed size. The temperature also depends on the type of filament you are printing with. The size of the bed depends on your 3D printer. The larger the bed, the more energy will be required to maintain the set temperature. nine0005
Heat loss
3D printer components can reach temperatures above 200°C. They must also remain at this temperature, so any heat loss to the environment must be compensated by the heating element. This is another issue for high temperature 3D printing as a hotter nozzle and print bed will inevitably have higher heat loss. If there is a way to minimize heat loss, you can save a lot on your energy costs. nine0005
Stepper Motors
There are two important sets of stepper motors in one 3D printer: those that drive the extruder gears and those that drive the movement of the nozzle.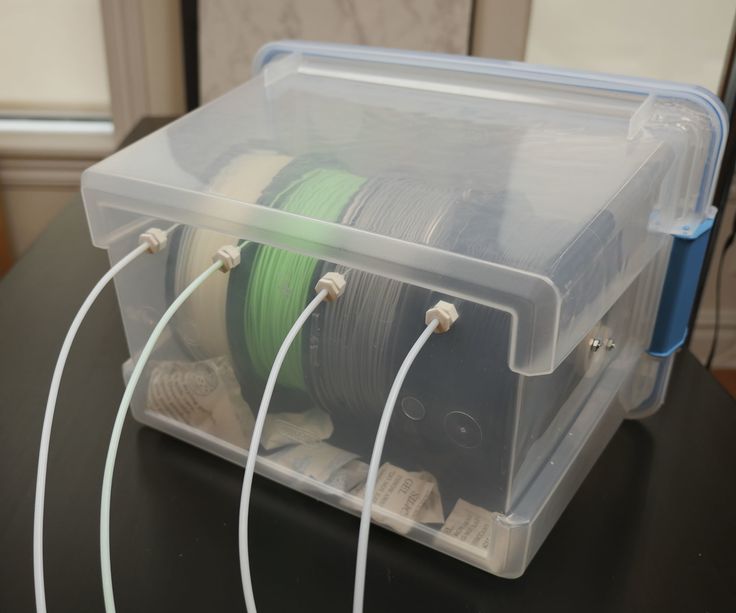 While these motors are very small and draw little power, they also need to be constantly running for the hours needed to complete a single 3D printing project.
Control Board
The control board or "brain" of a 3D printer consists of several electrical components that help control the printer's temperature, nozzle placement, extruder gears, and various other trivial tasks. Despite the importance of this feature, the control board does not actually consume much power. nine0005
The conclusion that we can draw from this little exercise is that most of the energy consumed by a 3D printer goes towards heating the nozzle and the print bed. While not surprising, this fact also gives us insight into how we can reduce the power consumption of our 3D printing projects.
Comparison of power consumption of various 3D printer models
Since it is impossible to determine the exact power consumption of a 3D printer without specifying the model, we will look at how much power consumption of various 3D printer models and how this affects costs. nine0005
Let's start with the Monoprice Mini Delta, a very small and inexpensive Delta type device. A 3D printer that has proven to be quite popular among beginners. Among its distinguishing features are a small build platform and a print head driven by three stepper motors. The Monoprice Mini Delta reportedly only consumes up to 45W during bed and nozzle preheating. Power consumption during printing increases slightly to 60W, probably due to the action of the stepper motors. nine0005
To provide contrast, let's look at the power consumption of Flashforge Creator Pro. This is a much more expensive 3D printer with a larger print bed, a rigid metal frame, and a built-in housing. Preheating the large print bed required a staggering 300W of power, while the nozzle required slightly less than 280W. The case proved to be very useful in reducing heat loss and stabilizing the printer's power to 250W during printing.
The two 3D printers we referenced here give us a useful range for how much power models of varying complexity can consume, from 60W to 250W when printed. In terms of kWh, this range corresponds to 0.07–0.24 kWh.
This also allows us to compare the power consumption of 3D printers with other devices we have in the house. For example, a typical desktop computer consumes about 1.05 kWh, which is more than four times the power consumption of Flashforge Creator Pro. nine0005
Based on electricity tariff data from April 2020, the average US consumer pays 13.31 cents per kWh. This means that you will pay approximately 3.2 cents for every hour you use Flashforge Creator Pro. The numbers for the Monoprice Mini Delta are even more pleasantly surprising - you pay less than 1 cent for every hour of use.
These numbers are likely to come as a relief to 3D printing enthusiasts, especially those who leave their printers running for hours on end. While this isn't an excuse for wasting electricity, it's still nice to know that you haven't been hit hard on your running costs just because you got into 3D printing. nine0005
Cost Saving Tips 3D Printer Power Consumption
Although you've come to terms with the fact that you're unlikely to add a huge amount to your energy bill just because you use a 3D printer, many of you probably we still appreciate any advice on how to reduce power consumption.
1. Use the Printer with the
Enclosure As our analysis of Flashforge Creator Pro has shown, having a platen enclosure can significantly reduce the power consumption of a 3D printer during the printing process. This becomes even more pronounced if you are printing with a filament that requires high temperatures for both the nozzle and the print bed. If you're using an inexpensive printer without a built-in case, you can simply make your own using a couple of plastic sheets and wood frames. There are many tutorials on the internet for DIY 3D printer cases. nine0005
2. Reduce print time
Time is a factor we haven't talked about much, but it's certainly one of the most important when determining how much power a 3D printer consumes. If you can reduce the print time of your project, you can significantly reduce your energy costs.
There are several ways to achieve this goal, but there are two that are particularly effective: increasing print speed and printing with thicker layers. Obviously, this is not advice that can be taken in a vacuum. When making these adjustments, you need to consider other factors such as print temperature, filament type, and the quality level of the finished product..
3. Print with high temperature fibers only when necessary
Experimenting with different types of fiber materials is a natural part of 3D printing, but using those that require very high print temperatures can be quite expensive in the long run. . This requires not only more heat in the nozzle, but also a hotter print bed. The difference between 30 and 40°C may not seem like much, but every little thing counts – at least depending on which point of view you take. nine0005
Your 3D printer is unnecessary, then you can stick with low temperature fibers like PLA if you're printing just for fun. PLA not only saves energy but is also a more environmentally friendly choice due to its biodegradable nature.
Closing Thoughts
Consider how much power each of our electrical devices we consume on a regular basis is only part of being a responsible consumer. The same principle applies to 3D printers. As 3D printing is quickly becoming a hobby for more and more people, now is the perfect time to be more aware of how much power 3D printers use. nine0005
It's nice to know how energy efficient 3D printers are, especially when compared to the computers and TVs we usually have at home. However, this is no excuse for not making any effort to reduce the power consumption of our 3D printers. When used responsibly, we can reduce energy costs by fulfilling our responsibilities as responsible citizens.
Attention! Never leave 3D printers unattended. They can pose a fire safety hazard. nine0005
3D printer. How to calculate plastic consumption and printing time. The cost of 3D printing.
Probably one of the most frequently asked questions from customers who want to build a 3D printing business is “How to calculate the material (plastic) consumption and time to print an object.”
For many, this question arises long before the decision to purchase a 3D printer is made. In fact, this question is really important, as it allows you to calculate in advance the economic benefits of manufacturing a particular product. nine0005
Now we will teach you how to do it using this case for Iphone 5 as an example:
You can download this model from the following link.
Tested on the following settings:
Print speed - 90 mm/s, Free travel speed - 120 mm/s, Infill - 20%, Layer - 0.2 mm, Support - disabled.
First, let's learn three simple rules:
1) The amount of plastic spent on a particular product does not depend on the printer you use; nine0005
2) The speed of production is inversely proportional to the quality of the product;
3) The amount of plastic used for a particular product is VERY dependent on the print settings, in particular on the degree of filling the product (Infill) and the use of support (Support).
You can use any free program to calculate the printing time and the amount of material spent, but we will show you how to do it based on the 3 most popular ones:
The first software is MakerWare. At the time of the publication of this article, the most current version of the program: MakerWare 2.4.1* (this software is suitable for working with 3D printers of the Replicator series and most of its copies from China). You can download this program for free on the website of the manufacturer , and read the description and details of working with the program on our website in the article " Working with MakerWare ".
*The highlight of the new version is improved print support for the MakerBot Dissolvable Filament (using a special support plastic ( HIPS ) which dissolves in Limonene). Also, a new profile has appeared in MakerWare, which contains the layout of a special compacted support. The standard melting point for MakerBot Dissolvable Filament (HIPS) is 250°C-260°C, which allows the support plastic to adhere well to the print plastic (such as ABS plastic). When working with printing with two extruders, you just need to specify a different melting temperature for the support plastic and plastic (print plastic) in the settings, and, accordingly, which of the plastics in which extruder.Please note: on Mac OS X, before installing version 2.4.1 (this is the latest version today), you must first uninstall MakerWare 2.4.0, otherwise the program will not work correctly. nine0174
In order for MakerWare to display the information we are interested in during the file generation process, it is necessary to check the “Preview before printing“ checkbox. Then, if you press the “Export” button, the program will display a window in which a layer-by-layer visualization of the 3D printing process will be built. In the upper right corner of this window you will see the information you are interested in. To activate this function, your computer must be equipped with a modern video card, if you see an empty window, then you can safely go to the store for a new video adapter or the latest drivers. nine0005
The second software is Cura. This program is the most versatile and feature rich software for 3D printers. The program is developed for Ultimaker 3D printers, but at the same time it is compatible with a number of other developments, such as reprap, delta and even the original replicator.
You can download the latest version of Cura on the official website.
To calculate the material, you do not need to do any additional manipulations, just place the object on the platform and the program itself will calculate the information we are interested in in the background. nine0005
We remind you that the performance of your computer directly affects the time it takes for the program to generate the G-code.
The third software is Repetier-Host. Repetier certainly cannot boast of a modern interface, simplicity and convenience. But on the other hand, the software has full-fledged Russification, flexible settings, the ability to connect third-party slicers, as well as a whole array of useful professional settings. This is the only program that allows you to customize literally every step of the 3D printing process, has a full-fledged manual control mode for a 3D printer, as well as the ability to launch 3D printing directly from a flash card that is installed in the printer. nine0005
On the basis of this open source software, many manufacturers create their proprietary programs for 3D printing. One such clone is the Polygon software for Picaso 3D printers.
You can download Repetier-Host from the developer's site.
You can calculate the printing time and plastic used by clicking on the “Slicing” button on the “Slicer” tab. After that, you need to go to the “G-code editor” tab, where you will receive the necessary information:
0005
| Name | MakerWare | Cura | Repetier |
| Logo |
|
|
|
| Interface | excellent | good nine0220 | poor |
| Comfort | high | medium | low |
| Slicing speed | medium | high | slow |
| Third party 3D printer support | poor | nine0215 rich | |
| Easy to calculate time and material | very simple | just | medium |
| Plastic used to print one cover for Ip hone | 13 | 15 | 14 |
| Time taken to print one case for Iphone | 65 min. | 44 min. | 52 min. |
Please note that all three programs, despite different slicers, showed approximately the same results. All differences in printing speed can be explained by the error and features of the movement of the extruder at different stages of creating an object.
Our results allow us to answer another popular question: “What is the cost of manufacturing an object on a 3D printer?”. nine0041
Now this question is easy to answer. We proceed from the fact that at the time of this writing, an ABS plastic reel in our store costs UAH 359, and a PLA reel costs UAH 379.
In total, we can print approximately 70 covers for Iphone 5 phone from one kilogram reel .
If we neglect electricity, then the cost of one cover from:
- ABS plastic will be about - 5 UAH. 13 kop.
- PLA plastic will be about - 5 UAH.
Learn more