Zcorp 650 full color 3d printer
ZCorp 650 (3D Systems Projet 660) - Great Deal! - For Sale - Talk Manufacturing
For Sale
zcorp, projet, full-color, 3d-systems, 3dprinter, for-sale
FormURLife
#1
We have a Zcorp Z650 3D Printer in PRISTINE CONDITION for sale - photos here. We have partnered with a 3D Print provider to produce and ship our products so we no longer need our wonderful in-house printer. We’re selling it very cheap so we don’t have to move it to our new offices and are not looking to make a profit only to get it into the right hands with somebody who’ll take good care of it. If you have any interested or know anybody who might be please let us know!
I would welcome you to come by and have a look in person or request any additional information including sending something to be printed for quality assurance. I previously worked for 3DSystems as a design engineer helping to create and test all of there 3D printers during and after there Zcorp acquisition and can guarantee this machine is in fantastic shape!
PRINTER DETAILS
Year: 2013 (purchased used 2015)
Make: Zcorp
Model: Z650
Depowder station: Included
Title: Yes
Condition: Excellent
Materials: Yes
Laptop: Included (required for starting builds)
Spare Parts: Yes
Print Logs: Yes
Our Run-time: 286hrs total
Price: $26,000 OBO
- This printer is very well maintained by me (Chris) personally after each print run and during monthly maintenance. I also keep a detailed log of maintenance history. Print logs and maintenance history available upon request.
- Includes every print run we have run including run-time
- * This is the same model that had the paneling changed to grey and rebranded as “Projet660” when 3DSystem acquired Zcorp.
ZPRINTER SET UP / TRAINING (local purchaser)
- I am happy to spend a day to teach ins and outs
- I will provide documented processes for cleaning and maintaining the printer (per run / monthly)
- I am available for questions as needed in general
- I will provide set-up support(on-site if local)
SHIPPING
When ready to move forward I am happy to help arrange the pickup/delivery.
User_1425
#2
We would want to purchase one. Can you send across more details and where are you located.
FormURLife
#3
We’re located in the San Francisco Bay Area. Please send over your email address and we can discuss details. Thanks!
User_1425
#4
pasha0212
#5
Please let me know if your printer still for sale.?
3dprintmeplace
#6
Hello,
We own a zcorp 650 and were wondering is you could help us understand why we are getting the error code #40006 when we run the alignment. It indicates that the window needs to be cleaned. We have thoroughly cleaned it several times in every different way w could think of and it still gives us this reading. The window is crystal clear. Is it due to any other issue that it gives this error code. Had read your post as being well versed in the industry. We would appreciate any help you could give us. Thanks.
Used Z Printer 650 for sale. 3D Systems - Z Corp equipment & more
Düsseldorf, Germany
Düsseldorf, Germany
Trusted Seller
Stuttgart, Germany
Trusted Seller
Berlin, Germany
Lija, Malta
Trusted Seller
Munich, Germany
5.000 €
Kranj, Slovenia
Socorro, TX, USA
Socorro, TX, USA
Trusted Seller
25.304 €
New Mexico, USA
Moscow, Russia
Moscow, Russia
Moscow, Russia
Overview of the ZPrinter 650 full-color 3D printer
Good afternoon, Lovers of additive technologies!
Today we will tell you how the Zprinter 650 professional color 3D printer works. It is also Projet 660 Pro.
So, as they say, Let's go!
The Zprinter 650 is a professional 3D printer that prints full color plaster models using CJP (ColorJet Printing) technology. With a maximum printable size of 254 x 381 x 203 mm, this is the second largest camera in the ZPrinter line of printers.
The number of colors is 390,000, so the printer can print any gradations and shades. The layer thickness is 100 microns and the X and Y resolution is 600 x 540 dpi.
First, let's go through the consumables, because there are really a lot of them in this printer.
Consumables.
Let's start with plaster. The entire ZPrinter and Projet x60 range uses a special gypsum resin. Gypsum is taken as the basis, but with some additives, thanks to which it holds its shape better, sticks together better, and less crumples.
If you have purchased a new printer, you will need 28 kilograms of plaster to fill the entire chamber. Well, or at least 14 kg to start it.
The printer uses the same printhead as conventional Hewlett-Packard (HP11) inkjet printers. Only 4 colors: blue, pink, yellow, black. As well as a print head with a binder component.
The most interesting thing is that only black HP11 heads are suitable for this printer. Other colors do not fit. And when we install a new cartridge in the print carriage, the printer first spills all the native ink and fills the cartridge with ink of the desired color.
The Zprinter has a CISS (Continuous Ink Supply System) installed. Color ink comes in 300 ml cartridges, and binder and black in 1 liter.
Also, a special 1 liter Cleaning Solution is installed at the bottom of the printer, but we will talk about it later.
So, to summarize all consumables, let's make a small list:
- Cyan (VisiJet PXL Cyan)
- Magenta (VisiJet PXL Magenta)
And also poking around in the service functions, changing the temperature of the heads, voltage, watching the amount of remaining polymer and ink, calibrating the printer. After we have selected the necessary print options and placed the object, the program slices the model into layers and sends the job to the printer.
3D printing.
Like all 3D printers, Zprinter prints models in layers. But unlike other 3D printing technologies, this printer glues the layers together. Now I will tell you in more detail how this happens.
Before printing, the printer pours a small amount of resin (about 1cm thick) onto the worktable and levels it. This is necessary to create a "raft", that is, the substrate of the future model.
The print of the model then starts. First, the feed roller moves as far back as possible, and a small amount of gypsum is poured from a special feeder on top. The roller rides back and, while scrolling, discards the gypsum polymer, thereby evenly leveling the entire future layer.
The photo clearly shows the feeder in which the material is stored.
Plaster residue falls into the waste bin located under the work table.
The print head, sorry for the tautology, is printing a new layer. Everything happens as in a conventional inkjet printer: the ink falls through small nozzles onto the gypsum polymer and paints it. The binder holds the plaster together.
After the new layer is painted and glued, the working table is lowered by 100 microns. And the whole process is repeated again.
And this is where the description of the process of building a model can end, but one more thing happens: as the print progresses, the nozzles begin to clog, and just for this there is a special cleaning fluid - Cleaning Solution.
Once in several layers, the print head moves as far to the left as possible, to the cleaning station. At the station, all nozzles are sprayed with cleaning liquid and passed through a plastic spatula. At the exit, the nozzles are cleaned of ink and plaster residues, and they can safely print further.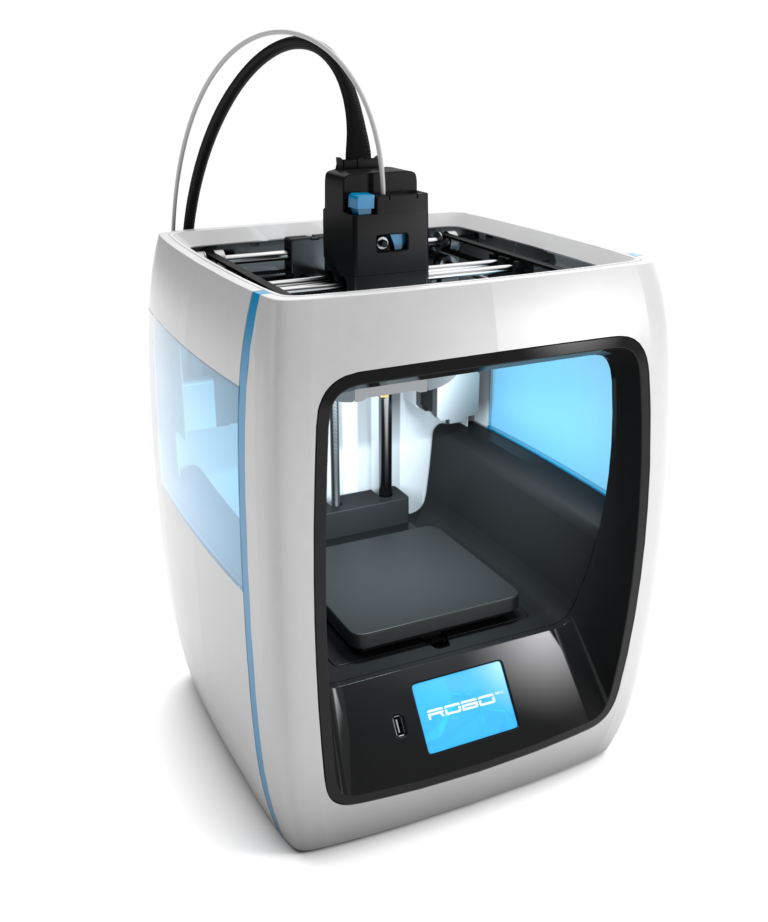
When the model is completely printed, the most interesting stage begins: taking the model out of the plaster and post-processing.
Postprocessing.
Once the print is complete, we need to take the model out of the resin bath. There are two ways to do this. Fast and for the "lazy"
The first way: the printer has a special “vacuum cleaner” that sucks the plaster into the top feeder. Also, there are several attachments for it. We just take and "vacuum" the desktop. The second way is to simply select the plaster drop function in the printer menu, and the material will begin to disappear into the bowels of the desktop on its own (a 'vacuum cleaner' is also installed under the desktop.
The model will remain, and all excess plaster will fly back to the storage bin and future prints.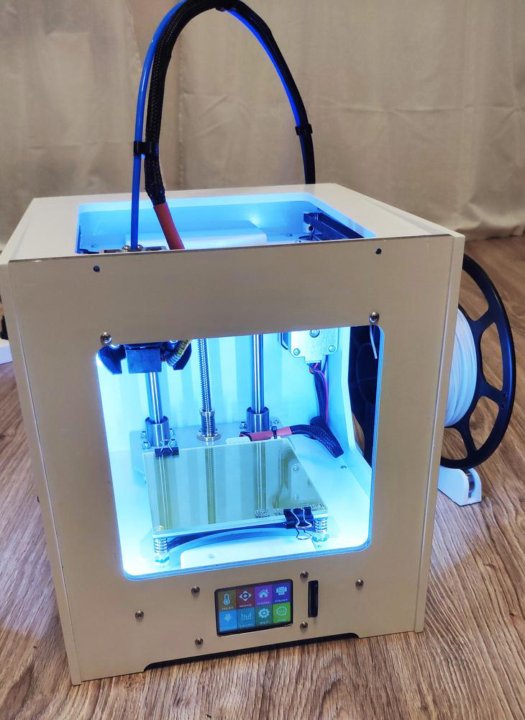 This is a huge plus of this 3D printing technology - unused material can be reused.0005
The printer has a model cleaning station on the right. We place our model there, and begin to blow it with air. The chamber has a special “purge handle”. By directing the air flow on the model, we blow off all the residual plaster. To save material, some models can be made hollow on the inside - and use the blow handle to blow unused plaster through the holes. And instead of 100 used cubic centimeters of material, only 30-40 can be used. Saving!
When the model has been blasted and all plaster has been removed, the model can be poured.
Pouring and impregnating.
Our model is almost ready, but so far it is very fragile and easy to break. In order for it to become strong, and all colors become bright, we need to impregnate it with a fixative - a special ColorBond liquid.
There are several ways to impregnate, either by hand or by placing the whole model in a fixer bath. The second option is more expensive, less economical, but fast.
Impregnation is not as easy as it seems - when interacting with the fixer, the model starts to warm up to 80 degrees, smoke, and you can get burned! And if you pour too much fixative - there will be a blot, if too little - the colors will be dull. So it's a whole art.
When the fixer is dry, the last step of post-processing remains - paraffin pouring.
So far the model is a bit rough. But after we shed it with hot paraffin, it will change, stop absorbing moisture, and the roughness will go away.
So, let's heat up the ProJet Finisher to 70C, wait until the paraffin melts, put the model on the grid, and start dousing it with melted paraffin. First on one side, turn over to the other side, and spill on the other side. Then we close for half an hour in the oven, so that the remaining paraffin would stack, and you can take out the model. Ready!
As you can see, the post-processing process is not the easiest. You have to do many different operations, and in words it is not difficult, but in reality you need a lot of experience to make a model with high quality.
At all stages, you need to be extremely careful with the model: at the stage of blowing with air, the model is very fragile;
But having gone through all the difficulties, we got an excellent color model!
I hope you liked this article, and you picked up something interesting and useful for yourself, because we wrote this review with love and kindness))
Subscribe to our Vkontakte group, stay tuned for news, articles, and reviews!
VK
Youtube
Techno Print 3D Company
This is our first review of the most popular and inexpensive 3D printers for 2020. The list will include the best-selling devices in two price ranges (up to 30 tr and up to 60 tr). Printers working with both plastic filament (FDM) and photopolymers (LCD/DLP) will be presented. This list will always be up to date, as it is periodically updated and supplemented. Read more→
The Chinese company Dazz3D announces the launch of the project on KickStarter and accepts pre-orders for Dazz3D Basic and Dazz3D Pro 3D printers. These revolutionary new devices are aimed at both the professional and amateur markets. Read more→
We all know that precise calibration of the 3D printer desktop is the foundation and the key to successful printing on any FDM printer. In this article we will talk about the main and most popular ways to level the "bed". So, as mentioned above, 3D printing without desktop calibration is impossible. We face this process Read more→
It's hard to go through a day today without hearing about 3D printing technology, which is bursting into our lives at an incredible speed. More and more people around the world are becoming addicted to 3D printing technology as it becomes more accessible and cheaper every day. Now almost anyone can afford to buy a 3D printer, and with the help of Read more→
The FormLabs Form 2 and Ultimaker 3 are perhaps the most popular 3D printers today, capable of high quality printing with incredible surface detail.