3D printing abs ender 3
Ender 3 (Pro & V2) ABS settings; Prevent Warping, and more. – 3D Solved
ABS is one of the hardest materials to learn how to print properly on an Ender 3, Pro, or V2, and this is mainly due to the fact that it’s not an enclosed printer.
However, you can still print ABS on an Ender 3 by adjusting some settings and using some tricks to improve bed adhesion.
Here’s the short version: To print ABS on an Ender 3 you need to set the printing temperature between 230°C and 240°C, the bed temperature to 100°C, turn off the part cooling fan, and apply some glue stick to the build surface in order to improve adhesion and prevent warping.
Of course, that’s not all and I’d recommend that you keep on reading to find out how my tests went, how to improve bed adhesion, how to prevent a couple of issues, and more.
If you don’t want to have to go through all the trial and error that we did in order to find the Ideal Settings for creating high-quality prints on your Ender 3, then definitely check out our own Cura Profiles tailored specifically for the Ender 3 Printer Series.
Recommended: Use an Enclosure
Before I get into the settings, I have to mention that you should absolutely use an enclosure to print ABS on an Ender 3, since this will keep the temperature inside of the printer consistent and prevent warping and layer separation.
It’s worth noting, however, that you don’t necessarily need to buy an enclosure since you could absolutely make one yourself, or you could even put a big cardboard box over the printer and this will also work just fine.
Of course, this could be a potential fire hazard, which is why I don’t recommend it, but it works. My recommendation would be to get an affordable non-flammable Creality enclosure to be on the safe side.
Now, if you already know your printing settings and want to skip straight to the tips on how to improve bed adhesion to prevent warping, click here.
Printing Temperature
On the Ender 3 (Pro and V2), 230°C up to 240°C seems to be the sweet spot not just in terms of detail, but also bridging and overhang quality as well as preventing unwanted artifacts. Going below 230°C results in poor layer adhesion, whereas going above 240°C may result in poor bridging quality.
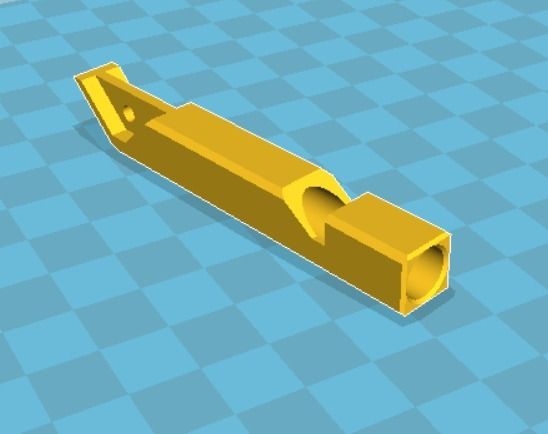
I printed multiple temperature towers, some larger and some smaller since I wanted to test bed adhesion at the same time, and I also printed a simple cable guide that I designed that attaches to my desk.
Like I just mentioned, the best temperature seems to be between 230°C and 240°C for the Ender 3, especially if there’s bridging and overhangs. As far as the cable guides go, I didn’t notice any quality difference between the different temperatures since they were simple designs.
However, and this goes back to the point on requiring an enclosure since I didn’t use one for these tests because I assume that most of you don’t have one, the cable guides always cracked at the same spot (the 230°C had a wider crack than the 240°C one), which goes to show how important an enclosure is to keep a high and consistent temperature around the object.
Printed at 235°C using a brim and glue stick for adhesion.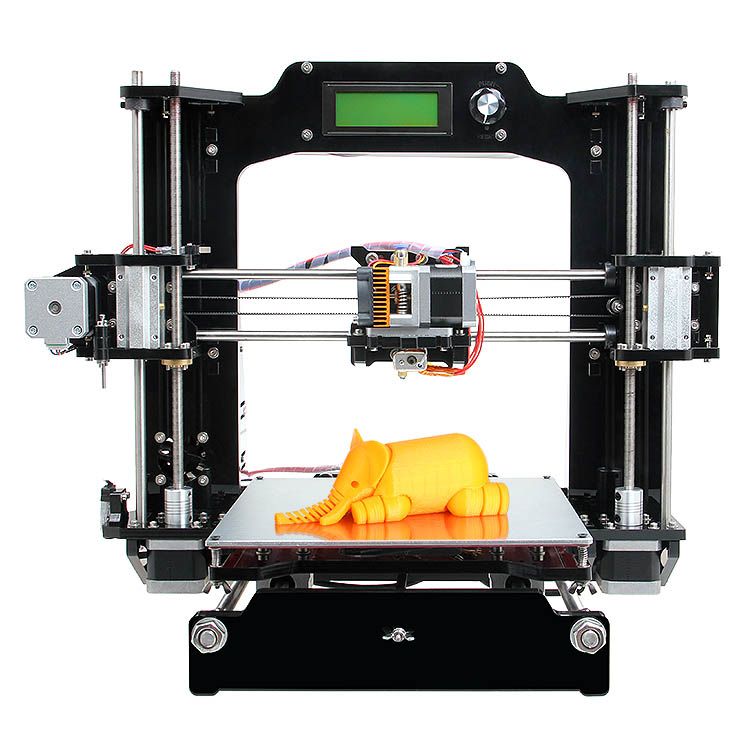
Slight crack on the far right of the print which is not visible in the image (thanks crappy phone camera).
Note: If you want to learn more about the importance of enclosures and why you may need one, check this article.
Now, it’s worth noting that ABS can be printed at much higher temperatures, but the reason I stopped at 240°C is because of the PTFE tube which isn’t capable of handling temperatures over 245°C and will get damaged and release some very toxic fumes. So, don’t go over 245°C unless you change the PTFE tube or make some other alterations to the printer.
- Ideal Ender 3 ABS Printing Temperature: 230°C to240°C.
Ideal Bed Temperature
If there’s one thing you need to get right with ABS it’s bed adhesion, and setting the bed to the right temperature is absolutely crucial (also using a brim, but more on this in a second).
A study was conducted about how bed temperature affected adhesion, and the conclusion is; “This study shows a significant increase in adhesion forces when printing parts at a bed temperature slightly above the glass transition temperature of the printing material”.
Essentially, if you’re having trouble with bed adhesion, increase the bed temperature slightly over the Glass Transition Temperature of the filament (60°C for PLA, 100°C for ABS, and 80°C for PETG).
For the Ender 3 (Pro and V2), the ideal bed temperature when printing ABS is 100°C up to 110°C (for increased adhesion). In some cases, the use of glue stick may be necessary to keep the print from detaching from the build plate.
Now, without an enclosure you’ll always have to deal with warping since ABS contracts a bit too much, and in some cases, the print may completely detach from the build plate even if you set the bed temperature to 110°C (again, more on how to prevent warping later in the post).
- Ideal Ender 3 ABS Bed Temperature: 100°C to110°C.
Part Cooling
Since ABS contracts more than other plastics while cooling down, the print has a higher chance of warping since the upper layers that are not being heated by the bed cool down and exert a pulling force on the lower layers, which may either cause the print to warp or layers to separate (less common).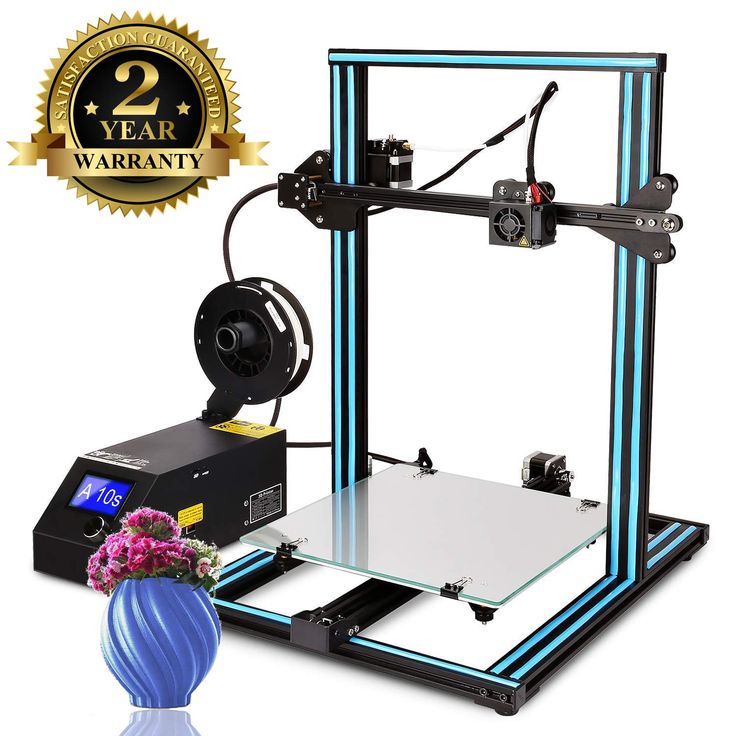
This is why you may want to keep the cooling to a minimum or off, not just for the first few layers, but always.
In my testing, I found that keeping the fan off for the first couple layers and then running it at 30% speed yielded great results.
However, bridging can be an issue with ABS since it requires the plastic to be cooled as fast as possible to work, which means that the higher the fan speed, the better the bridges come out.
Luckily, there’s an experimental setting in Cura called “Enable Print Cooling” where you can adjust the “Bridge fan speed”, which allows you to set the print cooling fan to 100% only when printing bridges (To find the setting type “bridge” into the settings search bar, check the “Enable Print Cooling” box and scroll down to “Bridge fan speed” to adjust it).
Ideal Ender 3 ABS Cooling settings:
- Fan completely off for first layers.
- Fan at 30% or off for the rest of the print.
- Fan at 100% for bridges.
Retraction Settings
Stringing test with Default Cura Settings.I ran a retraction/stringing test and got absolutely perfect results with the same settings I use for PLA, which are also the default settings in Cura, which are as follows:
- Combing Mode: ON and set to “Within Infill“ (default is “not in Skin”, both work).
- Retraction Distance: 6.5mm
- Retraction Speed: 25mm/s
- Maximum Retraction Count: 100
- Minimum Extrusion Distance Window: 10mm
With these settings, my stringing text came out extremely clean with no visible strings anywhere.
Speed Settings
Just like with PLA, printing at speeds between 40mm/s and 60mm/s is ideal for ABS on the Ender 3 and will result in great looking prints without many artifacts, ghosting & ringing. The best tradeoff between speed and quality is 50mm/s.
Now, while you may get great results at 50mm/s and 60mm/s, there may be times where you may want to lover it to 35 or 40mm/s depending on the complexity of the model and the level of detail, since you’ll want to avoid ringing & ghosting as much as possible.
- Ideal Ender 3 ABS Speed settings: Between 40mm/s and 60mm/s.
If you don’t want to have to go through all the trial and error that we did in order to find the Ideal Settings for creating high-quality prints on your Ender 3, then definitely check out our own Cura Profiles tailored specifically for the Ender 3 Printer Series.
Solving ABS issues on the Ender 3
Like I previously mentioned, ABS contracts a lot more than other thermoplastics when cooling down and this causes it to warp and sometimes even crack along the layer lines.
This means that the cooling of the print needs to be taken more into consideration than when using other easier to print filaments, such as PLA or PETG, which is why I’d highly recommend investing into an enclosure since this will prevent most of ABS’ issues, such as warping, poor bed adhesion (since this is also cause by warping), layer delamination/cracking, etc.
However, if you don’t want to get one and are going to be printing with a Stock Ender 3, then here are some tips to improve your chances of success:
Keep the printer away from air drafts
Cold air drafts will cool the print faster than it needs to and it will also cool it irregularly, and this means that the plastic will contract more on one side than the other, causing the print to warp and maybe also crack.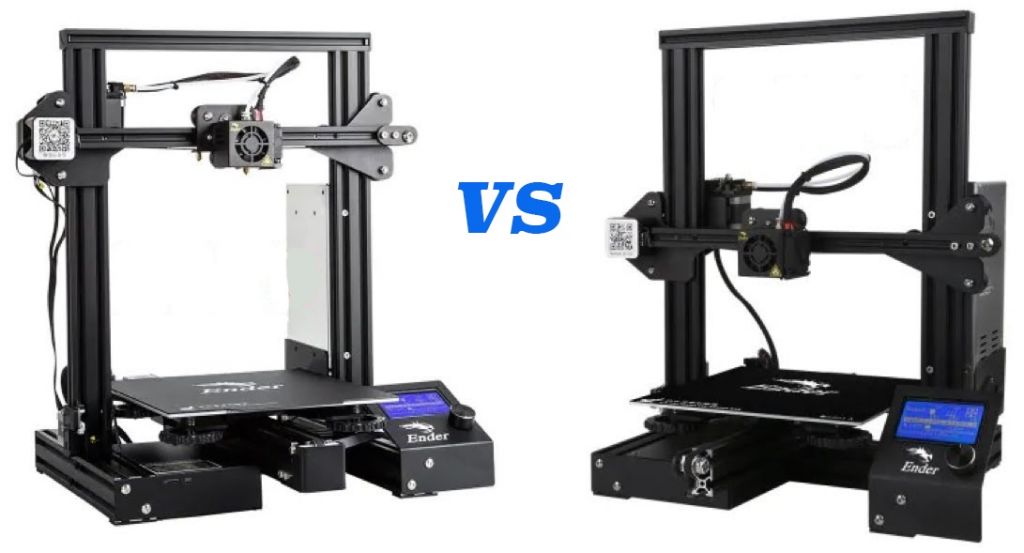
If you’re printing without an enclosure, keep the printer in a room that’s as warm as possible and close all the windows/doors to prevent air drafts.
Note: ABS emits some toxic fumes and you shouldn’t be in the same room as the printer while it’s running.
Print using a Brim
Since bed adhesion can be a serious problem with ABS, you should use all the slicer settings at your disposal to improve it, and using a brim is probably the best way of dealing with it.
A brim is essentially a skirt that contacts with the print and which helps with bed adhesion and warping in particular, so always print ABS with a Brim.
Use Glue Stick for better adhesion
I managed to keep my print from detaching from the bed and even from warping by applying a little amount of glue stick to the print surface.
Glue stick will drastically improve adhesion and also help with the removal of the print once the bed has cooled down.
It’s worth noting that trying to remove the print with the bed still hot will be nearly impossible because of how strong the bond becomes with the glue, so let it cool down first to room temperature and then remove it.
Using Glue Stick was hands down what gave me the best results while printing ABS as far as bed adhesion goes, and even though there was some slight warping going on, it was barely noticeable.
Use Painters Tape
Taping some Painters’ tape to the build surface also helps with bed adhesion a lot. Just make sure to apply the strips of the tape as neatly as possible and to not leave any gaps between them.
As far as adhesion goes, ABS stuck really well to the tape and it causes less of a mess when compared to the glue stick and removing it is also much easier.
However, the glue stick performed a bit better, which is why I’d recommend using it over the tape.
Print Cracking (layers separating)
While the only real way to solve this is by printing using an enclosure, the stronger the bond between the layers the lower the risk of delamination, and this means that using a larger nozzle could keep the print from cracking since it provides a much larger contact surface area between the layers, essentially increasing the bond strength between them.
Cold environments and air drafts will further increase the risk of cracked prints, so make sure to keep the printer in a closed room with as high of an ambient temperature as possible.
Conclusion
The major enemy of ABS is mostly rapid and uneven cooling since it can cause the print to warp, detach from the bed, and even crack.
Printing using an enclosure will solve all of these issues and printing with ABS will be a cakewalk, but if you don’t have an enclosure, you could put some glue stick or painters’ tape on the build surface for improved adhesion, and keep the printer in a closed room away from cold air drafts.
Increasing the bed temperature to just slightly above ABS’ glass transition temperature (100°C) will also help with bed adhesion, so play around with the bed temperature. I got the best results, without using glue stick, at 110°C.
The difference between 100°C and 110°C without glue stick was quite noticeable, with it, however, not so much. Which is why I’d recommend keeping the bed at 100°C and to apply some glue stick to it since it’s by far the best adhesion I managed to get.
Lastly, remember to lower- or to completely turn of the cooling fan to get better results, just remember to enable the setting that turns the fan on while printing bridges, otherwise they won’t come out looking good.
We created a recommended products section that will allow you to remove the guesswork and reduce the time spent researching what printer, filament, or upgrades to get, since we know that this can be a very daunting task and which generally leads to a lot of confusion.
We have selected just a handful of 3D printers that we consider to be good for beginners as well as intermediates, and even experts, making the decision easier, and the filaments, as well as the upgrades listed, were all tested by us and carefully selected, so you know that whichever one you choose will work as intended.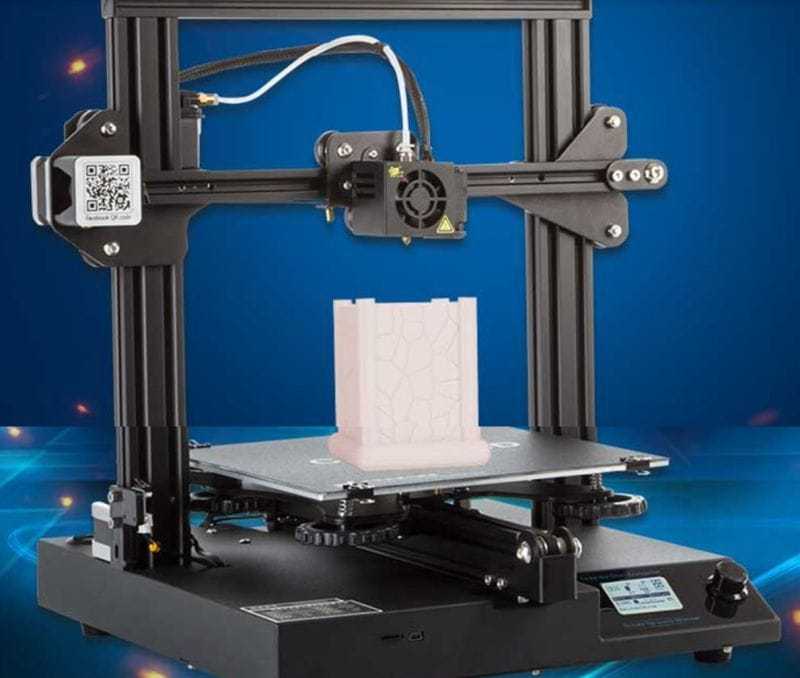
What Filaments Can Be Used On A Creality Ender-3 3D Printer?
What Filaments Can Be Used On A Creality Ender-3 3D Printer?
2020-07-23 09:11:11
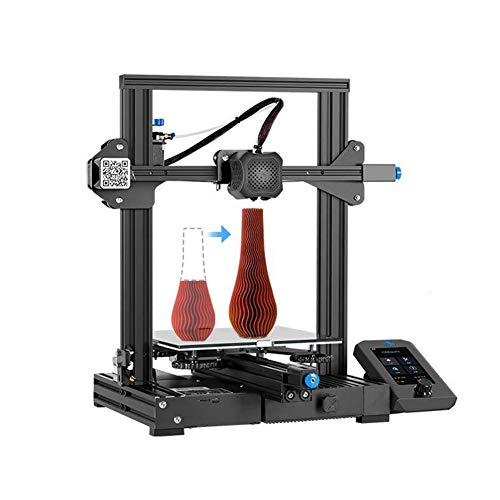
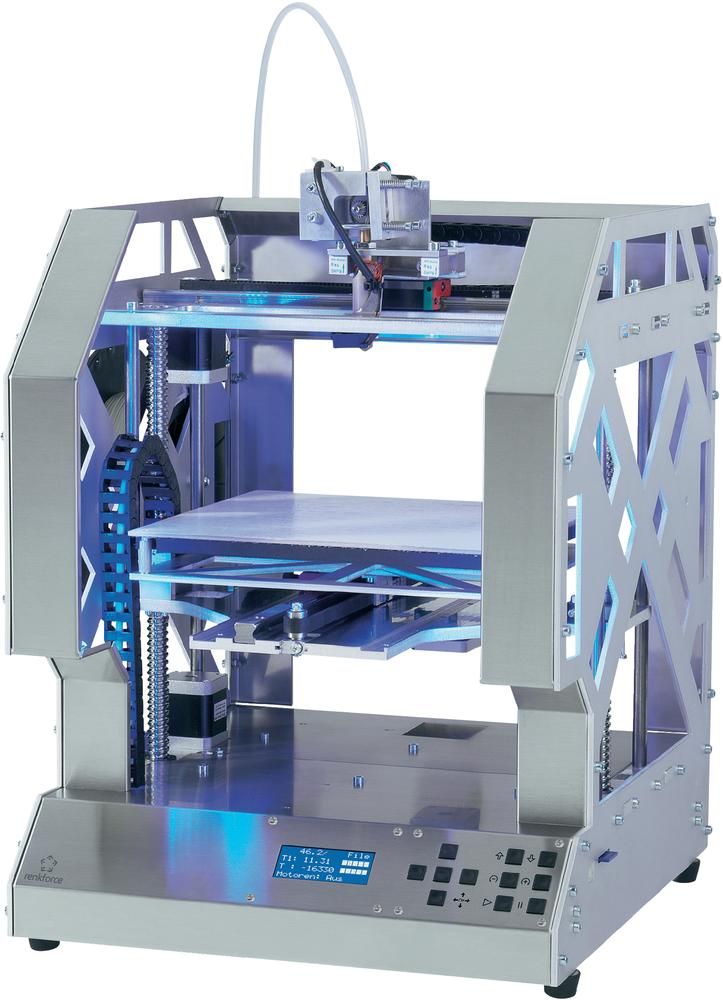
Creality Ender-3 3d printer has always been praised as the best-pick-up for 3D printing hobbyists due to its reliability and affordability. Since its release, Creality Ender-3 3d printer has achieved amazing sales records, a total annual shipment of 100,000 pieces.
With conclusions drawn from audiences, Creality Ender-3 3D Printer is an extraordinary 3D printer when you take the sub-$200 price tag into consideration.
Though it is actually a budget 3D printer, Creality Ender-3 3d printer can achieve performance comparable to many high-end machines in the market. For instance, the wide material compatibility will make it more versatile than its peer machine.
Before we probe into its filament compatibility and print performance, we would like to gain some understanding about its components which will affect the performance of various filaments.
What Impacts Material Compatibility?
Hot end: Creality Ender-3 3d printer has a reliable hot-end which easily reach up to 280°C. However, as it is not an all-metal hot-end, so the temperature is limited to 240°C because of the use of PTFE tubing and the quality of the components it's made of. Otherwise, Creality Ender-3 3d printer is supposed to quite versatile in printing with a variety of plastics, such as PLA, ABS, TPU, and even PETG.
Nozzle: The standard 0.4-mm brass nozzle made use of on the Creality Ender-3 3d printer will certainly give you superb printing performance with a wide range of filaments. You can't make use of unpleasant materials, though, because those would certainly eat through the brass very swiftly.
Heated bed: The Creality Ender-3 3d printer has an integrated heated bed that can reach temperature up to 110 ° C, which will allow you to print with products susceptible to bending, such as ABS.
Supportive Filaments on Ender-3 3D Printer
PLA
Polylactic Acid, commonly referred to as PLA, is among the most popular products used in desktop 3D printing. Because it can be printed at a reduced temperature and does not require a heated bed, it is the default filament of selection for many extrusion-based 3D printers.
PLA is an excellent first product to utilize as you are learning about 3D printing because it is very easy to print, extremely inexpensive, as well as creates components that can be made use of for a variety of applications.
It is also among the most environmentally friendly filaments on the market today. Derived from crops such as corn and sugarcane, PLA is renewable and most notably biodegradable. As a bonus offer, this likewise allows the plastic to produce a sweet aroma during printing.
PLA Printing Settings:
Printing temperature: 180-230 ° C. Normally, the specific printing temperature depends on the brand of PLA.
Hotbed temperature: PLA does not always require a heated bed, however, benefits dramatically from having on. Having a heated bed will certainly decrease the possibilities of warping. A modest 20-60 ° C helps a lot. If the temperature goes any higher, the PLA at the bottom layers might deform.
Bed adhesion: The build plate on Ender-3 provides a superb bed attachment for PLA. But for a smoother bottom surface, glass is a much better option. When utilizing glass, hairspray, or glue stick function the best. They provide your prints a good hold on the bed.
Print speed: PLA has no concerns as speed is taken into consideration. A basic recommended speed of 60 mm/s functions excellent, balancing high quality with printing time.![]()
Retraction: PLA is a stiffer material, as well as thus it can be easily tuned. As the Ender 3 has a Bowden style setup, retraction settings are much higher. We only need to consider 2 factors here.
Retraction range: 5 mm
Retraction speed: 45 mm/sec
Part-cooling fan: This should be on. PLA is a drippy product, so it requires to be effectively cooled.
ABS
ABS (Acrylonitrile Butadiene Styrene) has a long background in the 3D printing community. This material was among the first plastics to be made use of with industrial 3D printers.
Many years later, ABS is still an incredibly popular material owing to its affordability and its excellent mechanical prosperities. ABS is known for its toughness and impact resistance, permitting users to print sturdy parts that will hold up to additional usage and wear.
LEGO building plates are made from ABS for the same reason! ABS likewise has a higher glass transition temperature, which implies ABS can endure much higher temperatures before it starts to deform. This makes ABS a great selection for outside or high-temperature applications.
When printing with ABS, please make sure to use an open space with great ventilation, as the material has a great tendency to have some smell. ABS likewise often tends to contract quite a bit as it cools, so regulating the temperature level of your print area and the part inside can have significant advantages.
ABS Printing Settings:
Printing temperature: ABS
Requires to be printed at a higher temperature than PLA. A printing temperature of 230°C is a great beginning factor. Although the printing temperature varies from different brands of filaments, the optimal temperatures vary from 210-250°C.
Hotbed temperature: ABS does not easily get warped, yet a heated bed does a good work of preventing this. A bed temperature level of 80-110°C should be really helpful. Since the Creality Ender-3 3d printer is capable of getting to such temperature levels, ABS is a wind to print.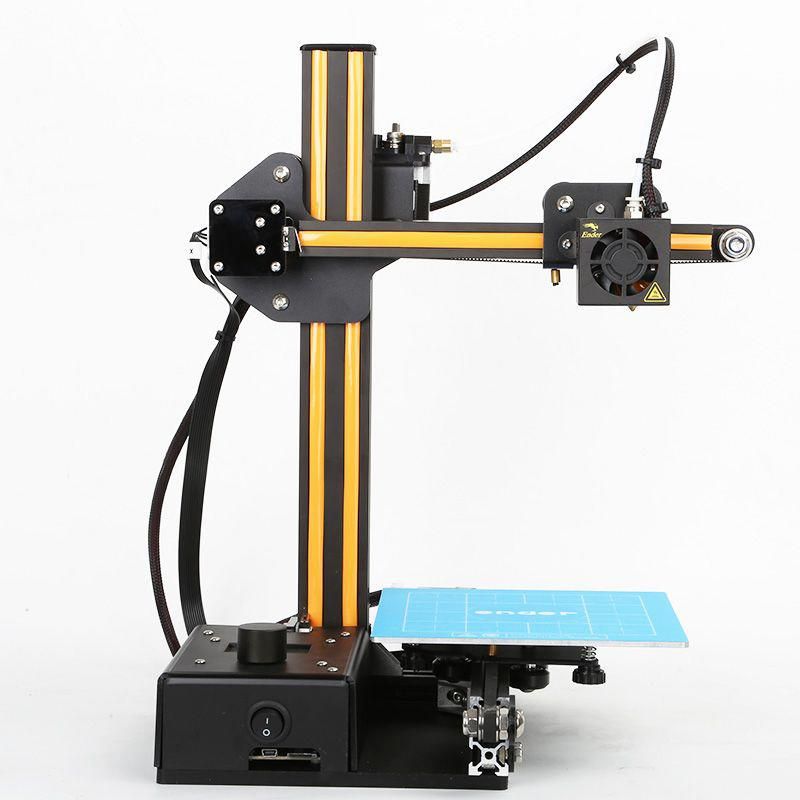
Bed adhesion: ABS needs some adhesion. Otherwise, you might find the corners of your prints lifted up. A border or a raft will help in lowering the bending of the parts. Furthermore, you ought to also be using a glue stick or ABS slurry for better adhesion.
Print speed: The print speed for PLA doesn't have much difference from ABS. Printing at 60 mm/s works well for ABS too. You run the risk of layer bond as well as layer splitting if you print at any kind of higher speed.
Retraction: Same values as for PLA.
Retraction distance: 5 mm
Retraction speed: 45 mm/sec
Part-cooling fan: ABS likes to be cooled down gradually. If it's cooled instantly, it might warp, or have higher possibilities of layer splitting.
PETG
PETG is a Glycol Modified variation of Polyethylene Terephthalate (PET), which is commonly utilized to make water bottles. It is a semi-rigid material with great impact resistance, but it has a slightly softer surface that makes it prone to wear.
The material likewise benefits from great thermal conductivity, allowing the plastic to cool down efficiently with almost minimal warpage. There are a number of variations of this material in the market including PETG, PETE, and PETT.
PETG Printing Settings:
Printing temperature: The best printing temperature for PETG is at 220-250°C. Many PETG manufacturers have actually optimized their PETG filament so that it can be printed at a temperature lower than 240 ° C.
Hotbed temperature: The very first layers should be a little high. It assists with adhesion and also minimizes warping. A bed temperature for PETG is supposed to be set at 50-75°C.
Bed adhesion: You should utilize a releasing agent on a glass surface for PETG. Otherwise, you'll be having a chunk of glass in addition to your part. PETG adheres extremely well to blue painter's tape. Hairspray and gluestick also function well.
Print speed: PETG prints well at around 50-60 mm/s. With greater speeds, it will sacrifice print quality. There could also be under-extrusion issues. Therefore, you should print at 25-30 mm/s, also, for much better high quality.
Retraction: This can get more difficult, and nobody wants stringing or blobs on their prints. PETG needs greater retraction than PLA, but printing at too high speed might result in nozzle clogging.
Retraction range: Start with a 5 mm distance, and rise in 0.2 mm increments. The max is 7 mm.
Retraction rates: A beginning speed of 40 mm/s with 5 mm/s increments to call it in.
Part-cooling fan: Keep the part-cooling fan on, as it will certainly provide you very in-depth prints and aid you with decreased stringing as well as blobs. If you want a stronger part, you can also choose to turn off the fan.
First layer height: PETG shouldn't be squeezed on the bed. It should lay down smoothly, and hence the layer height of the first layer should be approximately 0.32 mm. It prevents the build-up of material on the nozzle, which would introduce blobs and strings.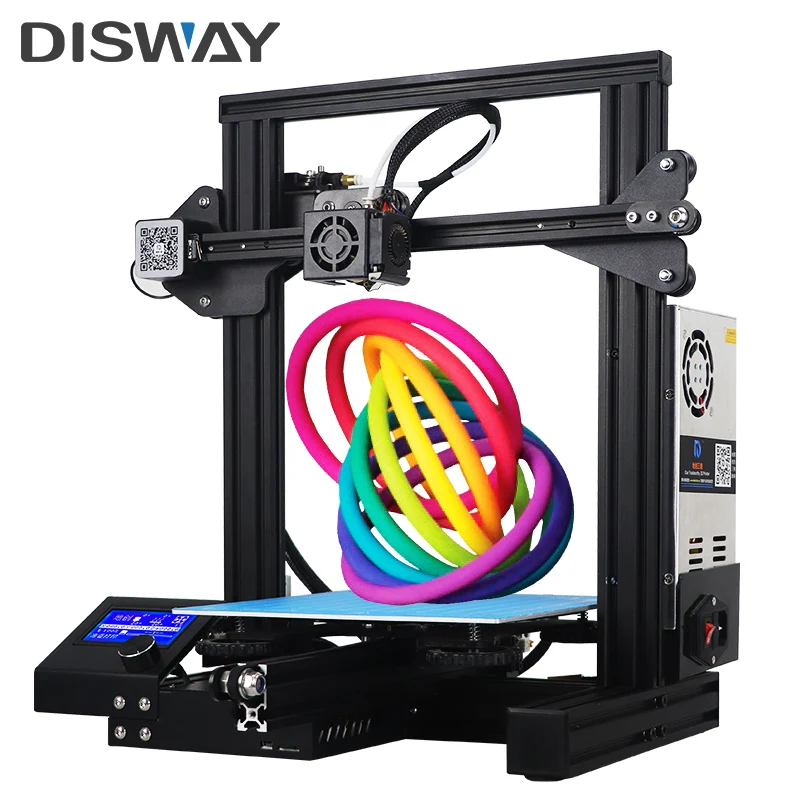
TPU
Thermoplastic Polyurethane (TPU) is a flexible, abrasion-resistant polycarbonate. It's being utilized in a variety of producing procedures for both customers as well as commercial usage. In specific blends, it can end up being really soft, yet TPU product offers numerous benefits as well as functions. 3D printed parts with TPU are durable, and have the ability to endure ambient temperature up to 80°C.
Print temperature: TPU prints well at a temperature between 210°C and also 230°C.
Hotbed temperature: A heated bed isn't required, as TPU doesn't shrink or warp like other materials. Nevertheless, if you desire, you can restrict it to 60°C.
Bed adhesion: Blue painter's tape works simply great. You can additionally use a raft or a border, but they're not crucial.
Print speed: TPU is a flexible material, as well as printing it quickly will certainly lead to issues, like the filament obtaining wound up in the extruder gear. The suggested maximum speed is about 25-30 mm/s.
Retraction: Keep retraction settings as low as possible. Higher values of retraction will lead to filament winding up in the extruder.
Retraction Distance: 3 mm must do it to start. Increase the value by 0.2 mm at a time if you still have stringing issues.
Retraction rates: 25-30 mm/s.
Part-cooling fan: Leave the part-cooling fan on. This will certainly help in the energetic air conditioning of layers as well as likewise stop any kind of stringing or balls, thus boosting print quality.
What Filaments Can Be Used On A Creality Ender-3 3D Printer?
Subscribe to Our Newsletter
Creality is a leading 3D printer manufacturer dedicated to developing the FDM/resin 3D printer, 3D printer filament, and maker related products. Subscribe to learn more.
Thanks for subscribing
Social Media
Ender 3 ABS 3D Printing Tips
3DPrintStory 3D printing process Tips for 3D Printing ABS on Ender 3
Acrylonitrile butadiene styrene (ABS, ABS) is an industrial thermoplastic that finds applications in a wide variety of applications. If you are familiar with LEGO bricks, you are already using ABS. It is especially known for its high impact resistance and is one of the most popular materials for 3D printing.
While printing with ABS plastics is notoriously difficult, after a few tries and getting your 3D printer set up correctly, you will definitely end up with some great 3D models. Products made of ABS plastic after treatment with acetone have a smooth and glossy surface, which makes them aesthetically similar to parts obtained by injection molding.
In this article, we'll look at tips to help you get great ABS 3D printing results on the popular, inexpensive Ender 3 3D printer.
Ender 3 motherboard cooling
Make sure the motherboard fan is on by default. If not, then read on.
At first glance it may seem that motherboard cooling and 3D print quality are completely unrelated things, but when it comes to ABS with Ender 3, this is the first thing to check and fix.
The default installation for some reason turns on the electronics cooling fan only when the partial cooling fan near the hotend is turned on.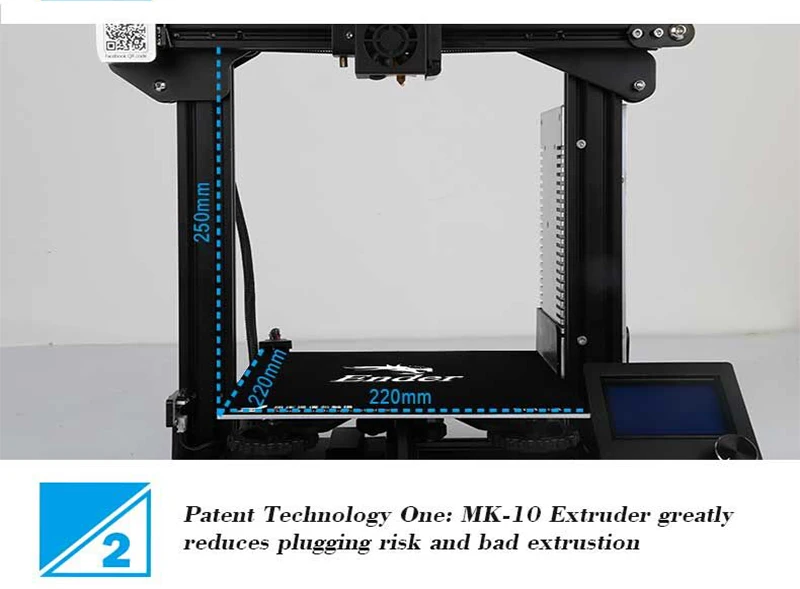 The fact is that when 3D printing ABS, the cooling fan of the part must be turned off. We will discuss why this is so. And this, in turn, means that the board fan will also be turned OFF. This causes the electronics to heat up, affecting the performance of the 3D printer.
The fix is very simple. You just need to connect the part cooling fan wires and the hot end wires as shown in the picture above.
Ender 3 Quality Print Table Surface
Ender 3 comes standard with a heated print bed. This is important for 3D printing with ABS plastic. The heated bed promotes good adhesion of the first layer and maintains an elevated temperature in the 3D printing area, which significantly reduces the likelihood of deformation when printing parts from ABS plastic.
Standard Ender 3 has a surface similar to Buildtak. Thanks to this coating, the first layers of ABS at the end of 3D printing can be easily removed even without the use of an additional layer of glue or hairspray.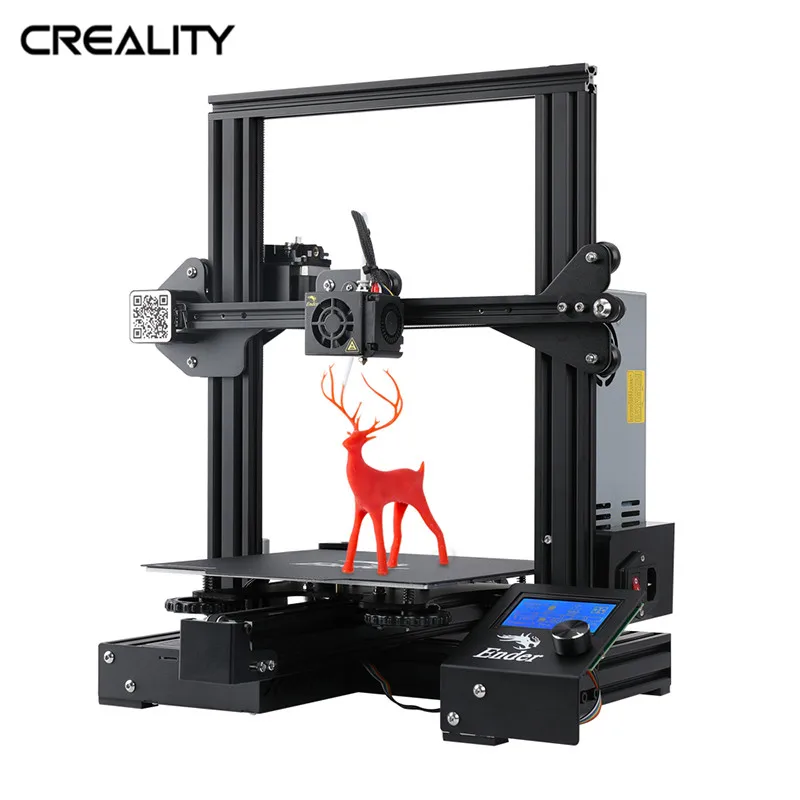 You can also look into using PEI-coated sheets, which also work well for good surface adhesion.
If you are using Creality Glass or any other glass surface, hairspray or glue will greatly improve the adhesion of the first coat.
As with the Ender 3 Pro, the default table cover is a flexible magnetic surface. This is a great option for 3D printing PLA plastics, but be aware that these coatings lose their magnetic properties at temperatures above 80° C. For greater safety, glass is recommended.
If you've tried everything and still can't get good first coat adhesion, your table may be damaged. But this is not a cause for concern. You can always just switch to Creality Glass or any other glass surface. Also, consider upgrading the table adjustment springs. You can also consider the option of automatically correcting the position of the extruder, but this is already a more complicated way.
Suitable slicing settings for 3D models
If you're already printing with PLA, you're already halfway there. ABS printing is very similar to PLA, only a few settings need to be changed for optimal results.
- Nozzle temperature: ABS material melts at temperatures between 220 and 240°C. The higher temperature allows the part to cool gradually, reducing the chance of any defects. It is recommended to set the table temperature of the Ender 3 3D Printer between 100 and 110°C.
- Cooling Fan 3D models: ABS tends to deform when cooled quickly. For this reason, it is necessary to turn off the partial cooling fan near the hot end. This allows the ABS to cool gradually, reducing the chance of warping.
- Brim or raft: The use of additional bases of the first layers helps to mitigate the effects caused by thermal contraction and will also provide better adhesion of the first layer in the table.
To check the quality of the slicer settings, we recommend choosing one of the test 3D models for printing.
Enclosure for Ender 3
And finally, for high-quality 3D printing with ABS plastics, you should think about an enclosure or, at least, isolated corners, in which there will be no drafts.
Ender 3 is an open frame 3D printer and is not ideal for printing ABS plastics, because during 3D printing, the model is affected by all sorts of external factors, such as wind and overly curious pets.
But most importantly, the housing helps keep the ambient temperature high enough to prevent warping and delamination of the layers by reducing the effects of thermal contraction. It retains the heat from the heated table and also prevents any external influences.
Even a cardboard box can be used as an enclosure (not recommended due to safety and flammability, but even this option will help). The main job of the case is to maintain a uniform, high ambient temperature so that the ABS cools naturally.
We hope that the features of 3D printing ABS plastics on the Ender 3 mentioned above will help you. Good luck in the world of 3D printing and DIY experiments!
How I beat ABS on Ender 3 Pro
g.i.ko
Loading
02/04/2020
6068
Personal diaries
Subscribe to the author The conditions will be in sunlight, the body should be white or light gray.
 Withstand minor mechanical loads (the device is attached to the panel and hangs on the case by pressing the case against the panel).
 Part dimensions 98x48x25 mm (LxWxH). The choice fell on white ABS. And then it started. No matter what I did during printing, the plastic was torn in the corners. After consulting here and on the rest of the Internet, after reading tons of criticism and suggestions, the following was done: Creality put a rubber cover on the heating element (in front of the nozzle), which does not cover the body of the heating element from above, place a thermocouple next to the heating element and calm down). Although no, it did not calm down. They put a radiator cooler on a carriage so that it blew through both the radiator and the heater block. Thus, the thermocouple is hot, and the block is 20 degrees colder. I got out of the situation by wrapping it with a special insulation, similar to cotton wool with a yellow transparent film on top. I wrapped it around the perimeter and covered it from above, then I put a silicone case on top of it all.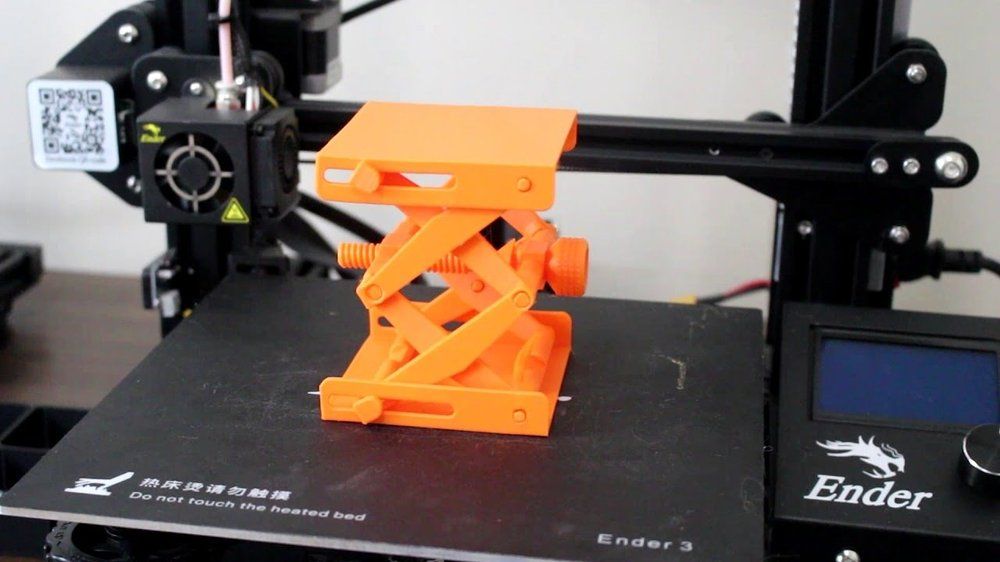
And voila! Here are the results:
Special thanks to Ravshan40 for the tip to build a skirt around the part. The part was not torn, did not stretch, but the skirt also remained intact. It fell apart in the process of dismantling from the table. The part is glued on!
Article comments
More interesting articles
LVV78
Loading
10/11/2022
2963
twenty
Subscribe to the author
Subscribe
Don't want to
Can't buy? But no, it's even in the garage and.