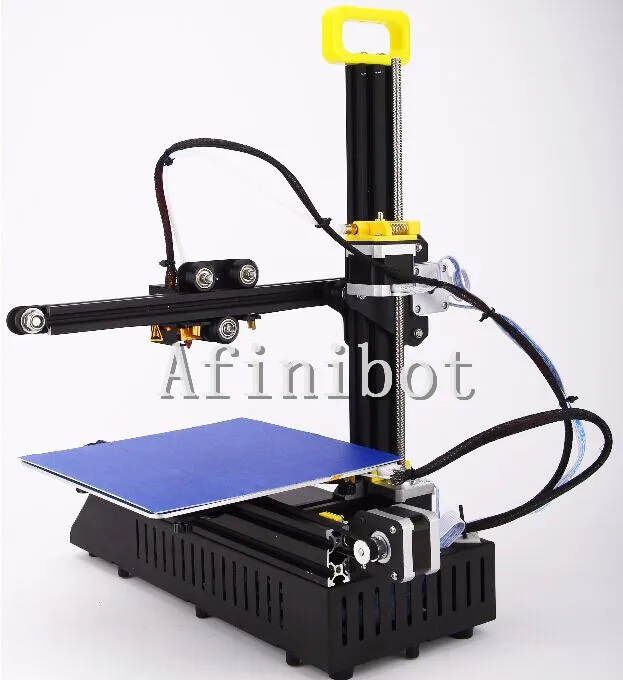
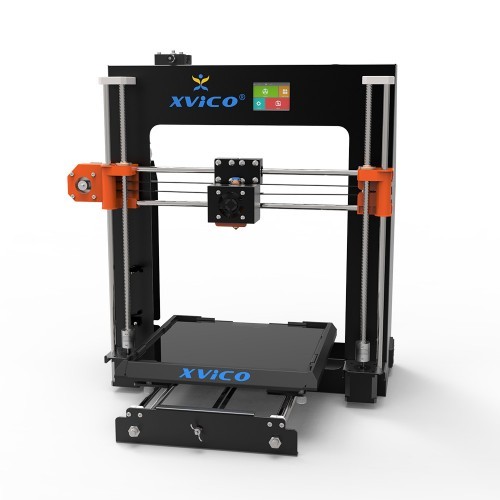
Xvico x3 3d printer review
Xvico X3 Pro 3D printer review by Chris Kilcrease
Table of Contents
Xvico…have you ever heard of them? Other than seeing Angus do a couple of videos on his Youtube channel, Makers Muse, about the earlier version of this printer I personally never heard of this company. XVICO’s is where you can see their lineup of printers and filament, and it stated they have been in business since 2008. You can see more on their website. From the most I could gather, they were making filament and now adding printers to the product line. Please don’t quote me on that as the website is in Chinese. It was difficult to tell what was what on my end. So let’s go on a little journey unboxing, assembling and reviewing this XVICO X3 Pro 3D printer.
So whats this printer all about?
Well, it’s an Ender clone with some variations. Let’s see the breakout here from XVICO directly.
【UNIQUE DESIGN REMOVABLE GLASS PLATE 】- Unique design with the glass plate, easy to remove your printing models after cooling. Very convenient for ender to operate the machine.
【SMOOTHY & DURABLE & NOISELESS 】- Xvico 3d printer kits with high-quality extruder significantly reduces plugging risk and bad extrusion. Sturdy aluminium construction is very durable for customer printing.
【SEMI-ASSEMBLED KIT】- Xvico 3d printer DIY comes with several assembled parts. You only need about half an hour to assemble and more stable performance, Win-Win for fun and time, the knockdown parts will help you and your children to learn about the basic construction of 3d printer as you finish putting it together. This is the lovely gift for your kids and your family, ideal for STEM Projects.
【FILAMENT RUN-OUT DETECTION & RESUME PRINTING 】- Filament runs out to remind you to change new filament quickly, XVICO 3d aluminium printer can resume printing from the last recorded, saving your time and money.
【GUARANTEE & SERVICE】- Strict testing for key components before delivery.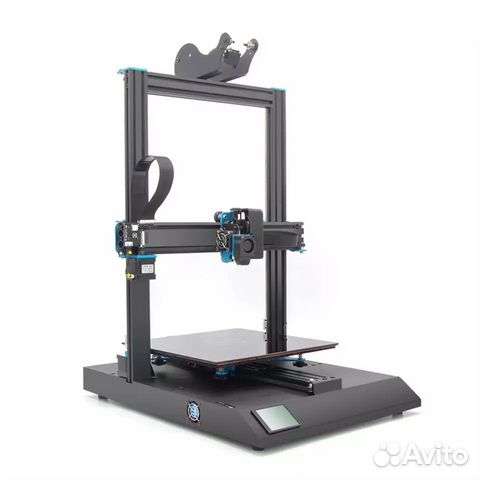 We are Confident about 3d printer printing quality. We offer 7* 24hours online after-sales service, 100% Satisfaction Guarantee and life-time technical assistance.
【EASY & QUICK ASSEMBLY】- It comes with several assembled parts, you only need about 2 hours to assemble with installation manual and video in the SD card.
【RESUME PRINT】- It can resume printing even after a power outage or lapse occurs.
【EASIER 3D PRINTS REMOVAL】– Slide-in build plate allows you to draw it out of the printer and then remove the finished 3D prints more efficiently. At the same time, it can minimise damages or offsets to the build plate.
【ADVANCED TECHNOLOGY】- Upgraded extruder significantly reduces plugging risk and bad extrusion.
【MICRO SD CARD SLOT】- Use a microSD card to store sliced GCode files, then plug the card into the microSD card slot to print without the need to connect to a Windows or Mac PC.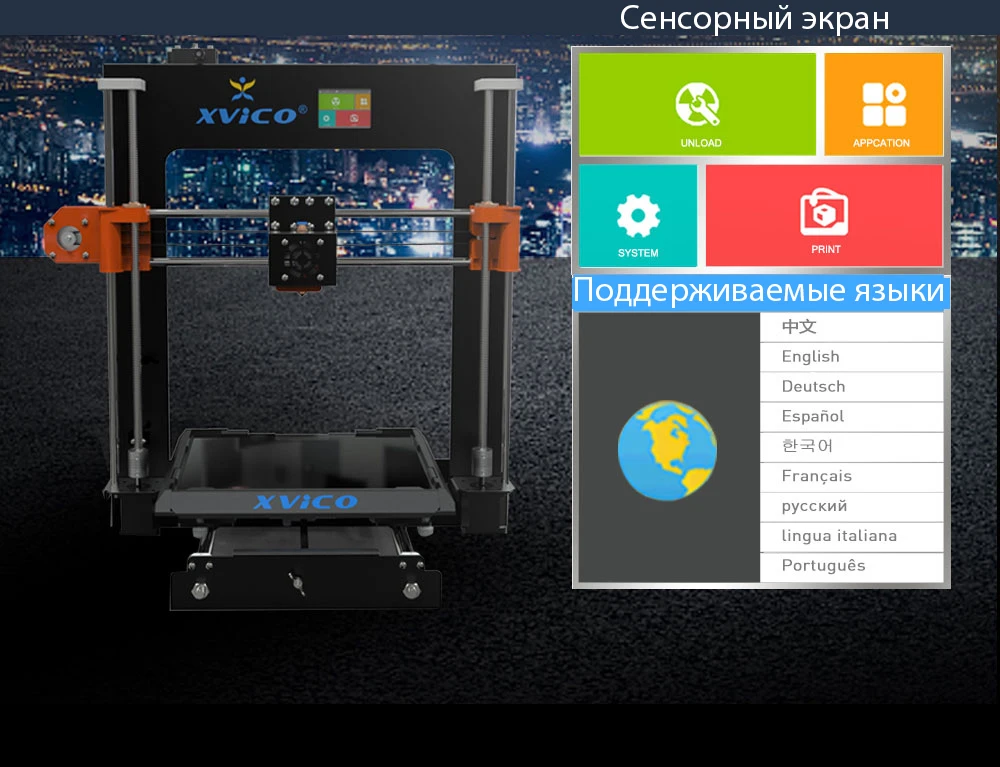 The printer includes a 2GB microSD card with sample 3D models, which you can slice and store on the card for direct printing.
【100% SATISFACTION GUARANTEE】- Strict testing for key components before delivery and life-time technical supports.
Specification- Printing Size: 200*200*250mm
- Machine Size: 390*410*490mm
- Screen: 2.4-inch colour touch screen
- Printing Speed:20-200mm/s
- Extrusion head temperature (highest):260℃
- Number of nozzles:1
- Nozzle diameter 0.4mm
- Engraving Accuracy: 0.1mm
- Nozzle Temperature:210-230℃
- Supporting Material: ABS, PLA, TPU, WOOD, etc.
- Material Diameter: 1.75mm
- Language: Chinese, English, German, French, Spanish, Russian, Italian, Korean, Portuguese
- Machine Weight: 7kg Package Weight: 8kg
Want to Buy? Amazon
First Contact
When XVICO reached out to me to do a review on their new XVICO X3 Pro 3d printer, I was pumped to see what improvements and or changes they have made since for their XVICO Pioneer (older version of the X3). On January 1st, 2020, I was so excited, I had to do an unboxing and assembly video live on my youtube channel Kilcreations. In this video, you’ll see me assembling X3 Pro while drinking some seriously good scotch I got as a Christmas gift.
First, I would like to say this XVICO X3 Pro is pretty much a full kit. I do know my way around a 3D printer (depending on how much scotch I had that evening) so when it states, you can have this assembled in a half-hour on the first part of the description and then further down 2 hours, maybe. If you’re new, it will take a bit longer, in my opinion. Estimate more like 2+ hours, but not much longer than that.
I did only run off the assembly guide/booklet that was provided with the XVICO X3 Pro. I did not reference the build video at his point of the XVICO X3 Pro Review. The instructions were pretty clear, but it is easy to miss steps and have to go back to adjust to the layout of the instructions and schematic drawings provided. I did watch the entire build video after and it was nicely produced but can be a bit confusing because it does not follow the same build order as the instructions.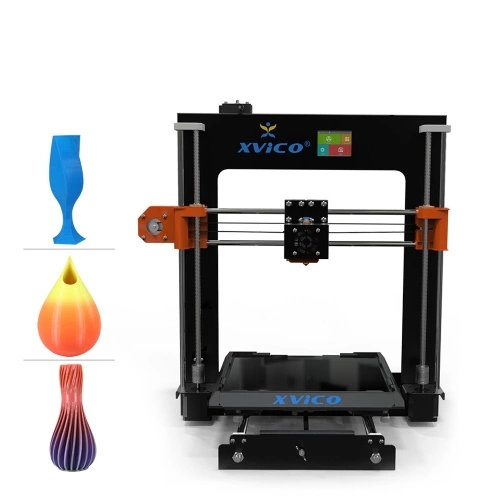
Your New Kit
The X3 Pro was very nicely packaged and had everything needed for assembly. Also, all parts, tools, some spare parts and an extra nozzle are included. The CPU is already installed and most of the wires attached. Also, the extruder and hotend assemblies were already completed, and that was nice. The first issue I noticed when taking out all the part is the power supply and wires were exposed, and this is a massive concern for my safety-wise. XVICO can quickly resolve this with a vented cover underneath and should take serious note to this in their future printer designs.
Assembly went about as expected and compared in many ways to the Ender printers. I stopped the XVICO X3 Pro build review video because there were no clear instructions for cable management, and I felt it was a good time to end the live stream. After going over the instructions that were provided electronically as well and watching the video, there was nothing about cable management. There is absolutely zero cable management for this printer to my surprise. Loose cables laying everywhere underneath this X3 Pro makes my cable management OCD go a little crazy, but that’s another story. Once the printer was finished and plugged in, I turned it on, and everything was working and moving correctly.
Woohoo, A Touchscreen!!!
I do like the X3 touchscreen, a lot, but it is tiny, especially for someone like me with big old bear hands and sausage fingers. Even though I have big hand syndrome, the touchscreen was very responsive. It always seemed to know what I was selecting every time without me dealing with fat-fingered mistakes.
The touchscreen is completely exposed on the backside. Therefore, I would like to see those components enclosed and secure to eliminate accidental damage to the delicate ribbon cable. As I started using the printer, the touchscreen would lock up and become unresponsive when the memory card was inserted. This was a minor issue and was quickly resolved by ejecting it and putting it back to make it work again. I’m sure XVICO can fix this in a future firmware update. To note this glitch didn’t happen every time, only every once in a while.
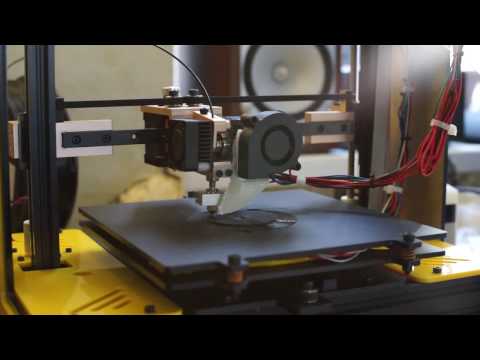
Let’s Print Something
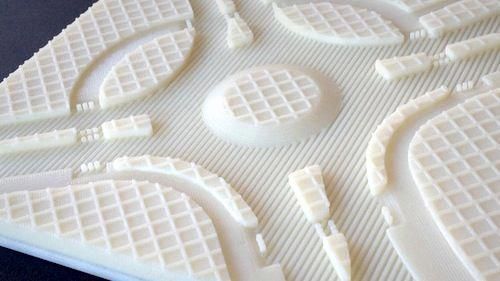
At this point on my XVICO X3 Pro Review, everything on the printer in stock. After I levelled the bed, I started the preloaded Bay Max test print on the micro SD card provided with the XVOICO X3 Pro with some 3D Solutech white PLA filament. This print definitely suffered from a lot of issues starting with the first layer. It was under extruding, had a ton of z banding and then eventually separated from the plate causing the print to fail.
Then I loaded the classic benchy on Cura 4.4 and gave that a shot. This defiantly improved the quality of the print, and I noticed fewer extrusion issues, but it still eventually failed. So then I tried the same file, but with different Eryone white PLA.
This failure was a bit odd because it just stopped printing or paused the print right at the very end. I selected resume, but then it freaked out moved the hot end to the front of the build plate and smashed the nozzle into the plastic part of the heat bed melting a sweet hole into the plastic. Then dragged across the glass busting into the benchy and then moving back up to were it thought it should resume (no were close) and continued printing. I initially thought this was something in the Firmware and contacted XVICO about it.
XVICO thought it was something weird with the gcode due to the printer having the most current firmware. I think they were right because I re-sliced everything in Cura and never had the issue again. At this point, I felt I had to come up with a new plan of attack to get this XVICO X3 Pro pumping out some successful prints.
Upgrade Time!
Up to this point, I wasn’t getting anywhere. So the first thing that I had to go on my review was the PTFE tube that is provided with the XVICO X3 Pro. I switched that out with some Capricorn PTFE tube I had lying around. I then flipped the Z-rod over and adjusted the Z Coupler some more to try and help with some of the Z banging and wobble issues. Ultimately, I think this Z coupler provided is a bit too squishy. Upgrading to a solid one or maybe one from the ender three should help. **NOTE flipping the Z-rod over maintained a lot!!!** Next I re-levelled the bed using a 0.20 feeler gauge and not a piece of paper like the first time. I then loaded up the ender 3 Chaz Meister profile on Cura 4.4.
Cura Settings Screenshots
Let’s Print Something… Take Two!
“Why don’t I go with something a little tougher to print”? I thought, and I grabbed this fantastic file of Voodoo Bree by Arte Creator on Myminifactory. I loaded up some of the nicest PLA filament I had in my inventory, Prusament Galaxy Black PLA and hit print for the base. Boom, now we were cooking with gas! Next, I printed her body and head with eryone lagoonbow silk rainbow pla. Her hat was printed with Sunlu black PLA+ and the pins with CC3d silk gold PLA. I ran a lot of different filament through this machine in a short period, and it did well.
As I printed the Bree model, I slowly tweaked my settings in Cura 4.4, and they did help, but there is defiantly more to do. I feel some corrections with the z coupler are in order as I mentioned as a concern earlier. I also found due to the z issues, the bed at times required re-levelling, but after turning the Z-rod over it seemed to have resolved this issue. Calibrating the e-steps could also help significantly to make these prints muy perfecto on the XVICO X3 Pro!
Testing The Added Features
I then started another benchy print in the cc3d silk gold to test the Xvico X3 Pro filament runout sensor and the power recovery. The filament runout sensor worked as it should and resumed printing like a boss. The only issue is it didn’t quite continue at the same layer height and created separation on the print. This could quite possibly be the issue I feel the printer has with the z rod or even just a firmware update to resolve.
For the power loss recovery, I tried unplugging it at the printer, and it didn’t work. To give it the benefit of the doubt, I also started a new print and tried unplugging it at the wall. I plugged it back in and still nothing, no option to resume the print. It just didn’t work. As an advertised feature, I was disappointed to see it not working at all. UPDATE: I spoke with XVICO, and they advised they recently removed the power loss recovery due to it having issues. I did let XVICO know that it is showing power loss available on the product features in the Amazon listing. In addition, as of 1/11/2020 it still there and has not been removed, so buyer beware.
The Kilcreations No BS Breakdown
The Good:
- It prints. (once its dialled in this printer prints and I think with some tinkering it can print well for the price)
- Touchscreen. (By far my favourite feature on this printer)
- Temp adjust on the fly. (This is super cool, to be able to change the print temps while printing is a nice feature)
- Removable bed. (for those printing on glass, this is a super sweet option standard on the printer)
- Price.
 (only $179.99 US on amazon las of 1/11/2020)
 - Easy to level. (This took about 10 min or less to level. I recommend using a feeler gauge vs a sheet of paper for better accuracy)
- You can use the preloaded ender three profile in Cura. (load up the creality ender three profile minus the heated bed and your good to go… Easy!)
- Filament runout sensor standard
The Not So Good:
- No standard heated bed. (advertising it can print ABS, PETG, etc. as is)
- Exposed power supply and wires under the printer. (major safety issue)
- PTFE tube not of the best quality. (requires immediate replacement in my opinion)
- Poor/no cable management
- Cooling fan/duct. (fan shroud or duct not secured to the fan and continued to fall or pop off the fan)
The Mehh: (no deal breakers here):
- Firmware buggy at times.
 (can resolve with firmware updates)
 - No live z level, but second nozzle option… what? (Hopefully, we get this in future firmware updates. Hint XVICO)
- Not the most straightforward instructions to follow, but not the worst. (The video differs from the booklet)
- micro SD, still? (companies need to upgrade this to full SD or even better USB)
- Minimal bed level knobs
Final Review Video
Here is my last review video where I go into a more visual look at this printer and talk about a lot of the things in this article on the XVICO X3 Pro 3D printer.
Final Thoughts!
In conclusion, this XVICO X3 Pro is a fun little printer that works well when dialed in. I don’t think it would be my first choice for a beginners printer. However, if you like to tinker on printers as I do, this is a fun kit to get. I do feel the exposed wires, and power supply is a huge safety issue, and the single biggest issue I have with the printer. On the other hand, everything else can be modified, upgraded, and revised with future firmware updates. These issues are certainly not deal breakers for me.
The X3 Pro is nicely built and solid. The touchscreen is fun with a lot of potentials, and the slide-out bed is a cool feature too! I have never seen before on a glass bed. The cherry on top is that its less than $200 US dollars.
do you own a Creality CR10S PRO? Check out our verdict on what we think about it.
Xvico: 646 Reviews of 6 Products
ReviewMeta is a metrics tool for evaluating Amazon reviews- We are in no way affiliated with or responsible for any products bought on Amazon.
- We only provide an analysis of user reviews.
- Our estimate is based on deep data analysis. PASS/FAIL/WARN does not necessarily prove the presence or absence of ‘fake’ reviews.
By using our site, you are agreeing to our Terms of Service and Privacy Policy. We may use cookies to provide a better experience.
Watch Me: Why is ReviewMeta.com a Must-Have for Amazon Shoppers? Watch Me
Close
Why is ReviewMeta.com a Must-Have for Amazon Shoppers?
Free Phone Apps
Free Browser Extensions
6
Products Analyzed
238
Reviews Analyzed
3.8 5
average adjusted rating
221 Reviews
6 Products Analyzed
646 Reviews Analyzed
Products (9)
Original:
3.3
120 Ratings
88 Reviews
Adjusted:
3.3
78 Reviews
Original:
3.4
64 Ratings
27 Reviews
Adjusted:
3.4
20 Reviews
Original:
4. 3
3
56 Ratings
36 Reviews
Adjusted:
4.3
36 Reviews
Original:
3.5
40 Ratings
22 Reviews
Adjusted:
3.4
22 Reviews
Original:
4.6
22 Ratings
13 Reviews
Adjusted:
4. 6
6
13 Reviews
Original:
4.2
1,422 Ratings
Adjusted:
4.2
1,390 Reviews
*Based on preliminary signals
90,000 operating manual of the 3D printer XVICO X3SReport this Ad
Report this AD
XVICO X3S 3D printer
9000
Warm up
,You can set the subpose temperature in the preliminary overstrus. Click the nozzle icon to switch to hot bed heating mode.
Click the nozzle icon to switch to hot bed heating mode.
Press to close nozzle or hot bed
Press to close nozzle or hot bed
extruder
Press and hold the extruder lever, then insert 1. 75mm filament through the small hole in the extruder. Keep feeding until you see the filament coming out of the nozzle.
Tip: Replace consumables
- The extruder must be heated to the correct consumable temperature. nine0038
- Preheat the nozzle, after reaching the extrusion temperature, pull the consumables back until they come out of the extruder.
(Note: consumables can be manually removed by pressing the black gas pipe connector) - Place the 1.75mm consumables into the feed port of the extruder.
Leveling
- Tool → Leveling. Press point1 Wait for the nozzle to move to the left/forward of the platform. nine0038
- Move the nozzle with the front/left adjustment screw and adjust the height of the platform by turning the handle at the bottom. Use an A4 size sheet of paper (standard printer paper) to make the adjustment easier, making sure that the nozzle slightly scratches the paper.

- Complete all 4 corner adjustments.
- If necessary, repeat the above steps 1-2 times.
You can change nozzle/hot bed temperature, fan speed, printing
speed and other related values in the operation interface
Maintenance
The 3D printer can continue to work for a long time. Some parts that last a long time, especially moving parts, need maintenance. Here are some machine care instructions:
- X, Y, Z Axis Maintenance: Add some lubricant to the rods to reduce friction when the machine is noisy and shakes a little. Take a clean cloth, add some oil and run it back and forth along the guide. nine0038
- The filament is not easy to pull out of the extruder after high temperature melting and cooling, so use iron wire to excavate dredging. Of course, we still recommend emptying the extruder as much as possible after the print job is completed. This is also the basic maintenance of a 3D printer.
- Belt tension: The belt tension must be correct, otherwise it will affect the life of the belt.
 The belt is too tight, and the radial force of the motor shaft and pulley is too large, which affects the service life of the belt. Once the belt is in place, you can judge if it is too tight by turning the pulley. If the belt makes a loud noise when the belt is tensioned, the belt is too tight. If the belt is too loose, it will cause a transmission error and affect the printing effect. Check if the belt is loose, you can rotate the motor synchronous wheel in reverse and positive direction. If the travel distance of the extruder before and after is not the same, this indicates too much play; you can also press the middle of the belt, if you gently press the belt, the arc is very
large size, indicating that the belt is too loose; There is a testing method - loading cylindrical data. If one side is flat, that means the shaft on that side is too loose.
Maintenance
- This product complies with the terms of the Product Warranty Card.
- If a problem occurs with the product, please contact your supplier or customer support.
 Do not repair it yourself, otherwise you will have to bear all the consequences. nine0038
Amazon support: [email protected]
Ebay support: [email protected]
Skype: XVICO
XVICO Facebook Group (owners of XVICO 3D printers): https://www.facebook.com/groups/583066442160349 Website : www.xvico3d.com
Shenzhen Zhongxin Microscience Software Co., Ltd.
Documents / Resources
| XVICO X3S 3D Printer [pdf] Operating Instructions X3S 3D Printer, X3S, 3D Printer |
Recommendations
Overview of Anycubic Photon Mono X 3D Printer. and polymers up to 10%
Overview of the 3D printer Anycubic Photon Mono X
10/14/2021 Max Gusev
3D printer Anycubic Photon Mono X
We are glad to present to your attention an interesting novelty in the field of 3D printing - Photon Mono X from the well-known and widely respected manufacturer Anycubic. One glance at the model evokes a mood for a serious working mood, but this 3D printer deserves a more detailed consideration, as well as an acquaintance with the functionality.
Exterior of the printer
Even a first glance at the Photon Mono X is enough to recognize the creation of Anycubic in the machine. And it's not the logo, although it catches the eye. The first thing you notice is the branded design and the large yellow protective cap, which will leave no doubt that Anycubic is in front of you. nine0003
The model has a black all-metal housing at the bottom. Management is carried out through a 3.5-inch screen. There are two heatsinks and a USB port on the back and side of the Photon Mono X.
The 3D printer exudes stateliness and minimalism, as there are no protruding elements - a solid monolith of form and style. In terms of appearance, Photon Mono X is definitely on trend!
Printer Specifications
Photon Mono X's key features will be high quality and equally fast print speeds.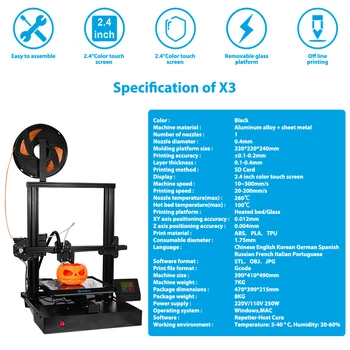 This device has the highest print speed in its lineup. nine0003
Photon Mono X is equipped with a matrix with an 8-inch 4K screen. The UV light is projected in such a way that uniform curing of the resin is guaranteed. This is a proprietary proprietary technology that delivers high quality prints. The monochrome screen provides full curing of the layer in just 2 seconds. For comparison, in other models, this figure is 6 seconds.
The protective cover is highly durable and blocks out up to 99% of harmful UV radiation. The Photon Mono X is also equipped with a lid close sensor, meaning the machine will not print until you close the lid. And even if you need to open the cover during printing, the printing process will immediately pause and continue only after closing it. nine0003
The Z axis of the Photon Mono X features a special design with dual rails. This guarantees stability during printing even at high speeds.
The print area of this model of 3D printer is very significant - 19. 2x12x25cm.
Like most modern 3D printers, the Photon Mono X has a USB port, but in addition there is also a WiFi module that allows you to control the device remotely.
Printer kit
Photon Mono X delivery set includes:
- aluminum spatula for removing models – 1 pc;
- network cable;
- WiFi module;
- plastic spatula for removing resin from the container;
- USB stick;
- external power supply;
- protective masks;
- resin filter;
- resin container;
- print bed;
- gloves;
- screws for fixing the container - 2 sets; nine0038
- hexagons;
- after-sales service cards.
And, of course, the Photon Mono X 3D printer itself.
Results
The advantages of Photon Mono X are: 
Learn more