Fusion3 3d printer price
Fusion3 EDGE: Affordable Industrial 3D Printer
INDUSTRIAL 3D PRINTER ALTERNATIVE
Until now, owning an industrial 3D printer required an initial capital outlay of $50,000 to $100,000. In addition, expect between $5,000 to $10,000 of annual expense for service contracts and a limited selection of expensive 3D printing materials for upwards of $200 per kilogram that otherwise would be purchased on the open market for $25 to $100 per kilogram, depending on the type of material.
Few businesses and educational institutions can afford a single industrial 3D printer at this price, much less be able to purchase additional 3D printers to expand their capacity for multiple users.
The Fusion3 EDGE, the affordable alternative to expensive industrial 3D printers, delivers or exceeds most of the capabilities of industrial 3D printers at a fraction of the price ($6,999 USD + Shipping).
Fusion3 EDGE
Affordable Industrial-Grade 3D Printer
Fusion3 EDGE 3D Printer – Perfect for Every Industrial Application:
The Fusion3 EDGE helps companies accelerate product development, producing conceptual models and/or functional prototypes, more quickly and inexpensively than traditional methods.
Manufacturers using the Fusion3 EDGE have an affordable alternative for low-rate / short-run / low volume production of plastic parts. Companies can implement 3D Printers in a production role, with lower up-front tooling cost and reduced lead times.
Instead of spending thousands of dollars and waiting 4-6 weeks for CNC milled aluminum fixtures, companies using the Fusion3 EDGE can quickly and inexpensively print and iterate your toolings, jigs and fixtures.
Only $6,999 USD + Shipping World-Wide
REQUEST A PERSONALIZED QUOTE
Features That Exceed Expensive Industrial 3D Printers
Exceptional 3D Print Quality At High Speed
The Fusion3 EDGE industrial 3D printer’s patented ‘F-Series’ motion control technology enables printing of high-quality objects at layer heights as low as .02mm and speeds up to 250mm/sec. Your team operating industrial production workstations will spend less time waiting and more time designing, testing and using their finished parts.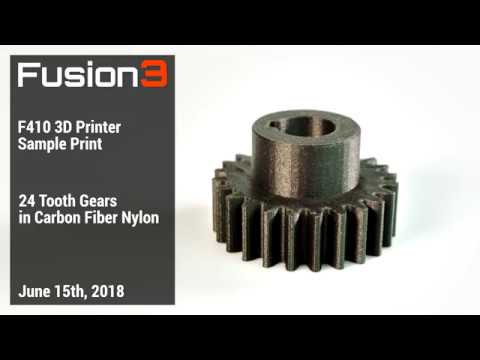
Durable & Reliable 3D Printing
EDGE has been engineered to be increasingly robust and durable with a new linear rail system, our V3 extruder, and push-to-fit connectors for our Bowden tube system to make servicing the filament path easier. Unlike consumer printers, the F410 industrial 3D printer withstands use and abuse in production environments and if you have an issue, you’re protected by the longest warranty in the industry.
Large Print Volume
Featuring a large 1.64 cubic foot print volume (14″x14″x14.5″), EDGE empowers users to print their large projects in one piece, saving time and frustration. Companies get the benefit of increased throughput, combining multiple parts into one print job.
Fraction of the Cost of Industrial 3D Printers
With a price of only $6,999, EDGE is an affordable way to add high-performance 3D printing capabilities to any organization. Fusion3 also provides competitive leasing options and volume discounts to orders of 4 or more.
Widest Variety of Engineering-Grade Plastics
Our ‘open material’ philosophy provides Fusion3 industrial customers with the widest variety of 3D printing plastics on the market from many quality manufacturers of filament. EDGE’s enclosed, stable temperature environment and proprietary multi-zone heated print bed makes EDGE the ideal platform for manufacturing parts with high temperature and high strength requirements using engineering-grade materials.
FREQUENTLY ASKED QUESTIONS:
INDUSTRIAL 3D PRINTERS
What types of industries are using 3D printers?
Many industries are embracing industrial 3D printing, with one of the most significant being Automotive, Aerospace, Medical Manufacturing, Metalworking, and other related manufacturing fields.
How fast should an industrial 3D printer print?
A reliable industrial 3D printer should print with at least 150 mm/sec. Fusion3’s F410 comes with 250 mm/sec printing speed, making it one of the fastest 3D printers in its price range.
How much does an industrial 3D printer typically cost?
Industrial printers typically run anywhere from $20,000 – $100,000. The printers in the Industrial class differ from the Performance class in a few ways. These printers can print in high quality at good speeds, however, you pay a significant premium for this privilege. While these printers are durable and reliable, their price makes them only appropriate for large enterprises who can afford their large price tag. Because of this, the Performance class of 3D printers becomes an attractive alternative to industrial printers for a wide variety of businesses.
What are the advantages of using industrial 3D printers?
Industrial 3D printers allow you to manufacture in full scale to avoid multiple print jobs and save you time post processing. However, you can get these same advantages using a professional grade 3D printer.
Click Here
Fusion3 F410 Desktop 3D Printers - Price - Product Specifications
Home / Products / Desktop 3D Printers / Fusion3 F410
- – Enclosed print area
- – Automatic bed leveling
- – Remote control management
- – Low operating sound
- – Built-in air filter
- – Powerful slicing software
- – Wide range of printable materials
$4,599Fusion3
Buy Now
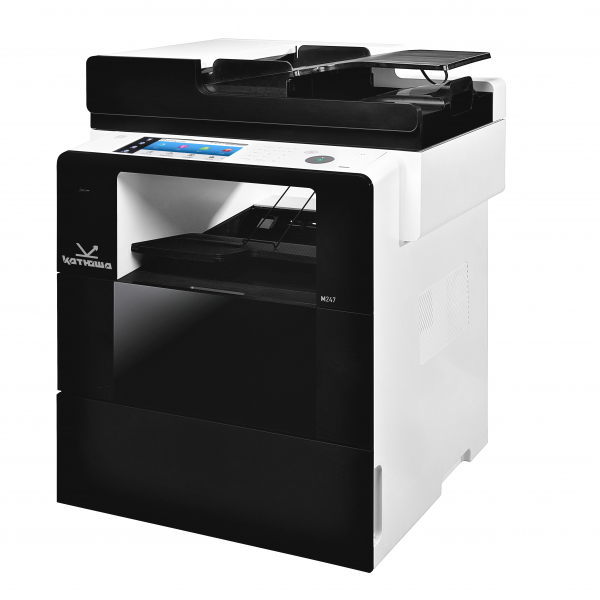
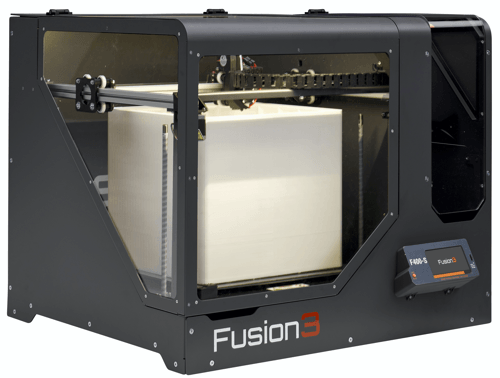
The Fusion3 F410 is a professional grade FFF 3D printer and the successor of the Fusion3 F400.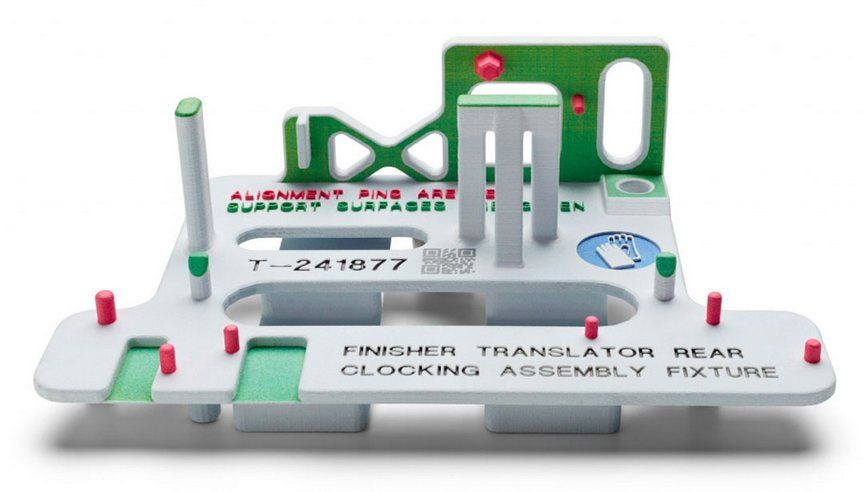 A big new feature on the F410 is that this 3D printer comes with interchangeable print heads. You have the choice between three interchangeable print heads, a .4mm and .6mm are included and a .8mm can be purchased separately.
With a new 2.0 extruder and updated 32-bit on-board controller, the Fusion3 F410 is very precise and near silent in operation.
The large enclosed printing area ensures that you can also print with heat sensitive materials such as Nylon and ABS while also protecting users from contact with high-temperature surfaces and sensitive electronics.
Add-ons
You get the option to include a heavy-duty rolling cart (as shown in the image) where you can store filament and other equipment. This is an add-on and not included in the initial purchase. The company also offers the option to add an external air filter system to the 3D printer. This is a suggested add-on for when you are working in the same room as the 3D printer is operation in.
Fusion3 offers a 2-Year warranty for their products and free lifetime phone & email support.
Fusion3 F410 specifications
- Company: Fusion3
- Technology: FFF FDM
- Printer type: Filament deposition
- Year: 2018
- Assembly: Fully-assembled
Materials
- Materials: HIPS, PLA, TPU
- Material system: Open material system
Build size (XYZ)
- Print size metric: 355 x 355 x 315 mm
- Print size imperial: 14.0 x 14.0 x 12.4 inches
Properties
- Diameter: 1.75 mm
- Layer thickness: 20 - 500 Microns
- Closed print chamber: Yes, fully enclosed
- Feeder system: Bowden drive and geared feeder
- Extruder: Single
- Max. extruder temp.: 572 °F / 300 °C
- Print bed details: Heated Glass (Multizone Heater)
- Max.
 bed temp.: 284 °F / 140 ˚C
 - Bed leveling: Automatic (via conductive sensors) & manual
- Display: LCD touch screen
- Connectivity: WIFI, Ethernet, microSD card (included)
- Camera: No
Requirements
- Operating System: Linux, Mac OS X, Windows
- Slicing: Simplify3D Creator 4.X
Dimensions (XYZ) & weight
- Dimensions metric: 724 x 775 x 648 mm
- Dimensions imperial: 28.5 x 30.5 x 25.5 inches
- Weight metric: 38.56 kg
- Weight imperial: 85 pounds
- Fusion3 F410
355 x 355 x 315 mm
Filament deposition
$4,599
Buy Now - gCreate gMax 2 PRO (with enclosure)
457 x 457 x 609 mm
Filament deposition
$6,295
Buy Now - Modix BIG-60
600 x 600 x 660 mm
Filament deposition
$4,900
Buy Now
Fusion3 EDGE 3D Printer User Manual - Manuals+
report this ad
report this ad
Fusion3 3D Printer
PRINTING ON THE EDGE (NORMAL OPERATION)
steps and what to expect when printing using EDGE SUMMARY
There are 11 key steps to start printing on EDGE:
- Slice your part in REACTOR
- Transfer .
 gcode file to EDGE
 - Load filament
- Preparation of the bed
- Launch of print
- The start of the start of the print EDGE
- Providing the correct first layer
- Print process
- sequence of seal EDGE
- Removal of the finished part from Edge
- Cleaning after printing
YOUR PART IN THE REACTOR
Basic steps:
- Export the CAD file in . STL file
- Load this into REACTOR
- Customize your parameters and settings in REACTOR (material, quality preset, etc.)
- Generate .gcode
- Preview/verify .gcode
- Save .gcode file
For more information, see:
STEP 2: TRANSFER YOUR. GCODE FILE TO EDGE
There are two ways to transfer the .gcode file to EDGE:
If Edge is on your local network
- Download the EDGE user interfaces to your computer by navigating to its IP address with a web browser.
- Make sure the main door is closed.
- Press the START PRINT button on the main screen.
- In the file selection dialog, click "LOAD PRINT" in the upper right corner.
- In the dialog box that opens, navigate to where the .gcode file is saved on your computer. Select it and click "Open". nine0021
- The file will be loaded and will appear in the file list.
- DO NOT select it for printing; we have to prepare the printer itself!
Manual USB Transfer
If your network does not have EDGE or you do not want to use the network interface:
- Find a USB flash drive and insert it into your computer. Transfer your .gcode file to it.
- SAFELY REMOVE the flash drive and transfer it to the USB port on the front of the EDGE below the LCD screen.
 nine0021
 - THIS IS ALL until we have the printer ready to print.
STEP 3: LOAD THE FILA
See the Loading Filament section of the Quick Start Guide for details on how to load filament into EDGE. Make sure the material you upload IS MATCHING the .gcode file you created! For example, don't load PLA if you've cut for ABS.
STEP 4: PREPARE THE PRINT PLATFORM
See Cleaning and Preparing the Platform in the quick guide for details on how to prepare the print platform. Make sure the bed you have installed on the EDGE and its preparation (glass + glue, glass + magic, flexible, etc.) matches the requirements of the material you are using and the settings of your REACTOR. nine0003
STEP 5: START PRINTING
- Make sure the main door is closed.
- From the main screen, press the START PRINT button.
- A file selection dialog will appear. Scroll through the file list to find the file you want to print.
- Thumbnails show what your prints look like.
- Use the "SORT BY" button in the upper right corner to sort files by name or creation date. The latter will put your latest file first, making it easier to find. nine0021
- A long press on a file will bring up additional options.
- Select the file you want to print. Press "YES" to confirm that you want to start printing immediately.
- The printer will start printing.
STEP 6: START PRINT SEQUENCE
At the start of each print, the printer performs the following steps:
- Bed Warmer: The bed is heated to the set temperature. Nothing else will happen until the bed warms up to the right temperature. You will see the bed temperature sensor pulsing orange to indicate that it is warming up and the user interface will advance to the print progress screen. For ABS or other high temperature materials, it may take up to 20 minutes for the platform to heat up for the first time.
 nine0021
 - Home axes: Once the platform is warm, the printer will home the Z, Y, and X axes in that order.
- Platform Leveling, Nozzle Offset, Printhead Heat: EDGE will perform a calibration routine that cleans the printhead, checks for nozzle offset, and checks the platform level. During this sequence, the print head heats up. Stay tuned for status updates and information about what the printer is doing on the screen.
- Prime Printhead: After bed sensing is completed, the printhead will move to the front left corner, extrude some filament into free air to prime the extruder, and then start printing. nine0021
NOTE:
- The print pause feature is not available until EDGE has started printing your part.
- If you have enabled fast turn mode, the print start sequence bypasses platform alignment and nozzle offset checks to speed up print start. Instead, the axes return to their original position, a single probe is made in the center of the platform, then the print head heats up to start printing.

STEP 7: DURING THE FIRST LAYER
IMPORTANT:
We STRONGLY recommend that you ALWAYS control the print start sequence and print the first layer. Most printing failures are due to problems in the first layer that are not detected and corrected in a timely manner. To ensure the success of your print, you must evaluate the following during the first print layer:
Filament Fill and Wipe:
The printer will push a piece of filament over the bed, then move down and "wipe" the print head from left to right. Sometimes this filament gets stuck in the print head and is drawn into the print. In this case, stop printing and remove it from the print head using needle nose pliers or the like. nine0003
First layer height:
Check that the height of the first layer is correct. You can do this by checking the perimeter "skirt" lines the printer will make around the outline of your part. Look at the photo how they should look.
The first layer is TOO close. STOP PRINTING, fix, try again:
First layer too close, but printing can continue:
First layer of goldilocks - just right:
First layer TOO FAR. Stop printing, correct, try again:
If you are unsure of the height of your first layer from the skirt line, you can also look at the infill pattern. See photos above for examples If the height of the first layer is wrong, use the Babystepping buttons to adjust it. For more information on Babystepping, see the Bed Leveling module.
Sticking to the bed
Make sure that the entire first layer is firmly attached to the bed. If you see a corner or other part lifting or peeling off, stop printing. Check the following:
- Your slicer settings and loaded material match
- The surface of your bed matches the material (glass, flexible material, etc.
 )
) - The cover of your bed matches the material (glue stick, magic, nothing, etc.)
- Your bed cover is fresh and applied to a clean, cold (<40°C) bed.
STEP 8: DURING PRINTING
NOTE:
If you open the main door while printing, the printer will automatically pause printing for safety reasons. To resume printing, close the main door and select Resume on the control panel. nine0003
Pause, resume, cancel printing:
To pause printing, press PRINT PAUSE on the control panel or open the main door.
To resume printing, close the main door and press RESUME PRINTING on the control panel. While printing is paused, you will receive additional options on the control panel to change filament or cancel printing.
When printing is paused:
- The print head will be turned off
- The bed will remain hot
- The motors will remain energized
When you resume printing, nothing will appear to be happening while the print head is warming up. The longer printing has been paused, the longer it will take.
STEP 9: END PRINT
When printing is complete, the printer will move the head to the rear left corner and move the platform all the way down.
- If quick start mode is off (default), the bed will turn off and start to cool down. nine0021
- If you have turned on the quick turn mode, the bed will remain hot.
For high temperature materials (ABS, PC, PC-PBT, etc.), the door can be left closed until the bed has cooled down. This helps the part to cool more evenly and reduces the likelihood of it warping once removed from the bed.
STEP 10: REMOVE THE READY PRINT
If you have enabled quick turn mode, you will need to remove the printable surface from the printer to allow it to cool as the platform remains hot. For details on deleting parts, see the Deleting a Finished Part module. nine0003
In general:
- If quick turn mode is off (default), it is not necessary to remove the glass.
- Allow the bed to cool to <40°C before attempting to remove the part.
- For PLA, remove as soon as possible; the longer the part is on the bed, the stronger the bond becomes.
- Try running the part scraper at the corner or edge of the part and gradually remove more of the part.
- If you find you need more than a couple pounds of strength, STOP. Using brute force to separate parts may result in printer damage, personal injury, broken glass panels, and broken/deformed printouts. nine0021
- Thermal shock the loose part instead (see above for recommended procedure).
STEP 11: CLEANING AFTER PRINTING
- Remove the primer stitch and print the skirt from the bed.
- (Glass surface) Clean applied coating, if present, with water. For best results, do not coat more than 1 print.
- (Flexible surfaces) Wipe the surface with alcohol. nine0021
- Do not recoat until you are ready to reprint.
 In other words, don't prepare your bed and then leave it for a week while you're not using it.
See Cleaning and preparing the bed in the quick guide for more information.
Related Articles/Resources:
Tags: edge, quick start, printing, print start, normal operation
Documents / Resources
Published in FFUSION3 TETHERS: 3D printer EDGE, FUSION3, Printer 90,000 Fusion3 EDGE Review: Available Industrial 3D printer12+
6 months ago
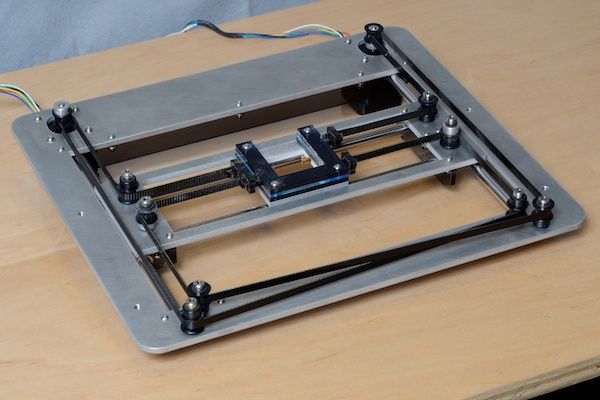
D Group & TOP 3D Shop22 OVOZHIS FISTRA EDGE: affordable industrial 3D printer - 3D printing with refractory materials Hello! Top 3D Shop is with you and in the next review we are talking about the Fusion3 EDGE 3D printer. The American company Fusion3 introduced a new generation EDGE 3D printer in early 2022. The novelty is based on the F-Series kinematics [f-siriz], which is an improved version of the classic CoreXY kinematics [core-x-y]. The Fusion3 EDGE is an affordable industrial-grade 3D printer designed for low to mid-volume production and high-volume, high-speed printing using refractory filaments. The range of consumables includes polycarbonate, polypropylene, nylon, TPU, as well as reinforced composites. Brand new Fusion3 EDGE components include ANVIL's proprietary print head based on an in-house developed extruder, improved build leveling system, reinforced belts, precision linear guides and stepper motors to improve print speed and quality at the same time. Fusion3 EDGE is a rigid aluminum construction that reduces vibrations and thus guarantees fast and high-quality printing. The ANVIL print head combines a branded extruder as well as its own know-how - instead of the usual interchangeable nozzles, it uses a surgical steel tube. This solution provides faster print speeds and improved wear resistance for highly abrasive composite materials. The maximum working temperature is 320 degrees, and the print speed for some materials reaches 250 millimeters per second.