What is needed to start 3d printing
3D printing on Windows: Everything you need to get started
Windows 3d Printing Hero (Image credit: Windows Central)So you have decided that you want to try your hand at 3D Printing, you've seen all the cool YouTube videos, and you are ready to pick up your first printer. But getting started requires a little more than you might think.
Here's an overview of the things you will need to ensure you can start printing straight away — and have a good chance of those prints actually working.
- A computer
- A 3D printer
- Base materials
- Assorted tools
- 3D models
- A slicer
A computer
Source: Daniel Rubino / Windows Central (Image credit: Source: Daniel Rubino / Windows Central)Not only do you need a computer for finding 3D models and for preparing those models for printing, but a lot of the back end of printing can be done here. From firmware upgrades to running the printer in real-time, almost anything can be done from a good laptop or PC. It doesn't even have to be the best laptop, just something powerful enough to run the basics.
I would recommend making sure you have at least 4GB of RAM and a fairly powerful processor. My Dell XPS 13 runs all of my slicing software and 3D design software, while my 2011 MacBook struggles to prepare some of the more complex models for the printer. Newer is often better, but most modern laptops should be handle anything.
If possible, avoid using a direct connection to your PC. Using an SD card to copy your models over to the printer and letting it do the work is far better than using your laptop. If anything happens to your PC while you print, an update, for example, or a blue screen of death (BSOD), you could potentially lose hours of printing.
A 3D printer
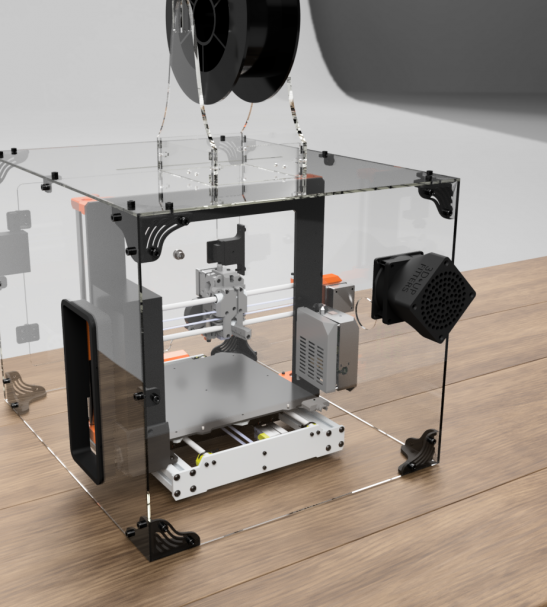
Source: Windows Central (Image credit: Source: Windows Central)The type of printer you start with will entirely depend on your budget. If you are looking to enter the 3D printing world for as little as possible, you can get a printer that requires a little work to get perfect.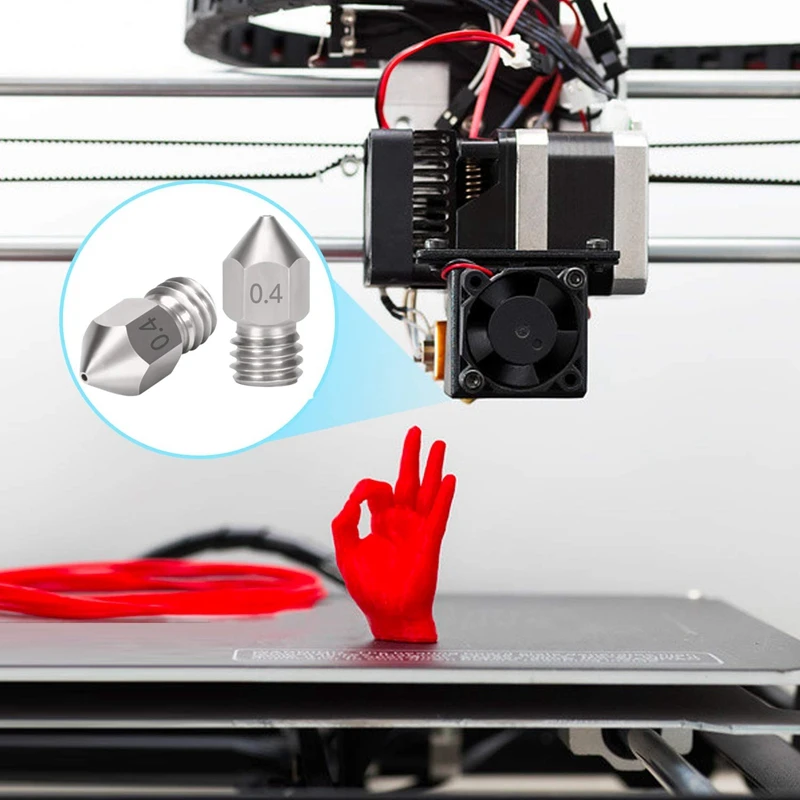 This can sometimes be a false saving as you might spend more on upgrades than it would have cost to buy a new one. If you have a little more money to spend, buying a better printer early on can save you a lot of time, money, and frustration.
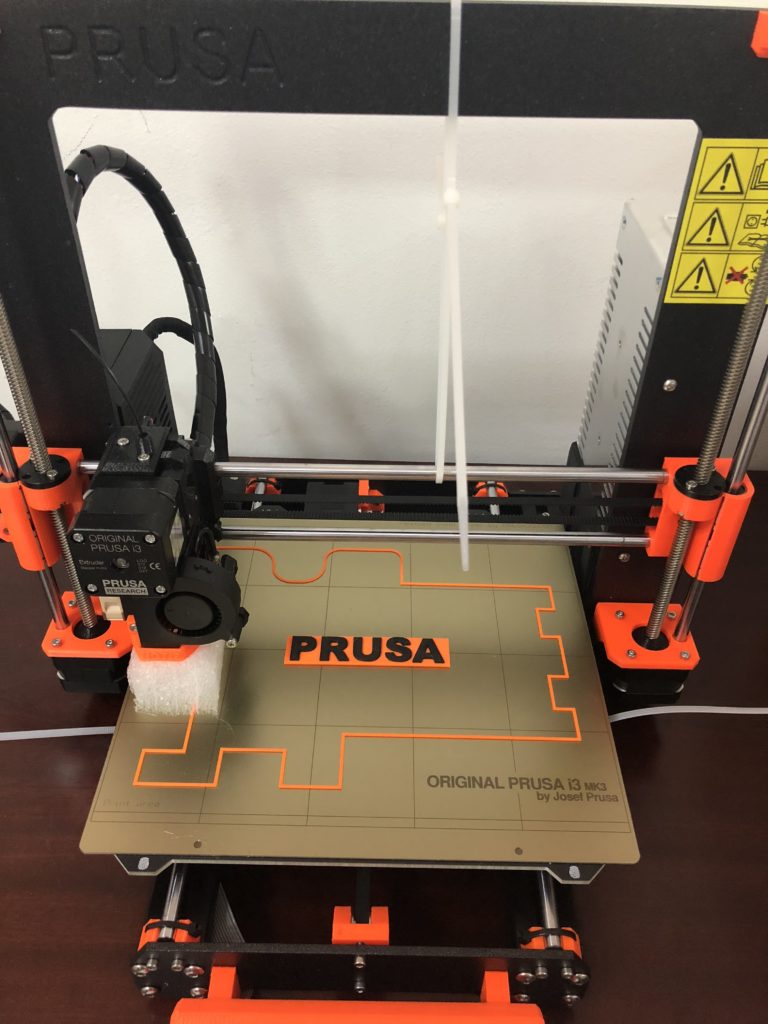
We have a list of the best 3D printers for under $1000, but if you are just starting, there are two I would consider — The Ender 3 from Creality and the Prusa Mini+.
The Ender 3
The Ender 3 is an incredibly cheap, entry-level model into the world of 3D printing. It requires very little in the way of setup and has a huge community behind it. The community is important because there are many upgrades for the Ender 3 to make it a powerhouse, and some guidance is probably a good idea. The most notable selling point for the Ender 3 is the price. You can get a working printer that will give you great prints for just $200. That's a great entry point to the hobby.
The Mini+
The Mini+ from Prusa is more expensive than the Ender 3, double the cost actually, but in terms of reliability and print quality, it wins hands down. As I said in my Prusa Mini review 'You would be hard-pressed to see any difference between the quality of the Prusa Mini and its big brother' the Mk3s. If you want stunning prints right out of the box, then the Mini+ is your best choice for under $500. It's also the perfect size to sit on your desk, next to your PC, and print anything you want while you work. I love it.
A fantastic printer at a great price
Prusa Mini+
The Prusa Mini+ is a 3D printer that offers a premium printing experience with a cost to sort all pockets. If you are new to 3D printing and want to start with quality, this is the printer for you.
Resin Printers
Source: Windows Central (Image credit: Source: Windows Central)Resin 3D printing requires an entirely different set of 3D printers, materials, and accessories. We go into Resin or filament 3D printing here, but generally, if you are looking for tiny details on small models, then a resin printer is best. If you want big models that can take some punishment, an FDM printer is better suited. Resin 3D printing also requires a lot of must have accessories to use safely and efficiently. When it comes to Resin 3D printers, there are three sizes (small, mid-range, and large) but for beginners, there are really only two you need to think about.
Small
Small resin 3D printers like the Phrozen Mini 4K and the Sonic 4K are perfect if you are looking for an entry-level printer, at a reasonable price, that can print highly detailed models such as miniatures for tabletop games or figurines. The mono screen on these new printers makes them extremely fast, and the 4K resolution gives fantastic model detail.
Fast and Affordable
Phrozen Sonic Mini 4K
An excellent printer for hobbyists
The Phrozen Sonic Mini 4K is a great place to start resin 3D printing. It's small, cheap, and produces a level of detail FDM printers are jealous of every time.
Mid-size
If you are looking to print larger models, like masks, or 7 inch-figures, then a mid-sized printer might be up your alley. We reviewed the Anycubic Mono X and found it to be excellent at just about every aspect of 3D printing. If you are looking to get into 3D printing as a business, this is a great place to start.
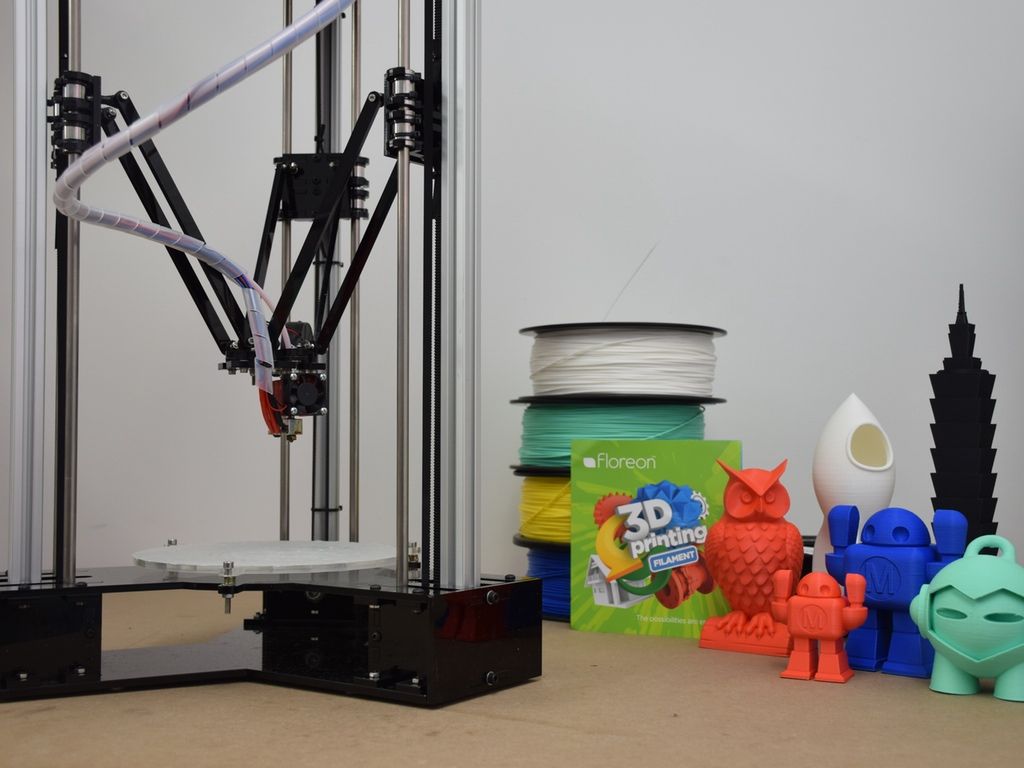
Base materials
3D Printing (Image credit: Windows Central)Filament
Filament is the material you use to make everything in your FDM 3D printer. The most popular and arguably the easiest to use is PLA, a corn-based plastic that requires fairly low temperatures to print and is easy to sand, prime, and paint. There are many other filament choices, such as ABS, a stronger, higher temp plastic, and Ninja Flex, a flexible filament you can use for things like phone cases.
Rolls of filament come in many different sizes, and I like to use the 1kg or 2.2lb rolls that you can get for as little as $15. Plenty of people will tell you the cheap stuff is no good, and they may be right if you are planning on selling your prints or you don't want to paint them. For your first few rolls, though, while you are learning the ropes, go as cheap as you can. You will reach a point in your printing career when it is time to buy some of the more expensive materials, but you can find many excellent filaments on a budget if you need to.
A note of caution, some of the filaments are noxious when printed. ABS shouldn't be printed without adequate ventilation in the house and needs to have an air-controlled room to really work well. Most printers don't come with an enclosure, so you will need to build one to print ABS properly. That said, ABS is a really nice material to get very smooth prints from, so it's worth learning more about. Make sure, as well, that you get the right size filament; 1.75mm is the norm, but 2.85mm is available for some printers.
Resin
Resin is required for resin 3D printers, obviously, but it is important to note how much more toxic it can be. While you can have a resin 3D printer sat next to you on your desk, you need to ensure there is adequate ventilation when it has resin in it.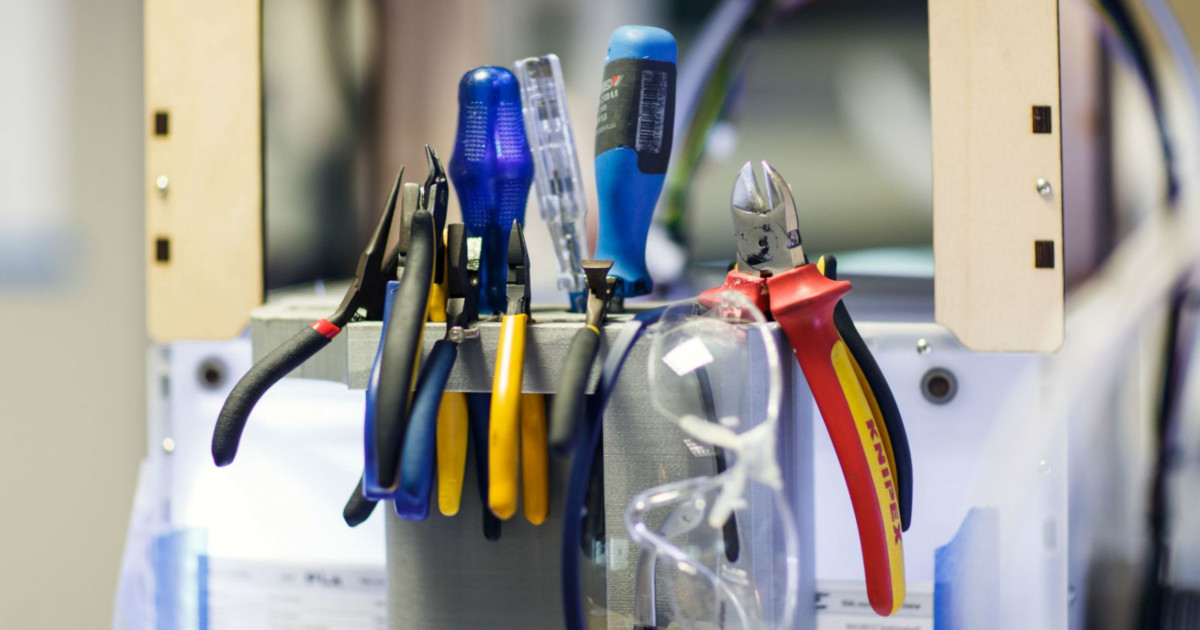
There are many different types of resin that you can use depending on the type of model you are making. There are extra tough resins for practical prints, resins that are good for sanding and painting, and even resins that can be used as wax for casting metal. We've collected the best resin for your SLA/DLP 3D Printer in a handy list, but for my money, the Siraya Tech fast resin is all you need every day.
Assorted tools
Now you have your laptop, printer, and base material, you need to start looking at the type of tools you need to help make life easier. If you are printing in resin, then our list of must have accessories will steer you in the right direction, but the most important things to purchase are Nitrile gloves and Isopropyl Alcohol (IPA). These will keep you safe and make your prints look fantastic once cleaned and cured.
There are also some must have accessories for filament 3D printers because while your printer may come with a cheap scraper and some snips, you really need some quality tools like the Buildtak scraper to make your printing successful. Some of the best stuff you can buy for your printer can be found in your local supermarket too. Things like Aquanet hairspray and Elmer's glue sticks are readily available and will keep your print planted firmly on the bed.
3D models
Repositories
Most printers come with an SD card and a few basic models to try out, but you may have an idea of what you want to print for your first go. You can always design your own models, but for now, let's find one on the interwebs.
- Thingiverse: Thingiverse is the largest repository of free-to-use 3D models on the web, with hundreds of thousands of models to choose from. If you have had an idea, the chances are someone already made one. I even uploaded a quick design of the Windows Central Logo that you could use as your first print.
- My Mini Factory: My Mini Factory is smaller than Thingiverse, but each model on there is guaranteed to be print-ready. This means someone has actually printed all the models to make sure they will print.
 There are a lot more paid artists on My Mini Factory, but honestly, it's worth a few dollars to get some of these amazing models.
 - Prusaprinters: Prusa makes two of my favorite printers, the Mini+ and the Mk3s and recently created a site to house 3D creations. It is already building a strong community and is an easy site to navigate around.
- Patreon: While Patreon isn't exactly a 3D model library, there are some fantastic 3D modelers out there who offer beautiful models for a low monthly fee. Some like Fotis Mint even let you sell their original models if you sign up for the right amount. I spend around $30 a month on different modelers and average 10-15 new models each month for that money. Bargain.
Slicers
Slicers are the final piece of the 3D Printing puzzle. Slicing software turns the 3D model file, normally an .STL or .OBJ, into a usable set of instructions for your printer to plot in 3D space. Normally a slicer will create a file called GCode, which can be edited by you to tweak certain aspects of the print. The GCode tells the printer when to start and stop, when to home the print head, and when to extrude filament between two points. There are quite a lot of different slicers, and they are getting better every day.
- Simplify 3D: Simplify 3D (S3D) is an extremely powerful slicer that can be used on just about any printer. One of my printers uses a different flavor of code to print called .x3g, and as such, it needs specific software to run, which S3D includes. S3D has an excellent UI and powerful features to help you generate the best prints. I wouldn't necessarily recommend it right now as they have some weird limits to the number of printers you can use, they are slow to update, and it costs $149 to buy, but what it does, it does very well.
- Cura: Cura by Ultimaker is completely free and almost as powerful as Simplify 3D. Due to the open-source nature of Cura, you will see many different versions floating around in the world, your printer may even come with a version on the SD card.
 Don't use any other version than the current stable version unless you are secure in your 3D printing skills, as even one wrong setting can make all your prints look like garbage. I like Cura, and its UI is a little easier to understand than S3D, and with a constant upgrade cycle and a price tag of $0, it is a good choice for a beginner.
 - PrusaSlicer: PrusaSlicer is another free offering that deserves a good look. It works for both FDM and resin printing and has a lot of amazing features, one of my favorites being the paint on supports. Instead of messing around with blockers, you can simply paint the area you need supporting at PrusaSlicer will generate the support you need. It's an elegant system that I really dig. If you decided on a Mini+ or Mk3s from earlier in this article, then PrusaSlicer is the best choice for you.
- Chitubox: When it comes to resin printing, there is no better slicer out there than Chitubox. It offers fantastic features that allow you to support the model and hollow it, ready for resin printing.
 It can even connect to certain printers wirelessly through your PC to make file transfer nice and simple. I use Chitubox every single day, and I love it.
James built his first PC when he was 13 and has never looked back. He can be found on Windows Central, usually in the corner where all the 3D printers are, or huddled around the Xbox playing the latest games.
3D printing on Windows: Everything you need to get started
Windows 3d Printing Hero (Image credit: Windows Central)So you have decided that you want to try your hand at 3D Printing, you've seen all the cool YouTube videos, and you are ready to pick up your first printer. But getting started requires a little more than you might think.
Here's an overview of the things you will need to ensure you can start printing straight away — and have a good chance of those prints actually working.
- A computer
- A 3D printer
- Base materials
- Assorted tools
- 3D models
- A slicer
A computer
Source: Daniel Rubino / Windows Central (Image credit: Source: Daniel Rubino / Windows Central)Not only do you need a computer for finding 3D models and for preparing those models for printing, but a lot of the back end of printing can be done here.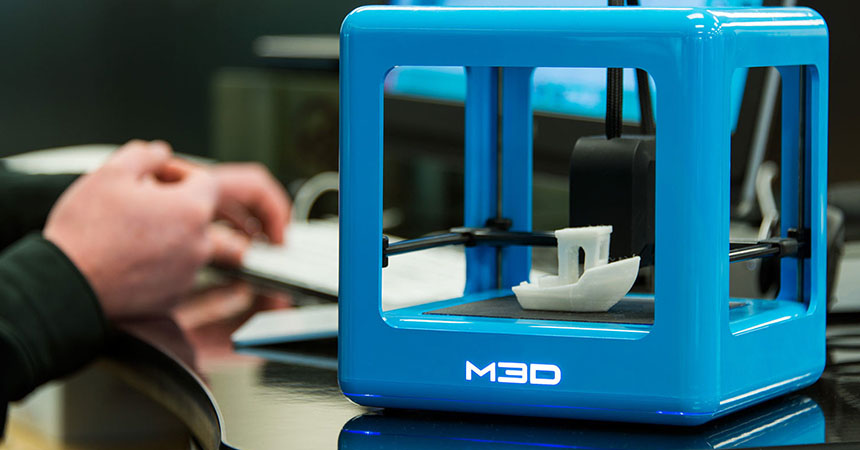 From firmware upgrades to running the printer in real-time, almost anything can be done from a good laptop or PC. It doesn't even have to be the best laptop, just something powerful enough to run the basics.
I would recommend making sure you have at least 4GB of RAM and a fairly powerful processor. My Dell XPS 13 runs all of my slicing software and 3D design software, while my 2011 MacBook struggles to prepare some of the more complex models for the printer. Newer is often better, but most modern laptops should be handle anything.
If possible, avoid using a direct connection to your PC. Using an SD card to copy your models over to the printer and letting it do the work is far better than using your laptop. If anything happens to your PC while you print, an update, for example, or a blue screen of death (BSOD), you could potentially lose hours of printing.
A 3D printer
Source: Windows Central (Image credit: Source: Windows Central)The type of printer you start with will entirely depend on your budget. If you are looking to enter the 3D printing world for as little as possible, you can get a printer that requires a little work to get perfect. This can sometimes be a false saving as you might spend more on upgrades than it would have cost to buy a new one. If you have a little more money to spend, buying a better printer early on can save you a lot of time, money, and frustration.
We have a list of the best 3D printers for under $1000, but if you are just starting, there are two I would consider — The Ender 3 from Creality and the Prusa Mini+.
The Ender 3
The Ender 3 is an incredibly cheap, entry-level model into the world of 3D printing. It requires very little in the way of setup and has a huge community behind it. The community is important because there are many upgrades for the Ender 3 to make it a powerhouse, and some guidance is probably a good idea. The most notable selling point for the Ender 3 is the price. You can get a working printer that will give you great prints for just $200.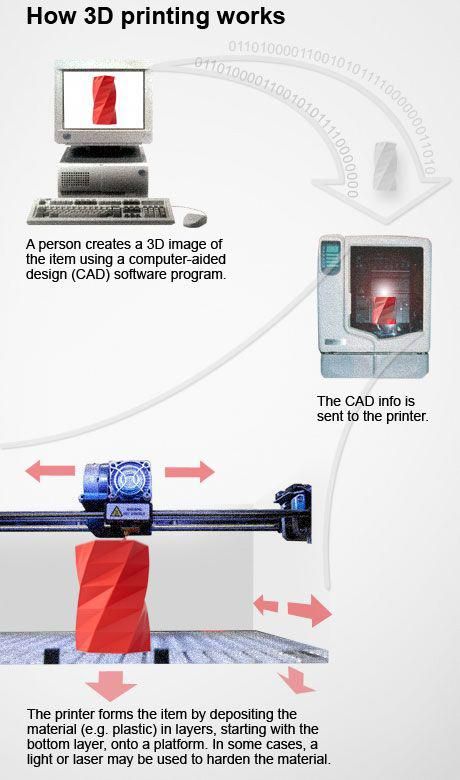 That's a great entry point to the hobby.
The Mini+
The Mini+ from Prusa is more expensive than the Ender 3, double the cost actually, but in terms of reliability and print quality, it wins hands down. As I said in my Prusa Mini review 'You would be hard-pressed to see any difference between the quality of the Prusa Mini and its big brother' the Mk3s. If you want stunning prints right out of the box, then the Mini+ is your best choice for under $500. It's also the perfect size to sit on your desk, next to your PC, and print anything you want while you work. I love it.
A fantastic printer at a great price
Prusa Mini+
The Prusa Mini+ is a 3D printer that offers a premium printing experience with a cost to sort all pockets. If you are new to 3D printing and want to start with quality, this is the printer for you.
Resin Printers
Source: Windows Central (Image credit: Source: Windows Central)Resin 3D printing requires an entirely different set of 3D printers, materials, and accessories. We go into Resin or filament 3D printing here, but generally, if you are looking for tiny details on small models, then a resin printer is best. If you want big models that can take some punishment, an FDM printer is better suited. Resin 3D printing also requires a lot of must have accessories to use safely and efficiently. When it comes to Resin 3D printers, there are three sizes (small, mid-range, and large) but for beginners, there are really only two you need to think about.
Small
Small resin 3D printers like the Phrozen Mini 4K and the Sonic 4K are perfect if you are looking for an entry-level printer, at a reasonable price, that can print highly detailed models such as miniatures for tabletop games or figurines. The mono screen on these new printers makes them extremely fast, and the 4K resolution gives fantastic model detail.
Fast and Affordable
Phrozen Sonic Mini 4K
An excellent printer for hobbyists
The Phrozen Sonic Mini 4K is a great place to start resin 3D printing.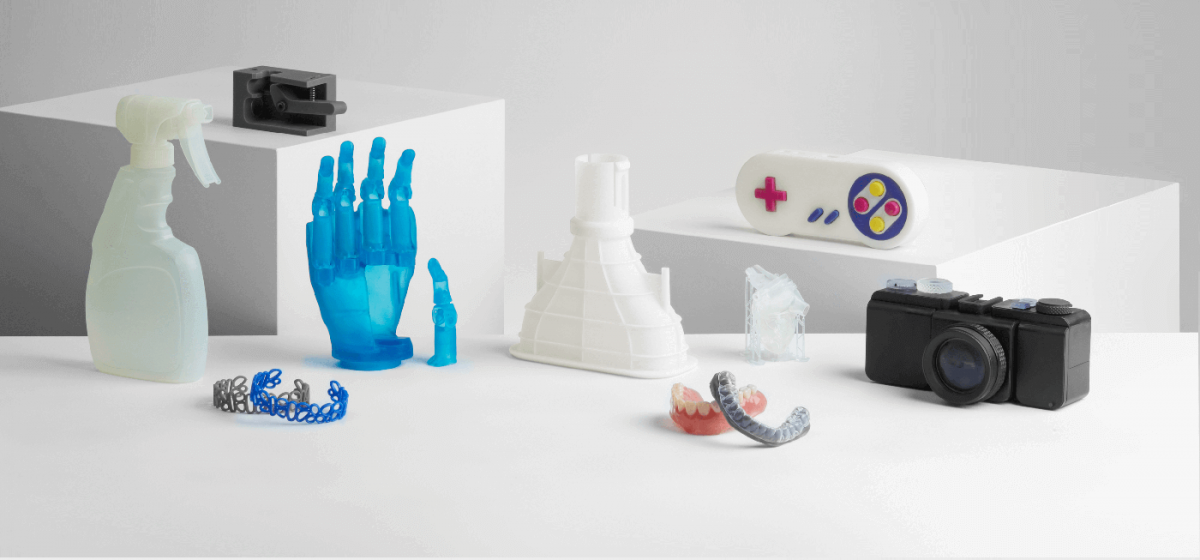 It's small, cheap, and produces a level of detail FDM printers are jealous of every time.
Mid-size
If you are looking to print larger models, like masks, or 7 inch-figures, then a mid-sized printer might be up your alley. We reviewed the Anycubic Mono X and found it to be excellent at just about every aspect of 3D printing. If you are looking to get into 3D printing as a business, this is a great place to start.
Base materials
3D Printing (Image credit: Windows Central)Filament
Filament is the material you use to make everything in your FDM 3D printer. The most popular and arguably the easiest to use is PLA, a corn-based plastic that requires fairly low temperatures to print and is easy to sand, prime, and paint. There are many other filament choices, such as ABS, a stronger, higher temp plastic, and Ninja Flex, a flexible filament you can use for things like phone cases.
Rolls of filament come in many different sizes, and I like to use the 1kg or 2. 2lb rolls that you can get for as little as $15. Plenty of people will tell you the cheap stuff is no good, and they may be right if you are planning on selling your prints or you don't want to paint them. For your first few rolls, though, while you are learning the ropes, go as cheap as you can. You will reach a point in your printing career when it is time to buy some of the more expensive materials, but you can find many excellent filaments on a budget if you need to.
A note of caution, some of the filaments are noxious when printed. ABS shouldn't be printed without adequate ventilation in the house and needs to have an air-controlled room to really work well. Most printers don't come with an enclosure, so you will need to build one to print ABS properly. That said, ABS is a really nice material to get very smooth prints from, so it's worth learning more about. Make sure, as well, that you get the right size filament; 1.75mm is the norm, but 2.85mm is available for some printers.
Resin
Resin is required for resin 3D printers, obviously, but it is important to note how much more toxic it can be. While you can have a resin 3D printer sat next to you on your desk, you need to ensure there is adequate ventilation when it has resin in it.
There are many different types of resin that you can use depending on the type of model you are making. There are extra tough resins for practical prints, resins that are good for sanding and painting, and even resins that can be used as wax for casting metal. We've collected the best resin for your SLA/DLP 3D Printer in a handy list, but for my money, the Siraya Tech fast resin is all you need every day.
Assorted tools
Now you have your laptop, printer, and base material, you need to start looking at the type of tools you need to help make life easier. If you are printing in resin, then our list of must have accessories will steer you in the right direction, but the most important things to purchase are Nitrile gloves and Isopropyl Alcohol (IPA). These will keep you safe and make your prints look fantastic once cleaned and cured.
There are also some must have accessories for filament 3D printers because while your printer may come with a cheap scraper and some snips, you really need some quality tools like the Buildtak scraper to make your printing successful. Some of the best stuff you can buy for your printer can be found in your local supermarket too. Things like Aquanet hairspray and Elmer's glue sticks are readily available and will keep your print planted firmly on the bed.
3D models
Repositories
Most printers come with an SD card and a few basic models to try out, but you may have an idea of what you want to print for your first go. You can always design your own models, but for now, let's find one on the interwebs.
- Thingiverse: Thingiverse is the largest repository of free-to-use 3D models on the web, with hundreds of thousands of models to choose from. If you have had an idea, the chances are someone already made one.
 I even uploaded a quick design of the Windows Central Logo that you could use as your first print.
 - My Mini Factory: My Mini Factory is smaller than Thingiverse, but each model on there is guaranteed to be print-ready. This means someone has actually printed all the models to make sure they will print. There are a lot more paid artists on My Mini Factory, but honestly, it's worth a few dollars to get some of these amazing models.
- Prusaprinters: Prusa makes two of my favorite printers, the Mini+ and the Mk3s and recently created a site to house 3D creations. It is already building a strong community and is an easy site to navigate around.
- Patreon: While Patreon isn't exactly a 3D model library, there are some fantastic 3D modelers out there who offer beautiful models for a low monthly fee. Some like Fotis Mint even let you sell their original models if you sign up for the right amount. I spend around $30 a month on different modelers and average 10-15 new models each month for that money.
 Bargain.
Slicers
Slicers are the final piece of the 3D Printing puzzle. Slicing software turns the 3D model file, normally an .STL or .OBJ, into a usable set of instructions for your printer to plot in 3D space. Normally a slicer will create a file called GCode, which can be edited by you to tweak certain aspects of the print. The GCode tells the printer when to start and stop, when to home the print head, and when to extrude filament between two points. There are quite a lot of different slicers, and they are getting better every day.
- Simplify 3D: Simplify 3D (S3D) is an extremely powerful slicer that can be used on just about any printer. One of my printers uses a different flavor of code to print called .x3g, and as such, it needs specific software to run, which S3D includes. S3D has an excellent UI and powerful features to help you generate the best prints. I wouldn't necessarily recommend it right now as they have some weird limits to the number of printers you can use, they are slow to update, and it costs $149 to buy, but what it does, it does very well.
- Cura: Cura by Ultimaker is completely free and almost as powerful as Simplify 3D. Due to the open-source nature of Cura, you will see many different versions floating around in the world, your printer may even come with a version on the SD card. Don't use any other version than the current stable version unless you are secure in your 3D printing skills, as even one wrong setting can make all your prints look like garbage. I like Cura, and its UI is a little easier to understand than S3D, and with a constant upgrade cycle and a price tag of $0, it is a good choice for a beginner.
- PrusaSlicer: PrusaSlicer is another free offering that deserves a good look. It works for both FDM and resin printing and has a lot of amazing features, one of my favorites being the paint on supports. Instead of messing around with blockers, you can simply paint the area you need supporting at PrusaSlicer will generate the support you need. It's an elegant system that I really dig. If you decided on a Mini+ or Mk3s from earlier in this article, then PrusaSlicer is the best choice for you.
- Chitubox: When it comes to resin printing, there is no better slicer out there than Chitubox. It offers fantastic features that allow you to support the model and hollow it, ready for resin printing. It can even connect to certain printers wirelessly through your PC to make file transfer nice and simple. I use Chitubox every single day, and I love it.
James built his first PC when he was 13 and has never looked back. He can be found on Windows Central, usually in the corner where all the 3D printers are, or huddled around the Xbox playing the latest games.
FDM 3D printing guide for beginners. Understanding Basic Terms
Getting started with 3D printers doesn't have to be intimidating. We have created this simple 3D printing guide for beginners to help all beginners understand the basic terms.
3D printing is a very general term. The media, especially mainstream marketing, portray 3D printing as the magical technology of the future, capable of reproducing complex objects.
But this approach makes it difficult to understand what 3D printing is from a technical point of view.
In reality, there are many different 3D printing technologies, but the most common for beginners is layer-by-layer modeling (FDM or FFF), which is the focus of this article.
Ender 3 V2 is one of the most popular hobbyist 3D printers.
FDM prints parts using thermoplastic, which is basically a filament of material that can melt, cool, and solidify. Details are built by stacking layers on top of each other.
This technology was created because people needed a way to quickly prototype parts. Even today, rapid prototyping is one of the biggest advantages of FDM and 3D printing in general. Not surprisingly, 3D printing is also gradually becoming a powerful manufacturing solution.
Before we get into the details of how FDM works, there is one more thing worth mentioning. If you have done some research on FDM, you may have noticed that some sources use the term "FFF" instead of FDM when referring to the technology. This is because FDM is a term originally patented by Stratasys and FFF is a non-proprietary generic abbreviation. Remember, this is the same technology, only the names are different. Today, most people use the term FDM.
FDM 3D printing. How it works?
- 3D printer control interface
- 3D printing plastic (filament)
- Extruder
- Hotend (hot end)
- Fan (cooler)
- Print platform (table)
- 3D printing
The easiest way to understand how FDM works is to study the details of an FDM 3D printer. However, before we get into the specifics, it's worth mentioning that most 3D printers can move in three axes: X, Y, and Z. The X and Y axes are responsible for moving left, right, forward, and backward, while the Z is responsible for vertical movement.
Now let's look at the main components of a 3D printer:
Control interface : Some modern 3D printers have a touch screen that is used to control the 3D printer. On older printers, a simple LCD with physical scrolling and a click wheel may be present instead of a touch interface. Depending on the model, an SD card slot and a USB port may also be present.
Print Bed : The bed or table of a 3D printer is essentially the surface on which parts are made. Platforms are most often made with heating to improve the adhesion of the part, but more on that later.
Extruder(s) : The extruder is the component responsible for melting and progressively depositing the plastic filament to build the model.
The extruder actually consists of two subcomponents: hot and cold. The hot end or hot end contains a heater and nozzle that actually melts the filament, while the cold end consists of a motor, drive gears and other small components that push the filament into the hot end to melt.
There is a heatsink and a fan between the hot and cold ends because it is necessary that the cold end stays cold to avoid jamming.
In addition to the heatsink fan, there is usually at least one other fan designed to cool the molten filament after it exits the extruder - this is commonly referred to as the parts cooling fan.
Print head : one or more extruders are installed on the print head (standard 3D printers have one extruder). At the top of the print head is a tube that feeds filament into the print head.
How a 3D printer prints.
The process starts when you send the 3D model file to the printer. After starting a print job, the nozzle starts to heat up. When the nozzle reaches the temperature needed to melt the filament, the extruder draws the filament into the hot end in preparation for deposition modeling.
The printer is now ready to 3D print the part. The print head descends onto the build surface (platform) and begins to fuse the filament, which cools and solidifies shortly after exiting the nozzle thanks to the part cooling fans.
Plastic is applied one layer at a time, and after one layer is completed, the printhead moves up the Z-axis a short distance and the process is repeated until the part is completed.
Create, download and purchase 3D models.
Naturally, if you want to 3D print a part, you must have a 3D model of that part. 3D models are created using 3D modeling software commonly referred to as CAD (computer-aided design) software. Here are some examples of popular 3D modeling software:
- Autodesk's Fusion 360 (Free for non-commercial use)
- Blender (free of charge)
- ZBrush (paid, but free trial available)
However, most newcomers to 3D printing do not have the skills required to use such software. If so, don't worry because there are other solutions.
First, there are simpler CAD software options like Tinkercad, a program that almost anyone can use without any prior experience. This is an online application developed by Autodesk, one of the leading developers of CAD software.
Downloading files
With so many people having access to 3D printers in recent years, several websites have become repositories for 3D models.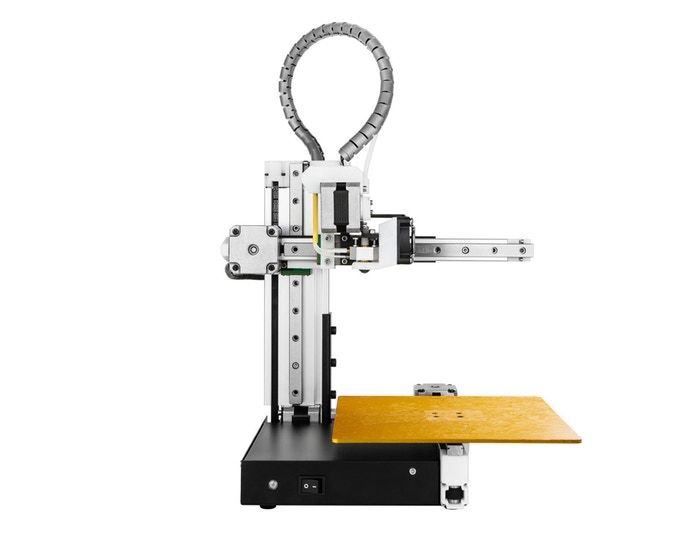
Some of the most popular are:
- Thingiverse (free)
- MyMiniFactory (many free, some paid)
- Cults3D (free and paid)
- CGTrader (some free and most paid)
- PrusaPrinters (all free)
So anyone can get their hands on a model without any modeling skills.
Model preparation.
3D models must be prepared for 3D printing using special software that translates the model into machine instructions. This is done using slicing software, also called a slicer. 3D models are imported into a slicer, which then actually "cuts" the model into layers. The resulting files consist of a G-code, which is essentially a long list of instructions that a 3D printer follows to build a model.
G-code is the "language" of 3D printers and CNC machines. These files contain important parameters needed to create a model, such as print speed and temperature, wall thickness, infill percentage, layer height, and many others. In other words, 3D printing is impossible without G-code files!
Supports (support structures)
Another of the main functions of the slicer is the generation of support structures (supports). In particular, supports are needed for parts with attachments.
9The 0002 Slicer allows you to choose where to place the supports and how tight you want them to be. Some slicers even offer users the ability to select different types of support structures for easier removal or strength.Printer preparation.
Before you start printing on a 3D printer, there are a few mandatory steps to take:
Plastic loading: The extruder must be ready to extrude the filament before printing begins. The loading process begins with heating the hot end to the melt temperature, and then the filament is directly loaded into the heated extruder.
Platform Leveling: In order for the printer to successfully print an object, the table must be as level as possible.
Depending on the printer, platform calibration can be performed manually, semi-automatically or automatically.
Platform leveling is very important because, for example, if the nozzle is too far from the table, the first and most important layer will not adhere to the surface, resulting in you not being able to print your object.
Materials for FDM 3D printing.
As we already mentioned, FDM 3D printers use spools of plastic as part material. Filament is basically a thermoplastic specifically designed to melt and cool while maintaining its structural integrity.
3D printing filaments usually come in two diameters: 1.75mm and 3mm (or 2.85mm). Most 3D printers use 1.75 diameter plastic, which is why the variety of types and shades of 1.75 filament significantly exceeds 2.85.
We recommend that before you buy a 3D printer, be sure to clarify which filament it works with.
Converting the extruder from 2.85 to 1.75 is possible, but requires fiddling, time and additional accessories.
One of the best things about FDM 3D printers is that they can handle a wide range of plastics.
Here are just a few of the different types that are used in FDM 3D printing:
Standard:
- PLA
- ABS
- PETG
Engineering:
- Flexible (TPU, TPE)
- Nylon
- With additives (wood, metal, etc.)
- Polycarbonate (PC)
For supports:
- HIPS
- PVA
Among other things, FDM filament is one of the cheapest materials used in the world of 3D printing.
Post-processing of printed products.
Post-processing is the final steps you must take to complete your object.
Below we have listed some of the post-processing steps for a 3D printed part. You don't necessarily need to complete each of these steps.
Most often, post-processing is completed at the stage of removal of supports.
Support Removal : After printing, support structures are mechanically removed by simply breaking them off. As a result, you can see marks left on the surface of the part.
If you have bought a 3D printer with two extruders, you can use special soluble plastics to print supports. In this case, you just need to place the object in water if you printed with PLA+PVA or in limonene if you printed with ABS+HIPS.
Sanding : Your part may have imperfections (for example, after removing supports). In this case, grinding comes into play. Light sanding of 3D printed parts can make the surface smoother.
Coloring : You will often print in one color. To add more colors, details or protection, you can paint your model!
Polishing or Smoothing : Epoxy is one way to smooth the surface of a printed part. For ABS, an acetone steam bath is often used. Under the influence of acetone vapors, ABS begins to dissolve and, if this process is stopped in time, you will get a smooth and glossy part.
Gluing : If you want to print a large 3D model that won't fit in your printer's build chamber, you can print the part in two or more parts and then glue them together.
Common 3D printer problems.
Let's discuss some of the most common problems beginners may encounter when using a 3D printer.
Warp : This problem occurs due to temperature differences during the 3D printing process. 3D Print Delamination - 5 Tips and Tricks to Avoid Delamination.
Plastic bleed (snot) : Thin extra filaments of plastic on your model may be caused by incorrect temperature or retraction settings. Some types of plastic, such as PETG, are more prone to free flow from the nozzle.
Nozzle Clog : Nozzle clogging is one of the most annoying problems of FDM 3D printers.
If you hear a strange printhead sound and no plastic comes out of the nozzle, the nozzle may be clogged. This can be caused, for example, by poor filament quality or incorrect temperature settings.
Layer Offset : This problem can be caused by vibrations and wobbles in your printer, insufficient X and Y belt tension, or excessively high print speeds.
Underextrusion : Underextrusion occurs when not enough plastic is extruded during printing. This can result in gaps, missing layers, and even small dots or holes in the layers. With insufficient extrusion, the quality and even the strength of the parts deteriorate.
Overextrusion : As the name suggests, overextrusion occurs when your 3D printer extrudes too much material. This can lead to sagging layers, broken geometry, and poor quality of your prints. Check your filament diameter, play with the print speed and fluidity settings in your slicer.
10 rules for preparing a model for 3D printing / Habr
Download the model, print it, use it - what could be easier!? But, if we talk about FDM 3D printers, then not every model can be printed, and almost every model (not prepared for 3D printing) has to be prepared, and for this it is necessary to imagine how this 3D printing goes.
First, a couple of definitions:
Slicer is a program for converting a 3D model into a control code for a 3D printer. (There are plenty to choose from: Kisslacer, Slic3r, Skineforge, etc.). It is necessary, because the printer will not be able to immediately eat the 3D model (at least not the printer in question).
Slicing (slicing) is the process of translating a 3D model into a control code.
The model is cut (sliced) in layers. Each layer consists of a perimeter and/or fill. The model may have a different percentage of filling with a fill, and there may not be a fill (hollow model).
On each layer, movements occur along the XY axes with the application of a plastic melt. After printing one layer, it moves along the Z axis to the layer above, the next layer is printed, and so on.
1. Mesh
Intersecting faces and edges can lead to funny slicing artifacts. Therefore, if the model consists of several objects, then they must be reduced to one.
But it must be said that not all slicers are mesh-sensitive (for example, Slic3er).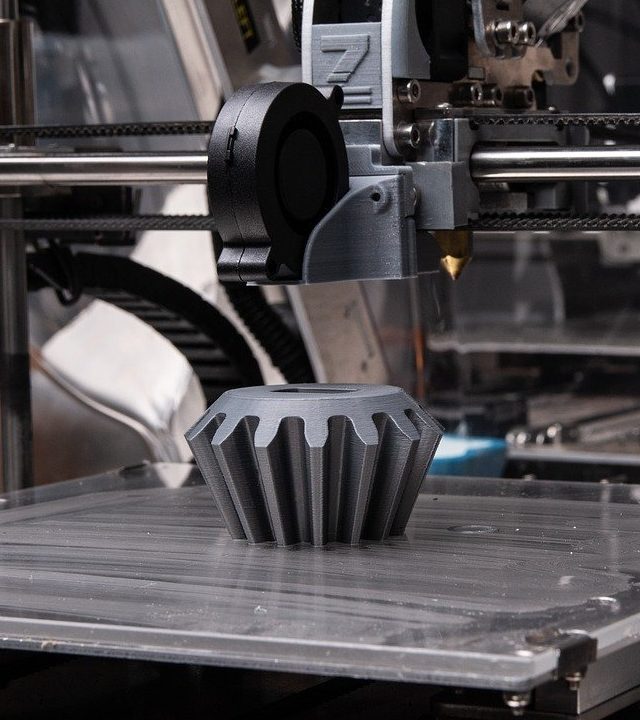
And even if the grid is crooked, and it’s too lazy to fix it manually, then there is an excellent free cloud service cloud.nettfab.com that will help in most cases.
2. Flat base
Desirable, but not mandatory. A flat base will help the model stay better on the printer table. If the model becomes unstuck (this process is called delamination), then the geometry of the base of the model will be violated, and this can lead to a shift in the XY coordinates, which is even worse.
If the model does not have a flat base or the base area is small, then it is printed on a raft - a printed substrate. The raft damages the surface of the model it comes into contact with. Therefore, if possible, it is better to do without it.
3. Wall thickness
The walls must be equal to or thicker than the nozzle diameter. Otherwise, the printer simply will not be able to print them. The wall thickness depends on how many perimeters will be printed. So with 3 perimeters and a nozzle of 0.5mm, the wall thickness should be from 0.5, 1, 1.5, 2, 2.5, 3mm, and above it can be any. That is, the wall thickness should be a multiple of the nozzle diameter if it is less than N * d, where N is the number of perimeters, d is the nozzle diameter.
4. Minimum overhangs
Each overhanging element requires a supporting structure - support. The fewer overhanging elements, the less supports you need, the less material and printing time you need to spend on them, and the cheaper the print will be.
In addition, the support spoils the surface in contact with it.
It is allowed to print without wall supports, which have an inclination angle of not more than 70 degrees.
5. Precision
Accuracy along the XY axes depends on backlash, structural rigidity, belts, in general, on the mechanics of the printer. And it is about 0.3 mm for hobby printers.
The Z-axis accuracy is determined by the layer height ( 0.1-0.4 mm). Hence, the height of the model will be a multiple of the height of the layer.
It should also be taken into account that after cooling, the material shrinks, and at the same time the geometry of the object changes.
There is also a software side of the problem - not every slicer correctly processes internal dimensions, so it is better to increase the diameter of the holes by 0.1-0.2 mm.
6. Small parts
Small details are quite difficult to reproduce on an FDM printer. They cannot be reproduced at all if they are smaller than the nozzle diameter. In addition, when processing the surface, small details will become less noticeable or disappear altogether.
7. Bottlenecks
Bottlenecks are very difficult to handle. If possible, it is necessary to avoid such places that require processing, which cannot be approached with a sandpaper or a microdrill. Of course, you can treat the surface in a solvent bath, but then small elements will melt.
8. Large models
When modeling, it is necessary to take into account the maximum possible dimensions of the print. If the model is larger than these dimensions, then it must be cut in order to print in parts. And since these parts will stick together, it would be nice to immediately provide connections, for example, a dovetail.
9. Desktop location
How to place the model on the desktop depends on its strength.
The load should be distributed across the print layers, not lengthwise. Otherwise, the layers may disperse, because. adhesion between layers is not 100%.
To make it clear, let's look at two L-shaped models. The lines show the print layers.
The strength of the printed part depends on how the force is applied relative to the layers. In this case, a small force will be enough for the right "G" to break it.