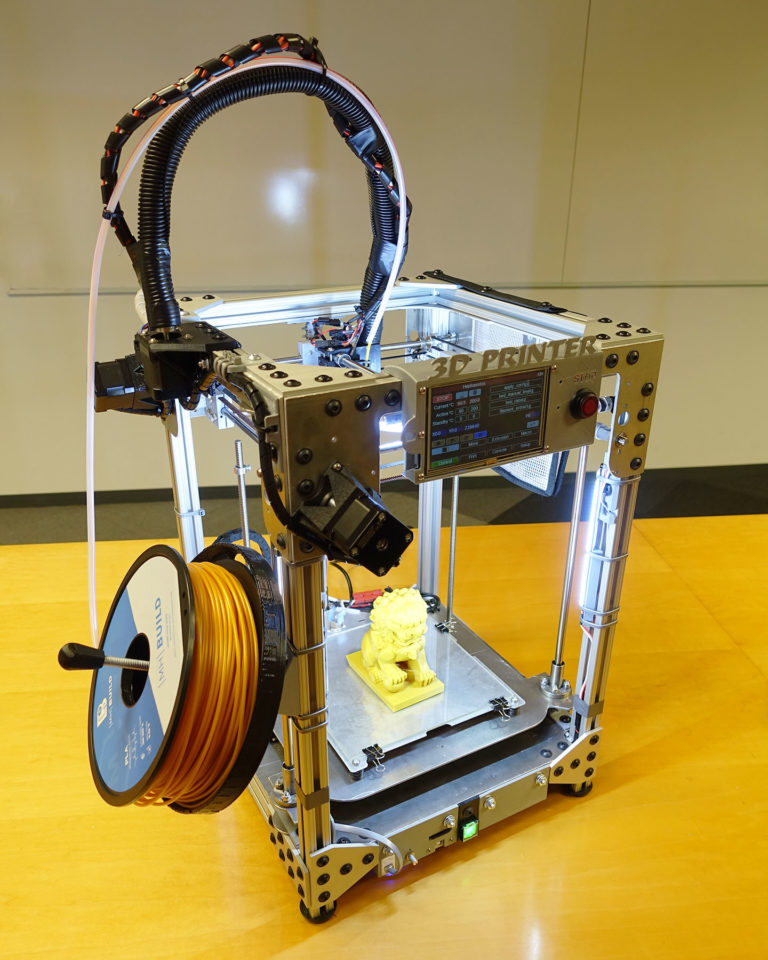
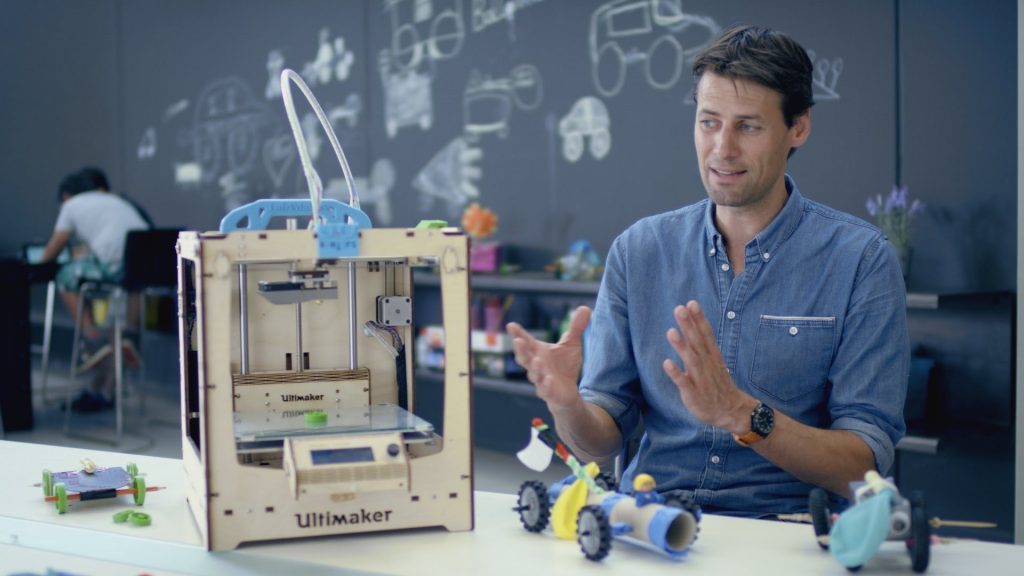
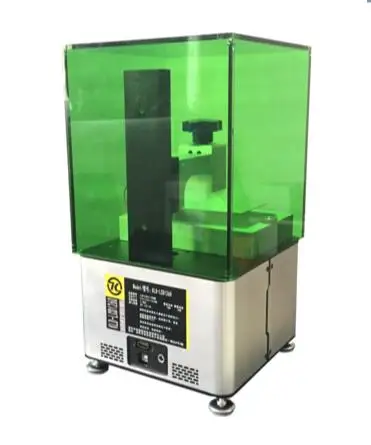
New sla 3d printer
Best Resin 3D Printers in November 2022 (Every Price Range)
Resin 3D printers are more affordable than ever – you can now pick up a great quality resin printer with a 4K LCD screen for just a few hundred dollars. So if you’re a home maker who wants to make detailed miniatures for your next game, or have more professional ambitions, it’s never been easier.
MSLA (masked stereolithography) 3D printers have taken over the low-cost space, using LCD screens to cure resin models based on your sliced STL file.
With 2K, 4K, and even up to 8K LCD screen quality available under $1,000, and sub-35-micron resolution becoming increasingly common, with the right settings you can create incredible-looking miniature models, as well as key uses in jewelry molds and in the dental industry.
Here are our top picks for 4K, 6K, and 8K screens:
Budget Pick
Anycubic Photon M3High quality 4K resolution for low price
Larger build volume than Photon Mono 4K and Elegoo Mars 3
Available at Anycubic here at Amazon Here
mid-range Pick
Anycubic Mono X 6KHigher-quality 6K LCD screen
Much larger print area for printing many minis in one job
Available At Anycubic here at Amazon here
Premium Pick
Phrozen Sonic Mini 8KExtremely high-res 8K LCD screen with 22-micron accuracy
Reasonable price for the quality
Available At phrozen here at amazon here
We’ve split our recommendations into the best cheap resin 3D printers with recommendations for $200, $300, $500, and $700, as well as recommending a couple of clear winners for professional resin 3D printers if you’re looking to start a business or scale things up.
The Best Resin 3D Printers 2022 – Reviews
| Resin printer | Price | Best price at | Alternative |
|---|---|---|---|
| Elegoo Mars 2 Pro / 3 | $200-349 | Elegoo here | Amazon here |
| Anycubic Photon M3 | $300 | Anycubic here | |
| Anycubic Mono X 6K | $639 | Anycubic here | |
| Elegoo Saturn | $499 | Elegoo here | Amazon here |
| Phrozen Sonic Mini 8K | $799 | Phrozen Store here | |
| Prusa SL1S Speed | $1,999 | Prusa Store here | |
| Formlabs Form 3 | $3,499 | Dynamism store here |
Best Cheap Resin 3D Printers (Under $1,000)
3DSourced is reader-supported. When you buy through links on our site, we may earn an affiliate commission. Learn more
Elegoo Mars 2 Pro / Mars 3
BUDGET PICK
Elegoo Mars 2 Pro
Print Volume: 129 x 80 x 160 mm
Screen size: 6. 08″ 2K Monochrome LCD
XY Resolution: 50 microns
Speed: 30-50 mm/h
Cleaning/Curing: Elegoo Mercury Plus/X
Available at:
Elegoo hereAmazon herePREMIUM PICK
Elegoo Mars 3
Print Volume: 143 x 90 x 175 mm
Screen resolution: 6.6″ 4K LCD
XY Resolution: 35 microns
Speed: 1.5-3 seconds per layer
Cleaning/Curing: Elegoo Mercury Plus/X
Available at:
Elegoo hereMatterhackers hereAmazon hereWhile there are newer Mars printers like the Mars 3 and brand-new Elegoo Mars 3 Pro, the Mars 2 Pro still offers great quality if you’re on a budget. It features the revamped z-axis linear guide system for smoother layers and better surface areas.An accurate dinosaur head we 3D printed on the Elegoo Mars 2 Pro.Clank video game 3D print on the Elegoo Mars 2 Pro.
But for those looking for more precise detailing on their miniatures or other prints, consider upgrading to the Mars 3 range.
Whereas the Mars 2 Pro has a 6.08-inch 2K LCD, the Mars 3 and Mars 3 Pro both have 6.6-inch 4K screens, improving XY resolution from 50 microns to 35 microns – a 30% accuracy improvement.
You also get a 37% larger build volume: 143 x 90 x 175mm on the Mars 3, vs the 129 x 80 x 160 mm. This is ideal for printing a number of models at once to save time, and for printing larger models that might not quite have fit into the Mars 2 Pro’s build area.
So if you’re on a tight budget, the Mars 2 Pro is still a fine choice – we’ve printed some great detailing in our dinosaur head’s teeth, and in video game miniatures. But, for sharper accuracy and larger build areas, upgrade to the Mars 3, or Mars 3 Pro.
Read our full review: we tested the Elegoo Mars 2 Pro
Compared: Elegoo Mars 2 Pro and 3 vs Elegoo Saturn
Anycubic Photon M3
- Price: Check latest price at Anycubic here
- Build Volume: 180 x 163 x 102 mm
- XY Resolution: 40 microns
- Minimum Layer Height: 10 microns
- Speed: 50mm/h
Pros
Larger build volume and 4K LCD screen than the Photon Mono 4K.
Low cost, high quality
Perfect if you’re looking to print larger minis faster, and several at once.
Cons
40-micron resolution vs 35 microns on the Mono 4K – though you’ll probably not notice the difference.
The latest entry-level Photon 3D printer, the Anycubic Photon M3 takes everything we loved about the series – fast print times, excellent resolution, and a user-friendly printing experience – and levels it up with a few choice enhancements.
Among the improvements, Anycubic has upgraded to a 180 x 163 x 102 mm build volume, which lends itself to larger prints along with the superb high detail models and miniatures the Mono 4K is known for, even intricate articulated figurines.
Another benefit of the build volume is the possibility of producing bigger batches of the same Warhammer or D&D mini-figures, ideal if you’re hoping to use your M3 to fuel a small business.
Though the Anycubic Photon M3 includes an excellent 7.6″ 4K monochrome screen, the resolution drops slightly to 40 microns – 5 microns higher than the Mono 4K. For us, this is a reasonable compromise for the extra printing space.
At this level of detail, you’d be hard-pressed to notice any tangible difference between the two resolutions, so the larger screen and print area is worth the drop to us – though you can opt for the Anycubic Photon Mono 4K if you prefer 35 micron resolution and a smaller build volume.
It’s cheap, user-friendly, and creates feature-rich, detailed 4K parts, models, figurines, and minis.
Anycubic Mono X 6K
- Price: Check latest price at Anycubic here
- Build Volume: 197 x 122 x 245 mm
- XY Resolution: 34 microns
- Minimum Layer Height: 10 microns
- Speed: 80 mm/h
Pros
Market leading print quality.
Reasonably priced for the specs it offers.
Cons
Average build volume.
The Anycubic Mono X 6K allows makers to craft exceptionally detailed 6K prints at 34 microns XY resolution without sacrificing build volume (or vice versa), which inches close to standard FDM printer sizes at 197 x 122 x 245mm. A max print speed of 80 mm/h also prints the most complex minis and models at a blistering pace.
If you’re not constrained by a tight budget and want some of the best quality offered by any consumer-grade printer, there’s no question the Anycubic Mono X 6K is a sensible buy. The same goes for those piecing together the kit needed to take a budding minis business to the next level.
But, for those restricted to a smaller budget, the original Mono X and the even lower-cost M3 are perfect for those that want to print high-quality minis without breaking the bank. The trade-offs are smaller build volume, slightly lower resolutions, and longer print times – nothing that should hamper the majority of hobbyist resin projects.
Elegoo Saturn
- Price: Check latest price at Elegoo here / Available on Amazon here
- Print Volume: 192 x 120 x 200 mm
- Screen resolution: 3840 x 2400 pixels
- Screen size: 8.9″ 4K Monochrome LCD
- XY Resolution: 50 microns
- Speed: 30-40mm/h
- Cleaning/Curing: Elegoo Mercury Plus/X Washing and Curing Station
Featuring an 8.9-inch 4K monochrome LCD screen for fast layer curing, the Elegoo Saturn comes much upgraded on standard models, printing 60% faster than the Elegoo Mars Pro, printing a layer every 2-3 seconds.![]()
For your money, you get a number of other key upgrades, most notably the larger build area, turning the Elegoo Saturn into a solid resin 3D printer for larger resin models or terrain for miniatures, as well as for printing more minis in one batch and taking advantage of resin printers’ abilities to print entire layers at once.
The improved precision, owing to the Saturn’s double linear guideway Z-axis structure makes it steadier than ever, ensuring accuracy and uniformity across the print.
If this isn’t enough, you have two upgrade options:
- Elegoo Saturn S: a slight improvement across the board, with an 9.1” 4K LCD, and a slight build volume increase to 196 x 122 x 210 mm
- Elegoo Saturn 2: upgrades to a 10” 8K LCD, 28.5nm XY resolution, and a larger 219 x 123 x 250 mm build area.
| Elegoo Saturn | Elegoo Saturn S | Elegoo Saturn 2 | |
|---|---|---|---|
| LCD Quality | 8. 9″ 4K LCD 9″ 4K LCD | 9.1″ 4K LCD | 10″ 8K LCD |
| Build Volume | 192 x 120 x 200 mm | 196 x 122 x 210 mm | 219 x 123 x 250 mm |
| XY Resolution | 50 microns | 48 microns | 28.5 microns |
| Buy here | Buy here | Preorder here |
Read more: Elegoo Saturn vs Anycubic Mono X – compared
Phrozen Sonic Mini 8K
- Price: Check latest price at Phrozen here
- Build Volume: 165 x 72 x 180 mm
- XY Resolution: 22 microns
- Minimum Layer Height: 10 microns
- Speed: 80 mm/h
Phrozen’s flagship resin printer capitalizes on a sleek 7.1″ LCD screen and 22-micron resolution to deliver frankly outstanding print detail and surface quality that more budget-priced printers simply can’t provide.
As consumer printers go, the Phrozen Sonic Mini 8K has the potential to produce the most intricate, detail-rich models of any printers currently on the market.
The jump from a 2K, and even a 4K/6K, to an 8K screen is apparent when scrutinizing a print fresh off the Mini 8K bed. This is the main reason it out-classes Phrozen’s excellent budget Sonic Mini 4K, albeit with a hefty but warranted price increase.
For lots of makers, the jump in quality won’t be enough to justify spending more than double the price of a Photon or Mars, but the Phrozen Sonic Mini 8K fleshes out the proposition with superb all-around usability and a decent 165 x 72 x 180 mm build volume.
If that’s not quite enough for your larger print projects or you’re looking to batch print to stock an online mini store, there’s always the Phrozen Sonic Mighty 8K, and its 123 x 218 x 235 mm printable area.
Best Desktop Resin 3D Printers (Between $1,000 and $3,000)
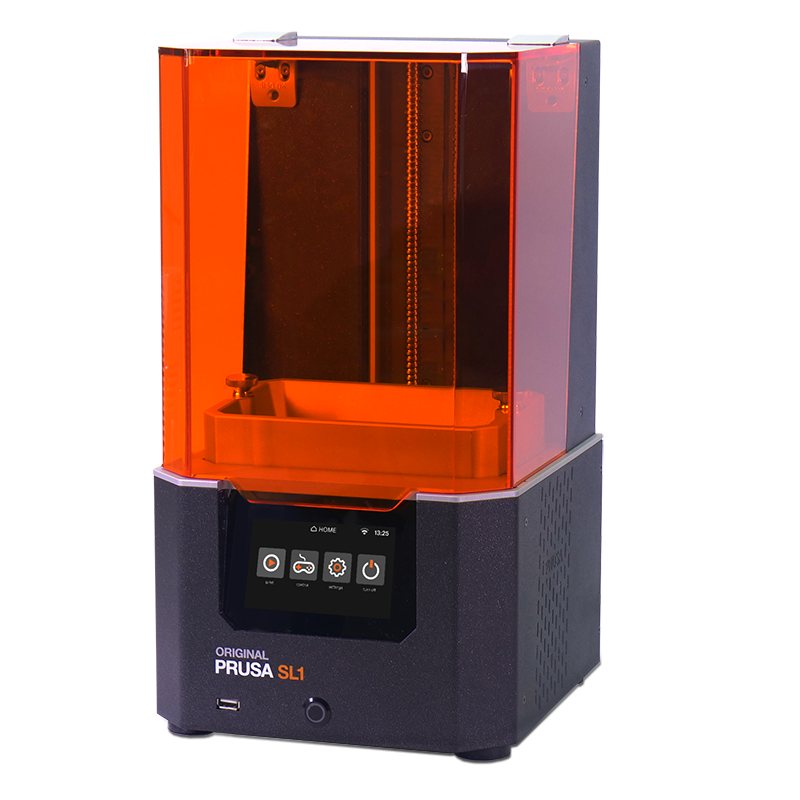
Prusa SL1S Speed
- Price: $1,999 — Available at Prusa Store here
- Print Volume: 120 x 68 x 150 mm
- Screen resolution: 2560 x 1620 pixels
- Screen size: 5.
 96” 2K Monochrome LCD
 - XY Resolution: 47 microns
- Print Speed: 50mm/h
- Cleaning/Curing: Original Prusa CW1S
Prusa printers are known for being the best open-source FDM kits around, but have since ventured into resin printing.
One thing we really want to drive home is how important it is not to get tunnel vision when looking at the specs of printers when choosing which to buy. As we explain in the buyer’s guide portion below, a well-made printer made from high-quality parts that can handle precise movements and stability will outperform a printer with a higher-spec LCD screen but worse build quality.
The 5.96” monochrome LCD is smaller than some lower-priced printers like the Elegoo Saturn 2, but it is capable of fantastic accuracy, even for tiny miniature models smaller than a penny. It’s made from high-quality parts to minimize vibrations, with a rigid aluminum body, and features a quick release mechanism to maintain z-axis calibration.
It’s also super fast, with 1.4-second layer exposures even on standard 405nm resins. If you’re a small business owner looking to produce minis at scale, or just want to print lots of models for yourself, the SL1S Speed suits you well.
You can buy the printer on its own, or as a bundle with the CW1S 4-in-1 wash and cure machine. It pre-heats your resin before use, washes resin prints, dries them off, and cures them, all in one add-on. The bundle is available here.
Professional Resin 3D Printers ($3,000+)
Formlabs Form 3 — best professional resin 3D printer
- Price: $3,499 — Available on Dynamism Store here
- Build Volume: 145 x 145 x 185 mm
- XY Resolution: 25 microns
- Print speed: 70mm/h
- Cleaning/Curing: Formlabs Form Wash & Cure
Formlabs make professional resin 3D printers, but at desktop resin printer prices. The US manufacturer sells the Form 3 SLA 3D printer for $3,499, with its quality making it key for super accurate prototypes, as well as being adopted in the dental and jewelry industries.
The Form 3 comes with a huge variety of new features as compared with the previous Form 2. It comes with new LFS technology advantages as well as a new Light Processing Unit (LPU) to improve resin part surface finishes, as well as better layer registrations. The Form 2 was already fantastic, and these added features elevate the Form 3 to a whole new dimension within desktop SLA printers.
Additionally, the Formlabs Form 3 has an automated resin system and uses smart cartridges that automatically fill the resin tank – key for business owners looking to maximize efficiency and revenue per hour.
In addition, it has a scanning system for the resin tray after each layer, and automatically adjusts based on the type of resin used. Furthermore, its got a fantastic touch screen and can be operated remotely via a WiFi connection, as well as operable as part of a factory with Formlabs’ industrial multi-printer ‘Form Cell’ solutions.
This UV 3D resin 3D printer has a print volume of 145 x 145 x 185 mm, and is extremely precise with 25-micron XY resolution. The Formlabs Form 3 is compatible with a large number of resins, from ceramic, to flexible resins, to castable resins, though Formlabs also sell their own high-quality resin materials.Formlabs resins are available here.
Curing and Cleaning Stations
With washing and curing an unavoidable part of resin 3D printing, we’ve rounded up a few choice washing and curing stations well worth weaving into your printing setup to take some of the sting and mess out of post-processing.
Anycubic Wash & Cure
- Available at Anycubic Store here / Amazon here
The Anycubic Wash & Cure is an all-in-one station compatible with the overwhelming majority of resin printers. Thanks to a nifty recent price cut from Anycubic, the Wash & Cure sets you back under $100.
The wash mode has adjustable wash cycles, including 2, 4, and 6 minutes. Cure mode employs a wide range 356 nm and 405 nm UV light set mounted on a 360° rotating platform to ensure a uniform cure of all and any print sized at 115 x 65 x 165 mm and under.
Anycubic has simplified the whole wash and cure process thanks to a set-and-forget design – choose either wash or cure on the touch button interface, and off it goes. The station blocks 99.95% of UV light and comes with an auto-pause function if the cover inadvertently comes off. The station has an adjustable bracket that can latch onto an Anycubic build platform if you’re working with a Photon Mono series printer.
Elegoo Mercury Plus
- Available at Amazon here
Another all-in-one station, but this time from Elegeoo, the Elegoo Mercury Plus is an easy-to-use option for hands-free post-processing.
The accepted max print size is 125 x 85 x 160 mm for washing and 140 x 165 mm for curing. You can either use the provided cleaning basket or mount an Elegoo build plate with models still attached, making it compatible with most if not all resin 3D printers, not just with Elegoo machines.
A 385 nm and 405 nm UV light set and 360-degree rotating curing turntable do all the curing work with the option to key in and monitor curing time up to 30 minutes on the TFT touchscreen.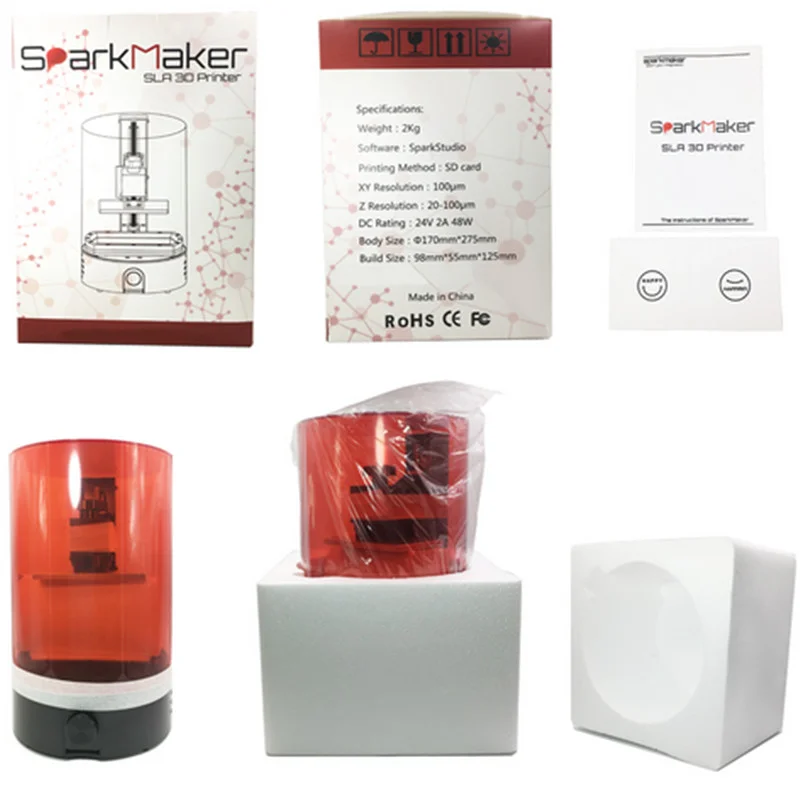 Safety’s covered with an anti-UV lid that blocks 99.95% of UV rays and a suspend operation function should the cover come off during curing.
Expect to pay more than the Anycubic station, but at roughly $120, you’ll deck out your resin 3D printing setup with a quality mess-free station.
Buyer’s Guide – What to Consider When Buying a 3D Resin Printer
RGB vs Mono LCD Screens – Pick a Mono Resin 3D Printer
Most modern resin printers now ship with monochrome LCD screens instead of the RGB variants found in earlier models.
The shift is all to the benefit of makers as monochrome screens have many advantages over RGB:
- They print faster, often up to 3x quicker
- They are more durable, lasting up to 4-5x longer before replacing
LCD Screen Resolution: 2K, 4K, 6K, 8K – What Quality Do You Need?
Raw specs do translate to better quality overall. You will notice the difference in sharpness on corners, and on precise features of models such as facial features and hair on an 8K screen versus a 4K or 2K print.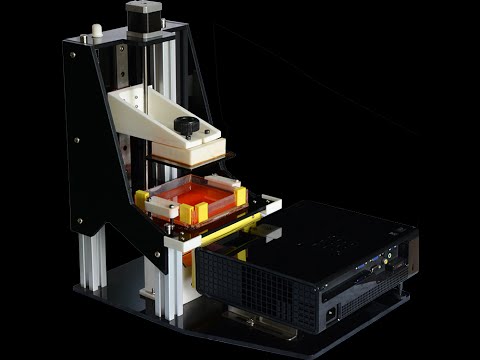 4K vs 8K resin printed miniature. Source: Geek Gaming Scenics
However, while a higher resolution makes a clear difference to print results, even the highest resolution 3D printer will not perform as well as a lower-res 2K screen if it is built from low-quality parts.
Therefore, buy from a reputable brand known for making high-quality parts, such as well-built screws and z-axis parts for the build plate, and resin vat screws, to deliver top quality.
We recommend resin printers from Anycubic, Elegoo, and Phrozen for hobbyist printing, and Prusa and Formlabs for professional resin printing.
Build Volume
As a general rule, resin printers feature smaller build volumes than more common FDM machines, hence why makers and professionals use them to create small intricate parts with high precision.
If you do need extra printing space for duplicate part printing or larger figurines and models, consider larger format resin printers such as the Peopoly Phenom and Phrozen Sonic Mighty 4K.
Post-Processing Equipment
Resin 3D printing is a messy business, and post-processing is a core part of the printing process. Post-processing breaks down into two parts, washing and curing.
Washing involves removing any residual uncured resin from the print using isopropanol.
Curing uses further UV light source slexposure to complete the curing polymerization process to improve the part’s finish and overall rigidity.
Self-guided, hands-on post-processing is one way to go, but manufacturers now propose all-in-one washing and curing stations to take much of the messy hassle out of the process.
How Does a Resin 3D Printer Work?
Resin is sticky, liquid, and moves around in any container (or resin vat) that you pour it into. However, take that container outside, and the sun’s UV rays will almost immediately cure and solidify the resin.
Your resin printer’s LCD screen uses the same UV light as the sun but in a more stable indoor environment, flashing light at certain parts of the resin to selectively cure parts, based on your model’s features.
The LCD screen blocks off the LEDs from certain parts so that the resin isn’t cured in some places – only where your model file is sliced to be.
The screen sits under the resin vat, and projects light upwards into the build platform. An FEP screen (fluorinated ethylene propylene) protects the screen from damage – though these FEP films themselves need to be replaced more often than any other parts of the printer.
As each layer is cured, the resin printer’s z-axis platform, lifts up one layer, for the next resin layer to be cured. The cured model sticks to the build platform as it moves up out of the resin (if it sticks to the resin, the print fails), with the layer on the edge cured and moved up each time.
Resin 3D Printing Tips for Beginners:
Check the MSDS (material safety data sheet) for the resin you’re using – all reputable resin manufacturers will have these sheets. They outline any potential hazards, and how you can keep safe and prevent these issues.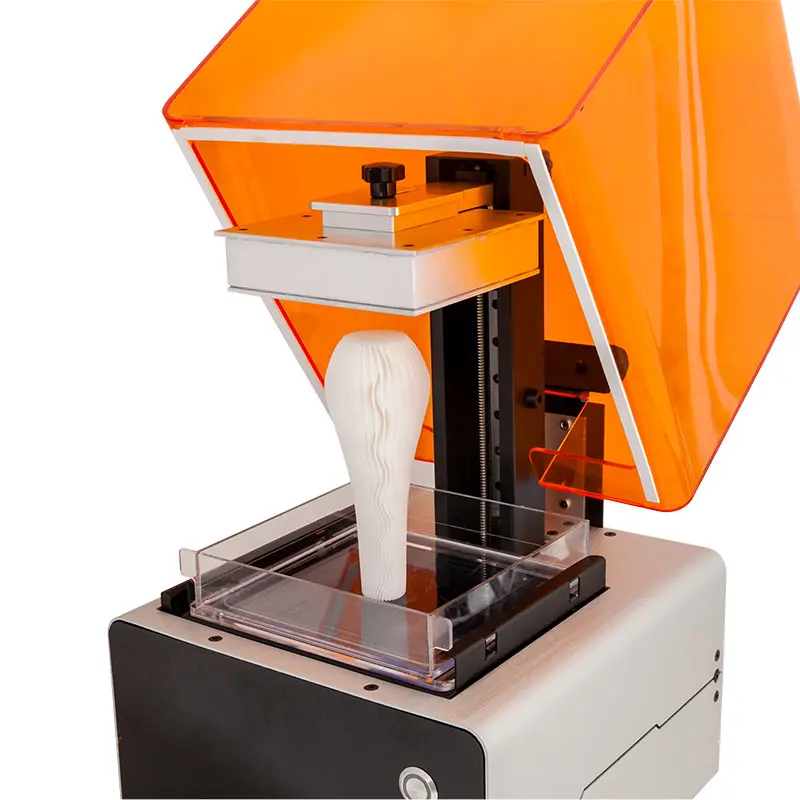
Print in a relatively warm environment – room temperature is fine, but if resin gets too cold it become more viscous and difficult to print.
Wear gloves when handling resin – nitrile rubber disposable gloves work well.
Pick the best slicer for you – if you use a certain brand such as Prusa, you’ll likely use Prusa Slicer. For simple everyday use, CHITUBOX is fine, but other options for great resin results include Lychee Slicer. We have a full run-down of resin slicers here.
Take care over supports – within your slicer, take care over how you position your model, and the supports you use. Flat printed models don’t work as well as they do in FDM, as you can damage the resin print scraping it off – though there are workarounds with sacrificial rafts. Generally, lift the model off the bed and have supports between the bottom raft and the FEP sheet. If you’re technical, there is a very powerful tool called UVTools which automatically detects likely errors, resin traps and islands, and with one click fixes them all. It is available at Github here. It acts as a kind of previewer, showing you where potentials for print failure are, so you can avoid the costly failed prints, and optimize them automatically.
How Much is a Resin 3D Printer?
Good cheap resin 3D printers start at around $200, with either a 2K or 4K screen that can still print precise features on miniature models. 6K and 8K screen resin printers cost from $600 to $1000+, and professional resin 3D printers from companies like Formlabs cost $3500 and up.
Uses of resin 3D printers
Budget resin 3D printers are typically used by hobbyists to make accurate figures and miniatures at details FDM printers just cannot reach. They’re commonly used for 28mm miniatures, D&D figures, and other similar projects for tabletop models.
See also: our buyer’s guide for the best 3D printers for miniatures.
However, these low cost options can sometimes be used for creating wax molds for jewelry casting. For better quality casting with precious metals however it is recommended to use a more professional resin 3D printer capable of better resolutions and precision.
See also: our guide to the best jewelry 3D printers.
Resin printers are commonly used in the dental, audiology, jewelry, and medical industries. For example, within dentistry resin 3D printers can print orthodontic models and implants, and within audiology, almost 100% of custom hearing aids are now 3D printed.
See also: 3D printing in the dental industry.
See also: how 3D printed hearing aids took over the world.
Is Resin Printing Messy?
Though the resin printing process isn’t messy per se, the post-processing of a finished resin print invariably descends into a frustrating, sloppy, not to say potentially harmful mess of dripping resin and pungent isopropanol. It isn’t for the faint of heart or those wary of getting stuck in.
Fortunately, curing and cleaning stations help contain resin processing’s messiness, so you’re not caking your hands in muck by juddering your prints around in a vat of isopropanol.
FAQs
What are the best resin 3D printer brands?
For the home resin 3D printing $200-600 range, the best resin 3D printer brands are Anycubic, Elegoo and Phrozen, who make high-quality printers capable of accurate details. In the professional resin printer range, Prusa, Formlabs and Peopoly are well-reputed, as well as industrial brands like 3D Systems, Carbon 3D and EnvisionTEC.
Is it worth getting a resin 3D printer?
Resin 3D printers can print incredible-looking details for miniatures that FDM simply can’t compete with, so for anything precise and detailed, resin printers can’t be beaten. However, if you want a simpler printing experience without washing or curing prints, or want to print large-scale models, go for an FDM 3D printer instead.
Do You Need To Wash and Cure Resin Prints?
Yes. The resin printing process leaves uncured residual resin on the finished part. Rinsing off the excess resin ensures all the detail and finish of the print remain accurate once you move to the curing process.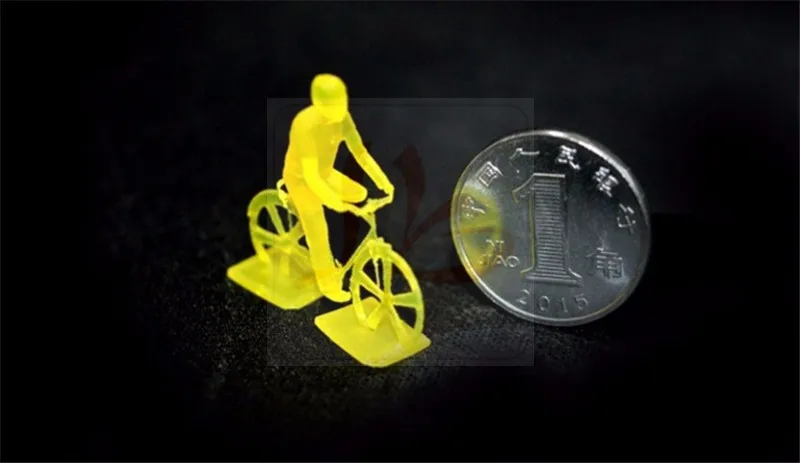 There’s also a safety concern; washing resin prints removes potentially toxic uncured liquid resin, so you can handle the part safely.
Curing is an equally important part of the process. When a printer completes a part, the resin is in a transitory state: hard enough to retain the desired shape and detail but lacking overall rigidity, making it prone to scratches, scarring, and blemishes. By curing the print with UV, or even sunlight if you’ve got time on your side, the resin reaches its optimal, finished state.
If you liked this ranking, you may also like:
- Top 10 SLS 3D printers
- The best metal 3D printers
- Best Dual Extruder 3D Printers
- 3DSourced’s Overall Top 20 Best 3D Printers
- Our guide to the 10 types of 3D printers
- Best large resin 3D printers
- Best resin curing stations
SLA 3D Printers - 10 Best of 2022
SLA 3D printers are used in various industries, from jewelry to dentistry to several companies, at affordable prices.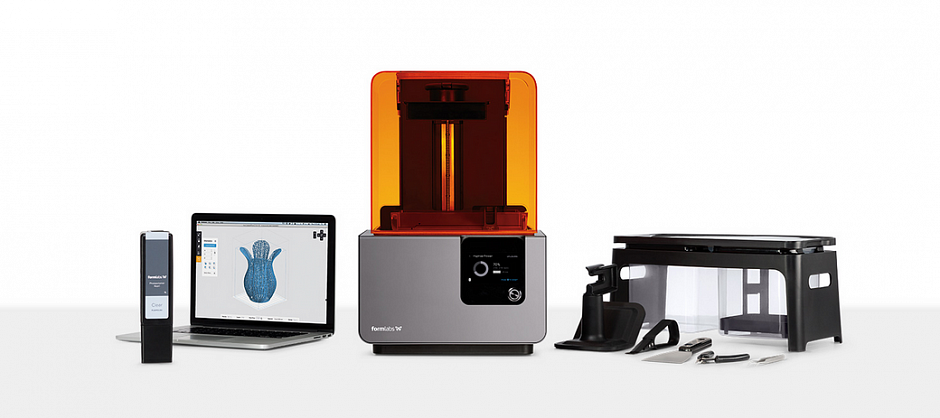 We’ve compiled a list of the ten leading SLA 3D printers based on our research. Before that, let’s refresh what we know about SLA.
Stereolithography is also known as SLA. This method uses a UV laser and mirrors (galvanometers) to cure the photosensitive resin. It was one of the very first additive printing methods. SLA 3D printers were first invented in 1986 by Chuck Hull.
After SLA, many similar improvised processes emerged, such as DLP. However, SLA has not lost its significance over time. It’s used in the jewelry, automobile, and aerospace industries to make prototypes and functional parts.
The Advantages of SLA 3D PrintingSLA 3D printers have numerous advantages. These are some of them:
- 3D prints that are extremely precise
- Finished with a smooth surface
- A wide range of materials
- Low-cost
- High-volume production stiffness and strength
- Resistant to chemicals
- Prints with a high resolution
Purpose
One of the first things you should consider when purchasing a 3D printer is what you intend to make with it. This can significantly impact the type of machine you should buy.
Printer Style
There are a few different printer styles available on the market that you should consider. What you choose will, once again, influence the types of things you can make with the printer.
Quality
Before you buy, you should evaluate the printer’s overall quality. Naturally, print quality is determined by two factors: print resolution and print speed.
Now, let’s discuss the choicest SLA printers with their characteristic attributes and prices.
Top 10 SLA 3D Printers of 2022There are hundreds of SLA 3D printers available in the market. If you want to buy one for your company, screening out each 3D printer that meets your requirements is time-consuming and exhausting, especially if you have no prior experience.
The detailed comparison of the following best 10 SLA 3D printers will make selecting one that meets your printing goals and demands easier.
XYZPrinting Nobel 1.0 A: Image Source: 3dprima.com
XYZPrinting is well-known for producing high-quality SLA 3D printers. The company began by manufacturing low-cost FDM 3D printers, but as demand for SLA printers grew, it expanded to include resin 3D printers.
The advanced version of Nobel 1.0 is Nobel 1.0 A. The letter ‘A’ stands for ‘Advanced.’ It has a print volume of 128 x 128 x 200 mm and runs on user-friendly XYZ Ware Nobel Software. The STL files can be uploaded for 3D printing using a USB cable or key.
The machine is reasonably priced at $1995.95 and is a good choice for long-term 3D printing.
2. Anycubic Photon SAnycubic Photon S: Image Source: amazon.in
Anycubic, a Chinese company, created the Proton S, the cheapest SLA 3D printer. It provides complex 3D prints. It’s a better version of the original Proton. The plastic resin is cured using a UV lamp.
It comes with a 5.2-inch 2K LCD screen for monitoring the printing process. The printing quality is outstanding.
The printing speed is 15 to 18 mm per second, industrial-grade. It’s an excellent material for making jewelry, figurines, and other small models.
The printer has a 115 x 65 x 65 mm print volume and costs $419. It comes with a one-year warranty and a three-month warranty on the LCD screen.
3. Original Prusa SL1Original Prusa SL1: Image Source: top3dshop.com
Prusa SL1, a magnetically appealing 3D printer, is a well-designed and ideal machine for producing high-quality 3D prints with minimal effort.
UV-sensitive liquid resin with a wavelength of 405 nanometers is supported by the printer.
The machine’s built volume is 120 x 68 x 150 mm, with a 0.025 to 0.1 mm layer resolution.
The printer costs $1399 unassembled and $1699 fully assembled. It is primarily used in the aerospace, medical, and jewelry industries to create functional prototypes and parts.
Formlabs Form 3: Image Source: formlabs.com
Form 3 is a more sophisticated version of Form 2. Low Force Stereolithography is used, which is superior to SLA. The built-in volume of the printer is 145 x 145 x 185 mm. The layer resolution is set to 25 microns.
It works with 20 different materials and is simple to set up by following the manufacturer’s instructions.
The machine’s body is black with an orange hood. The basic printer package costs $3499, while the full package costs $5999 and includes post-processing tools (one form wash, 1 L of resin, pro service plan, and one form cure).
Choose the package that is most cost-effective for you.
5. EnvisionTEC D4K ProEnvision TEC D4K Pro: Image Source: envisiontec.com
Envision TEC D4K Pro, one of the large 3D printers, has a print volume of 148 x 83 x 110 mm. It allows for the faster production of large-scale models without sacrificing print quality.
The user can employ a variety of castable resins, such as PIC100, WIC100G, and QView, among others.
The XY and Z-axis resolutions are 25 microns and 1 micron, respectively. Its primary applications are in the dental and jewelry industries.
6. 3D Systems FabPro 10003D Systems FabPro 1000: Image Source: 3dprintingindustry.com
3D Systems produced the FabPro 1000, an entry-level industrial 3D printer. It has excellent print quality but comes at a high cost. It specializes in the low-volume production of small parts and prototypes.
The build volume is 125 x 75 x 120 mm, with a print speed of 21 millimeters per hour. Layer resolution ranges between 30 and 50 microns.
For 3D printing, the printer employs DLP StereoLithography technology. Engineering, manufacturing services, dentistry, and jewelry are among the industries that use it the most.
The cost of the machine is $4126.
It comes with a slew of extras. A print tray, two print platforms, a resin tank kit, and a post-processing kit are included.
Zortrax Inkspire: Image Source: amazon.in
The vat polymerization process is used in Inkspire. To come up with the best design, a research team was assigned for at least two months.
It can print eight times faster and nine times more precisely than other 3D printers, as per the company.
Users in the automotive and consumer electronics industries were taken aback by this.
The layer height is a minimum of 25 microns, and the x-y resolution is 50 x 50 microns. The print volume is 74 x 132 x 175 mm, with a print speed of 20 to 36 mm per hour.
Aerospace, medical, jewelry, and automotive industries all use the printer.
Around $2699 is the price of the machine.
8. DWS XFAB 2000DWS XFAB 2000: Image Source: sundonull.com
DWS Systems, an Italian company, created XFAB 2000 specifically for the jewelry and fashion industries. It claims that the XFAB 2000 is the best 3D printer for the money of its time.
Its dimensions are 180 x 180 x 180 mm. For greater precision, the layer thickness ranges from 10 to 100 microns.
The cost of the machine is $7540. The printer is also used to make fashion accessories like eyewear, keychains, studs, zip pullers, brooches, and cufflinks, among other things.
It’s a good option for those with long-term 3D printing goals.
9. Uniz Slash ProUniz Slash Pro: Image Source: aniwaa.com
Uniz, a California-based company, created Slash Pro for professional use. For 3D printing, it is based on LCD technology. It has a build volume of 192 x 120 x 400 mm and can be used with any of the five resin types.
Layer resolutions of 10, 25, 50, 100, 150, 200, and 300 micrometers are available on the printer.
The machine has two modes of operation. The printer uses standard resins in the usual way. It uses special resins established by the company in UDP (Uni-Directional Peel) mode.
The light source is an LCD that is kept in the tank. The UDP mode prints at 600mm per hour, while the standard mode prints at 200mm per hour.
The printer cost is $4499. The printer is delivered fully assembled by the manufacturer. Uniz has excellent customer service. You can watch instructional videos on the brand’s website for more information.
10. Phrozen Shuffle XLPhrozen Shuffle XL: Image Source: top3dshop.com
Phrozen Shuffle XL, as the name suggests, allows for the 3D printing of large models without sacrificing quality. It can print full-size mechanical parts and precise medical equipment, jewelry, and automobiles for the aerospace industry.
LCD masked StereoLithography technology is used in the printer. It’s compatible with nanometer-sized resins.
It has a print area of 190 x 120 x 200 mm, a resolution of 85 microns on the X and Y axes, 10 microns on the Z-axis, and a print speed of 35 mm per hour.
The machine costs $1399 and is delivered fully assembled. A one-year warranty is also included.
3D Printing Software – “SelfCAD”: Image Source: 3dwithus.com
SelfCAD is a free online 3D modeling and STL editor software for beginners and advanced 3D printer users. The user interface of this 3D printing software is very simple. Compared to other programs, the average number of available tools has been drastically reduced, with only the most commonly used tools included. SelfCAD is one of the programs whose devices can be easily mastered because the available tools can be reused. It’s the only 3D modeling software that combines artistic, technical, rendering, and 3D printing capabilities into a single package!
SelfCAD is 3D printing optimized in several ways. There’s a Magic Fix tool that ensures the model’s geometry is stable. An in-built slicer assists you in slicing your models and generating G-Code for your 3D printer.
It’s the most cost-effective professional 3D printing tool available, and both beginners and experts use it. You can sign up for a free account and use it to test out the program before upgrading to the premium version if you like it.
SLA 3D Printers –
ConclusionSLA 3D printers can produce high-quality prints, and their prices have dropped significantly in recent years. Both personal users and businesses can afford them.
Finding the right one isn’t as simple as buying the first 3D printer you come across; there are several factors to consider first.
This is why we compiled this list to show you the best SLA 3D printers on the market, but you must choose one, or you can also try our SelfCAD 3D Modeling and Printing software.
3D printer comparison in 2020
A variety of 3D printing technologies are available on the market today. Getting to know the nuances of each helps you understand what you can expect from the final models and decide which technology is right for you.
Stereolithography (SLA) and digital light processing (DLP) are the two most common 3D printing technologies using resins. 3D printers that use resin as consumables have become very popular due to their ability to produce highly accurate, isotropic and waterproof prototypes and models with high detail and smooth surfaces.
While these technologies used to be complex and prohibitively expensive, today's compact desktop SLA and DLP printers produce industrial quality parts at an affordable price and offer tremendous application flexibility through a wide range of materials.
Both of these processes selectively expose liquid polymer to a light source: an SLA laser, a DLP projector, forming very thin, hard layers of plastic that fold into a solid object. Although the principle of operation of these technologies is very similar, they can give significantly different results.
In this detailed guide, we will explain the features of these two 3D printing processes and see how they differ in terms of resolution, accuracy, print volume, speed, workflows, etc.
sample print
printing from my own experience. We will send a free sample of the Formlabs stereolithographic 3D printed model directly to your office.
Request a free print sample
Desktop stereolithography 3D printers contain a resin tank with a transparent bottom and a non-adhesive surface that serves as a base for the liquid resin to solidify, allowing the newly formed layers to be gently peeled off.
The printing process begins with the platform lowered into the resin tank, leaving a free space corresponding to the height of the layer between the platform or the last finished layer and the bottom of the tank. The laser beam is fed to two mirror galvanometers, with the help of which it enters the desired coordinates on a series of mirrors. This allows a focused beam of light to be fed upwards through the bottom of the tank, under the influence of which the polymer layer hardens.
Then the hardened layer is separated from the bottom of the tank, and the platform rises higher, and liquid polymer enters the freed space.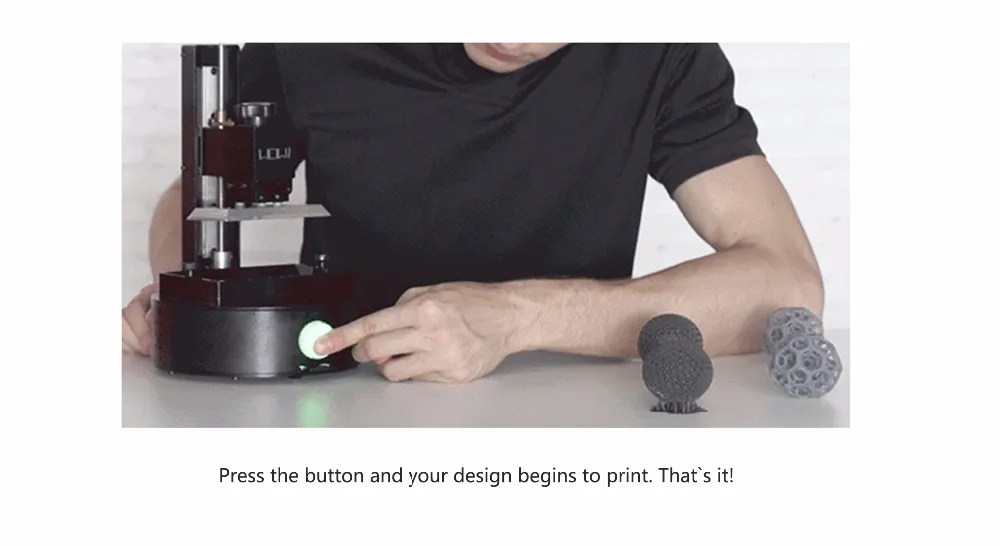 This process is repeated until printing is complete.
The Form 3 and Form 3L Low Force Lithography (LFS) stereolithography technology is a new step in the development of stereolithographic 3D printing.
In LFS-based 3D printers, the optical components are located in the Light Processing Unit (LPU). Inside the LPU, a galvanometer positions the high-density laser beam in the y-direction, passes it through a spatial filter, and directs it into a deflecting and parabolic mirror to ensure that the beam always remains perpendicular to the plane of the platform, ensuring print accuracy and reproducibility.
As the LPU moves in the X direction, the printed model is gently separated from the flexible bottom of the tank, which greatly reduces the forces on the models during the printing process.
LFS-based 3D printing greatly reduces the stress placed on parts during the printing process by using a flexible reservoir and linear illumination to deliver incredible surface quality and print accuracy.
This advanced stereo lithography technology features higher surface quality and print accuracy. The lower print tear force also allows the creation of lightweight support structures that can be detached without force, and the method itself opens up great opportunities for the further development of advanced production-ready materials. Learn more about stereolithographic 3D printing
White Paper
Download our in-depth white paper to learn how SLA printing works, why thousands of professionals use it today, and how this 3D printing technology can help your work.
Download white paper
Desktop DLP printers use a resin tank with a transparent bottom and a platform that descends into the tank to layer upside down models. In this they are no different from stereolithographic 3D printers.
The difference between them is the light source. DLP-based 3D printers use a digital screen to project the image of the layer onto the entire platform, causing all the desired dots to solidify at the same time.
Light is reflected on a digital micromirror screen (DMD), a dynamic mask consisting of microscopic mirrors that are located in a matrix on a semiconductor chip. The rapid switching of these tiny mirrors between lenses that direct light to the bottom of a tank or radiator determines the coordinates at which the liquid polymer must solidify in order to form the current layer.
Because the projector is a digital screen, each layer's image is made up of square pixels, resulting in a three-dimensional layer of rectangular cubes called voxels.
When it comes to 3D printer specifications, resolution is the focus, but it often leads to confusion. The basic units of the SLA and DLP processes are different forms, making it difficult to compare printers by numbers alone.
In 3D printing, there are three dimensions to consider: two planar 2D dimensions (X and Y) and a third vertical Z dimension, which is used for 3D printing.
The resolution of the Z measurement is determined by the thickness of the layer that the 3D printer can print. Printers based on SLA and DLP technology have one of the best Z resolutions of any other process, allowing you to print layers with minimal thickness. Typically, users can set the layer height to between 25-300µm, allowing developers to trade-off between level of detail and speed.
In DLP printers, XY resolution is determined by the pixel size, the smallest detail that the projector can reproduce in a single layer. It depends on the resolution of the projector (the most common is Full HD (1080p)) and its distance from the optical glass. Therefore, most desktop DLP printers have a constant XY resolution of 35 to 100 microns.
In stereolithographic 3D printers, the XY resolution is determined based on the size of the laser spot and the number of steps that can be used to control the beam. For example, a Form 3 3D printer based on LFS technology has a laser with a spot size of 85 μm, but due to the constant line scanning process, the laser can move at a smaller step, and the printer can consistently print models with an XY resolution of 25 μm.
Resolution itself is often only an indicator of vanity. It gives some idea of the performance, but does not necessarily directly correspond to the accuracy and quality of the print.
Learn more about resolution in 3D printing in our detailed guide.
Since 3D printing is an additive process, violations can potentially occur in every layer. The process of forming layers affects the level of accuracy and correctness of each layer. Accuracy and accuracy depend on many factors: 3D printing process, materials, software settings, post-processing, etc.
In general, SLA and DLP printers are among the most accurate. Differences in print accuracy are often more noticeable between printers from different manufacturers than between the technologies themselves.
For example, entry-level SLA or DLP printers may use off-the-shelf projectors, lasers, or galvanometers, and their manufacturers strive to achieve optimum performance from these parts. Professional SLA and DLP printers (such as Formlabs Form 3) have a special optical system that is adjusted according to the needs of users.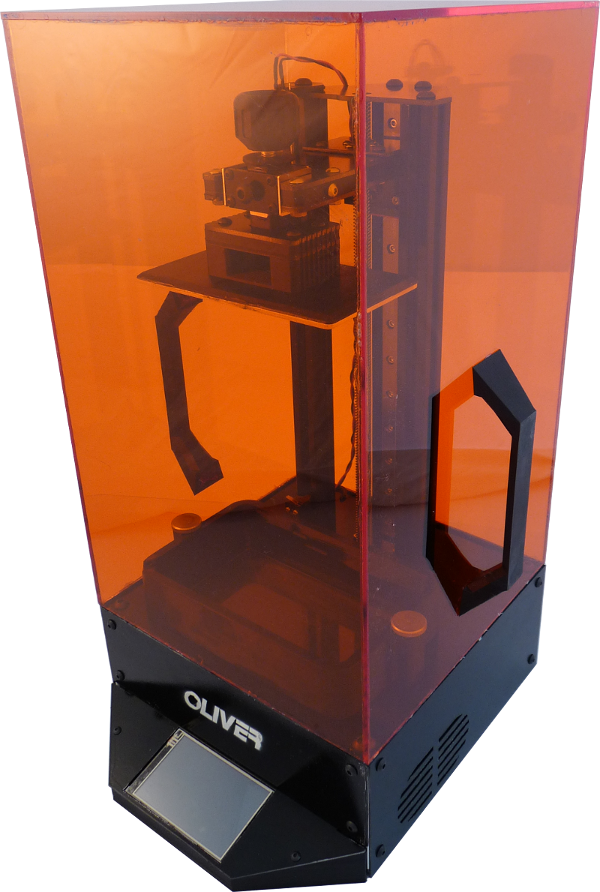
Precision is critical for parts such as mouth guards (left) and surgical guides (right).
Precision is critical for parts such as mouth guards (left) and surgical guides (right).
Equally important is calibration. When using DLP projectors, manufacturers face uneven distribution of light on the platform and optical lens distortion, which means that the size and shape of the pixels in the middle and at the edges are different. Stereolithographic 3D printers use the same light source for all parts of the model, ensuring uniformity, but they still need to be carefully calibrated to avoid distortion.
Even a 3D printer with the best components and the best degree of calibration can produce different results depending on the consumables used. Resin parameters have to be changed to ensure the best quality, but they may not be available for new materials that have not been properly tested with the appropriate 3D printer model.
What conclusion can be drawn from this? Knowing only the technical characteristics, it is impossible to get a complete picture of the quality. The best way to evaluate a 3D printer is to study the models printed on it or ask the manufacturer to make a test model for your project.
DLP printers have an inverse relationship between resolution and working volume. The resolution depends on the projector, which determines the number of pixels/voxels available. If you move the projector closer to the optical glass, the pixels will become smaller and the resolution will increase, but the working area will be limited.
Some manufacturers install multiple projectors side by side or use a 4K high-definition projector to increase the working area, but this increases the cost significantly. The price of such models is much higher than other desktop 3D printers.
Therefore, DLP printers are usually optimized for specific purposes. Some of them have a smaller workspace and allow you to produce in high resolution such small and detailed models as jewelry, while others can print larger parts, but with a lower resolution.
The stereolithography process is inherently more scalable because the print volume of an SLA printer is independent of model resolution. A single model can be of any size and resolution, and can be placed anywhere on the workspace. This allows you to print large high-resolution 3D models or large batches of finely detailed models to increase printer performance.
Another hurdle to increasing print volume in both SL and DLP printers is the release force. When printing large models, the forces applied to them increase exponentially as the cured layer separates from the reservoir.
With LFS printing, the flexible film at the base of the resin reservoir gently peels off when the platform pulls the model up, greatly reducing stress on the model. This unique feature has dramatically increased print volume in the first affordable large-format stereolithography printer, the Form 3L.
Form 3L is the first affordable 30 x 33.5 x 20cm large format 3D lithography 3D printer. compared to solutions based on other technologies. When we talk about differences, in most cases they are only visible on very small parts and models with a high degree of detail.
Because 3D printers print in layers, finished models often have noticeable horizontal lines. And due to the fact that digital light processing technology uses rectangular voxels, the effect of vertical lines can also be observed.
DLP printers use rectangular voxels to render images, which can result in vertical lines. In this image, the vertical voxel lines are shown as they appear when printed (left), highlighted for better visibility (right).
Since voxels are rectangular, they affect the shape of the curved edges. Let's draw an analogy with creating a round shape from a LEGO constructor - the edges will have a stepped shape both along the Z axis and on the X-Y plane.
Due to the rectangular shape of the voxels, curved edges appear jagged. Removing visible voxels and layer lines requires post-processing such as sanding.
Layer lines are virtually invisible when printed with LFS-based 3D printers. As a result, surface roughness is reduced, resulting in a smooth surface, and when using transparent materials, models with greater transparency.
When talking about the speed of 3D printing, it is important to consider not only the printing speed itself, but also the performance.
The overall print speed of 3D printers based on SLA and DLP technologies is approximately the same. Since the projector exposes each layer as a whole, the speed of DLP 3D printing is uniform and depends only on the height of the model, while SLA 3D printers laser shape each part. As practice shows, as a result, stereolithographic 3D printers become comparable in speed or even faster when printing one small or medium model, while DLP printers are faster at printing large solid models or several models that almost completely fill the space of the platform.
But do not forget that in printers based on DLP technology, there is an inverse relationship between resolution and working volume.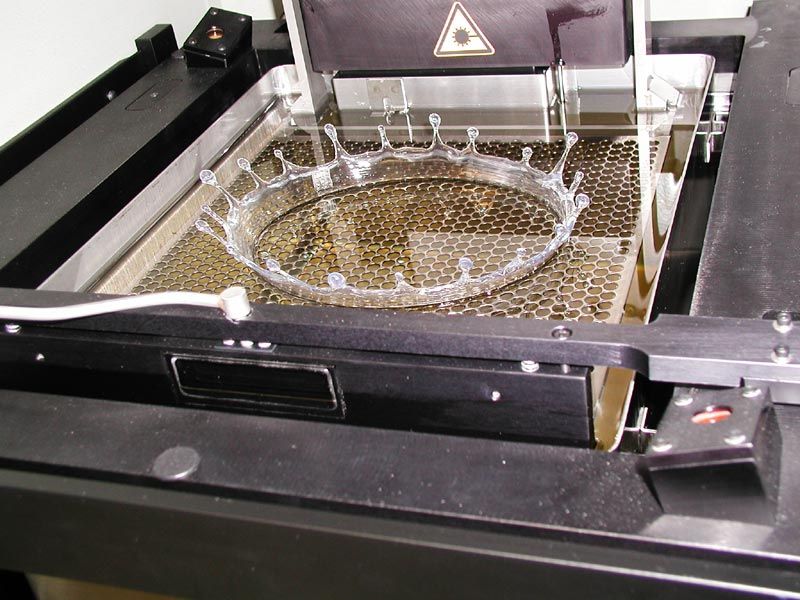 A small DLP printer can quickly print small models or high-resolution (small) batches of small models, but print volume limits model size and device performance. Another high volume device can produce larger models, or batches of smaller models, faster but at lower resolution than a stereolithographic printer.
With a stereolithographic 3D printer, all this can be done on one machine. At the same time, users can decide what they want to optimize in each case: resolution, speed or performance.
DLP printers use rectangular voxels to render images, which can result in vertical lines. In this image, the vertical voxel lines are shown as they appear when printed (left), highlighted for better visibility (right).
Stereolithographic 3D printers have higher print volumes, batch production, and overnight printing for increased productivity.
| 100 microns | 200 microns |
|---|---|
| | |
| 100 microns | 200 microns |
|---|---|
| | |
| 100 Microns | 200 Microns |
|---|---|
| | |
Stereolithographic 3D printers have higher print volumes, batch production, and overnight printing of models, increasing productivity.
INTERACTIVE
Try our interactive ROI tool to see how much time and money you can save by printing with Formlabs 3D printers.
Calculate savings
As with accuracy, differences in workflows and available materials are more printer specific than technology.
Most SLA and DLP printers are plug and play and allow easy replacement of platforms and resin tanks. Some more sophisticated models come with a cartridge system to automatically refill the reservoir with liquid resin, requiring less attention and making it easier to print at night.
Some printers come with their own software for preparing 3D models for printing (for example, PreForm for Formlabs stereolithographic 3D printers), while other manufacturers offer ready-made standard solutions. Different software tools have different features, such as PreForm allows you to customize the printing process with one click, powerful tools for optimizing the density and size of supporting structures, adjustable layer thickness, and features to save materials and time. Fortunately, the software can be downloaded and tested before purchasing a 3D printer.
As with precision, differences in workflows and available media are more printer dependent than technology.
3D printers can work with a wide range of polymer materials for different applications.
One of the main advantages of polymer-based 3D printing is the large number of materials from which models can be made for various purposes. Polymers with different compositions have a variety of characteristics: they can be soft or hard, contain additives such as glass and ceramics, or have special mechanical properties such as high bending temperature under load or impact resistance.
But at the same time, the range of supported materials depends on the specific model of the 3D printer, so we recommend that you check this information with the manufacturer before making a purchase.
SLA and DLP prints require post-processing after printing. First, the models must be washed in solvent to remove excess resin. In some cases, such as models made from engineering and biocompatible materials, final polymerization is also required. For stereolithographic 3D printers, Formlabs offers solutions to automate these steps, saving you time and effort.
Finally, 3D models printed on supporting structures require the removal of such structures. This must be done manually - the process is similar for both SLA and DLP printers. LFS-based 3D printers use lightweight support structures with very small contact points, allowing for easy release with minimal marks.
Interactive
Need some help figuring out which 3D printing material you should choose? Our new interactive material wizard helps you make the right material decisions based on your application and the properties you care the most about from our growing library of resins.
Recommend Me a Material
We hope that after understanding the differences in technologies and print results, it will be much easier for you to choose the 3D printer that best suits your needs and workflow.
To learn more about the next generation of stereolithographic 3D printers, check out the Form 3 and Form 3L devices based on LFS technology.
Would you like to see the resulting quality with your own eyes? Order a print sample, which will be delivered directly to your office.
Request a free print sample
SLA Technology. How SLA 3D printing works.
Hello everyone, 3DTool is with you!
Today we will look at the basic principles of the SLA technology. After reading this article, you will understand the main points of the printing process using this technology, the advantages and disadvantages of this method 3D printing .
On our website, you can find a list of 3D printers working on technology SLA , at this link: Catalog of 3D printers printing using SLA / DLP technology
Technology 3 D printing SLA
Stereolithography (SLA) is an additive manufacturing process that achieves its result by means of resin polymerization. In SLA printing, the object is created by selectively curing a polymer resin, layer by layer, using an ultraviolet (UV) laser beam. The materials used in SLA printing are photosensitive thermoset polymers that are available in liquid form.
SLA is known as the first 3D printing technology : its inventor patented this technology back in 1986 . When you need to print parts with very high precision or a smooth surface, the SLA comes to the rescue. In this case, it is the most cost-effective and efficient technology 3D printing . The best results can be achieved only if the operator of the equipment on which the printing process takes place is familiar with the technology and some of the nuances. That is, he has the necessary qualifications.
SLA shares many characteristics with Direct Light Processing (DLP ), another photopolymerization technology. For simplicity, both technologies can be considered equal.
SLA printing process
Here's how the process works:
1) 2) 3)
1) A platform is placed in the tank with liquid photopolymer, at the same height from the resin surface.
2) The UV laser then selectively cures the required areas of the photopolymer resin according to a predetermined algorithm.
The laser beam is focused on a given path using a set of mirrors called galvos. Then the entire cross-sectional area of the model is illuminated. Therefore, the resulting part is completely solid.
3) When one layer is finished, the platform moves to a safe distance and the mixing foot inside the tub mixes the resin.
This process is repeated until the part is printed. After printing, the part is not fully cured and requires further post-processing under the UV lamp . At the end of UV illumination, the part acquires very high mechanical and thermal properties.
The liquid resin solidifies through a process called photopolymerization: during solidification, the monomer carbon chains that make up the liquid resin are activated by an ultraviolet laser and become solid, creating strong, inextricable bonds with each other.
The photopolymerization process is irreversible, and there is no way to convert the resulting parts back into a liquid state. When heated, they will burn, not melt. This is because the materials that are produced with SLA technology are made from thermoset polymers, as opposed to thermoplastics that FDM uses.
Scheme of work SLA printer
Printer Features SLA
On SLA systems, most print settings are set by the manufacturer and cannot be changed.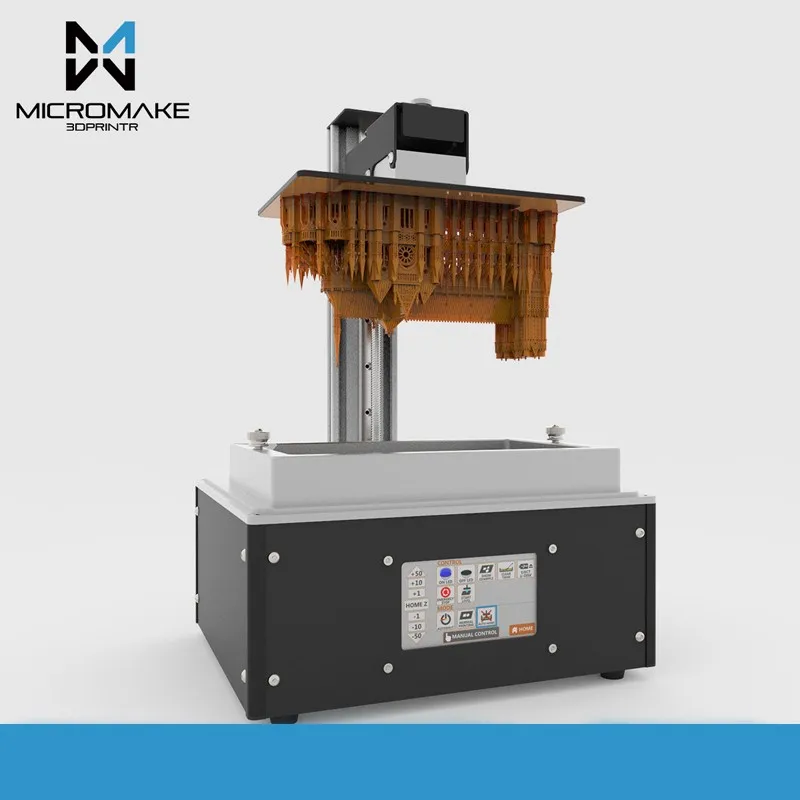 The only inputs are the layer height and the part orientation ( last, locates the supports ).
The typical layer height in SLA printing ranges from 25 to 100 micron .
The lower the layer height, the more accurately the complex geometry of the model will be printed, but at the same time the printing time and the likelihood of failure will increase. The layer height of 100 microns is suitable for most common geometries and is the golden mean.
Another important parameter for the operator is the size of the platform. It depends on the type of SLA printer. There are two main types: orientation top to bottom and orientation from bottom to top .
In the first case, the laser is above the tank, and the part is face up. The platform sits at the very top of the resin vat and moves down after each layer is sintered.
Schematic SLA top-down printer
In " bottom up " layout on SLA printers , the light source is placed under the resin tank (see picture above) , and the part is built upside down.
The tank has a transparent bottom with a silicone coating that allows the beam of light to pass through but prevents the cured resin from sticking. After each layer, the cured resin separates from the bottom of the tank as the platform moves up. This is called the sintering step .
Schematic SLA bottom-up printer
The orientation " bottom to top " is mostly used in desktop printers such as Formlabs. The " top - down " orientation is used in the industrial SLA printer .
Printers SLA " bottom-up " are easier to manufacture and operate, but the size of the possible print will be smaller, since the forces applied to the part during the sintering stage can cause printing to fail.
Top-down printers, on the other hand, can print very large parts without much loss in accuracy. The wide possibilities of such systems naturally cost more.
The following are the main characteristics and differences between the two orientations:
| "From top to bottom " | |
| Pros: | |
| lower cost | |
| Wide market availability | |
| Minuses: | |
| Small platform size | |
| Smaller range of materials | |
| Requires additional post-processing due to extensive use of supports | |
Popular brands:
FORMLABS
Printable size: Up to 145 x 145 x 175 mm
Typical layer height and print accuracy: 25 to 100 µm and ± 0. 5% (lower limit: ± 0.010 to 0.250 mm) respectively
| "Upwards" | |
| Pros: | |
| Very large platform | |
| Faster Print Time | |
| Minuses: | |
| High price | |
| Qualified operator required | |
| Material change involves emptying the entire tank | |
Popular brands:
PRISMLAB
Printable area: Up to 1500 x 750 x 500 mm
Typical layer height and print accuracy: 25 to 150 µm and ± 0.15% (lower limit ± 0.010 to 0.030 mm) respectively
Support during printing 3 D
Supports are always required at Print SLA . Structural structures are printed from the same material as the part and must be manually removed after printing.
Part orientation determines the location and amount of supports. It is recommended that the part be oriented so that surfaces that require maximum quality do not come into contact with supports.
In different types of SLA printers, support is used in different ways:
For top - down printers , support requirements are the same as FDM . They are essential for accurate printing of overhangs and bridges ( the critical overhang angle is typically 30 degrees ).
The part can be oriented in any position and is usually printed flat to minimize the number of supports and the total number of layers.
In printers like " from bottom to top " everything is more complicated. Overhangs and bridges also need to be supported, but minimizing the cross-sectional area of each layer is the most important criterion.
Forces applied to the part during the sintering step can cause it to come off the platform. These forces are proportional to the cross-sectional area of each layer.
For this reason, the parts must be oriented at an angle, and minimizing supports here is not a primary concern.
On the left - a detail oriented on the SLA printer "from top to bottom" (support minimization).
On the right is a part oriented on the SLA printer "from the bottom up" (minimizing the cross-sectional area).
Removing supports for an SLA printed part
Curl
One of the biggest problems with the accuracy of parts made with SLA , is twisting. This problem is similar to the deformation in FDM when materials shrink.
During curing, the resin shrinks slightly when exposed to the printer's light source. When shrinkage is significant, large internal stresses develop between the new layer and the previously cured material, causing the part to twist.
Adhesion (sintering) between layers
SLA printed parts have isotropic mechanical properties. This is due to the fact that one pass UV beam is not enough to completely cure the liquid resin.
Further passes help the previously hardened layers to fuse together. In fact, in the SLA of printing, curing continues even after the printing process is complete.
To achieve the best mechanical properties, parts printed using this technology should be post-cured by placing them in a chamber under intense ultraviolet radiation ( and sometimes at elevated temperatures ).
This greatly increases the hardness and heat resistance of SLA but does not make it any stronger. Rather the opposite.
For example.
Test specimens printed with standard clear resin on a SLA desktop printer have, after curing, almost 2 times 's tensile strength ( 65 MPa compared to 's 38 MPa) after curing.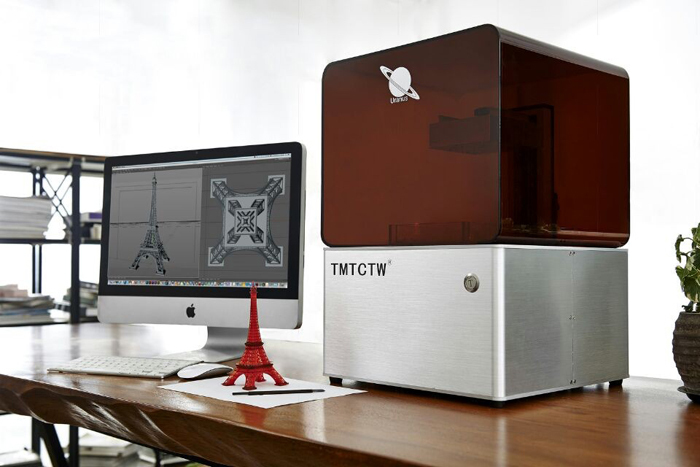
Can operate under load at higher temperatures ( 58 degrees Celsius compared to 's 42 degrees), but their elongation at break is less than half ( 6.2% compared to 's 12%).
If you leave the part in the sun, then nothing good will come of it.
Prolonged exposure to ultraviolet radiation has a detrimental effect on physical properties and appearance. The part may curl, become very brittle, and change color.
For this reason, before using the part, it is recommended to apply a spray of transparent acrylic paint resistant to UV radiation .
SLA media
SLA Printing Materials is available in liquid resin form. Price per liter of resin varies greatly - ranges from $50 for standard material to $400 for specialty materials such as casting or dental resin.
Industrial systems offer a wider range of materials than desktop systems SLA printers, which give the designer more control over the mechanical properties of the printed part.
SLA materials ( thermosets ) are more brittle than materials made using FDM or SLS ( thermoplastics ) and for this reason SLA parts are not typically used for functional prototypes that will be subjected to significant stress. However, new advances in materials development may change this in the near future.
The following table lists the advantages and disadvantages of the most commonly used resins:
| Material | Features |
| Standard resin | + Smooth surface Relatively fragile part |
| transparent resin | + Transparent material - Requires post-processing for Presentable appearance |
| casting resin | + Used to create mold templates + Low ash after burnout |
| Rigid or durable resin | + ABS-like or PP-like mechanical properties - Low thermal resistance |
| High temperature resin | + High temperature resistance + Used for injection molding · - High price |
| dental resin | + Biocompatible + High abrasion resistance · - High price |
| Rubber-like resin | + Rubber-like material - Poor printing accuracy |
Post-processing SLA 3D printing
Parts printed with SLA technology can be processed to a high quality using various methods such as sanding and polishing, staining and mineral oil treatment. Widely developed articles about post-processing can be found on the Internet.
Transparent resin housing cover for electronics in various finishes. From left to right: removal of the main support, wet sanding, UV irradiation, acrylic and polishing
SLA advantages and disadvantages
Pros:
-
SLA 3D printers can produce parts with very high dimensional accuracy and complex geometries.
-
The parts will have a very smooth surface, making them ideal for visual prototypes, for example.
-
Special materials are available such as clear, flexible and cast resins.
Cons:
-
Parts printed using SLA technology tend to be fragile and not suitable for functional prototypes.
-
The mechanical properties and appearance of these parts deteriorate over time.
 They are adversely affected by exposure to sunlight.
 -
Supports and post-processing when printing are always required.
The main characteristics of the SLA are shown in the table:
materials
Photopolymer resins (thermosetting
materials)
Dimensional accuracy
± 0.5% (lower limit: ± 0.10 mm) - domestic
± 0.15% (lower limit ± 0.01 mm) - industrial
typical size
print area
Up to 145 x 145 x 175 mm - for desktop printers
Up to 1500 x 750 x 500 mm - for industrial
Total layer thickness
25 - 100 µm
Support
Always required
(Needed to make an accurate part)
Total
-
SLA print is best for producing visual prototypes with a very smooth surface and very fine detail.
Learn more