Bottom up 3d printing
What is 3D Resin Printing
What is 3D Resin Printing?
Stereolithography (SLA), Digital Light Processing (DLP), and Liquid Crystal Display (LCD) are 3 different types of 3D Resin Printing processes. In these vat polymerization methods, light sources are used to cure liquid resin, layer-by-layer, to form a desired 3D model. Although SLA, DLP, and LCD all use a light source, a build platform, and a vat of resin, each process uses a different type of light source.
Looking for Instant 3D Resin Printing Quotes?
Get Instant 3D Resin Printing Quotes
Learn more about our Custom 3D Printing Services.
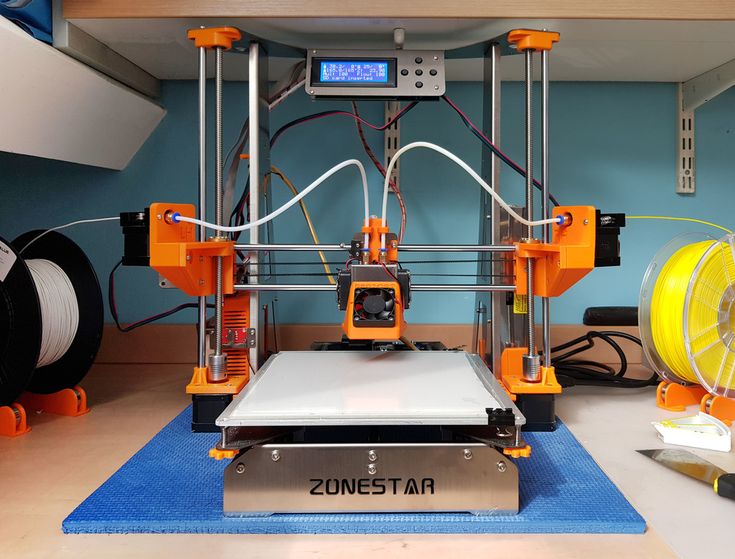
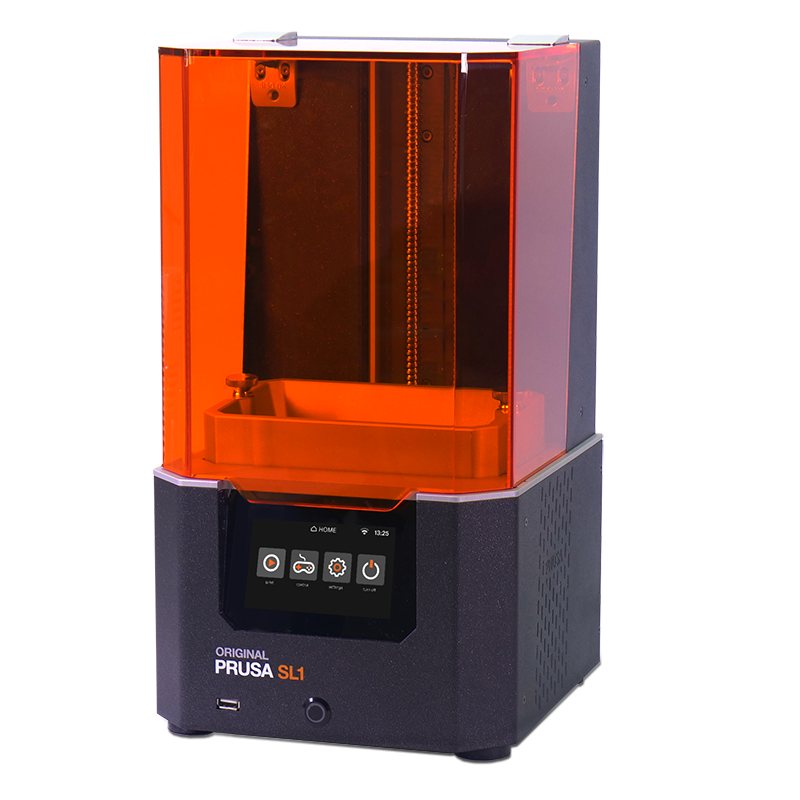
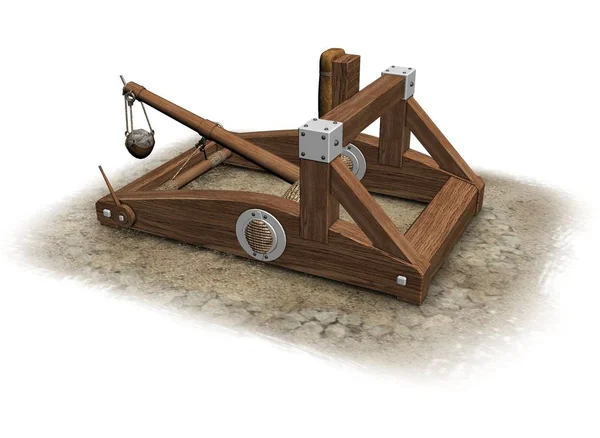
Bottom-up 3D resin printer showing build platform and resin vat.
SLA 3D Resin Printing
SLA, the original form of 3D Printing, was patented in 1986. In this technique, galvo mirrors focus an ultraviolet (UV) laser that solidifies the cross-section of each layer, point-by-point. In general, SLA 3D Printing may be top-down, as is used in some industrial applications, or bottom-up, as is used for desktop printers.
In top-down SLA 3D Printing, the laser source is positioned above the vat of resin. The build platform begins at a predetermined layer height under the top surface of the liquid resin. After solidifying a layer, the build platform drops by a specified layer height, typically between 25-100 microns, to solidify the next layer and merge it with the previous. This process repeats until the model is complete, at which point it rises from the vat. Unlike other 3D Printing methods, curing continues after completion. Extra exposure to UV light is generally needed to fully cure the resin and improve the model’s hardness and temperature resistance.
In bottom-up SLA 3D Printing, the light source is positioned under the vat and the model is formed upside down. The build platform begins at a predetermined layer height above the tank’s bottom surface, which is transparent to allow light to penetrate the liquid resin. After each layer is solidified, the build platform rises, removing the cured resin from the bottom of the tank in a process called “peeling. ” Forces applied to the model during peeling are the main cause of print failures in bottom-up SLA 3D Printing.
DLP 3D Resin Printing
DLP is similar to bottom-up SLA 3D Printing in that the light source is positioned below the vat of resin. However, instead of a using a UV laser, DLP uses a projector screen to flash a pixelated 2D image of the layer onto the tank bottom. This allows for faster processing times. The disadvantage of DLP is the restriction of build accuracy, which is determined by pixel size.
LCD 3D Resin Printing
LCD is similar to DLP in that it also uses a pixelated 2D image. You may recognise the term LCD from computer monitors and other display devices. In LCD 3D Printing, an array of UV LCDs shine the entire layer image directly onto the tank bottom to cure the liquid resin. As no mirrors are used to project each layer image, there is no distortion of the light. This means that the quality of LCD 3D Printing is determined by the LCD density. LCD generally uses cheaper components than both SLA and DLP, which is often a good introduction to Resin 3D Printing for the first-time owner.
With 3D Resin Printing, high levels of accuracy can be achieved with smooth surfaces. As the UV curing method tends to leave models brittle, most 3D Resin Printing is better suited for non-functional parts and visual models. But, as material science continues to develop, functional resin printed parts are now becoming a reality. Visit the 3D Printing comparison page for more information about the ideal 3D Printing method for your next project.
About the author:
Chris Brennan is a Manufacturing Engineer and the founder/owner of Thirteen Design Consultancy based out of County Louth, Ireland.
[email protected]
Instagram: @thirteendesignconsultancy
Facebook: @thirteendesignconsultancy
Twitter: @13DesignIreland
Prototype Hubs Profile: Thirteen Design Consultancy
Share This Post
Related Articles
What is SLA 3D printing?
Get to know the basics of stereolithography, also known as SLA 3D printing. Find out why the original 3D printing technique is still so popular and cost-effective, learn about how SLA printing works and its parameters and discover which materials and options will best suit your custom part needs.
In this introduction to Stereolithography (SLA), we cover the basic principles of the process to determine whether it is suitable for your specific application. After reading this article you will be familiar with all the important aspects of SLA 3D printing.
If you are interested in Hubs' SLA printing processes, check out our SLA capabilities .
What is stereolithography?
Stereolithography (SLA) is an additive manufacturing process that belongs to the vat photopolymerization family. Also known as resin 3D printing , there are three main 3D printing technologies associated with vat polymerization: SLA, DLP and LCD. The three technologies all use a light source to cure a photopolymer resin but with the following differences:
-
Stereolithography (SLA) uses UV lasers as a light source to selectively cure a polymer resin.
-
Digital light processing (DLP) uses a digital projector as a UV light source to cure a layer of resin.
-
Liquid crystal display (LCD) uses an LCD display module for projecting specific light patterns.
SLA is one of the most widely used vat photopolymerization technologies. It is used to create objects by selectively curing a polymer resin, layer by layer, using an ultraviolet (UV) laser beam. The materials used in SLA are photosensitive thermoset polymers that come in a liquid form.
Patented in 1986, SLA was the first 3D printing technology. And even today, SLA is still the most cost-effective 3D printing technology available when parts of very high accuracy or smooth surface finish are needed. Best results are achieved when the designer takes advantage of the benefits and limitations of the manufacturing process.
What to watch: How do you print highly detailed parts with SLA?
Here's a short video that will teach you everything you need to know to get you started with SLA 3D printing in about 10 minutes.
How does SLA 3D printing work ?
-
SLA 3D printing works by first positioning the build platform in the tank of liquid photopolymer, at a distance of one layer height for the surface of the liquid.
-
A UV laser creates the next layer by selectively curing and solidifying the photopolymer resin.
-
During the solidification part of the photopolymerization process, the monomer carbon chains that compose the liquid resin are activated by the light of the UV laser and become solid, creating strong unbreakable bonds between each other.
-
The laser beam is focused in a predetermined path using a set of mirrors, called galvos. The whole cross-sectional area of the model is scanned, so the produced part is fully solid.
-
After printing, the part is in a not-fully-cured state.
 It requires further post-processing under UV light if very high mechanical and thermal properties are required.
The photopolymerization process is irreversible and there is no way to convert the SLA parts back to their liquid form. Heating these SLA parts will cause them to burn instead of melt. This is because the materials that are produced with SLA are made of thermoset polymers, as opposed to the thermoplastics that fused deposition modeling (FDM) uses.
Schematic of SLA printerWhat are the print parameters of SLA?
Most print parameters in SLA systems are fixed by the manufacturer and cannot be changed. The only inputs are the layer height and part orientation (the latter determines support location).
Layer height: Ranges between 25 and 100 microns. Lower layer heights capture curved geometries more accurately but increase the build time and cost—and the probability of a failed print.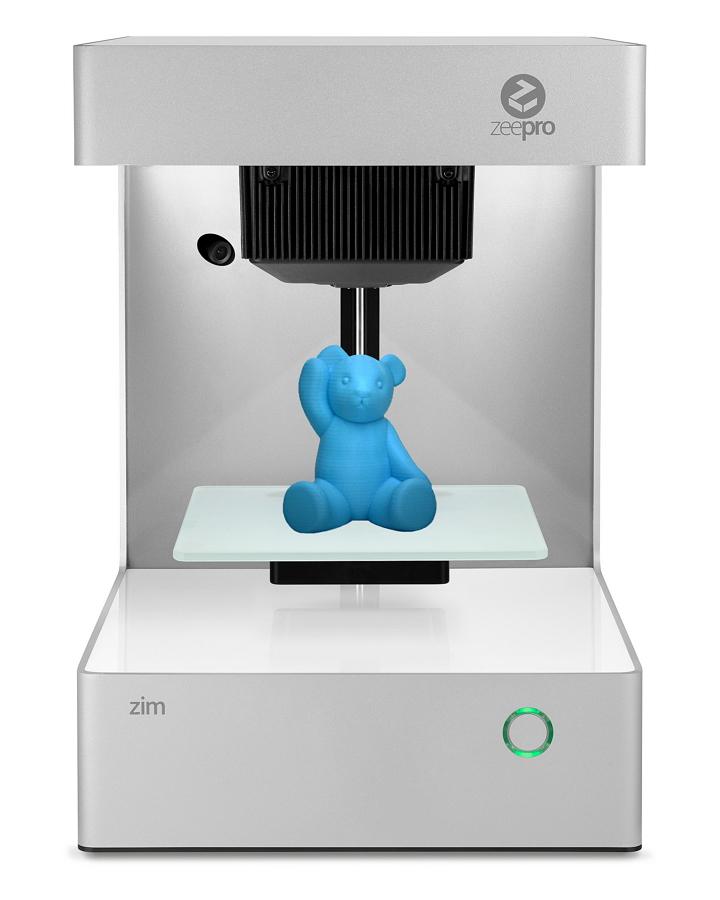 A layer height of 100 microns is suitable for most common applications.
Build size: This is another parameter that is important for the designer. The build size depends on the type of SLA machine. There are two main SLA machine setups: the top-down orientation and the bottom-up orientation:
-
Top-down printers place the laser source above the tank and the part is built facing upwards. The build platform begins at the very top of the resin vat and moves downwards after every layer.
-
Bottom-up printers place the light source under the resin tank (see figure above) and the part is built upside down. The tank has a transparent bottom with a silicone coating that allows the light of the laser to pass through but stops the cured resin from sticking to it. After every layer, the cured resin is detached from the bottom of the tank, as the build platform moves upwards.
 This is called the peeling step.
The bottom-up orientation is mainly used in desktop printers, like Formlabs, while the top-down is generally used in industrial SLA systems. Bottom-up SLA printers are easier to manufacture and operate, but their build size is limited. This is because the forces applied to the part during the peeling step might cause the print to fail. On the other hand, top-down printers can scale up to very large build sizes without a big loss in accuracy. The advanced capabilities of these systems come at a higher cost.
The following table summarises the key characteristics and differences of the two orientations:
| Bottom-up (Desktop) SLA | Top-down (Industrial) SLA | |
|---|---|---|
| Advantages | + Lower cost + Widely available | + Very large build size + Faster build times |
| Disadvantages | - Small build size - Smaller material range - Requires more post-processing due to extensive use of support | - Higher cost - Requires specialist operator - Changing material involves emptying the whole tank |
| Popular SLA printer manufacturers | Formlabs | 3D Systems |
| Build size | Up to 145 x 145 x 175mm | Up to 1500 x 750 x 500mm |
| Typical layer height | 25 to 100 µm | 25 to 150 µm |
| Dimensional Accuracy | ± 0.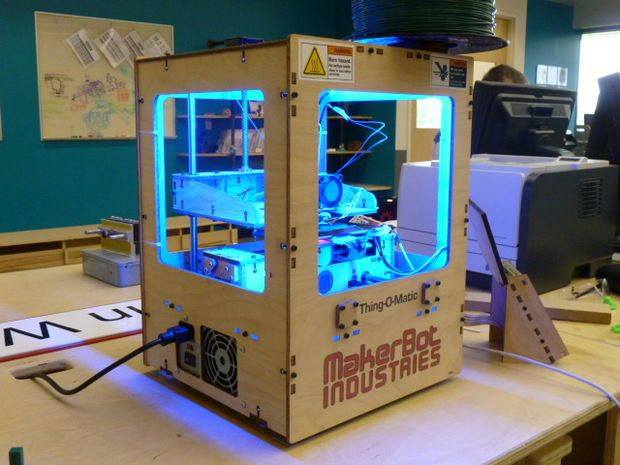 5% (lower limit: ± 0.010–0.250 mm) 5% (lower limit: ± 0.010–0.250 mm) | ± 0.15% (lower limit ± 0.010–0.030 mm) |
What are the characteristics of SLA 3D printing?
The main characteristics of SLA 3D printing are the necessary support structure, curling and layer adhesion.
Support structures
A support structure is always required in SLA. Support structures are printed in the same material as the part and must be manually removed after printing. The orientation of the part determines the location and amount of support. It is recommended that the part is oriented so that so visually critical surfaces do not come in contact with the support structures.
Bottom-up and top-down SLA printers use support differently:
-
Top-down SLA printers: S upport requirements are similar to those for FDM . They are needed to accurately print overhangs and bridges (the critical overhang angle is usually 30o).
 The part can be oriented in any position, and they are usually printed flat, to minimize the amount of support and the total number of layers.
 -
Bottom-up SLA printers: Support requirements can be more complex. Overhangs and bridges must still be supported, but minimizing the cross-sectional area of each layer is the most crucial criterion: the forces applied to the part during the peeling step may cause it to detach from the build platform. These forces are proportional to the cross-sectional area of each layer. For this reason, parts are oriented at an angle and the reduction of support is not a primary concern.
 Marks on the locations where the support structures touched the part are visible
 Curling
One of the biggest problems relating to the accuracy of parts produced via SLA is curling. Curling is similar to warping in FDM.
During the curing process, the resin shrinks slightly upon exposure to the printer's light source. When the shrinkage is considerable, large internal stresses develop between the new layer and the previously solidified material, which results in the part curling.
Support is important to help anchor at-risk sections of a print to the build plate and mitigate the likelihood of curling. Part orientation and limiting large flat layers is also important. Over-curing (for example by exposing the part in direct sunlight post-printing) might also cause curling.
The best way to prevent curling is to keep it in mind during the design process. Avoid large thin and flat areas wherever possible, or add a structure to prevent the part from curling.
Layer adhesion
SLA printed parts have isotropic mechanical properties. This is because a single UV laser pass is not enough to fully cure the liquid resin. Later laser passes help previously solidified layers to fuse together to a very high degree. In fact, curing continues even after the completion of the printing process.
To achieve the best mechanical properties, SLA parts must be post-cured, by placing them in a cure box under intense UV light (and sometimes at elevated temperatures). This greatly improves the hardness and temperature resistance of the SLA part but makes it more brittle. The results of the post-curing process mean:
-
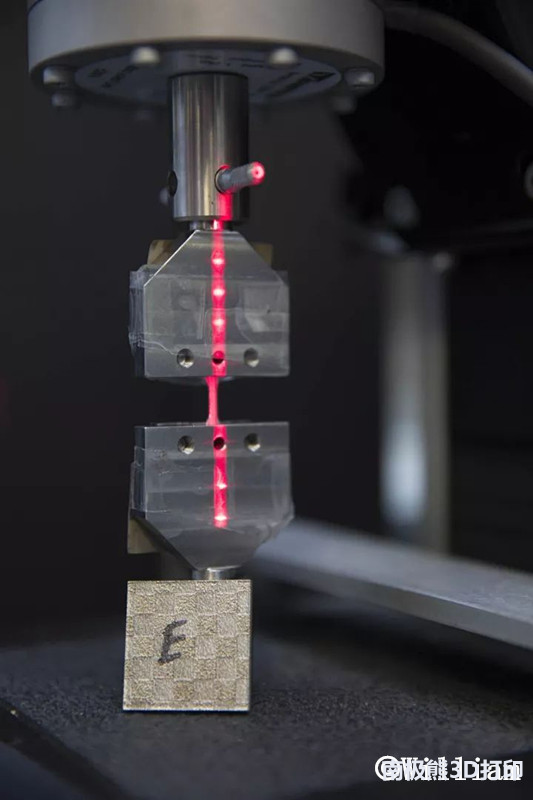
Test pieces of parts printed in standard clear resin using a desktop SLA printer have almost twice as much tensile strength post-cure (65 MPa compared to 38 MPa).
-
Parts can operate under load at higher temperatures (at a max temperature of 58ºC compared to 42ºC).

-
The elongation at break is almost half (6.2% compared to 12%).
Leaving the SLA printed part in the sun can also cause curing. Although spray coating with a clear UV acrylic paint before use is highly recommended because extended exposure to UV light has a detrimental effect in the physical properties and appearance of SLA parts—they may curl, become brittle or change color.
Summary of the main characteristics of SLA 3D printing
The main characteristics of SLA are summarized in the table below:
| Stereolithography (SLA) | |
|---|---|
| Materials | Photopolymer resins (thermosets) |
| Dimensional Accuracy | ± 0.5% (lower limit: ±0.10 mm) – desktop ± 0.15% (lower limit ± 0.01 mm) – industrial |
| Typical Build Size | Up to 145 x 145 x 175mm – desktop Up to 1500 x 750 x 500mm – industrial |
| Common layer thickness | 25–100 µm |
| Support | Always required (essential to producing an accurate part) |
What materials are used for SLA printing?
SLA materials come in the form of liquid resins, which can be chosen based on the end use of the part—for example, thermal resistance properties, a smooth surface finish or abrasion resistant. As such, the price of the resin varies greatly, from about $50 per liter for the standard material, upwards to $400 per liter for specialty materials, such as castable or dental resin. Industrial systems offer a wider range of materials than desktop SLA printers, that give the designer a closer control over the mechanical properties of the printed part.
SLA materials (thermosets) are more brittle than the materials produced with FDM or SLS (thermoplastics) and for this reason SLA parts are not usually used for functional prototypes that will undertake significant loading. Advances in materials may change this in the near future.
The following table summarizes the advantages and disadvantages of the most commonly used resins.
| Material | Characteristics |
|---|---|
| Standard resin | + Smooth surface finish - Relatively brittle |
| High detail resin | + Higher dimensionally accuracy - Higher price |
| Clear resin | + Transparent material - Requires post processing for a very clear finish |
| Castable resin | + Used for creating mold patterns + Low ash percentage after burnout |
| Tough or Durable resin | + ABS-like or PP-like mechanical properties - Low thermal resistance |
| High temperature resin | + Temperature resistance + Used for injection molding and thermoforming tooling |
| Dental resin | + Biocompatible+ High abrasion resistant- High cost |
| Flexible resin | + Rubber-like material- Lower dimensional accuracy |
What are the options for SLA post-processing?
SLA parts can be finished to a very high standard using various post-processing methods, such as sanding and polishing, spray coating and finishing with a mineral oil. To find out more, read our extensive article on post-processing for SLA parts.
What's the difference between desktop (prototyping) and industrial SLA 3D printers?
The two main types of SLA systems are desktop (prototyping) and industrial printers. Industrial SLA machines can produce more accurate components than their desktop counterparts (and maintain better accuracy over larger builds), and often make use of higher-cost materials. While desktop SLA can achieve tolerances between 150 and 300 microns, industrial printers are capable of tolerances as low as 30 microns for nearly any build size.
One of the biggest advantages of industrial SLA over desktop machines is the range of materials that industrial printers are able to print with. While desktop printers may use a flexible resin, industrial machines offer a large range of flexible resins each with varying mechanical properties.
One of the limitations of most industrial machines is that they produce parts using a top-down approach resulting in the need for large resin tanks (over 100L). This makes swapping between materials difficult and can increase lead time on parts. This also makes these machines more expensive to maintain.
For designs where cosmetic appearance is more important than function, desktop printers are generally adequate. If engineering properties like temperature resistance, castability and transparency are required, then industrial properties offer a greater range of solutions.
Compared to desktop printers, industrial machines are designed for repeatability and reliability. They can often produce the same part over and over again and do not need the high level of user interaction that desktop machines typically require.
Overall, SLA’s unique ability to batch produce intricate, customized parts makes it a popular method of manufacturing small parts, low-run production.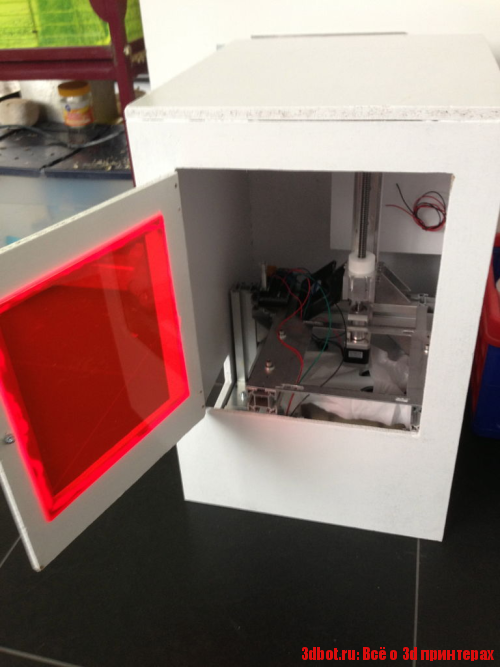
What are the advantages of SLA 3D printing?
-
SLA can produce parts with very high dimensional accuracy and with intricate details.
-
SLA parts have a very smooth surface finish, making them ideal for visual prototypes.
-
Speciality SLA materials are available, such as clear, flexible and castable resins.
What are the disadvantages of SLA 3D printing?
-
SLA parts are generally brittle and not suitable for functional prototypes.
-
The mechanical properties and visual appearance of SLA parts will degrade over time when the parts are exposed to sunlight.
-
Support structures are always required and post-processing is necessary to remove the visual marks left on the SLA part.
What are Hubs' top tips & tricks for SLA 3D printing?
Is SLA 3D printing the right manufacturing solution for your parts or products? These are our rules of thumb:
-
SLA 3D printing is best suited for producing visual prototypes with very smooth surfaces and very fine details from a range of thermoset materials.
-
Desktop SLA is ideal for manufacturing small injection-molded-like parts at an affordable price. Think "smaller-than-a-fist".
-
Industrial SLA machines can produce very large parts, as big as 1500 x 750 x 500mm).
Want to find out more? Read our complete guide to 3D printing.
Ready to transform your CAD file into a custom part? Upload your designs for a free, instant quote.
Get an instant quoteSLA Technology. How SLA 3D printing works.
Hello everyone, 3DTool is with you!
Today we will look at the basic principles of technology SLA . After reading this article, you will understand the main points of the printing process using this technology, the advantages and disadvantages of this method 3D printing .
On our website, you can find a list of 3D printers working on SLA technology, at this link: Catalog of 3D printers printing on SLA / DLP technology
Technology 3 D printing SLA
Stereolithography (SLA) is an additive manufacturing process that achieves the result by means of resin polymerization. In SLA printing, the object is created by selectively curing a polymer resin, layer by layer, using an ultraviolet (UV) laser beam. The materials used in SLA printing are photosensitive thermoset polymers that are available in liquid form.
SLA is known as the first 3D printing technology : its inventor patented this technology back in 1986 . When you need to print parts with very high precision or a smooth surface, the SLA comes to the rescue. In this case, it is the most cost-effective and efficient technology 3D printing . The best results can be achieved only if the operator of the equipment on which the printing process takes place is familiar with the technology and some of the nuances. That is, he has the necessary qualifications.
SLA shares many characteristics with Direct Light Processing (DLP ), another photopolymerization technology. For simplicity, both technologies can be considered equal.
SLA printing process
1) 2) 3)
1) A platform is placed in the tank with liquid photopolymer, at the same height from the resin surface.
2) The UV laser then selectively cures the required areas of the photopolymer resin according to a predetermined algorithm.
The laser beam is focused on a given path using a set of mirrors called galvos. Then the entire cross-sectional area of the model is illuminated.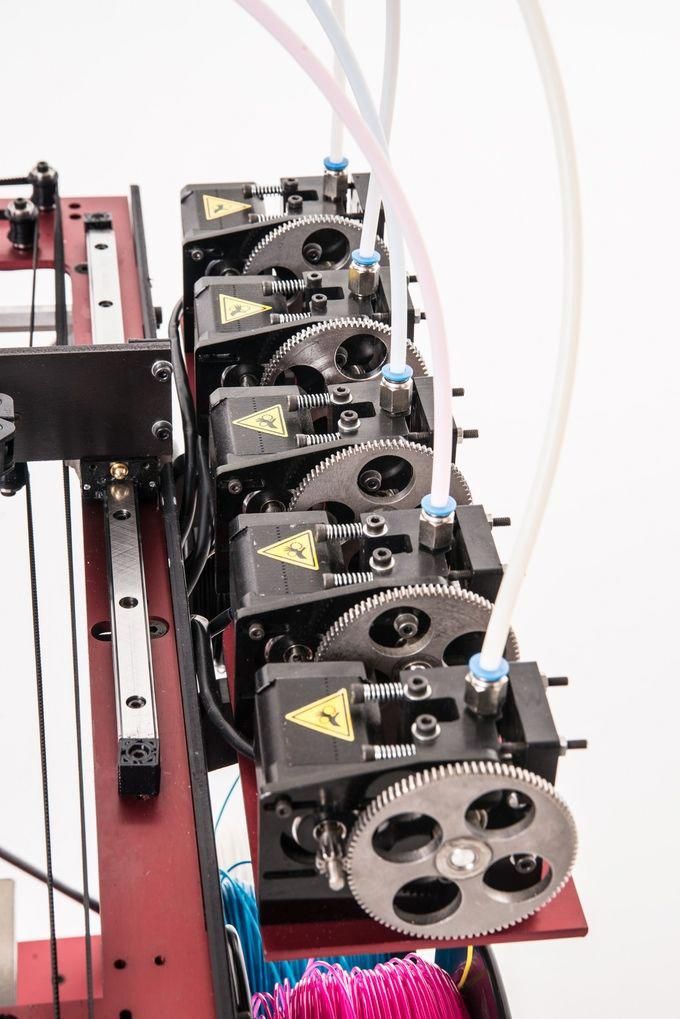 Therefore, the resulting part is completely solid.
3) When one layer is finished, the platform moves to a safe distance and the mixing foot inside the tub mixes the resin.
This process is repeated until the part is printed. After printing, the part is not fully cured and requires further post-processing under the UV lamp . At the end of UV illumination, the part acquires very high mechanical and thermal properties.
The liquid resin solidifies through a process called photopolymerization: during solidification, the monomer carbon chains that make up the liquid resin are activated by an ultraviolet laser and become solid, creating strong, inextricable bonds with each other.
The photopolymerization process is irreversible, and there is no way to convert the resulting parts back into a liquid state. When heated, they will burn, not melt. This is because the materials that are produced by SLA technology are made from thermoset polymers, as opposed to the thermoplastics that FDM uses.
Operation scheme SLA printer
Specifications SLA printer
On SLA systems, most print settings are set by the manufacturer and cannot be changed. The only inputs are the layer height and the part orientation ( last, locates the supports ).
The typical layer height in a SLA print ranges from 25 to 100 micron .
The lower the layer height, the more accurately the complex geometry of the model will be printed, but at the same time the printing time and the likelihood of failure will increase. A layer height of 100 microns is suitable for most common geometries and is the golden mean.
Another important parameter for the operator is the size of the platform. It depends on the type of SLA printer. There are two main types: orientation top to bottom and orientation from bottom to top .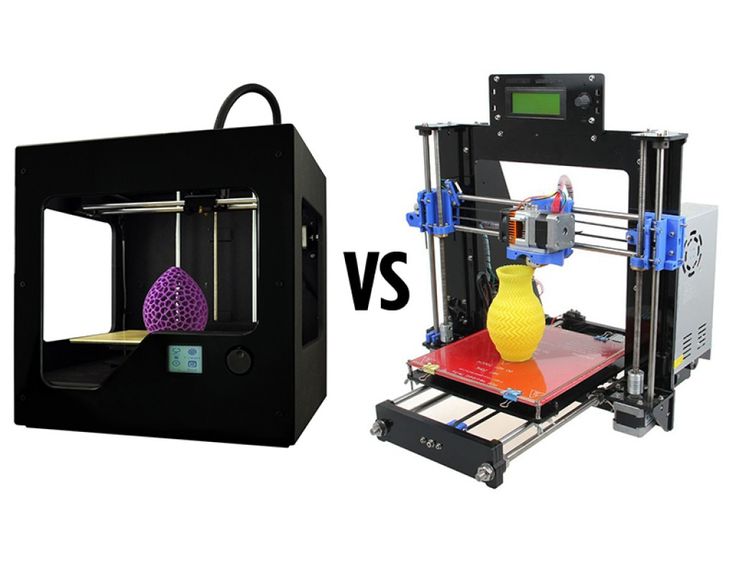
In the first case, the laser is above the tank, and the part is face up. The platform sits at the very top of the resin vat and moves down after each layer is sintered.
Schematic SLA top-down printer
In " bottom up " layout on SLA printers , the light source is placed under the resin tank (see picture above) , and the part is built upside down.
The tank has a transparent bottom with a silicone coating that allows the beam of light to pass through but prevents the cured resin from sticking. After each layer, the cured resin separates from the bottom of the tank as the platform moves up. This is called the sintering step.
Schematic SLA bottom-up printer
The orientation " bottom to top " is mostly used in desktop printers like Formlabs. The " top - down " orientation is used in the industrial SLA printer .
Printers SLA " bottom-up " are easier to manufacture and operate, but the size of the possible print will be smaller, since the forces applied to the part during the sintering stage can cause printing to fail.
Top-down printers, on the other hand, can print very large parts without much loss in accuracy. The wide possibilities of such systems naturally cost more.
The following are the main characteristics and differences between the two orientations:
| "Top down " | |
| Pros: | |
| lower cost | |
| Wide market availability | |
| Minuses: | |
| Small platform size | |
| Smaller range of materials | |
| Requires additional post-processing due to extensive use of supports | |
Popular brands:
FORMLABS
Printable area: Up to 145 x 145 x 175 mm
Typical layer height and print accuracy: 25 to 100 µm and ± 0. 5% (lower limit: ± 0.010 to 0.250 mm) respectively
| "Upwards" | |
| Pros: | |
| Very large platform | |
| Faster Print Time | |
| Minuses: | |
| High price | |
| Qualified operator required | |
| Material change involves emptying the entire tank | |
Popular brands:
PRISMLAB
Print area size: Up to 1500 x 750 x 500 mm
Typical layer height and print accuracy: 25 to 150 µm and ± 0.15% (lower limit ± 0.010 to 0.030 mm) respectively
Support during printing 3 D
Supports are always required at Print SLA . Structural structures are printed from the same material as the part and must be manually removed after printing.
Part orientation determines the location and amount of supports. It is recommended that the part be oriented so that surfaces that require maximum quality do not come into contact with supports.
In different types of SLA printers, support is used in different ways:
For top - down printers , support requirements are the same as FDM . They are essential for accurate printing of overhangs and bridges ( the critical overhang angle is typically 30 degrees ).
The part can be oriented in any position and is usually printed flat to minimize the number of supports and the total number of layers.
In printers like " from bottom to top " everything is more complicated. Overhangs and bridges also need to be supported, but minimizing the cross-sectional area of each layer is the most important criterion.
Forces applied to the part during the sintering step can cause it to come off the platform. These forces are proportional to the cross-sectional area of each layer.
For this reason, the parts must be oriented at an angle, and minimizing supports here is not a primary concern.
On the left - a detail oriented on the SLA printer "from top to bottom" (support minimization).
On the right is a part oriented on the SLA printer "from the bottom up" (minimizing the cross-sectional area).
Removing supports for an SLA printed part
Curl
One of the biggest problems with the accuracy of parts made with SLA is curling. This problem is similar to the deformation in FDM when materials shrink.
During curing, the resin shrinks slightly when exposed to the printer's light source. When shrinkage is significant, large internal stresses develop between the new layer and the previously cured material, causing the part to twist.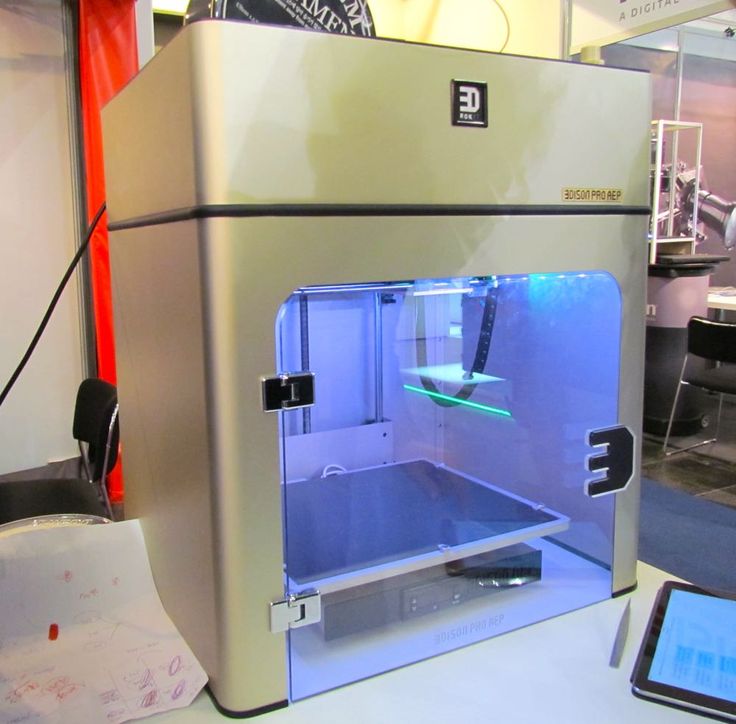
Adhesion (sintering) between layers
SLA printed parts have isotropic mechanical properties. This is due to the fact that one pass UV beam is not enough to completely cure the liquid resin.
Further passes help the previously hardened layers to fuse together. In fact, in the SLA of printing, curing continues even after the printing process is completed.
To achieve the best mechanical properties, parts printed using this technology should be post-cured by placing them in a chamber under intense ultraviolet radiation ( and sometimes at elevated temperatures ).
This greatly increases the hardness and heat resistance of SLA , but does not make it stronger. Rather the opposite.
For example.
Test specimens printed with standard clear resin on a SLA desktop printer have almost 2 times tensile strength after curing ( 65 MPa compared to 38 MPa).
Can operate under load at higher temperatures ( 58 degrees Celsius, compared with 42 degrees ), but their elongation at break is half as much ( 6.2% compared to 12% ).
If you leave the part in the sun, then nothing good will come of it.
Prolonged exposure to ultraviolet radiation has a detrimental effect on physical properties and appearance. The part may curl, become very brittle, and change color.
For this reason, before using the part, it is recommended to apply a spray of transparent acrylic paint resistant to UV .
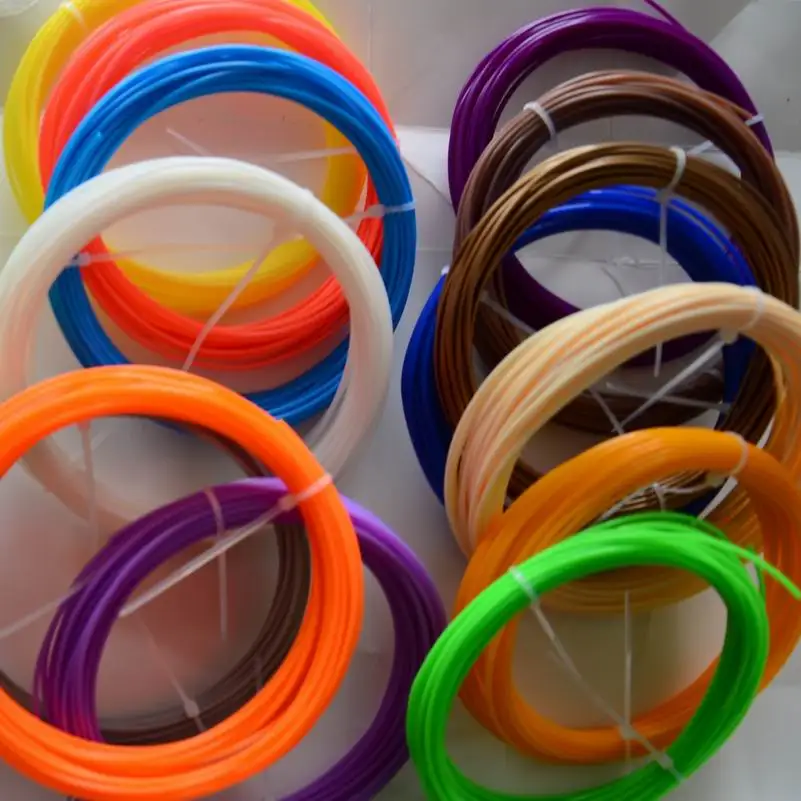
SLA media
SLA Printing Materials is available in the form of a liquid resin. The price per liter of resin varies greatly - ranges from $50 for standard material to $400 for specialty materials such as casting or dental resin.
Industrial systems offer a wider range of materials than desktop systems SLA printers, which give the designer more control over the mechanical properties of the printed part.
SLA materials ( thermosets ) are more brittle than materials made using FDM or SLS ( thermoplastics ) and for this reason SLA parts are not typically used for functional prototypes that will be subjected to significant stress. However, new advances in materials development may change this in the near future.
The following table lists the advantages and disadvantages of the most commonly used resins:
| Material | Features |
| Standard resin | + Smooth surface Relatively fragile part |
| transparent resin | + Transparent material - Requires post-processing for Presentable appearance |
| casting resin | + Used to create mold templates + Low ash after burnout |
| Rigid or durable resin | + ABS-like or PP-like mechanical properties - Low thermal resistance |
| High temperature resin | + High temperature resistance + Used for injection molding · - High price |
| dental resin | + Biocompatible + High abrasion resistance · - High price |
| Rubber-like resin | + Rubber-like material - Poor printing accuracy |
Post-processing SLA 3D printing
Parts printed with SLA technology can be processed to a high quality using various methods such as sanding and polishing, staining and mineral oil treatment. Widely developed articles about post-processing can be found on the Internet.
Transparent resin housing cover for electronics in various finishes. From left to right: removal of the main support, wet sanding, UV irradiation, acrylic and polishing
Advantages and disadvantages of SLA
Pros:
-
SLA 3D printers can produce parts with very high dimensional accuracy and complex geometries.
-
The parts will have a very smooth surface, making them ideal for visual prototypes, for example.
-
Special materials are available such as clear, flexible and cast resins.
Cons:
-
Parts printed using SLA technology tend to be fragile and not suitable for functional prototypes.
-
The mechanical properties and appearance of these parts deteriorate over time.
 They are adversely affected by exposure to sunlight.
 -
Supports and post-processing when printing are always required.
The main characteristics of the SLA are shown in the table:
materials
Photopolymer resins (thermosetting
materials)
Dimensional accuracy
± 0.5% (lower limit: ± 0.10 mm) - domestic
± 0.15% (lower limit ± 0.01 mm) - industrial
typical size
print area
Up to 145 x 145 x 175 mm - for desktop printers
Up to 1500 x 750 x 500 mm - for industrial
Total layer thickness
25 - 100 µm
Support
Always required
(Needed to make an accurate part)
Total
-
SLA print is best for producing visual prototypes with very smooth surfaces and very fine detail.
-
Desktop SLA 3 D The printer is ideal for making small, about the size of an adult's fist, injection molded parts. Moreover, such a printer can be purchased at an affordable price.
-
Industrial SLA 3 D printers can produce very large parts (up to 1500 x 750 x 500 mm)
Well, that's all we have! Thank you for being with us, see you soon. Further it will be more interesting!
You can purchase the 3D printers mentioned in the article , consumables for them, ask your question, or track the order, you can
-
By phone: 8(800)775-86-69
-
E-mail: [email protected]
-
Or on our website: https://3dtool.ru/
Don't forget to subscribe to our YouTube channel:
And to our groups in social networks:
In contact with
Fused Deposition Modeling (FDM)
- 1 FDM Technology
- 2 History
- 3 Process
- 4 Application
- 5 Other 3D printing technologies
FDM technology
Heacenth FFF printer based on Prusa Mendel open source RepRap design
Fused deposition modeling (FDM) 3D models, prototyping and industrial production.
FDM technology involves the creation of three-dimensional objects by applying successive layers of material that follow the contours of a digital model. As a rule, thermoplastics supplied in the form of spools of filament or rods act as printing materials.
FDM technology was developed by S. Scott Trump in the late 1980s and entered the commercial market in 1990.
The original term "Fused Deposition Modeling" and the acronym FDM are trademarks of Stratasys. 3D printing enthusiasts at RepRap have coined a similar term, "Fused Filament Fabrication" or FFF, to circumvent legal restrictions. The terms FDM and FFF are equivalent in meaning and purpose.
History
Fused Deposition Printing (FDM) technology was developed by S. Scott Trump in the late 1980s and introduced to the market by Stratasys beginning in 1990. The technology is now gaining ground among enthusiasts building printers with open source, as well as commercial companies, due to the expiration of the original patent.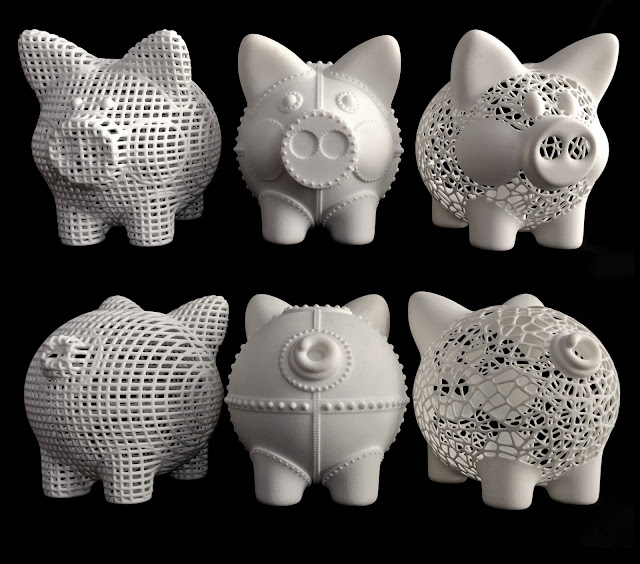 In turn, the widespread adoption of the technology has led to a significant reduction in the prices of 3D printers using this production method.
Process
Stratasys' latest Connex3 multicolor FDM printer
The production cycle begins with a 3D digital model. The STL model is divided into layers and oriented in the most appropriate way for printing. If necessary, the supporting structures needed to print overhanging elements are generated. Some devices allow the use of different materials during one production run. For example, it is possible to print a model from one material with supports printed from another, easily soluble material, which makes it easy to remove support structures after the printing process is completed. Alternatively, it is possible to print different colors of the same type of plastic while creating a single model.
An article, or "model", is made by extrusion ("extrusion") and the application of microdroplets of molten thermoplastic to form successive layers that solidify immediately after extrusion.
The plastic thread is unwound from the spool and fed into the extruder, a device equipped with a mechanical drive for feeding the thread, a heating element for melting the material and a nozzle through which the extrusion is carried out directly. The heating element serves to heat the nozzle, which in turn melts the plastic filament and supplies the melted material to the model being built. Typically, the top of the nozzle is instead cooled by a fan to create the sharp temperature gradient needed to ensure smooth material flow.
Diagram of a typical FDM printer
The extruder moves in the horizontal and vertical planes under the control of algorithms similar to those used in CNC machines. The nozzle moves along a trajectory set by a computer-aided design system (“CAD” or “CAD” in English terminology). The model is built layer by layer, from bottom to top. Typically, the extruder (also called the "print head") is driven by step motors or servos. The most popular coordinate system used in FDM is the Cartesian coordinate system, built on a rectangular 3D space with X, Y, and Z axes. An alternative is the cylindrical coordinate system used by so-called "delta robots".
Typical filament spools used by FDM and FFF printers
FDM technology is highly flexible but has certain limitations. Although overhanging structures can be created at small angles, large angles require the use of artificial supports, usually created during the printing process and detached from the model at the end of the process.
A variety of thermoplastics and composites are available as consumables, including ABS, PLA, polycarbonates, polyamides, polystyrene, lignin, and many more. As a rule, various materials provide a choice of balance between certain strength and temperature characteristics.
Application
Printrbot FFF Extruder
Fused Deposition Modeling (FDM) is used for rapid prototyping and rapid production. Rapid prototyping facilitates re-testing with consistent, step-by-step object upgrades.