Velleman k8200 3d printer software
K8200 downloads – Vertex 3D Printers -
K8200 downloads – Vertex 3D Printers -Repetier software
Before you can start 3D printing, you will need a 3D design of something that you want to 3D print and you will need to ‘prep’ it for your Vertex Delta. To ‘prep’ this design, you will need a custom software called Repetier. Just download our customized Repetier Host, install it and start printing, it is easy as that. No more troubles with driver installation or fiddling with settings and config files. This leaves more time for creativity. Try it now!
VERSION 2.0.5
- Custom Repetier host for Velleman K8200 3D printer – Download
Manual
- Short user manual: important safety instructions / getting started – Download
- Assembly manual: explains how to build the kit and how to use the printer – Download
- CNC milling machine transformation manual: how to transform your 3D printer into a CNC milling machine – Download
Latest Firmware
- K8200 firmware Marlin V1: version 1 of the k8200 firmware called Marlin based on Sprinter and grbl Reprap firmware.
Copyright (C) 2011 Camiel Gubbels / Erik van der Zalm – Download
- K8200 firmware Marlin V2: version 2 of the k8200 firmware called Marlin based on Sprinter and grbl Reprap firmware. Copyright (C) 2011 Camiel Gubbels / Erik van der Zalm.This version supports the VM8201 (LCD and SD card controller. – Download
- K8200 firmware K8200 V2.1.1: this version supports the K8204 Z AXIS UPGRADE ROD AND COUPLER FOR K8200 and the VM8201 LCD and SD card controller. DO NOT FORGET TO RESET YOUR EEPROM SETTINGS AFTER THE UPGRADE!. Copyright (C) 2011 Camiel Gubbels / Erik van der Zalm – Download
STL and GCODE files
- K8200 board cover: .STL 3D file for the board cover (needs to be sliced before you can print this file, see the manual how to do this). – Download
- K8200 board cover: .GCODE file for the board cover (can be printed directly with a K8200). – Download
- K8200 fannozzle: .STL 3D file for the fan nozzle (needs to be sliced before you can print this file, see the manual how to do this).
 – Download
 - K8200 fannozle: .GCODE file for the fan nozzle (can be printed directly with a K8200). – Download
- VM8201 enclosure files: contains all the .STL files for the VM8201 module enclosure. – Download
- Glass plate clip: use these clips (4x) to clamp the GP8200 glassplate tot the printing bed. – Download
Slic3r configuration
- K8200 PLA standard: slic3r configuration file for standard PLA prints. Consult the K8200 manual on how to use this file. This file is only compatible with Repetier 0.84 and Slic3r 0.9.8. – Download
- K8200 PLA standard new: slic3r configuration file for standard PLA prints. Consult the K8200 manual on how to use this file. This file is only compatible with Repetier 0.90 and Slic3r 0.9.10b. – Download
- K8200 ABS standard new: Slic3r configuration file for standard ABS prints. Consult the K8200 manual on how to use this file. This file is only compatible with Repetier 0.90 and Slic3r 0.9.10b. Make sure to read the FAQ’s on how to get good result printing with ABS! – Download
0.
 35mm Direct drive extruder for K8200 3D printer (K8203)
- Firmware K8200 V2.2: this version supports the K8203 DIRECT DRIVE EXTRUDER and the VM8201 LCD and SD card controller. DO NOT FORGET TO RESET YOUR EEPROM SETTINGS AFTER THE UPGRADE!. Copyright (C) 2011 Camiel Gubbels / Erik van der Zalm. – Download
- Firmware K8200 V2.3: this version supports the K8203 DIRECT DRIVE EXTRUDER and the K8204 Z AXIS UPGRADE ROD AND COUPLER FOR K8200 and the VM8201 LCD and SD card controller. DO NOT FORGET TO RESET YOUR EEPROM SETTINGS AFTER THE UPGRADE! (C)2011 C. Gubbels E. van der Zalm – Download
- K8203 PLA standard: slic3r configuration file for standard PLA prints. Consult the K8200 manual on how to use this file. This file is only compatible with Repetier 0.90 and Slic3r 0.9.10b. – Download
Stand-alone controller for K8200 3D printer (VM8201)
- assembly instructions: manual explaining how to mount the module. – Download
- VM8201 enclosure files: contains all the .
 STL files for the VM8201 module enclosure. – Download
K8200 3D Printer head LED ring (VM8202)
- Assembly instructions: manual explaining how to mount the module. – Download
We use cookies to ensure that we give you the best experience on our website. If you continue to use this site we will assume that ypu are happy with it. Read more
Velleman K8200 3D Printer Kit. Printer Setup and Callibration
By Ben Lopez
Description: Legacy Velleman K8200 3D Printer
Assembly Time: 32 hours
Skill Level: Intermediate
Recommended Items:
Filament
Precision Blade
Screwdriver
Washer
Last month, I wrote about the challenges and lessons I learned from Building the Velleman K8200 3D Printer Kit. As it turns out, the setup and calibration was way more fun than the build.
The printer can be a bit rough around the edges, but by the time you have everything tuned the way you like it, you will have learned a great deal about how your machine works. The Velleman K8200 3D printer has very customizable settings, with the trade off that they are not all changeable within the provided easy-to-use interface.
3D printers take a 3D model, usually an .stl file, and use "slicer" software to divide the model into printable layers. From there, a g-code is constructed to command the printer to execute the geometric movements (x, y, z axis) necessary to print the part. The supported software, Repetier, is a nice, free interface that handles the g-code for you. Repetier also handles the slicer software pretty well within the same interface, making the process relatively user-friendly.
The kit's instruction manual will give you the correct settings to use for your first print, which are not default settings. All of the other settings must be changed in a separate file meant to specify your printing material. This file is essentially a text file that the printer will use for parameters such as the fill density, infill shapes and number of shell layers.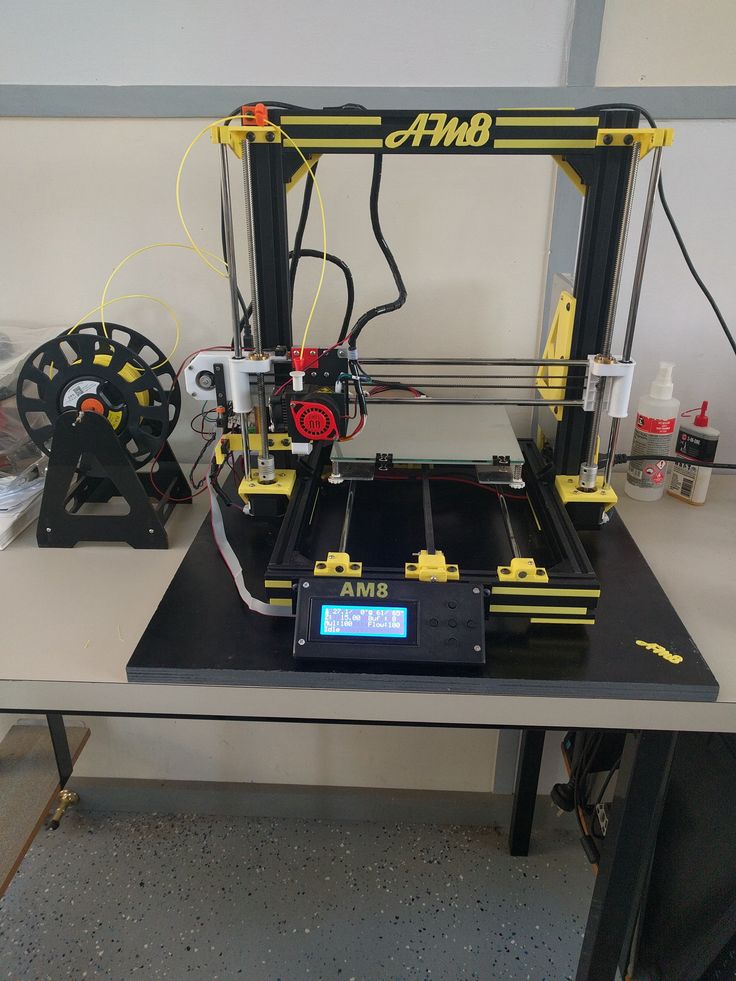
You start the calibration by tuning the motors to a standard voltage – but there was a step left out of the instructions about when to plug in the power cord. Remember to plug in the power cord just before tuning the motors, because you will not get correct readings or enough power from just the USB connection.
The Troublesome Switch
I began to calibrate the printer bed and all of its "home" positions on the x-, y- and z-axis when I encountered a small clearance issue. The black home switch pictured was blocking the extruder assembly from reaching the bottom of its range and activating the switch.
An easy fix with a washer
When I hit the z-axis home button in Repetier, the assembly ran into the switch housing and caused a very loud vibration as the motor kept trying to turn but could not. While I tried to figure out what was going on, a couple of co-workers walked into the room to see if I had broken something. I used a washer to resolve this clearance issue and was back in business. Aside from embarrassing myself, there were no other problems caused by the clearance issue.
The next step before printing your first part is to feed your filament through the extruder. I recommend purchasing your own filament as you will likely want to start testing out what your printer can do and maybe try out more than one color. Once you get your full-sized spool primed as per the instructions, you are ready to print!
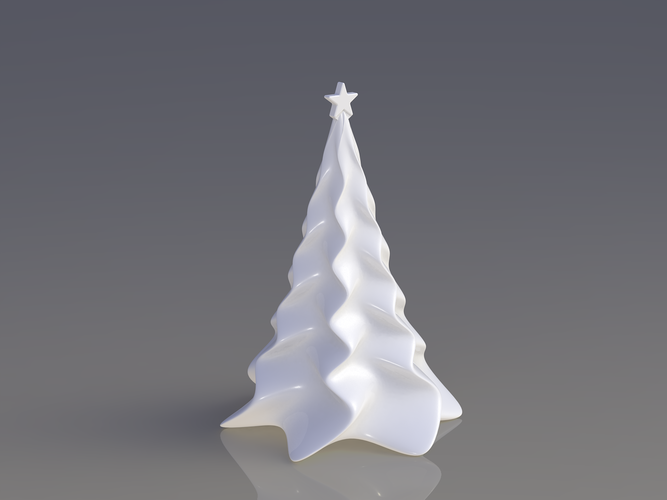
The first two prints!
Your first print will let you know what to adjust in your printer profile text file. In our case, we could tell we needed to increase the filament retraction because PLA filament was unintentionally dripping when the extruder was moving between sections where it actually needed to lay down material (as can be seen between the Christmas tree branches). The extra material on the first print was cleaned up a bit with a precision blade.
 Each of these tree halves were printed in about 20 minutes and without bugging any of my co-workers in the other room. This printer is surprisingly quiet, even with the fan turned on all the way.
 Now that you know what to expect from the build, calibration and printing.
Ben earned his bachelor's degree in Mechanical Engineering from UC San Diego, where he learned about robotics andelectric vehicles. His interests include innovative technology, music, tools and anything automotive.
Top 20 Free 3D Printing & 3D Printing Software
Looking for 3D printing software? We've rounded up the top 20 software tools for beginners and professionals alike. Most slicers are free.
What is a slicer? This is a program for preparing a digital model for printing. Models for 3D printing are usually distributed in STL files. To turn an STL file into G-code (a language that a 3D printer understands), a slicer program is required. It is called a slicer because it cuts (to slice - English) a 3D model into many flat two-dimensional layers, from which a 3D printer will add a physical object.
Which slicer should I choose? In this article, we will tell you which slicer is best for 3D printing for each stage of your work. Which one is better for preparing a 3D model for printing? But what if you need to create a 3D model from scratch? And if you are only taking the first steps in 3D?
Don't be afraid: we've answered all of these questions, including the required skill level for each program and where you can download it. The great thing is that most of these programs are completely free and open source.
- Cura
- CraftWare
- 123D Catch
- 3D Slash
- TinkerCAD
- 3DTin
- Sculptris
- ViewSTL
- Netfabb Basic
- Repetier
- FreeCAD
- SketchUp
- 3D Tool
- Meshfix
- Simplify3D
- Slic3r
- Blender
- MeshLab
- Meshmixer
- OctoPrint
#1: Cura
For beginners who need a slicer to prepare STL files for 3D printing
Cura is the default slicer software for all Ultimaker 3D printers, but can be used with most others , including RepRap, Makerbot, Printrbot, Lulzbot and Witbox. The program is completely open source, its capabilities can be extended using plugins.
This program is very easy to use and allows you to manage the most important 3D printing settings through a clear interface. Start in Basic mode to quickly get up to speed and change print quality settings. If finer control is required, switch to Expert mode.
Cura can also be used to directly control the printer, but then the printer and computer must be connected to each other.
Download: Cura
Price: Free
Systems: PC, Mac, Linux
#2: CraftWare
3D printers by the Hungarian startup CraftUnique to support their CraftBot crowdfunding machine. However, the program works with other printers.
Like Cura, CraftWare allows you to switch from "Easy" to "Expert" mode, depending on how confident you feel. It's a colorful app that features a visual G-code visualization with each function represented by a different color. But the most outstanding feature is the individual support service.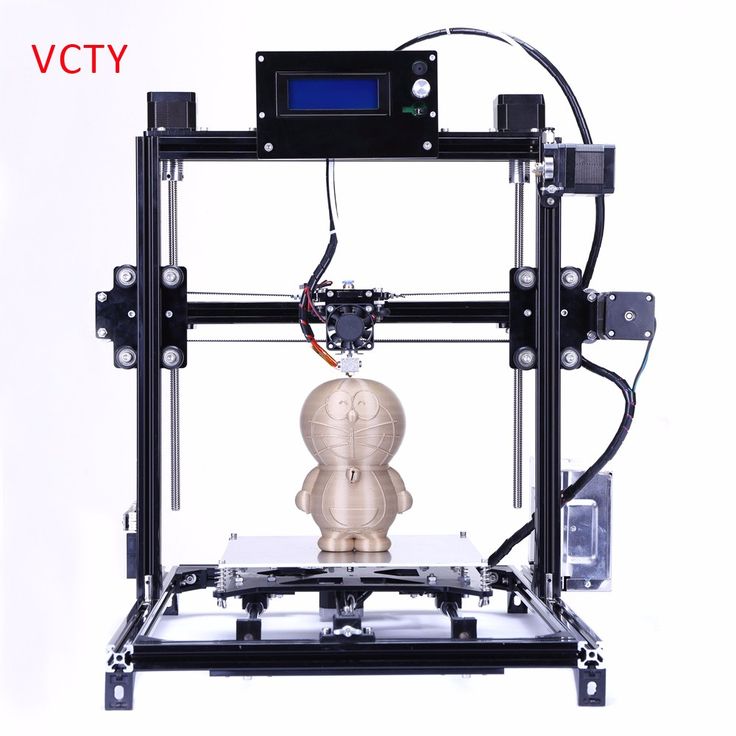 As far as we know, only the paid program Simplify3D has this.
Please note, however, that this program is still in beta, so bugs may occur.
Download: CraftWare
Price: Free
Systems: PC, Mac
#3: 123D Catch
-systems, smartphones and tablets, which allows you to convert images of objects into a 3D model. Pictures can be taken with a smartphone/tablet or digital camera.
You need many photos of an object from different angles - the more the better - after which they will be compiled into a 3D model.
123D Catch is more of a fun app than a professional 3D printing tool, but after some tambourine dancing, you can get good results, especially when paired with an STL editor like MeshLab or Meshmixer.
Price: Free
Systems: PC, Android, iOS, Windows Phone
#4: 3D Slash
and surprisingly simple, and refreshingly new. With 3D Slash, you can design 3D models using your dice skills.
You can start with a large block and, like a virtual sculptor, remove small cups from it with tools such as a hammer or drill, or start from empty space and build a model from cubes and other shapes. You can paint with flowers or use template pictures.
Other features worth mentioning are tools for creating logos and 3D text. The Logo Wizard imports an image and creates a 3D model, while the Text Wizard allows you to enter and format text, and then turn it into 3D.
Recommended!
Download: 3dslash.net
Price: Free
Systems: PC, Mac, Linux, Browser
#5: TinkerCAD
- A computer-aided design (CAD) system for 3D printing, which is a good starting point for beginners. Since its capabilities are limited compared to Blender, FreeCAD and SketchUp, many users switch to more powerful tools after some time.
As in 3D Slash, here you can build models from basic shapes. At the same time, unlike 3D Slash, TinkerCAD allows you to create vector shapes in 2D and convert them into three-dimensional models.
Come in: Autodesk TinkerCAD
Price: Free
Systems: Browser
#6: 3DTin
For beginners who want to create 3D printable models
another easy and intuitive online tool choice for beginners in 3D modeling. All you need is a Chrome or Firefox browser with WebGL enabled.
Choose from a huge library of 3D shapes and add them to your sketch. All sketches are stored in the cloud, access to them is free if you honor the Creative Commons license. Everything can be exported to STL or OBJ formats.
Enter: 3DTin
Price: Free
Systems: Browser
#7: Sculptris
For beginners who want to create 3D printable models
clay. This is a fantastic 3D modeling program if figurines are your main task. For example, you can make a bust of your favorite video game or comic book character. Sculptris is completely free and bills itself as a stepping stone to the more complex (and expensive) ZBrush tool.
Download: Pixologic Sculptris
Price: Free
Systems: PC, Mac
#8: ViewSTL
For beginners who want to view STL files
ViewSTL is the easiest way to view STL files . Simply open a web page and drag the STL onto the dotted box.
The STL online viewer allows you to display the model in one of three views: flat shading (for a quick view), smooth shading (for a high-quality image), and wireframe.
Enter: ViewSTL
Price: Free
Systems: Browser
#9: Netfabb Basic
some nice features that allow you to analyze, "repair" and edit STL files before moving on to the model cutting stage.
A good choice if you need more than just a slicer and want to be able to quickly fix STL files without having to learn programs like MeshLab or Meshmixer.
Don't let the 'Basic' in the title fool you, Netfabb Basic is actually a very powerful 3D printing tool. It's "basic" only in the sense that it doesn't cost €1,500 like Netfabb Professional!
Download: netfabb. de
de
Price: Free
Systems: PC, Mac, Linux
No. 10: Repetier
For advanced to prepare STL files for 3D printing
9002 the next level of 3D printer slicer software, but if you want to stay open source, you should look into Repetier. It is the great grandfather of 3D printing software and a favorite of the RepRap community.To date, the program is moving by leaps and bounds from the level for beginners to advanced users. Packaged in an all-in-one configuration, it supports up to 16 extruders, multi-slicing via plug-ins, and virtually every fusing 3D printer on the market. Get ready to tinker!
What's more, Repetier Host works remotely via Repetier Server, so that the 3D printer can be controlled via a browser, tablet or smartphone.
Download: Repetier
Price: Free
Systems: PC, Mac, Linux
#11: FreeCAD
The program is a great option for developing your design skills. More technically, this parametric 3D modeling program allows you to easily change the project by rolling back through the history of the model and editing the parameters.
Download: freecadweb.org
Price: Free
Systems: PC, Mac, Linux
#12: SketchUp
For beginners who want to create 3D printable models
SketchUp is the perfect combination of simplicity and the perfect combination functionality, with a user-friendly interface and a relatively flat learning curve (i.e., as experience grows with the time spent), the ideal program for developing three-dimensional models.
The Make SketchUp version is free and will include everything you need for 3D modeling if you also download and install the free STL exporter. There is also a professional edition for architects, interior designers and engineers.
Download: sketchup.com
Price: Free (SketchUp Make), $695 (SketchUp Pro)
Systems: PC, Mac, Linux
#13: 3D-Tool Free Viewer
view and validate STL files
3D-Tool Free Viewer is a sophisticated tool that, among other things, allows you to check the structural integrity and printability of your file.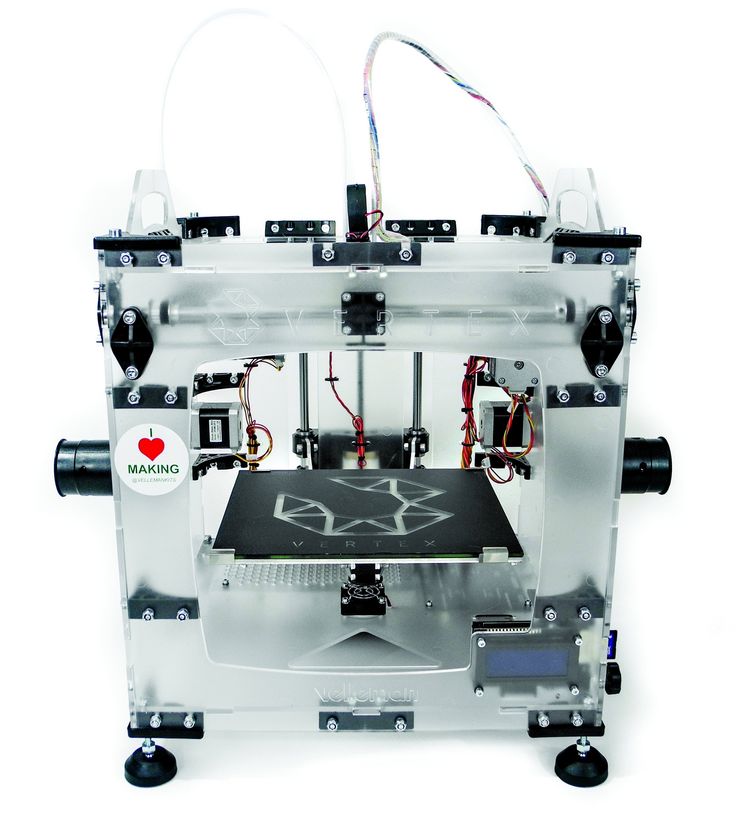 With the Cross-Section function, for example, you can look at the model from the inside and check the wall thickness. Very useful if you want to check your STL file for killer errors before printing.
Download: 3D-Tool
Price: Free
Systems: PC
#14: Meshfix
your model for errors.
Price: Free
Systems: Browser
#15: Simplify3D
For professionals to prepare STL files for 3D printing print. A flexible algorithm checks the model for problems, fixes them, shows a preview of the printing process (ideal for identifying potential problems), and then slices it.
This slicer offers the best infill pattern options in the competition. For models that require supports, Simplify3D will create the appropriate structures on its own and give you full control over their placement. For printers with a dual extruder, when printing with different materials, the Dual Extrusion wizard will help, as a result of which, for example, it will be easier to remove the dissolving filament.
Simplify3D supports 90% of today's commercially available desktop 3D printers and is compatible with Marlin, Sprinter, Repetier, XYZprinting, FlashForge, Sailfish and MakerBot firmware. Simplify3D can also be used to directly control the printer, but then the printer and computer must be connected to each other.
Download: simplify3d.com
Price: $149
Systems: PC, Mac, Linux
#16: Slic3r
source code, which has a reputation as a carrier of super new functionality, which you will not find anywhere else. The current version of the program is able to show the model from multiple angles, so that the user gets a better preview experience.
There's also an incredible 3D honeycomb infill, the first of its kind that can extend over multiple layers rather than repeating itself like a stamp. This significantly increases the strength of the internal filling of the model and the final printout.
Another option is direct integration with Octoprint. Once the files on the user's desktop are sliced, they can be directly uploaded to Octoprint with one click.
Download: Slic3r
Price: Free
Systems: PC, Mac, Linux
#17: Blender
For professionals who want to create 3D printable models
Blender is a popular computer-aided design (CAD) system with a steep learning curve. Not at all the best choice for beginners, but what you need if you are quite experienced and need something more complex for modeling and printing.
In short, Blender is one of the most powerful tools out there. Its community is always ready to help, there are a lot of educational materials. It's also open source, so enthusiasts often write extensions to make it even better and more powerful.
Download: blender.org
Price: Free
Systems: PC, Mac, Linux
#18: MeshLab
For professionals to prepare STL files for 3D printing
MeshLab - advanced editor. It allows you to remove parts of a 3D model, merge two models into one, patch holes. If you need a program to modify models for 3D printing or some kind of "repair" work, MeshLab is the right choice.
Price: Free
Systems: PC, Mac, Linux
#19: Meshmixer
For professionals to prepare STL files for 3D printing files. It's especially good for identifying potential problems and fixing them automatically. For example, it will show paper-thin walls that can lead to problems with 3D printing. Meshmixer is part of the Autodesk family of 3D printer software, so it should work well with tools like TinkerCAD.
Price: Free
Systems: PC, Mac
#20: OctoPrint
start, pause or interrupt 3D print jobs. Combined with Wi-Fi capable devices, it makes for a great monitor for remotely monitoring the 3D printing process.
Octoprint understands the G-codes of almost all 3D printers and slicers and includes a gCodeVisualizer to visualize this code before or during printing.
If you want to work away from your 3D printer and control it remotely, Octoprint is the best you can find.
Download: octoprint.org
Price: Free
Systems: PC, Mac, Linux
Source
- Authors
- Executives
- Job files
- Award documents
Kuznetsov E.K. 1
1
Raikova S.G. 1Guseva V.A. 1
1
The author of the work was awarded the diploma of the winner of the III degree
The text of the work is placed without images and formulas.
The full version of the work is available in the "Job Files" tab in PDF format
INTRODUCTION
Now our country, like the whole world, is entering the period of the sixth technological order. In the sixth technological order, artificial intelligence systems, global information networks, etc. will develop. During this period, complex products will be created using flexible robotization and production automation technologies (digital production). Under these conditions, the use of traditional modeling methods loses economic feasibility, there is a modernization of known and the creation of new technological processes. Preference will be given to mathematical modeling, which, already in the process of development, will allow modeling not only manufacturing, but also all stages of operation up to disposal.
In this technological mode, production will take place in the so-called digital factories that produce small-scale products and are able to create products for specific requirements, up to single copies.
In developed countries, they already produce products at similar enterprises, exchanging data with each other electronically. Employees in one place in Russia or the world work, turning their ideas into design documentation, for example, into 3D models, and send information by e-mail from the laboratory to such a digital factory, which allows them to manufacture the necessary products.
Thus, the concept of a digital factory allows you to create the required products where and when they are needed. Placing a digital factory near the consumer will optimize logistics and reduce resource and time costs for the production of products in various industries.
Great hopes are placed on additive technologies for obtaining parts for machines and mechanisms. For the manufacture of parts from thermoplastic low-melting materials and compositions, this method has proven its progressiveness and economic feasibility.
However, for materials with a high melting point, it is necessary to consider the feasibility of using additive technologies for manufacturing parts from metals and ceramics. IN 1 /
The following parameters are listed as disadvantages:
Low productivity of the process 1 ... 1.5 cm3/h.
The maximum dimensions of manufactured parts, as a rule, do not exceed 300 x 350 x 300 mm.
High surface roughness Ra 6-12 µm (without post-processing).
Large internal stresses in manufactured parts (without the use of post-processing processes).
At the same time, additive technologies can be applied to traditional technologies for manufacturing parts from metals and ceramics, for example, for making models for investment casting, slip casting, etc.
2.GOALS AND OBJECTIVES OF THE WORK
1. The study of modern technologies in terms of the application of digital technologies
2. The study of traditional technologies on the example of investment casting (burned out) models.
3. Learning how to create a 3D model, devices and principles of operation of a 3D scanner and 3D printer
4. Creation of a casting using 3D technologies.
3. TRADITIONAL CASTING TECHNOLOGIES
Additive technologies do not always have an advantage over traditional technologies in terms of productivity, economics, and part properties.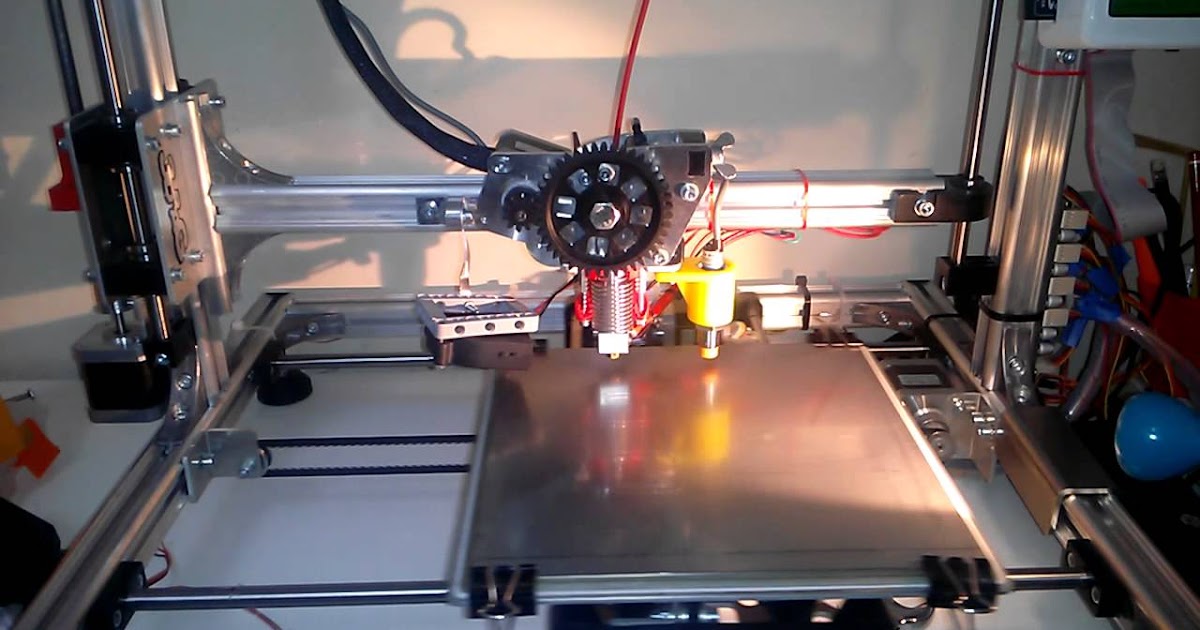 At the same time, additive technologies are necessary to optimize technology in various branches of technology, in particular for foundry production.
APPENDIX 1 shows a diagram of the traditional casting technology.
One of the most widely used and most accurate casting methods is investment casting.
In the technology of casting metals and alloys by burnt/smelted models, a model of the future product is first made from the appropriate material. As a material for the manufacture of investment models, wax or its mixtures with paraffin, stearin are used, and for burnt models, materials that burn in air with little smoke and ash are used.
Burnt-out/lost-wax casting is used to cast both artistic products and machine parts. The master model is made both by hand carving and on processing machines. This model is poured into silicone. After polymerization, the rubber part is cut and the master model is removed from it. Wax is poured into the resulting form.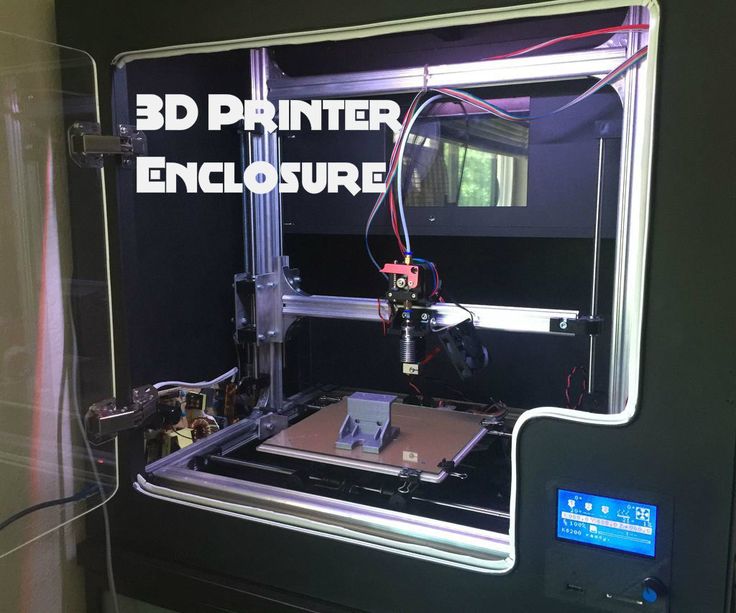 The extracted stencils are used in the manufacture of investment casting flasks. Waxes are placed in the body of the flask and filled with plaster. In the process of subsequent heating, the moisture from the plaster evaporates and the burnt-out model is removed. Then molten metal is poured into the formed cavity.
To obtain accurate digital models of complex objects, which can later be used in casting, 3d design or 3d scanning is used.
In order for the printer to print, you need to load a 3D model into a special program on a computer that controls a 3D printer. A 3D model is a sample of what we want to print on a 3D printer, created in a special program, for example, AutoCad in the "stl" format.
3D scanning is also used to obtain digital models in various branches of technology and the national economy: cultural heritage objects, products in medical prosthetics, digital archiving, and so on can be digitized.
A 3D printer perceives information encoded in a special format called G-code. This program prescribes the actions that the 3D printer should do when it should do them, for example, the speed of the extruder, the temperature of the extruder, and other parameters.
To facilitate printer management, slicer programs have been created (from the English to slice - to cut). These programs divide the loaded model into layers and describe the procedure for creating each layer in the G-Code language. The most popular slicer programs are Cura and Repetier.
MAIN PART
1. EXPERIMENTAL
To obtain metal castings in the manufacture of prototypes, an improvement in casting technology is possible by eliminating the operation of manufacturing a silicone mold for waxes or the waxes themselves.
If a digital model is developed in the "stl" format (or the master model is subjected to laser scanning) and using 3D printing from a polylactide (PLA) polymer that burns almost without ash, a burn-out model is made, then this model can be used for pouring into a plaster mold.
At the same time, there is no need to change something in the metal casting technology itself, you can use standard, already existing casting equipment.
To test the feasibility of this option, I conducted an oven annealing of model wax and PLA material at a temperature of 700C. Subsequent weighing showed that the weight of the ash residue of both materials is below the sensitivity of the balance (0.01 g).
1.1. 3D DESIGN, 3D SCAN AND 3D PRINT
The models were created in the AutoCad program in the “.stl” format.
In my experiments, I decided to limit myself to simple models. I decided to print the medallion and the cuboctahedron. For an experimental evaluation of the possibilities of laser scanning, I made a model of a cuboctahedron, shown in APPENDIX 2
.
The model for the medallion was created in the AutoCad program, the model for the cuboctahedron was also obtained by 3D scanning.
First, I created an electronic 3D model of the medallion in AutoCad and saved it in the “.stl” format (APPENDIX 3)
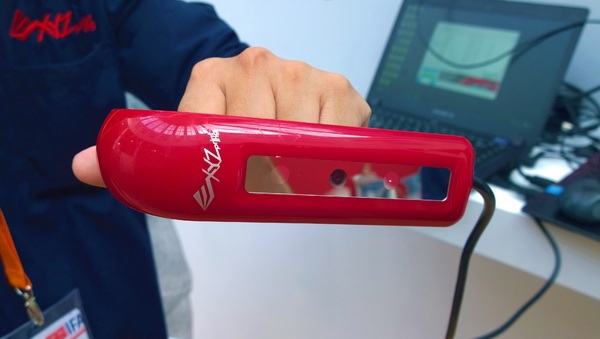
For laser scanning, a 3D scanner DAVID starter-kit2 was used (APPENDIX 4).
Consider the scanning process. The scanning scheme and the programming environment are given in APPENDIX 5. When working with the scanner, we first perform calibration. To do this, we fix the camera motionless relative to the calibration panel so that it is at the level of the calibration grid.
The object is placed in the corner of the calibration panel. We turn on the laser and direct the beam into the corner between the calibration sheets. A broken line appears on the monitor, which indicates that the program is ready to work and analyzes the image coming from the camera.
We move the laser beam up and down, form a scan of the given position of the object and save the scan result to a file. To create a model, you need to make several scans, since the scans must necessarily overlap each other so that it is easier for the program to analyze them.
Using the special software of the DAVID scanner, a spatial mathematical model of the object's surfaces is constructed - a 3D model of the object from scans of individual positions by joining the scans and their subsequent merging.
At the next stage, a reduced copy was obtained using a 3D printer - a burnt-out model made of PLA material. At the same time, it is possible to print the required number of models.
In this work, I used the Cura program to create the G-Code, and Repetier to program the 3D printer.
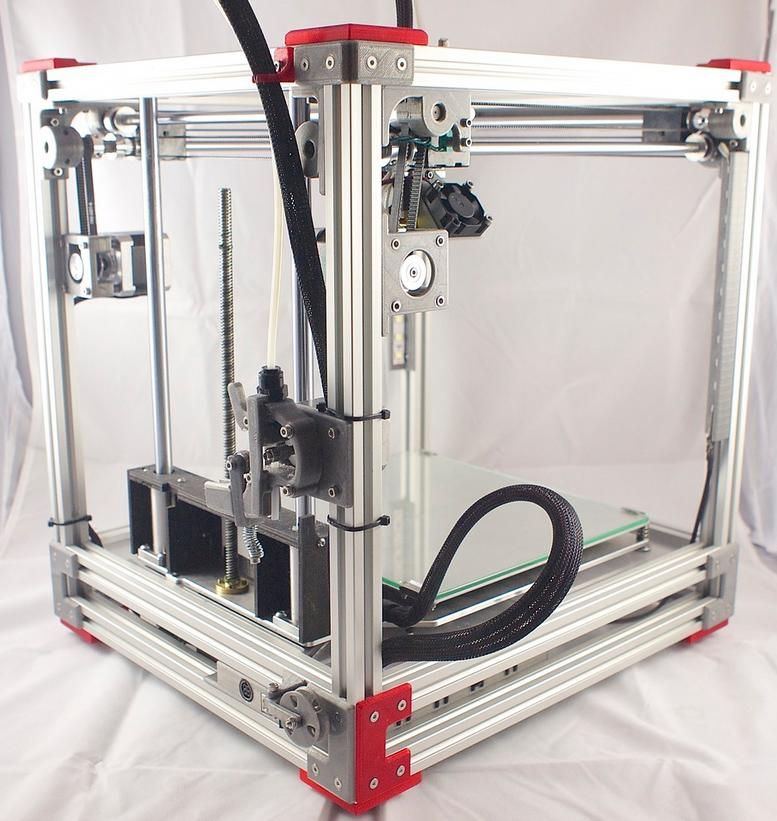
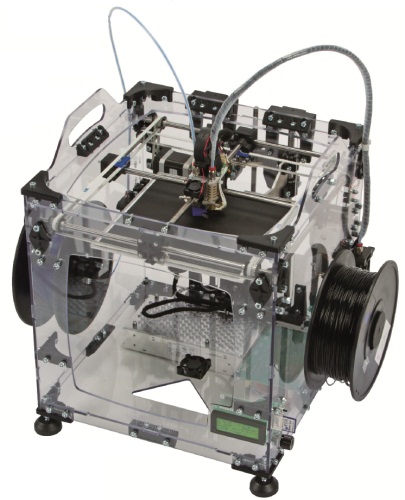
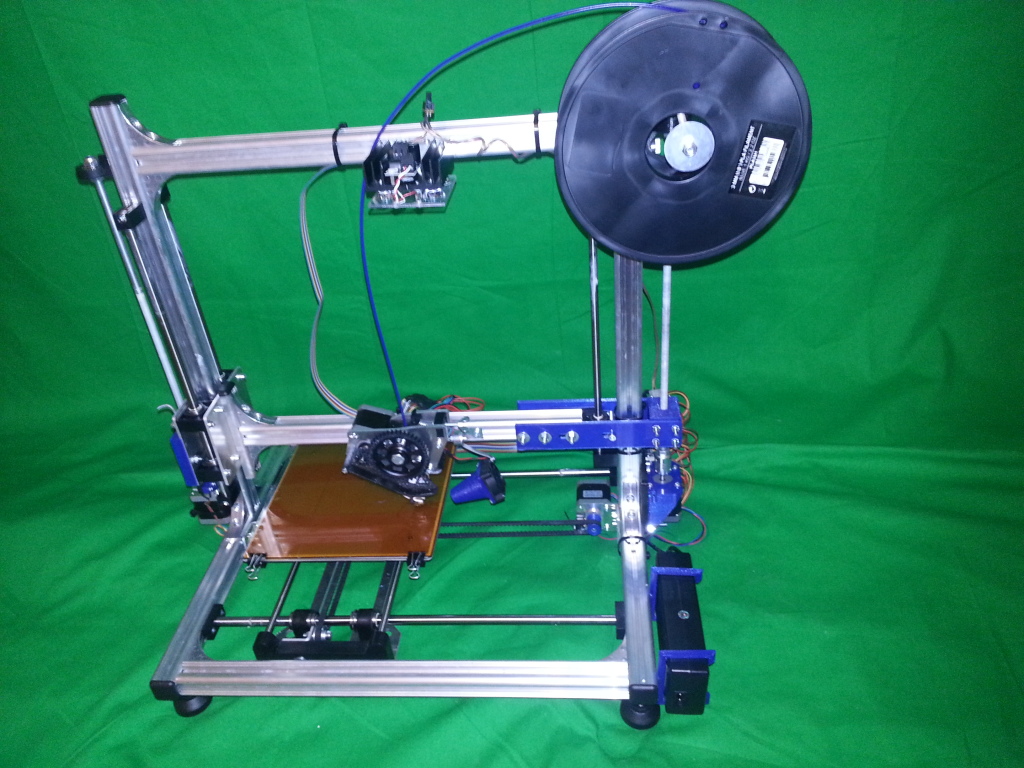
For printing, I used a Velleman K-8200 3D printer assembled by me from a special designer. (APPENDIX 6) This printer uses the layer-by-layer extrusion method in its work. When printing with this method, the raw material (plastic rod) enters the extruder, where it is melted, and then squeezed out of the extruder and superimposed on the part layer by layer. When printing with this method, you need to consider some nuances:
1. When starting the printer, it is necessary to draw several lines not related to the model to remove the plastic remaining in the extruder and warm up the extruder.
2. For better bonding of the lower layers of the part with the surface, it is necessary to heat the printing table. The temperature should provide softening of the plastic, but at the same time not bring it to a temperature at which the material passes into a liquid state.
Also, it is necessary to select the optimal line thickness, because. if the line thickness is too large, the quality of the part decreases, due to the fact that the layers begin to spread and stick together poorly, because they do not have time to cool down, and when the next layer is applied, the previous layer is smeared with the “nose” of the extruder, and if the line thickness is too small, the layers do not stick together as they completely harden before the next layer is applied, and this is why the line spreads again.
1.2. PREPARATION OF THE MOLD AND CASTING
First, I assembled the model with the waxing of the casting cup by wax soldering and placed it in the flask body, in which they were filled (molded) with a special SatinCast 20 plaster mass. pressure tin.
The appearance of the resulting casting is presented in APPENDIX 7.
1.3 CONCLUSIONS ON THE EXPERIMENTAL PART
Thus, as a result of the work carried out, the possibility of improving the casting technology was shown by using a burn-out model from PLA, obtained by digital technologies - laser scanning and 3D printing.
At the same time, there is no need to change the traditional metal casting technology, that is, standard casting equipment can be used.
At the same time, a comparison of the shape, surface quality of the original master model and the one printed on a 3D printer showed that the sharp corners of the model being burned out were smoothed out, the gluing lines turned into small rollers, and the surface acquired a relief. This indicates that the hardware and software used affect the quality of the burnt model. In cases where it is required to transfer small parts, it is necessary to use equipment and software with the appropriate characteristics.
Comparison of the shape, surface quality of the burnt model and the cast part showed that the casting repeats all the features of the surface of the part poured with gypsum in the flask. This indicates that the equipment and materials used for the preparation of the flask and casting provide a high-quality transfer of the shape and quality of the surface of the burnt model.
CONCLUSION
As a result of the work done, I was able to:
1. To study modern production technologies from the point of view of digital production.
2. To study the traditional technology of investment casting (burned out) models.
3. Study the device and principle of operation of a 3D scanner and 3D printer
4. Reveal the features of digital production of individual master models for casting.
5. Check the possibility of using PLA as the material of the burnt master model.
6. Create burnout models for casting using 3D technologies: 3D scanning and 3D printing
7. Cast a metal sample according to the burnt model from PLA.
8. To identify the features of the use of individual master models for casting, obtained by digital production methods.
In the future, I plan to continue to improve my skills in 3D programming, scanning, printing and create more complex models, including those applicable in everyday life.
BIBLIOGRAPHY
1. Nazarov A. P. Development of a technological process for the manufacture of complex profile parts from heat-resistant cobalt alloy by selective laser melting. Dis. ... cand. tech. Sciences: 05.02.07. FSBEI HPE Moscow State Technological University "Stankin", 2013.
:quality(80)/images.vogel.de/vogelonline/bdb/1696600/1696673/original.jpg)