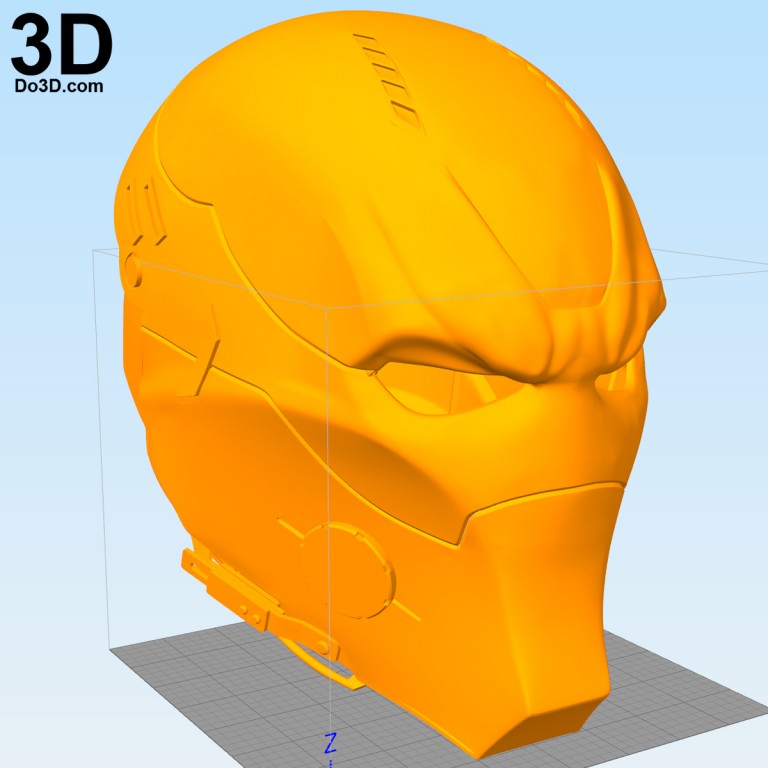
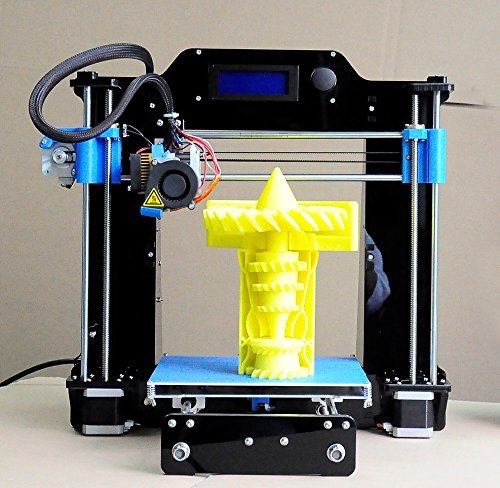
3D printer inside
Should I Put My 3D Printer in My Bedroom? – 3D Printerly
Anyone using a 3D printer wonders to themselves “where should I put it?” and whether they should put it in their bedroom. It seems like the ideal area because it’s easy to keep watch. There are however some things to keep in mind when thinking about putting it in your bedroom which I will explain in this article.
Should you put a 3D printer in your bedroom? No, it’s not advised to put a 3D printer in your bedroom, unless you have a very good ventilation system with a HEPA filter. Your printer should be in an enclosed chamber, so particles don’t spread out easily.
There are a few important things to keep in mind when deciding where to put your 3D printer. In this article, I’ve pointed out red flags to look out for and other common issues that you should know about.
If you are interested in seeing some of the best tools and accessories for your 3D printers, you can find them easily by clicking here (Amazon).
Factors for Good 3D Printer Placement
The ideal place for where to put your printer is where you’ll get the best quality prints. There are a number of factors that can affect the quality of the final print depending on where your printer is placed:
- Temperature
- Humidity
- Sunlight
- Drafts
Temperature
The average temperature of the room you are printing in can have an effect on the quality of a print. You can find the specs of the required ambient temperature of your printer as many will differ.
If your 3D printer finds itself in a cold environment, the difference in the temperature it needs to adequately print can start to increase warping, and cause prints to become loose on the print bed before it finishes.
Ideally, you want your room temperature high as well as constant. A good way to tackle this would be to have an enclosure around your printer to retain the heat necessary for a good quality print.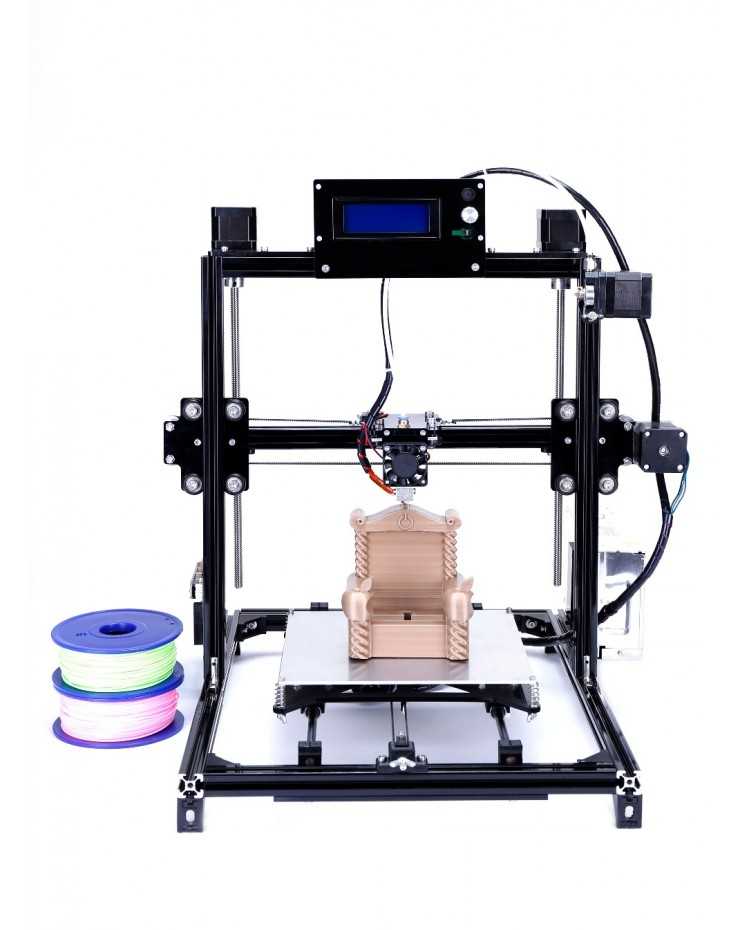
If you want to take an extra step, get yourself an enclosure. A great one is the Creality Fireproof Enclosure from Amazon. It’s a great long term purchase if you love 3D printing that should last you years and usually results in better prints.
A good idea to lower how much heating your bed has to do is to use a FYSETC Foam Insulation Mat . It has great thermal conductivity and greatly reduces heat and cooling loss of your heated bed.
If your printer is in a cold environment, I’ve heard of people using an electric radiator to keep the temperature high which should work out. The room temperature, if not at an ideal level and fluctuates a lot, can negatively affect the quality of a print and even make some fail.
Humidity
Is your bedroom humid? 3D printing doesn’t tend to work very well in high humidity. When we sleep we let off quite a lot of heat which can increase the humidity of your bedroom and can ruin your filament when it soaks up the moisture in the air.
A high level of humidity in a room where your printer is printing can leave filaments brittle and easily breakable. Now there is a big difference between which filaments will be affected by humidity.
I wrote an article exactly about Why PLA Gets Brittle & Snaps which has good information and prevention methods.
PLA and ABS don’t absorb moisture too quickly but PVA, nylon and PETG will. In order to combat the levels of humidity, a dehumidifier is a great solution as it’s ideal to have as low humidity as possible for your filaments.
A good choice is the Pro Breeze Dehumidifier which is cheap, effective for a small room and has great reviews on Amazon.
For the most part, proper filament storage will fight the effects of humidity but once a filament is saturated from humidity, a proper filament-drying procedure is necessary to ensure high quality printing.
You want a good storage container, with silica gel beads to ensure your filament stays dry and isn’t affected by humidity. Go with the IRIS Weathertight Storage Box (Clear) and WiseDry 5lbs Reusable Silica Gel Beads.
To measure your humidity levels inside the storage container you should use a hygrometer. You can use something like the ANTONKI Humidity Gauge (2-Pack) Indoor Thermometer from Amazon.
This is how people used to do it, but there are more efficient methods now, like using the eSUN Filament Vacuum Storage Kit with 10 Vacuum Bags from Amazon. It has reusable humidity indicators and a hand-pump to produce a vacuum sealed effect to reduce moisture.
If your filament already has absorbed moisture you can use a professional filament dryer to solve your issues from here on out.
I’d recommend getting the SUNLU Dry Box Filament Dehydrator from Amazon today. These started making an appearance and got people getting them really quickly because of how well they work.
You wouldn’t believe how many people are printing at lower quality because their filament has so much moisture built up, especially if you live in a humid environment.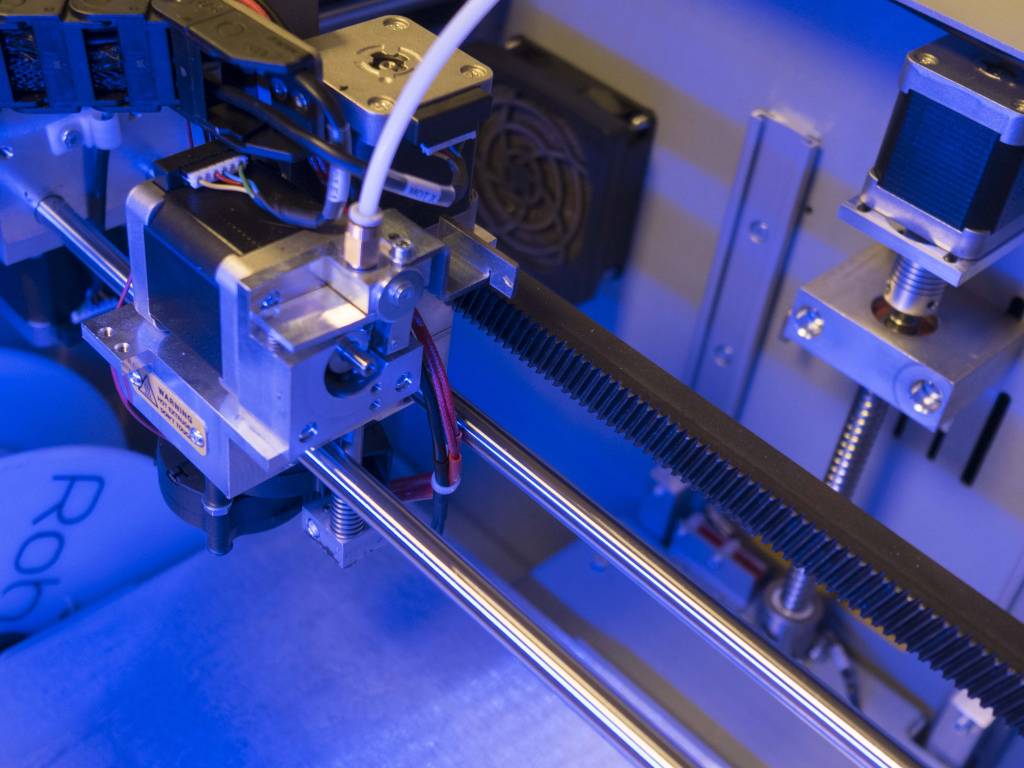
Sunlight
Sunlight can give the opposite effect from humidity, essentially over-drying out filaments and again, causing a low quality final print.
It can have the effect of making your end product brittle and easily breakable. Make sure the area where your printer is doesn’t have direct sunlight shining on it.
There are some 3D printers that have UV protection to combat against this like the ELEGOO Mars UV 3D Printer. It uses UV photocuring so it’s a necessary protection, but standard 3D printers like the Ender 3 won’t have this.
Drafts
When you have your printer in a bedroom, there can be issues with opening a window in relation to the quality of your prints. Draft from an open window can be a killer for your print quality so ensure your ventilation doesn’t create too much physical disturbance.
There can also be quite a lot of movement going on in a bedroom so you want to make sure your printer is safe during printing and storage to not get bumped in to.
So in brief, you want a room temperature which is fairly constant and not cold, a low level of humidity, out of direct sunlight and with minimal physical movement such as drafts and vibrations from movement.
Getting an enclosure is a great solution to prevent those drafts from affecting your 3D prints. A very popular enclosure that has increased the success rate of many 3D printer hobbyists is the Creality Fireproof & Dustproof Printer Enclosure from Amazon.
Common Complaints About 3D Printers in Bedrooms
There are things that people have in common when having their printer in the bedroom. One of these is the smell and fumes that the filaments give off while high temperatures are used.
PLA generally has a mild smell, depending on how sensitive your sense of smell is, but ABS can be a bit harsher and people do complain about feeling nauseous around it.
Some people will be more sensitive to fumes and respiratory problems than others so you have to take into account the health issues that can arise, especially over many hours in a day.
If you have asthma, the quality of air will be affected when 3D printing if you don’t have adequate ventilation systems put into place so this is something to keep in mind.
To the light sleepers out there, 3D printers do tend to make noise while in action so it may not be a viable option for you. 3D printers can be noisy and cause surfaces to vibrate, so having one printing in your bedroom while you try to sleep can cause issues.
Check out my popular post on How to Reduce Noise on Your 3D Printer.
Using an enclosure should minimize the sound your printer makes, as well as some kind of vibration absorbing pad underneath the printer.
The fan and the motors are the main culprits for the noise made by printers and printers do differ in just how much noise they make. There are many ways to reduce the noise made so it’s not the biggest factor, but does still matter.
Safety Issues with Where to Put your 3D Printer
Surroundings
3D printers get really hot so you wouldn’t want objects that hang over it.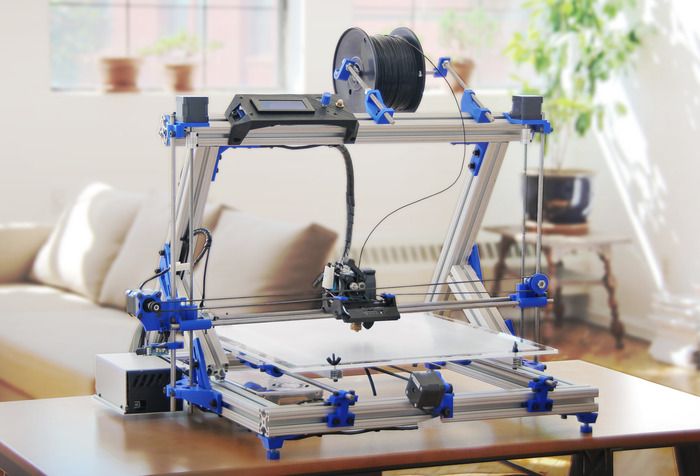 Things that are hung up such as paintings, clothing, curtains and pictures can be damaged by the heat of a 3D printer.
So, you want to make sure there aren’t things that can be damaged, which can be difficult especially in a small bedroom.
Another thing to take into account is whether you have a 3D printer kit or a manufactured 3D printer. These are two very different things in regard to fire safety.
When you buy a 3D printer kit, the manufacturer is technically yourself, so the packer of the kit wouldn’t be responsible to ensure the fire or electrical certification of the end product.
As 3D printers develop, the safety features improve so there is a much lower chance of fire risks. This doesn’t mean it’s impossible so having a smoke alarm is a good solution, but isn’t a preventative measure.
Make sure your 3D printer has the latest firmware as it is one of the main things that put safeguards in place.
Possible Fumes & Dangerous Chemicals?
PLA has been considered one of the safest filaments to print with, but since it’s a relatively new material the information on long-term health effects are lacking.
Even though PLA is known for it’s safety and lack of dangerous fumes, it still gives off particles which can still cause health issues.
Some people do complain of respiratory irritation and other related issues when printing with PLA. Even though the fumes aren’t considered dangerous, it doesn’t mean you’ll be able to easily tolerate them while you relax in your bedroom or sleep.
It’s advised, if printing with PLA, to try and use the lower temperature limit of around 200°C to minimize the fumes it gives off.
You probably don’t want to be printing with ABS if you put your printer in the bedroom due to the well-known harsh fumes it can release.
PLA is biodegradable and made from renewable starches, whereas many other filaments are made from less safe material such as ethylene, glycol and oil-based materials and usually require higher temperatures to print.
We deal with harmful fumes on a daily basis, but the difference is, we aren’t subjected to them for longer than a few minutes or in other cases a few hours.
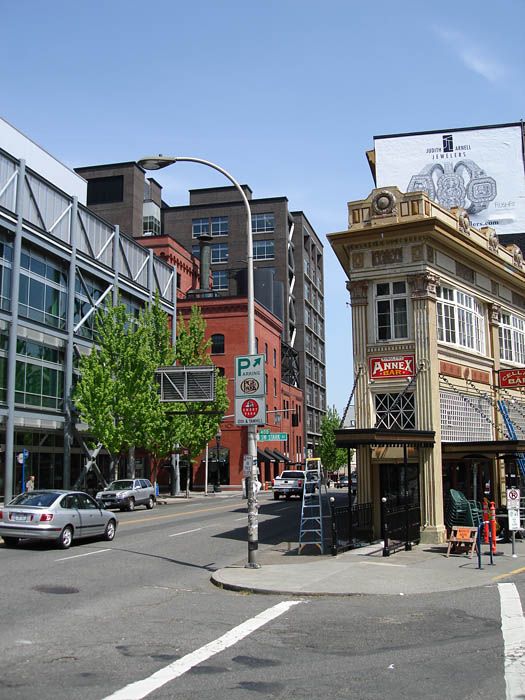
In many cases, simply being in an urban city will expose you to similar harmful particles, but you definitely don’t want to be inhaling that in an enclosed room.
With a 3D printer, you could be running it all day and night resulting in polluted air. It is recommended to not have your printer running while you occupy the room.
This is why putting your printer in a bedroom is not a very good place when taking this into account.
One of the best and most popular filters is the LEVOIT LV-h232 Purifier with HEPA Filter.
You can check out my article about the 7 Best Air Purifiers for 3D Printers.
It’s very effective in removing harmful pollutants in the air due to its advanced 3-Stage Filtration System – pre-filter, HEPA filter & high-efficiency activated carbon filter.
This purifier does an amazing job and removes 99.97% of airborne contaminants as small as 0.3 microns.
It would be ideal to have a printer with an enclosure, as well as with some type of fan or vent to remove harmful fumes.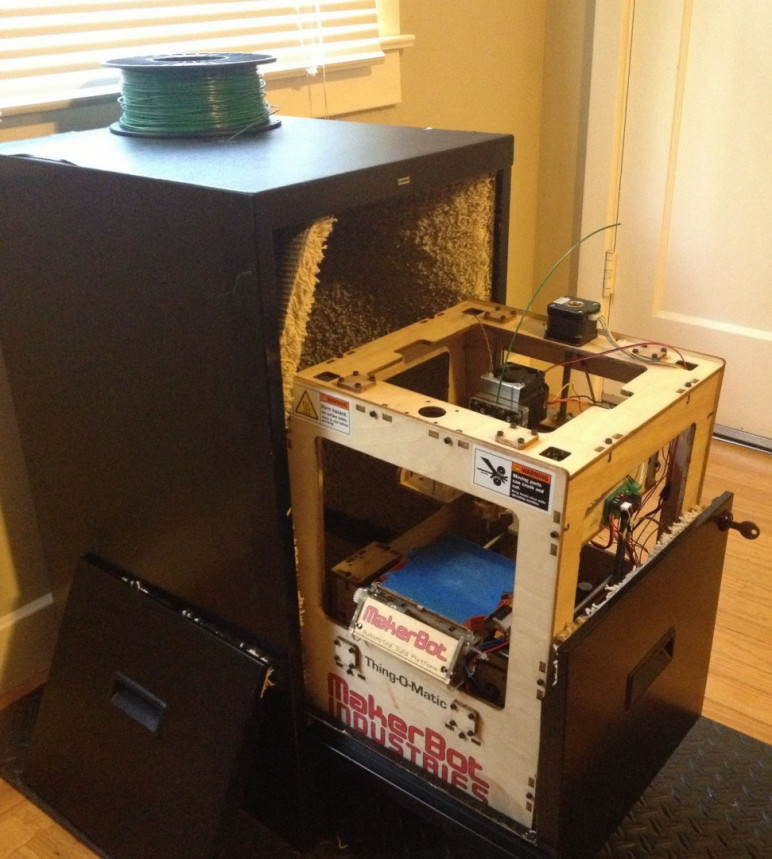 Simply opening a window while your 3D printer prints won’t necessarily direct the particles in the air away.
Your best bet is using a ventilated enclosure, as well as a high-quality filter. In addition to this, have some kind of vent/window to recirculate fresh air into the space.
Flammable Safety Issue
Bedrooms are prone to have flammable materials and may not have the best ventilation, which are both red flags for where to put your 3D printers.
Now, if a 3D printer is in your bedroom, you are much more likely to catch any electrical or fire issues that occur, but this benefit also comes at a cost where it could cause harm.
Should I Put My 3D Printer on the Floor?
For the most part, if you have a solid floor, it’s going to be a flat surface which is exactly what you want for a 3D printer. Having your 3D printer on the floor, however, does increase certain risks such as accidentally stepping or knocking over your printer.
You’ll also get a lot more dust affecting your printer, filament and bed surface which can decrease print quality and bed adhesion.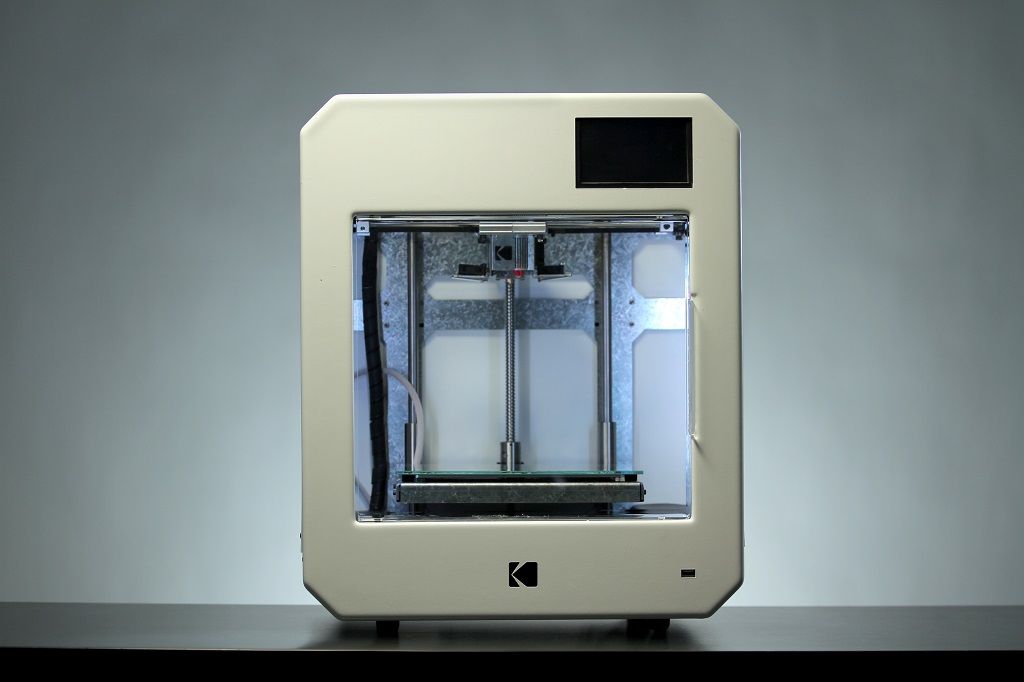 Rather than put your 3D printer on the floor, you should at least get a small table like an IKEA Lack table, which is popular in the 3D printing community.
The Ender 3 is around 450mm x 400mm in width and length so you need a table a little bigger to house a medium-sized 3D printer.
A pretty good table that you can get yourself on Amazon is the Ameriwood Home Parsons Modern End Table. It’s highly rated, sturdy and looks good in a home or apartment setting.
Can You Use a Resin 3D Printer Inside an Apartment or Bedroom?
You can use a resin 3D printer inside an apartment or bedroom, but you want to use low-odor resins that have low VOCs and are known to be safe. Many people recommend not to use a resin 3D printer in living spaces, but rather in places that aren’t occupied. You can build a ventilation system to reduce fumes.
Many people do 3D print with resin indoors in their bedroom without issues, though some people have reported that they get respiratory problems or allergies as a result.
One user mentioned how he thought he had the flu for a few months, but was actually being affected by being next to an active resin printer.
Resins should have an MSDS or Material Safety Data Sheet which provides reliable information about the safety of your resin. Generally speaking, resin fumes aren’t considered hazardous and are fairly low-risk if you have the right ones.
The biggest safety risk for resins is getting uncured resin on your skin because they can easily be absorbed and cause skin irritation, or even hypersensitivity after long-term use.
Related Questions
Where is the best place to put a 3D printer? The usual places people put a 3D printer are in a workshop, garage, home office, wash-room, or basement. You’d just need about four square feet of space and a shelf.
It’s not recommended to keep a 3D printer in your bedroom, bathroom, living room/family room or kitchen.
Should I only print with PLA? PLA, for the most part, can do almost everything that you require for 3D printing and is the recognized as the safer option in the 3D printing community.
Only in specific cases will PLA not be feasible for prints so I’d recommend only printing with PLA until you have enough experience.
If you love great quality 3D prints, you’ll love the AMX3d Pro Grade 3D Printer Tool Kit from Amazon. It is a staple set of 3D printing tools that gives you everything you need to remove, clean & finish your 3D prints.
It gives you the ability to:
- Easily clean your 3D prints – 25-piece kit with 13 knife blades and 3 handles, long tweezers, needle nose pliers, and glue stick.
- Simply remove 3D prints – stop damaging your 3D prints by using one of the 3 specialized removal tools.
- Perfectly finish your 3D prints – the 3-piece, 6-tool precision scraper/pick/knife blade combo can get into small crevices to get a great finish.
- Become a 3D printing pro!
Regarding "Is it safe to use a resin 3D printer in my room?" : ElegooMars
There's a lot of misinformation out there about whether or not it's safe to use a resin printer in your room. Like almost everything else in life, the answer is "It depends."
I asked two major 3D resin printing manufacturers if it was safe to print with their resins in your room.
One key recommendation resin manufacturers make is that you should use some kind of ventilation so fumes don't accumulate. They don't specify how much ventilation is enough (a fan in the window versus a full blown enclosure), just that it's recommended.
Taking a look at Elegoo's ABS-like resin, this is the info Elegoo provides in the MSDS:
Breathing Equipment: None should be needed from normal use. If this material is handled at elevated temperature or under mist forming conditions, approved respiratory protection equipment should be used. Selection and use of respiratory equipment must be in accordance with applicable regulations and good industrial hygiene practice.
Based on this, Elegoo claims you don't need breathing equipment while running the printer in your room. But of course they still suggest ventilation. If you're going to, for whatever reason, put the resin in a spray bottle and mist it everywhere, yes you're going to need more protection than a flimsy paper mask.
Based on my experience from almost a year of printing with their resin, on multiple machines in a small apartment, this is true. I have the printers by a window and a box fan succing out any fumes/smell. I have had zero issues.
However, when I asked Elegoo's customer support if it was safe to print in your room, this is the response I got:
"For more resin information please refer to the link file (Download link for MSDS of their resins) Please wear gloves and masks during the normal operation of the printer. The chemicals are more or less harmful to the body. The resin will emit an irritating odor during the printing process. Please keep the room ventilated"
Okay, some of that may be muddied by a language barrier. Gloves protect you from physical contact with the resin, but is the odor "irritating" as in it's just annoying/unpleasant, or is it physically irritating? I'm inclined to think they mean it's simply unpleasant, because a flimsy paper mask doesn't do anything to stop any chemicals/fumes from getting through anyway.
However, you should NOT breathe in the fumes for extended periods of time or let them accumulate, you will get get dizzy, headaches, etc. This is why ventilation is recommended.
Now let's look at MakerJuice's Substance G+ resin.
I asked their Customer Service if it was safe to print in your room with their resin, their answer:
"Although There is a slight acrylic ("plasticy") smell to the resin, it is non toxic and not harmful. Please review our Safety Data Sheets for more information. There are no toxic or harmful fumes produced by the resin."
That's the manufacturer directly telling you their resin doesn't produce harmful fumes. They still recommend ventilation though, like every other 3d printing resin manufacturer.
However, the resin is only safe when it's used as intended, at normal operating temperatures.
Reading the MSDS for the resin:
Specific hazards arising from the chemical:
In the event of fire and/or explosion do not breathe fumes.
May cause sensitization by inhalation and skin contact. Thermal decomposition can lead to release of irritating and toxic gases and vapors.
Hazardous combustion products: Formaldehyde.
May release formaldehyde when heated to high temperatures [> 150 °C (> 212 °F)] in the presence of air. Formaldehyde is a known skin and lung sensitizer and is regulated as a carcinogen.
If for some reason you decide to super-heat or set the resin on fire, then you're going to have problems.
Fun Fact: In the state of California everything will give you cancer, and products suspected of causing cancer require a label on the product to tell you so. However, it does not consider this resin a cancerous threat. Go figure.
Unfortunately, resin printing hasn't been around long enough as a hobby to know for sure what the long term effects of resin printing at home are. All we can do is ask questions to people much smarter than us and make decisions based on that.
So, in my opinion and experience, putting your printer by a window with a fan to succ out the air around it is more than enough to safely print in your room, at least while using these particular resins. Different resins will have different properties of course, so do your research.
Will any of the info shared here change the way you print in your home?
3D printer: what's inside?
In this column, we will look at the main design features of 3D printers based on FDM printing technology. There are several mechanical schemes of 3D printers, but most of them use a scheme with a closed case and a lifting desktop - XY-Head Z-Bed (we are talking about serial factory designs).
In this column, we will look at the main design features of 3D printers based on FDM printing technology. There are several mechanical circuits of 3D printers, but most use a circuit with closed case and lifting work table - XY-Head Z-Bed (we are talking about serial factory designs).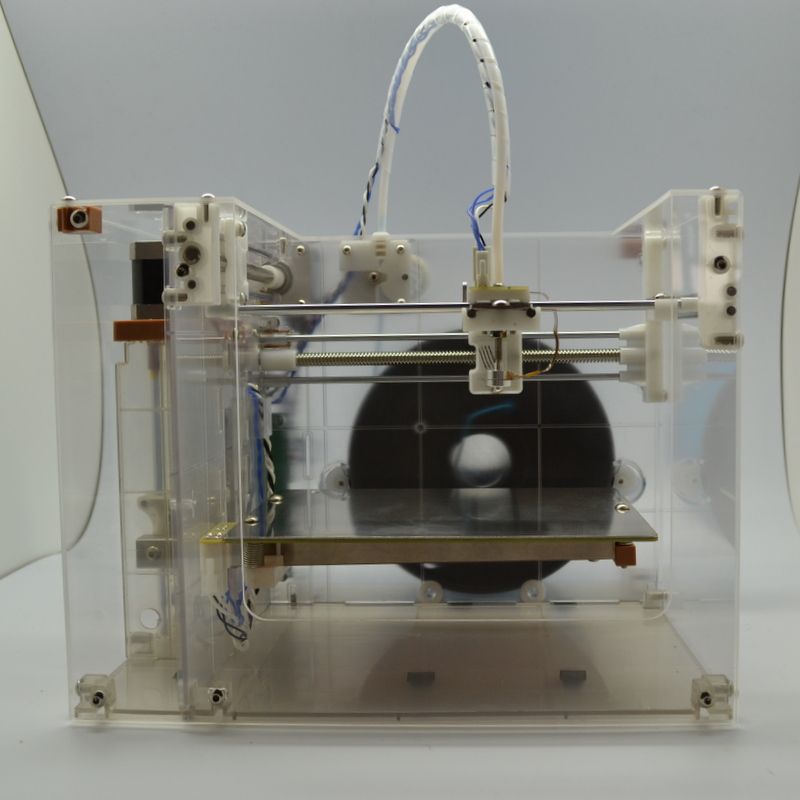
What does such a design give, besides the finished appearance? The first is safety compliance, since there is no direct access to moving parts, and noise reduction, which can be critical when using a printer in an office. The second is to reduce the negative impact of external factors (drafts, etc.) on the quality of manufacturing parts made of polymers that have shrinkage (for example, ABS).
The very same scheme with a lifting table has the best indicators of the accuracy of the mechanisms, which improves the quality of manufactured products.
Now let's look inside the 3D printer case. What's there?
First of all - work surface , the so-called table . It can be heated or not. What is heating? The ability to print plastics that have shrinkage (first of all - ABS). Heating creates the desired temperature regime, which reduces the effect of material shrinkage on the final product. On such a desktop, you can print with any materials used on FDM printers.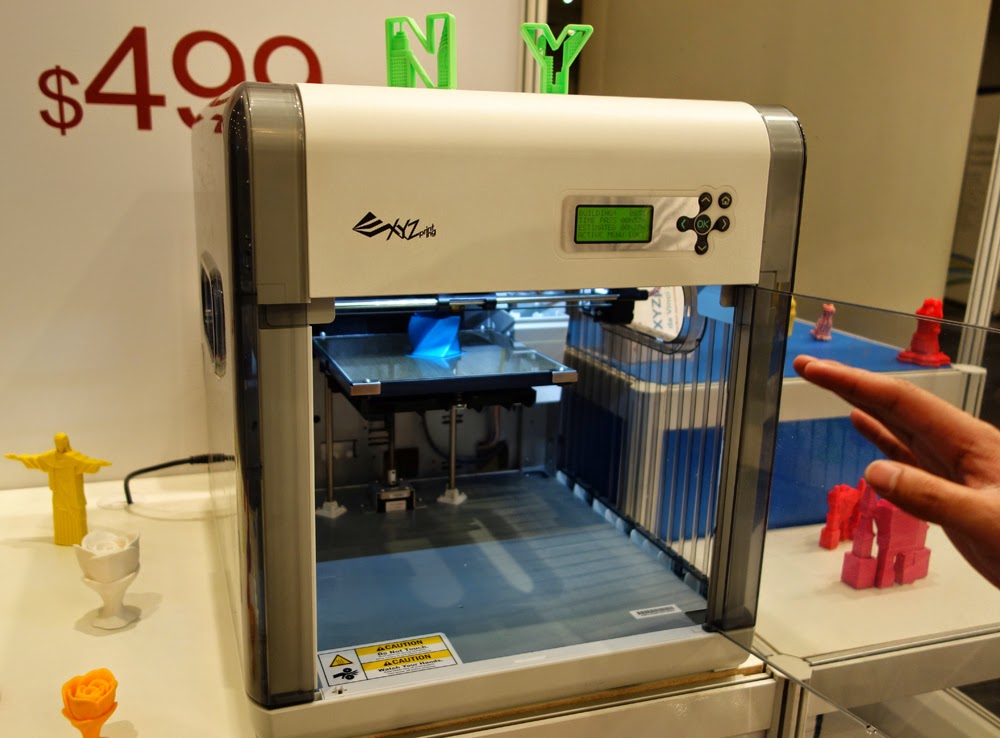
Unheated tables are limited to printing mostly with PLA plastic and its derivatives. Now some of the new printers in the West are produced only in this version. One of the reasons is environmental friendliness, but there are more real advantages of such a solution. First, lower power consumption. Secondly, the security and speed of printing are higher (due to the exclusion of time for heating the table). The PLA plastic itself, in terms of its physical and technical properties, overlaps the capabilities of ABS by about 80%. Among the main disadvantages of PLA is its low heat resistance, about +50–60 °C. But there are also benefits. Due to the small shrinkage, which can be neglected, the rejection rate is an order of magnitude lower than when printing with ABS plastic. Higher and the strength of products - due to better soldering of the layers to each other.
The main printing mechanism is extruder . Consider its design from the point of view of practical application.
An extruder is a device in which a filament of plastic is heated to a molten state and dosed into the print area. The extruder itself is positioned at the desired point using special drives . The quality of the print depends on the correct operation of the extruder and the accuracy of its positioning. Printers come with one or more (usually two) extruders. What gives extra? In addition to printing with two colors of plastic at once, it is also possible to use dissolvable plastics for complex models. In their manufacture, the so-called " support ", subsequently removed from the model. When printing supports with dissolvable plastic, they are easier and faster to remove, and the quality of the finished product increases.
The diameter of the extruder nozzle, through which plastic is extruded, is usually in the range of 0.3-0.4 mm. There are solutions with a smaller or larger diameter, but these are special cases for solving specific problems.
Important design features include the information display and the ability to print from SD card , which makes it possible to control a 3D printer without connecting to a computer. This is especially useful when the 3D printer is in a separate room. In addition, printing directly from a computer to a 3D printer can be an additional source of problems. The fact is that the process can take many hours, and any failure on the computer can lead to marriage.
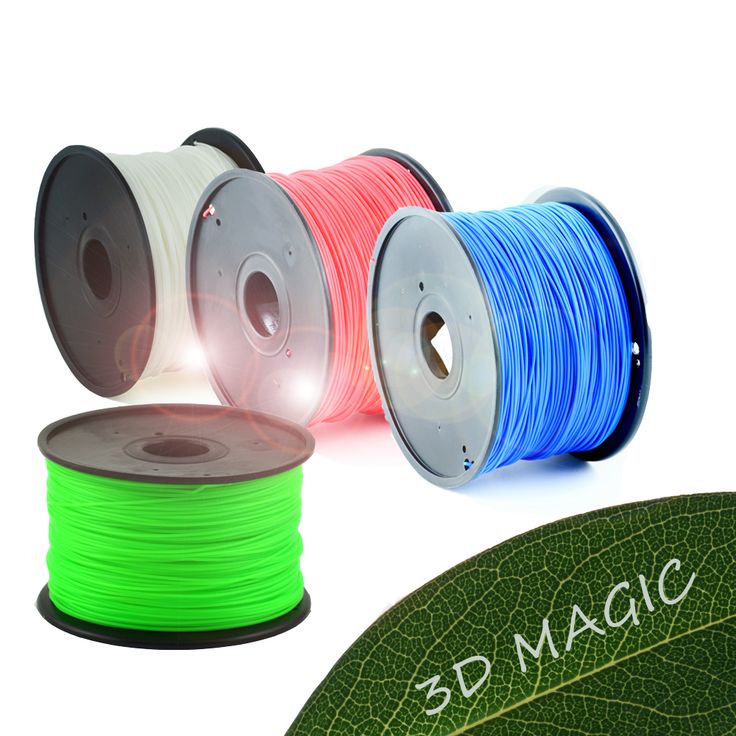
The next nuance is consumables . There are two popular diameters of plastic filament used for printing, 1.75mm and 2.85-3mm. For the first, a huge number of different material options are offered. And there is a trend when new types of material are made only in this size.
The diameter of 2.85-3 mm is losing its popularity, but printers are made for it, which are the de facto standard for print quality - the Dutch company Ultimaker. As long as it produces 3D printers, such plastic will be produced.
These are the features that lie on the surface and that you should pay attention to when choosing a 3D printer for solving your problems. The remaining nuances, such as the control board, printer kinematics, etc., are hidden inside. Usually you will deal with them only during periodic maintenance (lubrication, dusting).
About the author: Dmitry Gorkov (feedback@ 3d-print-nt.ru) is an expert in 3D printing: author of several books and training courses, custom 3D printing practitioner, application and implementation consultant.
Important for beginners. Inside of a 3D printed part
The information that we will cover in the article is intended primarily for users who are just getting acquainted with 3D printing. Beginners have to learn a lot of nuances and questions in order to become experts. We hope this article will help answer some of your questions.
Structure of a 3D printed part
So that you like the result of printing and the part performs its functions (technical or aesthetic - no difference), think about its structure in advance.
As, for example, the construction of a house is made of bricks or logs, so any part printed on a 3D printer consists of layers that are superimposed on each other from the bottom up. Layers can be of different heights and printed with different nozzles - the smaller the nozzle diameter, the lower the layer height needs to be set and vice versa. For example, the vase in the figure below is printed with a nozzle with a diameter of 1 mm, a layer height of 800 microns.
When printing the vase, the characteristics are set so that the layers are clearly visible and tangible
How does the height of the layer affect the finished model? The layered part will have more roughness and at times lower print accuracy (the thicker the nozzle, the larger the corner print radius).
The layer also includes the perimeter and internal filling:
Perimeters create the shape of an object3
Filling can be patterned
Internal filling can be patterned or solid. Forms of its execution: honeycombs, rectangles, lines, Gilbert curve, etc. The fill pattern affects the rigidity of the part, as well as the duration of printing and material consumption.
The number of outer and inner perimeters affects the strength of the part. If we set more perimeters, then the part will be stronger.
Almost always the optimal number of perimeters is 2-3.
yellow are the perimeters (internal and external)
There are more perimeters (5 pieces) and the part became stronger than
more perimeters is also established so that it appeared so that it appeared so that it appeared so that it appeared so that it appeared so that it appeared so that it appeared so that it appeared the ability to make a hole in the model without damaging it, and also for threading.
There are bottom and top layers. They are easy to distinguish: the bottom layer will be smooth and glossy, as it adhered tightly to the glass during printing, and the top layer will be rough due to micro-marks of the nozzle.
The lower layer is smooth due to contact with the glass table
and the upper layer is slightly rough
To get a more smooth surface, it is necessary layer. In this case, the nozzle makes more passes (eg nozzle d=0.5 mm, extrusion width on the upper layers = 0.25 mm). Instead of one line of top fill, the extruder will make two lines and the surface texture will become denser and smoother.
Extrusion Width is an adjustable parameter that sets the width of the line when printing (the thickness of the plastic at the exit) smoothes unevenness with a nozzle.An infill is a structure within a part (perimeters). The part is most often not 100% filled and is not a monolith, but this does not affect the loss of strength, since the filling can be made in the form of a pattern that holds the part together and gives it rigidity.
How to take into account 3D printing when modeling a part
Often, people who first encountered 3D printing use their previously acquired design and modeling skills, or knowledge of resistance materials to model printed parts.
In fact, in addition to knowledge of modeling, you need to take into account the features of 3D printing itself. More on these details below:
Part anisotropy - the strength of a part in only one direction.
Imagine that our task is to print a bracket that will be attached to the wall with 2 holes (see the figure below).
Spoiler: you cannot model the bracket in this way
With this simulation, it turns out that the part will carry the load along the layers. Most likely the bracket will not withstand the load and break. When using technical plastics, the risk of breakage of the part is reduced (their sintering of the layers is better), but, nevertheless, you need to design the model correctly - place it across (put it on the table).
We recommend positioning the model in this way. In addition, you can do without support e to
When printing the bracket in the supine position, the layers are perpendicular to the load vector.
Such a detail will be stronger. It can be compared with the fibers of a tree - if the load is directed across the fibers, then it will be easier to break it. When we place the model horizontally, the layers are arranged correctly, so the product should be more practical and stronger.
First layer flat
Parts are being printed on a flat table and you need to plan in advance the flat part from which to start printing
For example, let's look at this detail:
Dmitry looks at the detail and understands that it will not be possible to print the same one without supports. The grooves are located just above the flat part2 As a result, the part was printed in this position
There were a lot of supports at the bottom and a lot of material wasted. But such a detail could not be printed otherwise.
By the way, this part was not designed for 3D printing. If its printing was originally supposed, then the issue of protruding grooves would probably be solved by drowning them behind the plane.
This could have allowed the printing of the part with the maximum area of contact with the table.
If the contact area is small, then there will be a high probability that that the part will peel off the table when printing.
Consider the example of a rocket:
Imagine that its three small nozzles are slightly shorter than the main average e
In this case, there will be only a couple of perimeters with which it is in contact with the table (central nozzle) . This makes it very unstable when printing, and the movement of the extruder can drop nozzles hanging around the perimeter. Therefore, when modeling a rocket, all elements of the base were made on the same level.
Overhanging elements
Another point related to the specifics of preparing the model for printing.
Let's start with the fact that models with overhanging elements should be avoided :)
If such an element appears in the part, then most likely it will go to print with supports (and eventually they will have to be removed), or the element will sag.
How to solve a problem? If possible, avoid models with overhanging elements, you can add a chamfer (cut corner).
No sag at 45°. For example, the wings of the rocket already mentioned are printed without supports
Thin walls in the model
Often in modeling it is necessary to make a wall of a certain thickness. How to model a thin wall so that there are no errors during slicing:
Heat gun wall thickness = 1 mm, with a slight 1.5 mm thickening at the edges
Dmitry indicates the wall thickness of the hair dryer
The wall must be modeled with a thickness that is a multiple of the nozzle diameter (nozzle = 0.5 mm, which means the wall is 1 mm or 1.5 mm). But what if there is no multiple match, and we need to make a layer 0.4 mm thick?
The answer is simple: you need to increase the width of the extrusion
A good example of increasing the width of the extrusion and
How can I save printing time? A few tips.
Let's imagine that we need to print a non-functional part (cover, casing) in order to “try it on” or “attach” it somewhere. In a word, make sure it fits its destination. Such a blank can be printed without internal filling at all (only with two or three perimeters), if there are no overhanging elements. The part will be empty and light, but it will do very well for trying on.
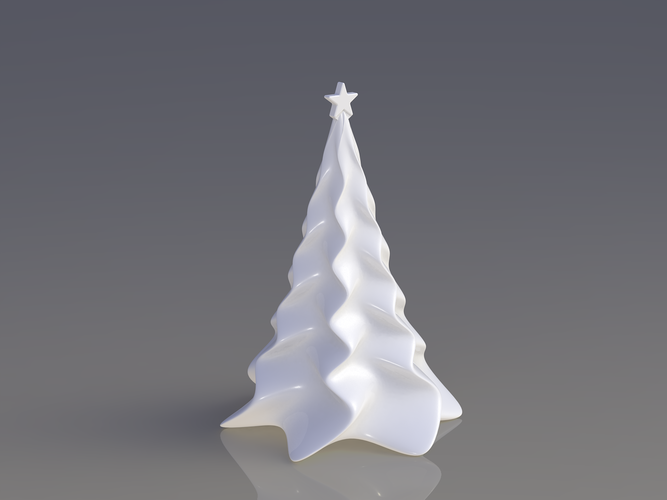
Consider the example of printing the FIFA Cup. This goblet can be printed without infill, but we have it with a small, thin infill bar from the base to the top of the sphere (an option in the infill slicer only needed). Due to this, it does not sag. The case is printed entirely with perimeters.
In general, you can use the modifier and start filling only at the top. Until this part, printing is done only by perimeters and the pole of the sphere does not sag. It is also possible to set a very small extrusion width for filling, in which case the “inner wool” will not allow the top to fall through.

If we need a part whose surface does not have to be very smooth, then we can take a nozzle with a larger diameter (0.8 mm, 1 mm) and set a higher layer height.
The bottom square piece (see photo below) is printed with a 0.8 mm nozzle and a fairly high layer of 0.5 mm. It took 15 minutes to print. The top part is printed with a 0.5 mm nozzle and a 0.15 mm layer. This part is very smooth, but it took 39 minutes to print.
15 and 39minutes. Agree, there is a noticeable difference?
The time savings when printing the first part is quite noticeable, and when printing a large part, you can save several hours without losing accuracy, but only a little in appearance. Layer height is the main parameter that significantly affects the speed of printing.
You can also save time by printing through-the-layer infill and increasing the extrusion ratio per infill (there will be only one infill layer per two perimeter layers).

Learn more