3D printing bjd
Bjd best 3D printer models・Cults
BJD SNOWWHITE DOLL
€19.30
Simple Bjd Deer
€9.65
Scaly dragon BJD
€12.75
MATTHEW HEAD
€7.27
Griffiths Head
€7.27
Tom Of Finland(Inspired) BJD body
€36.36
Skeledaddy BJD(Ball-Jointed-Doll) body
€27.17
Mars jointed body (BJD)
€36.36
Head BJD doll Rinka
€6.65
BJD Doll Rinka - 3d model for print
€19.30
Transforming UFO bjd
Free
3D BJD DOLL, Ball jointed doll, doll, 3D BJD, 3D BJD, BJD 3D
€50
Watermelon corgi BJD doll
€10. 01
BJD-doll forest dog
€13.07
11 3d shoes / model for bjd doll / 3d printing / 3d doll / bjd / ooak / stl / articulated dolls / file
€20
6 3d shoes / model for bjd doll / 3d printing / 3d doll / bjd / ooak / stl / articulated dolls / file
€20
12 3d shoes / model for bjd doll / 3d printing / 3d doll / bjd / ooak / stl / articulated dolls / file
€25
8 3d shoe / model for bjd doll / 3d printing / 3d doll / bjd / ooak / stl / articulated dolls / file
€25
D girl-BJD
€45.75 -60% €18.30
3D | STL | PRINT | MODEL | CHAIR FOR DOLL | BJD | ARMCHAIR | ROCOCO | INTERIOR | DOLL ROOM | OOAK | RESIN | COLLECTION
€42
3D | STL | print | model | chair for doll | BJD | armchair | Rococo | interior | doll room | ooak | resin | collection
€40
Hands and feet for BJD doll, STL 3D model for 3D printing
€3
Monster mask for SD BJD doll
€4
Owl BJD
€12.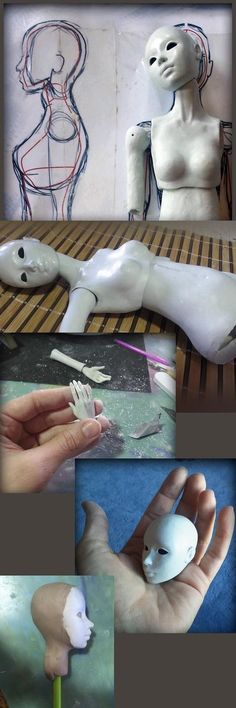 75
75
Cup of Hot Cocoa
€1.61
Houndoom BJD
€12.75
Dragon BJD baby
€12.03
Head Sigma
€2.65
Nancie retro-style Ball jointed doll
€2.37
BJD HEAD, BJD DOLL, 3D BJD, BJD 3D MODEL, HEAD BJD DOLL
€10
BJD HEAD, BJD DOLL, 3D BJD, BJD 3D MODEL, HEAD BJD DOLL
€10
BJD HEAD, BJD DOLL, 3D BJD, BJD 3D MODEL, HEAD BJD DOLL
€10
BJD HEAD, BJD DOLL, 3D BJD, BJD 3D MODEL, HEAD BJD DOLL
€10
BJD HEAD, BJD DOLL, 3D BJD, BJD 3D MODEL, HEAD BJD DOLL
€10
BJD Head, bjd doll, 3d bjd, bjd 3d model, head bjd doll
€10
Ball jointed doll, bjd, 3d bjd kid, obitsu, nendoroid
€28
Bjd Doll, Ball jointed doll, 3d bjd, bjd 3d printing
€50
Fly-agaric Dragon BJD
€12.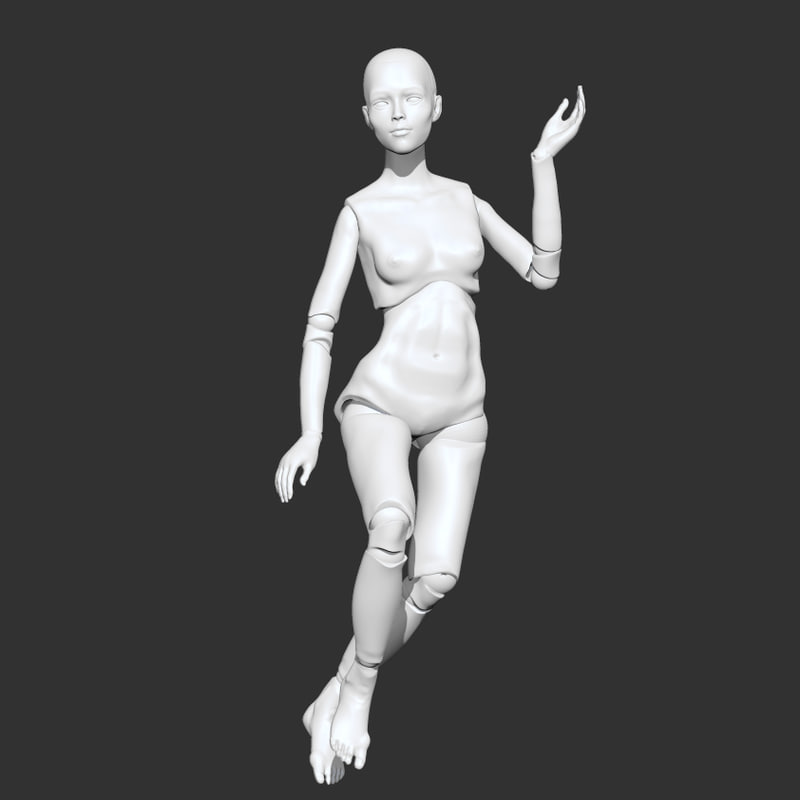 75
75
Alien fey bjd female
€16.12
Hands for BJD
Free
bjd wrist hands
€1
BJD doll
€15
BJD Yosd Size (complete)
€38
Bjd 3d
€20
A Ball-Jointed-Doll
€29.37
Chiroptera - Animents BJD
€17.40 -50% €8.70
Felina Mask - BJD
€3.26
Expansive head
€241.28
Design and Print the Doll of Your Dreams
0Shares
Obviously anything doll-related may not be something to associate with dreams for some, but there are communities of doll collectors that are larger than you’d initially think.
One doll community which is starting to feel the force of 3D printing in particular, is the Ball Jointed Doll (BJD) community.
What is a Ball Jointed Doll?
A BJD is a doll which features ball joints, and is strung together with elastic cord. Most are cast in resin and finished by hand, before being professionally painted, which is why they come with quite a hefty pricetag. However, this doesn’t stop doll hobbyists from collecting them, painting them, developing characters and making accessories. The ‘custom’ element of these dolls is what brings many people into the hobby (as well as them being super pretty and cool to look at) and ‘custom’ products are becoming more and more widely produced on 3D printers.
Sculpt: Ringdoll Andrew, credit to Lydia MahonThese resin BJDs allow you change their eyes, hair, how the face is painted, and body parts can even be mixed and matched depending on the owners requirements to help create the perfect doll for them. They even come in a wide range in sizes, from as small as under 10cm, to over a metre tall. More common sizes include 1/6 scale (around 27cm), 1/4 scale (around 45cm) , 1/3 scale (around 60cm) and larger (70cm +).
However the levels customisation these dolls already offer just isn’t enough to some, as that perfect face shape can often be just out of reach. This is where RML makes their entrance.
RML allows customers to model their own doll face using a user-friendly program, print the 3D modelled face, finish, paint and then assemble the face and body into a full doll.
How do I customise my own doll face?
A user friendly program called ‘RML 3D FACEMAKER’ presents you with a list of facial features which you can manipluate using a sliding bar which you can select and scroll side to side with a computer mouse or touchpad. You don’t have to pay anything to use the program, so I’ve already had a go at creating my own dream doll.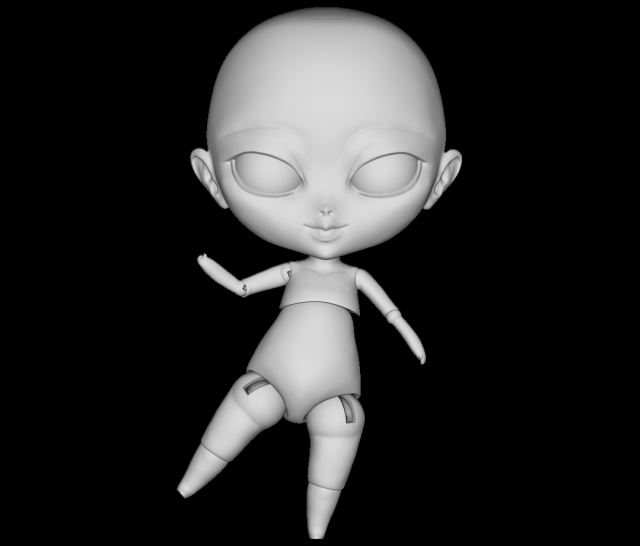 Here’s the link to the program, which requires unity web player and a browser to run. It doesn’t run in Google Chrome, but it works with most other browsers.
You can create a wide range of faces, here are two I created myself, which both look very different. The different sliders do need a lot of tweaking in order to balance everything and create a face, but its super fun, especially when RML encourages users to share their creations with each other. They do stress that users can’t use their creations on a commercial level, however.
Providing a program that uses a browser to run is particularly useful, as it doesn’t shut out potential users who would otherwise be unable to download large programs just to customise a doll face.
To get your finished design over to RML for making, all you do is copy and paste the code at the bottom into the right box in the order form, and they do the rest. Make sure to click the ‘creation code’ button when you’re finished creating, otherwise you either won’t have a code or may have the wrong one!
Just imagine if this kind of software could be used for other customised items? A chair? An ornament? One of the biggest problems when it comes to 3D printing is the lack of user friendly programs which opens doors for those who struggle with complex 3D modelling software, so this could be the way forwards for customers to customise products themselves.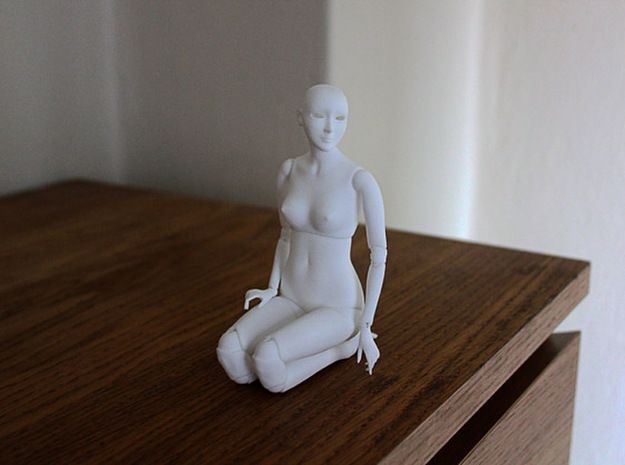
Once the information is sent off to RML, the face is printed in nylon using a 3D printer.
Once printed, the face is a bit rough, which is fine for some figurines and toys that are printed, but in the world of BJDs, the dolls need to be finished to a very high level of quality, after the printing stage, the head is then sent to an artist who sands and paints the doll face.
The head can be bought separately as is, without a body too, for those who want to paint the doll themselves.
You can get the full doll with a body, which stands at 60cm tall, fitting into the 1/3 category for dolls, also placing it at about the average size for a BJD. This doesn’t seem that important for some, but many owners struggle with buying clothing for dolls which are odd sizes, so having your own custom doll at a size which is easy to buy accessories for makes the doll all the more appealing to potential owners.
The finished face is smooth, painted professionally, and sealed with a Japanese branded matte sealant called ‘Mr Super Clear’.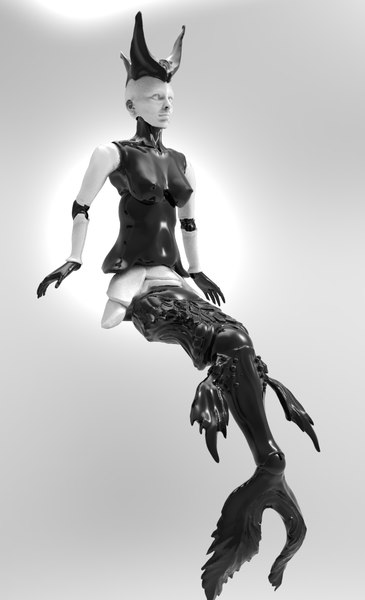
From this point, you can either buy accessories and clothing straight from RML, or source or make your own. As a doll collector myself, its amazing to know that I can customise a doll down to the tiniest of facial features, like lip thickness.
It’s a bit hard to find the right area on the website for everything to be in English, but if you choose the English option in the facemaker program page its a lot easier to navigate the site. However, you can also access the FAQ here and the order form here to see what RML has to offer.
3D printed doll clothes too?
The clothing is printed in flexible acrylic, and is modelled and printed to fit their specific doll. Sadly this means these creations aren’t the right size to fit other BJDs on the market, but if you happen to own one of their dolls, this clothing should fit.
I’ve seen all too many doll collectors angst over never finding the perfect face for a character they want to customise a doll for, so it’s incredibly exciting to see that you can in fact customise a doll face to exactly what you need.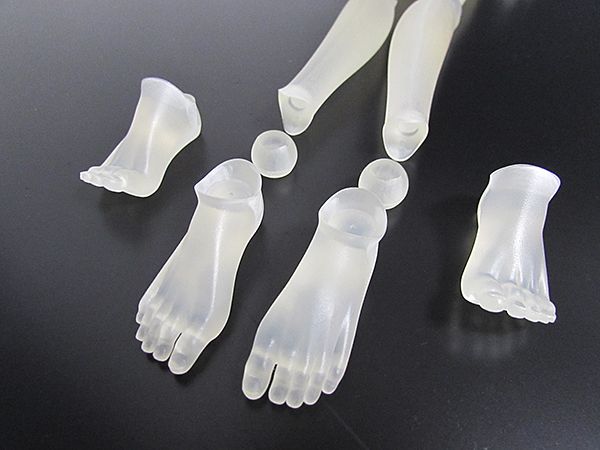 In fact, it is mentioned in the FAQ that you can contact RML about them helping you to create a particular look if you can’t quite manage it using the program, so even if you struggle with the software, you can still have the doll face of your dreams!
Happy Customising!
Lydia Mahon
A Product Designer and overall creative person, with a passion for all things design. I have a particular interest in cosplay and the violin, but I'm an explorer of many mediums.
BJD dolls: in step with technology
Puppeteers have been creating their treasures for decades using proven technology: first, we create a doll from self-hardening or baked plastic with pens, and then we give it to the caster to remove the mold and cast copies of parts.
But the age of technology brings innovations to this profession, for example - photopolymer 3D printing.
Why
This method opens up amazing opportunities to approach each order individually, making changes to the model if you need to make a different eye cut, hand pose, chest shape, etc. After all, before each change would have to be sent to the caster, and again to wait for the mold and the queue for casting.
Until recently, the physical properties of photopolymers left much to be desired, the parts from it were fragile, which was not suitable for creating dolls, because the fingers are about a millimeter in diameter, they must be strong in order to stay in place But progress does not stand still and appeared in Russia Hardlight, which introduced 3D polymers that are not inferior in strength to polyurethane (video with a strength test below) + it is also possible to print from a flexible material, suitable for tails and clothing items of various kinds.
How it looks like
For example, there is such a character - a gnome from mmo archeage. An unusual costume, and on the tail and ears you can try a flexible photopolymer. You will have to master 3D modeling. At least that's enough to create hollow parts with slots that fit together. Here is a video where we sculpt the desired model from a low-poly blank.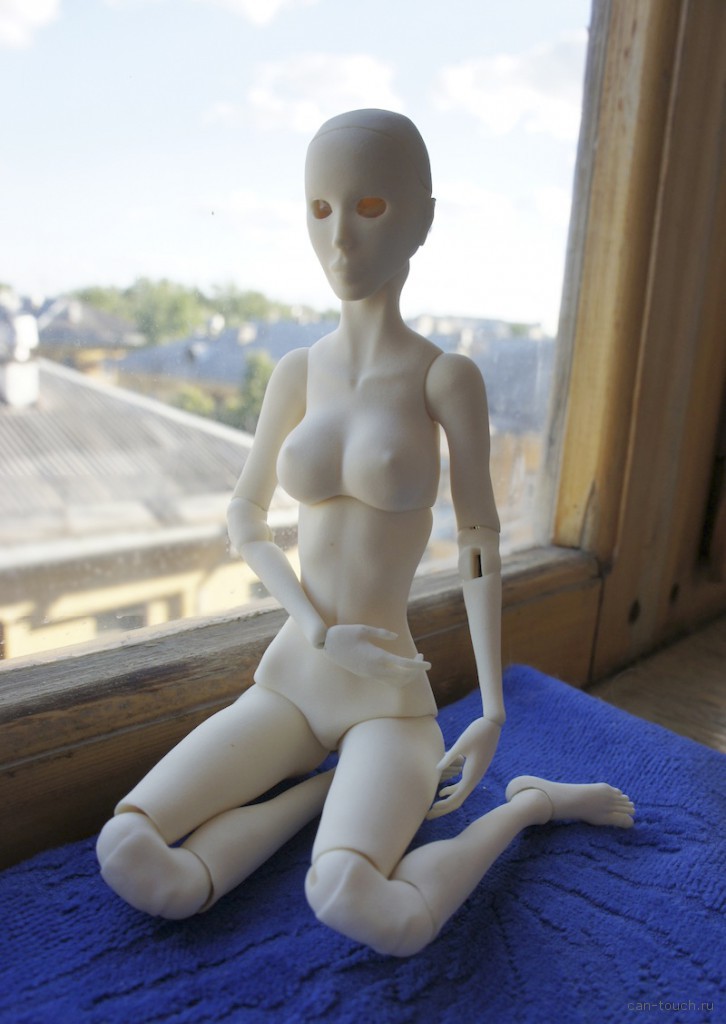
This is not a manual, so it's quick, just for reference. In the process, we check with the screenshots of the character to maintain proportions.
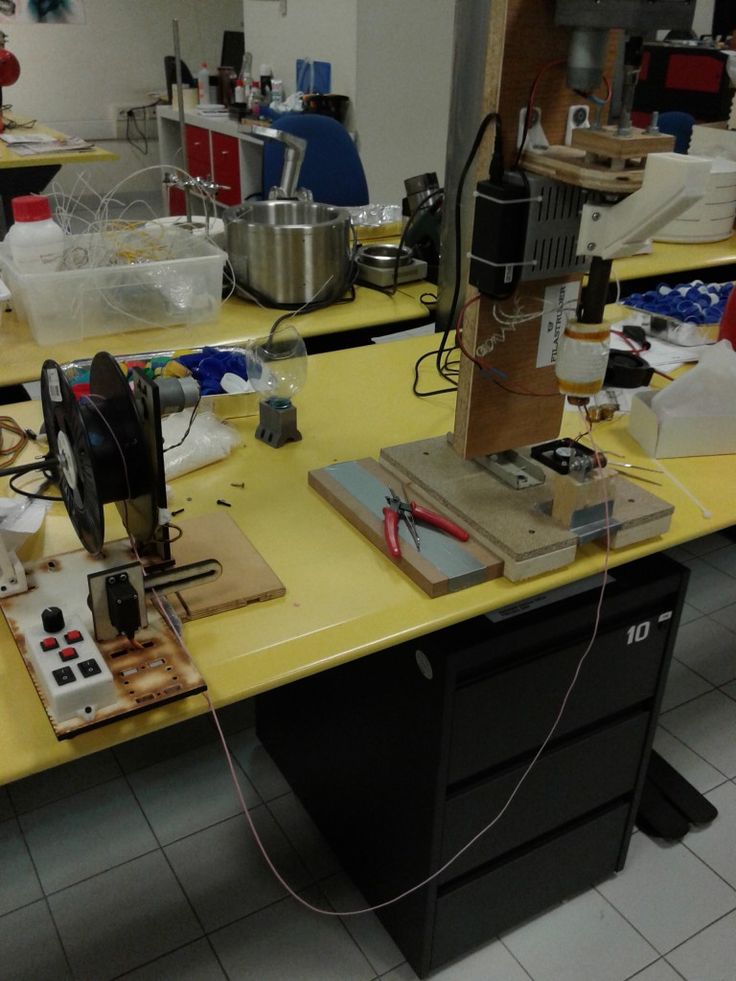
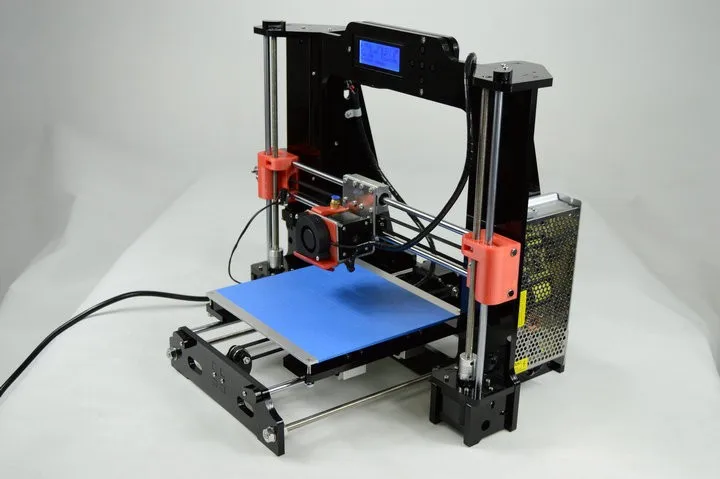
We open the finished parts one by one in the slicer program (ChituBox), in which we prepare them for printing.
Arrange the details, duplicate and reflect the arms and legs, rotate for the subsequent placement of the supports. Place the supports. There is no way without them, so you need to put them where it will be convenient to cut them off and grind the place from them. We write the resulting ("cut into layers") file to a USB flash drive and insert it into the printer. It's about the polymer. For carcasses, a goo called Tough. It's durable, but a little bouncy.
Get a cream color. We print something small with them in advance and evaluate the result, if necessary - add a dye.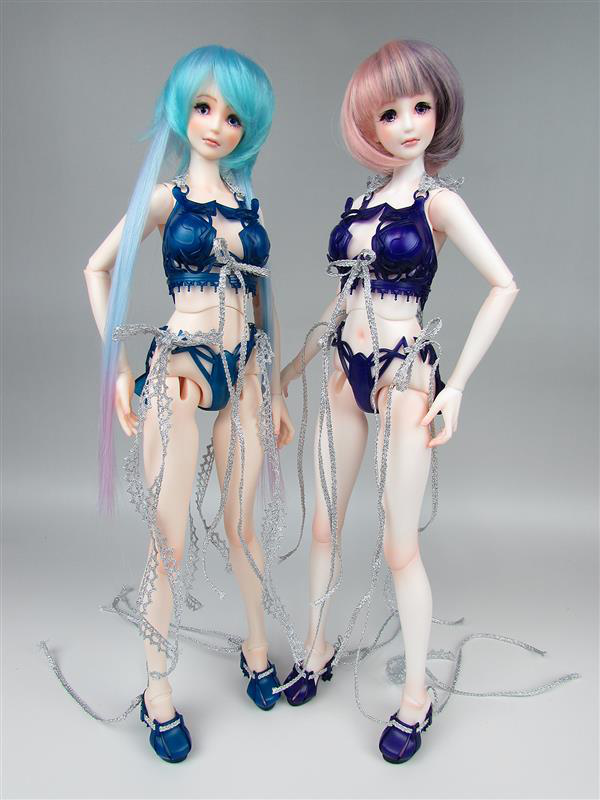 We pour liquid into the printer's bath. Above - the platform from which printing will begin. Close, select the desired file with the gnome on the screen, check the print settings (there are many of them, the necessary ones are selected empirically) and that's it! You have to wait until the end of the print. The gnome took about 2.5 hours. After completion, we open it, we take out the platform with the details. They are all in liquid, sticky. Using a narrow spatula, we knock them together with supports from the platform into the basket of the ultrasonic bath and send them to wash for a few minutes. In alcohol or in water with special detergent. This is usually sufficient for almost all polymers. But this one remains a little sticky after such washing. After backlighting, there will be no stickiness, but you need to cut off the supports before that. It is not very pleasant to do this on sticky parts, so we rinse them for a few seconds in acetone.
Do not overexpose, otherwise the details will begin to dissolve! We wait a bit until the acetone dries, so as not to breathe it.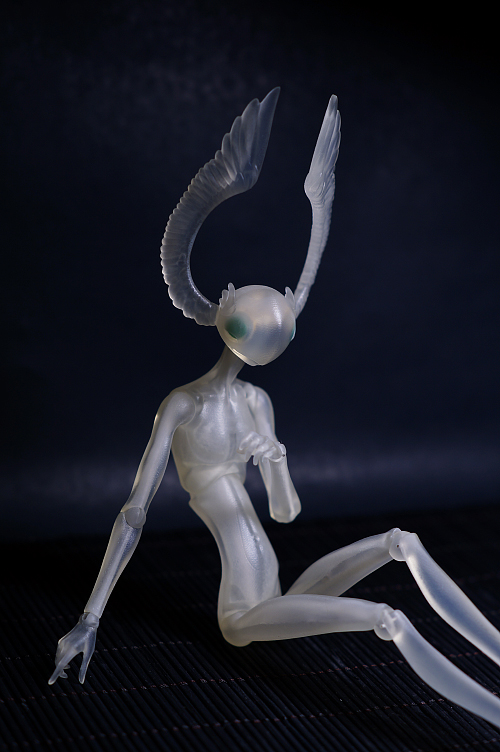 Cut off the supports with thin wire cutters. You have to be very careful! at this stage, before backlighting, the details are quite soft or fragile, you can break off a piece inadvertently. It's time to explore what happened. If there is a marriage or errors (anything happens), we remake and reprint what is needed.
When all parts without support are assembled, they need to be "re-lighted" or "roasted". At the same time, they will gain their strength, final properties and will be ready for grinding. There are special cameras, but you can get by with "your own personal design" :)
We place the parts in a container with water. And the container is placed in a home-made backlight chamber. Just a box pasted over with white photo paper or chicken foil, and a UV lamp with the desired wavelength (405nm) is built into the lid! Close and leave for 10 minutes, then turn the parts in water to the other side and another 10 minutes. , with the help of files and sponges, we remove the hemp from the supports and grind it.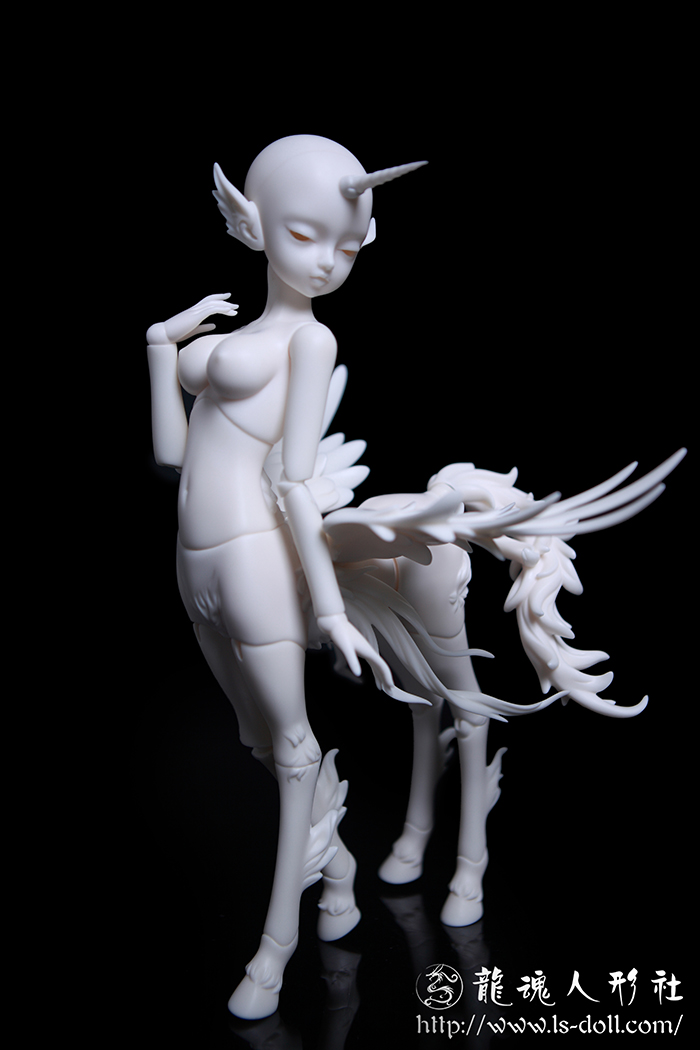 A drill helps in hard-to-reach places. We put the finished parts on toothpicks. Admire or paint. You also need to prepare the tail, ears and paws for printing. Now you need a polymer called Hardlight Flex.
P.S. For the photo, experience, thanks to master puppeteer Anastasia Vesker
Articulated BJD dolls | ZetterellyDolls
Dolls on a 3d printer: 3d model of an articulated bjd
Creating beautiful well-detailed dolls is a rather long and laborious process. 3D printing technology will help simplify it. It will allow you to create three-dimensional articulated dolls using a printer. Consider how such dolls differ from ordinary ones, how they are created and what are the advantages and disadvantages of such products.
BJD dolls on a 3D printer
BJD (ball-jointed doll) are ball-jointed dolls. Thanks to the articulated joints, the doll's arms, legs, head and torso are movable.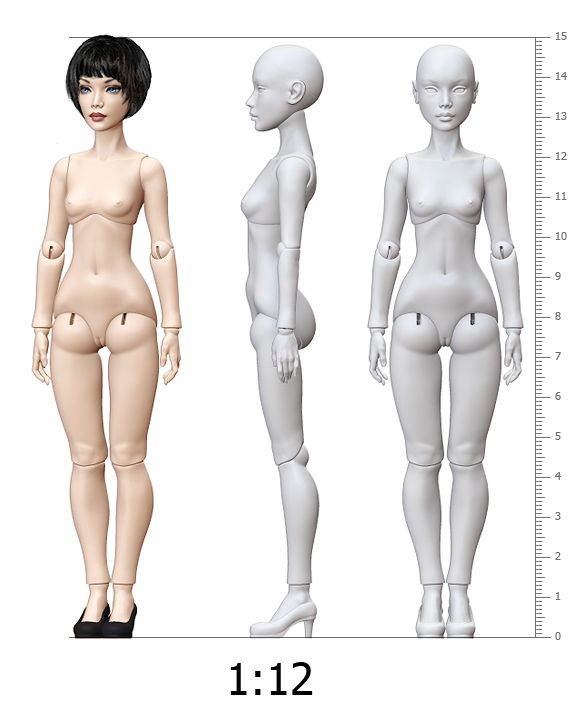
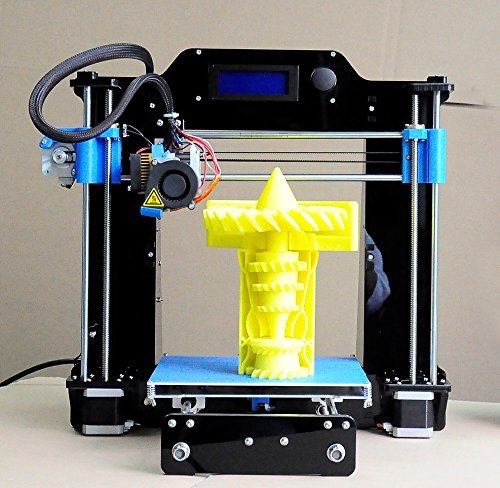
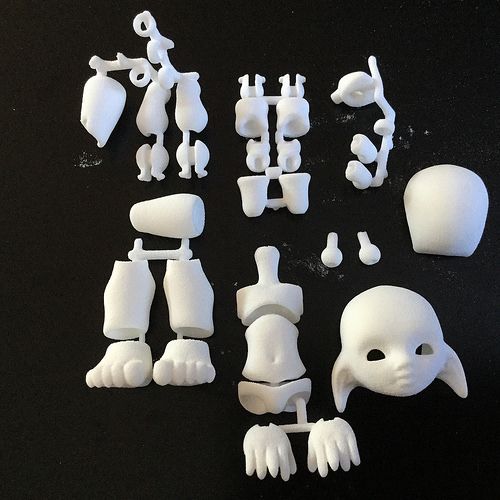
BJD dolls are printed as separate parts on a 3D printer, which are assembled on an elastic band using special fasteners.
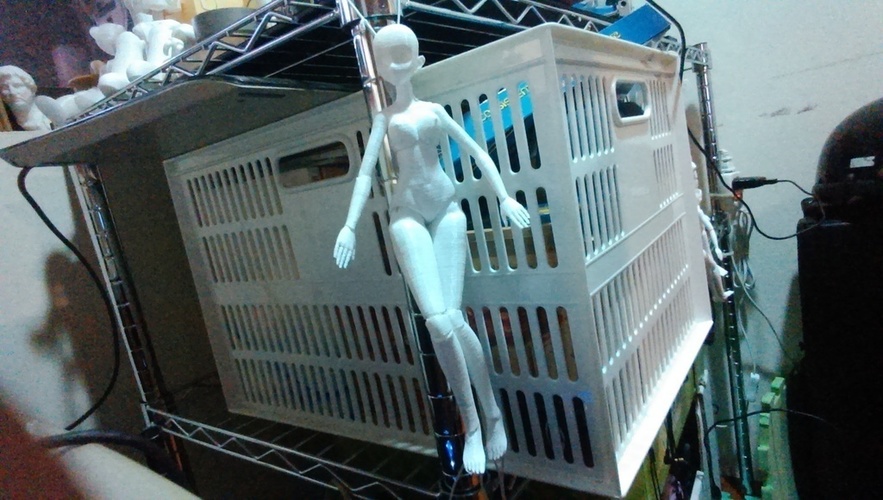
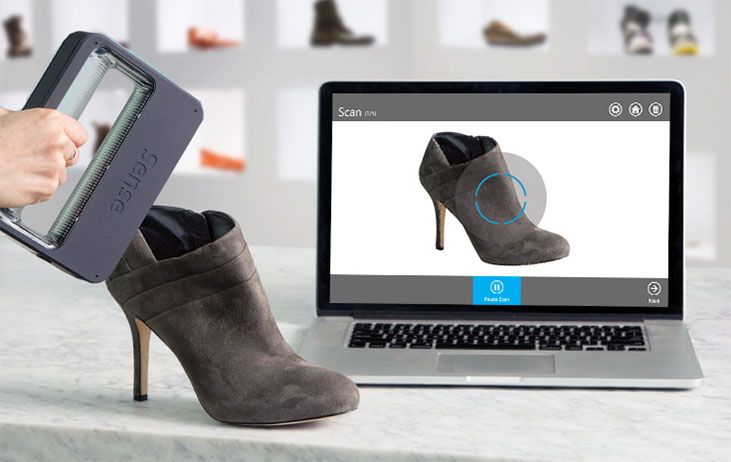
Due to their good detail, ball-jointed dolls are very often used as models in photo shoots to demonstrate various reduced items of clothing, accessories, shoes, etc. Ball-jointed dolls are also popular for visual demonstration of various sports stances, yoga poses and other demonstration purposes.
What do 3D printed articulated dolls look like?
The 3D printed dolls feature highly detailed facial features, body curves and even fingers. With proper refinement with the help of decorative materials, they will look very similar to people.
Thanks to 3D modeling it is possible to develop dolls with characteristic individual features (special eye cuts, different hand poses and different body parameters). In this case, they will be perfectly symmetrical.
BJD dolls have a solid construction due to the material they are printed from (ABS plastic or translucent plastic (ProJet, Objet)).
Where can I get a 3D model?
Creating a 3D model of a articulated doll is a very complex process that consists of designing each individual part of the product and creating supports. Therefore, few masters share their many hours of the fruits of labor.
But you can still find 3D doll models online. The largest number of files with different print formats can be found on two sites: https://www.thingiverse.com and https://open3dmodel.com. The first site is completely in English, but its database of 3D objects is quite extensive. The second web resource has a smaller number of models, but its localization is completely Russian.
How to print?
Creation of a ball-jointed doll on a 3D printer is carried out in seven stages:
- Development of a 3D model in a specialized program. Almost any software that usually comes with the printer is suitable for this. You can also use highly specialized programs for 3D modeling. You can skip the first stage of creating a doll if the user already has a ready-made three-dimensional model.

Important! Jointed doll mainly consists of hollow parts. Therefore, before completing the development of a three-dimensional object, it is necessary to install support structures in the necessary places of the part, which will help to print the parts of the workpiece located in the empty space.
- Cutting finished product parts in a slicer. Each part must be cut into identical slices. Thanks to this, layer-by-layer printing will be more clear and will produce better quality blanks.
- Media selection. It is recommended to use one of two materials to create a ball-jointed doll:
- ABS plastic is durable and inexpensive. However, it has a low level of detail and requires post-processing (priming and sanding) after printing.
- Translucent plastic (ProJet, Objet) is a strong but expensive filament. It reproduces the fine details of the product well when printed. The surface is very smooth and does not require additional processing.
- Doll print. Sliced 3D doll parts are printed separately. Further, depending on the material used, the workpieces are cooled, washed in acetone or illuminated. After that, the supporting structures are removed.
- Post-processing parts. Additional surface treatment may be required depending on the material used. Most often they are sanded, sanded and primed. All these actions are necessary in order to remove the irregularities that have arisen during printing and remove the remnants of the supporting structures. After the part is painted in the main shade (flesh or any other, depending on the master's idea).
- Assembly of the doll. All prepared parts are assembled into a single product using special hooks or thick paper clips. When assembling movable dolls, high-strength elastic threads are used, which are stretched.
- Decoration. At this stage, eyes, lips, nails and various small details of the product are drawn. Hair is also attached, clothes, shoes are put on and accessories are added.
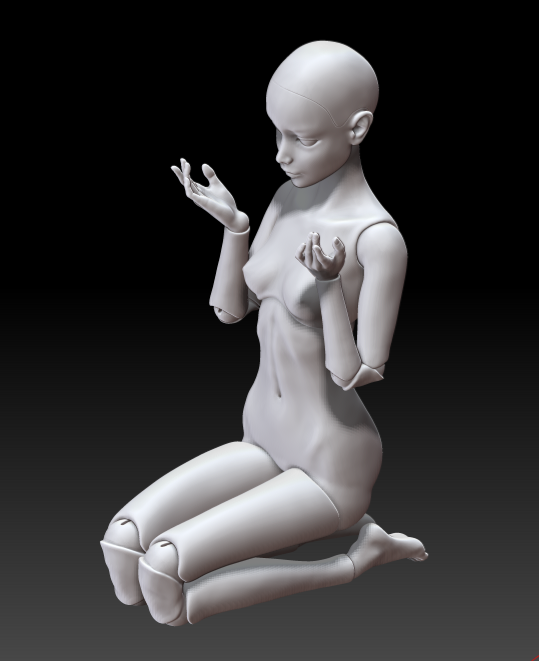
The main advantage when creating articulated three-dimensional dolls is their realism. Dolls really turn out very similar to real people. It follows from this that a doll printed on a 3D printer can always look different. Thanks to 3D modeling, individual parts of the product are extremely detailed and can be designed in any way. Therefore, the master can create individual models of dolls that will fully meet the requirements of the customer.
Along with significant advantages, articulated dolls have a number of disadvantages:
- a very long process of creating a 3D model in a specialized program;
- Limited media available for printing;
- 3D printed dolls always need post-processing.
Creating BJD dolls on a 3D printer is a rather laborious process that will require certain modeling skills in specialized programs, good knowledge of working with a printer, as well as the ability to do post-processing and product design.