Using 3d printers
How to use a 3D printer
David Roberson14 September 2021
Guide
How do you use a 3D printer step by step? Many different technologies share the same basic steps which we’ll cover next, but each 3D printer can also be easier or harder to use depending on its features.
Step 1 – Prepare your design for 3D printingBy this point, it’s important you have a part ready to print and you have chosen your material. This part can be one you designed yourself using CAD (computer aided design), one taken from a 3D scan, or one you have taken from an inventory of existing designs.
Before you start printing, you need to translate your design into ‘coordinates’ the 3D printer can understand, as well as tell it important parameters such as the material you are printing with.
This is known as ‘slicing’, because it involves slicing the 3D design into – you guessed it – layers. This is typically done in a program known as slicing or print preparation software. Our Ultimaker Cura slicing software comes with many preconfigured settings so will normally only take you a matter of seconds to prepare a print. Or if you prefer granular control of the printing process, there are also hundreds of custom settings to use. Once the slicing is done, your file is ready to print.
Preparing a 3D print with Ultimaker Cura software
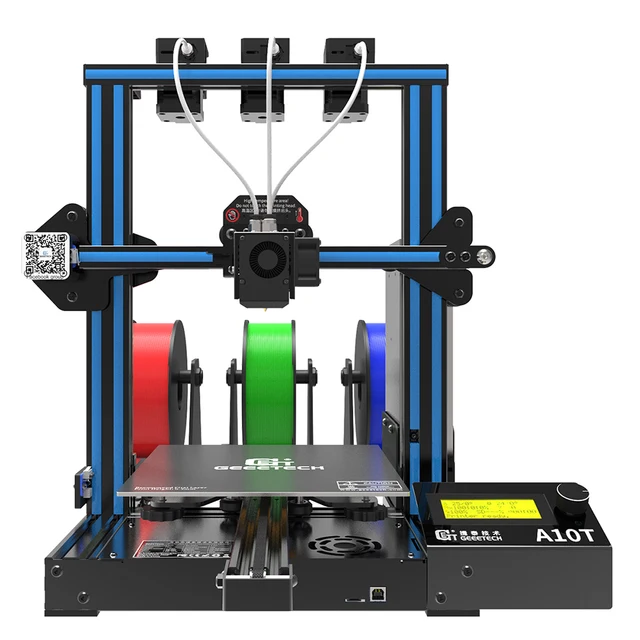
Step 2 – Set up your printerYou could also do this step first if you like. Or you may not need to at all, for example if you regularly print the same type of parts.
But before you start printing, be sure to check you have the right material loaded. FFF 3D printers like Ultimaker also let you choose different nozzle sizes, with a smaller nozzle giving more detailed prints and a larger nozzle faster print times. If you’re using Ultimaker software together with an Ultimaker 3D printer, it will check your printer configuration and prompt you if anything needs changing.
Step 3 – Send your file to the printerOnce you are ready to go, you need to get the file to your 3D printer. There are two main ways to do this. One is to load the file onto a data storage device (such as a USB drive), put it in the printer, and start your print job via the printer’s interface. The other option is to send the job remotely to a network enabled printer via your local network or the cloud. Remote printing is particularly helpful if you are not in the same location as your 3D printer.
Now you can sit back and relax! Or if you’re at work, get on with something else while the printer does its job.
Printing times vary depending on the size and detail level of your printed object and your 3D printer type. On an FFF 3D printer such as Ultimaker, a small component or rough prototype may only take a few hours. Most parts will be ready the next day if you leave the printer running overnight. And if you need a very large, detailed print, you may have to wait a couple of days.
Some 3D printing platforms enable you to monitor your print job. You can do this via the Ultimaker Digital Factory – and with an Ultimaker S3 or Ultimaker S5 printer, even view progress via a webcam feed.
When the print is finished, remove from the printer. Depending on your chosen material and printing process, some final manual steps may be needed before it’s ready to use. With an FFF 3D printer, this ‘post-processing’ is often little more than peeling off a small brim of material around the part. Other methods like SLA or SLS typically need more intricate post-processing, for example removing the loose powder from the chamber of an SLS printer.
With the Ultimaker platform you can prepare a print, choose a printer with your required setup, then send the print job – all remotely. Just collect it when it’s done
Are 3D printers easy to use?
This can depend on a lot of factors, but in general 3D printing is one of the most accessible manufacturing processes available. Compared to injection molding or CNC machining, 3D printers are a much easier way to make parts and models, which is why it works as a desktop technology everywhere from schools to offices.
But, there are a few things to be aware of that will help make your experience of 3D printing hassle-free:
Material choice – Perhaps the key area where all 3D printers are not created equal. Check which materials a 3D printer can print or you may end up surprised to discover you are limited to only one or two. Even worse, some printer manufacturers only let you print with their own material products, so you’re locked into using these forever. Look for a 3D printer that’s compatible with a wide range of materials, including those made by third parties, so you can leverage the near endless options on the market and benefit from open innovation
Automation – There are potentially hundreds of parameters and configurations involved every time you 3D print, such as printer temperatures or how the nozzle will travel to build up the print. But at Ultimaker, we don’t believe this should mean complexity for the user. For example, our material spools come with embedded NFC chips so the printer knows what’s loaded, preconfigured printing profiles in our software dramatically reduce setup time for each print, and you can manage the whole end-to-end process in one place via the Ultimaker Digital Factory
Support and service – If things do go wrong, it can be frustrating and impact your productivity.
 So be sure to check your 3D printer comes with comprehensive support and a warranty. Check for troubleshooting, FAQs, and other resources so you can easily solve problems yourself and stay productive
What do you need to 3D print?
Your 3D printer should come with everything you need to get started out of the box. Below we list the essentials, as well as the optional extras it’s good to know about:
A 3D printer – OK, this one’s obvious
Material – Your printer should include some in the box or it can be bought from 3D printing vendors
Software – Some printer brands supply their own, or you may have to find a compatible program. Note that there are two types of 3D printing software – print preparation (or slicing) software and printer (or print job) management software
Consumables – In addition to materials, your 3D printer may require or come with other consumables. For example, oil or grease for maintenance, or adhesive aids for the build surface.
 With Ultimaker, everything you need to get started comes in the box
Tools (largely optional) – Some 3D printers may require one or two basic tools for configuration changes or maintenance. (Again, with Ultimaker everything essential comes in the box.) Otherwise, if you’re going to be using your 3D printers a lot and will need to do some post-processing of prints, it’s useful to keep a few tools handy. We created a guide to tools for FFF 3D printers
Peripherals (optional) – These can add more functionality to your 3D printer. For example, for some of our printers you can also add an Air Manager, which encloses the 3D printer and filters up to 95% of UFPs (ultrafine particles), or Material Station which stores filament in an optimal environment and automatically loads material when a spool runs out
Next to this, all you need is a power supply and a clean, safe workspace for your 3D printer. You can find more advice on these topics in our free, in-depth white papers.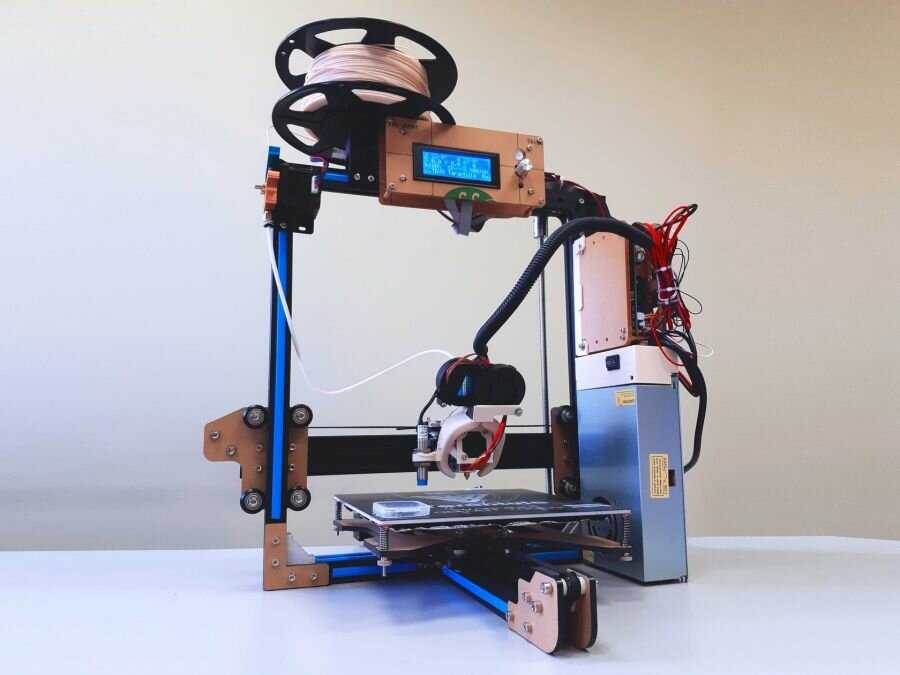
How do you use a 3D printer at home?
Hobbyists and entrepreneurs have been using desktop 3D printers at home for years, but at a time when remote working is more common than ever, this is an important question.
Generally, the same setup advice as above for a workplace is recommended. But think carefully about two key considerations – safety and space. SLS and SLA printers require careful processing of hazardous chemicals before unused resin or powder can be disposed of with your household waste. And as space is likely at a premium in the home, choosing a large format printer like the Ultimaker S5 Pro Bundle may not be practical compared to a smaller unit like an Ultimaker 2+ Connect or Ultimaker S3.
3D printers vary in size. Check the dimensions before installing it in your chosen location
There's more to discover...
Explore the wider world of 3D printing by checking out our answers to these common questions:
What is 3D printing?
What can you 3D print?
How much does 3D printing cost?
How to 3D print? The Beginner’s Guide to 3D Printing
Learning how to 3D print has never been easier!3D printing is an ever-evolving and expanding field. If you’re a beginner at 3D printing, the number of possibilities and applications can seem so vast, it can be a bit overwhelming when you’re just starting to know how to 3D print and how to use a 3D printer.
In this beginner’s guide to 3D printing, we’ll explain what exactly 3D printing is, how it works, how to 3D print, the best materials for beginners, and what you need to get started.
What is 3D Printing?3D printing is the process of creating a three-dimensional object, usually done by systematically layering material on top of itself. The printer reads a digital file from the computer which dictates how to layer the material to build the object.
This is why 3D printing is also known as additive manufacturing. 3D printing and additive manufacturing are mostly synonymous, although you may hear additive manufacturing used more frequently in the context of mass consumption or mass manufacturing.
How to 3D Print:Depending on the specific print you are planning to do there could be more or fewer steps in your process. But in general, 3D printing involves the following actions:
The first step of 3D printing typically starts on a computer. You must create your design using a 3D design software, typically a CAD (computer-aided design) software. If you are unable to create the design yourself, you can also find many free resources online with free designs.
Step 2: Export the STL FileOnce you have created or chosen a design, you must either export or download the STL file. The STL file is what stores the information about your conceptual 3D object.
Step 3: Choose Your MaterialsTypically you may have an idea about what kind of material you will use before you print. There are many different 3D printing materials available, and you can choose them based on the properties that you want your object to have. We will discuss this more in-depth below.
Step 4: Choose Your Parameters The next step is then deciding on the different parameters of your object and the printing process. This includes deciding on the size and placement of your print.
You will then import the STL file into a slicing software, like BCN3D Cura. The slicing software will convert the information from the STL file into a Gcode, which is a specific code containing exact instructions for the printer.
Step 6: PrintThis is when the magic happens! The printer will create the object layer by layer. Depending on the size of your object, your printer, and the materials used, the job can be done in a matter of minutes or over several hours.
Depending on what you want your final product to be or the material you used, there may be additional post-processing steps after printing, like painting, brushing off powder, etc.
What is 3D Printing Used For?3D printing can be used both recreationally and professionally, across various industries. It has applications in many different fields and sectors, from the healthcare industry to engineering, and even fashion.
Increasingly, 3D printing is seen as a sustainable and cost-friendly solution for creating prototypes and tools for different manufacturing projects and processes. Traditionally, acquiring prototypes can be time-consuming and costly, requiring companies to depend on outside manufacturers. 3D printing allows companies to quickly make units of an object, tool, or prototype, all in-house.
A great example of this is shoe company Camper. In-house 3D printing has allowed them to transform their nearly month and a half long modeling and designing process into an operation that takes only several days.
3D Printing For Beginners: How To Get Started
So, what do you need to get started with 3D printing? Your specific needs will depend on why and what you want to print, but in general, there are three considerations for getting started:
- A 3D printer
- Filament
- Slicing software
If you plan on creating your own designs you will also need the appropriate designing software. But, as we mentioned earlier, you can also find many free resources online to download designs.
If you have not yet purchased a 3D printer, we have a guide that can help steer you through the most important considerations.
3D printer FilamentsThe material also called filament, you choose for your print will depend on many different factors:
- Do you want your object to be flexible?
- Heat resistant?
- Does it need to be very durable?
These are just some of the factors to consider when choosing your filament.
In general, most beginners start with PLA. This is because PLA is cost-effective and typically easy to print with a standard configuration. Depending on your specific project, PLA could be good starter material.
PET-G is also considered a beginner-friendly material, although it is a bit more technical than PLA. However, it is great for industries like engineering and manufacturing. It is a good material for functional prototypes because it can withstand higher temperatures and has a different chemical makeup that is ideal for these uses.
There are two important pieces of software for 3D printing: CAD and slicing software.
Typically, you can use any CAD system that can create a functional model. CAD is essential if you want to create your own models and objects. You must be able to export an STL file from your CAD software.
The slicing software is the second part of the equation. This software translates the STL file into a language that the printer can understand. The Gcode contains movement information that tells the printer how and where to move its axis, as well as how much material to deposit. The Gcode is sent to the printer via an SD card or wifi.
Final Thoughts3D printing is now more beginner-friendly than it has ever been. In the beginning, many people saw 3D printing as something inaccessible to the major public, but this sentiment is changing, and for good reason. While it takes practice to perfect your prints and technique, learning how to 3D print is an attainable skill.
3D printing for "dummies" or "what is a 3D printer?"
- 1 3D printing term
- 2 3D printing methods
- 2.1 Extrusion printing
- 2.2 Melting, sintering or gluing
- 2.3 Stereolithography
- 2.4 Lamination
- 3 Fused Deposition Printing (FDM)
- 3.1 Consumables
- 3.2 Extruder
- 3.3 Working platform
- 3.4 Positioners
- 3.5 Control
- 3.6 Varieties of FDM printers
- 4 Laser stereolithography (SLA)
- 4.1 Lasers and projectors
- 4.2 Cuvette and resin
- 4.3 Types of stereolithographic printers
3D printing term
The term 3D printing has several synonyms, one of which quite briefly and accurately characterizes the essence of the process - "additive manufacturing", that is, production by adding material. The term was not coined by chance, because this is the main difference between multiple 3D printing technologies and the usual methods of industrial production, which in turn received the name "subtractive technologies", that is, "subtractive". If during milling, grinding, cutting and other similar procedures, excess material is removed from the workpiece, then in the case of additive manufacturing, material is gradually added until a solid model is obtained.
Soon 3D printing will even be tested on the International Space Station
Strictly speaking, many traditional methods could be classified as "additive" in the broad sense of the word - for example, casting or riveting. However, it should be borne in mind that in these cases, either the consumption of materials is required for the manufacture of specific tools used in the production of specific parts (as in the case of casting), or the whole process is reduced to joining ready-made parts (welding, riveting, etc.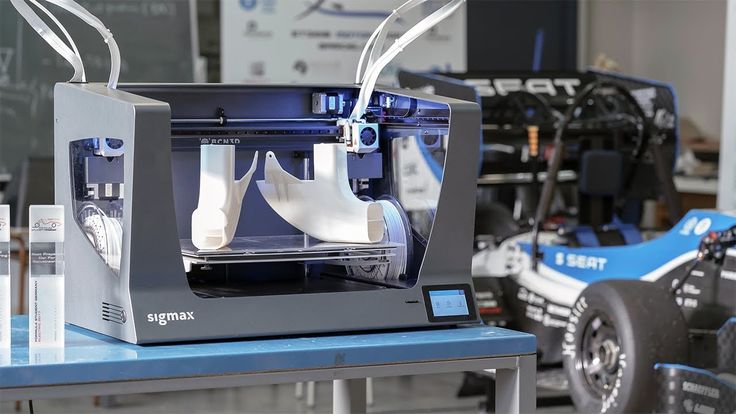 ). In order for the technology to be classified as “3D printing”, the final product must be built from raw materials, not blanks, and the formation of objects must be arbitrary - that is, without the use of forms. The latter means that additive manufacturing requires a software component. Roughly speaking, additive manufacturing requires computer control so that the shape of final products can be determined by building digital models. It was this factor that delayed the widespread adoption of 3D printing until the moment when numerical control and 3D design became widely available and highly productive.
3D printing techniques
3D printing technologies are numerous, and there are even more names for them due to patent restrictions. However, you can try to divide technologies into main areas:
Extrusion printing
This includes methods such as deposition deposition (FDM) and multi-jet printing (MJM). This method is based on the extrusion (extrusion) of consumables with the sequential formation of the finished product. As a rule, consumables consist of thermoplastics or composite materials based on them.
Melting, sintering or bonding
This approach is based on bonding powdered material together. Formation is done in different ways. The simplest is gluing, as is the case with 3D inkjet printing (3DP). Such printers deposit thin layers of powder onto the build platform, which are then selectively bonded with a binder. Powders can be made up of virtually any material that can be ground to a powder—plastic, wood, metal.
This model of James Bond's Aston Martin was successfully printed on Voxeljet's SLS printer and blown up just as successfully during the filming of Skyfall instead of the expensive original
sintering (SLS and DMLS) and smelting (SLM), which allow you to create all-metal parts. As with 3D inkjet printing, these devices apply thin layers of powder, but the material is not glued together, but sintered or melted using a laser. Laser sintering (SLS) is used to work with both plastic and metal powders, although metal pellets usually have a more fusible shell, and after printing they are additionally sintered in special ovens. DMLS is a variant of SLS installations with more powerful lasers that allow sintering metal powders directly without additives. SLM printers provide not just sintering of particles, but their complete melting, which allows you to create monolithic models that do not suffer from the relative fragility caused by the porosity of the structure. As a rule, printers for working with metal powders are equipped with vacuum working chambers, or they replace air with inert gases. Such a complication of the design is caused by the need to work with metals and alloys subject to oxidation - for example, with titanium.
Stereolithography
How an SLA printer works
Stereolithography printers use special liquid materials called "photopolymer resins".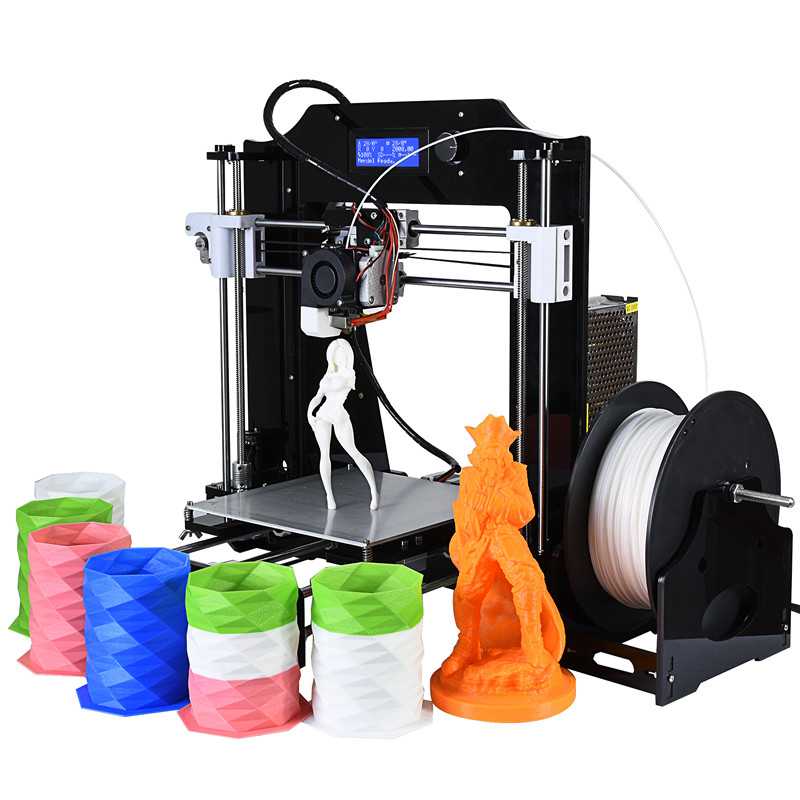 The term "photopolymerization" refers to the ability of a material to harden when exposed to light. As a rule, such materials react to ultraviolet irradiation.
Resin is poured into a special container with a movable platform, which is installed in a position near the surface of the liquid. The layer of resin covering the platform corresponds to one layer of the digital model. Then a thin layer of resin is processed by a laser beam, hardening at the points of contact. At the end of illumination, the platform together with the finished layer is immersed to the thickness of the next layer, and illumination is performed again.
Lamination
Laminating (LOM) 3D printers workflow
Some 3D printers build models using sheet materials - paper, foil, plastic film.
Layers of material are glued on top of each other and cut to the contours of the digital model using a laser or a blade.
These machines are well suited for prototyping and can use very cheap consumables, including regular office paper. However, the complexity and noise of these printers, coupled with the limitations of the models they produce, limit their popularity.
Fused Deposition Modeling (FDM) and Laser Stereolithography (SLA) are the most popular 3D printing methods used in the home and office.
Let's take a closer look at these technologies.
Fused Deposition Printing (FDM)
FDM is perhaps the simplest and most affordable 3D construction method, which makes it very popular.
High demand for FDM printers is driving device and consumable prices down rapidly, along with technology advances towards ease of use and improved reliability.
Consumables
ABS filament spool and finished model
FDM printers are designed to print with thermoplastics, which are usually supplied as thin filaments wound on spools. The range of "clean" plastics is very wide. One of the most popular materials is polylactide or "PLA plastic". This material is made from corn or sugar cane, which makes it non-toxic and environmentally friendly, but makes it relatively short-lived. ABS plastic, on the other hand, is very durable and wear-resistant, although it is susceptible to direct sunlight and can release small amounts of harmful fumes when heated. Many plastic items that we use on a daily basis are made from this material: housings for household appliances, plumbing fixtures, plastic cards, toys, etc.
In addition to PLA and ABS, printing is possible with nylon, polycarbonate, polyethylene and many other thermoplastics that are widely used in modern industry. More exotic materials are also possible, such as polyvinyl alcohol, known as "PVA plastic". This material dissolves in water, which makes it very useful for printing complex geometric patterns. But more on that below.
Model made from Laywoo-D3. Changing the extrusion temperature allows you to achieve different shades and simulate annual rings
It is not necessary to print with homogeneous plastics. It is also possible to use composite materials imitating wood, metals, stone. Such materials use all the same thermoplastics, but with impurities of non-plastic materials.
So, Laywoo-D3 consists partly of natural wood dust, which allows you to print "wooden" products, including furniture.
The material called BronzeFill is filled with real bronze, and models made from it can be ground and polished, achieving a high similarity to products made from pure bronze.
One has only to remember that thermoplastics serve as a binding element in composite materials - they determine the thresholds of strength, thermal stability and other physical and chemical properties of finished models.
Extruder
Extruder - FDM print head. Strictly speaking, this is not entirely true, because the head consists of several parts, of which only the feed mechanism is directly "extruder". However, by tradition, the term "extruder" is commonly used as a synonym for the entire print assembly.
FDM extruder general design
The extruder is designed for melting and applying thermoplastic thread. The first component is the thread feed mechanism, which consists of rollers and gears driven by an electric motor. The mechanism feeds the thread into a special heated metal tube with a small diameter nozzle, called a "hot end" or simply a "nozzle". The same mechanism is used to remove the thread if a change of material is needed.
The hot end is used to heat and melt the thread fed by the puller. As a rule, nozzles are made from brass or aluminum, although more heat-resistant, but also more expensive materials can be used. For printing with the most popular plastics, a brass nozzle is quite enough. The “nozzle” itself is attached to the end of the tube with a threaded connection and can be replaced with a new one in case of wear or if a change in diameter is necessary. The nozzle diameter determines the thickness of the molten filament and, as a result, affects the print resolution. The heating of the hot end is controlled by a thermistor. Temperature control is very important, because when the material is overheated, pyrolysis can occur, that is, the decomposition of plastic, which contributes both to the loss of the properties of the material itself and to clogging of the nozzle.
PrintBox3D One FDM Printer Extruder
To prevent the filament from melting too early, the top of the hot end is cooled by heatsinks and fans. This point is of great importance, since thermoplastics that pass the glass transition temperature significantly expand in volume and increase the friction of the material with the walls of the hot end. If the length of such a section is too long, the pulling mechanism may not have enough strength to push the thread.
The number of extruders may vary depending on the purpose of the 3D printer. The simplest options use a single print head. The dual extruder greatly expands the capabilities of the device, allowing you to print one model in two different colors, as well as using different materials. The last point is important when building complex models with overhanging structural elements: FDM printers cannot print “over the air”, since the applied layers require support. In the case of hinged elements, temporary support structures have to be printed, which are removed after printing is completed. The removal process is fraught with damage to the model itself and requires accuracy. In addition, if the model has a complex structure with internal cavities that are difficult to access, building conventional supports may not be practical due to the difficulty in removing excess material.
Finished model with PVA supports (white) before and after washing
In such cases, the same water-soluble polyvinyl alcohol (PVA) comes in handy. Using a dual extruder, you can build a model from waterproof thermoplastic using PVA to create supports.
After printing, PVA can be simply dissolved in water and a complex product of perfect quality can be obtained.
Some FDM printers can use three or even four extruders.
Working platform
Heated platform covered with removable glass work table
Models are built on a special platform, often equipped with heating elements. Preheating is required for a wide range of plastics, including the popular ABS, which are subject to a high degree of shrinkage when cooled. The rapid loss of volume by cold coats compared to freshly applied material can lead to model distortion or delamination. The heating of the platform makes it possible to significantly equalize the temperature gradient between the upper and lower layers.
Heating is not recommended for some materials. A typical example is PLA plastic, which requires a fairly long time to harden. Heating PLA can lead to deformation of the lower layers under the weight of the upper ones. When working with PLA, measures are usually taken not to heat up, but to cool the model. Such printers have characteristic open cases and additional fans blowing fresh layers of the model.
Calibration screw for work platform covered with blue masking tape
The platform needs to be calibrated before printing to ensure that the nozzle does not hit the applied layers and move too far causing air-to-air printing resulting in plastic vermicelli. The calibration process can be either manual or automatic. In manual mode, calibration is performed by positioning the nozzle at different points on the platform and adjusting the platform inclination using the support screws to achieve the optimal distance between the surface and the nozzle.
As a rule, platforms are equipped with an additional element - a removable table. This design simplifies the cleaning of the working surface and facilitates the removal of the finished model. Stages are made from various materials, including aluminum, acrylic, glass, etc. The choice of material for the manufacture of the stage depends on the presence of heating and consumables for which the printer is optimized.
For a better adhesion of the first layer of the model to the surface of the table, additional tools are often used, including polyimide film, glue and even hairspray! But the most popular tool is inexpensive, but effective masking tape. Some manufacturers make perforated tables that hold the model well but are difficult to clean. In general, the expediency of applying additional funds to the table depends on the consumable material and the material of the table itself.
Positioning mechanisms
Scheme of operation of positioning mechanisms
Of course, the print head must move relative to the working platform, and unlike conventional office printers, positioning must be carried out not in two, but in three planes, including height adjustment.
Positioning pattern may vary. The simplest and most common option involves mounting the print head on perpendicular guides driven by stepper motors and providing positioning along the X and Y axes.
Vertical positioning is carried out by moving the working platform.
On the other hand, it is possible to move the extruder in one plane and the platforms in two.
SeemeCNC ORION Delta Printer
One option that is gaining popularity is the delta coordinate system.
Such devices are called "delta robots" in the industry.
In delta printers, the print head is suspended on three manipulators, each of which moves along a vertical rail.
The synchronous symmetrical movement of the manipulators allows you to change the height of the extruder above the platform, and the asymmetric movement causes the head to move in the horizontal plane.
A variant of this system is the reverse delta design, where the extruder is fixed to the ceiling of the working chamber, and the platform moves on three support arms.
Delta printers have a cylindrical build area, and their design makes it easy to increase the height of the working area with minimal design changes by extending the rails.
In the end, everything depends on the decision of the designers, but the fundamental principle does not change.
Control
Typical Arduino-based controller with add-on modules
The operation of the FDM printer, including nozzle and platform temperature, filament feed rate, and stepper motors for positioning the extruder, is controlled by fairly simple electronic controllers. Most controllers are based on the Arduino platform, which has an open architecture.
The programming language used by the printers is called G-code (G-Code) and consists of a list of commands executed in turn by the 3D printer systems. G-code is compiled by programs called "slicers" - standard 3D printer software that combines some of the features of graphics editors with the ability to set print options through a graphical interface. The choice of slicer depends on the printer model. RepRap printers use open source slicers such as Skeinforge, Replicator G and Repetier-Host. Some companies make printers that require proprietary software.
Program code for printing is generated using slicers
As an example, we can mention Cube printers from 3D Systems. There are companies that offer proprietary software but allow third-party software, as is the case with the latest generation of MakerBot 3D printers.
Slicers are not intended for 3D design per se. This task is done with CAD editors and requires some 3D design skills. Although beginners should not despair: digital models of a wide variety of designs are offered on many sites, often even for free. Finally, some companies and individuals offer 3D design services for custom printing.
Finally, 3D printers can be used in conjunction with 3D scanners to automate the process of digitizing objects. Many of these devices are designed specifically to work with 3D printers. Notable examples include the 3D Systems Sense handheld scanner and the MakerBot Digitizer handheld desktop scanner.
MakerBot Replicator 5th Generation FDM Printer with built-in control module on the top of the frame
The user interface of a 3D printer can consist of a simple USB port for connecting to a personal computer. In such cases, the device is actually controlled by the slicer.
The disadvantage of this simplification is a rather high probability of printing failure when the computer freezes or slows down.
A more advanced option includes an internal memory or memory card interface to make the process standalone.
These models are equipped with control modules that allow you to adjust many print parameters (such as print speed or extrusion temperature). The module may include a small LCD display or even a mini-tablet.
Varieties of FDM printers
Professional Stratasys Fortus 360mc FDM printer that allows printing with nylon
FDM printers are very, very diverse, ranging from the simplest homemade RepRap printers to industrial installations capable of printing large-sized objects.
Stratasys, founded by Scott Crump, the inventor of FDM technology, is a leader in the production of industrial installations.
You can build the simplest FDM printers yourself. Such devices are called RepRap, where "Rep" indicates the possibility of "replication", that is, self-reproduction.
RepRap printers can be used to print custom built plastic parts.
Controller, rails, belts, motors and other components can be easily purchased separately.
Of course, assembling such a device on your own requires serious technical and even engineering skills.
Some manufacturers make it easy by selling DIY kits, but these kits still require a good understanding of the technology. RepRap Printers
And, despite their "homemade nature", RepRap printers are quite capable of producing models with quality at the level of expensive branded counterparts.
Ordinary users who do not want to delve into the intricacies of the process, but require only a convenient device for household use, can purchase a ready-made FDM printer.
Many companies are focusing on the development of the consumer market segment, offering 3D printers for sale that are ready to print “right out of the box” and do not require serious computer skills.
3D Systems Cube consumer 3D printer
The most famous example of a consumer 3D printer is the 3D Systems Cube.
While it doesn't boast a huge build area, ultra-fast print speeds, or superb build quality, it's easy to use, affordable, and safe: This printer has received the necessary certification to be used even by children.
Mankati FDM printer demonstration: http://youtu.be/51rypJIK4y0
Laser Stereolithography (SLA)
Stereolithographic 3D printers are widely used in dental prosthetics
Stereolithographic printers are the second most popular and widespread after FDM printers.
These units deliver exceptional print quality.
The resolution of some SLA printers is measured in a matter of microns - it is not surprising that these devices quickly won the love of jewelers and dentists.
The software side of laser stereolithography is almost identical to FDM printing, so we will not repeat ourselves and will only touch on the distinctive features of the technology.
Lasers and projectors
Projector illumination of a photopolymer model using Kudo3D Titan DLP printer as an example
The cost of stereolithography printers is rapidly declining due to growing competition due to high demand and the use of new technologies that reduce the cost of construction.
Although the technology is generically referred to as "laser" stereolithography, most recent developments use UV LED projectors for the most part.
Projectors are cheaper and more reliable than lasers, do not require the use of delicate mirrors to deflect the laser beam, and have higher performance. The latter is explained by the fact that the contour of the whole layer is illuminated as a whole, and not sequentially, point by point, as is the case with laser options. This variant of the technology is called projection stereolithography, "DLP-SLA" or simply "DLP". However, both options are currently common - both laser and projector versions.
Cuvette and resin
Photopolymer resin is poured into a cuvette
A photopolymer resin that looks like epoxy is used as consumables for stereolithographic printers. Resins can have a variety of characteristics, but they all share one key feature for 3D printing applications: these materials harden when exposed to ultraviolet light. Hence, in fact, the name "photopolymer".
When polymerized, resins can have a wide variety of physical characteristics. Some resins are like rubber, others are hard plastics like ABS. You can choose different colors and degrees of transparency. The main disadvantage of resins and SLA printing in general is the cost of consumables, which significantly exceeds the cost of thermoplastics.
On the other hand, stereolithography printers are mainly used by jewelers and dentists who do not need to build large parts but appreciate the savings from fast and accurate prototyping. Thus, SLA printers and consumables pay for themselves very quickly.
Example of a model printed on a laser stereolithographic 3D printer
Resin is poured into a cuvette, which can be equipped with a lowering platform. In this case, the printer uses a leveling device to flatten the thin layer of resin covering the platform just prior to irradiation. As the model is being made, the platform, together with the finished layers, is “embedded” in the resin. Upon completion of printing, the model is removed from the cuvette, treated with a special solution to remove liquid resin residues and placed in an ultraviolet oven, where the final illumination of the model is performed.
Some SLA and DLP printers work in an "inverted" scheme: the model is not immersed in the consumable, but "pulled" out of it, while the laser or projector is placed under the cuvette, and not above it. This approach eliminates the need to level the surface after each exposure, but requires the use of a cuvette made of a material transparent to ultraviolet light, such as quartz glass.
The accuracy of stereolithographic printers is extremely high. For comparison, the standard for vertical resolution for FDM printers is considered to be 100 microns, and some variants of SLA printers allow you to apply layers as thin as 15 microns. But this is not the limit. The problem, rather, is not so much in the accuracy of lasers, but in the speed of the process: the higher the resolution, the lower the print speed. The use of digital projectors allows you to significantly speed up the process, because each layer is illuminated entirely. As a result, some DLP printer manufacturers claim to be able to print with a vertical resolution of one micron!
Video from CES 2013 showing Formlabs Form1 stereolithography 3D printer in action: http://youtu.be/IjaUasw64VE
Stereolithography Printer Options
Formlabs Form1 Desktop Stereolithography Printer
As with FDM printers, SLA printers come in a wide range in terms of size, features and cost. Professional installations can cost tens if not hundreds of thousands of dollars and weigh a couple of tons, but the rapid development of desktop SLA and DLP printers is gradually reducing the cost of equipment without compromising print quality.
Models such as the Titan 1 promise to make stereolithographic 3D printing affordable for small businesses and even home use at around $1,000. Formlabs' Form 1 is available now for a factory selling price of $3,299.
The developer of the DLP printer Peachy generally intends to overcome the lower price barrier of $100.
At the same time, the cost of photopolymer resins remains quite high, although the average price has fallen from $150 to $50 per liter over the past couple of years.
Of course, the growing demand for stereolithographic printers will stimulate the growth in the production of consumables, which will lead to further price reductions.
Go to the main page of the Encyclopedia of 3D printing
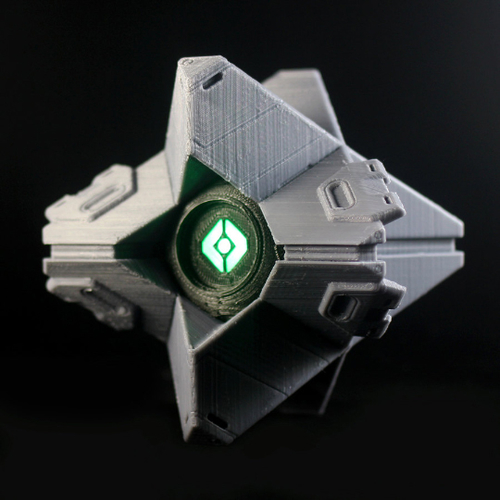
50 cool things to print on a 3D printer / Sudo Null IT News
No ideas for 3D printing? Tired of worthless trinkets? Here is a list of 50 cool really useful things for 3D printing.
Like us, you're excited about the possibilities of 3D printing. But, unfortunately, the horizon is littered with trinkets, trinkets and other unnecessary things. We are in danger of being buried under a heap of useless rubbish.
Throw off the shackles of mediocrity! Let's create really useful things! Here is a list of cool things that you can make on a 3D printer right now. Prove to your family and loved ones that this wonderful technology can be used daily and in practice.
Don't have access to a 3D printer? No problem. Just upload your files to our 3D printing price comparison system and choose the best price, ONLINE!
Don't have a 3D printer to print these amazing things? Then come to
Download from ThingiVerse
Cool 3D Printing Item #2: socket shelf
Attach a shelf to your power outlet to support your phone while charging. The shelf has a slanted recess that allows you to keep your smartphone or tablet upright.
Download from ThingiVerse
3D Printing Cool Item #3: Soap Dish
Elegant bathroom soap dish with two washable compartments. You can change the pattern of the inner pallet if you wish.
Download from ThingiVerse
3D Printing Cool Item #4: Nightstand Tag Handles
The art of storage doesn't have to be boring. The Hobb Knob is a small pen with a label to describe the items in the drawers. Now you will never lose your socks!
Download from ThingiVerse
3D Printable Cool Item #5: Coasters with Geometric Patterns
When it comes to hot drinks, mugs are an inevitable risk. Things take a much more serious turn if there is a coffee-addicted inhabitant in the house. Available in three designs, these coasters help you avoid unsightly stains.
Download from Pinshape
3D Printing Cool Thing #6: Hinge Lamp
This hinged modular lamp consists of 6 main elements: base, body and top with LEDs. To make the lamp taller, you can add the required number of elements.
Download from MyMiniFactory
3D Printable Cool Item #7: One Handed Bottle Opener
This boomerang-shaped bottle opener is useful for people who have difficulty performing activities that require force, such as opening a plastic bottle. Print it out and give it to your grandmother. She will appreciate this gesture.
Download from ThingiVerse
3D Printable Cool Item #8: shower head
Is swimming under a waterfall on your list of things to do before you die? The next best thing is a 3D printed shower head (probably).
Download from ThingiVerse
3D Printable Cool Item #9: Secret Shelf
Hide valuable documents and stash from prying eyes on this secret shelf.
Download from ThingiVerse
3D Printable Cool Item #10: Jar Handle
Enhance empty jam jars with a printed handle. What could be easier?
Download from ThingiVerse
3D Printing Cool Item #11: Plastic Wrench
A full-fledged general purpose plastic wrench. Actually for screwing and unscrewing around the house.
Download from ThingiVerse
Cool 3D Printing Item #12: business card holder
"What a delicate yellowish tint, and the thickness is tasteful, oh my, even the watermarks." Do you have such a business card? Find her a pair in the form of this business card holder, printed in its entirety (yes, already with a hinged lid). Instructions for adding a custom logo are included.
Download from ThingiVerse
3D Printable Cool Item #13: Alien Invader Shaped Toilet Paper Holder
Brighten up your bathroom with a functional print of your classic toilet paper holding alien invader… ahem.
Download from ThingiVerse
3D Printing Cool Thing #14: lift platform
Here is a fully assembled lift platform. Printed in full. No need to fiddle with a bunch of details. The adjustable height can be used to lift or support an object of acceptable weight.
Download from ThingiVerse
3D Printing Cool Thing #15: Plant Feeder
Houseplants fallen victim to neglect? FORGET ABOUT IT. Print out this simple automatic plant drinker and your conscience will be clear.
Download from ThingiVerse
3D Printing Cool Item #16: earbud holder
We spend a lot of money buying headphones on the go, but we don't protect them enough when we use them. Hide your headphones safely in this 3D printed holder.
Download from ThingiVerse
3D Printing Cool Thing #17: bag pen
We all know this situation. You trudge home from the supermarket, loaded with bags of groceries. The force of gravity causes plastic to crash into your palms, am I right? ENOUGH. Print these bag handles and forget about chafed palms forever!
Download from ThingiVerse
Cool thing for 3D printing #18: tablet stand
There are times when you need to free your hands when using your smart device, such as watching TV shows or cooking recipes. This simple stand supports 7" and larger tablets in both portrait and landscape modes.
Download from Pinshape
3D Printable Cool Item #19: Plant Drinker #2
Another horticultural art contraption. It is especially suitable for kitchen plants. The next time you buy fresh herbs for cooking, transplant them into this neat device and they'll stay fresh all week long.
Download from ThingiVerse
Cool thing for 3D printing #20: door stop
Tired of everyone slamming doors at home or in the office? Then you need an UNCOMPROMISING door stop. Light weight, child safe, designed for easy installation and easy fabrication on an FDM 3D printer. The creator of the stop also claims that the device can be used to repel zombie attacks, however this version has not been verified.
Download from ThingiVerse
3D Printing Cool Item #21: Windshield Scraper
If you want to quickly and easily get rid of snow and ice on your car windshield with this handy scraper. Printed without support, at the end there is a hole for a lace.
Download from ThingiVerse
3D Printing Cool Thing #22: Water Hose Control
This special nozzle regulates the flow of water in the garden hose, about 2 liters per minute. It’s great if you have water limits set in the height of summer.
Download from ThingiVerse
3D Printable Cool Thing #23: Modular Wine Rack
Whether you're a beginner or a wine connoisseur, this modular wine rack is the perfect storage solution for your fine drink. bottles of WIRA. It can be expanded (or narrowed) according to your collection by printing only the required number of modules.
Download from 3DShook
3D Printable Cool Item #24: Security Whistle
This original design whistle is easy to make and carry around. Durable and very loud. How loud? How about 118 decibels? This is more than enough to get people to hear about your emergency.
Download from ThingiVerse
3D Printable Cool Item #25: Apple Headphone Holder
Download from Myminifactory
Cool thing for 3D Press No. 34: Key holder
download from Myminifactory
Cool Press №35: Holder of tables with limited possibilities 9036
Download from MyMiniFactory
Cool 3D Printable Item #36: Wine Bottle Cap
Download from MyMiniFactory
90
Download from MyMiniFactory
Cool 3D Printable Item #43: Beer Glass Holder
Download from MyMiniFactory
Cool thing for 3D printing No.