Up plus 2 3d desktop printer
Tiertime UP Plus 2 3D Printer
Properties
| Build Volume | 140 x 140 x 135 mm (5.5 x 5.5 x 5.3 in.) |
| Layer Resolution Low | 400 micron (0.016 in.) |
| Layer Resolution High | 150 micron (0.006 in.) |
Documents
- UP Plus 2 3D Printer Manual.pdf
| Brand | Tiertime |
| Machine type | 3D Printer |
| Technology | FDM (Fused Deposition Modeling) |
| Materials | PLA, ABS, Color-Blending PLA |
| Website | http://www. |
| Average Price | $849.00 |
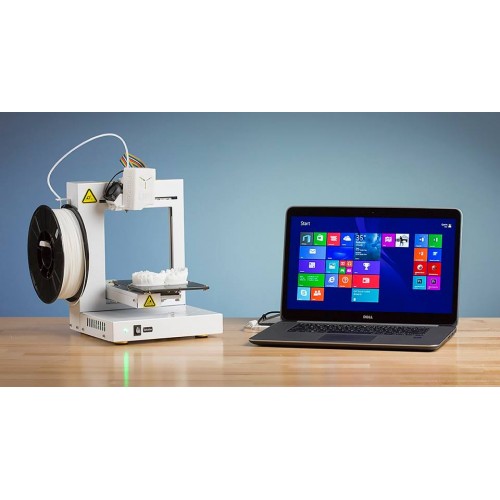
A classic prosumer 3D printer in the UP series, it is one of the most popular 3D printers in the world. Awarded by MakeMagazine for two consecutive years as the easiest 3D printer to use. Compared to the consumer level UP Mini, it can make bigger objects with more details. Its open chassis makes it convenient to use and its small foot print fit perfectly on desktop. UP Plus 2 is fitted with high precision linear bearings, so its printing quality and reliability is comparable to industrial printers. UP Plus 2 supports automatic platform leveling and nozzle height detection, so calibration becomes so easy that anyone can finish in a matter of minutes.
Features:
- Out Of The BOX 3D Printing: Without prior knowledge of 3D printer you can start your first print within 30 minutes.
- High Quality Prints At Low Price: UP Plus 2 produces better print quality than most more expensive rivals. It supports UP PLA and UP ABS filaments which guarantee great prints at low cost.
- Highly Reliable: UP Plus 2 uses high quality precision parts. It has very low failure rate that save you time and money.
- Quiet Operation: UP Plus 2 produces very little noise, you will feel comfortable working with it in the same room, on the same desk.
- Powerful But Easy To Use Software: UP software is simple to use, feature rich, fast and free. It is easy enough for rookies and versatile enough for gurus.
- Smart Support Technology: Industrial leading support generation algorithm that produces easily removable support structures and improve print quality.
 This advanced technology allows difficult and complex designs to be printed at ease.
Specifications:
- Melted Extrusion Manufacturing(MEM)Printing technology
- Single extruder, modularize for easy installation
- Layer Thickness of 0.15/0.20 /0.25 /0.30 /0.35 /0.40 mm
- Automatic Leveling and automatic detection of nozzle height
- Print Surface Heated, with perforated board or UP Flex
- Average Operational Noise 55 dB
- UP Studio Software
- Metal body, open form
UP Plus 2 3D Printer | UP!
- Redesigned model inside and out, engineered to provide continuous dimensionally accurate 3D printed parts
- Best-in-class desktop 3D Printer and easiest to use
- Innovative auto leveling platform calibration and automatic height sensor
- Improved 3D print spooling speed
UP Plus 2 3D Printer
Using a 3D Printer just got easier, the UP Plus 2 features automatic platform levelling along with automatic platform height detection. The all new UP Plus 2 is the latest version of the award-winning UP Plus 3D printer. It is closely based on its predecessor, but with a host of innovative new refinements. The newest way to print quality 3D models right from your desk for visualisation, collaboration, and functional prototyping testing.
Award Winning 3D Printer
The all-new UP Plus 2 is based on the award winning UP Plus 3D Printer (also known as Afinia in USA) that won the Make Magazine Ultimate Guide to 3D Printing Buyer’s Guide Competition. [tagline_box title=”Make Magazine editors said” description=”A Clear winner and Easy to use, with feature-rich software and impressive print quality.“] The only printer that managed to print the owls nostril was the UP 3D Printer, even 3d printer bureau parts from Shapeways and Ponoko didn’t manage this test correctly. Watch some of the results 20 minutes into the video http://www.youtube.com/watch?v=x4plMvIzlA0.
Smart Support
The clever 3D Print software that comes with your 3D Printer does the hardest job of all.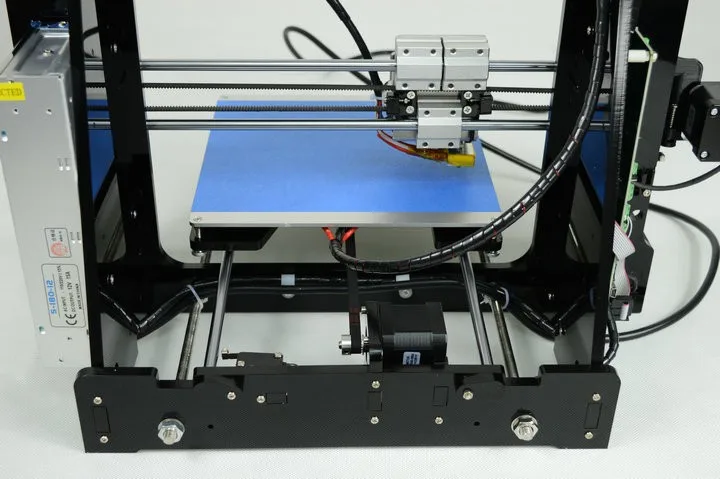 No matter how complex your 3D model is, the visual printer software driver will work out where it needs to support the model during printing. Then the 3D Printer prints the support material in a lower density at the same time as printing the part. That’s smart stuff! Once the model has been printed, you simply just break away the support material. So no need to worry if your part or model will print. Since it is all automatic, all you need to do is click ‘Print’. The UP Plus 3D printer and software will analyse your design, see where support will be required and then build it all for you. No worries! Just an easy to use 3D printer.
Full Metal Jacket
With a strong and durable steel structure and linear bearings on each axis, the UP Plus 2 is built for making quality parts endlessly 24hrs a day. The registration of each layer is absolutely spot-on the previous layer. So you get constant build quality every print.
Easiest to use
There is no other 3D Printer that is as easy to use as the new UP Plus 2. With it’s innovative auto levelling (the hardest job for any 3D Printer operator is to level the print platform, as it is essential to have a flat and level surface before your 3D model is printed.) Everything you need is in the box! Our printers are easy to use, with minimal setup, USB connectivity and include the Smart visual print driver. 3D Printing has never been so easy. Just load in your STL and click ‘print’ and away you go! There is no need to worry about over hangs or under cuts. [tagline_box title=” description=”From the home, the classroom, and to the office. Our 3D Desktop Printers are easy to use for everyone! With a network of local Australian and Australia resellers with local support.”]
Ideal for the Prosumer
With the “UP Plus 2” 3D Printer you can print professional (150 micron detail), tough and functional parts faster and more affordable right on your desk. Pair that with our open consumable design, you can keep the cost of printing low. When using our filament, the cost of printing is about 6-8c per gram! When selecting a 3D Printer it is important to take into account the total cost of ownership. Traditional inkjet printing has been locked down to manufacturers inks, the UP Plus 2 uses an open consumable design, if it meets the specifications you can print with it and save!
Colour 3D Printing
With over 15 colours to choose from and in three different ABS plastic material types. A high impact translucent crystal ABS, a white ABS+ that is tough and can flex ideal for snap lock fitting parts. Many more to come, including glow in the dark, high impact and star burst. Create the rose in red, stem in green and the vase in lime. Give your designs that extra bling, let them glow in the night. If you prefer to stick to the basics, our white plastic is the most versatile. You can dye it using clothing dye to any colour you want! It just soaks it right up! What about creating the full colour model? Grab your paint brush and get to it! ABS plastic is very versatile – you can sand it, paint it, dye it, drill it and use it for functional parts.
Create Super Large Parts
Just because it’s a desktop 3D Printer, doesn’t mean you can’t make super large parts. By slicing your model into several components, then printing and gluing together you can make some impressive models. For example the Eiffel Tower in the picture, stands nearly a meter tall and is made of thirteen separate parts. Amazing engineering, amazing 3D printing.
Materials
The UP Plus 2 can print in ABS (acrylonitrile butadiene styrene) thermoplastic which is the same plastic as Lego. ABS is the plastic of choice for 3D Printers, as the printed parts are tough and durable. The parts are built tough and can be used as usable parts and functional end-use parts. Removal of support material is easy and safe. No dangerous chemicals are required, just simply break away the support that is printed in the same material but in a lower density. You can slice your models into parts, print them in components and then just glue using nail varnish remover (Acetone).
PLA
The UP Plus 2 3D Printer can also print with PLA (Polylactic acid). PLA is derived from corn and is biodegradable. The big advantage of printing with PLA is that it can be used for investment casting / lost wax casting. In general, PLA is not the recommended plastic to print with, as the material starts breaking down after a few months and printed parts are fragile. The material is very sharp when broken and can be a hazard when removing support material from the printed parts.
Smart Software
The UP Plus 2comes with our easy to use Smart Visual Print Driver software. Just open up your STL (Most 3D CAD software packages can export to STL) – with the software you can rotate, scale and resize to your heart’s content. Much like a traditional 2D where printer where you can choose different settings, you can also choose your 3D print settings. Layer thickness, fill type (Honeycomb hollow or solid), quality and amount of Smart Support you want for each print.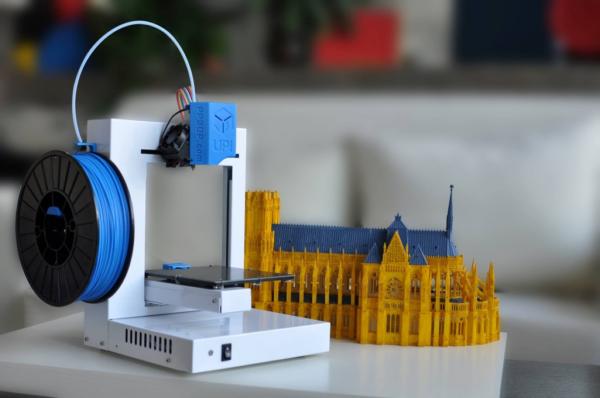 If that’s too much for you, don’t worry the default settings will work just fine by just clicking ‘print’! [tagline_box title=”Printing out multiples of the same thing?” description=”It’s easy! Just click ‘reprint’ . It saves time by printing an exact copy of the previous model.”] So there is no need to use special software. Just about anything will do! As long as you can get it into a water tight STL file.
Digital Design Software (3D CAD)
There are so many great 3D CAD options available to turn your idea into a professional 3D CAD model in just a few minutes. Tinkercad has got to be the easiest to use, it’s cloud based so will run on multiple platforms. 3DTin also deserves a mention as another cloud based design option. Both of these export to STL files so they are ready for 3D Printing. Did I say they are both Free! Another free alternative is Google Sketchup. The majority of 3D CAD software can export to STL, so the UP Plus 2 works with Autodesk Inventor, Solidworks, Rhino, 3DSMax, Creo and many others.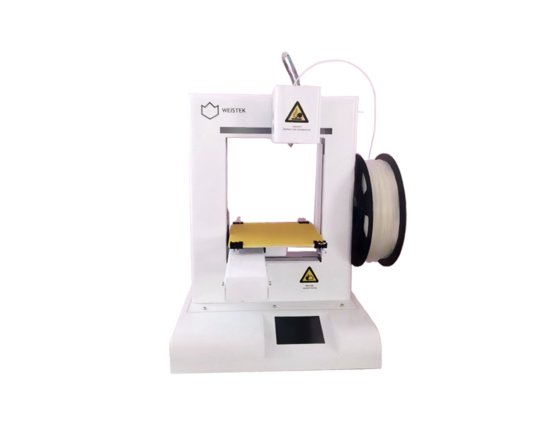
Small on size, big on features
All the features of industrial sized 3D printers packed into a form factor that fits right on your desk.
It has 90% of the quality of the bigger machines at 10% of the price. With its wonderful smart support and is easy to use, you will be pumping out professional parts, model after model!Mark Stolten, Senztek Ltd
I’ve seen the UP 3D Printer in operation at three different organizations and it has made a favourable impression. I believe it could serve as a tool for product design and concept modelling as well as for education and training in additive manufacturing.Terry Wohlers, Wohlers Report
UP Plus 2 3D Printer Specifications
What’s in the box
Everything you need is in the box, ready for you to start turning your ideas into real parts. You don’t require any extras. We even give you a free roll of white ABS plastic filament included with your new 3D Printer.
- UP! Plus 2 Desktop 3D Printer
- One free 500g spool of 1.75mm tough ABS white plastic filament
- Perfboard x 3
- Heat resistant gloves
- USB Cable
- Selection of tools to maintain and self service the printer
Smart 3D Print Software
Visual 3D Print Software and drivers
The included Smart 3D Print software included with your UP Plus 2 3D Printer is very easy to use and is very smart. It automatically calculates the required support material for the most demanding 3D models. Just load any STL file (Just about every 3D CAD modelling software can export to STL). It doesn’t matter how complex your 3D model is, it will churn through the 3D model at lightning speeds and then start printing it out.
- Scale, Rotate, Move & Print
- Supported File Types: STL
- Extrusion temperatures 260 and 200 degrees
- Print Preview with material usage and time estimates
- Automatic placement
- Repeat last print
- Rotate, Resize, Scale, Move 3D object
- Select layer thickness
- Select print speed vs.
 quality
 - Variable fill of models with honeycomb fill.
- Fine to large honeycomb mesh
- Smart Support
- Automatic Support material angles, 10 to 80 degrees
UP Plus 2 3D printer from Beijing TierTime Technology Co. Ltd - reviews of the owners of the 3D printer, description, characteristics, photos, printed models on the 3D printer UP Plus 2
UP Plus 2 is a 3D printer that combines ease of use with high printing precision. The device has small dimensions - 245x260x350 mm and a weight of 5 kg. The printer is equipped with an automatic platform calibration system, which allows you to adjust the tilt and height. UP Plus 2 can print 3D models up to 140x140x135mm with a minimum layer thickness of 0.15mm. For construction, the printer uses FDM (Fusion Fused Modeling) technology, which allows you to create parts from ABS or PLA plastic with different physical characteristics. Software UP! The software is supplied free of charge and with its help you will be able to start working with the printer right away.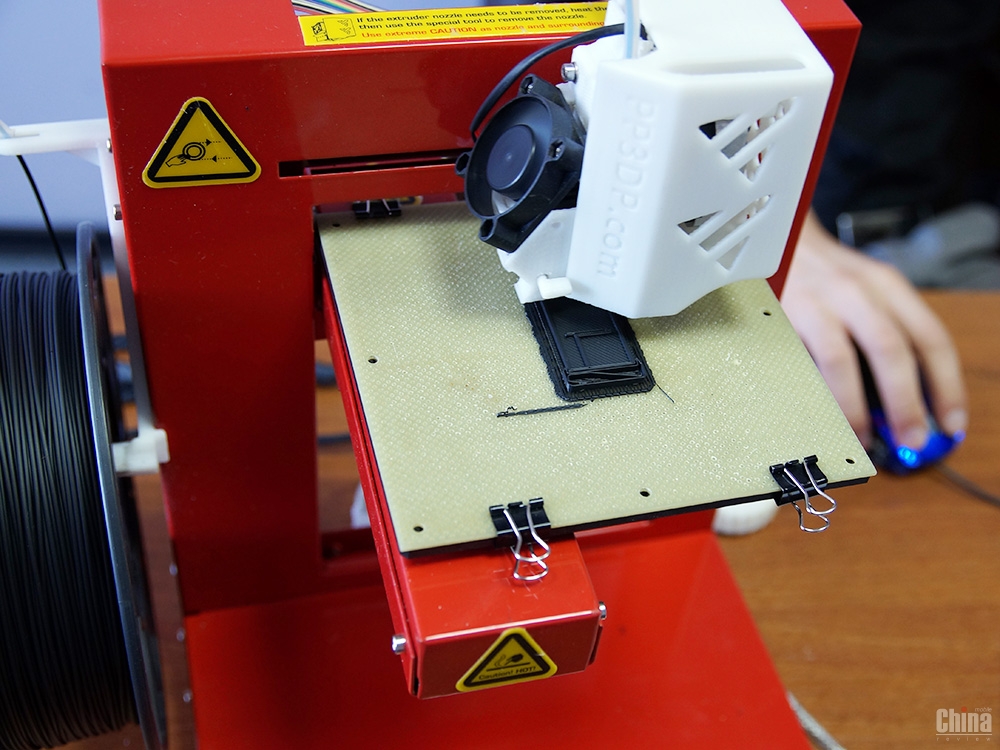
About UP Plus 2
UP! The Plus 2 is one of the first families of 3D printers originally aimed at home use. The ancestor of the family, Up Plus served as inspiration for 3D Systems Cube, and at the same time went into licensed production under the American trademark Afinia, as h579.
Improvements
Afinia H-Series - American clone of Chinese Up! Plus. Yes, it happens
In fact, UP! Plus 2 came to replace the original Up! Plus, which has been discontinued. Same story with Afinia h579- the h580, a clone of the Up! version, has already gone into production. Plus 2. Like the original, the new printer has an all-metal body of an extremely simple design: an L-shaped frame, a print head that moves along the X axis, and a work platform that moves along the Y and Z axes. Innovations come down mainly to fine-tuning : Platform now descends softly at the end of a print, instead of accelerating at 9.8m/s² and clanging on landing. Desktop clamps are now included. Calibration of the initial nozzle height no longer needs to be done manually - touch sensors are supplied with the device, and the corresponding function is included in the software. The extruder mounting bracket has been replaced with a more durable one. Head movement algorithms have been improved for increased smoothness. An additional connector on the printhead allows you to install an additional fan or backlight.
Design
The print area is quite small, only 140x140x135mm, but you should also consider the compact dimensions of the device itself - only 245x260x350mm. This small printer has a place in the tightest of spaces, and it weighs only five kilograms, which means it is easy to move and transport. Printing is carried out by a single extruder, so you should not count on printing supports from water-soluble PVA. Polylactide (PLA) and ABS plastics are offered as materials. It should be noted that the guide tube is very short, so with some skill you can change the material to a thread of a different color on the fly or by pausing the print. The extruder, again, is as simple as can be: a nozzle, a heating element, a filament feeder with a pinion roller, and a small fan, although upgrades are possible.
Model on a perforated desktop. Clogged holes visible
Experience has shown that open bed printers are not suitable for printing with ABS, however some of the difficulties may not be apparent due to the small size of the printed models. In addition, the developers have equipped the printer with a heated working platform, which allows to level out deformations and cracks resulting from rapid shrinkage to a certain extent. Another rather rare solution was the use of a perforated table for better plastic adhesion.
Attached sensors are used for calibration
The device is equipped with “automatic bench calibration”, although the meaning of this concept is somewhat distorted in practice. In fact, the printer measures the tilt of the platform by touching the magnetic sensor at nine points and takes into account the received data when printing. First of all, a substrate is printed, the top layer of which is aligned in a horizontal plane, and the model itself is printed on it. This means increased material consumption and the need to remove the substrate from the finished model. In addition, the holes in the platform, although they serve as a fairly reliable fastening, they tend to clog when the substrate is separated. However, "real calibration" of the platform is possible, but only manually with the help of adjustment screws.
Software
Software Up! – simple and tasteful
The proprietary printer software is simply called Up! The program is as simple as the printer itself and is compatible with both Windows and Mac OS. Among the available functions there is the possibility of automatic or manual positioning of the model on the platform, automatic generation of supporting structures and scaling of models, calibration for the height and inclination of the platform. Digital models are imported in regular STL format via USB connection. There are also certain disadvantages. Experienced 3D craftsmen will be disappointed by the same simplicity of the program with the accompanying lack of fine tuning. It would not hurt to provide the possibility of manually turning on the heating of the table, which could facilitate the removal of plastic from the table.
Printing
Surprisingly, this simple device often exceeds its claims for print accuracy. So, with the official minimum layer thickness of 150 microns, Up! Plus 2 have been seen in the production of models with layers of the order of 100 microns, especially in the production of hollow models. The print speed is quite low, up to 30mm/sec, but this only benefits the quality.
Although not ideal for printing with ABS, the printer's design makes it easy to create your own solutions, such as this protective plexiglass case:
Plastic cover for ABS printing
The cover is designed as a removable structure, which allows it to be installed to maintain a higher background temperature when working with ABS or, conversely, removed when working with PLA that requires rapid cooling.
Printed with standard 1.75mm filament. Coils can be ordered from the manufacturer, or you can buy them yourself, but you should be careful - the quality of plastic is of great importance when printing, and not only quality.
Packaging is also important: if purchased reels are not vacuum-packed, the plastic may become damp and dusty. Do not be too lazy to dry the thread and install the filter. The filter is easy to make with your own hands - you only need a piece of foam rubber and, possibly, a frame that would keep the foam rubber from falling into the pulling mechanism.
Pros and cons
When properly used Up! The Plus 2 is capable of producing very high quality models
Print quality reviews are mixed, with some complaining about the backlash of the platform sitting on the spring-loaded calibration screws, although if the springs are strong enough there will be no movement under the weight of small models or due to inertia. must. There are complaints about the breakage of the thread by the pulling mechanism or its insufficient power. Finally, there are cases of significant deformation of the perforated table when heated, but this is treated with additional clamps at the edges. Perforations often get clogged, but this is also easy to treat: if we are talking about ABS, the platform can simply be dipped in a bath of acetone for a couple of minutes, and the plastic will dissolve. In the case of working with PLA, you can try the organic solvent Limonen (acetone will have no effect), but, most likely, you will have to arm yourself with a needle. In the end, the table can be replaced with another one - without holes and from a more heat-resistant material, as long as it is of the correct area. Variations in thickness should not cause problems thanks to the same auto-calibration.
The construction of supports can be done in automatic mode
Among the advantages: bulletproof metal case of sufficiently high assembly rigidity, modest dimensions and weight of the device, relatively low price, maximum ease of operation - for a beginner, automatic calibration, automatic construction of supports, the ability to print ABS plastic and relatively high print quality for an amateur printer, subject to proper operation.
The device comes with a set of tools, three Teflon-coated work tables, a massive power supply and a spool of plastic thread. The software is not supplied, but is available for free download on the manufacturer's website - apparently due to the constant updating of the program.
12 months manufacturer's warranty.
unpacking, calibration, parsing and first printing / Sudo Null IT News
The first rule of working with Up! Plus 2: warm up platform
Second rule: make sure you warm up the platform
The third rule: check again if you have warmed up the platform
The Chinese company PP3DP has closed the release of printers of the first version (Review on Habré of the first model: Up! Plus) and now it’s really possible to buy only UP on the Russian market! Plus 2.
In this topic I will try to highlight differences from the first version of (why did it cost 70.000 before and now 83. 000?)
000?)
I'll look " under the hood ", I'll say a few words about the Surface mode, print a shield from World of Warcraft (is it really printing in 1 click? ) and give a couple of recommendations for using a 3d printer.
(35 photos under the cut)
Improvement number 1: soft platform lowering mode - now you don't have to jump from the clanging sound of a falling platform.
Feature: design feature of the extruder with a shortened feed tube allows you to easily and easily change the plastic thread during printing, that is, print in different colors. (together with the “pause” mode, although if the dexterity is pumped enough, you can do without it)
Platform size comparison:
Beige - from Up! plus 1, black - Up! plus 2
Comes with 3 platforms. Teflon coated. Cleaned with acetone. (Some stock up on a special needle ... for meditation).
No need to buy at the stationery store to fix the platform - convenient clips are included:
Platform calibration nozzle:
Platform Auto Calibration Auto Level - a sensor is hung on the head with a magnet and it probes the distance by poking at 9 points.
Platform height sensor:
If earlier it was necessary to adjust the height of the nozzle, then this was done manually. Now it is enough to connect the sensor on the platform with a cable to the connector on the back of the printer and start the program Auto Nozzle High
New connector for calibration sensors (colour/green-blue):
Fixed what was a lot of complaints - the head bracket (now you won’t bend or loosen it!):
The platform heaters used to be frayed, now the issue is resolved - the cable is flat:
The board has been improved:
The board is a new textolite. New quality of harassment and track optimization. Multi-colored molexes are used (blue to blue, yellow to yellow). All wires are braided.
New 8000 processor programmed with softer/smoother movements.
Photo of the old board for comparison
Grounding (taking into account the "stability" of the Russian
voltage in the network, grounding - a thick bolt on the board):
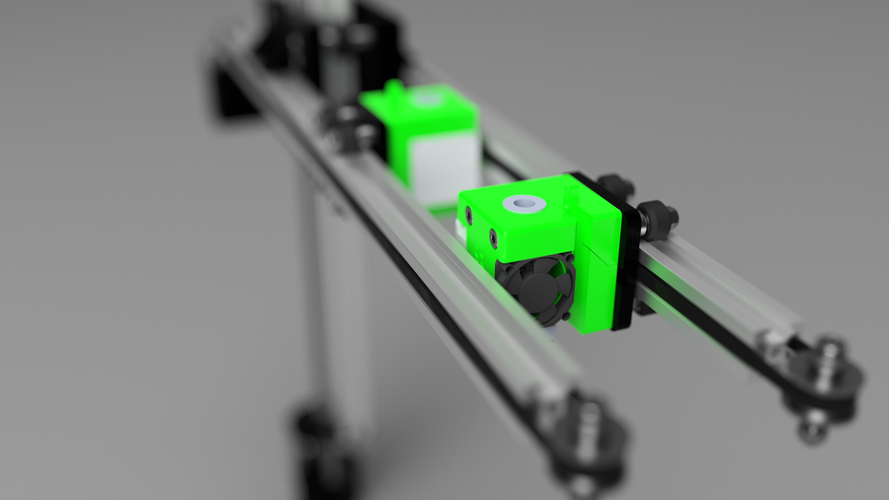
2-pin printhead - you can put either an additional fan or backlight:
(Up! Plus 2 on the left, Up! Plus 1 on the right)
The power supply (19. 5V, 9.5A) has become a little smaller, but still huge:
On the left is the power supply of a regular laptop, on the right - Up! Plus 1, centered Up! Plus 2
Mode
Surface(picture from the manufacturer's website)
Surface mode prints only the outer wall of the model, ignoring the inner padding. for example, if it is a closed cylinder model, a “tube” will be printed with a wall thickness equal to the layer resolution. For example 150 with a thickness of 150 and so on. In principle, with a tricky arrangement, you can print closed balls. That is, models where the overlap of layers is less than 90 degrees not including. The trick is that this mode allows you to best see the general shape of the future model and print it in full size, compare it with the rest, much faster than with normal print settings. Of course, the model will turn out to be more fragile. Plus, the quality of laying layers will in some cases be even higher than that declared by the manufacturer. I have seen samples of printed parts where the layer thickness reaches 100 microns instead of the declared 150.
Auto-calibration and automatic level detection
Choosing in the car -caliber menu:
Nazading on the print head applies to the platform at 9 points:
Dimension data entered in the program:
Auto -river is completed:
Automatic determination of the height of the print head relative to the platform:
Print head nozzle touches platform sensor:
Height detected:
Printing a shield from
World of WarcraftLet me remind you that, like Up! Plus 1 and Up! Plus 2 is its own software, which lacks the brain-breaking “slicer” stage.
Step 1. Download the model from the Internet (http://www.thingiverse.com/thing:48069), or save from WoW itself
Step 2. Load the model into the print program (scale and rotate if necessary)
Step 3.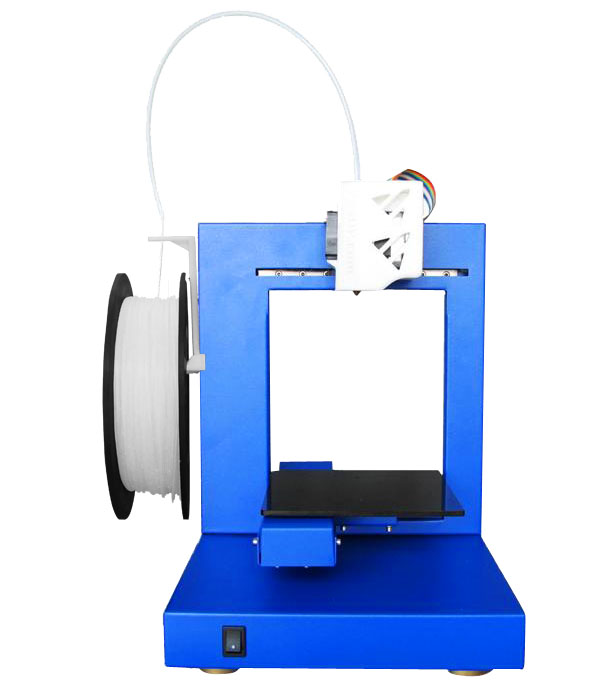 Warm up the platform
Step 4. Print
Estimated print time and plastic weight:
The beginning of the seal of the auxiliary layer on which the part will be placed:
SHIELDO of Lordaeron !
A few words about
soft There are 2 kinds of printers: those who use "open software" and those who use their own software.
Both of them have their own advantages.
Open software claims to be universal, to be able to improve the code itself and to set up "9000" parameters. Open software gives complete freedom (in binding - full responsibility) to the user. If you are a fan of settings with an accuracy of microns and fractions of a degree, then this is a godsend for you. But you can insert plastic from any manufacturer and get the optimal printing temperature for it in some time.
Own software from the manufacturer guarantees 100% compliance between hardware and software. Also, the manufacturer's own software assumes that 95% of the "9000" parameters have already been debugged by professional technicians, and the company is responsible for this (in some way). Software from the manufacturer allows you to avoid installing additional programs, several (tens, hundreds) hours of configuration, and allows you to "unpack and print" . There is no need to think about the form of filling and the minimum wall thickness, because. There are presets verified by the manufacturer. With software from the manufacturer, it is more difficult to spoil the printed part than with "open software". Printers with software from the manufacturer have recommended suppliers of consumables (coils), which will be covered by a “guarantee” that this printer will print optimally with this material.
Only large companies (3d systems, Makerbot, PP3DP, etc.