Tronxy 3d printers
3d Printer, Filaments, Tronxy 3D Printers – Tronxy 3D Printers Official Store
$474.05 $499.00
Shipping from
Czech(To EU Countries Only)
United State(To US Only)
United Kingdom(To UK Only)
Russia(To RU Only)
China to Asia
China
Type
Gemini XS
Select variant dropdownCzech(To EU Countries Only) / Gemini XS - $474. 05 USDUnited State(To US Only) / Gemini XS - $474.05 USDUnited Kingdom(To UK Only) / Gemini XS - $474.05 USDRussia(To RU Only) / Gemini XS - $474.05 USDChina to Asia / Gemini XS - $474.05 USDChina / Gemini XS - $474.05 USD
Quantity
GEMINI IDEX SERIES NEW ARRIVAL
Gemini XS IDEX 3D Printer Independent Dual Extruders 3D Printer 255mm*255mm*260mm
- Two-Color Printing
- Dual-Material Printing
- Duplication Printing
- Mirror Printing
- Eight Languages Supported
- Direct USB Connection
- Soluble Supports
- PEI Removal Spring Steel Plate
- Compatible with Flexible Filament
- TMC2225 drivers silent motherboard
- Color Touch Screen
- Elctromagnectic Sensor
- 255mm*255mm*260mm
Sale
Tronxy Ceramic & Clay 3D PrinterModel: MOORE 2 PRO
1. Building Size: 255mm*255mm*260mm
2. LDM Exruder
3. Materials: Clay,Ceramics slurry, Red Porcelain and various liquid flowing materials
4. Feeding mode: Electric push rod + screw extrusion
5. Exclusive OSG Dual Core Guide Rail
6. 3.5 Inch Touch Sreen
7. 32 Bit Silent Mainboard
Support Center – Tronxy 3D Printers Official Store
Support Center – Tronxy 3D Printers Official Store Skip to contentX5SA-500-2E US warehouse new arrive, Flash sale discount
Tronxy 3D Support Center
JOIN US NOW!Install and Assemby Video
Product Manuals
Firmware Download
STL Files Download
Products Manual
- [X5SA 500 Series] MANUAL (Double limit version)
- [X5SA 400 Series] MANUAL
- [X5SA Series] X5SA MANUAL
- [XY-2 Pro Series] MANUAL
- [XY-3 Pro Series] Manual
- D01 Series MANUAL
- ULTRABOT Series MANUAL
Firmwares
- [X5SA 500 Series] FIRMWARE
(Double limit version) - [X5SA 400 Series] FIRMWARE
- [X5SA Series] X5SA FIRMWARE
- [XY-2 Pro Series] FIRMWARE
- [XY-3 Pro Series] FIRMWARE
- D01 Series FIRMWARE
- ULTRABOT Series FIRMWARE
WHEN WOULD YOU LIKE TO START?
JOIN US NOW!FAQ
Frequently Asked Questions - About 3D Printers
About 3D Printers
FAQ - Problem of Leveling
FAQ -- Slicing software supported by Tronxy 3D printerBROWSE MORE
Installation and Debugging
Problem of Z aixs lead screw
The contents of the SD card cannot be read?
BROWSE MORE
Printing Process
Nozzle no silk
If the print head does not produce enough material?BROWSE MORE
SUBSCRIPTION
THE LATEST NEWS, EVENTS AND STORIES WILL BE SENT RIGHT INTO YOUR BOX
a good choice for a beginner maker / 3D printers, machines and accessories / iXBT Live
A good beginner 3D printer is an inexpensive and high-quality 3D printer with auto-calibration and useful functions (filament detector, print pause). The new model from TRONXY - the XY-2 printer with the “PRO” modification has not only this, but also an increased print size (up to 255 x 255 x 260 mm), as well as a powerful power supply that gives quick warm-up and start, and all this for modest price of $180. The mounted inductive sensor on the movable head ensures accurate multi-point calibration in automatic mode. The printer is already assembled and configured, so you do not have to rack your brains upon receipt. I will try to tell in general terms about the printer itself and the basic things at the first start of printing.
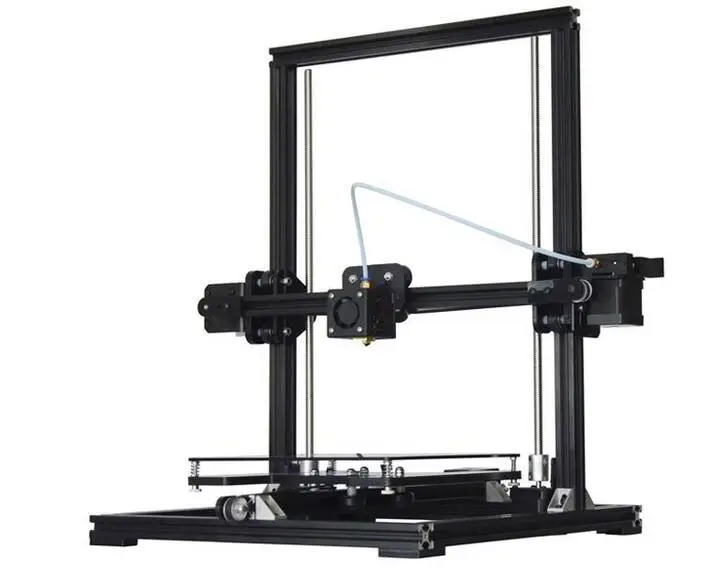
TRONXY XY-2 PRO 3D PRINTER
The newest Tronxy XY-2 Pro 3D printer is an improved version of the already popular 3D printer that can "just a little more". Print field 255 x 255 x 260 mm. The printer is all metal, has a rigid frame, inductive self-leveling sensor, huge (3.5") touch control display, filament sensor. Specially designed extruder allows printing with soft materials (for example, TPU). Current cost is $180 minus store coupon ($3 and promo codes) .
Features:
Brand: Tronxy
Model: XY-2 Pro
Print field 255 x 255 x 260 mm
Control: 3.5" touch screen
Calibration: automatic, inductive Z sensor
Options: filament sensor fast warm-up, print pause, automatic filament change
Power: 360W
Plastic type: PLA HIPS WOOD PC PVC ABS PETG 1.75mm
Maximum working speed: 180mm/s
Nozzle diameter: 0.4mm
Positioning accuracy: 0.0125mm0011 Layer thickness: 0.1-0.4mm
The packaging of the printer is thoughtful and compact - the portal is laid in the foam, accessories are in layers, at the bottom there is a frame with electronics and a table.
Kit includes: assembled vertical gantry (completely, with X-axis and extruder), lower part (stand, table, Y-axis, power supply, display, control unit), bag with gouges and screws, tools, spatula, spare ends and hot end, power cord, detailed instructions and frame for the coil. Well, a trial spool of filament (PLA 330g).
I will immediately make a reservation about the features of the assembly.
First you need to dock the portal to the base part. Specifically, for this printer model, you must first rearrange the display, which is fixed in the transport position (hidden under the table).
| Carefully remove the display from under the table and rearrange | … onto the front frame profile. Mounting in T-nuts in the groove |
| Check that it does not touch the table when moving | Next, we prepare the portal for assembly (4 screws m6x30 mm) |
Holes are already pre-drilled and chamfered in the frame. We carefully try on everything and twist it. There is a tool in the kit, I personally use an electric screwdriver (quickly and conveniently). It makes sense to install the screws on the thread lock - this will eliminate loosening, but complicate reverse disassembly.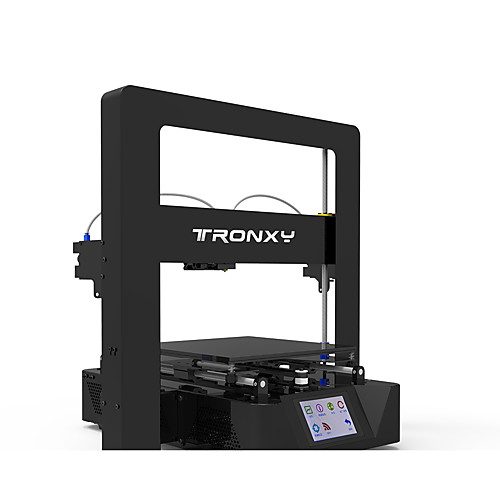 So if you are not going to disassemble it, then you can use it.
This is what the assembled printer looks like. As you can see, it was already checked at the factory, the belts were tightened and set up.
The printable area is 255 x 255 (XY) and 260 mm (vertical). A fairly large size, 20 percent more than the usual Ender-3. The plastic used for the printer is common - you can see it here and here.
After installation, we check the electrics.
| We connect the motor connector Z | All connectors in the printer are marked (Z1 in the photo) |
| X-Axis Adapter Cable - The PRO version has a special adapter that simplifies connection | This method is much more convenient than the usual "spider". |
In the kit there is a special adhesive pad - it is better to calibrate with it.
| Inductive sensor mounted on the head | Table tilt adjustment screws visible on the table |
The hot part is covered by a cover. | Carriages and brackets with metal rollers |
| The blower is located outside the casing: an impeller with a nozzle | |
On the electronics unit, the manufacturer placed a sticker with information about the model and basic characteristics. There is also a QR code - a link to the official Tronxy group on FB.
The printer has a well-placed electronics and power supply.
| In the photo Tsevik Y, an engine with an engine, a circuit of | can be controlled by USB, or printed with Microsd |
| Power supply is supplied through a standard connector, a number of safety curser and a tumbler. | Simple plastic extruder modified for soft plastics |
| Coil is mounted on a bracket on the top bar | Z-axis screw is clamped in the bearing on the top part.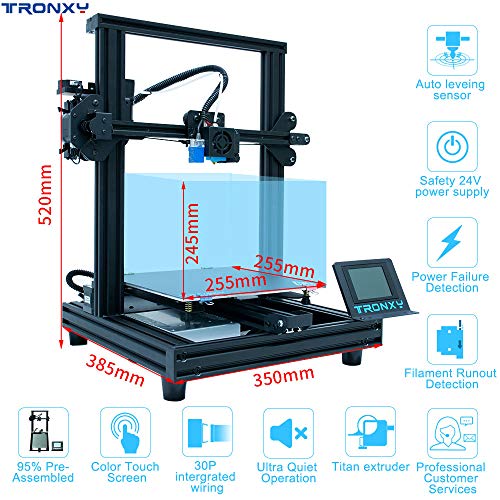 |
Exterior view of the Tronxy printer ready to go.
In principle, it does not take up much space on the table.
Before starting work, you need to calibrate the level of the table at several points. It works automatically, there is a corresponding menu.
Alignment takes place using an inductive sensor. The head moves along the grid, lowers until the sensor is triggered, and deviations are calculated. When triggered, the red LED lights up.
Large touch screen. With the help of this, it is a pleasure to manage the printer. The menu contains the main functions. The screen starts with the display of 3 icons - settings (System), tools (Tools), printing (Print).
| At startup, select the desired menu. | In the Tools menu, manual movement, preparation, plastic loading, leveling, fan adjustment, emergency stop and Z level change (for example, when using additional glass) are available warning - check that nothing is in the way on the table | The sensor automatically calculates table deviations.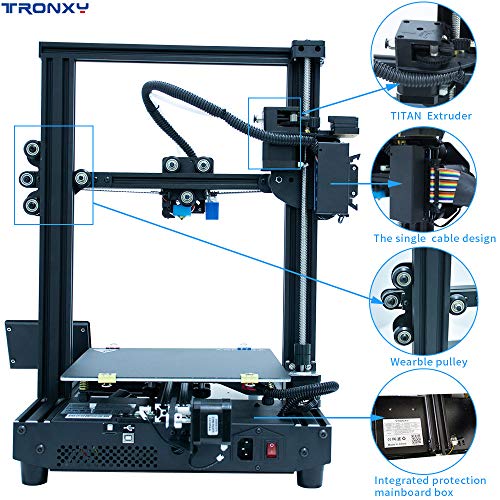 The first time is best done in the cold. And the “working” version is with a heated table. The fact is that when warming up, the deviations increase significantly The first time is best done in the cold. And the “working” version is with a heated table. The fact is that when warming up, the deviations increase significantly | |
| To refuel the Philament Pre -refuel the rod | There is a preliminary heating of the table and nozzle | ||
| 9003 CHILESUS OF HEALTH MOVERSE. 4 axes (XYZ+E), home position. | All three fans are controlled by software. Thermal barrier and model airflow in %, electronics airflow on/off only. The printer can be made “quieter” | ||
| In the settings menu, there is not a lot - this is information and language. | Firmware version is fresh. You can update with Microsd |
| The printer status window - position and temperature | Print menu “Print” | select the file, run the file, we run the file.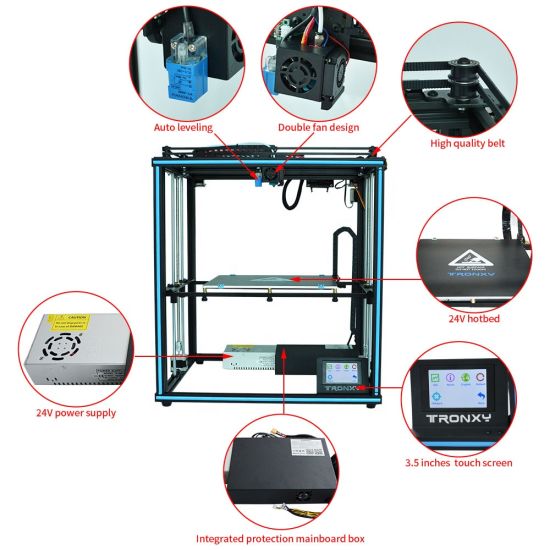 There is a pause for changing the filament There is a pause for changing the filament | Some adjustments are available when printing. |
The printer is ready to go. We fill the plastic - we press the extruder lever, we push the bar. If you are interested in how extruders differ and how they work, you can read the article about the BMG extruder.
Please note that there is a filament break (end) sensor in front of the extruder. The plastic is filled - the light is on.
Install the coil on the bracket.
Push the bar through the hot nozzle. I have red PETG refilled, but you can see that they checked it with blue PLA at the factory.
Before the start, I check the operation of the heating elements - I check the heating of the table and nozzle with a thermal imager.
Slicers are standard, there are no tricks, there are profiles on the USB flash drive, examples of models for the test.
Print test)))
During printing, you can change the parameters on the fly - speed, temperature, etc.
Measured piece approx. 20 cm.
Battery case.
If you pause during printing, the automatic offers to change the color. So the printer allows you to print in layers in different colors. plus the printer.
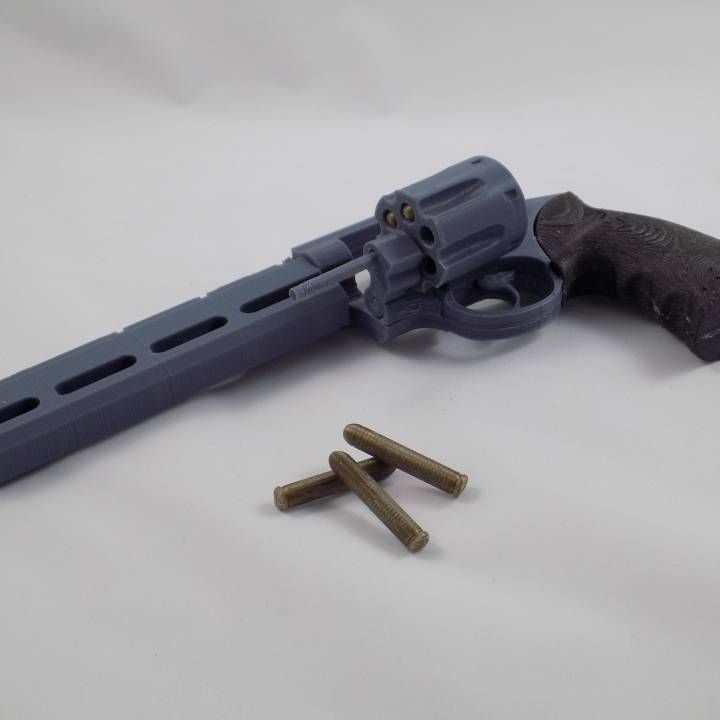
The enlarged working area (255 x 255 mm) makes it possible to print also large parts. The photo shows a detail of a compound bow.
TRONXY XY-2 PRO 3D PRINTER
So, using the printer is easy and convenient. The basic things have already been implemented - the printer is assembled, configured, tested, the belts are tensioned. You are required to fasten 4 screws to fix the portal and carry out automatic table calibration. Next, fill the bar and print. Moreover, a convenient filament change with a print pause is available - it is possible to print color models in layers.
The printer is very easy to use, does not require any deep knowledge of 3D printing, and is suitable for beginners.-kupit-v-soin-store.ru-1.png)
At this price, I would recommend Tronxy as the first 3D printer. Discount coupons are available in the store.
The Undiscovered Cheapest 3D Printer! Applause? Tronxy X1
#competitionCreality
The Tronxy X1 printer is the cheapest machine I could find on Ali (less than $100). This is my first and only printer (so to speak, a child of the crisis). I wanted a printer for a long time, but finances did not allow.
It is originally presented as a training printer, ie. for kids. Is it worth buying for kids? Is it worth buying at all? Let's figure it out.
Briefly.
Tronksy is a plush-like open-table printer, or, as they say, "dragastol". Print area 150x150x150 mm. The control unit of the printer is made in a separate housing, into which the wires are connected. Powers the printer from an external power supply connected to the connector of the control unit. There is no table heating, although Ali indicated otherwise.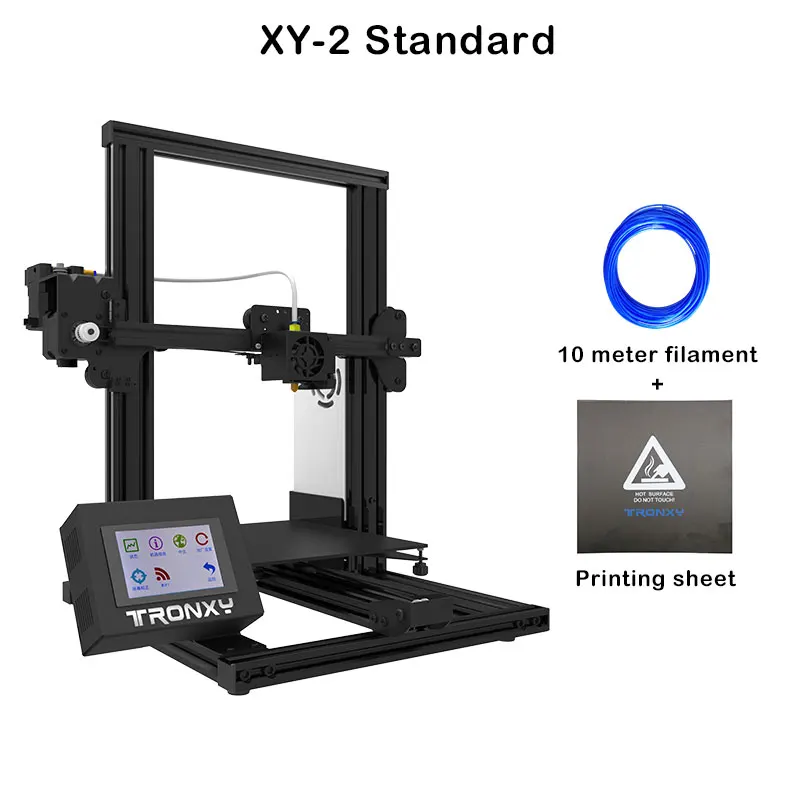
This type of printer has a number of speed and material limitations, but theoretically should be fine for evaluation purposes.
(photo in current condition)
Assembly.
The printer comes to the happy owner in a box in which the complete set is placed in two boxes made of polyethylene foam. The only pre-assembled part is the hot-end mounted on the bottom bracket.
The printer is assembled on a base made of black Plexiglas (or polycarbonate), on which frame elements made of aluminum profiles are screwed. In general, this profile not only has the function of a power element, but also guides (plastic wheels roll along its grooves).
The assembly instructions are quite understandable, although they did not put them in paper form, only the electronic version is available on a flash drive from the printer kit. The whole spore took me about 4 hours. All tools for assembly are included except for wrenches, although the quality of this tool is poor (better to have your own).
Complete set for assembly was enough. Hardware was poured with a margin (although one screw was too long and had to be sawn).
The main difficulty during assembly was to find the right screw, because hardware of all types and sizes are covered in two bags.
A locksmith's square is needed to assemble the frame, otherwise everything will not come together very straight. The guide surfaces are too small to position the parts perpendicularly, and the fixing elements (metal angles and plexiglass brackets) are made with gaps.
The surfaces of the Plexiglas elements are protected with shipping paper.
The wires are not marked, so it is better to mark them to avoid confusion during the assembly process.
Z-axis screw and nut not lubricated and no lubricants included.
Particularly inconvenient is the assembly of the control box housing. Not only that, before assembling it, all the wires must already be connected, but it is also assembled on screws with nuts that are inserted into the grooves and strive to fall out of there.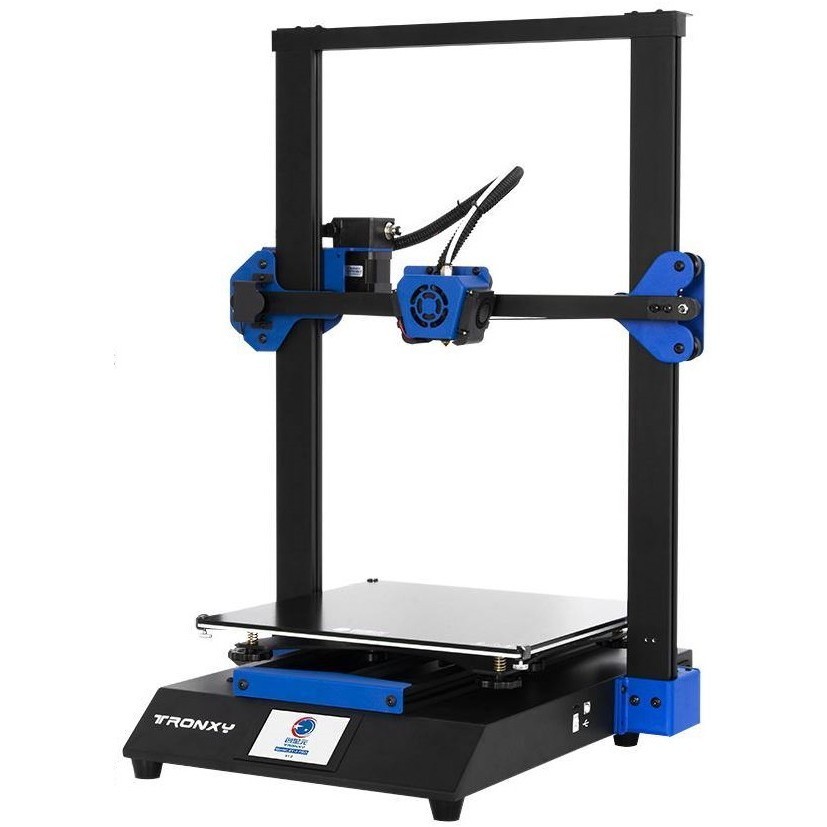 Assembled using a magnet to hold the nuts.
The wires are assembled into bundles with a braid (a tube cut in a spiral), but this solution seemed unsuccessful to me already at the first removal of the braid. The wiring will have to be disassembled during operation, so I put everything in a plastic corrugation (automobile) and fixed it with electrical tape.
The guide carriages do not have a clearance adjustment mechanism, so it was necessary to unscrew and tighten several times to get the minimum free play.
There is no mechanism for tensioning the belts either, and it is not possible to construct simple springs, so we pull with our hands.
Motors are marked "Tronxy"
First run.
We connect the power supply to the freshly assembled printer, plug the power supply into the socket and ... Oh, miracle! He works! The name of the printer and firmware “Repetier v0.9” appears on the screen.one". And all because the control unit and the power supply do not have a toggle switch, i. e. to turn it off, you will have to pull the cord out of the socket or get a surge protector.
Next joy. A flash drive prepared in advance (micro-SD and card reader supplied with the printer) with g-codes must be inserted into the printer control unit from the rear wall. Not very comfortable.
And it is clear that it will not be possible to permanently place the control unit without modifications. It will have to be rotated with each print. "Print over the wire!" - at first I thought, but immediately passed, because. a 1 m cable was included in the kit.
Further tedious navigation through the menu using the buttons on the front panel. Pleasure is doubtful, because. the button travel is very large, and they are quite rigid, as a result, they do not always work. In principle, the menu is understandable, but one thing still pisses me off! Why was it necessary to hide the print stop so far in the menu, because it is extremely needed on this printer in quick access.
The table is calibrated with 4 screws with wing nuts (it is better to change immediately), which is very inconvenient due to the small size of the printer.
The table itself is made of 4 mm thick plexiglass, on which 1 mm thick plexiglass is fastened with clamps. During the calibration process, this whole thing bends as it wants, and besides, the table carriage, standing on a 20 mm wide profile, allows the table to swing up to 1 mm in amplitude. As I already said, there is nothing to tighten, and even 0.1 mm of clearance in the carriage will give 0.75 mm on such a shoulder at the edge of the table. So it is better to print always in the center.
Time to print! Plastic - PLA (and the other is not recommended by the printer manufacturer), parameters from online tutorials. Plastic is lying around, because there is no regular place for its placement. Go.
Without additional calibration, the printer prints in normal sizes in all axes. There are all sorts of defects on the surface caused by weak belt tension and insufficient experience in the slicer.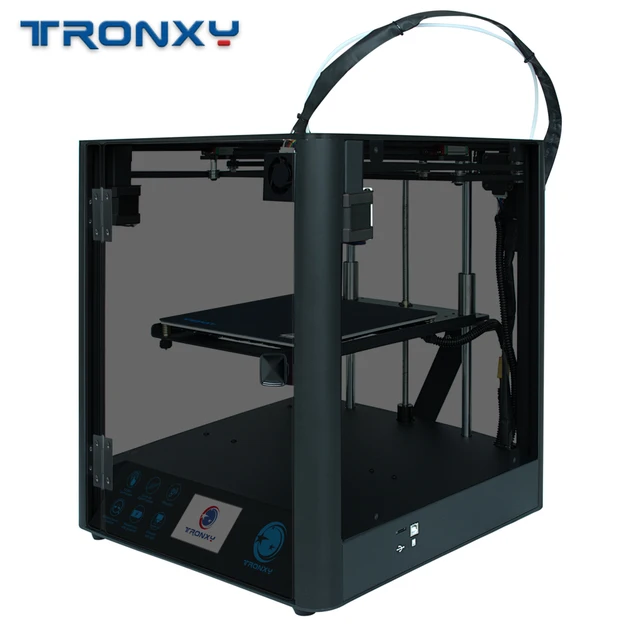
Of course, nothing stuck to the standard plate, but smearing it with a glue stick gave an excellent result. Due to the lack of heating of the table, the glue does not dry out, and the liquid plastic practically bakes into it and dries. The first times I smeared too thickly, so the details came off with great effort.
What can be summarized?..
The printer, after being assembled from the box, prints quite well for a user inexperienced in the quality of parts.
Tensioners were found and printed on the Internet to bring the belts back to normal. They significantly improved the surface quality and geometry.
The first printed samples were small and light, and when printed, it was impossible to detect problems in the mechanical part of the printer. Underextrusion was visible, but there could be many reasons, and I decided to eliminate them as they worsened.
On larger models, the extruder motor was clearly audible, so the conventional drive with gear wheel and pressure roller was replaced with a geared one. The number of steps changes in the control unit, there are no difficulties.
Nozzle blockage began to appear after long printing. At first I thought it was dust. I made a foam filter for the filament.
Did not help. The cleaning didn't help much either. When the hot end was completely disassembled, it turned out that the plastic was melting far beyond the heating block, which clogs the exit. To begin with, I replaced the regular radiator airflow, which, it should be noted, is made of a cooler (40x40x10 mm) in a metal case.
I installed a computer heatsink (40x40x18 mm) that I had on a printed case. Didn't solve the problem completely.
I will not describe all kinds of replacement nozzles, installation of a sock, thermal paste, etc.
It should be noted that during the experiments, the fittings for fixing the Teflon tube collapsed and were replaced (the standard one was very dead).
The hot end has a throat that includes a Teflon tube.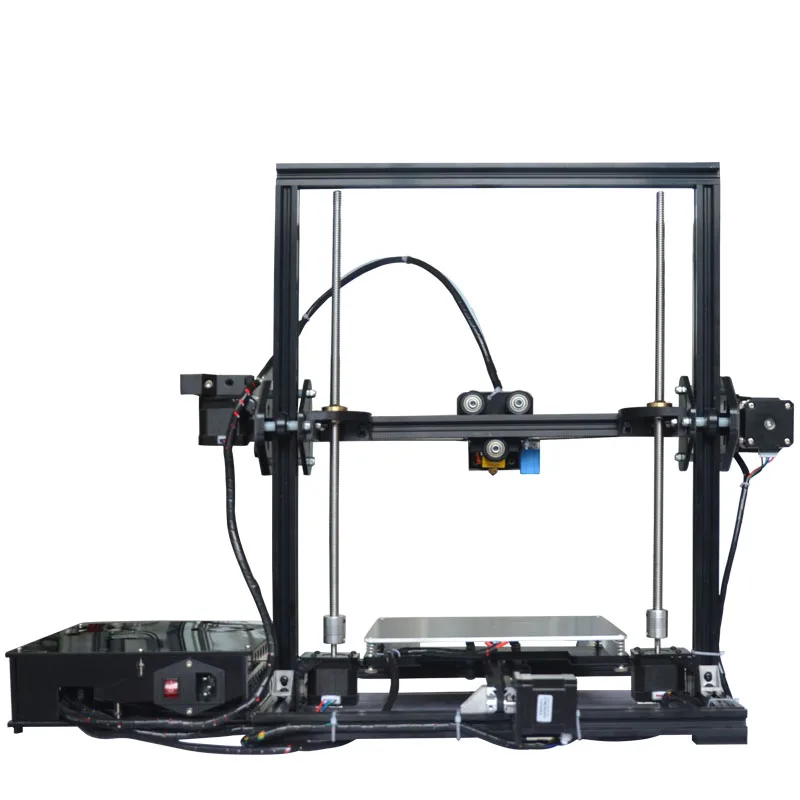 Considering that melting also occurred in the tube, after which it looked bad and deformed, I decided to change the throat. The new throat was steel with a 2mm hole, theoretically reducing the heat bridge between the heating block and the radiator.
Printing has become much more stable. Blockage occurs on long seals with a large number of retracts, but as without retracts, because this is a bowden. I decided that the main reason was overheating of the throat due to inefficient heat removal through an unsuccessful radiator (its design is really not very good). I ordered a hot-end analogue of E3D V6, I'm waiting ...
Necessary improvements.
Of those already carried out - blowing the part. The thing is indispensable for bridges and overhangs. The model was downloaded from the Internet, there was already a cooler from a computer 40x40x18 mm (powered to blow the hot end).
When turned on, I encountered a power problem (the speed dropped when the heating was turned on). It seems that the standard power supply was chosen at the limit of its capabilities, so now everything is powered from the power supply from the computer (400 W), besides, it has a power switch.
The next important improvement was the replacement of the table cover. Regular plastic threw out and put the usual glass 165x165 mm 5 mm thick. The plans are to make a mount on magnets, but for now it is installed on 3M adhesive tape. Details are separated with a clerical knife blade.
A necessary trifle was the stand (bracket) for the reel. I mounted it on top of the printer stand instead of a carrying handle (why was it invented at all).
Model from the Internet, but not very successful. You need to change it to your design model, but so far it's a pity for plastic.
Key features.
The reader will reasonably ask: “Why are the characteristics indicated at the end of the story?”. Everything is simple.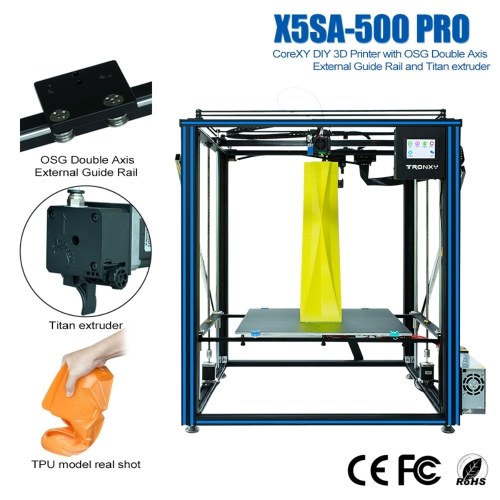 These characteristics are achievable only after the ordeals described above.
Print area - 150x150x150 mm (if you really want, then 160x160x150 mm).
The temperature of the heating block is up to 240 degrees (it does not rise above, and if you press the plastic, then this will not happen either).
Used plastics – only PLA has been mastered so far.
Print speed - up to 40 mm / s (if you want quality, then 25).
Minimum layer height 0.1...0.3 mm.
Table heating - no!
Plans.
At first I wanted to replace the frame of this printer, build something rigid (like a cube) with a heated table and a larger printable area, but it turned out to be quite expensive. Therefore, at the current stage, I ordered one aluminum profile for the table rails in order to increase the width of the wheel support from 20 to 40 mm. Next, I want to put eccentrics to sample the gaps in the carriage assembly.
The printer is very noisy, and the motor drivers are soldered on the board, which does not allow you to get rid of the screech of a crazy cat.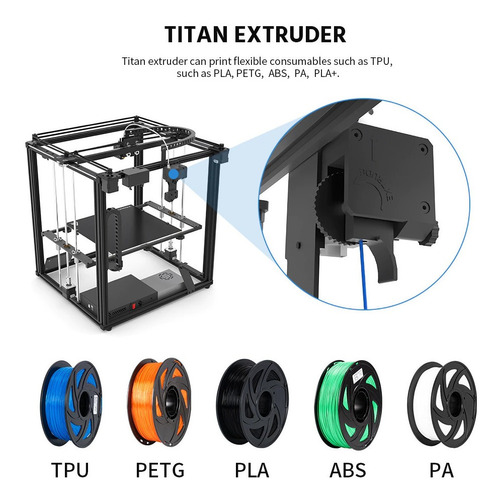 I decided to make a box for the printer, throw out the control unit case and mount everything in the box, incl. and power supply.
In addition, the mechanics of the printer has a number of disadvantages that need to be addressed:
- the attachment points of the belts on the carriages are made far from the profile groove, as a result of which the belts rub against the profile, they can even jam;
- the “sloths” of the belt are made of bearings of a larger diameter than necessary, as a result, the belt goes skewed, again, rubs against the profile.
New sloths have now been ordered. I'm still in the process of figuring out the belt mounts.
Printing examples.
Boat that blew everything
(transparent PLA, layer 0.2, tested at 220 degrees without blowing the model)
Test cube
(transparent PLA, layer 0.2, tested at 220 degrees without blowing the model)
Microphone holder (broke, and a new one costs 500 rubles)
(transparent PLA, layer 0.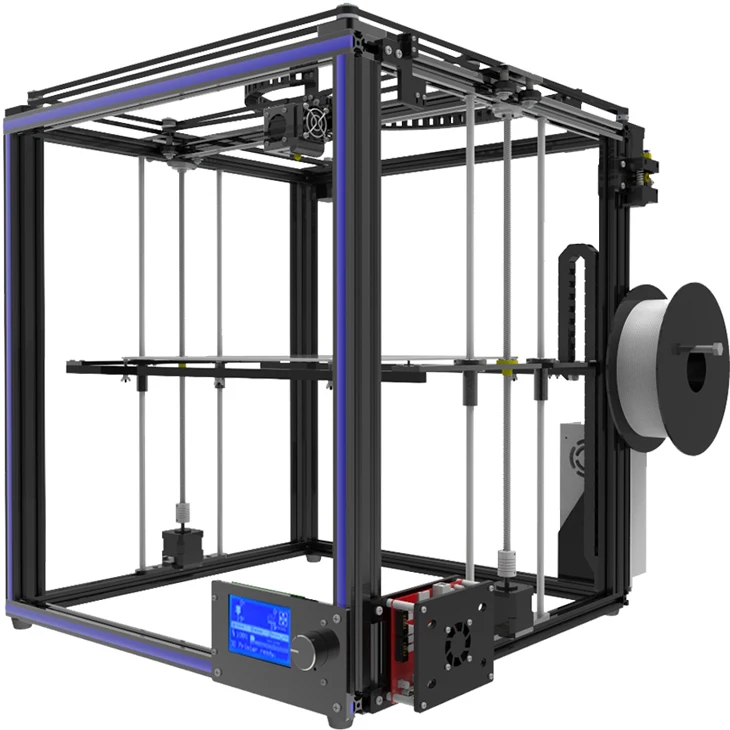 2, temperature 190 degrees without blowing the model, layers with gaps are visible)
Sleeve for headrest guides (slicer test)
(transparent PLA (2 coils), layer 0.2, temperature 190 degrees without blowing the model)
There are defects on the surface of the right part, more or less clean on the left. The main difference is that different slicers are used. For the left - Pryusha Slicer, for the right - Kura. In a detailed analysis of the trajectory in the slicer, it was found that Kura 4.5, when printing walls, presses the plastic in the same place 2 times, due to which defects appear on the surface of the part.
Mixer couplings
Printed 4 pcs. I checked one for strength, the second I installed in the mixer, and these remained spare.
(transparent PLA, layer 0.2, temperature 190 degrees without blowing the model)
Screwdriver battery case.
When replacing the battery cells in the battery of the screwdriver, it was necessary to enlarge the casing.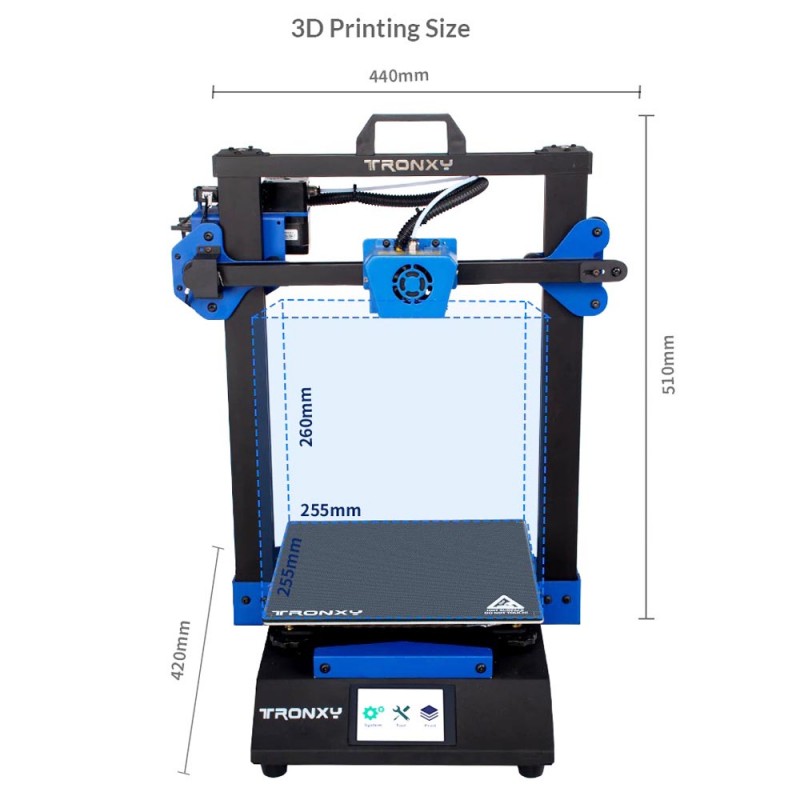 Drawn, printed. In the photo there is a print marriage. When reaching the layers with retracts, the nozzle was clogged.
(transparent PLA, layer 0.2, temperature 190 degrees without blowing the model)
Mini hood fan wheel.
This is a prototype. To save money, it was printed from leftover plastic. Here's a rainbow. The plastic was tucked in on the move, so retracts were not carried out.
(various PLA, layer 0.2, temp 190° without airflow on the model)
Car sun visor holder (prototype)
(black PLA, layer 0.1, temp 195° with airflow on the model)
Logo Dodge (enamelled).
This is a marriage. During the printing process, blockages occurred, as a result, the part turned out to be fragile and there are visible defects. I decided to check how the enamel from a spray can lays down without a primer.
(black PLA, layer 0.2, temperature 195 gr. with model airflow)
End cap for Bowens mount monobloc.
(black PLA, layer 0.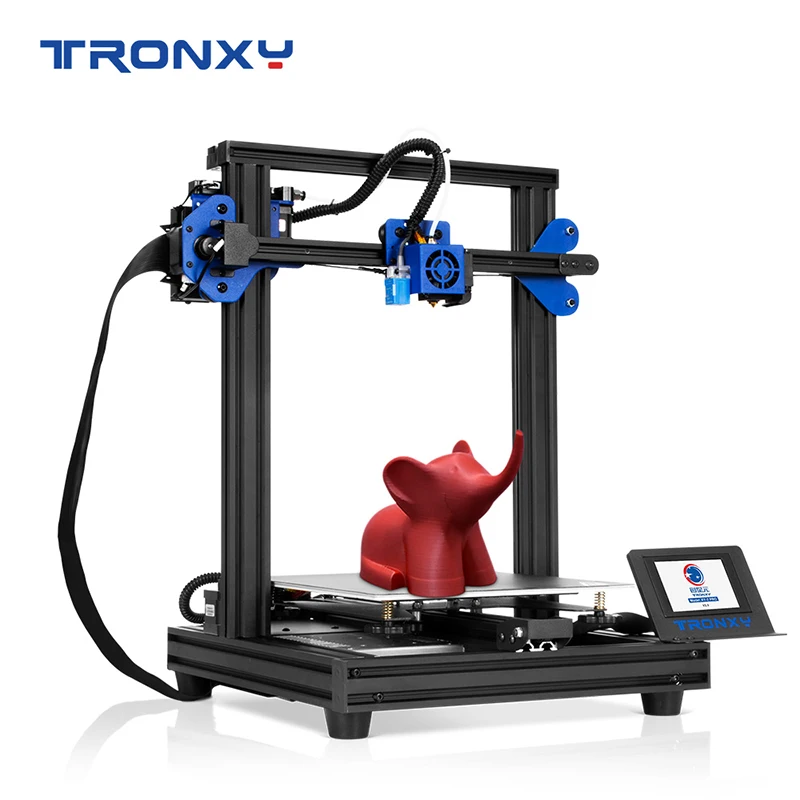 2, temperature 195 degrees with model blowing)
Conclusions.
The printer is certainly suitable for training, but it will mostly consist of the basics of printer operation and troubleshooting, and not the basics of modeling, slicing and printing.
In principle, depending on the tasks, the printer may well come in handy. I printed on it the holders of sun visors in the car, which used cost 1.5 tr. per piece + shipping. For me, the printer has already worked out its money, but I can only say this at the current stage, when a lot has been fixed.
Still, there is a lack of a hot table, which limits the choice of material. But one PLA will not be full!
In general, when you scatter the printer package by price, you understand that it will not be cheaper and better to assemble, but still the product must remain at the level of performance with the declared characteristics. What to add here? Thank God it's not a "delta" for $120.