Top down dlp 3d printer
Carima DM400A, world’s first XXL top-down DLP 3D printer
Home › Insights › Carima DM400A, world’s first XXL, top-down DLP 3D printer
Carima is Korea’s leading DLP 3D printer manufacturer and has been working with the technology for over 20 years. They develop turnkey resin 3D printing solutions for professional and industrial use in numerous sectors, though they are specialized in the dental industry.
Table of contents
Top-down DLP resin 3D printing vs. bottom-up printing
Advantages of top-down resin 3D printers
Large resin prints require an XXL-sized curing machine
Carima partners with Adaptive3D for wider choice of resins
Carima’s DM400A uses top-down DLP technology, which offers significant advantages over the more common bottom-up printer setup.
But first, what is DLP 3D printing? DLP stands for Digital Light Processing, a technology where an optical engine lamp projects light onto a layer of resin. The light, which is projected into a specific layer’s shape thanks to a mirror system, cures entire layers at a time.
This technique is faster than laser SLA (stereolithography) all while being less expensive. There are two ways in which the projector can be configured: below the tank, or above the tank.
When below the tank, the projector’s light hits the bottom of the resin tank, which is often made up of a very thin, transparent film. The build platform starts at the very bottom of the tank and is completely immersed in the resin, moving upwards as each layer is cured.
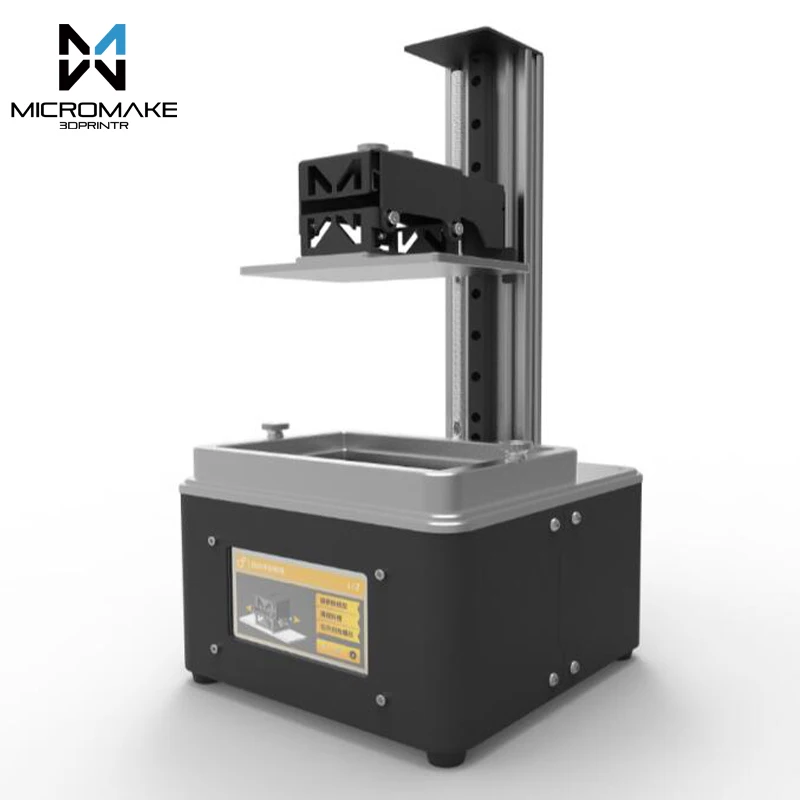
Top-down 3D printers work in the opposite way; the projector is located above the resin tank, and the build platform moves downwards. Nothing stands in between the light and the resin, so the projector’s light hits the resin directly.
Advantages of top-down resin 3D printers
The main advantage of having the platform move downwards (with the printed object on top) is very simply linked to gravity. With bottom-up printers, prints can easily fall off the print platform – or parts of the print can break off – and splash into the resin tank. After hours of printing a large object, this frustrating type of failure wastes a lot of time and material.
Another advantage of top-down printing is that since you’re not working against gravity, you don’t need to add as many support structures. Support structures can add up to a lot of material usage and waste, and they also imply more post-processing (e.g. surface finishing to remove the marks left by the support structures).
Last but not least, maintenance. During the resin 3D printing process, tiny bits of non-intentionally hardened resin can fall to the bottom of the tank. This means that light will be blocked in certain areas, which is why bottom-up tanks must be cleaned after each print, or why their transparent film must be changed (another time-consuming task) after several runs. Top-down 3D printers offer easier, cleaner workflows.
Overall, top-down printers enable larger, heavier prints that won’t fall off the print bed, and the smoother process is less prone to failures.
A closer look at the DM400A
The DM400A is the world’s first large, top-down DLP 3D printer with a dual 2K light engine. This high definition doubles down on resolution and makes it possible to cover a large build area of 400 x 330 x 500mm.
Its large area paired with DLP technology’s high speed means that the Carima DM400A is more than capable of handling mass production applications. An entire build plate with, for example, 57 dental pieces, can be printed in just over an hour and a half. It can also 3D print larger, heavier parts than small dental models with very slim failure rates thanks to its top-down configuration.
The printer also boasts Carima’s Precise Dual DLP Engine Alignment Technology and offers native 132-micron pixel size, for high-quality surface finishes. The DM400A features a 50°C heated chamber as well, meaning it can handle highly viscous materials of up to 6,000 cps.
| Build size | 400 x 330 x 500 mm |
| Available layer thicknesses | 50, 100, 125, 150 microns |
| Engine light source | LED UV 405 nm |
| Engine resolution | Dual 2K high UV LED 2560×1600 |
| Pixel size (XY) | 132 microns |
| Machine weight | 800 kg |
| Resin tank capacity | 220 L |
| Machine dimensions | 1050 x 1200 x 1900 mm |
Large resin prints require an XXL-sized curing machine
For post-curing, Carima provides a large-sized curing machine, CL1800, which offers a curing full base of ⌀520 x 450mm. Its powerful 1800W UV LED cures large prints in approximately 10 minutes (e.g. with Elastic ToughRubber 90 standard material).
Carima partners with Adaptive3D for wider choice of resins
Adaptive3D is a leading AM polymer resin supplier. They are especially known for developing the toughest polymers on the market for additive manufacturing.
DM400A’s 6,000 cps viscosity capacity makes it possible to print Adaptive3D’s rubber-like materials, which are optimized for top-down DLP printers.
A part 3D printed with Elastic ToughRubber material.These are the different types of rubbery materials that the DM400A can 3D print:
| Material | Use cases |
|---|---|
| Elastic ToughRubber 90 | Primary: Mid-soles & heel-cups Secondary: Impact parts, recoil pads, door boots & wire guides, tough enclosures, seals |
| Soft ToughRubber | Primary: Audio earpieces Secondary: Wearable electronics, anatomical medical models, insoles |
| Elastic ToughRubber 70 | Primary: Mid-soles & heel-cups Secondary: Impact parts, recoil pads, door boots & wire guides, tough enclosures, seals |
Interested buyers in the United States can contact Adaptive3D for DM400A inquiries.
Xtreme 8K - ETEC
Skip to content
Team DM
Platforms
Metal and composites 3D printing 3D printing solutions for health care Industrial-grade polymer 3D printing™
Sand and tooling 3D printing solutions 3D printers for sheet metalMaterials
Breakthrough photopolymer development Advancing 3D printed upcycled woodApps & More
The hydraulic additive manufacturing experts Multi-material powder recoating technology Driving digital transformation in dentistryIndustrial Family
The largest size production-grade DLP 3D printer in the world (1) for high-volume production of end-use parts.
• Overview
The Xtreme 8K makes volume production of 3D-printed parts a reality, with the ability to print thousands of parts per day. With wide material compatibility, including hard plastics, high-temperature plastics, elastomers and rubbers, the Xtreme 8K enables the production of the broadest possible range of parts.
The Xtreme 8K leverages long-chain polymer chemistry to create fully-isotropic, stable, end-use parts, and features a heated vat, allowing users to process highly viscous and solid materials at room temperatures.
1.Xtreme 8K offers the largest build area among commercially-available, production-grade DLP printers
· Key Features
Designed for volume production
With the largest build volume of any production-grade DLP 3D printer in the world, the Xtreme 8K is capable of producing thousands of parts per day.
Wide material compatibility
Everything from hard plastics, high-temperature plastics, elastomers and rubbers – the Xtreme 8K’s heated vat allows users to process a wide variety of highly viscous materials.
Exceptional part strength and quality
Long-chain polymer chemistry produces strong, stable, fully-isotropic parts suitable for demanding end-use applications.
· Feature 1
Largest DLP build volume on the market
450 x 371 x 399 mm (17.
 7 x 14.6 x 15.7 in)
With the largest build volume on the market and an incredibly productive print engine, the Xtreme 8K is highly agile and productive. The large build volume allows users to print very large parts, thousands of smaller parts, or mix and match both in one build.
Made Possible By:
Largest DLP build volume on the market
Top down DLP printing
· Feature 2
Fast print speeds
Built to be a production system, the Xtreme 8K has the print speeds required for high volume production printing.
Incredibly fast print speeds are made possible by key features that are unique to the Xtreme 8K. Top-down printing allows for faster curing of each layer by eliminating the peeling step that is required for traditional DLP systems. When it comes to material polymerization times, the Xtreme 8K uses high-powered projectors and a highly-efficient, custom optical train to ensure that high power is delivered to each voxel, resulting in fast polymerization.
Made Possible By:
Top-down printing
High-power projectors
Highly-efficient, custom-designed optics
· Feature 3
Isotropic material properties
Parts printed on the Xtreme 8K are fully isotropic, allowing printed parts to rival traditionally manufactured plastic components such as injection molded plastic.
Unlike most plastic additive manufacturing methods, parts printed on the Xtreme 8K are made up of entangled long chain polymers, resulting in strong, fully-isotropic parts. This is vastly different from other processes, like FDM, where parts are anisotropic and have little to no polymer chains between each layer.
Creating those long-chain polymers requires processing highly viscous resins which need significant power to polymerize. Due to their high viscosity, these resins cannot be jetted (PolyJet,) and take too long to process with vector-based polymerization methods (SLA.)
Made Possible By:
Long-chain polymers
Top-down printing
High-power projectors
· Feature 4
Smooth surface finish
With the ability to achieve a surface roughness less than 1 um RA, Xtreme 8K parts feature the surface finishes required for end-use parts across a variety of industries.
DLP has long been known for its ability to deliver exceptionally smooth surface finishes on printed parts. The Xtreme 8K takes this one step further thanks to advanced DLP features such pixel tuning which further enhance surface finish. The Xtreme 8K also prints top down, meaning the parts are fully submerged in material during printing. This allows for less support structure requirements resulting in better surface finishes.
With the ability to print parts with a surface roughness of less than 1 um RA, the Xtreme 8K can deliver the surface finish required for end-use parts.
Made Possible By:
Pixel Tuning
Top-down printing (no peeling forces)
· Quote
Customer Story
rpm GmbH
rpm chose the combination of Elastic Tough Rubber (ETR 90) and the EnvisionTEC 8K to add another serial-production technology into our portfolio. In conversations with customers from the industrial goods and automotive industries, we found that a performant, rubber-like material with a simpler production chain can cover a set of use cases that currently aren’t economically feasible for additive manufacturing.
 As the first production center for ETR 90 in Europe, we look forward to paving new series AM applications with the elastic tough rubber
Dr. Claus Thomy, Managing Director
· Systems
Our Systems
- Printer technology
- Build envelope
- Models
- XY Resolution
- Z Resolution
- Printer technology
- Build envelope
- Models
- XY Resolution
- Z Resolution
- Printer technology
- Build envelope
- Models
- XY Resolution
- Z Resolution
- Printer technology
- Build envelope
- Models
- XY Resolution
- Z Resolution
- Printer technology
- Build envelope
- Models
- XY Resolution
- Z Resolution
SLA Technology. How SLA 3D printing works.
Hello everyone, 3DTool is with you!
Today we will look at the basic principles of technology SLA . After reading this article, you will understand the main points of the printing process using this technology, the advantages and disadvantages of this method 3D printing .
On our website, you can find a list of 3D printers working on SLA technology, at this link: Catalog of 3D printers printing on SLA / DLP technology
Technology 3 D printing SLA
Stereolithography (SLA) is an additive manufacturing process that achieves the result by means of resin polymerization. In SLA printing, the object is created by selectively curing a polymer resin, layer by layer, using an ultraviolet (UV) laser beam. The materials used in SLA printing are photosensitive thermoset polymers that are available in liquid form.
SLA is known as the first 3D printing technology : its inventor patented this technology back in 1986 .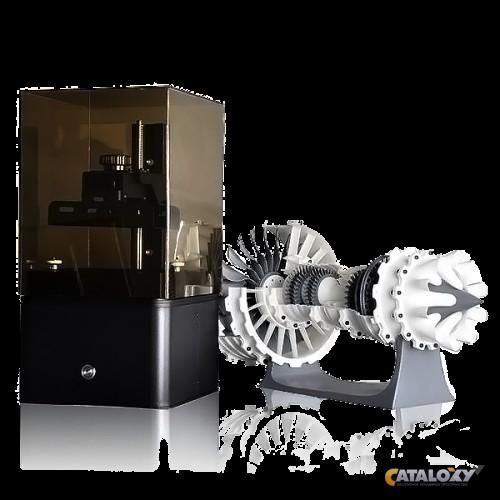 When you need to print parts with very high precision or a smooth surface, the SLA comes to the rescue. In this case, it is the most cost-effective and efficient technology 3D printing . The best results can be achieved only if the operator of the equipment on which the printing process takes place is familiar with the technology and some of the nuances. That is, he has the necessary qualifications.
SLA shares many characteristics with Direct Light Processing (DLP ), another photopolymerization technology. For simplicity, both technologies can be considered equal.
SLA printing process
1) 2) 3)
1) A platform is placed in the tank with liquid photopolymer, at the same height from the resin surface.
2) The UV laser then selectively cures the required areas of the photopolymer resin according to a predetermined algorithm.
The laser beam is focused on a given path using a set of mirrors called galvos. Then the entire cross-sectional area of the model is illuminated. Therefore, the resulting part is completely solid.
3) When one layer is finished, the platform moves to a safe distance and the mixing foot inside the tub mixes the resin.
This process is repeated until the part is printed. After printing, the part is not fully cured and requires further post-processing under the UV lamp . At the end of UV illumination, the part acquires very high mechanical and thermal properties.
The liquid resin solidifies through a process called photopolymerization: during solidification, the monomer carbon chains that make up the liquid resin are activated by an ultraviolet laser and become solid, creating strong, inextricable bonds with each other.
The photopolymerization process is irreversible, and there is no way to convert the resulting parts back into a liquid state.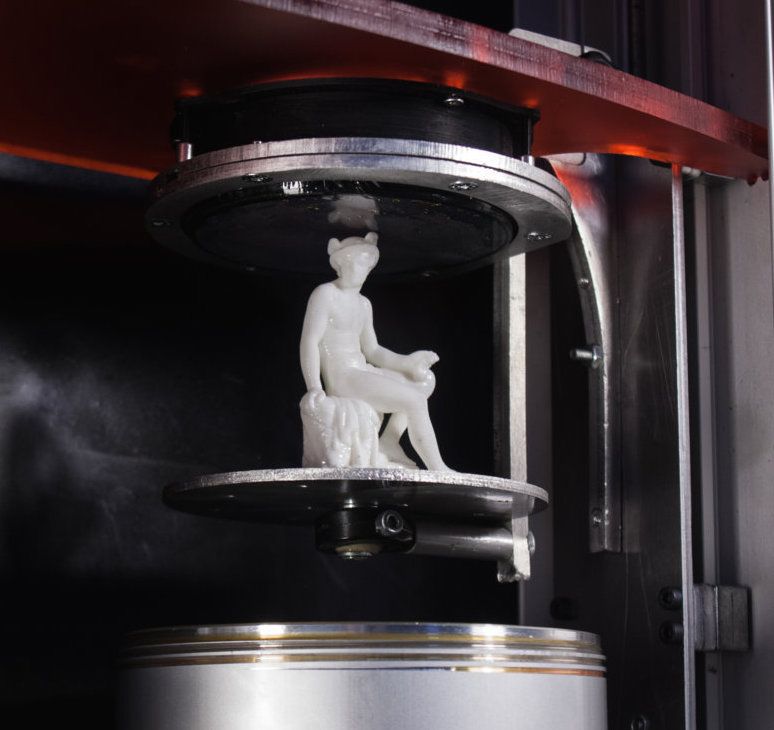 When heated, they will burn, not melt. This is because the materials that are produced by SLA technology are made from thermoset polymers, as opposed to the thermoplastics that FDM uses.
Operation scheme SLA printer
Specifications SLA printer
On SLA systems, most print settings are set by the manufacturer and cannot be changed. The only inputs are the layer height and the part orientation ( last, locates the supports ).
The typical layer height in a SLA print ranges from 25 to 100 micron .
The lower the layer height, the more accurately the complex geometry of the model will be printed, but at the same time the printing time and the likelihood of failure will increase. A layer height of 100 microns is suitable for most common geometries and is the golden mean.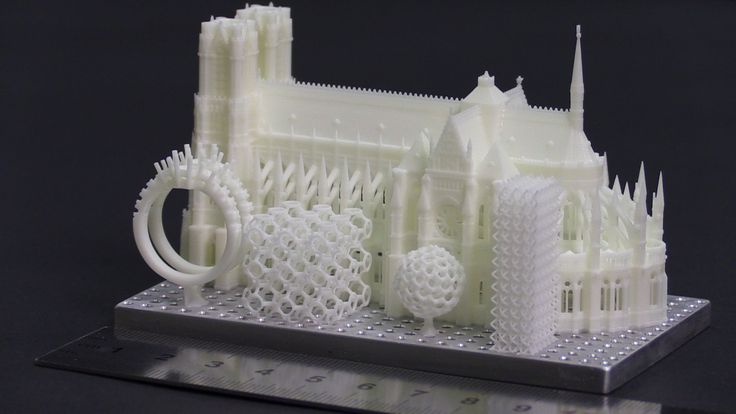
Another important parameter for the operator is the size of the platform. It depends on the type of SLA printer. There are two main types: orientation top to bottom and orientation from bottom to top .
In the first case, the laser is above the tank, and the part is face up. The platform sits at the very top of the resin vat and moves down after each layer is sintered.
Schematic SLA top-down printer
In " bottom up " layout on SLA printers , the light source is placed under the resin tank (see picture above) , and the part is built upside down.
The tank has a transparent bottom with a silicone coating that allows the beam of light to pass through but prevents the cured resin from sticking. After each layer, the cured resin separates from the bottom of the tank as the platform moves up. This is called the sintering step.
Schematic SLA bottom-up printer
The orientation " bottom to top " is mostly used in desktop printers like Formlabs. The " top - down " orientation is used in the industrial SLA printer .
Printers SLA " bottom-up " are easier to manufacture and operate, but the size of the possible print will be smaller, since the forces applied to the part during the sintering stage can cause printing to fail.
Top-down printers, on the other hand, can print very large parts without much loss in accuracy. The wide possibilities of such systems naturally cost more.
The following are the main characteristics and differences between the two orientations:
| "Top down " | |
| Pros: | |
| lower cost | |
| Wide market availability | |
| Minuses: | |
| Small platform size | |
| Smaller range of materials | |
| Requires additional post-processing due to extensive use of supports | |
Popular brands:
FORMLABS
Printable area: Up to 145 x 145 x 175 mm
Typical layer height and print accuracy: 25 to 100 µm and ± 0. 5% (lower limit: ± 0.010 to 0.250 mm) respectively
| "Upwards" | |
| Pros: | |
| Very large platform | |
| Faster Print Time | |
| Minuses: | |
| High price | |
| Qualified operator required | |
| Material change involves emptying the entire tank | |
Popular brands:
PRISMLAB
Print area size: Up to 1500 x 750 x 500 mm
Typical layer height and print accuracy: 25 to 150 µm and ± 0.15% (lower limit ± 0.010 to 0.030 mm) respectively
Support during printing 3 D
Supports are always required at Print SLA .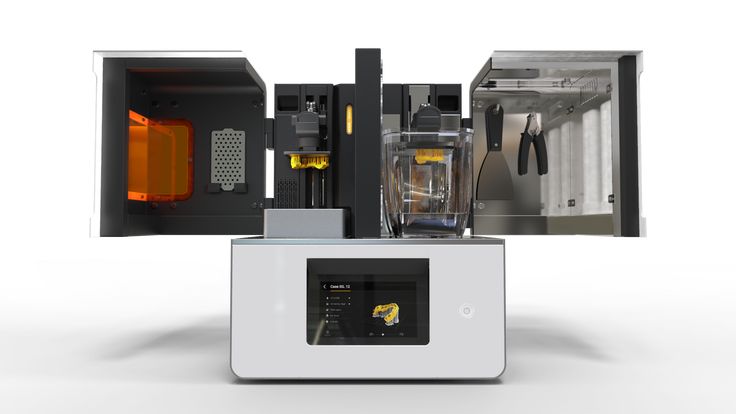 Structural structures are printed from the same material as the part and must be manually removed after printing.
Part orientation determines the location and amount of supports. It is recommended that the part be oriented so that surfaces that require maximum quality do not come into contact with supports.
In different types of SLA printers, support is used in different ways:
For top - down printers , support requirements are the same as FDM . They are essential for accurate printing of overhangs and bridges ( the critical overhang angle is typically 30 degrees ).
The part can be oriented in any position and is usually printed flat to minimize the number of supports and the total number of layers.
In printers like " from bottom to top " everything is more complicated. Overhangs and bridges also need to be supported, but minimizing the cross-sectional area of each layer is the most important criterion.
Forces applied to the part during the sintering step can cause it to come off the platform. These forces are proportional to the cross-sectional area of each layer.
For this reason, the parts must be oriented at an angle, and minimizing supports here is not a primary concern.
On the left - a detail oriented on the SLA printer "from top to bottom" (support minimization).
On the right is a part oriented on the SLA printer "from the bottom up" (minimizing the cross-sectional area).
Removing supports for an SLA printed part
Curl
One of the biggest problems with the accuracy of parts made with SLA is curling. This problem is similar to the deformation in FDM when materials shrink.
During curing, the resin shrinks slightly when exposed to the printer's light source. When shrinkage is significant, large internal stresses develop between the new layer and the previously cured material, causing the part to twist.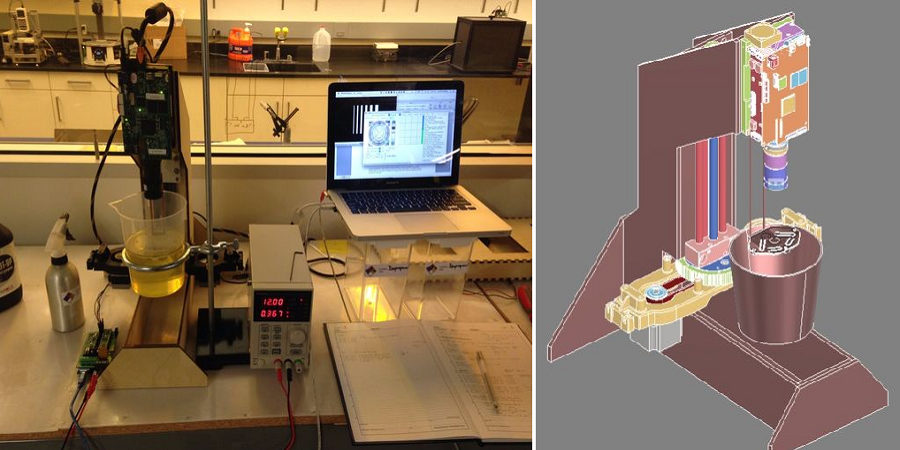
Adhesion (sintering) between layers
SLA printed parts have isotropic mechanical properties. This is due to the fact that one pass UV beam is not enough to completely cure the liquid resin.
Further passes help the previously hardened layers to fuse together. In fact, in the SLA of printing, curing continues even after the printing process is complete.
To achieve the best mechanical properties, parts printed using this technology should be post-cured by placing them in a chamber under intense ultraviolet radiation ( and sometimes at elevated temperatures ).
This greatly increases the hardness and heat resistance of SLA , but does not make it stronger. Rather the opposite.
For example.
Test specimens printed with standard clear resin on a SLA desktop printer have almost 2 times tensile strength after curing ( 65 MPa compared to 38 MPa).
Can operate under load at higher temperatures ( 58 degrees Celsius, compared with 42 degrees ), but their elongation at break is half as much ( 6.2% compared to 12% ).
If you leave the part in the sun, then nothing good will come of it.
Prolonged exposure to ultraviolet radiation has a detrimental effect on physical properties and appearance. The part may curl, become very brittle, and change color.
For this reason, before using the part, it is recommended to apply a spray of transparent acrylic paint resistant to UV .
SLA media
SLA Printing Materials is available in the form of a liquid resin. The price per liter of resin varies greatly - ranges from $50 for standard material to $400 for specialty materials such as casting or dental resin.
Industrial systems offer a wider range of materials than desktop systems SLA printers, which give the designer more control over the mechanical properties of the printed part.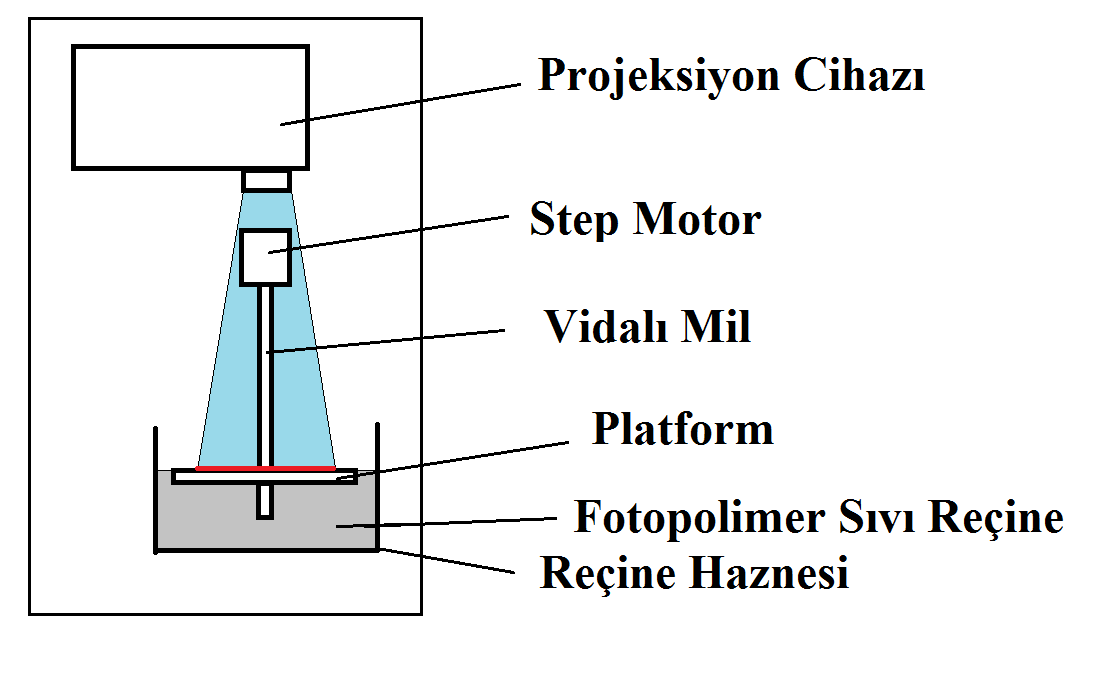
SLA materials ( thermosets ) are more brittle than materials made using FDM or SLS ( thermoplastics ) and for this reason SLA parts are not typically used for functional prototypes that will be subjected to significant stress. However, new advances in materials development may change this in the near future.
The following table lists the advantages and disadvantages of the most commonly used resins:
| Material | Features |
| Standard resin | + Smooth surface Relatively fragile part |
| transparent resin | + Transparent material - Requires post-processing for Presentable appearance |
| casting resin | + Used to create mold templates + Low ash after burnout |
| Rigid or durable resin | + ABS-like or PP-like mechanical properties - Low thermal resistance |
| High temperature resin | + High temperature resistance + Used for injection molding · - High price |
| dental resin | + Biocompatible + High abrasion resistance · - High price |
| Rubber-like resin | + Rubber-like material - Poor printing accuracy |
Post-processing SLA 3D printing
Parts printed with SLA technology can be processed to a high quality using various methods such as sanding and polishing, staining and mineral oil treatment. Widely developed articles about post-processing can be found on the Internet.
Transparent resin housing cover for electronics in various finishes. From left to right: removal of the main support, wet sanding, UV irradiation, acrylic and polishing
Advantages and disadvantages of SLA
Pros:
-
SLA 3D printers can produce parts with very high dimensional accuracy and complex geometries.
-
The parts will have a very smooth surface, making them ideal for visual prototypes, for example.
-
Special materials are available such as clear, flexible and cast resins.
Cons:
-
Parts printed using SLA technology tend to be fragile and not suitable for functional prototypes.
-
The mechanical properties and appearance of these parts deteriorate over time.
 They are adversely affected by exposure to sunlight.
 -
Supports and post-processing when printing are always required.
The main characteristics of the SLA are shown in the table:
materials
Photopolymer resins (thermosetting
materials)
Dimensional accuracy
± 0.5% (lower limit: ± 0.10 mm) - domestic
± 0.15% (lower limit ± 0.01 mm) - industrial
typical size
print area
Up to 145 x 145 x 175 mm - for desktop printers
Up to 1500 x 750 x 500 mm - for industrial
Total layer thickness
25 - 100 µm
Support
Always required
(Needed to make an accurate part)
Total
-
SLA print is best for producing visual prototypes with very smooth surfaces and very fine detail.
-
Desktop SLA 3 D The printer is ideal for making small, about the size of an adult's fist, injection molded parts. Moreover, such a printer can be purchased at an affordable price.
-
Industrial SLA 3 D printers can produce very large parts (up to 1500 x 750 x 500 mm)
Well, that's all we have! Thank you for being with us, see you soon. Further it will be more interesting!
You can purchase the 3D printers mentioned in the article , consumables for them, ask your question, or track the order, you can
-
By phone: 8(800)775-86-69
-
E-mail: [email protected]
-
Or on our website: https://3dtool.ru/
Don't forget to subscribe to our YouTube channel:
And to our groups in social networks:
In contact with
DLP 3D printing | Description and features of the technique
What is DLP 3D printing?
DLP 3D printing is an additive manufacturing technique that uses liquid photopolymer resins to build objects that are cured by light waves. “Yes, this is an SLA print!” - exclaim those who are already familiar with the methods of additive manufacturing. Indeed, the principle of operation of these two technologies is almost identical. However, the curing of the object in DLP printing occurs under the influence of a different light source.
In general, DLP 3D printing can be described as a direct analogue of SLA 3D printing, in some aspects even superior to it. For example, the print speed in DLP 3D printers is an order of magnitude higher than in SLA devices. And the difference in fidelity varies depending on the specific equipment and consumable, and is generally small. Now let's move on to the technical aspects and talk about the principle of operation of DLP technology.
Technology Description
As with all 3D printing technologies, the first step in manufacturing a physical object is to create a 3D digital model of it. We will not delve into the details of this stage, you can read more about 3D modeling for 3D printing here. The finished 3D model is loaded into a slicer program designed to set print settings and “cut” the model into layers. This step also generates supporting structures under the overhanging elements of the object. The received settings are saved, the model is converted into a control code for a 3D printer. Now you can start printing.
Above, we mentioned the similarities between DLP and SLA 3D printing. It's time to talk about their difference and how DLP printers work. Instead of a laser machine (as in SLA), DLP 3D printing works with a special projector as a light source. This technique is not new: you can also find such DLP projectors in other, more common devices, for example, in TVs. Here they are also used for curing liquid consumables - photopolymer resins.
As in SLA printing, there are two options for DLP 3D printing devices: in one, the object is built from the bottom up (the working platform goes down), and vice versa (the working platform goes up). In our article, we will consider DLP 3D printing using both types of devices as an example.
Reverse DLP 3D printing
So, a special container of a 3D printer is filled with photopolymer resin to a certain level. The building platform is lowered into the container so that the gap between it and the bottom is equal to the height of one layer. Under the tank is a DLP projector. Light corresponding to the section of the first layer of the model is projected onto the platform. After its curing, the platform rises and the illumination of the second layer begins.
So, step by step, a physical object is created. Upon completion of printing, the platform rises above the level of the photopolymer, the product is removed and cleaned of the remnants of the consumable. After that, it is necessary to perform the final illumination in a UV lamp for complete curing of the material.
Direct DLP 3D printing
In contrast to reverse printing, the DLP projector is located on top, above the resin tank. In this case, the working platform is located directly in it. To build the first layer, the platform rises so that the gap between it and the surface of the consumable corresponds to the height of the first layer.
The cross section of the first layer is projected onto the platform, curing the photopolymer, after which the platform is lowered down to the height of one layer. These steps are repeated until the complete construction of the product. Further actions are identical to those described in the previous paragraph: the object is removed, cleaned of consumables and subjected to additional illumination.
Benefits
Why is DLP 3D printing so interesting? What features of it help this technique to gain more and more popularity every day? Let's watch:
- Faster print speed than SLA 3 D printers. Unlike laser stereolithography, DLP 3D printing projects an entire layer onto the photopolymer at once, and does not gradually pass through its sections with a laser.
 Due to this, the speed of creating products increases several times;
 - High print precision. In terms of the accuracy of the created objects, DLP 3D printing is in no way inferior to SLA 3D printing: the layer height in this technique can reach 15 microns! However, it all depends on the type of 3D printer and the specific material;
- Large selection of consumables. As for photopolymers, their range in the 3D printing market is so wide today that it is sometimes difficult to decide. Moreover, often DLP 3D printers can work with the same consumables as SLA printers;
- Affordable equipment price. DLP projectors are much cheaper than laser systems, which affects the cost of 3D printers for DLP printing for the better. Technology is developing rapidly and many today are opting for digital LED projection.
Among the shortcomings, it is worth highlighting only the rather high cost of consumables.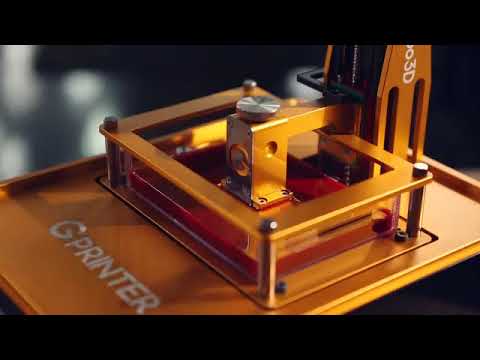
Materials used
DLP 3D printing works with liquid photopolymer resins (much the same as SLA 3D printing). Some consumables are even suitable for both methods. It depends on the wavelength of illumination and consumables. However, even specifically for digital LED projection, excellent professional lines of photopolymer resins have been developed.
So, today in the 3D printing market you can find flexible and rigid materials, transparent photopolymers and resins of a wide variety of colors. Consumables for specific applications are also available. For example, dental photopolymers with various properties, as well as burnable materials for the manufacture of jewelry master models.
Equipment
Even today, some DLP 3D printers can compete directly with SLA printing equipment. Our store presents a variety of devices, both professional and budget class, for DLP 3D printing. Some of them are listed below:
- WANHAO DUPLICATOR 7
- M-ONE
- WANHAO DUPLICATOR D7 PLUS
- B9CREATOR
- TITAN1
All 3D printers are available for order.