Diy moon lamp 3d print
How to make 3D printed moon lamp
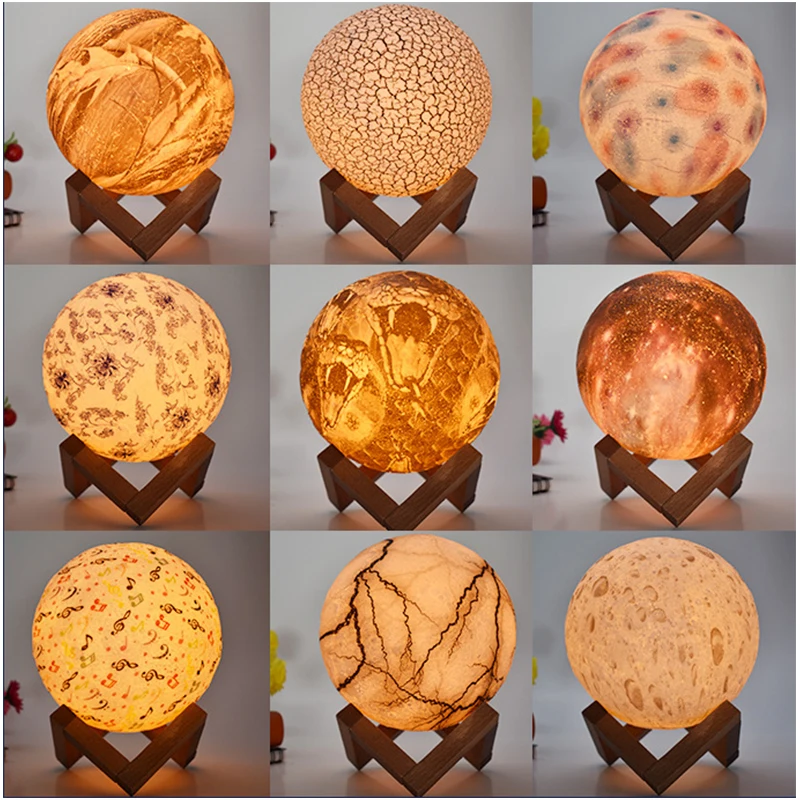
3D printed three-dimensional moon lamp, the most unmistakable element is the extent of the moon as the model production, 3D printing molding, with light alleviation on the surface of the light thickness of the transmittance of the moon demonstrate the uneven light and dark, the impact is amazingly vivid, it's a 3D printing Innovative investigation of the art in the field of lights and lamps. Light source LED light. it's lighting and watch Two in 1, LED moonlight chiefly utilizing for lighting, decoration,viewing, and photography.
ParticularProduct size: 9cm, 10cm, 12cm, 15cm, 18cm, 20cm, 24cm diameter
Material: PLA (Naturally degradable material)
Light style: LED design sparing light
Battery: 1500mAh(using time 24h)
USB Charge: 5VUSB DC port,full charge time 3h
Switch style: Touch switch catch
Production technology 3D Printing one molding
Advantages application
Lighting: Warm yellow light delicate for the eye, the best lighting for bedroom and study, particularly for children's bedrooms, eye insurance and advance rest.
Eco-friendly: with PLA eco-friendly materials, open to, invigorating, and LED vitality sparing lights to spare vitality.
Outdoors fundamental: Built-in battery and USB charging, enduring long life and simple to convey. Night calm, or touch off campfire gradually, or whisper, with a brilliant moon, appreciate the glow, consume the moonlight, blossoming in the dark!
Blessing ideas: If she focuses on the essence of life, the quest for the style; in the event that he is rich creative energy and love to make; in the event that she loves mold and rich scholarly air, give her (him) the moonlight. "Asking me how deep I cherish you? the Moon speaks to My heart."
Decoration: Elegant moon shape, design and basic, in the modern idea of light decoration substantial adornment, the moonlight is an extraordinary idea to frivolity your existence with it's lovely, add some sentimental air to the bedroom.
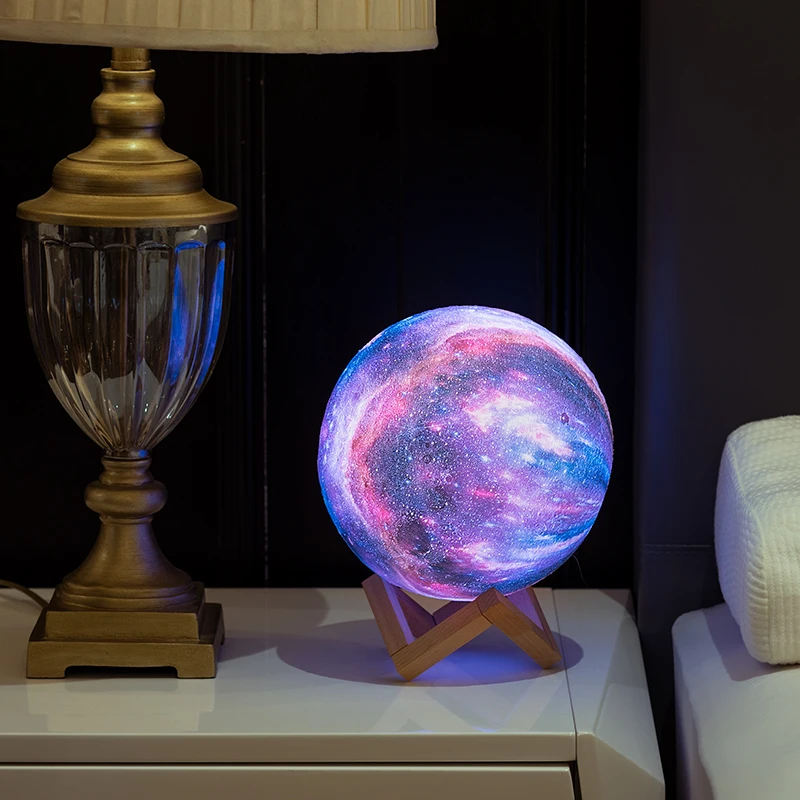
Photography: The moon is a divine and captivating image in mankind's history, and it presents to you a secret, delight, alleviation, and sentiment.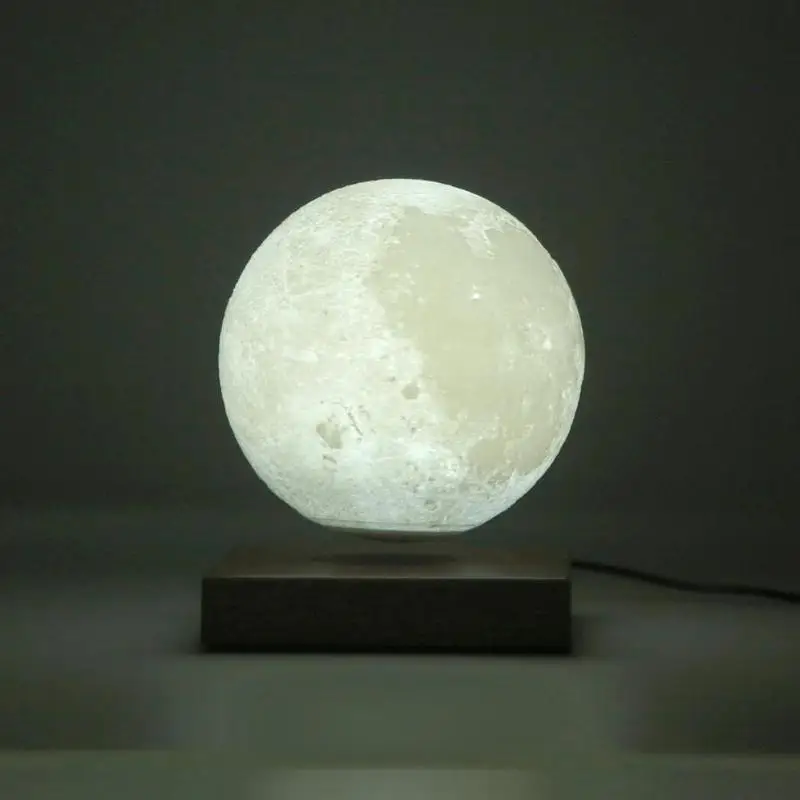 What a number of individuals make their minds to the moon yet just the dreams, it is so cold and distant. Presently picture takers can exploit our luna lamp catch its excellence with difference application, depicting the dim scene of the moon.
Features
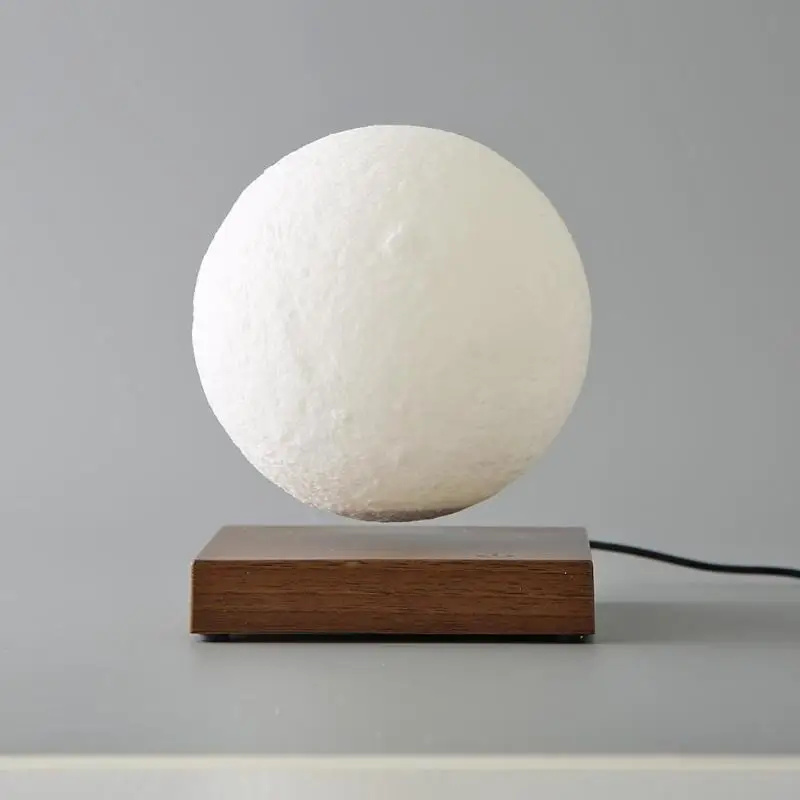
360° three-dimensional impeccable photograph reasonable reestablish Moon landscape, give you a moon can hold in your arms. According to NASA surface to exact modeling, adopting the most recent 3D printing innovation FDM printer printing one molding, printing precision underneath 0.2mm, print a solitary luna moon body takes 15 hours around, to give you a superior and more round moon. The desire of the writers to "hand the stars" will never again be extreme.
Material
Including lampshade, electronic frill across the board(PCBA, LED lights, batteries), charging cable, stand
- Idea design
According to the moon's grayscale, to rebuilding of the lunar landscape, in the front of the dim scale tallness (thickness), the dark at the moon, the thickness of the little, on the off chance that it is transmitted instead will be brilliant; splendid place for the mountain, high thickness, If it is transmissive however dark.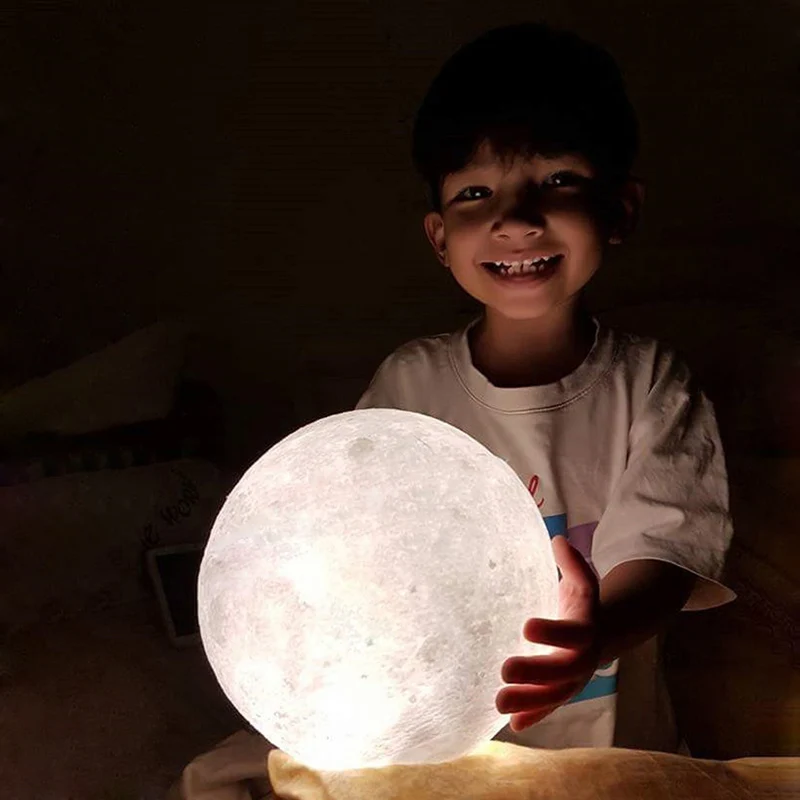
- Compose the code
the moon grayscale digitized, find a moon grayscale, and then edit the code to get the 3D model
In the wake of running the program, Got the accompanying 3D model of the moon (the thickness has been reversed):
- 3D printing
Utilizing 3D printers for printing, the printing procedureis more wanders aimlessly, you need to adjust the machine to a good level, generally in about 20 hours of printing, if there is a bug, everything will come to nothing.
- Get together
Here is a short discussion the production method, first equipped with a printed lampshade and base, and then set up the circuit board and charging line, if conceivable, add a stand (light is round, avoid scrolling). Instruments used are heated glue weapon, scissors, document, and 502 paste.
There are a few burrs on the edge of the printed part, and we can trim it with scissors
For example, the conspicuous blaze on the edges of the lampshade beneath, every one of them need be removed for an efficient work to be done.
At that point we put the circuit board in the base help position, focus on put strength, the circuit board is really integrated withthe light and lithium battery.
Presently we can attempt if the light is working, the moonlight is touch two-shading stepless direction, at the base of the circuit board, has a charging interface and little touch catch touch it to light ON. at that point touch it into yellow light, and touch the light off. On the off chance that you need to change the shine, simply long press, the method is additionally extremely straightforward moon night light White light.
In the wake of chilling off, we need to confirm that it is completely bonded and free. We utilize the charging link into the circuit board charging interface, forward and backward a few times stick the lampshade
At long last, we just need to stick the lampshade and the base with stick 502. While working, focus does not to press excessively 502, something else, the outpouring paste won't just influence the appearance yet, in addition, stick some dirty things and you will receive the best from it.
All things considered, now a moonlight has been done, as a warmhearted blessing, you can give him to children, spouse, goddesses.
▷ diy moon lamp 3d print 【 STLFinder 】
DIY Photo Moon Lamp
thingiverse
Hello everyone Here is moon lamp, I design base of lamp and strip light holder. I hope this very helpful for you.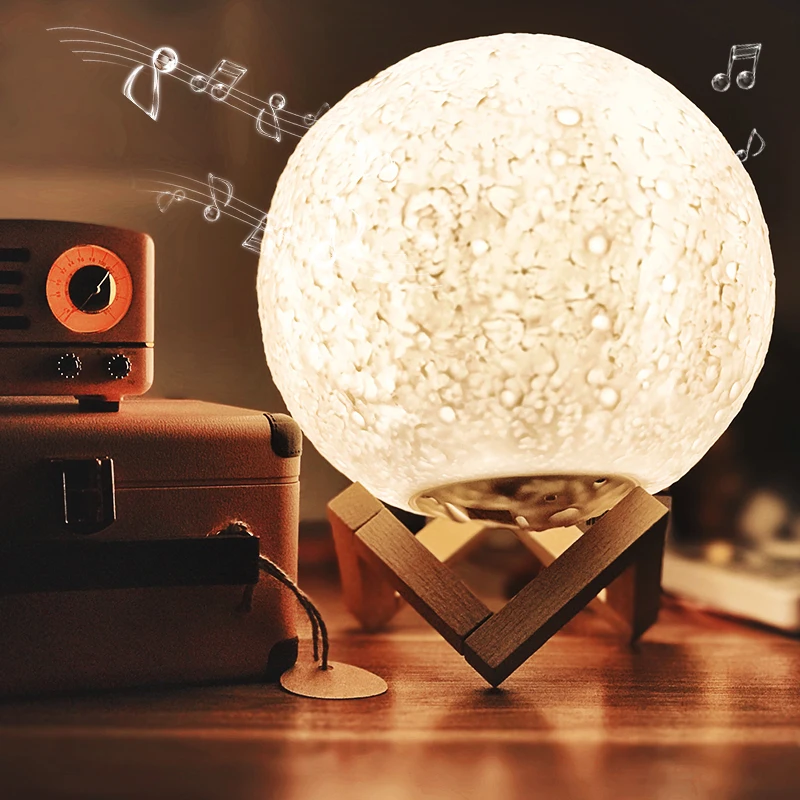 Thank you!
...
You need to buy:-
12v LED Strip
12v Power Adapter
Self locking dc switch
2.1mm x 5.5mm Round Panel Mount Female...
Thank you!
...
You need to buy:-
12v LED Strip
12v Power Adapter
Self locking dc switch
2.1mm x 5.5mm Round Panel Mount Female...
3D PRINTING-MOON LAMP
grabcad
hey, guys, I am made a tutorial for 3d printing moon lamp. kindly Please watch and subscribe to my channel. ...the new suggestion is welcome.my channelhttps://www.youtube.com/channel/UC0aNv-le_JLgelblN0WR63g?view_as=subscriber
DIY Disc Lamp 3D print model
cgtrader
DIY Disc Lamp's modeled with SolidWorks 2017. 3D Studio Max 2016 and also attached 2013 version. 1:1 Scale. Unit's millimeter. Many file formats are available.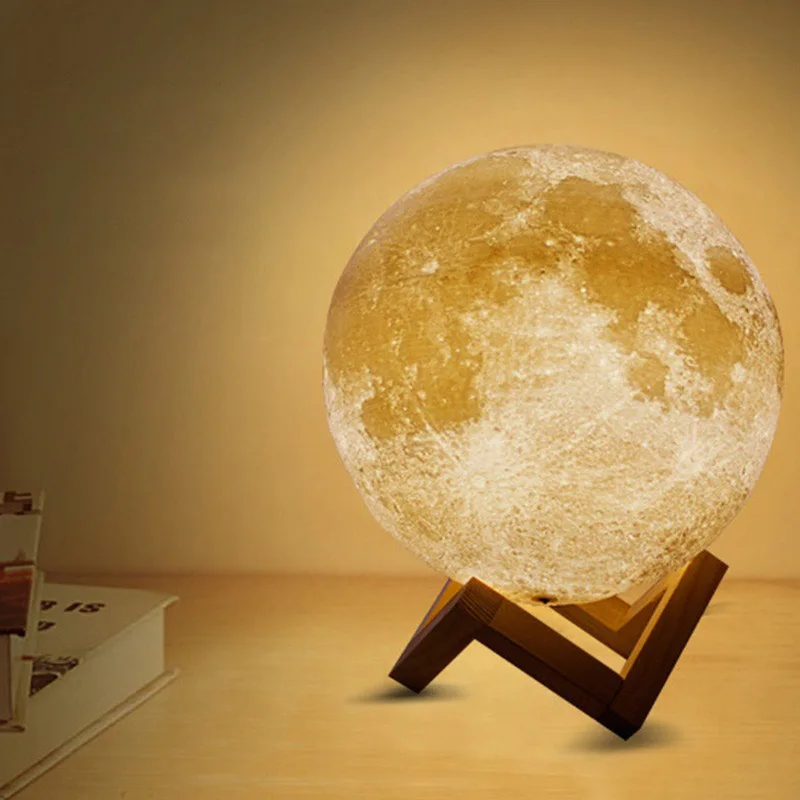 ... Features: Can be produced in 3d printer Practical installation File formats: SLDPRT,...
DIY tree lamp 3D print model
cgtrader
... and it didn't let her down, cus it is very beautiful. ...You can just take it as a tree, but if you wish it more than just a tree, you can diy putting some micro led in, as you finish, you will have a very beautiful tree lamp. Happy making tree! ...
DIY tree lamp 3D print model
cgtrader
... gift, it didn't let me down cus it is very beautifl. ...You can just take it as a tree decro but if you wish it more than just a tree, you can DIY put some micro led in, as you finish, you will have a very beautiful tree light! happy making tree! .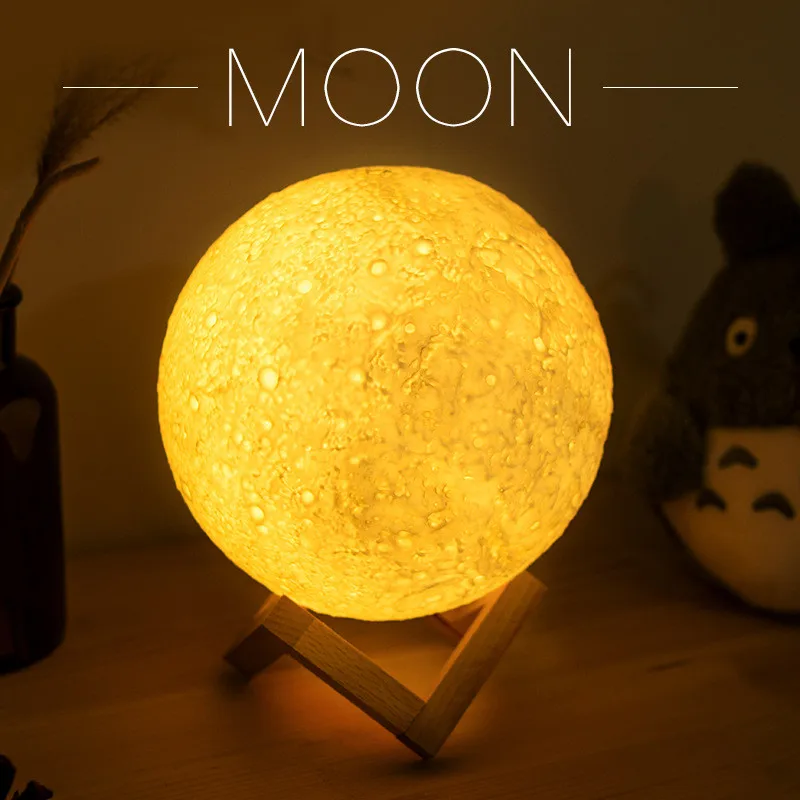 ..
..
KA LAMP - 3D PRINTED DIY LAMP 3D print model
cgtrader
I specially designed the Kâ lamp to be manufactured with 3D plastic printers. In the design, I took into account the technology and the way the object is printed, in order to avoid any support material and to ensure that the shape of the lamp...
3D printed "Sun & Moon" lamp
thingiverse
3D printed "Sun & Moon" ceiling lamp Printed on a Sunlu S8 plus Bed size 310x310 mm Sliced with Cura Sun and Moon lampshade are printed in vase mode All pieces printed without supports Complete with two E27 LED bulb holders
Moon Lamp Georges Melies litophane 3D print model
cgtrader
A Trip to the Moon Georges Méliès litophane 3d printed E14 lamp shade size 164x102x152 printing tips : 0.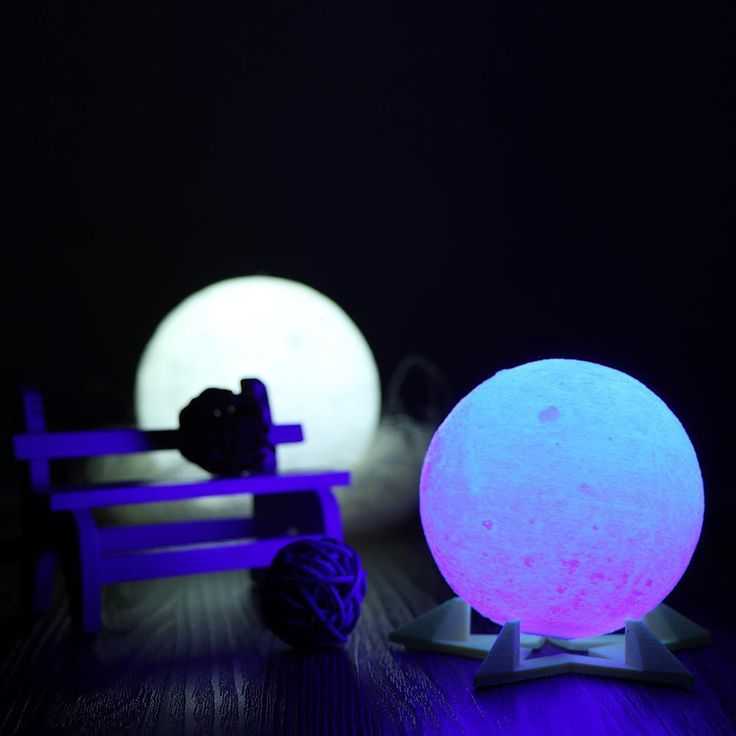 1 layer 100%infill 50mm/s no support
moon lamp 3D model
cgtrader
moon lamp for your interior lighting and decoration
Hand Stand for Moon Lamp 3D print model
cgtrader
Hand Stand For Moon Lamp or any other Spherical object
Moon Lamp 3D model
cgtrader
4 rendering available 3000x3000 px Render settings are ready Moon lamp design TEXTURES MoonMap : 4000x2000px MoonBump : 4000x2000px instagram : https://www.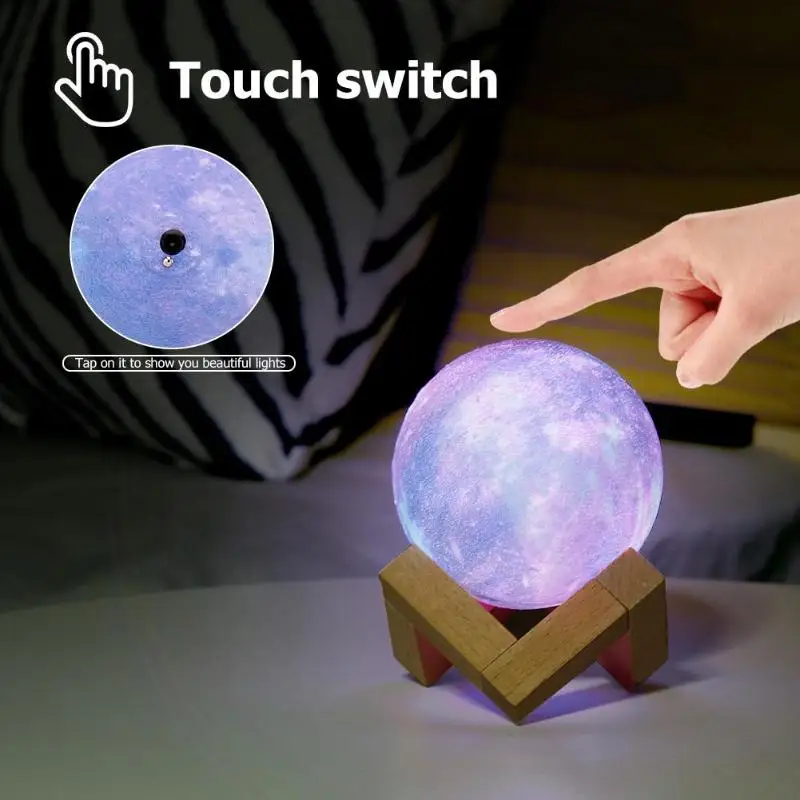 GOOD LUCK
Moon Lamp 3D model
cgtrader
Decorative Moon Lamp for Interior Design. The light can be turned On or Off simply changing the intensity of the emissive light in the moon material. ...Also it has a Subdivision level that can be changed (or removed) to make the model lighter or even...
8 Inches Progressive Moon Lamp 3D print model
cgtrader
Please find more details at instructables: https://www.instructables.com/id/Progressive-Detail-Moon-Lamp/ Please make sure your machine powerful enough to open this huge STL file before purchase it. ...
4 Inches Progressive Moon Lamp 3D print model
cgtrader
Please find more details at instructables: https://www.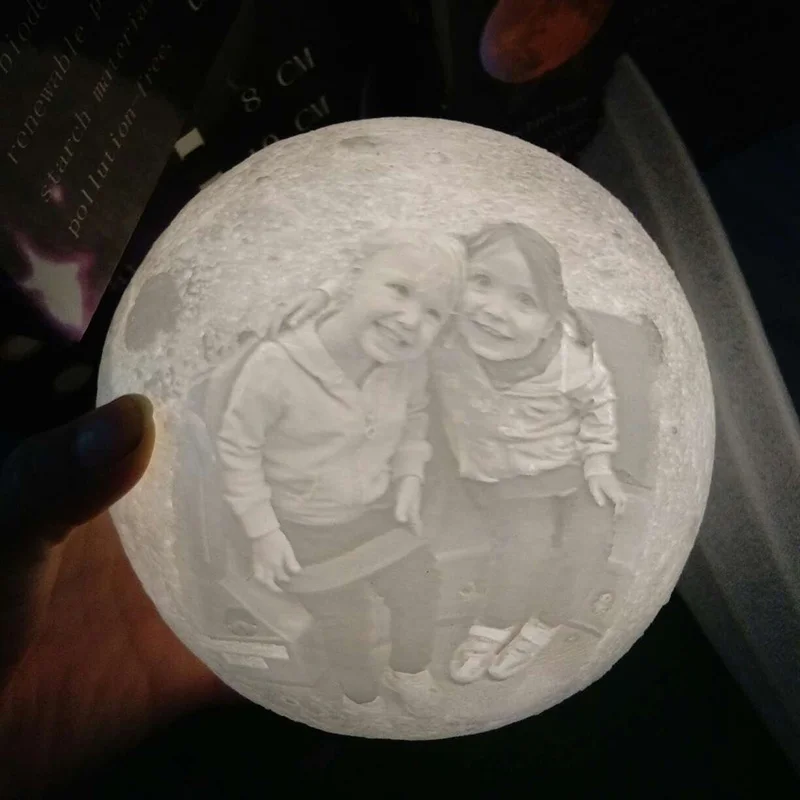 instructables.com/id/Progressive-Detail-Moon-Lamp/ Please make sure your machine powerful enough to open this huge STL file before purchase it. ...
5 Inches Progressive Moon Lamp 3D print model
cgtrader
Please find more details at instructables: https://www.instructables.com/id/Progressive-Detail-Moon-Lamp/ Please make sure your machine powerful enough to open this huge STL file before purchase it. ...
6 Inches Progressive Moon Lamp 3D print model
cgtrader
Please find more details at instructables: https://www.instructables.com/id/Progressive-Detail-Moon-Lamp/ Please make sure your machine powerful enough to open this huge STL file before purchase it.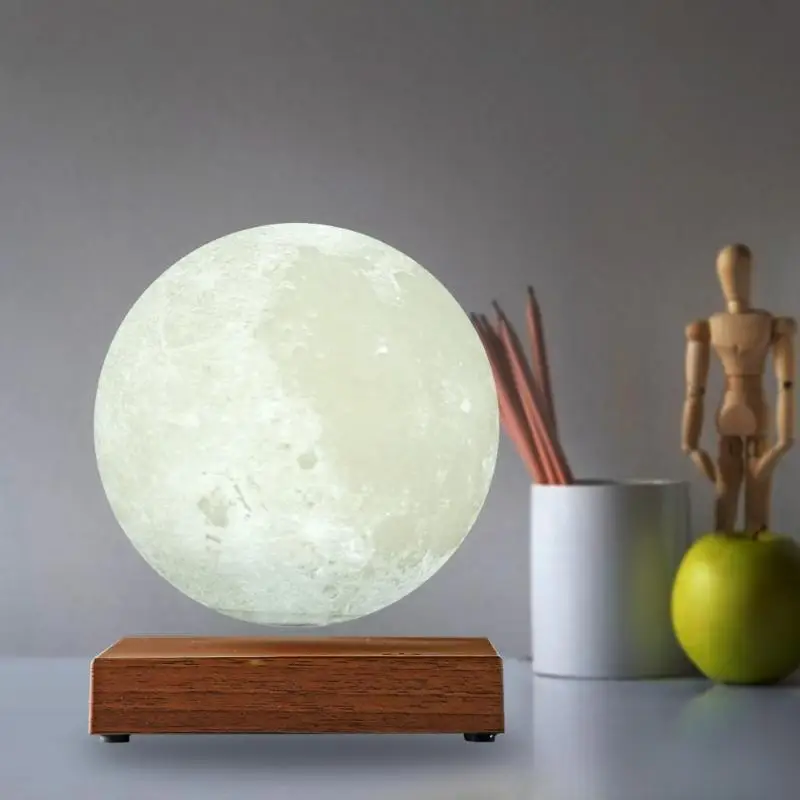 ...
...
7 Inches Progressive Moon Lamp 3D print model
cgtrader
Please find more details at instructables: https://www.instructables.com/id/Progressive-Detail-Moon-Lamp/ Please make sure your machine powerful enough to open this huge STL file before purchase it. ...
DIY 3D Printed Mood Lamp
thingiverse
DIY 3D Printed Mood Lamp ===================== T.Meadows - DIYElectronics ------------------------------------- Howzit going everyone, Thomas here for another Takeover. Today I will be talking about my custom Mood Lamp project. I saw a project on...
Kâ Lamp - 3D printed DIY lamp
cults3d
I specially designed the Kâ lamp to be manufactured with 3D plastic printers. In the design, I took into account the technology and the way the object is printed, in order to avoid any support material and to ensure that the shape of the lamp...
KÂ LAMP - 3D PRINTED DIY LAMP
pinshape
I specially designed the Kâ lamp to be manufactured with 3D plastic printers. In the design, I took into account the technology and the way the object is printed, in order to avoid any support material and to ensure that the shape of the lamp...
Stylish moon lamp 3D model
cgtrader
Staylish lamp design using moon as a main light also hand moon as an additional design also included in the same file.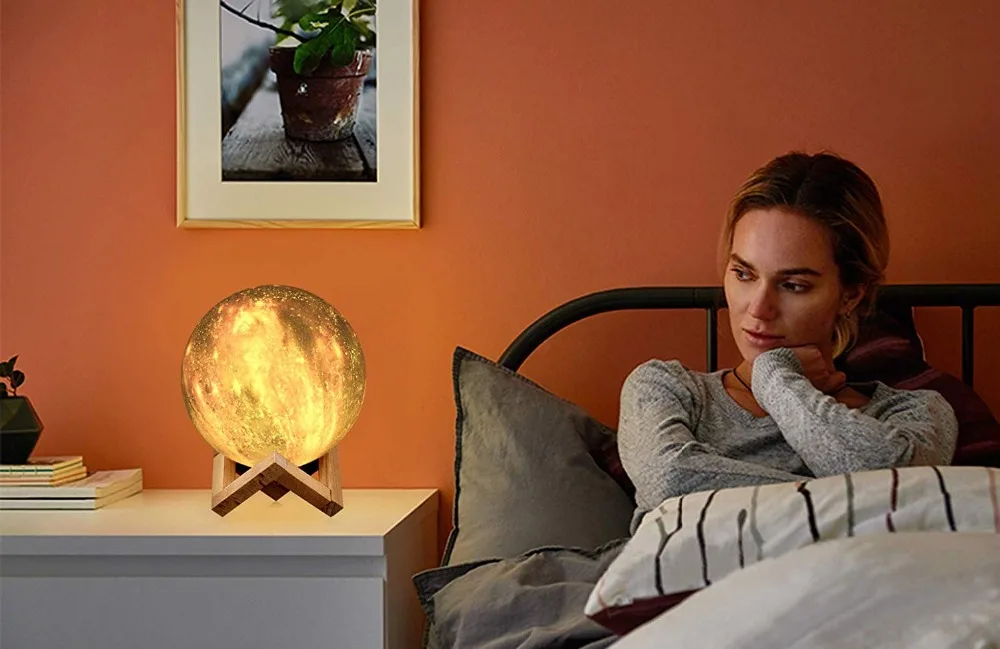 Materials and texture included. vray lights and setting also included. fbx.3ds.obj and max available I hope you like it. ...
3d model of Moon Lamp
grabcad
The model was made using solidworks 2017.In this tutorial you will learn how to model a 'Moon Lamp'.Reference of the model: https://pin.it/4igPclHThe important commands used in this tutorial are:- Boss Extrude- Boss Extrude with Thin Feature.-...
Moon Light Lamp 3D model
cgtrader
Here are some details for you: Name: Moon Light Lamp Version: 2012 Preview: Yes Units: millimeters Dimension: Polygons: 26024 Vertices: 26088 Formats: Max 2012 version, file of export obj and textures Textures: high texture resolution is used. The...
moon lamp
pinshape
moon lamp
Lamp -Moon
cults3d
Lamp -Moon
Moon Lamp
pinshape
Moon Lamp Moon spherical lamp with the real elevation map of the Moon the external part only. Made for standard E27. 1.212.000 Polygons. 118 megs the stl file. ... Please post images of your printed Moon Lamp.
Sailor Moon moon scepter 3D print model
cgtrader
I present the first version of the moon scepter used in the first season of Sailor Moon
Moon Lamp
thingiverse
More Moon Lamp version (from new to old): NASA CGI Moon Kit 2019 version: https://www. thingiverse.com/thing:4102658 Progressive Detailed 8 Inches IKEA screw socket version: https://www.thingiverse.com/thing:3532973 Progressive Detailed Rechargeable...
Moon Lamp
myminifactory
Please find more detail at instructables:https://www.instructables.com/id/Print-Your-Own-Moon/ Thingiverse have file size limit around 260 MB, Please find larger files here:...
Moon Lamp
thingiverse
Yep, another Moon lamp, but very easy to assemble with a quick IKEA hack ;) Buy a FADO IKEA lamp and replace the lampshade with this moon
How to create your own Moon / Sudo Null IT News
This article shows you how to make a 3D model of the Moon from scratch.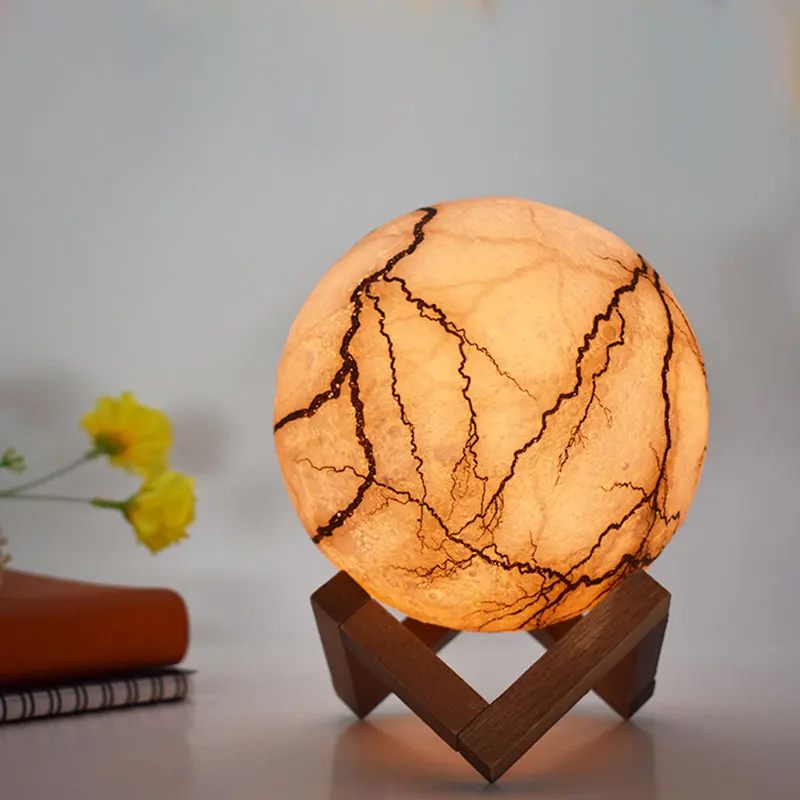 It would seem, Why create a model of the Moon yourself, if you can buy it? If only because when you make a model of the Moon yourself, you can set the desired parameters, for example, the dimensions and thickness of the shell, image resolution, rotation limits, the position of the cutting plane, you can make a hole for the lamp, and so on. Let us proceed to the creation of our own moon.
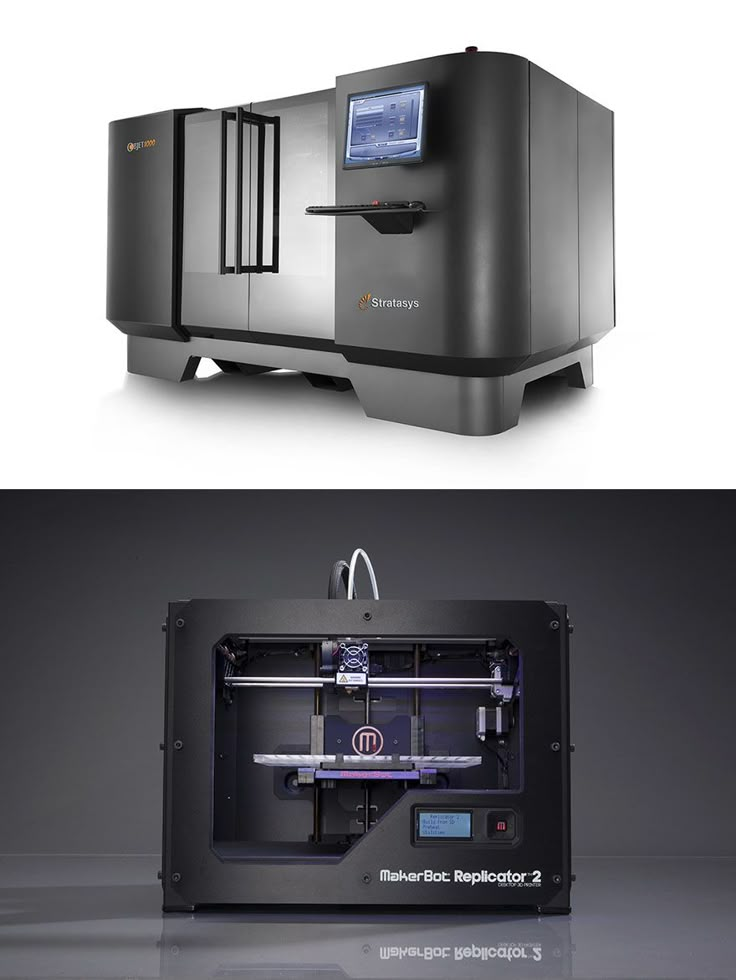
A variety of 3D models of the Moon can be found on the Internet. Some can be purchased from online stores, others can be downloaded as files and printed on a 3D printer. Finished models can be divided into 2 categories:
-
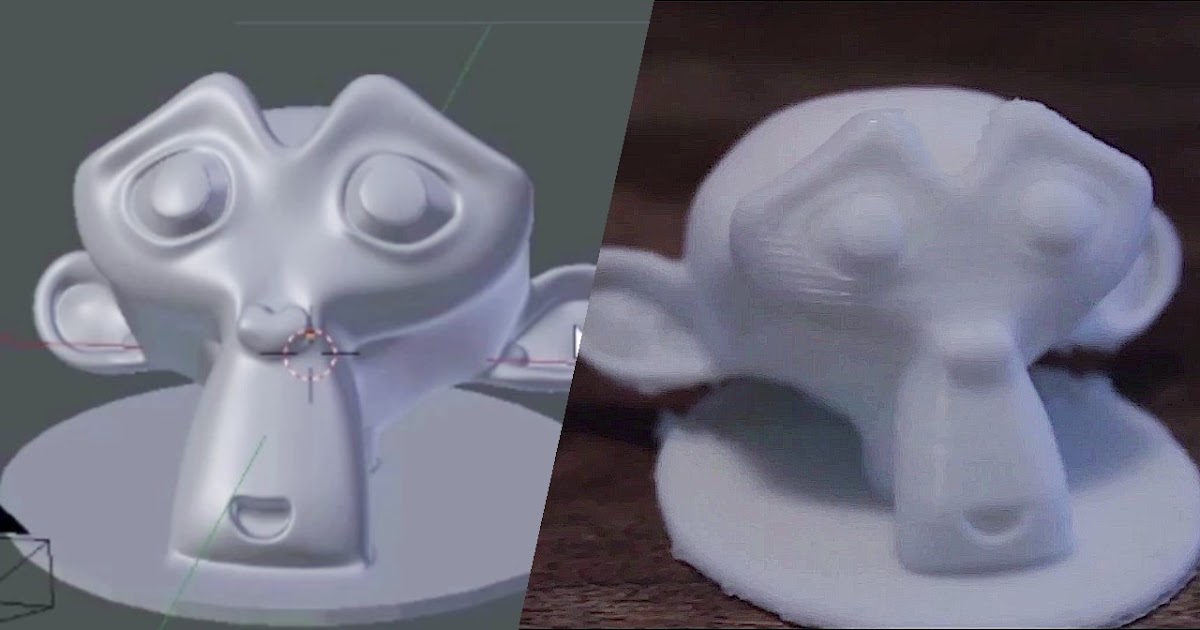
The surface of the moon is drawn in detail and with high quality, but if a light source is placed in the model, its details are not highlighted from the inside.
-
Surface details are well drawn when illuminated from the inside, but without illumination they are not visible.
Step 1: Draw details
Details do not light up from the inside when a light source is placed insideDetails are drawn well when illuminated from the inside
If you do not have a 3D printer, you can buy a lamp like Moon Lamp on the Internet.
Step 2: Prepare the software
Below is a list of the software involved. After familiarizing yourself with the technique, you will be able to do the same thing as I did with ordinary tools.
Modeling Tools
Download my custom version of Banate CAD from GitHub .
Banate CAD is written in Lua, so install Lua for Windows to run scripts on Windows.
STL Editing Tools
Meshmixer
Step 3 Preparing Materials
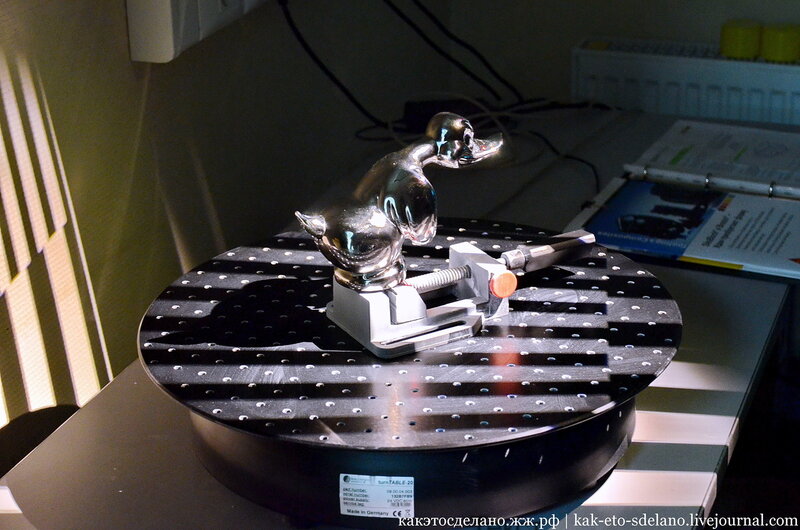
Plastic for Printing
The images above show PLA products. Products resulting from 3D printing using different types of white PLA plastic may have different shades. The plastic supplier claims that option B is the best, but that, alas, is stuck in my printer.
Light source
The moon model can be illuminated in different ways, the light source can be powered by batteries, mains, and so on. The size of the model also affects the choice of light source.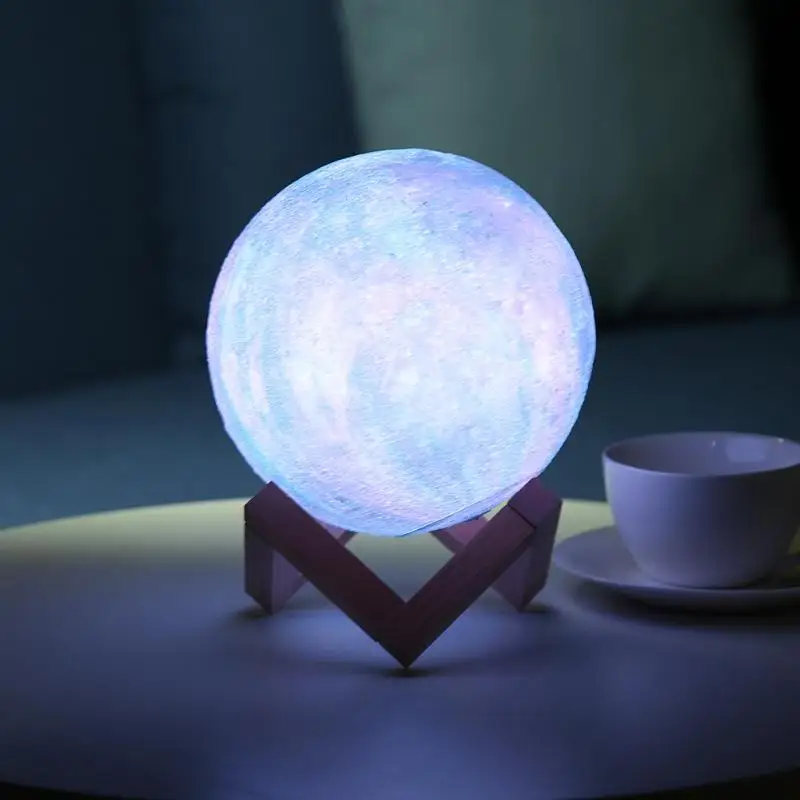 There are a lot of options, and if we start discussing them here, we will deviate from the topic of printing. It is enough to understand that there are a lot of options. I want to note that the warm white light of the source is more pleasing to the eye.
Matte Spray Paint
Most PLA models are highly reflective, so I recommend a matte finish. Matte spray paint will easily solve the problem.
Step 4. Images of the Moon
Two images of the Moon are required for the simulation. They are located in the BanteCAD/Examples folder. I reduced the resolution to 720x360, it should be enough for the model. If necessary, search for higher resolution images online.
Bump map
There is a special map for surface modeling, usually called a bump map. The shade of gray indicates the height of the corresponding point on the sphere. Having a bump map, you can accurately display all the details of the surface on the model. However, if you compare the bump map with the moon in the sky, you will notice that they are different from each other.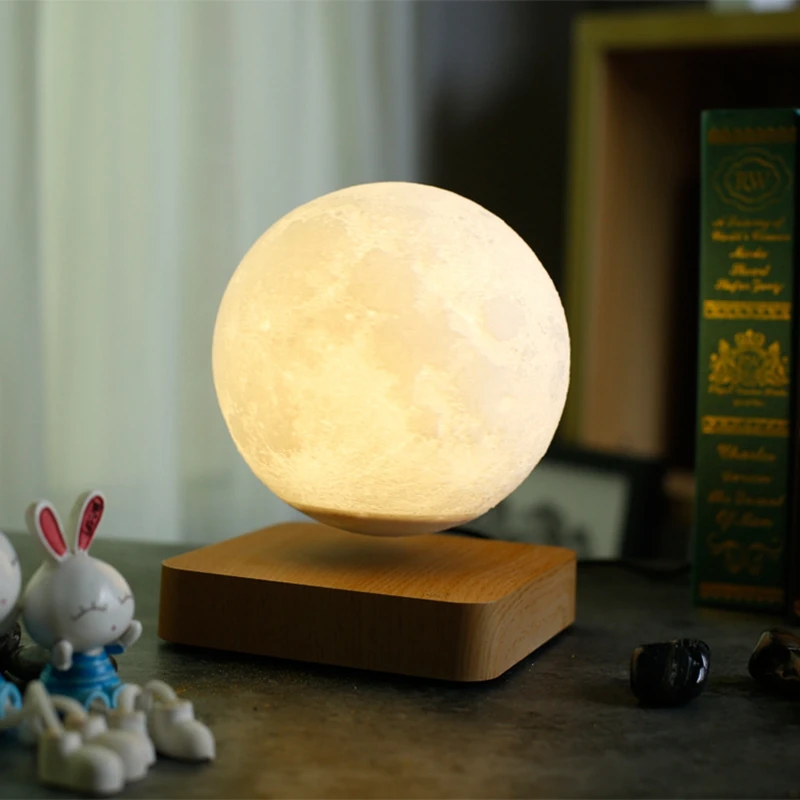
Visual map
Details of the real moon are not only different heights at different points. Color is also important. Naturally, we can instruct the printer to print different colors, but, fortunately, we see the real moon in grayscale. To allow light to pass through the model at different intensities, you can print the model with different wall thicknesses and superimpose a grayscale image on the model. To adjust the wall thickness of the model, we need a visual map of the moon.
Post-processing
-
Lunar surface map is a regular bump map. I need to take into account the internal thickness, so using the Level function (Level) I shift the value to the right (a brighter image will be displayed on the bump map).
-
Inner map of the Moon is the shape of the inner surface of the model. From this map, we determine the thickness at each point of the surface, that is, the desired shade of gray. This map is built from a visual map, which in turn has thickness settings based on a bump map applied to it.
 Or, to use another calculation method, by subtracting the bump map from the inverted visual map.
Adjustable Parameters
-
If you lower the bump map level, the elevations on the surface will be smaller, and the sag will decrease, but the surface details will have to be distributed differently.
-
If you move the level of the visual map to the left, the shell will become thicker, and vice versa. In this case, it must be remembered that the level should not be shifted too far to the right. The cladding must be at least 0.4 mm thick (if a 0.4 mm extruder nozzle is used), otherwise the cladding must be manually punched.
-
The range of the light gray scale depends on the level range of the visual map.
Attached files: moon.xcf
Step 5: Control the layer thickness above. If the shell is thinner than it is possible to print, the printer simply will not print anything, holes may even form on the surface in unexpected places.
 You can fix it like this.
 -
Open the STL file generated by BanateCAD with Meshmixer.
-
Delete the inner surface model.
-
Run the Edit command.
-
Select the Hollow command.
-
Set thickness to 0.5mm (for extruder size 0.4mm).
-
Run the Hollow command again.
-
Accept the changes, now the thickness of the shell of the lunar surface is 0.5 mm.
-
Rotation and cutting of the plane are carried out in the same way as in the settings of the lunar shell.
-
Export the STL file.
-
Open the moon shell STL file in Microsoft 3d Builder.
-
Repair any defects.
-
Open the STL file of the lunar surface with a shell thickness of 0.5 mm.
-
Repair object defects.
-
Select the entire object.
-
Accept the changes, now the thickness of the lunar shell is 0.
 5 mm.
5 mm. -
Export the STL file.
Step 6 Modeling - BanateCAD
BanateCAD can model a 3D shape from a bump map. In the examples folder, I posted the corresponding script. It reads a map of the surface and an internal map of the moon, and then models both shapes. The following are the steps for modeling with BanateCAD:
-
Open the BanateCAD.wlua file.
-
On the File menu, choose Open.
-
Open the file moonlamp.lua in the Examples folder.
-
Optional: change parameters.
-
From the Compile menu, choose Compile and Render.
-
After a while, the 3D model will appear.
-
From the File menu, choose Export -> Export STL.
-
Enter a name for the STL file and click the save button.
Configurable Parameters
Output sphere diameter in inches, bump map and internal map are generated from this parameter:
local outputSize = 3 -- inches
Surface height factor:
local outputSize = 3 -- inches
The resolution must not be greater than the resolution of the PNG image:
USteps = 720, WSteps = 360,
Step 7: Create a Shell – Meshmixer
Based on the shapes made in BanateCAD, we can create a shell by subtracting the surface of the inner shape from the shape.
The following describes the steps to create a wrapper with Meshmixer:
-
Open the exported STL file with Meshmixer.
-
Wait for the download to complete.
-
Select both models in the Object Browser.
-
On the left toolbar, select Edit, then select Boolean Difference.
-
Wait for the calculation to complete.
-
Select Accept.
-
Wait for the calculation to complete.
-
Leave one model in the Object Browser, this will be the lunar shell.
-
Save the file.
Step 8. Modify and output the model - Meshmixer
Before 3D printing, you can configure any parameters. The options are:
-
If you want to put a model of the moon on your desktop, I suggest that the z-axis rotates from -45 to -60 degrees, so the moon will be directed towards you in its usual direction.
-
If you want to hang the moon model from the ceiling, I suggest that the z-axis rotate 120 to 135 degrees for the same reason as above.

-
If you want to install a backlight inside, do not forget to make a hole for the wire (if you have difficulty printing a hole on a 3D printer, you can, like me, just drill a hole after printing with a drill.
-
90% percent The cutaway moons are flat, so you can hide the seams and print it easily without sagging.0003
When finished, export the STL file for printing.
Step 9: 3D Print
Open the object in the 3D Slicer, make sure there are no holes in the shell, and start printing.
If the moon needs to be perfect, you can skip the previous step with cutting the plane and turn on the support option. But, in my opinion, removing the remnants of the caliper is quite difficult.
If the previous step was difficult for you and you could not print the STL file, use my file.
Assemble the top, light source and bottom together.
Step 10: Coating the Surface with Matte Paint
Most PLA 3D prints are highly reflective, so I recommend coating the resulting surface with Matte Paint.
Now I'm trying to print a larger diameter moon lamp - 110mm, which is the largest size that can be printed with the Robo C2 printer. One printout will take tens of hours. I want a moon with these parameters:
local r = 52 local h = 3
Final!
You did it! Now you can brag to the familiar results of your work or just give the finished model to your friends!
Learn how to pump in other specialties or master them from scratch:
-
Profession Data Scientist
-
Profession Data Analyst
-
Course on Data Engineering
0011 Data analytics course DevOps course 3D moon night light with photo
COSMOLAMP
We make
the most expressive
lamps in the shape of the moon with a photo and an inscription
- a cool gift, whatever one may say
Order
Largest battery
20 hours - longest bright battery life of any luminaire
The most reliable
1 year warranty without saving the box and the receipt, the service period is not limited
The most convenient
Only in our lamps is a clear charge indication and double-tap for quick shutdown
The most expressive
High-quality 3D printing with a large thickness wall and embossed, layered lettering design, odorless material
COSMOLAMP
the most expressive
lamps in the form of moon with a photo and an inscription
- a cool gift, whatever one may say
Order
Bright, original gift!
We make not just nightlights, but unique gifts in a single copy that bring joy and delight, express your attention and care
TOP 6 lettering designs
Moon lamp COSMOLAMP is a designer lamp in the shape of the moon, glows wirelessly, is charged from a conventional USB connector (computer, laptop or phone charger), controlled by remote control and touch, can shine in any of 16 colors and in 4 modes of automatic color change.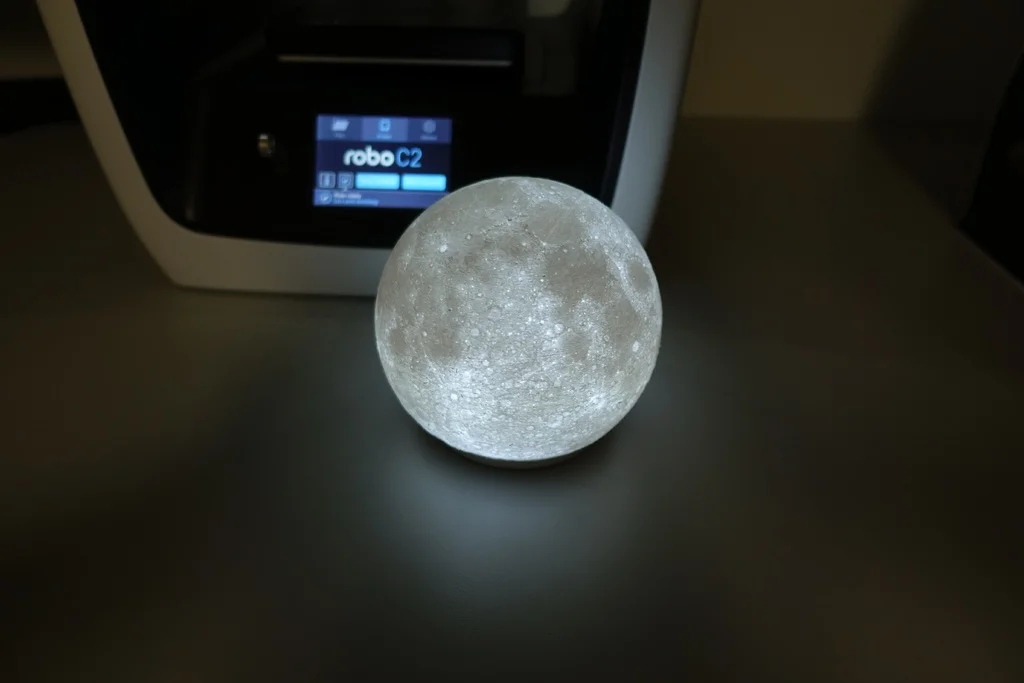
Play video
Features of COSMOLAMP luminaires
... and COSMOLAMP is much brighter too!
Relief 4 mm - unique COSMOLAMP technology for the most expressive image
Over 30 standard designs
Only 3 steps of manufacturing COSMOLAMP with photo:
Photo - 3D-Layout - Video report
Back
0002 Next
Reviews
Angelica H.★ ★ ★ ★ ★
Read another
, I ordered a very good time $ at the highest level. Very much exceeded my expectations. They work quickly and very pleasant communication. I recommend ordering, you won't regret it👍👍👍
Svetlana K.★ ★ ★ ★ ★
Read more
I ordered a night light as a gift for my sister's wedding. They really liked it! Rejoiced like children) Communication with the company pleased, they answered everything very quickly and in detail, taking into account all the wishes. Everything was done very quickly and beautifully! You are doing a good job! Thank you very much!
★ ★ ★ ★ ★
Read more
I made 2 orders of lamps and both times I was satisfied! The lamp is made very high quality, in a beautiful package, delivery is fast and everything came intact. I will be placing more orders.
Elena S.★ ★ ★ ★ ★
Everything was done quickly, beautifully, I am very glad that I contacted this company. The whole family is delighted with the gift. Thank you very much❤
Alexander Demin★ ★ ★ ★ ★
Read another order 4 pcs for a gift all the advisable than 9,000 Camila C ,and answered all my questions without being lazy.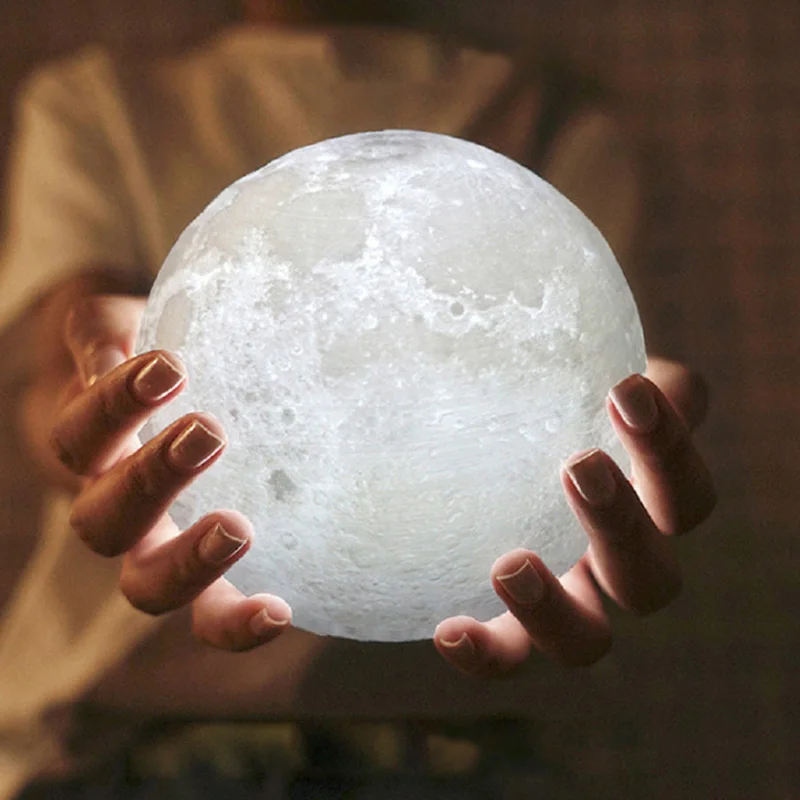 The opinion of the client is always taken into account.Very high-quality work.Everything is super.I am very happy..Once again, thank you so much for such a miracle❤️❤️
★ ★ ★ ★ ★
Read anotherDOWN DOCHENE and SITY for a three-year wedding. They really liked the gift. I advise everyone to order a nightlight from this company. Very friendly manager. Patiently and sensitively worked with my wishes. Delivered on time.
Natalia T.★ ★ ★ ★ ★
Read more
Space lamp is a very original and unexpected gift!) friends were delighted! We ourselves learned such a Moon and have been using it for more than six months! No complaints, only soft light at night and pleasant memories from the photo...✨ I placed an order via Instagram, very convenient, quick response, prompt and thorough study of the sketch, I was pleased with the strict adherence to the deadlines for work and delivery.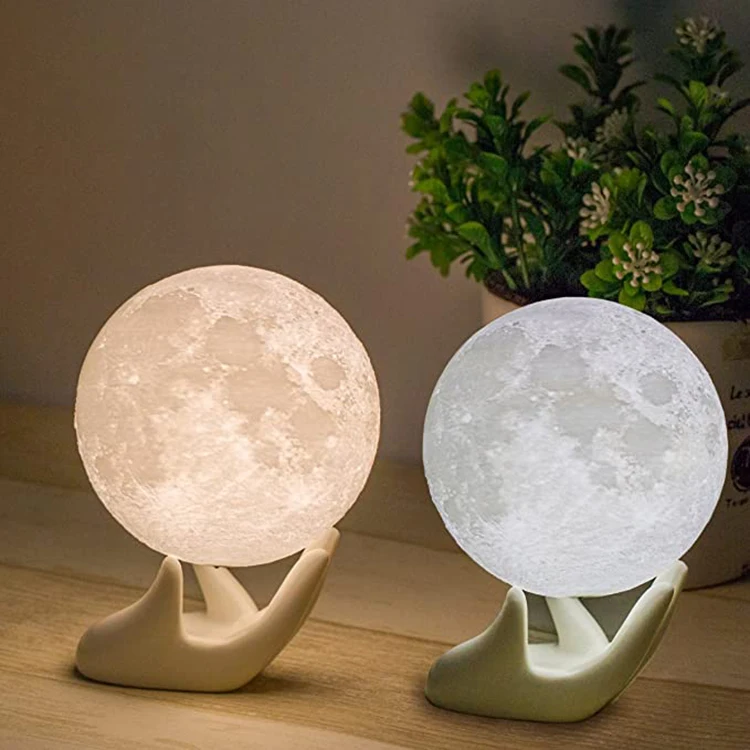 I recommend presenting such amenities to friends and acquaintances😊
★ ★ ★ ★ ★
9044 Read another
I ordered a 3D for a wedding gift, answered very quickly! They helped with the choice of the layout, there were several photos to choose from, and there were many questions, everything was explained clearly and clearly. The parcel came quickly, everything is intact. Convenient payment method. Convenient delivery method. I really liked Luna))) Beautiful, original!!! I will recommend to my friends and family!
Natalya Kalashnikova (order No. 1574)★ ★ ★ ★
@Natalya_Vladimirovna91 PITTLE ALSO 9000 9000 9000. We really like it, and people are certainly delighted with such a gift, unusual, creative and most importantly for a long memory 🤗we will definitely order more 🤩 Anastasia (order No. 1760)★ ★ ★ ★ ★
@anastasiia_886Read more
I ordered a lamp as a present for my girls. It turned out very cool. Everything works perfectly, delivery is very fast. My children were very pleased. Thank you for the cool gift!!!👌👍
★ ★ ★ ★ ★
@ykt.svetilnik.8handmadeRead more
THANK YOU SO MUCH FOR SUCH BEAUTY!!!! VERY EXCITED!!! I ORDERED A GIFT FOR DAUGHTER AND I DID NOT REGRET A LITTLE LITTLE!!!! THANKS!!! I AM YOUR REGULAR CUSTOMER NOW))) I will advise you to everyone!)))))))
Previous
Next
Reviews about us in social networks
More reviews in VKontakte
Quick request
Our specialists will contact you within 20 minutes (during business hours)
Phone (whatsapp preferred)
Upload a photo for the layout (up to 3 pcs)
Email where to send the layout
Work examples
We strip every light fixture we make and send it to you before shipment.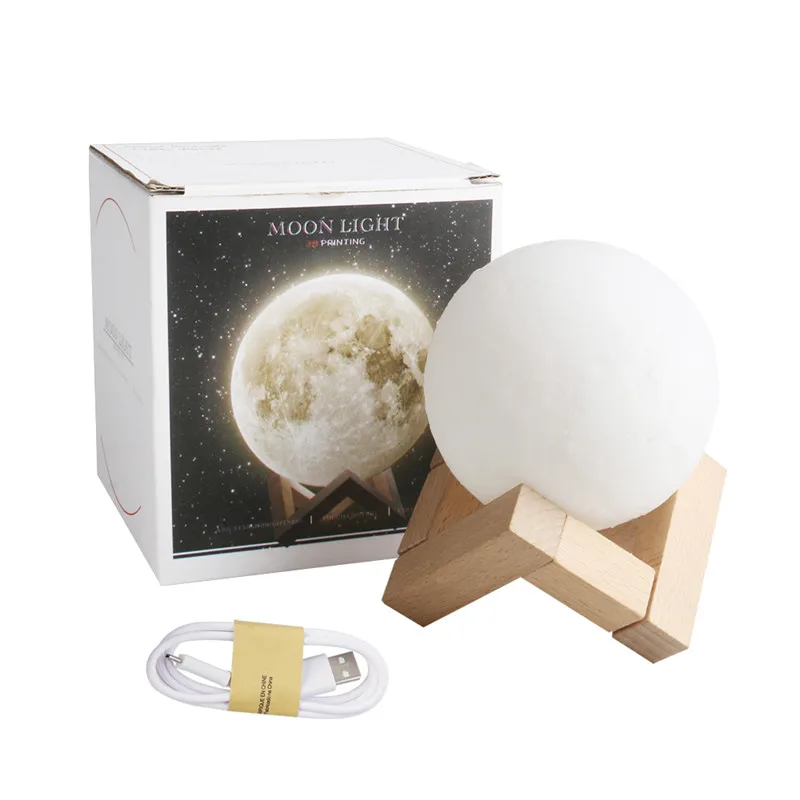 Some we publish on our YouTube page.
All photos are published only with the consent of our dear customers, without your consent we do not publish anything and do not share with anyone.
Play video
Play video
Play video
How to choose size
15 cm
20 cm
22 cm
The size of 15 cm is no longer small, you can place a photo of up to 3 people. 20 cm - is perceived twice as large, the size of a soccer ball. 22 cm - even more
How to choose a relief
Traditional relief for moon lamp - 2 mm. We offer lamps with a relief of 4 mm. This relief looks brighter, and the inscriptions are much more interesting.
High-quality 3D printing for an impeccable appearance
Accuracy, detail, interesting design
A neat, smooth relief with pronounced elements — such a night lamp will become an interior decoration not only at night, but also when the lights are on.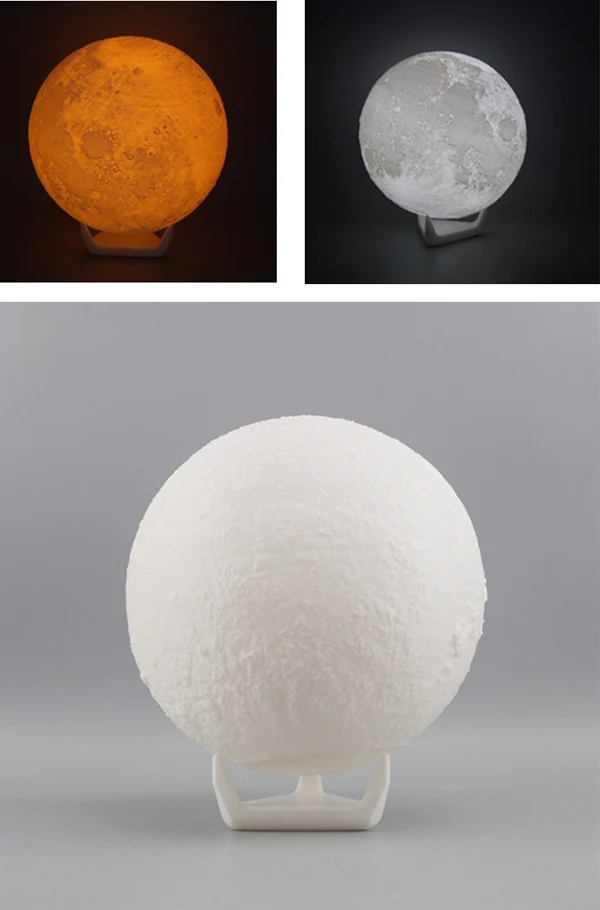 Design in the COSMOLAMP style is multi-layered, large inscriptions that are easy to read, not just a drawing, but truly three-dimensional letters and decorative elements.
Back
Next
The preparation of such inscriptions requires a lot of effort and time, experiments and development of technology and parameters. That's just what we do! We call such inscriptions “designs”.
When you write your inscription in this design, we use this design as a "template".
Stages of work
Application
Make an order on our website Choose from the catalog the most suitable design, size, attach a photo.
We will contact you during business hours within 20 minutes.
Free layout
we will prepare a layout with your photo and a personalized inscription, we will correct photo distortions, we will do a little retouching
Approval
You look at the layout if you like it or make adjustments to it.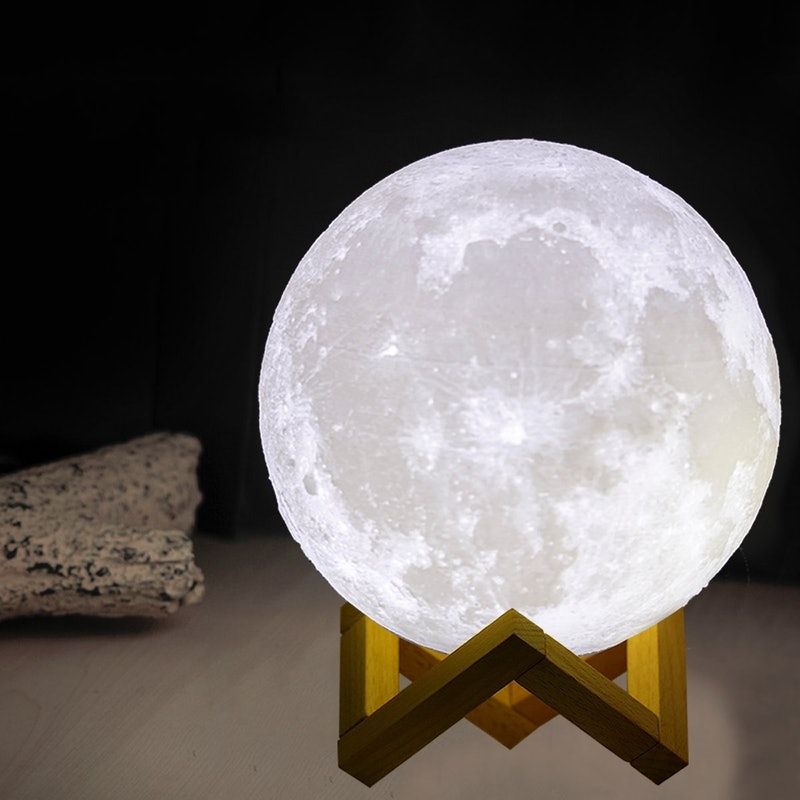 At this stage, we can try on up to 3 photos
Production
The body of the luminaire is printed from scratch, especially for you, after assembling the luminaire, we will shoot a video report on which the luminaire will be visible from all sides.
Sending and payment
We send a link to pay through the online checkout (the safest payment method) along with the video report. After receiving the payment, we will send it in the agreed way and send a link and a track number to track the parcel
After the sale
After sending, we continue to track the movement of the parcel, in case of delays we contact the shopping mall ourselves. A week after receiving, we ask for feedback to constantly improve the quality of service
Frequently asked questions
Frequently asked questions and answers
Can any photo be printed?
Almost any photo can be saved. It is better to send several at once, the designer will choose the most suitable one in terms of brightness, composition, framing
Can I see it before printing?
Yes, of course! Coordinate the layout before printing.