Stair stepping 3d printing
Why 3D Printed Objects Showing Stair-Stepping Effect? – Printing It 3D
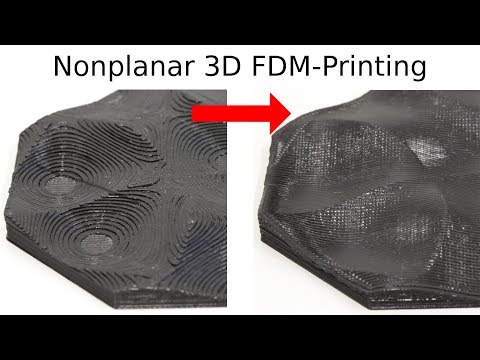
A typical 3D printing artifact is the stair-stepping effect, where the layers making up a 3D printed object become distinctly visible. The result is the appearance of a staircase on the side of your final print, where there should be a smooth surface. These sharp edges can reduce your print’s aesthetic quality and significantly lower your work’s quality.
3D printed objects show the stair-stepping effect mainly because layering is integral to 3D printing. The effect is more visible with thicker layers and in prints with curved or angled surfaces. Also, using a technique like SLA 3d printing lowers visibility compared to technologies like FDM 3d printing.
Read on for an explanation of how layering results in the stair-stepping effect. I’ll also discuss how to minimize the occurrence of stair-steps during printing and reduce visibility after printing is complete.
How 3D Printing Automatically Results in the Stair-Stepping Effect
Ideally, a 3D printed object should have smooth sides that seem continuous. Practically, this is impossible. Even so, 3D printing specialists always work to get as close to the ideal situation as possible.
Layering is integral to 3D printing techniques, from Fused Deposition Modeling (FDM) to sintering techniques like Selective Laser Sintering (SLS) and resin-curing techniques like Stereolithography (SLA).
Regardless of technique, for an object to be 3D printed, a computer program first slices the related design into layers, which is where your stair steps start.
3D Printers Work in Layers
When you print an object, the 3D printer receives layer-specific instructions and prints the object layer by layer.
These layers are then “stacked,” and the final object will be a stack of layers.
The trick to reducing layer lines is to make the merging of the layers appear as seamless as possible.
If you succeed, the result is a smooth, aesthetically-pleasing object. These imperceptible transitions are critical in 3D printing applications where aesthetic appeal directly correlates with quality.
If you fail, you get the stair-stepping effect. The more visible the steps are, the less attractive your print will be. In some cases, these rigid layer lines will also reduce the quality of your object.
The extent of the stair-stepping effect depends on various factors, which you can tweak, as I’ll discuss below.
How To Minimize the Degree of Stair-Stepping in 3D Printing
The following factors affect the extent of stair-stepping when printing 3D objects:
- Layer thickness
- Object geometry
- Technology used
I’ll discuss each factor in detail below.
Layer Thickness
As long as you are 3D printing an object, you must work in layers. You can’t go around that. However, you can determine the height of the layers, which is their thickness.
Printing with thick layers is generally favorable. It takes less time since the nozzle extrudes more filament while working on each layer. The time savings are usually significant.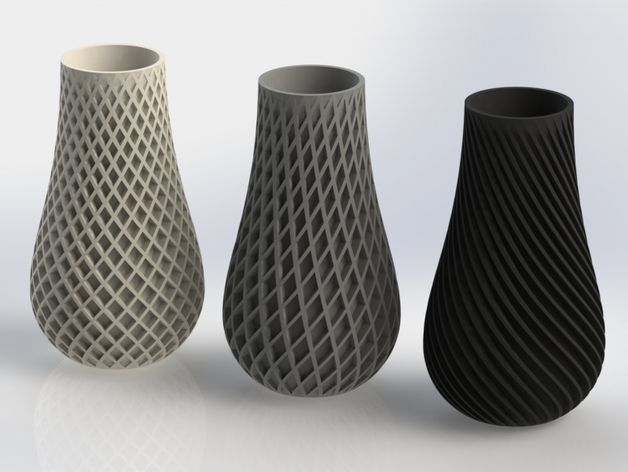
However, thick layers come with a downside. The wider the layer, the more visible it is, and the more visible the stair-stepping effect.
If your priority is to reduce the staircase effect, you’ll want to work with a small layer height. The layers will be less visible, and the 3D print will be smooth. Sometimes, it can be so seamless that you must use a magnifying glass to see the layers.
The obvious disadvantage is that you’ll take significantly longer to finish the print.
When aesthetic quality is crucial, longer turn-around times may be an acceptable tradeoff.
As a bonus, with a smaller layer height, you can effectively 3D print objects with intricate designs.
Object Geometry
The stair-stepping effect’s degree also depends on the nature of your 3D model.
If the object you want to print has angled or curved parts, the staircase effect will be amplified. If the thing has straight edges, it will most probably appear smooth.
The relationship between the angle of the print and the degree of the staircase effect is continuous.
Let’s use the vertical axis as our reference point. The lower the angle from the vertical axis, the less the stair-stepping effect. The higher the angle from the vertical axis, the higher the extent of stair-stepping.
As the angle increases, it becomes easier to single out individual layers.
To reduce the staircase effect, you can tweak this factor right at the design stage by reducing the angles and curvature of the object.
However, most times, changing the geometry of an object to reduce the staircase effect will result in a different model. For example, if you want to print a sphere, changing the geometry may result in flat surfaces with sharp edges.
In such cases, the only way to control side-stepping is to tweak the other factors like layer thickness.
Technology Used
While the underlying principle of 3D printing is the same, various means exist to achieve the same result.
You can use different technologies. Your choice of technology depends on several factors, including the available equipment and the qualities you want your final object to possess.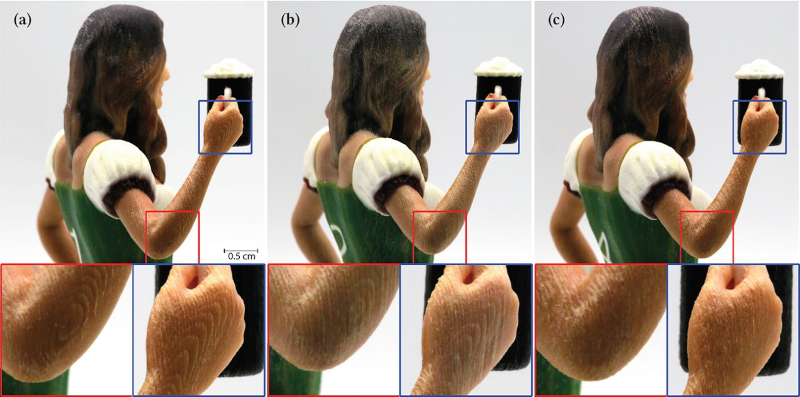
Though all 3D printing technologies rely on layering, different technologies result in varying degrees of the stair-stepping effect.
Fused deposition modeling is the most notorious technology for the stair-stepping effect. On the other end of the spectrum, Stereolithography seems to result in less visibility of the staircase effect.
Reducing the Appearance of Stair-Stepping After 3D Printing
Effectively combating stair-stepping during printing can be costly. For example, reducing the layer height can result in considerably longer turn-around times for prints.
An alternative is to alter the appearance of 3D prints after they are ready, which can be more economical. However, it’s not suitable for all 3D printed objects as it can reduce structural integrity, which can be a significant problem with delicate parts.
However, there are still ways to improve a bumpy print. You can use the following methods to change the surface quality of an object after it has been 3D printed:
- Surface coating
- Polishing
Surface Coating
Surface coating involves covering the object with a chemical. You can apply it to the model using a brush or spray.
Surface coating fills the gaps on the object’s surface, resulting in a smoother finish. After applying the chemical, you allow it to cure. This coating will harden to give your model a seamless outer surface.
For an even smoother surface, you can apply more than one coat. Wait for the first coat to cure, then spread a second coat.
One downside of this method, which could be significant depending on your use case, is that the dimensions of your 3D printed object change. With a second coat, the difference is even more prominent.
That said, surface coating effectively minimizes the staircase effect’s appearance and improves the smoothness of a 3D print.
Polishing
Polishing uses mechanical means to smooth out irregularities on a 3D printed object. You can use it to reduce the appearance of the staircase effect.
You can polish your 3D prints with the following methods:
- Blasting
- Sanding
Conclusion
3D printed objects are essentially a stack of layers.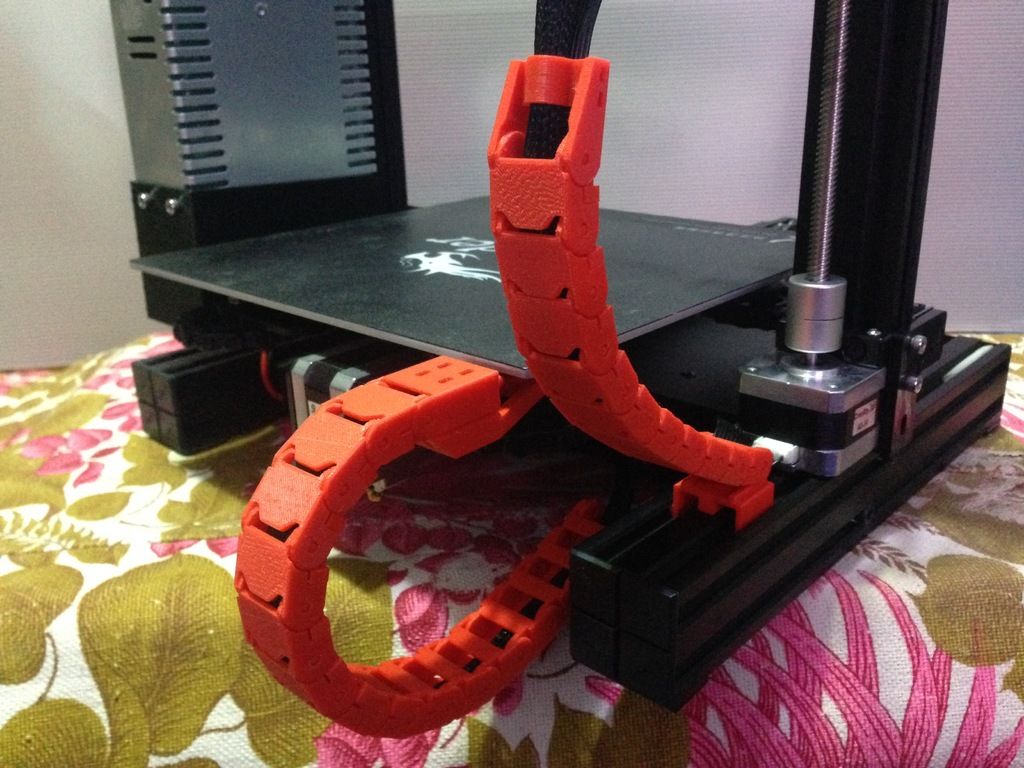 The easier it is to notice the layers, the more visible the stair-stepping effect is.
Working with a smaller layer height can reduce the staircase effect during printing. However, this decrease in layer height can result in a significant increase in the time it takes to finish the print.
After printing, you can reduce the staircase effect by polishing your print or coating it with a chemical.
How To Avoid it & Ensure Part Quality
Staircase effect is omnipresent in 3D printing irrespective of the technology chosen.
3D printing is a manufacturing technology where parts are fabricated layer by layer, thus layers form an integral part of the process. Staircase effect is a phenomenon associated with 3D printing when the layer marks become distinctly visible on the surface of the parts, giving the perception of a staircase. Hence the name. Staircase effect is omnipresent in 3D printing irrespective of the technology chosen. In some processes (FFF) the layers are highly distinct, whereas in some (SLA), they are not. Although this has got to do with the method of fabrication and the process parameters in general, one thing common across all the technologies is the layer thickness setting. So let’s see how layer thickness impacts the part geometry and results in the staircase effect.
Consider the images as shown in Fig. a, the layer thickness size varies across the images. The left-most image depicts a thicker layer, whereas the rightmost image depicts a finer layer thickness. Let’s assume that the curvature, marked in red colour, corresponds to the curvature of the part geometry under consideration. As you can see, if the same part geometry is fabricated with finer layer thickness, a number of layers are required and vice versa. More the number of layers, truer the shape of the final part with respect to the 3D CAD data. Because when the layer thickness is fine, the number of layers are cramped together in a smaller space and thus the distance between two consecutive layers is smaller, thereby resulting in a smooth, continuous surface. If the part geometry has a curvature or an angled surface, a finer layer thickness will result in mitigated staircase effect thereby leading to a better surface accuracy and finish. A 60µm layer thickness setting will result in a better surface finish as compared to a 100µm layer thickness setting.
Another important phenomenon responsible for the staircase effect is the nature of part geometry under consideration. It’s been an observed fact that layer marks are prevalent on curved and angled surfaces. Since layers are sliced and deposited with respect to the vertical axis, any change in the nature of the part geometry with respect to this axis will result in a staircase effect.
Layer thickness AngleConsider the image shown in Fig. b, there are two lines (marked in red) at an angle of 10˚ and 80˚ with the horizontal. It is evident from the image that, for a given layer thickness setting, as the slope becomes steeper, the aligned distance(d2) between two consecutive layers decreases, whereas as the slope becomes gradual, the aligned distance(d1) between two consecutive layers increases.![]() As the aligned distance between the layers increases, you can easily demark one layer from the other, thus the surface looks discontinuous, and the staircase effect is more prominent. Whereas, in case of steeper slopes, the surface looks like a smooth, continuous geometry because the staircase effect is mitigated.
As the aligned distance between the layers increases, you can easily demark one layer from the other, thus the surface looks discontinuous, and the staircase effect is more prominent. Whereas, in case of steeper slopes, the surface looks like a smooth, continuous geometry because the staircase effect is mitigated.
Thus, the staircase effect is more prevalent on part geometries having gradual surfaces as opposed to part geometries having steeply angled surfaces. To validate this, we prepared an angle benchmark and we found that the observations aligned with our assumptions.
Layer Thickness
Layer Thickness – Angle benchmarking
Staircase effect on a gradual surface (10˚)
Absence of Staircase effect on a steep surface (80˚)
Thus, part orientation is a critical phenomenon. Depending on the requirements, you can play around with the part orientation to avoid the staircase effect on critical and aesthetically good looking surfaces. The layer marks can be mitigated by polishing the parts, too. But it is advised that care be taken during part fabrication, itself.
Subcribe to our newsletter & get regular updates on 3D Printing, Cloud Manufacturing & Product Design.
3D printer and stairs to the second floor: viktor_ntagil — LiveJournal
?- Technology
- Cancel
click here to read more5... 900 in this place "STOP"!
3D printer + construction! The development of a construction printer is underway, at least in sketches, but using the printer in a real construction site today is a big deal.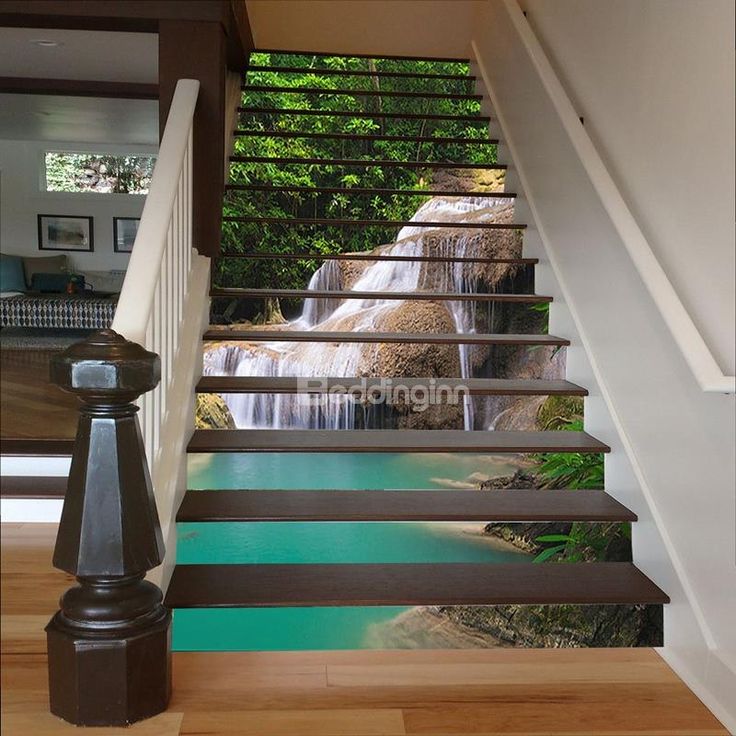 nine0019
There is experience in manufacturing various devices and tools on the printer, but now it became necessary to implement handrails for the stairs (of course, welded by myself).
It's simple: the base of the stairs is made of a square pipe approximately 40x60, 2 landings, landings and steps are made of pine boards soaked and covered with 4-5 layers of parquet lacquer.
But the railing - this is for my "light-floating" stairs require an individual approach.
The racks are based on a 15 square pipe + in difficult places reinforcement inside with a steel square bar, a round washer with a diameter of 50 with holes for fastening is welded at the base. nine0019
The question arises how to make connections to the railing tube itself. Here in this place it was decided to use a three-dimensional printer.
After printing of all objects, post-processing (cleaning, sanding), priming and dip painting will remain)))))
Printed out today....
Printing on a printer.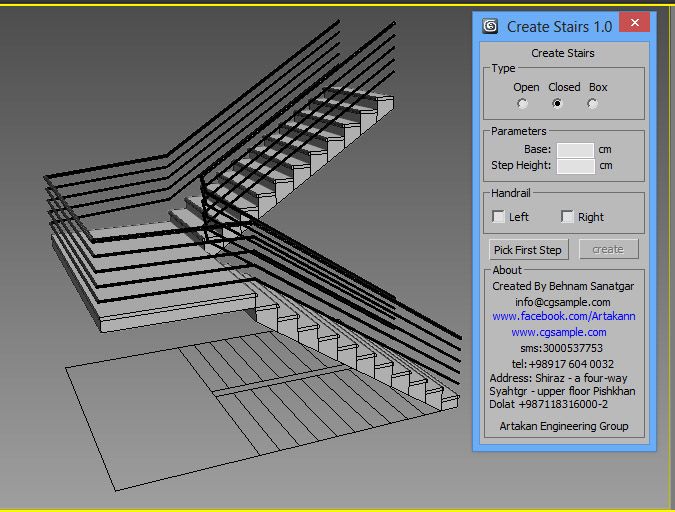
The ladder is specially made light and visually weightless
The drawing is simple so as not to overload the structure with various frills
To be continued!
Tags: 3d
Subscribe
-
Innovative beekeeping technologies
One of my hobbies is innovative beekeeping. This year, my bees died... This happens and is always very hard to endure, but it appeared...
-
An evening of reflection.
Good evening friends! Really kind. Literally just looked at the results of our election race, if not strange - I've been waiting all day ...
-
(no subject)
Dear colleagues, residents of Nizhny Tagil, friends! Our team, the team of candidates from the PARTY OF GROWTH, for the first time applied to the election campaign...
Photo
My hobbies are innovative beekeeping. This year, my bees died . .. This happens and is always very hard to endure, but it appeared ...
An evening of reflection.
Good evening friends! Really kind. Literally just looked at the results of our election race, strange as it may seem - I've been waiting all day...
(no subject)
Dear colleagues, residents of Nizhny Tagil, friends! Our team, the team of candidates from the PARTY OF GROWTH, has entered the election campaign for the first time.… nine0096 Model View Settings for Stairs
Model View settings are respected in 2D and 3D when displaying Stairs and when printing. They allow you to adjust the level of detail of the Stairs in the Sections, Elevations and 3D windows, as well as control the display in 2D (on the Floor Plans and Ceiling Plans).
Watch video
Stair parameters
This panel can be accessed using the menu command Document > Model View > Model View Options. nine0019
Detail Stairs in 3D and Section
Set the radio button to Full or Schematic to customize the display and output of Stairs in Sections/Elevations windows, 3D and 3D documents (including Edit mode).
•In Full Detail mode, all 3D sub-elements of Stairs are displayed in detail.
•In Sketch mode, the top surfaces of steps are displayed as outlines. nine0019
- With Schematic Display selected, click the Attributes button to customize the lines and coverages that are used to display Stairs in 3D and in Section Views.
• Passage Height: Enable or disable the display of Passage Height in 3D and Sections.
Note: Use the Rules and Standards panel in the Stair Options dialog to set the rules applied to Passage Height. (See Passage Height.)
Stair Symbols: Selecting Show on Floor Plan or Show on Ceiling Plan
For Stairs Symbols switcher on Plans: select “Show on Floor Plan” or “Show on Ceiling Plans”.
Each Stair has two groups of settings (in the Stair Options dialog) that determine the display of these two types of symbols. Toggling this Model View Parameter (Stair Symbols in Plans) controls how these settings are applied in Model Views.
See also Floor Plan Display/Ceiling Plan Display (Stair Options). nine0019
Show Stair Symbol Components (by Model View Settings)
The handles found in the Model View Options > Stairs Options dialog are for controlling the display of Stairs Symbol components at the View level.
These settings can be changed in the Parameters dialog of each individual Stair.
See Stair Options: Symbol Components.
To customize the display of Symbols (for Visible/Invisible parts of Stairs), use the Symbol Detail panel for Stairs and Railings, found in the Model View Options dialog:
Level of Detail for Stairs and Railing Symbols
Model View Options for Stairs: Examples
Stairs Model View Options allow flexible customization of the 2D display of Stairs in different Model Views.