Sense 3d scanner activation code
How do I activate the 3D sense scanner? – idswater.com
How do I activate the 3D sense scanner?
Let’s activate your scanner by clicking on the Sense 3D scanner and selecting the Activate tab . Enter your serial number; you will find it on the bottom of your scanner . Click Activate, a 4-digit activation pin code will display and also, sent to you in an email .
What is 3D Systems sense?
The Sense 3D Scanner from 3D Systems is a portable, full color, three-dimensional scanner for quickly and easily creating 3D models of real-world objects. It has a wide scan volume from small 8 x 8 x 8″ items up to 118 x 118 x 118″ objects. The Sense also has a convenient working distance of 15 to 60″. More Details.
What sensors do 3D scanners use?
Laser pulse-based 3D scanning technology Instead, it uses the speed of light and sensors to measure surface geometry. Millions of pulses are sent from the laser to the object’s surface, which are then reflected back to the sensor.
Which is non contact type 3D scanner system?
Non-contact 3D measurement technologies, as the name suggests, provide a means to collect 3D data without touching objects. They include 3D laser scanners, structured light scanners, photogrammetry solutions and optical CMM scanners. 3D measurement solutions can be further broken down based on acquisition type.
What is the purpose of a 3D scanner?
In other words, 3D laser scanning is a way to capture a physical object’s exact size and shape into the computer world as a digital 3-dimensional representation. 3D laser scanners measure fine details and capture free-form shapes to quickly generate highly accurate point clouds.
What is the last step in 3D scanning process?
The Process
- Step 1: Discuss the application. Contact Aeroscan to discuss your project.
- Step 2: Define articles/ subjects to scan.
- Step 3: 3D Laser Scanning.
- Step 4: Post-Processing.
- Step 5: CAD Modeling.
- Step 6a: 3D Printing.
- Step 6: Fabrication.
How is 3D scanning done?
The 3D Scanning Process: Specialized software drives the laser probe above the surface of the object. The laser probe projects a line of laser light onto the surface while 2 sensor cameras continuously record the changing distance and shape of the laser line in three dimensions (XYZ) as it sweeps along the object.
How much does a 3D scan cost?
3D scanning a part can cost anywhere from $100 to $1,000 or more. Our rates are between $100 and $200 per hour, depending on the 3D scanning technology being used. The cost is ultimately dependent on the size and complexity of the part being 3D scanned.
Why to use 3D scanners?
Advantages of 3D scanning: Fast data capture. Some objects can be scanned in under a minute. Cost-efficient. Avoid costly mistakes and reduce those expensive man-hours. Easy to use. Even a complete novice can use most 3D scanners. Realistic textures and vivid colors of your watertight 3D model. Portability. Create quality 3D scans on the go wherever your application takes you.
What can you do with 3D scanning software?
What can you do with 3D scanning software? Aerospace. In almost every aspect of aerospace manufacturing, accuracy is critical. Automotive. The same can be said for cars, especially if you’re restoring a classic car – whether that be a vintage McLaren or a Reliant Robin. Arts and sculptures. Medicine. Animation and film. Tool and part making. Product design and product development.
What is a 3D scanner used for?
3D scanners can be used to analyze a real-world object or environment in order to collect data on its shape and its appearance, and to expedite its recreation in a 3D printer.
What is the use of 3D scanning?
3D scanning is your key to success.
3D Systems Sense 3D Scanner In-Depth Review
ADVERTISEMENT
8.1Expert Score
3D Systems Sense
The 3D scanning process of 3D Systems Sense is extremely smooth and easy. It produces attractive 3D objects that can not only be easy but also quickly 3D printed.
Affordability
9
Quality
8
Speed
8
Capability
7
Practicality
7
User Expectations
10
PROS
- Relatively affordable.
- User-friendly software.
- Huge scanning area.
- Easy to operate.
- Capable of scanning large objects.
CONS
- Tethered by a cord.
- Can be operated with a PC only.
- Doesn’t work up to the mark with small objects.
- USB cable too short.
Table of Contents
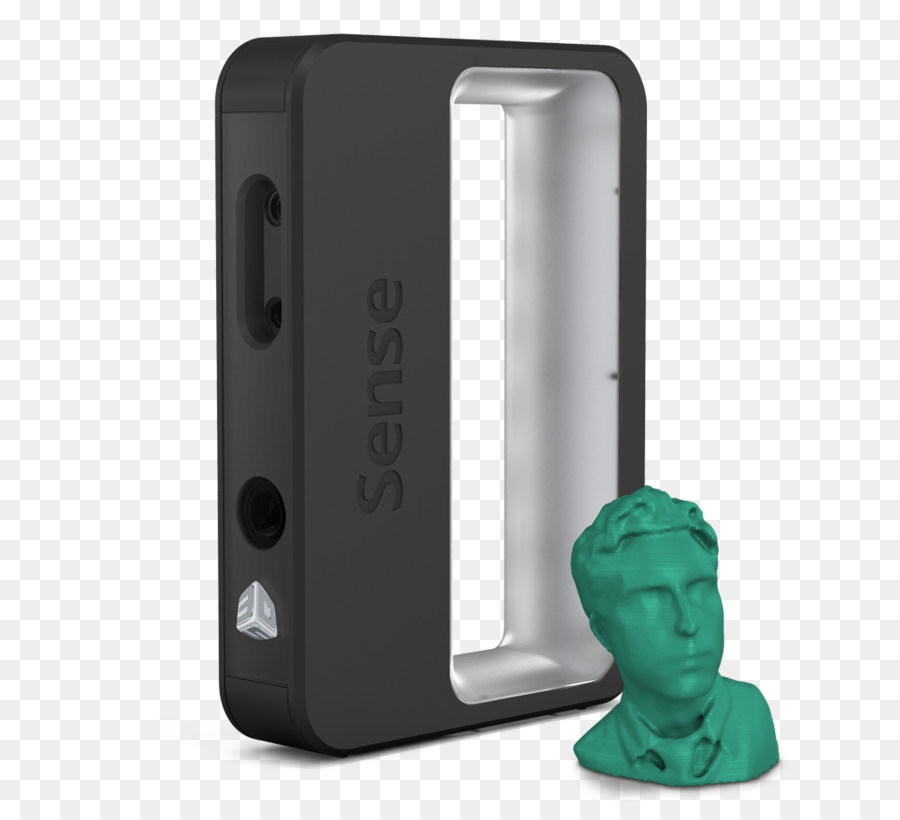
The Sense 3D scanner is very light in weight. It looks like a ray gun at some sci-fi convention. The scanner can be held in your hand and moved around the object.
The machine emits an infrared patterned beam onto the object present in front of it from its bottom. The beam gets affected by the middle webcam.
A normal webcam is present at the top of Sense which is utilized by the software to translate the images that it captures into the surface colors of the object.
Features
Below mentioned and explained are the striking features of the Sense scanner.
Simple scanning process
Sense’s scanning process is very simple. It starts with the software choosing the size of the object, either from the options provided for a person’s head, shoulders, or full-body or from a size range either small as at least 8 inches to as large as up to 3 meters.
As hinted by the software, users need to point the machine at the object, hit the space, and walk around it by following a series of on-screen prompts meant to keep you at the perfect distance from the object and track it while you move. Note that, in case you are too far away from the object, it loses the track of it.
When the scan is in progress, the software creates a rough model of the object painted in as it detects the shape.
ADVERTISEMENT
Ideal for medium-sized objects
Sense 3D works best with medium size parts and functional prototypes. The scanner is claimed to provide a resolution of 0.9 mm.
While the smallest scannable object on it is a cube measuring 0.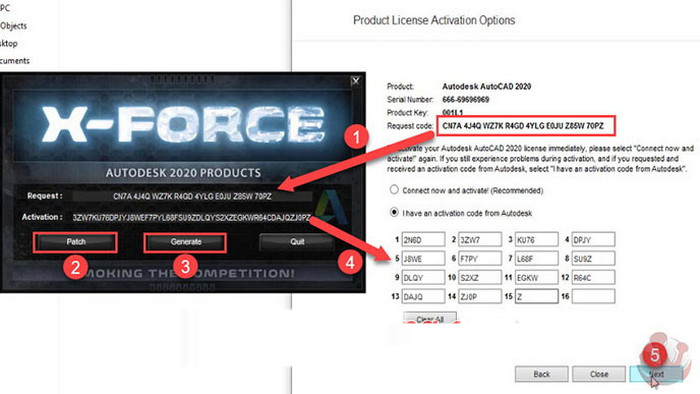 2 meters on each side. Going to the other end of the scale, Sense is capable of scanning objects as large as 3 meters on each side.
The entire system of Sense lets users rotate the object, letting you do head and shoulders scans on a rotating chair.
Editable result
The end-scan provided to you by Sense is editable. You can cut out the bits that you do not need and smoothen the object.
All of this process is fairly intuitive. This is because even when you are not satisfied with the end-scan, you still hold the power to change it according to your imagination. So that nothing gets reflected while making a model.
Good quality scan results
The simple scanning process of Sense produces decent results not only with medium-sized objects but also with larger ones. Generally, well-lit objects don’t get overlapped elements in their scans or large holes in them.
Sense does an interesting job with head and shoulders scans as well as full-person scans. Also, it does fantastic work of building a 3D mesh and then creating a simple final object from the collected data.
ADVERTISEMENT
Multiple file formats
The final scan can be exported in STL, PLY, or OBJ file formats. So, you do not need to worry whether the resulting scan would be compatible with most of the 3D modeling software or not.
Mostly STL files are used the most. But when it comes to delivering the color information of the object, that’s when PLY and OBJ file formats come into play.
Moreover, Sense’s software is directly linked to the 3D system’s Cubify object service which gives you the facility of ordering the 3D print that can be shipped to you. Other than that, it also lets you sell the 3D scan or a 3D printed model in different sizes and materials.
Specifications
| Technology | structured light technology |
| Price | 359 $ |
| Depth Image Size | 240 x 320 pixels |
| Depth Resolution | 39. |
| Image Size | Color: 240 x 320 pixels |
| Dimensions | 7.0 x 5.1 x 1.3″ (17.8 x 12.9 x 3.3 cm) |
| Supported Operating Systems | Windows 8 (32/64-bit) and 7 (32/64-bit) Mac OS X 10.8 or later |
 4 mil (1 mm) at 1.6′ (0.5 m)
The minimum scan volume that Sense can scan is 0.2 m * 0.2 m * 0.2 mm whereas the maximum stretch is up to 3 m * 3 m * 3 m. It has an operating range starting from 0.35 m and ending at 3 m.
The field of view of this scanner is 45 degrees * 57.5 degrees * 69 degrees. Its depth image size is 240 * 320 pixels and its depth resolution is 1 mm per 0.5 meters.
The machine’s dimensions are 17.8 cm * 12.9 cm * 3.3 cm. It can be connected using a USB cable and needs a consumption of around 2.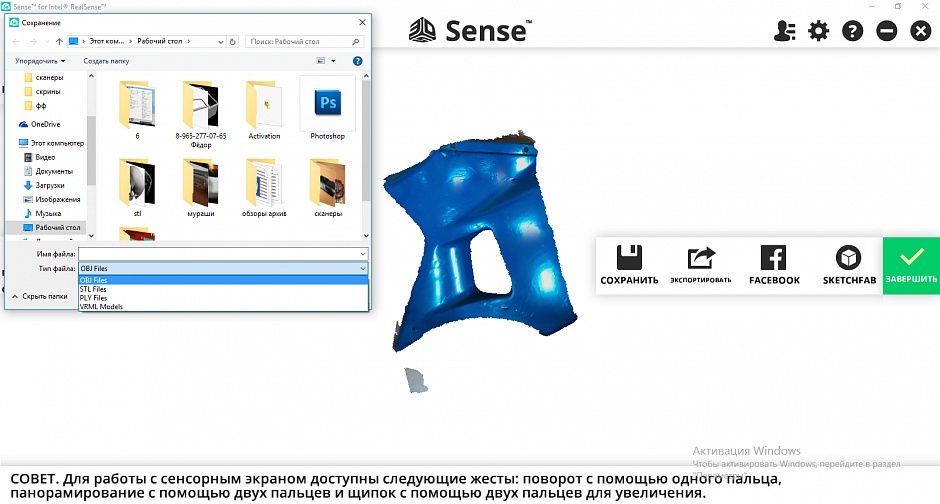 25 Watts.
ADVERTISEMENT
Price
Sense is available for $359.
First Impression
An Apple-ish flat white box carries the scanner to your place. A quick start guide and the device are present in it.
Designed to be handheld vertically, The Sense can be put on a tripod as well. Its front displays the 3D Systems logo, beneath which there is a window. An infrared laser pattern is projected from it helps to scan the object.
Setup
After unpacking your scanner you need to create an account on Cubify which is easy. It asks for general details, after giving which the account is created. Then, you need to download the sense software on your computer.
Once that is done, activate your Sense scanner in three simple steps:
- Plugging your scanner’s USB connector into the USB port present on the computer and clicking on the Sense icon to open the software.
- Choose one from the two available options of whether you have your activation code or not.
- Click on activate the scanner.
After that, you can start scanning the first object on the scanner.
Scan Type
Credit: 3dscanexpertSense uses structured light technology for processing objects of varying geometries. The process is fairly simple, it utilizes a UV light source, camera, and software for creating an end-scan file.
ADVERTISEMENT
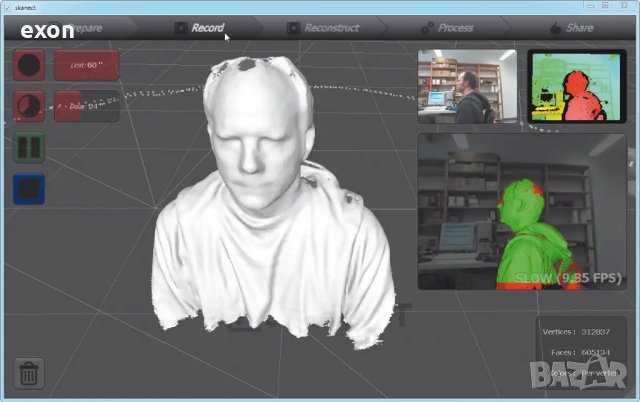
Scan Quality
Credit: 3dscanexpertSense manages to produce decent-quality prints of objects as well as human body parts. It is able to deliver detailed scan files that are capable of producing dimensionally accurate parts.
Software
Credit: 3dscanexpertSense’s software can be downloaded for both Mac as well as PC from the 3D System’s website where you can register the serial number of the device and retrieve an activation code. Both versions of the software are similar in function. They are easy to use and generally ask the user if you wish to scan a person or object.
There are several settings present on the software settings screen that allow you to use it either in Landscape mode or portrait mode. The resolution setting present in the application relates to the density of the 3D data captured, not the color information. If you adjust it to a lower number, it makes usual scanning happen at a faster rate.
Note that, if you are willing to scan very large objects, you would not need extremely dense mesh. But, experts recommend using high settings for smaller objects. The frame rate option exhibits the real-time frame rate on which Sense does the capturing. This tool makes it easier for you to know how much your computer can handle!
ADVERTISEMENT
Customer Support
3D Systems is known worldwide for its support. There are many ways of reaching out to its technical team, the most common one being via phone or email. Also, there is much material available online which you can also refer to, for solving your doubts.
Parameters Influencing Buying Decision
Below mentioned are some of the most important factors that are good to know before buying Sense.
3D Scanner Cost: Considering the amazing list of features the scanner can provide, $359 is a very reasonable and affordable cost that the manufacturer seeks.
3D Scanner Speed: Because the process is fairly simple, it doesn’t take much time to get the end scan.
3D Scan Quality: Scan qualities of objects and human body parts processed on Sense are superb. It’s rare to find a 3D scanner that’s able to deliver this quality in the same price range.
3D Scanner Capability: Sense is capable of scanning objects of varied geometries, shapes, and sizes. Thanks to its high-quality camera and UV LED source, the complete coordination of its components leads to an optimum level of efficiency that users can utilize for producing scans that are capable of creating precise parts.
3D Scanner Practicality: The scanner can be used in various fields such as education, reverse engineering, and 3D printing.
3D Scanner User Expectations: Sense is a gift for all beginners in the field of 3D scanning. Because of the device they can get access to various features that aren’t accessible otherwise.
The Verdict
The most important highlight of Sense is the Prime Sensor that it uses for ensuring the resulting scan is of decent resolution.
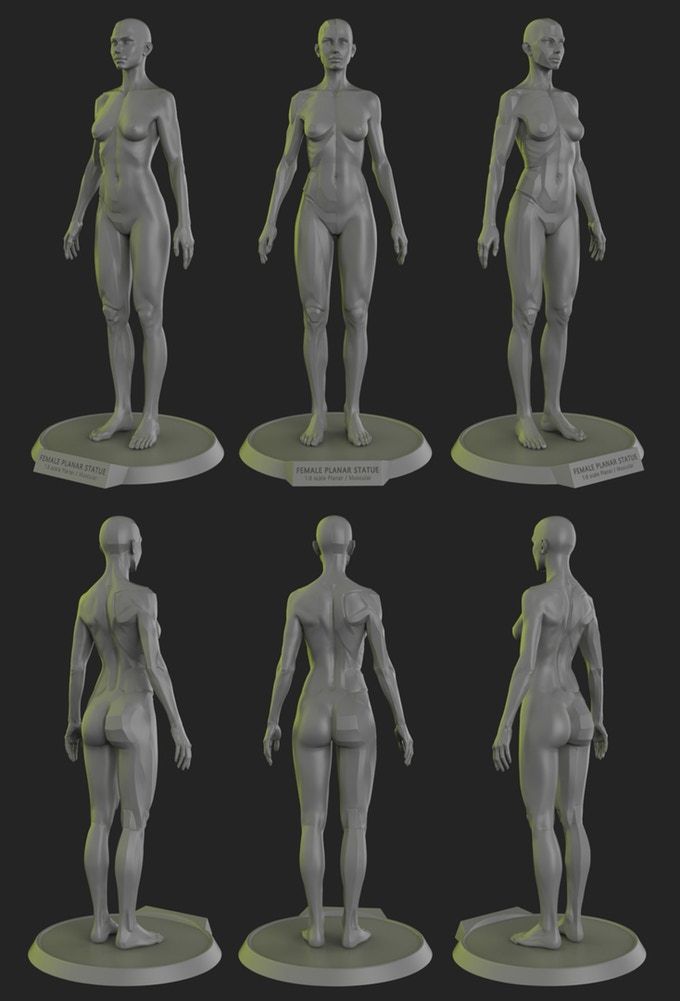
Note that the component is capable of delivering fine detail like MakerBot Digitizer or the David SLS-1. The scanner is best suited for scanning subjects like people and statues in particular.
The end-scans are worthy of creating a 3D model out of them. Also, the 3D scanning process is extremely smooth and easy. It produces attractive 3D objects that can not only be easy but also quickly 3D printed.
3D scanning of the product together with peel 3d
3D scanners
Reverse engineering
Experts recommend
Author: Ilya Krupennikov
Author: Ilya Krupennikov
1. Unboxing peel 3d 3D scanner | 2. Software installation and activation | 3. Request access to the client center | 4. Connecting a 3D scanner | 5. Calibration | 6. Part preparation | 7. Scan options | 8. Scan object | 9. Editing and saving a scan nine0003
Today we will talk about the basic principles of 3D scanning using the example of a professional manual peel 3d device. You will see how quickly and easily you can digitize a fairly complex object, even without experience with such equipment. peel 3d is a range of affordable portable reverse engineering 3D scanners designed and manufactured by market leader Creaform, a Canadian company. You can see the whole process described in the article in the video. nine0003
Need help or advice on 3D scanning, hardware and software selection? Contact our specialists and/or order a test scan for free!
Step 1.
 Unboxing the 3D scanner peel 3d
 Let's start with unpacking. Place the package on the table with the label facing up and open it. You will see that all contents are in an antistatic case. First of all, this is the peel 2 3D scanner itself (it is equipped with an upper camera, a lower camera, a color camera and a white light projector), a lens cleaning cloth, a USB power cable that connects to the scanner, a universal automatic power supply, USB software -flash drive, two packs of 500 position markers, as well as standard adapters. nine0003
Beneath the foam insert is a calibration plate, which must be handled very carefully.
Step 2. Installing and activating software
Now you need to install and activate the program. Take the USB key and run the installer. Then select the language of the program - one of the seven available. The program will be installed on your computer. After the installation is complete, find the "Calibration" folder on the USB key and select the calibration file. It is located in the "Configuration" folder. The license is activated in the same way. Find the "License" folder on the USB key and select the file to activate. Then click "OK". Now, most likely, the activation of the 3D scanner has been successfully completed. nine0003
Run the program. You will need to review the terms of service in their entirety and agree to them. Check the box next to "Do not show me again" (Do not show me again). Now you can start working with scans.
Step 3: Request access to the Client Center
It is best to create an account to which updates will come. The Customer Center has a link to request web access. Fill out and submit the form. Within 24-48 hours you will receive a confirmation email with login details (login and password). You can now log in to the customer support center. nine0003
Step 4 Connecting the
3D Scanner The next step: connect the scanner to the computer. To do this, take the power supply, plug it into an outlet, and the other end of the cable into the connection on the end of the USB cable. Connect the USB cable to any USB port on your computer. The other end is with a connector with an arrow on it. The arrow must point up when you connect the cable to the scanner's rear connector.
A light will come on indicating that the connection has been established, and at the bottom of the screen you will see an indicator indicating that the scanner has been successfully connected. nine0003
Step 5 Calibrate
Take out the calibration plate. Do not touch the marks on its surface. Select the Calibrate icon in the program. Place the white square on top of the green square and then zoom out. The square will increase and eventually the automatic calibration will be completed. A confirmation will appear that the calibration was successful.
Step 6 Preparing Part
Now we need to prepare the part for scanning. A 3D scanner can determine its location relative to an object using marks, geometry, or even color. This part has a rather complex geometry. We need to provide good tracking, but there are shiny elements that are difficult for the scanner to digitize. nine0003
Shiny elements can be sprayed with a Matting Spray, allowing them to be scanned along with the rest in one session. You can also stick several position marks on the object, this will help scanning. The geometry of this part does not require marks, but we use them because it is recommended and allows you to rescan the object if some parts are missing.
Step 7Scan Options
Now let's configure the scan settings. Since the object is single color, we can turn off Texture Capture. The positioning parameters can be adjusted to a specific geometry, and the positioning status display can be left active to see possible interruptions in the scanning process. nine0003
We will demonstrate how to adjust the shutter manually if necessary. Automatic setting is fine for most cases, but you can choose to manually adjust the shutter, then point the scanner at an object, press and hold the shutter button, and the device will display the current shutter speed on the surface of the object. Gray color - insufficient exposure, yellow - the most suitable, red - too long.
You can use the slider to adjust the shutter speed to optimize the 3D scanning process. Set the resolution to one or two millimeters. You can always change it after scanning, it's not a fixed value. Now everything is ready for scanning. nine0003
Step 8Scan object
Click on Scan. Hold down the yellow button and, keeping an adequate distance (about thirty centimeters from the object), start the scanning process.
On the left in the photo you see a stripe. If it is green, you are at the correct distance. Yellow is too close, blue is too far.
Start scanning. You need to go around the object to capture individual bumps and crevices and for the scanner to "see" every detail in its entirety. However, here it perfectly reads the geometry with one or two marks that we have pasted on the object. nine0003
Tracking may be interrupted. In this case, an alert will appear on the screen showing the positioning status.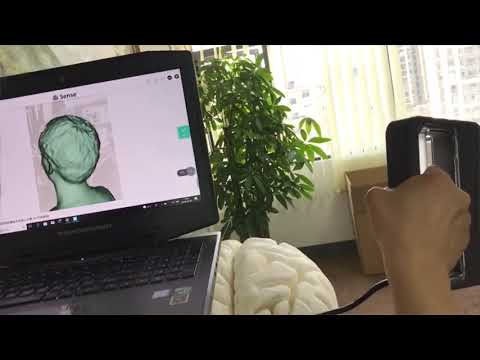 When tracking is interrupted, you can simply go back to a part with marks or a part you previously scanned and the 3D scanner will resume tracking so you can continue scanning. We have a rather complex object in front of us, but you can see that the device is tracking very well.
Step 9. Editing and saving the scan
We process and save the scan. Just click the "Scan" button again for further processing, which is usually very fast. Now you see the end result.
You may need to eliminate unnecessary geometry that you did not need to scan. To remove unwanted surfaces and noise, select the "Connect" (Connect), hold down the Ctrl key and select the main body of the scanned object. After that, add unselected areas, invert the selection to select these areas, and select "Delete" (Delete). Thus, all elements that you do not want to see on the scan will be removed. nine0003
You will also know if you missed something and you can return to those parts. Click the "Scan" button and rescan the missed areas if necessary. After that, optimize the mesh with features such as auto-fill holes and isolate removal.
First, let's extract the file as a grid. The STL format is quite common, but there are other formats available. Then we will save the scanning session itself - under any convenient name. nine0003
That's all! You have completed your first 3D scan.
Material provided by Creaform
Article published on 06/23/2020, updated on 03/04/2022
3DSystems Sense 3D Scanner Review: Specifications, Reviews,
The 3DSystems Sense 3D Scanner is an inexpensive handheld model with outstanding performance. It is no coincidence that we chose her in order to prepare a new interesting review with bright informative photos, because her popularity is growing exponentially. It is ideal for teaching and hobby, design and architecture, and color scanning of large objects, including the human body.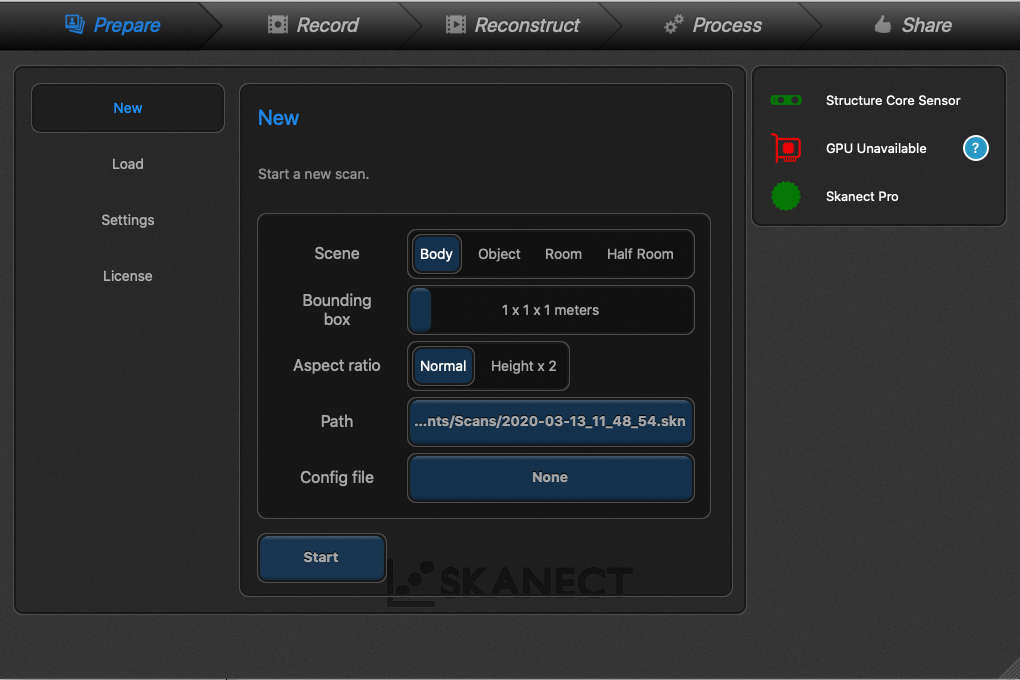 According to professionals, this is a productive device that creates high-quality scans. According to beginners, it is an easy-to-understand model with unified characteristics. nine0003
Features of the 3DSystems Sense scanning module
In the segment of handheld equipment, the 3D Scanner 3Systems Sense can rightfully be considered unique. It runs on intuitive software and is equipped with excellent stuffing. Light-sensitive optics capture the slightest changes in the geometry of any object that you work with, while the device does not need direct contact with it.
Design and exterior
It's a paradox, but from a distance this device can be confused with a large stapler, its body is so compact and simple in appearance. Dimension is only 129x128x330 mm, it is comfortable to hold in your hand also due to the minimum weight of 700 g. This is important when scanning large objects with complex reliefs and textures, which this kid captures with enviable accuracy.
Only one cable is used to connect to a laptop, but due to its short length, the PC must be held almost all the time. At the same time, if Windows 10 is installed on any compatible tablet, the problem is automatically fixed.
Key features
An overview of all the performance features of 3DSystems Sense can be found on our 3DMall website, but we cannot ignore the most basic of them:
- objects with a complex surface (saturated black, shiny, etc.) are best scanned almost closely;
- within a second the device makes and processes 30 frames; nine0106
- scanning area is from 200x200x200 to 2000x2000x2000 mm with an accuracy of 1 mm;
- texture capture rate - 1920x1080 pixels.
Equipment
Equipment 3Systems Sens is concise and standard for models of this class. It includes the scanning module itself, software, a cable for connecting to a laptop or PC, as well as a user manual. The packaging is a simple light-colored box with functional holes to accommodate the scanner and cord.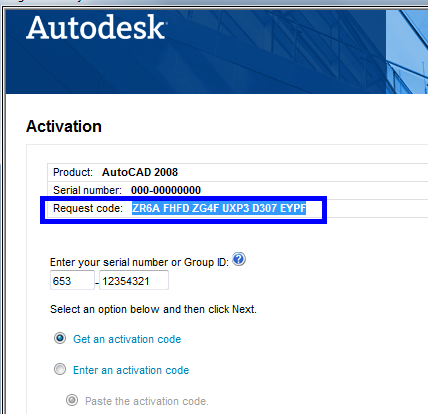 nine0003
Setting operating parameters
At the very first stage, you should install software, which is expected to have the same name as the scanner itself - 3DSystems Sense. The first launch implies the need to activate the device for security purposes after pre-registration on the official website of the brand. Please note that the equipment is bound to the PC that was used to activate the module; only specialists from the manufacturer can remove it. nine0003
Immediately after starting the program offers to choose one of 3 operating modes:
- object scanning;
- human body scan;
- face scan.
In the first mode, it is imperative that the object is stationary, only in this way you can achieve maximum accuracy of prints. In the process of work, a small problem may arise - additional points may not be added in real time when creating each next frame. In this case, you can try to mount the device on a tripod and save images frame by frame - the scanning speed will decrease slightly, but the quality will be incomparably higher.