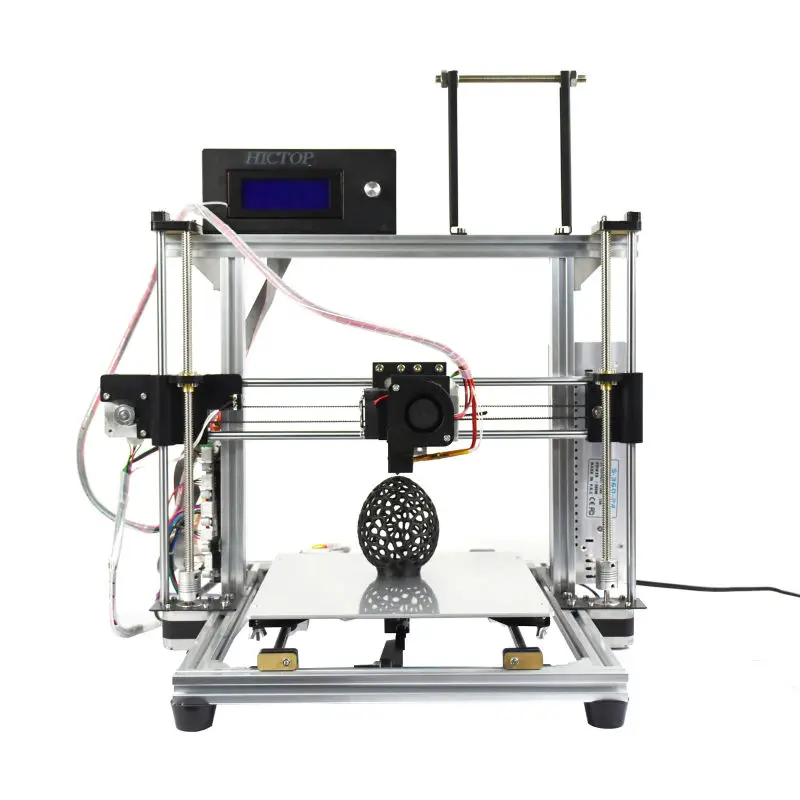
Select mini 3d printer v2
Monoprice Select Mini Review 2022
We reviewed and tested the Monoprice Select Mini 3D printer, and here's why we liked it so much! You'll want this budget 3D printer too after reading this!
By Justin Evans
4
See Price
Let’s say you’re in the market for a budget 3D printer. It’s tough: there are models that are vastly overpriced, models that have to be manually assembled from parts, and some that simply aren’t good enough to justify even a very low price. What if you saw a printer far less expensive than the rest? Would you trust it?
Maybe you should. We’re talking, of course, about the Monoprice Select Mini. It’s an absolutely tiny printer designed for people looking to explore the world of 3D printing, without breaking the bank. So how does it hold up? Let’s find out!
| Filament Diameter | 1. |
| Extruders | 1 |
| Supported Materials | PLA, ABS, HIPS, PVA, TPU |
| Connectivity | USB, SD Card |
| Printing Speed | 55mm/s |
| Build Volume | 4.7 x 4.7 x 4.7” |
Table of ContentsShow
Design
This printer’s design is about as simple as they come. It has a single extruder, and prints onto a heated bed. The build area is, as you’d expect, fairly small – roughly the size of a can of Coke. Still, this is about average for a printer in this price range, so there are no complaints on this front.
Since this printer is designed for beginners, we were pleased to see that it ships fully assembled and pre-calibrated. In fact, thanks to the four-post leveling system, you shouldn’t have to calibrate it too often. Instead, you can focus on the fun part: actually printing things.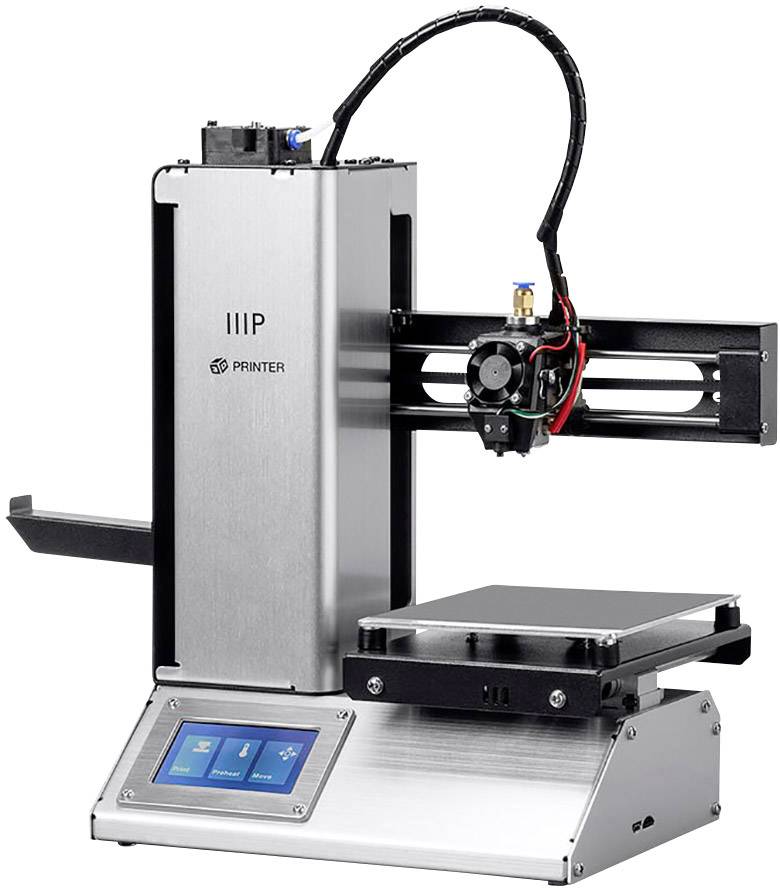
You can control this printer either with a PC or directly, using the built-in screen to select models for printing. There’s also a USB port and SD card slot, and the printer actually includes a USB stick with models so you can get printing right away.
Printing
The first thing you should know is that the Select Mini is slow. Its top speed is about half as fast as its rivals, and worse, it tends to fail when running even at that. You’ll be far better served with a slow and steady approach. This seems to create the most consistent, high-quality models.
Now, bear in mind that this is a budget 3D printer. Despite this, we found its prints come out looking pretty good! Sure, you can still see the layers, and intricate details aren’t replicated all that well, but with a little patience (and post-processing), you’ll find you can actually do quite a lot with the Select Mini.
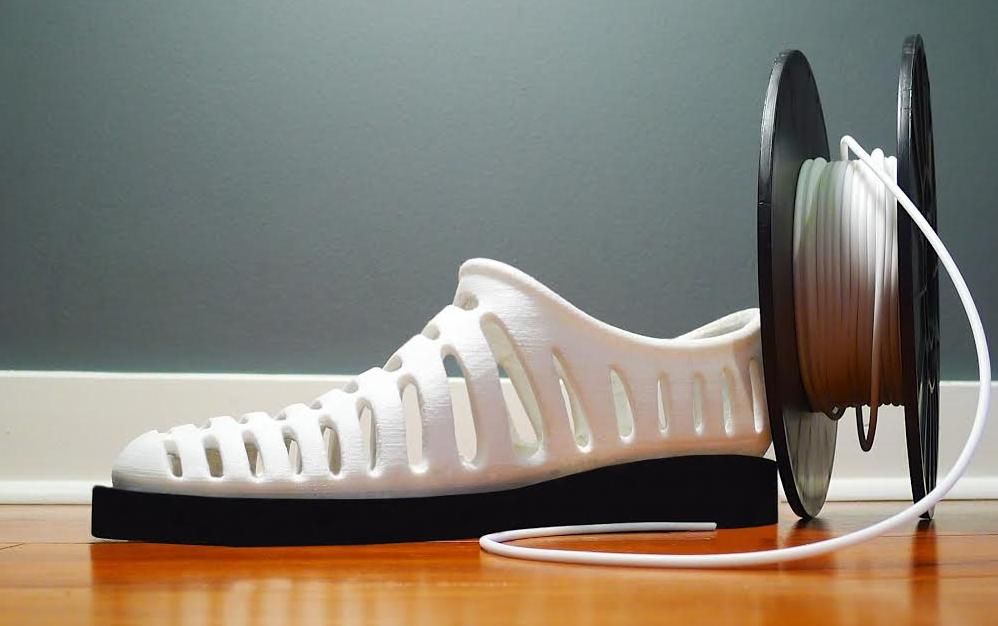
Budget 3D printers tend to have one characteristic in common: lack of versatility. You can expect to print with PLA, maybe ABS too, at best.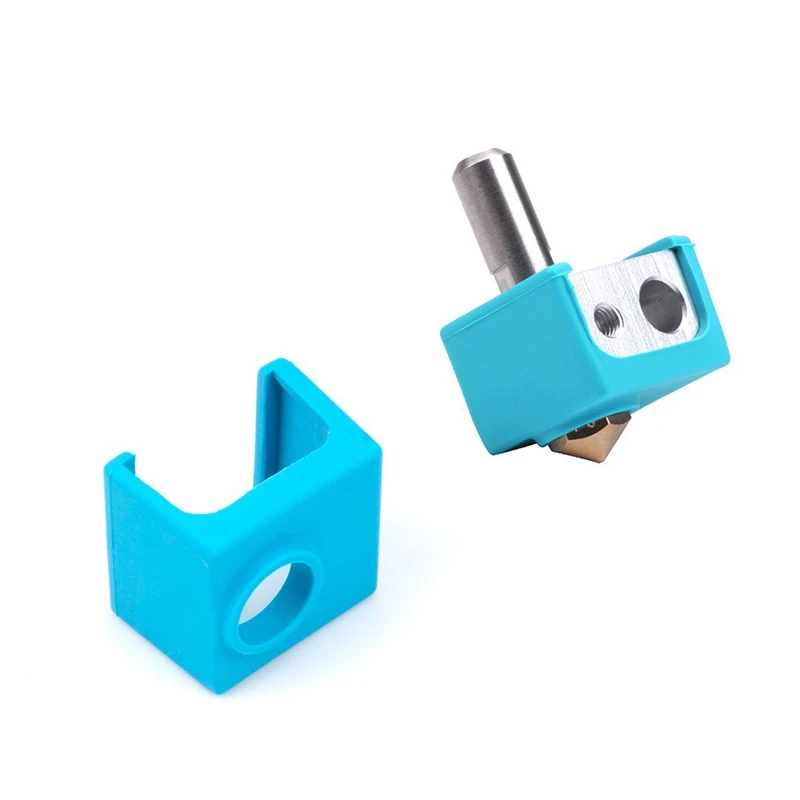 Incredibly, the Monoprice Select Mini supports both of these materials, as well as HIPS, PVA, and TPU. It’s not even limited to using a proprietary filament, so you can really go wild.
Features
Part of this printer’s appeal is its simplicity. As such, it doesn’t have many advanced features to speak of. Rather, it tries to make things as easy for new users as possible. Take software, for instance: it works with Cura, Repetier, Simplify3D, and most other popular modeling or slicing programs.
As you grow more comfortable using a 3D printer, you might want to add some upgrades. The Select Mini is perfect for this, since its inner workings are easily accessible, and its firmware easily flashed. In fact, we’ve found guides for everything from changing the hot end to adding wireless functionality.
If you’ve used a 3D printer before, it’s unlikely that this model will blow you away. It’s aimed at beginners and has a price point to match, after all. However, if you’re completely new to printing and just want something to tinker with as you learn, there are a few models better than this one.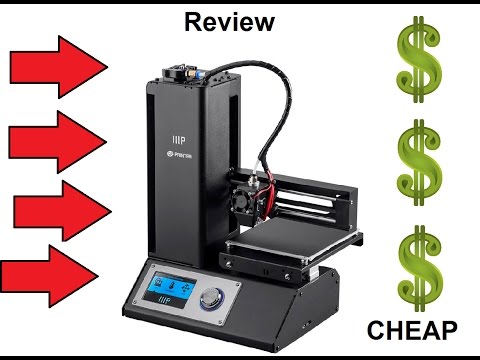
Cost
So how much do you think this printer costs? Brace yourself – it actually retails for around $190, making it among the cheapest 3D printers we’ve seen. Now, it’s not available directly from Monoprice anymore since they’ve released the Mini v2 for the same price. However, it can still be picked up by third-party retailers.
The freedom to use third-party filament means you can keep your material costs down. Evidently, if you want to print often, this will increase to some degree, but since there’s no support for exotic filaments, things shouldn’t get too out of hand.
This printer is perfectly priced and has enough versatility to corner the low-end market. Frankly, we’re amazed that this isn’t the go-to recommendation for people looking to get into 3D printing for the first time.
Support
Despite its low prices, Monoprice offers a 30-day money back guarantee on all its printers. Once you’ve committed to keeping the unit, a year-long limited warranty takes effect. This is pretty good coverage, especially since there’s no risk of breaking anything during assembly.
On the other hand, Monoprice only offers basic troubleshooting tips and 3D printing tutorials in its support section. You can use the ticket system, email, phone, or live chat to get more detailed help. Our only issue is that the returns link only works on some pages, throwing an error on others.
Honestly, this level of support was unexpected. Too often, low-end 3D printers try to sell their product and then wash their hands of it. That’s clearly not the case with Monoprice, and for that, we applaud them.
MakerGear M2 Review
Monoprice Maker Select Mini V2 Review
Monoprice’s $200 3D printer shouldn’t be great, but it is
By Forrest Daniels
DT Recommended Product
“It's more evolutionary than revolutionary, but Monoprice’s Maker Select V2 still offers a ton of bang for your buck.”
Pros
- Affordable
- Sturdy construction
- Reliable printing
- Decent print quality
Cons
- Small build envelope
A couple years ago, Monoprice took the 3D printing world by storm with a the original Maker Select Mini: a 3D printer that only cost 200 bucks, and had all the bells and whistles we could ever ask for. Now, it’s back with version two of that revolutionary printer — so naturally we took it for a spin to see how it stacks up to the original.
Contents
- Standout Features and Specs
- Setup and Configuration
- Design and Build Quality
- User Interface and Software
- Print Performance
- Our Take
Standout Features and Specs
Monoprice’s V2 builds upon the first generation’s solid set of specs and features by adding a few minor (but important!) upgrades.
Among these improvements is an all metal hot end, which improves heating and helps prevent clogging, as well as a heated/insulated printing bed, which boosts print adhesion and prevents warping.
Riley Young/Digital TrendsAlong with this improved heated bed, the V2’s build surface also features a special pad material (similar to BuildTak) that promotes adhesion during printing, and also makes parts easy to remove after they’ve finished. Finally, MP also equipped the V2 with an internal cooling fan that helps prevent everything from overheating.
There are also a few things that haven’t changed. Just like the first generation, the V2’s max resolution sits at 100 microns (0.1 millimeters), which is fairly average, but acceptable for the price. Its build envelope is also a perfect 4.7-inch cube, just like it was on the first generation. Again, this spec is somewhat average, but still not bad.
This V2’s setup is quite possibly the easiest we’ve ever encountered.
The all-metal hot end retains the same maximum temperature of 230, which allows you to print with a fairly wide range of filament types, but does limit you from some of the more exotic higher temperature materials. As for inputs and outputs, you can load your models onto the Mini V2 using a Micro SD card, a direct USB connection, or even do it via WiFi through Monoprice’s new mobile app.
All in all, the V2 is certainly more of an evolution than a revolution, but Monoprice’s improvements are smart ones that do big things for the printer’s reliability and overall performance — and it only costs you an extra $20.
Setup and Configuration
The V2’s setup is quite possibly the easiest we’ve ever encountered. It comes completely assembled and factory calibrated, so all you have to do is unbox it and supply some electricity. There’s not even an on switch — just plug it in, and you’re off to the races.
Riley Young/Digital TrendsFrom there, Monoprice’s super straightforward interface makes the remaining setup steps nearly foolproof. Things like loading filament and fine-tuning the print bed are all extremely simple to execute.
To offer a comparison, we’d say setting up the V2 is about as complicated as setting up a brand new toaster. It’s simple as hell, but it might take a bit of fiddling around before you find the ideal settings that result in that perfect, golden-brown slice of toast.
Design and Build Quality
Lifting this printer out of the box surprised us — it’s astonishingly heavy for its size. This is largely due to the Mini V2’s all-metal construction, which makes it an incredibly sturdy machine that doesn’t wiggle around too much during printing.
Monoprice gave everything a makeover in terms of aesthetics.
It’s also pretty easy on the eyes. Most of the V2’s mechanisms are tucked behind its metal exterior and hidden from view, so the machine doesn’t look as rudimentary and utilitarian as some of its competitors. Better yet, despite the printer’s sleek design and tucked-away components, its inner workings are still easily accessible.
To be fair, we never needed to tinker with the V2 at all during our testing process, but accessible design and easily-replaceable parts are something we love to see on a printer. Ten points to Gryffindor Monoprice.
User Interface and Software
Monoprice scores high marks in this category. Both the onboard software and desktop-based slicer programs are wonderfully simple to use — though the latter isn’t necessarily thanks to Monoprice.
Riley Young/Digital TrendsAs with all its printers, Monoprice’s Select Mini V2 is designed to work with whatever slicer program (the software that translates your 3D design into instructions a printer can follow) you desire. We used Cura: one of the most powerful and customizable slicers on the planet, which now includes pre-configured profiles for many of MP’s most popular printers. This makes the whole process extremely convenient, as you no longer have to manually configure your machine.
The onboard user interface similarly straightforward, and hasn’t changed too much since the first generation. The V2 boasts the same knob-based navigation scheme and the same intuitive menu trees — but Monoprice gave everything a makeover in terms of aesthetics.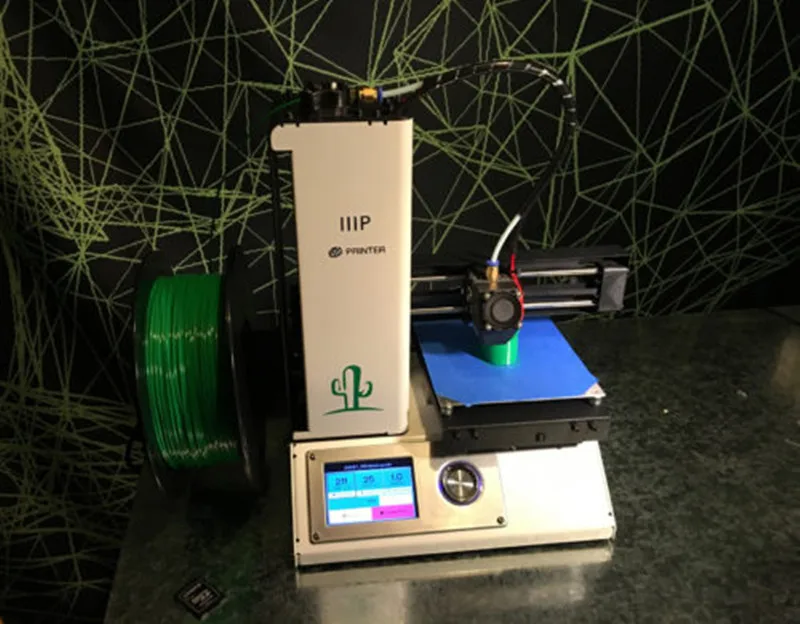
Suffice it to say you won’t have any trouble using this machine.
Print Performance
Don’t let the price tag fool you — the Select Mini V2 prints like a dream.
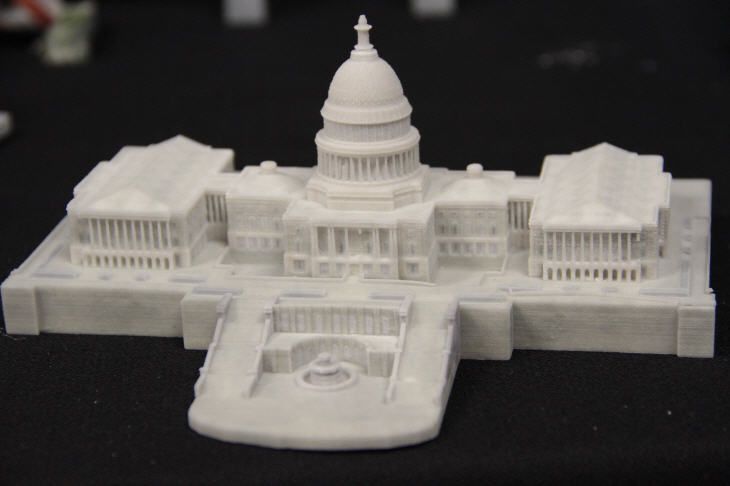
Our first print using the Mini was the infamous ‘lucky cat’ model, which Monoprice pre-loaded onto the printer’s SD card. Unsurprisingly, it turned out great, since most models like this are fine-tuned by the manufacturer. So in order to get a better idea of how the V2 performs, we ran it through our standard suite of benchmarks.
Riley Young/Digital TrendsThe first of these, as always, was the 3DBenchy: a tugboat-shaped torture test designed to highlight a printer’s strengths, weaknesses, and quirks. Much to our delight, the Mini V2 did a fantastic job. No matter what parameters we set, the tugboat always came out clean, accurate, and very consistent from layer to layer. Some of the superfine details of the boat didn’t come through as clearly as we’d like, but it’s worth noting that nearly all FDM printers struggle in this area, and the Select Mini V2 performed just as well (if not better than) as most printers that cost 10 times as much. Other tricky elements, like steep overhangs and unsupported spans, were also reproduced without any significant errors.
After a couple weeks of printing random (usually Star Wars-related) objects we found on Thingiverse, we found that the Mini V2 is also quite reliable. Whereas some 3D printers leave you feeling worried and unsure if they’ll complete the job, we felt highly confident with this machine.
The only real drawback here is the V2’s relatively small build envelope.
Thanks to the printer’s heated bed and solid construction, it doesn’t often fail mid-print — unless of course you make a slicing error and prepare the model improperly. This printer is still bound by the laws of physics, so we definitely recommend printing with supports unless you’re certain you don’t need them.
All in all, Monoprice’s new-and-improved Select Mini earns high marks for performance. We did experience a few flubs, failures, and funky-looking prints, but these were the exception, not the norm. The V2 prints just as well (and in some respects, even better) than printers with far larger price tags. The only real drawback here is the V2’s relatively small build envelope, which limits the range of objects you can create with it.
Our Take
The Maker Select V2 is definitely more of an evolution than a revolution — but in this case that’s a good thing. Monoprice didn’t need to reinvent the wheel with this machine, and thankfully, it didn’t try to. Instead, it threw on some new tread and made a rock-solid product that’s better than the original — and the original was already pretty great. The V2 might not be the best 3D printer on the planet, but you’ll be hard pressed to find a better blend of price and performance.
Is there a better alternative?
If your main concern is getting the most bang for your buck, then look no further. You won’t find this many features packed into such an affordable package anywhere but Monoprice.
If $220 is too steep for you, we also highly recommend the MP Mini Delta, which is about $60 to $70 cheaper, but does have a slightly smaller build envelope.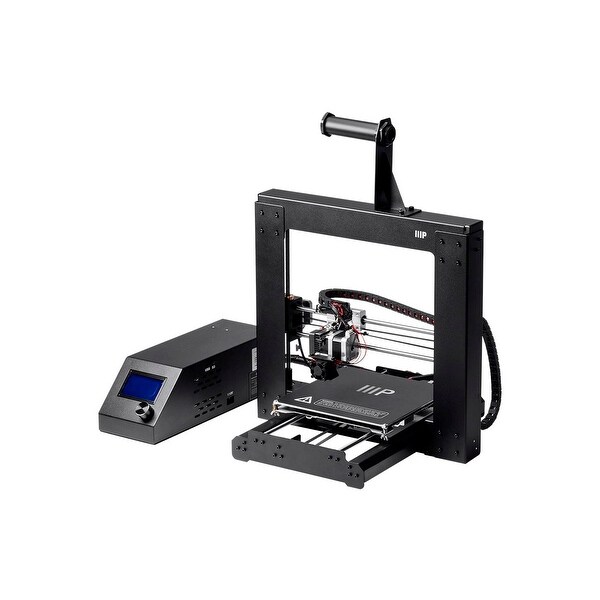
If build area is your main concern, then we’d recommend checking out the Monoprice Maker Select Plus — arguably one of the best printers we’ve ever reviewed. In terms of print performance, it’s nearly identical to the Maker Select Mini V2, but it does have a far larger build area that allows you to print much bigger objects. It also has a touchscreen, which is nice.
How long will it last?
If you treat this little guy well, it’ll likely give you a long life in return. Due to its all metal construction, durable components, ample replacement parts, and Monoprice’s continued software support, the Select Mini V2 seems well suited for a long life on your desktop.
Should you buy it?
Yes, yes, a thousand times yes! This printer offers a near perfect blend of price and performance, so if you’ve been waiting patiently for an affordable printer that doesn’t suck, then your time has come.
Editors' Recommendations
- AMD quietly slashes the prices of some of its best CPUs
- AMD 7000X3D V-Cache CPUs could challenge Intel at CES 2023
- Meta Quest 3 is coming, but is Quest 2 still worth buying?
- Nvidia expands DLSS 2 support, but DLSS 3 remains elusive
- Creative’s Katana V2X PC soundbar promises the same sound in a smaller footprint
Software installation
For the 3D printer to work, you need to download and install the following software:
- Virtual COM port driver
- Control program Repetier-Host
- Slicer and printer settings
Some anti-virus programs may falsely detect files from the network.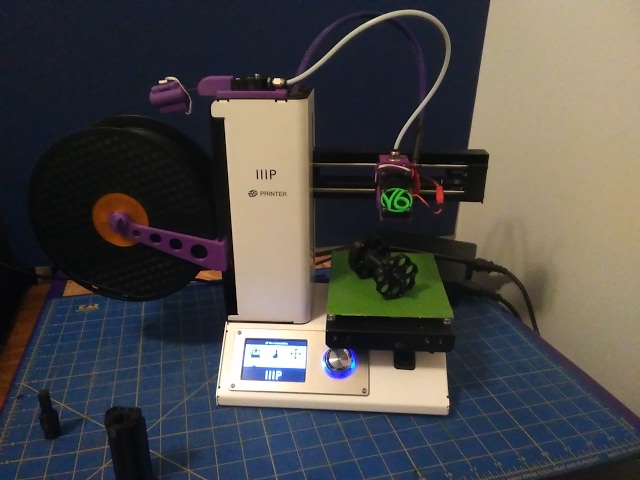 In this case, turn off the antivirus during the installation.
Installation sequence
- First install the driver - download and run as Administrator (right click "run as administrator") file serial_install.exe (notes and installation on 64 bit systems below)
After installing the driver, connect the printer to the USB port computer, it will find the device and determine its COM port.
- - Download and install the Repetier Host software. Along with it, the necessary programs will be installed, including slicer programs.
During installation, we recommend disabling the "Server" installation, as it is not needed for operation and may interfere with normal operation.
-
- Set the settings for your printer.
Together with the settings, the corrected Russian interface, scripts and a link to the help section will be installed.- Magnum Creative 2 UNI
- Magnum Creative 2 PRO
- Magnum Creative 2 PLA
- Magnum Education
- Magnum Modus A
- Magnum TT
Please note! Slicing profiles "Magnum 3D" and "Magnum 3D Vase" will be overwritten! If you have made changes to them and want to save them, then just rename them in the slicer before installing.
- After setting the settings, when you first start the Repetier-Host program, select the COM port to which your 3D printer is connected, because by default, the installer prescribes COM3 (more).
- - Update the scripts according to instruction (these updates will be included in the next version of the installer).
Installation on 64x Windows 7 and above
Installation on such systems requires a signed driver.
Restart your computer, press F8 at boot and select option
Disable driver signing enforcement
Install the driver as described in point #1. Reboot to normal mode.
Installation on 64x Windows 10 systems
Go to the start menu in "Settings" - "Update and security" - "Recovery". Then, in the "Special Boot Options" section, click "Restart Now".
After the reboot, go to the following path: "Diagnostics" - "Advanced Options" - "Boot Options" and click the "Restart" button.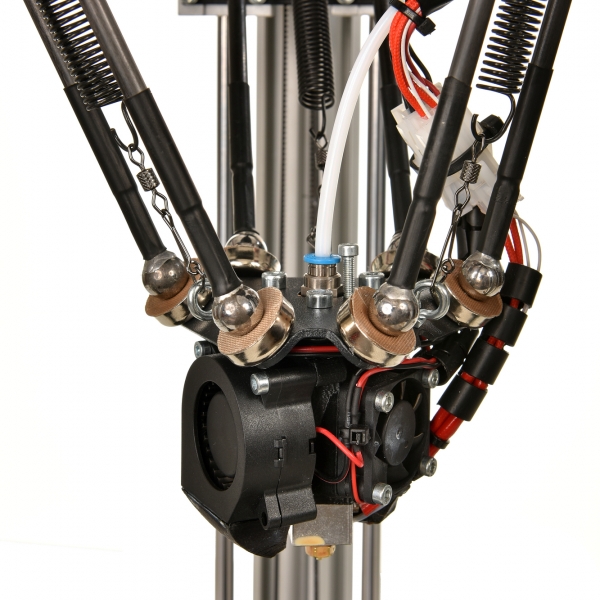 After the reboot, a menu of options will appear that will be used this time in Windows 10.
To disable driver digital signature verification, select the appropriate item by pressing the 7 or F7 key. Done, Windows 10 will boot with verification disabled and you can install the unsigned driver.
Alternative driver installation
This method is recommended when connecting to 64-bit systems if you failed to install the driver following the instructions above.
When connecting the printer to a computer for an unknown USB Serial device, you must select the driver yourself - in the Modems section, select Compaq and then the Ricochet Wireless USB Modem device.
Top 8 3D printers under $500 to buy in 2018
Our editors independently research, test and recommend the best products; you can learn more about our review process here. We may earn commissions on purchases made from our selected links.
Summary
- Best Overall: Qidi Technology X-one2 at Amazon, "The user-friendly interface of the display interface adds to the overall beginner-friendly functionality of Qidi."
- Best Budget: XYZprinting Da Vinci Mini at Amazon, "Files are easily transferred directly from your computer and printing is as easy as pressing a single button."
- Winner, Best Budget: Monoprice Mini Delta at Amazon, "The machine is relatively user-friendly so the learning curve isn't too steep."
- Best for Beginners: FlashForge Finder at Amazon, "User friendly and widely regarded as one of the most secure 3D printers."
- Best Value: Monoprice Select Mini V2 at Amazon, "Has a compact build that won't take up too much desktop or desk space."
- Best Design: XYZprinting Da Vinci Jr 1.0 Pro at Amazon, "Nine-point auto-calibration feature eliminates the need for manual print adjustments.
 "
" - Best for Kids: 3Doodler Start Essentials Pen at Amazon, "Easy to use, and the non-toxic filament has no harmful odor and is environmentally friendly."
- Best self-assembly: JGAURORA DIY Prusa i3 on Amazon, "Highly recommended for both beginners and advanced users."
Our Top Picks
Best Overall: Qidi Technology X-one2 3D Printer
View on Amazon . Ruggedly constructed with a full metal body, the Qidi is exceptionally durable while printing and can accommodate print sizes up to 5.5 x 5.5 x 5.5 inches.
Thanks to the free software for your PC and the device's 3.5" touch screen, programming is cinch. The friendly display interface interface adds to Qidi's overall beginner-friendly functionality and also allows you to adjust settings directly on the touch screen during the printing process, any learning curve is nominal. Compatible with PLA and ABS filaments, the 10mm rod and 10MK nozzle provide excellent engine quality that can heat up to 110 degrees Celsius.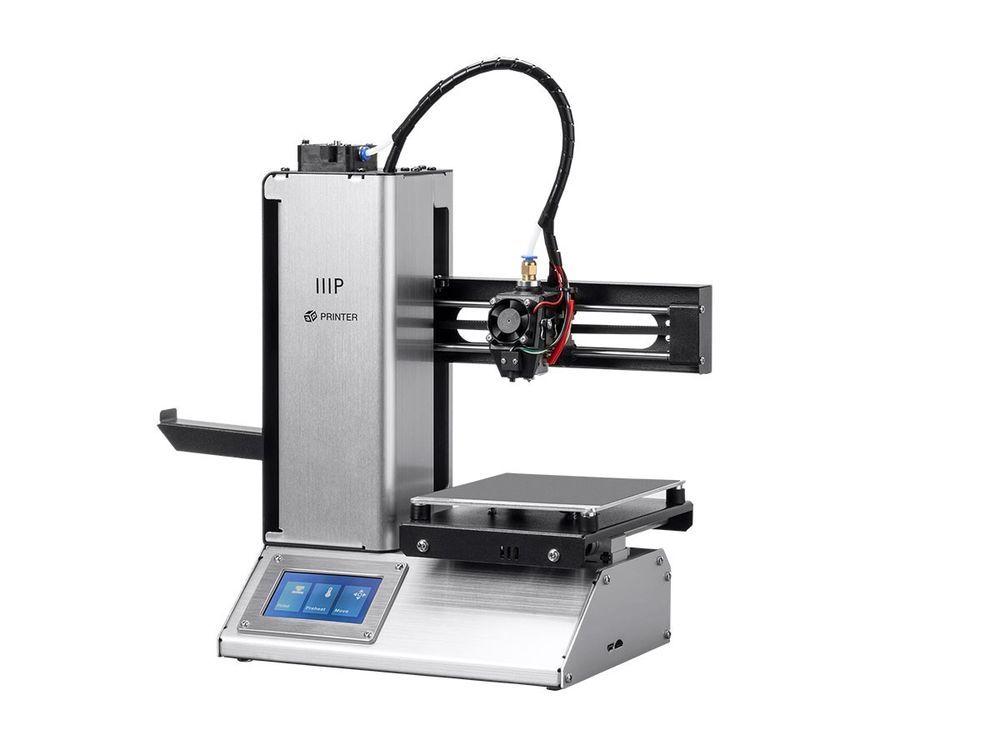
Best Budget: XYZprinting Da Vinci Mini 3D Printer
See Amazon See on Walmart
Modestly priced without sacrificing any functionality, the XYZprinting Da Vinci Mini 3D Printer immediately impresses with easy-to-use software . Ideal for beginners and experienced users alike, Da Vinci offers smooth prints at great speed.
Machine supports 1.75 diameter PLA filament ordered directly from XYZ. The filament is inexpensive to replace and provides a fair trade-off for such a budget 3D printer that delivers great results. Full print resolution can be adjusted anywhere from 100 to 400 microns, which is the same resolution found among more expensive competitors. Weighing in at 24.25 pounds, the Da Vinci is portable enough to move from room to room – and built-in Wi-Fi lets you do just that. Files are easily transferred directly from your computer, and printing is as easy as pressing a single button.
Runner-Up, Best Budget: Monoprice Mini Delta 3D Printer
See Amazon See on Walmart
For budget shoppers who don't mind a smaller build volume, the Monoprice Mini Delta 3D printer is a smart buy.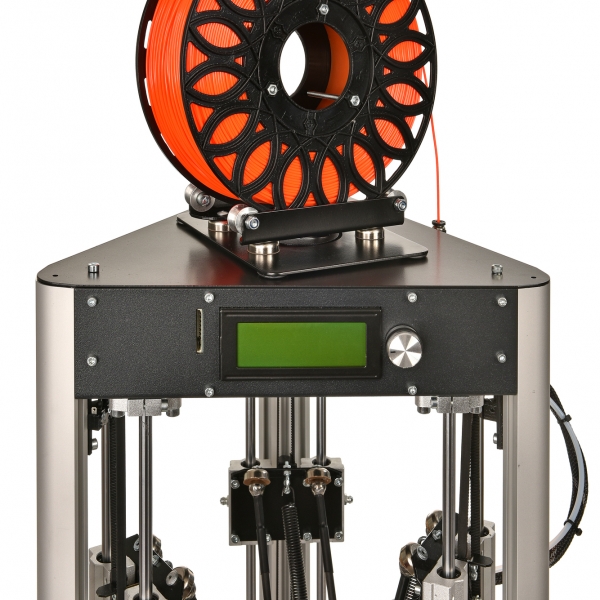 When the printer is fully assembled, the printer consists of three levers on rails that move up and down independently of the print head. Printing is carried out on a plate with a volume of 110 x 120 mm.
The printer will automatically calibrate each time you print, eliminating manual roll alignment. With a variety of different heating temperatures, the Mini Delta can work with a variety of materials including PLA, ABS, and wood or metal composites.
Print selection is via downloadable open source software and loaded via Wi-Fi, USB stick or SD card. Once downloaded, you can adjust the settings using the buttons on the front display. The machine is relatively user friendly, so the learning curve is not too steep.
Print speed is over 150mm per second which is relatively fast at a budget price. Due to the low build volume, you will often see final results within 20-30 minutes.
Best for Beginners: FlashForge Finder 3D Printer
See Amazon See on Walmart
User friendly and widely regarded as one of the safest 3D printers, FlashForge Finder is a great choice for beginners. Measuring 16.5 x 16.5 x 16.5 inches, FlashForge is easy to store on a shelf or desktop.
Compatible with Windows and Mac software, FlashForge prints using the popular PLA filament with a built-in control system that alerts users when it's running low. Transferring files to the device for printing can be done in a variety of ways, including via USB, flash drive or Wi-Fi, as users can navigate through a simple menu on the model's 3.5-inch touch screen. Another benefit for beginners is the FlashForge Bed Leveling to securely print designs up to a build volume of 5.5 x 5.5 x 5.5 inches.
Best value: Monoprice Select Mini 3D Printer V2
See on Amazon
Packed with features, the Monoprice Select Mini 3D Printer V2 offers the best bang for your buck when it comes to models under $500. The machine has a compact an assembly that didn't take up too much desk or table space is fully assembled and ready to print 10 minutes after unboxing.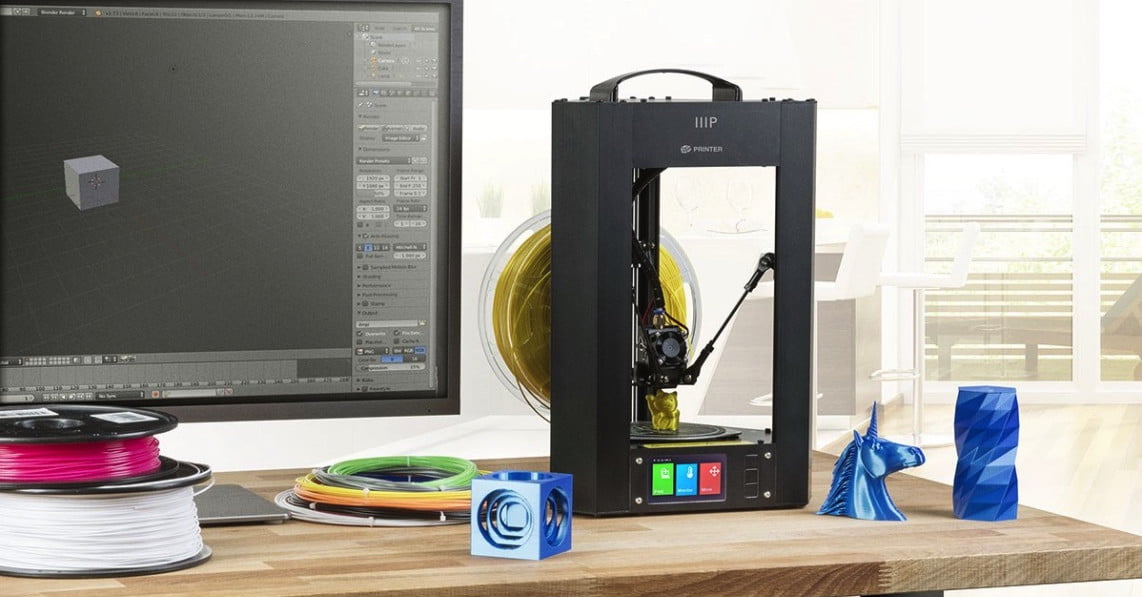
Using an aluminum heating bed for printing, a cooling fan helps keep the printing temperature constant within normal ranges while the small LCD displays the current printing status. With a resolution of 100 microns and a filament diameter of 1.75 mm, the monoprism has a build volume of 4.7 x 4.7 x 4.7 inches. The model uses a variety of filaments including PLA, ABS, PVA, wood and metal composites, and works with a microSD card or USB connection to transfer prints directly from a PC or Mac computer.
Best Design: XYZprinting Da Vinci Jr 1.0 Pro 3D Printer
See Amazon See on Best Buy
A beautiful frame that fits almost perfectly anywhere in your home.
Versatile, the Da Vinci Jr features an open filament structure that allows the use of third-party 1.75mm non-toxic PLA fibers. The Wi-Fi connection ensures that you can connect and print from anywhere in your home from a Windows or Mac computer and save files to an SD card as a backup method for transferring prints.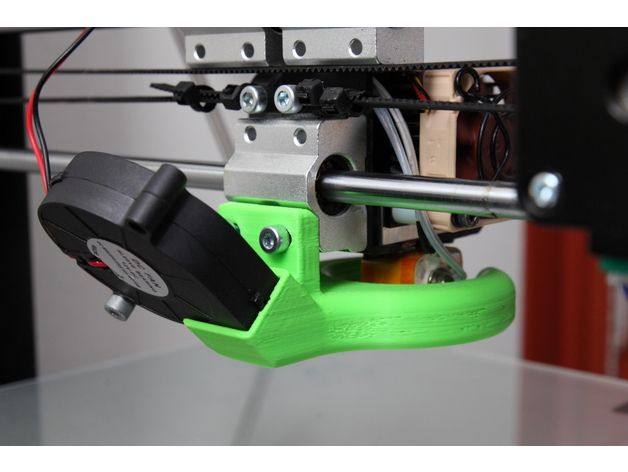 The nine-point auto-calibration feature eliminates the need for manual print adjustments and automatically calibrates the print layer with the Z-axis. Along with a printer resolution of 100 to 400 microns that produces excellent results, Da Vinci offers a respectable build volume with its 5.9x 5.9 x 5.9 inches.
Best for Kids: 3Doodler Start Essentials 3D Printing Pen
See at Amazon
The creativity doesn't stop kids, and the 3Doodler Start Essentials Printing Pen creates endless 3D possibilities for kids ages eight and up. Designed specifically for younger users, there are no externally heated components that can cause burns. It also uses a biodegradable plastic that melts at lower temperatures than the more widely used PLA filament. Because of this, the stove nozzle and plastic body can be safely touched when in use.
During printing, filament builds up quickly, limiting the need for extra (parental) help with each project.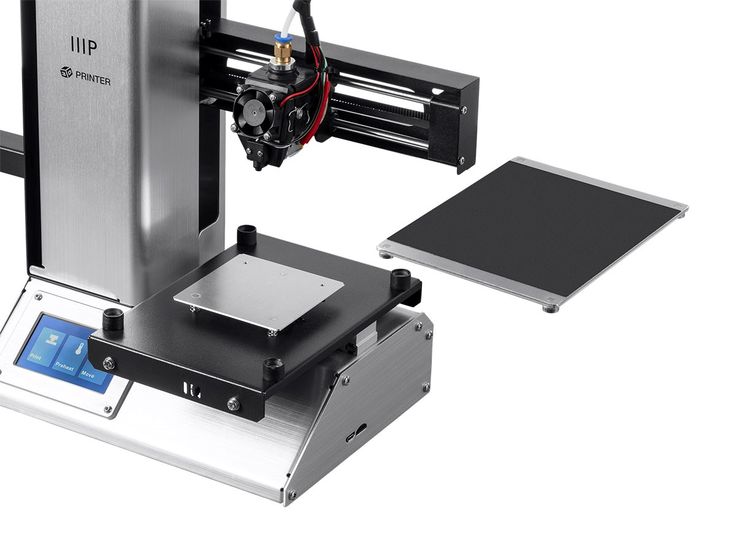 The ergonomic design of 3Doodler helps children with the correct positioning, so it is comfortable to use, and the non-toxic filament has no harmful smell and is environmentally friendly. It's also less prone to webbing, which happens when a 3D pen is pulled back too quickly and leaves a trail of excess material.
The auto-clean feature also reduces the chance of filament jams, while the auto-feed feature eliminates the need to constantly hold down the button to keep the filament flowing hot. The USB rechargeable battery eliminates the need for a power cord.
Best Self-Assembly: JGAURORA Prusa i3 DIY 3D Printer
See Amazon See on Neweggbusiness.com
Constructed almost entirely from metal parts, the JGAURORA is highly recommended for both beginners and advanced users who want to create their own 3D printer from scratch.
Fun to assemble and use safely, metal DIY model assembly is more stable than traditional acrylic 3D printers and has a respectable build volume of 7.