New matter mod t 3d printer review
MOD-t 3D Printer Review 2022 [UPDATED TODAY]
2
See Price
| Printing Area | 150mm x 100mm x 125mm |
| Printing Speed | 80 mm³/s |
| Supported Filament | PLA |
| Filament Diameter | 1.75mm |
| Extruders | 1 |
| Extruders Diameter | 0.4mm |
As more entry-level 3D printers geared towards the novice flood the market, it can be troublesome to differentiate the good from the bad. Among these is the NewMatter MOD-t 3D printer, a marvel of minimalist design touted as one the most user-friendly printers on the market today.
In the wake of the blistering success of its crowdfunding run on Indiegogo, which raised over $650,000, NewMatter brought the MOD-t to market in 2016. Does it stand up to the lofty promises of its designers, notably unmatched ease of use and simplicity, all for less than $400-$500?
Table of ContentsShow
Design
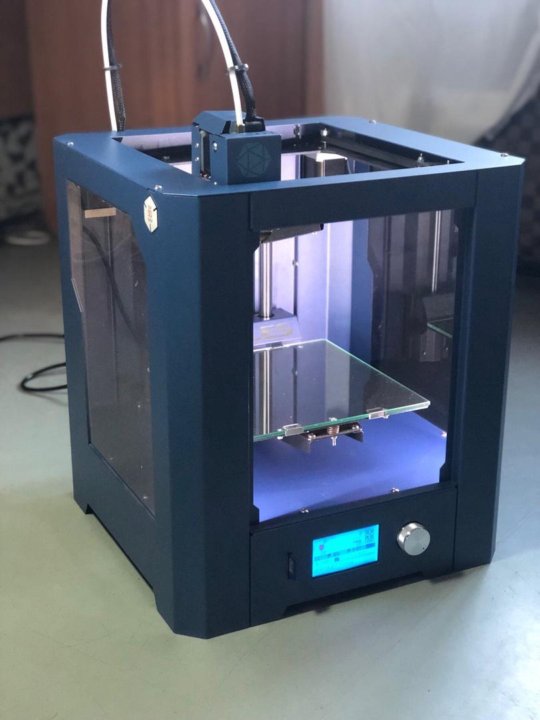
The MOD-t oozes elegant simplicity, from the removable clear glass panels to the streamlined Apple-inspired forms of the encased extruder shell. NewMatter employed the design prowess of technology design studio Frog Design to conjure up the sharp, clean, and sleek white look, and it shows. The MOD-t is easy of the eye, rivaling the look of pricier models such as the Ultimaker 2 +.
The most amusing aspect of this focus on design is that it carries over to functionality as we found out when assembling and setting up. NewMatter has intentionally gone out of its way to make the MOD-t as friendly and functional as possible. Simplicity is such a core tenet of the design that the MOD-t doesn’t have a control panel or LCD. The only interactive element is a backlit button on the bottom left of the unit used to trigger, pause, or stop prints.
The build area is a modest 150mm x 100mm x 125mm that, considering we are looking at a pre-assembled unit for less than $500, is reasonable and more than suitable for first-timers to cut their teeth with small print projects.
The layer resolution options are surprisingly varied for such a small unit, with the ability to trigger faster prints at 0. 4mm (400 microns), down to a reasonably accurate 0.05mm (50 microns) on the slowest speed setting. The MOD-t boasts a max speed of 80 mm per second.
The nozzle is a fairly standard 0.4 mm hot end that accepts the common 1.75 mm filament. Material wise, the MOD-t only supports PLA, but at this price point, we can’t argue with this lack of versatility. NewMatter does, however, get points for not marketing the printer as compatible with other materials, only for users to find out this isn’t the case – a practice that unfortunately plagues kit printers in this price range.
The MOD-t internal workings diverge from the standardized Cartesian fused filament fabrication build and incorporate a rather novel axis control system. Doing away with the tried and trusted multiple motor/belt setup to move the extruder and build plate on the three axes, NewMatter has perfected a set of servomechanisms that run two horizontal and perpendicular geared pinion rods.
The build plate sits on the pinions via grooves or teeth that lie underneath and catch the gears. The build plate isn’t held in place and instead lays on top of the pinions. As the gears and teeth interact, the build plate is latched and moves on the Y and X axes. The Z-axis is assured by two vertical perpendicular pinions holding the extruder that act in the same way.
The pinion design isn’t so much to reinvent the 3D printing wheel, but rather to cut costs due to the inherent need for fewer, and less complicated elements. A much simpler design lowers production costs and allows NewMatter to ship the MOD-t at such a competitive price point.
The build plate is sadly not heated but is equipped with a removable flexible plastic surface plate to aid stability and the removal of prints by bending the plastic to ease them off.
Where the allure of the MOD-t trails off is connectivity, not so much in the sense of the options (standard USB or Wi-Fi), but the constriction of having to be online to ready and launch a print job, because the MOD-t works with NewMatter’s proprietary browser-based printing app.
In itself, the idea is excellent. It means anyone – using any OS – can dive in and start printing without any problems. Mac or Linux? No problem. The app then safeguards a library of prints either downloaded or purchased from the NewMatter website or uploaded by the user, triggered for printing in just a few short steps.
The app is intuitive and sticks to a format we’re all used to thanks to the pervasiveness of smartphone and apps. Hobbyist lingo or technical considerations won’t dumbfound novices nor will the simple interface of the app.
As mentioned above the app is ideal for beginners and allows a certain amount of limited flexibility for those wanting to venture a little deeper into the specifics of 3D printing. From the app, you can tweak the layer resolution, resize the print object, upload and share print files. But anything more, and the app falls short.
To cater for this, NewMatter also provides the Printer Tool desktop software where the user can upload a . gcode file and apply all manner of parameters such as adding or removing supports, tweaking the extrusion speed and a selection of other custom settings.
Assembly
From unboxing to launching that first test print, NewMatter has once again aimed for simplicity. The MOD-t ships well-packaged and adheres to the efficient and straightforward ethos down to the accessory boxes placed in a modular fashion to protect the printer.
As for what’s in the box, the MOD-t is a veritable treasure chest of accessories: printer, wire brush, scraper, clippers, USB cord, kettle lead, filament spool holder, filament spool, PSU, and build plate.
From here, all that needs assembling is the build tray, which involves placing the surface plate onto the build plate and sliding it into place. It couldn’t be easier. The next step is loading the filament into the printer via either the MOD-t browser or MOD-t Printer Tool desktop software (you’ll need to connect your PC via USB to establish a Wi-Fi connection, but from there onward you can use the printer wirelessly).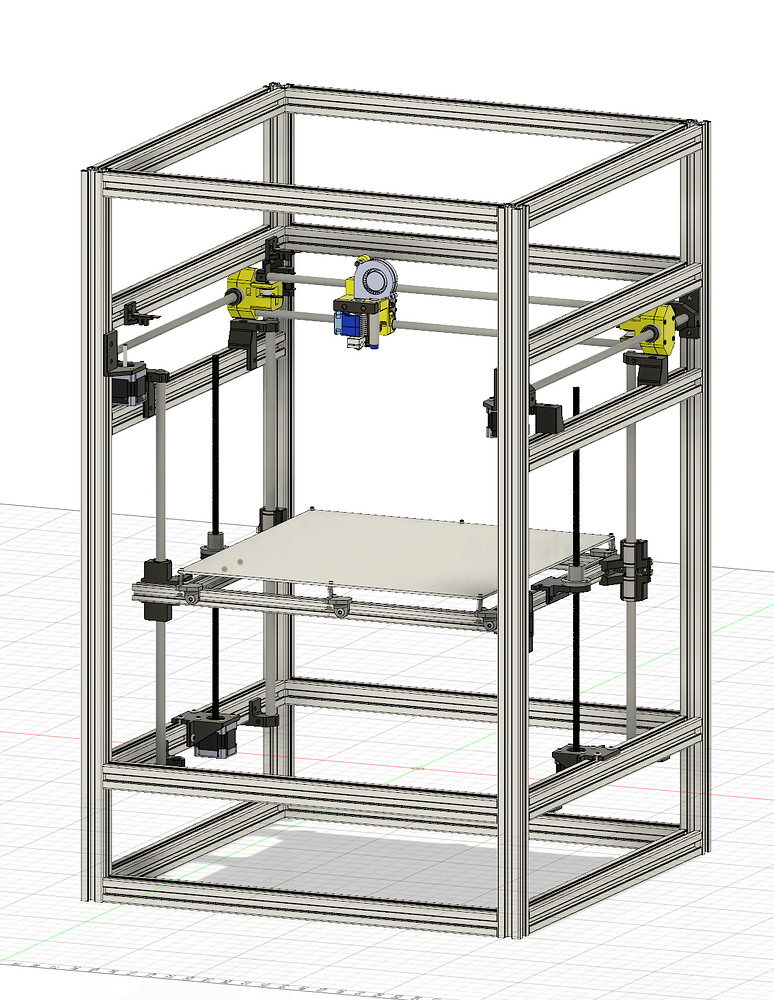 Attach the spool holder to the back of the printer, pop on the filament and feed it into the device.
From here, we had to feed the filament until it popped out of the other end of the spoil tube. Initiate the feeding process of the app, which heats the hot end, then load the filament into the hole at the top of the extruder carriage.
The above steps are easy enough that, with the helping hand of NewMatter’s succinct introduction guide of the browser app, are within the means of even the most unversed newbie. The build plate is also self-calibrated by the printer, so no user-led calibration process to tackle.
Printing
Overall, the MOD-t produces quality prints if you stick to the curated selection from the NewMatter app. We were hard pressed to find much wrong with the results. The mistakes are minimal, and the printing process is slow, but not unbearable. Thanks to the glass casing, the noise is relatively low for a printer of this caliber.
From loading up a print via the app to launching it with a simple touch of the button on the device, by way of bending the flexible surface plate to remove a finished print, the process was easy and intuitive.
Where the print quality starts to tread shaky ground is when more detail is required, or put otherwise when you opt for print jobs that aren’t part of the NewMatter store. Most of our tests with outside prints ended up with mild to severe imperfections, and in a few cases in that all too familiar mess of scrawled filament.
The root of the problem is the build plate, which as we mentioned above isn’t attached or clipped into the pinions. Instead, the natural friction of the gears is what keeps it in place; the natural vibrations of the printing process shift the plate in small increments.
Support
NewMatter offers a rich library of support articles and video walkthroughs covering setup to navigating the browser app. It’s cheery and unassuming, perfect for a daunted beginner.
Beyond this, there’s no support whatsoever as NewMatter shut down in early 2018 taking the web app, crucial to the MOD-t’s functionality with it.
Users can still make use of the MOD-t Printer Tool desktop software and upload .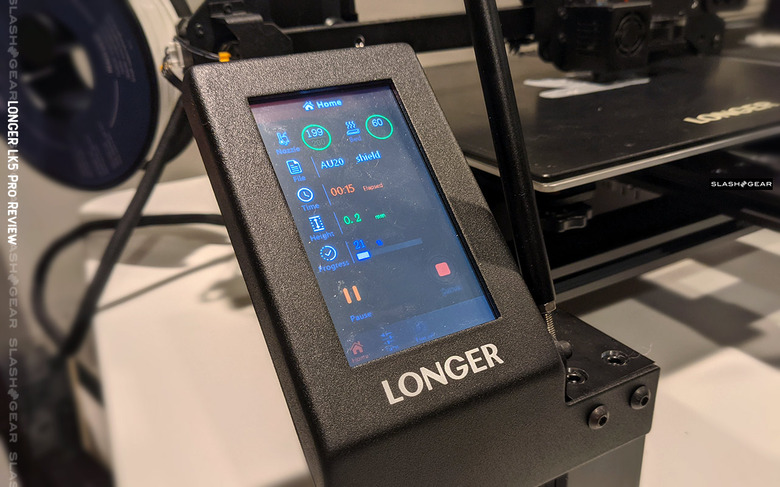 gcode files made with third-party software to generate prints, but that’s it.
Verdict
For someone who wants to explore and discover the world of 3D printing, the MOD-t is great. The price tag is reasonable, the curated library designs varied enough to keep interest, and the ease of use is unmatched.
However, the MOD-t suffers from its own simplicity especially in the wake of the company shutting its doors. The core idea of using the web app to initiate, manage, and shop for print designs mean the MOD-t is all but redundant for first-timers.
The MOD-t has, therefore, only become a viable option as a unit for seasoned makers who know how to create .gcode files and who want a well-designed entry-level printer. Beginners will struggle too much with the MOD-t without the helping hand of NewMatter to guide them.
Review: New Matter’s MOD-t 3D printer is ingeniously simple (with video)
3D printer reviews
The MOD-t is slow but produces decent-quality models for a beginner-friendly price.
By Lucas Mearian
Senior Reporter, Computerworld |
Lucas Mearian3D printer reviews
- Review: The da Vinci Mini leads as a...
- Review: New Matter’s MOD-t 3D printer...
- Review: The CraftBot Plus is a 3D...
- Review: MakerBot Replicator 3D printer.
 ..
.. - Review: Formlabs Form 1+ 3D printer...
Show More
In a consumer market filled with entry-level 3D printers, startup New Matter was able to garner nearly twice its crowdfunding goals last year (and raise $6.5 million in a series A funding round) to begin production of its minimalist 3D desktop printer -- the MOD-t.
So when offered the opportunity to review the MOD-t, which retails for $399 (Amazon price - What's this?), I jumped at the chance. And while I wasn't blown away by its value or quality, I was impressed with what I found to be a true plug-and-play 3D printer that doesn't take much desk space, offers Wi-Fi connectivity, and is easily ignored as it goes about quietly printing simple objects.
The MOD-t can make an object as large as 6 x 4 x 5 in. It has a compact Apple-inspired design and weighs 12.5 lb. It can print as fine as a .05mm layer height, which is pretty standard.
Simplicity and ingenious design
When it comes to hardware design, the MOD-t stands head and toes above other sub-$500 printers. New Matter teamed up with international design firm Frog Design to develop the all-white, contemporary look of the MOD-t, which exudes simplicity.
This time-lapse video shows the MOD-t in the process of creating two identical chess pieces. They took four hours to print.
Even the setup -- which takes about five minutes -- is simple enough that a first-time 3D printer user would have no problem doing it. After removing the printer from its box and downloading the firmware via New Matter's setup page, users can follow along with a series of GIFs on that same page that walk them through installing the reel of filament and the printer's build platform.
It is the build platform that I found to be the most impressive part of the printer. The platform isn't attached to anything. You simply lay it atop a couple of x- and y-axis gear rods, and you're done. The bottom of the build platform has tracks that ride on the gear rods during a build.
The platform also has a flexible plastic cover that slides off and allows you to bend it to remove printed objects; there's literally no need to scrape objects off of the build platform with a spatula as is so often required with other printers.
After you install the build platform, you hang a plastic filament reel holder on the back of the printer, feed the filament through a hole in the rear of the machine until it comes out of the machine's filament guide tube and hit "Load Filament" on the software. That's it. You're done.
The MOD-t prints with standard 1.75mm PLA filament, one of the most common polymers on the market for fused filament fabrication machines. While it may support other polymers, New Matter does not list any of them.
This is a relatively quiet machine -- not the quietest I've used, but certainly not a distraction even when you're sitting next to it. The only noise comes from the unit's fan, located in the printer head housing, and the print platform rolling across the gear rods.
There are no LCD screens or cursor pads on the MOD-t, as some other 3D printers offer. Instead, there's a single start/stop button that flashes when a job is ready to begin and can be pressed again to pause a print job or held down longer to stop it completely. That's it.
The printer comes with a small kit that includes a brass brush for cleaning the print head, a scraper for removing models from the build platform, a pair of snips for removing excess plastic from models and a replacement extruder head; including an additional extruder head is highly unusual for a $400 machine. The extruder head is also extremely simple to change out, requiring the removal of a single hex nut (the wrench for which is supplied).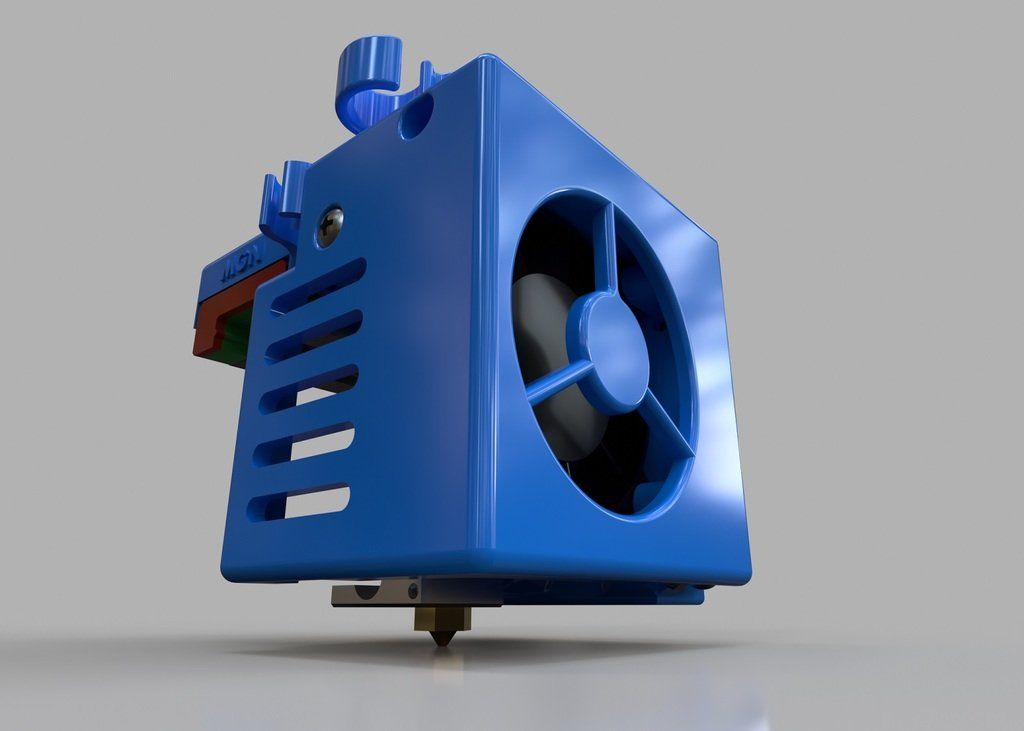
A sub-$500 printer with a social network
While there are more and more sub-$500 3D printers appearing on the market today, what makes this printer really unusual is that it uses a browser-based interface to connect users to the company's 3D printing software and marketplace, where you can upload or share a printable object file as simply as sending a text message.
All the processing of STL or OBJ object files, from uploading to print commands to slicing and print generation, is performed on New Matter's online servers. The printable file then gets uploaded to the 3D printer on your desktop. You can also download your own STL files from any number of unrelated online sites and send them to the MOD-t printer from your computer.
The MOD-t does not have onboard storage in the sense that you cannot store files in its internal memory. What it does allow you to do is upload the file, begin the print job and then unplug it from your computer. Once you power off the MOD-t, however, it will forget the last design, and you will need to re-transfer the file to the printer.
MOD-t owners sign on to become part of an online community that allows users to upload and download STL files to New Matter's online marketplace, and even charge for designs. They can send messages to other users with links to print files; when the other users get notifications, they can chose to accept them (and print the objects), ignore them or reject them.
All of the objects uploaded to New Matter's servers are vetted to ensure they work well with the printer. In contrast, sometimes objects downloaded from other online marketplaces such as MakerBot's Thingiverse don't print well on all machines.
If you want to tweak your designs, popular software such as Tinkercad, AutoCAD or Adobe Photoshop CC allows 3D printer users to perform simple manipulations of objects before printing.
You can also fine-tune your designs in the cloud using New Matter's CAD software, though just how much you change an object is severely limited based on preset commands. If you're printing objects based on files from the New Matter Store, you will unfortunately not be able to manipulate them or their placement on the print platform. However, you can choose good, better or best (recently updated to "high speed," "balanced" and "high quality") print resolutions, which represent layer thicknesses ranging from .4mm to .05mm in height. You can also turn print supports on and off (supports are scaffolding added to the design to temporarily hold up portions of an object while it's being printed).
New Matter recently rolled out new advanced settings so that users could perform slightly finer customization of print jobs through the New Matter Store. Once an object is uploaded, a "custom settings" menu allows you to choose adjustments such as incremental layer height, temperature (from 160 to 220 degrees Celsius) and print speed (from 10mm to 80mm per second).
Slow and sometimes difficult software
While the MOD-t can print at up to 80mm per second, which is a typical speed, I still found the printer to be remarkably slow. For example, on the "balanced" setting, it took five hours to print a simple 3. 25 x 1.75 x 1.5 in. hippopotamus figurine; it took 1.5 hours to print an octopus that was 3 in. in diameter and .75 in. high., which has taken as little as a half hour on other printers.
It was in New Matter's online software, however, that I discovered the greatest flaws. Its lack of ability to manipulate print jobs -- from not being able to adjust their placement on the print bed to the inability to inspect the layers prior to a print -- left me wholly unimpressed and at times downright frustrated.
Additionally, I found the software was often slow to get print jobs started. At times, it even took several minutes for the software to recognize that my computer was connected to the MOD-t via the USB cord. Using my MacBook Pro laptop, I often got Apple's spinning wheel icon indicating that New Matter's online software was not responding.
Lucas MearianThis hippo figurine was uploaded to the MOD-t from New Matter’s online store. It took five hours to print with the machine set to its “balanced,” or average, print quality setting.
Lastly, I didn't find the software very user-friendly. Nothing's obvious, as it should be with a plug-and-play machine. For example, if you want to start a print job by uploading a model file, you have to discover a small icon in the shape of a person's bust at the top right corner of the Web page. Icons need labels if they're not obvious.
After uploading a file for printing, sometimes it shows up in a virtual print area to adjust settings, and sometimes it doesn't. I'm not certain why that happens. I suppose over time, I'd learn how to manipulate the functions more easily, but with an entry-level machine, every function should be obvious.
Print tests
My initial print with the MOD-t was of the hippo figurine whose design I uploaded to the printer from New Matter's network. As I stated earlier, it took a whopping five hours to print, but the quality was good.
Next, I printed a chess piece, a "Pokemon queen." The piece is relatively small -- about 4 in. high and 1 in. in diameter -- and it took two hours to print. Again, the quality was good.
However, when I gave this printer its most difficult task -- to print a 5-in.-high Eiffel Tower -- it failed miserably and didn't come close to reproducing the object accurately. The extruder was unable to create the intricate scaffolding, and it went off track about halfway through the build, leaving me with a spaghetti mess of filament.
To be candid, I wasn't surprised. Only higher-end, over-$1,000 desktop 3D printers are typically able to recreate the intricate latticework of the Eiffel Tower -- and even then they're few and far between. I've even had 3D printers that cost over $2,000 fail the task, so in this case, I kept my fingers crossed. Put simply, it isn't a 3D printer capable of producing great detail.
My last test for this printer was to create multiple objects at the same time. Unfortunately, because you cannot manipulate where on the platform an object prints, you must upload chess pieces in sets. I chose a set of two.
The MOD-t 3D printer is capable of producing multiple pieces at the same time, such as these two chess rooks, which took four hours to print.
The two chess pieces, each about 5 in. tall and up to 2 in. in diameter, took four hours to print, which was extremely slow. They were both adequate in quality.
Bottom line
If I were to compare this printer to any other, it would be the da Vinci Junior 1.0, an entry-level machine from XYZprinting that retails for $295 (Amazon price) and that I reviewed a year ago.
The da Vinci has far more functionality than the MOD-t. For example, it has an SD card slot that allows you to store STL and OBJ files for printing. And all XYZprinting 3D printers - from the $1,500 Nobel 1.0 stereolithography printer to the da Vinci Junior 1.0 -- use the same, higher-functionality, downloadable software. The da Vinci also has an onboard LED screen and control panel for basic printing functions.
Otherwise, the two 3D printers are similar. Like the MOD-t, the da Vinci Jr. is fully enclosed, so it's relatively quiet. And the da Vinci Junior, like the MOD-t, cannot accurately print complex objects such as the Eiffel Tower and is slower than many other 3D printers.
When it comes to looks, however, the MOD-t kills it. I really liked the appearance of the machine as well as how simple it was to use.
So when choosing between the two machines, a user must consider the MOD-t's aesthetics and hardware simplicity versus the da Vinci Junior's greater functionality.
While I cannot highly recommend the MOD-t, I can say it's a decent machine that a beginner would be able to adapt to fairly easily, and with a $400 price tag, you're not breaking the bank to try your hand at 3D printing.
Related:
- 3D Printers
- Consumer Electronics
Senior Reporter Lucas Mearian covers Windows, Future of Work issues, mobile, Apple in the enterprise, and healthcare IT.
Copyright © 2016 IDG Communications, Inc.
7 inconvenient truths about the hybrid work trend
NEW MATTER MOD-t 3D Printer User Manual
NEW MATTER MOD-t 3D Printer User Manual
INTRODUCTION
Congratulations on your purchase of your new MOD-tTM 3D printer! We are excited to welcome you to the New Matter community and help guide you on your 3D printing journey. To start printing, go to www.newmatter.com/setup where you will complete the setup process. For questions or comments:
Web: support.newmatter.com
Phone: (866) 949-8722
Email: [email protected]
Social media: @newmatterhelp We look forward to hearing from you!
IMPORTANT INFORMATION ABOUT YOUR MOD-T
- You should visit www.newmatter.com/setup after re-viewing this manual for your MOD-t.
- Your main portal for controlling MOD-t via Wi-Fi: store.
 newmatter.com.
 - Always print with a clear cover for best results and for your safety.
- Always start printing with a clean print tray properly mounted on the X and Y axis gear arms.
- Log in to store.newmatter.com to explore our curated library of 3D designs.
- All information provided in this manual can be found on the Internet at www.newmatter.com/setup.
- Technical support is always ready to help. Visit support.newmatter.com or see the following page for more information.
NEW SUBSTANCE ECOSYSTEM
Your MOD-t 3D Printer
Once you have everything set up, MOD-t will be able to print designs from our store via Wi-Fi.
New Materia Shop
New Materia Shop is a portal to your MOD-t. Here you can shop online or print your own. files over Wi-Fi.
MOD-t Utility
MOD-t Utility configures Wi-Fi settings and updates printer firmware via USB. The app also supports MOD-t offline control, including filament loading/unloading and G-code printing. file are prepared using properly configured third party applications.
NEW MATERIAL STORE
3D Design Marketplace
Browse our catalog and download designs that are great for home, school or office.
Your print queue and control panel
Once logged into your New Matter account, manage your 3D print jobs and track activity on your MOD-t.
New Materia Store
Stock up on consumables and accessories to keep doing great things!
New Matter Support
Get help with your MOD-t and learn more about 3D printing.
WHAT'S IN THE BOX?
After unpacking the MOD-t, make sure you have all the accessories. Then, using a Mac OSX (10.7+) or Windows (7+) computer, navigate to www.newmatter.com/setup where you will complete the installation process.
- 3D printer MOD-t
- Transparent cover
- 0.5 kg Filament spool BOX A
- Spool holder BOX B
- Power supply B
- BOX BOX C
- Box Print Box C
- Box of the USB D
- Box Box Box Box Box Box Box Box Box Box Box Box Box Box Box Box Box.
- Wire brush BOX D
MOD-t SPECIFICATIONS
| 0002 store.newmatter.com | MOD-t primary interface. Requires Wi-Fi and supports desktop and mobile browsers including Chrome, Firefox, and Safari. Uses WebGL for rendering. Microsoft Internet Explorer and Edge browsers are not currently supported. | |
| MOD-t Utility | Configures MOD-t wireless network settings and updates printer firmware via USB. Additionally provides a standalone interface to MOD-t. Supports G-code printing file prepared using properly configured third party applications. 9000 9000 mod-T. PREPARE MOD-T CREATE A TRAY ASSEMBLY
LOADING FILAM Thread load
UNLOADING THE FILING
PREPARING THE TRAY FOR PRINTING THE DESIGN  WARNING: Do not force the print tray or apply excessive force to the gear rods. USING THE MOD-t 3D PRINTER PRINTING A DESIGN FROM THE NEW MATERIAL STORE
PRINT DESIGN FROM EXTERNAL SOURCE
START PRINTING PAUSE / CANCEL PRINTING
REMOVING THE PRINTED DESIGN FROM MOD-t
MOD-t MAINTENANCE PRINT SURFACE MAINTENANCE CLEANING THE MOD-t ACRYLIC COVER COMPLIANCE AND SAFETY WARNINGS COMPLIANCE FCC
SAFETY PRECAUTIONS USER AGREEMENT DISCLAIMER
WARRANTY INFORMATION MOD-t 3D PRINTER LIMITED WARRANTY (NORTH AMERICA) TO THE MAXIMUM EXTENT PERMITTED BY LAW, THIS LIMITED WARRANTY INDICATES YOUR SOLE AND EXCLUSIVE REMEDY WITH RESPECT TO THE PRODUCT AND IS IN LIEU OF ALL OTHER WARRANTIES, REPRESENTATIONS, OBLIGATIONS AND IMPLIED OTHER SUBLIMITS. RETURN AND REPAIR POLICY DEFECT ON ARRIVAL ARRIVAL DEFECT
CUSTOMER SUPPORT Your MOD-t 3D printer comes with 90-day limited warranty. If you would like to return or replace your MOD-t, please contact New Matter Technical Support. On our online support page, you can find answers to frequently asked questions, how-to videos, articles, forums, and chat (Monday, Friday, 9:66 p.m. PT). Documents / ResourcesRecommendations
look 3D printing software? We've rounded up the top 20 software tools for beginners and professionals alike. Most slicers are free. What is a slicer? This is a program for preparing a digital model for printing. Models for 3D printing are usually distributed in STL files. To turn an STL file into G-code (a language that a 3D printer understands), a slicer program is required. It is called a slicer because it cuts (to slice - English) a 3D model into many flat two-dimensional layers, from which a 3D printer will add a physical object. Which slicer should I choose? In this article, we will tell you which slicer is best for 3D printing for each stage of your work. Which one is better for preparing a 3D model for printing? But what if you need to create a 3D model from scratch? And if you are only taking the first steps in 3D? Don't be afraid: we've answered all of these questions, including the required skill level for each program and where you can download it. The great thing is that most of these programs are completely free and open source.
#1: Cura
For beginners who need a slicer to prepare STL files for 3D printing Cura is the standard slicer software for all Ultimaker 3D printers, but can be used with most others , including RepRap, Makerbot, Printrbot, Lulzbot and Witbox. This program is very easy to use and allows you to manage the most important 3D printing settings through a clear interface. Start in Basic mode to quickly get up to speed and change print quality settings. If finer control is required, switch to Expert mode. Cura can also be used to directly control the printer, but then the printer and computer must be connected to each other. Download: Cura Price: Free Systems: PC, Mac, Linux #2: CraftWare
For beginners to prepare STL files for 3D printing 3D printers by the Hungarian startup CraftUnique to support their CraftBot crowdfunding machine. However, the program works with other printers. Like Cura, CraftWare allows you to switch from "Easy" to "Expert" mode, depending on how confident you feel. It's a colorful app that features a visual G-code visualization with each function represented by a different color. Please note, however, that this program is still in beta, so bugs may occur. Download: CraftWare Price: Free Systems: PC, Mac #3: 123D Catch
-systems, smartphones and tablets, which allows you to convert images of objects into a 3D model. Pictures can be taken with a smartphone/tablet or digital camera. You need many photos of an object from different angles - the more the better - after which they will be compiled into a 3D model. 123D Catch is more of a fun app than a professional 3D printing tool, but after some tambourine dancing, you can get good results, especially when paired with an STL editor like MeshLab or Meshmixer. Price: Free Systems: PC, Android, iOS, Windows Phone #4: 3D Slash
and surprisingly simple, and refreshingly new. You can start with a large block and, like a virtual sculptor, remove small cups from it with tools such as a hammer or drill, or start from empty space and build a model from cubes and other shapes. You can paint with flowers or use template pictures. Other features worth mentioning are tools for creating logos and 3D text. The Logo Wizard imports an image and creates a 3D model, while the Text Wizard allows you to enter and format text, and then turn it into 3D. Recommended! Download: 3dslash.net Price: Free Systems: PC, Mac, Linux, browser #5: TinkerCAD
- A computer-aided design (CAD) system for 3D printing, which is a good starting point for beginners. Since its capabilities are limited compared to Blender, FreeCAD and SketchUp, many users switch to more powerful tools after some time. As in 3D Slash, here you can build models from basic shapes. Come in: Autodesk TinkerCAD Price: Free Systems: Browser #6: 3DTin
For beginners who want to create 3D printable models another easy and intuitive online tool choice for beginners in 3D modeling. All you need is a Chrome or Firefox browser with WebGL enabled. Choose from a huge library of 3D shapes and add them to your sketch. All sketches are stored in the cloud, access to them is free if you honor the Creative Commons license. Everything can be exported to STL or OBJ formats. Enter: 3DTin Price: Free Systems: Browser #7: Sculptris
For beginners who want to create 3D printable models clay. This is a fantastic 3D modeling program if figurines are your main task. For example, you can make a bust of your favorite video game or comic book character. Download: Pixologic Sculptris Price: Free Systems: PC, Mac #8: ViewSTL
For beginners who want to view STL files ViewSTL is the easiest way to view STL files . Simply open a web page and drag the STL onto the dotted box. The STL online viewer allows you to display the model in one of three views: flat shading (for a quick view), smooth shading (for a high-quality image), and wireframe. Enter: ViewSTL Price: Free Systems: Browser #9: Netfabb Basic
some nice features that allow you to analyze, "repair" and edit STL files before moving on to the model cutting stage. A good choice if you need more than just a slicer and want to be able to quickly fix STL files without having to learn programs like MeshLab or Meshmixer. Don't let the 'Basic' in the title fool you, Netfabb Basic is actually a very powerful 3D printing tool. Download: netfabb.de Price: Free Systems: PC, Mac, Linux No. 10: Repetier
For advanced to prepare STL files for 3D printing 9002 the next level of 3D printer slicer software, but if you want to stay open source, you should look into Repetier. It is the great grandfather of 3D printing software and a favorite of the RepRap community.To date, the program is moving by leaps and bounds from the level for beginners to advanced users. Packaged in an all-in-one configuration, it supports up to 16 extruders, multi-slicing via plug-ins, and virtually every fusing 3D printer on the market. Get ready to tinker! What's more, Repetier Host works remotely via Repetier Server, so that the 3D printer can be controlled via a browser, tablet or smartphone. Download: Repetier Price: Free Systems: PC, Mac, Linux #11: FreeCAD
The program is a great option for developing your design skills. Download: freecadweb.org Price: Free Systems: PC, Mac, Linux #12: SketchUp
For beginners who want to create 3D printable models SketchUp is the perfect combination of simplicity and - the perfect combination functionality, with a user-friendly interface and a relatively flat learning curve (i.e., as experience grows with the time spent), the ideal program for developing three-dimensional models. The Make SketchUp version is free and will include everything you need for 3D modeling if you also download and install the free STL exporter. There is also a professional edition for architects, interior designers and engineers. Download: sketchup.com Price: Free (SketchUp Make), $695 (SketchUp Pro) Systems: PC, Mac, Linux #13: 3D-Tool Free Viewer
view and validate STL files 3D-Tool Free Viewer is a sophisticated tool that, among other things, allows you to check the structural integrity and printability of your file. Download: 3D-Tool Price: Free Systems: PC #14: Meshfix
your model for errors. Price: Free Systems: Browser #15: Simplify3D
For professionals to prepare STL files for 3D printing print. A flexible algorithm checks the model for problems, fixes them, shows a preview of the printing process (ideal for identifying potential problems), and then slices it. This slicer offers the best infill pattern options in the competition. For models that require supports, Simplify3D will create the appropriate structures on its own and give you full control over their placement. For printers with a dual extruder, when printing with different materials, the Dual Extrusion wizard will help, as a result of which, for example, it will be easier to remove the dissolving filament. Simplify3D supports 90% of today's commercially available desktop 3D printers and is compatible with Marlin, Sprinter, Repetier, XYZprinting, FlashForge, Sailfish and MakerBot firmware. Simplify3D can also be used to directly control the printer, but then the printer and computer must be connected to each other. Download: simplify3d.com Price: $149 Systems: PC, Mac, Linux #16: Slic3r
source code, which has a reputation as a carrier of super new functionality, which you will not find anywhere else. The current version of the program is able to show the model from multiple angles, so that the user gets a better preview experience. There's also an incredible 3D honeycomb infill, the first of its kind that can extend over multiple layers rather than repeating itself like a stamp. This significantly increases the strength of the internal filling of the model and the final printout. Another option is direct integration with Octoprint. Download: Slic3r Price: Free Systems: PC, Mac, Linux #17: Blender
For professionals who want to create 3D printable models Blender is a popular computer-aided design (CAD) system with a steep learning curve. Not at all the best choice for beginners, but what you need if you are quite experienced and need something more complex for modeling and printing. In short, Blender is one of the most powerful tools out there. Its community is always ready to help, there are a lot of educational materials. It's also open source, so enthusiasts often write extensions to make it even better and more powerful. Download: blender.org Price: Free Systems: PC, Mac, Linux #18: MeshLab
For professionals to prepare STL files for 3D printing MeshLab - advanced STL editor. Price: Free Systems: PC, Mac, Linux #19: Meshmixer
For professionals to prepare STL files for 3D printing files. It's especially good for identifying potential problems and fixing them automatically. For example, it will show paper-thin walls that can lead to problems with 3D printing. Meshmixer is part of the Autodesk family of 3D printer software, so it should work well with tools like TinkerCAD. Price: Free Systems: PC, Mac #20: OctoPrint
start, pause or interrupt 3D print jobs. Combined with Wi-Fi capable devices, it makes for an excellent monitor for remotely monitoring the 3D printing process. Octoprint understands the G-codes of almost all 3D printers and slicers and includes a gCodeVisualizer to visualize this code before or during printing. | |
 MOD-t will automatically find and center the build tray at the start of a print job.
 Once the hot end of the MOD-t reaches the appropriate temperature, the MOD-t will start unloading. You will be prompted to delete the thread after the upload is complete. Don't try to delete the thread manually while MOD-t is unloading.
  Print with or without stands by selecting the On switch. / Off
  com/setup for detailed and visual instructions.
  Any of these options will interrupt the current print job.
 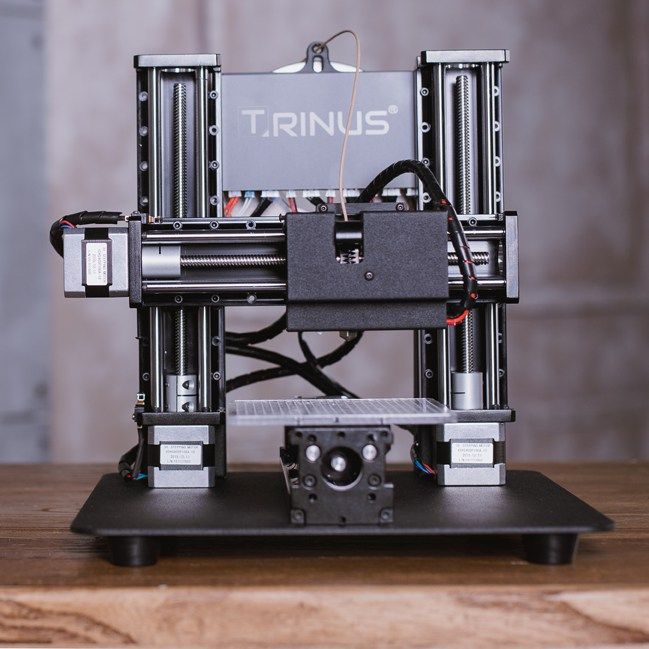 For best results, always start your print job with a clean print surface. Keeping the printing surface plate clean and free of oils is important for print adhesion. It is recommended to clean the printable surface every 3-5 builds with a residue-free cleaner based on citrus and oils. To remove the print shadow left by your previous builds, use the wire brush (included with your MOD-t) to gently sand the surface. Be sure to clean the print surface plate after brushing to remove debris. We recommend that you periodically replace the printable surface plate when the builds no longer adhere properly to the surface.
  These chemicals will damage the acrylic. Instead, use a mild solution of soap or detergent and water. Instead of paper towels, it is also recommended to use a lint-free cotton or microfiber cloth, which may cause minor scratches on the cover.

 Similarly to a new one, a replacement will be shipped prior to receipt of the original defective device by the buyer if the terms of the New Matter warranty are met. Warranty replacement requests must be handled by New Matter Technical Support. In order to obtain a replacement under warranty, the customer must allow the technical support representative to complete a complete diagnostic checklist. As soon as these conditions are met and the device is found to be defective, the technical support representative will initiate the process of returning new material.
  Your card will not be charged until the defective block is returned to New Matter.
  g., physical damage, problems with the device not originally reported to technical support, misuse, etc.) amp, along with the device, etc. New Matter reserves the right to charge a form of payment received by technical support prior to the commencement of the warranty process to pay for shipping, repair, and/or retail cost of the new device.0022
 This warranty is non-transferable and does not apply to resold products. The warranty does not cover any damage or failure of the Product that New Matter believes is caused by any cause other than manufacturing defects in materials or workmanship, including but not limited to: (i) improper assembly, installation, operation or maintenance; (ii) use in an environment or for a purpose for which the Product was not designed; (iii) negligence, abuse, accident or other physical damage; (iv) unauthorized repairs or modifications; (v) use of any parts not provided by New Matter, or use with components not intended or recommended for use with the Product, including the use of threads outside of specification; (vi) wear, cosmetic damage or maintenance work; and (vii) all causes beyond the control of the New Matter, including power surges, fire, floods, wind, freezing, power outages, general corrosion, biological contamination, unusual atmospheric conditions, or other unforeseen causes. Warranty claims cannot be made if the serial number on the Product has been altered, removed or cannot be verified.
 NEW QUESTION DISCLAIMS ALL OTHER WARRANTIES, INCLUDING WITHOUT LIMITATION ANY IMPLIED WARRANTIES OR CONDITIONS OF QUALITY, MERCHANTABILITY, FITNESS FOR A PARTICULAR PURPOSE, OR NON-INFRINGEMENT. SOME LAWS DO NOT ALLOW THE EXCLUSION OF IMPLIED WARRANTIES. IF THESE LAWS APPLY, ALL EXPRESS AND IMPLIED WARRANTIES ARE LIMITED TO THE DURATION OF THE WARRANTY SET FORTH ABOVE. IN NO EVENT WILL New Matter BE LIABLE FOR ANY SPECIAL, INDIRECT, INCIDENTAL, PUNITIVE OR CONSEQUENTIAL DAMAGES, LOSS OR EXPENSES, INCLUDING LOSS PROFITS, LOSS SAVINGS OR OTHER ECONOMIC LOSS. In the case of failure of the above funds or in relation to any other claims for any other theories of recovery, the general responsibility of the New Matter, if any, for losses, losses or otherwise, associated with the product, is limited to the amount that you paid for the product that has evaluated LOSSES.

 The customer is responsible for all damage caused by improperly packaged devices.
 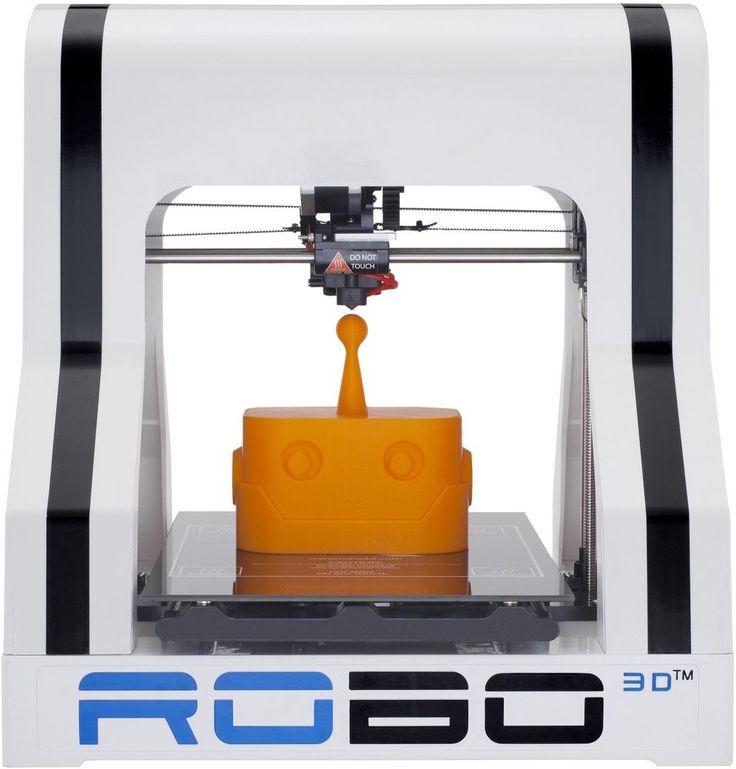 newmatter.com/warranty for full warranty and returns information.
 The program is completely open source, its capabilities can be extended using plugins.
  But the most outstanding feature is the individual support service. As far as we know, only the paid program Simplify3D has this.
  With 3D Slash, you can design 3D models using your dice skills.
  At the same time, unlike 3D Slash, TinkerCAD allows you to create vector shapes in 2D and convert them into three-dimensional models.
  Sculptris is completely free and bills itself as a stepping stone to the more complex (and expensive) ZBrush tool.
  It's "basic" only in the sense that it doesn't cost €1,500 like Netfabb Professional!
  More technically, this parametric 3D modeling program allows you to easily change the project by rolling back through the history of the model and editing the parameters.
  With the Cross-Section function, for example, you can look at the model from the inside and check the wall thickness. Very useful if you want to check your STL file for killer errors before printing.
 Once the files on the user's desktop are sliced, they can be directly uploaded to Octoprint with one click.
  It allows you to remove parts of a 3D model, merge two models into one, patch holes. If you need a program to modify models for 3D printing or some kind of "repair" work, MeshLab is the right choice.