3D printing modeling software reddit
makingmodels - 3dprinting
- Making 3D Models for 3D Printing
- CAD /CAM/ Parametric Design
- Sculpting
- Hard-Surface Modelling
- 3D Scanning and Photogrammetry
- Generative Design & Topology Optimization
- The importance of manifold
- Tutorials for goals
| This page is incomplete. You can help by expanding upon it. |
|---|
| If you've not contributed to this wiki before, some guidance and help can be found on this page: How to contribute to this wiki. |
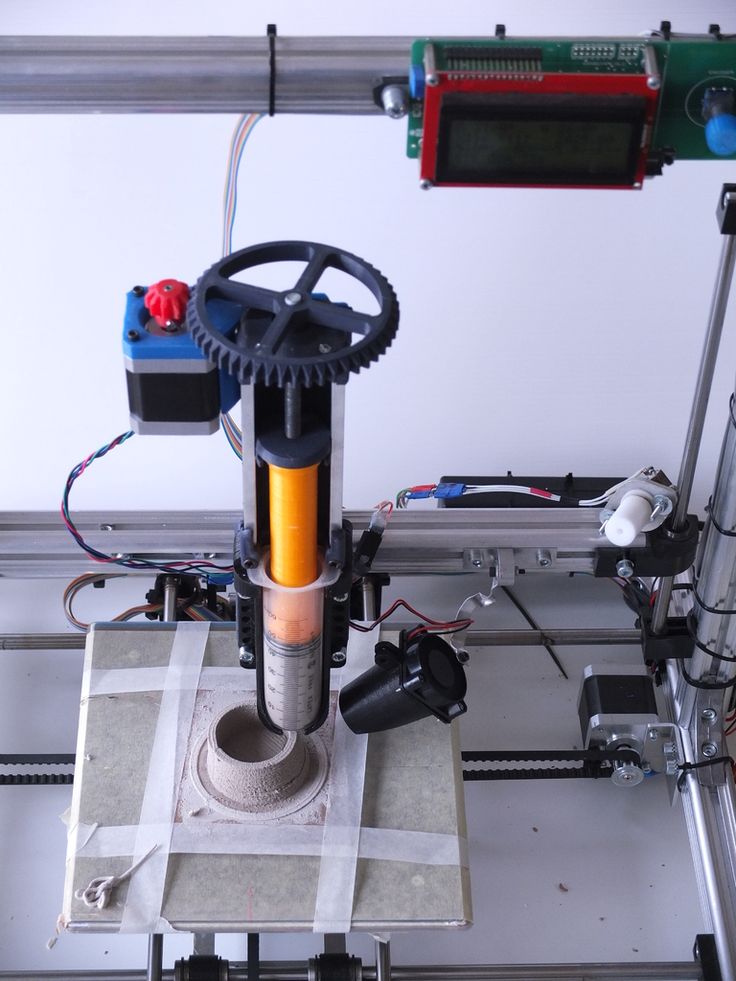
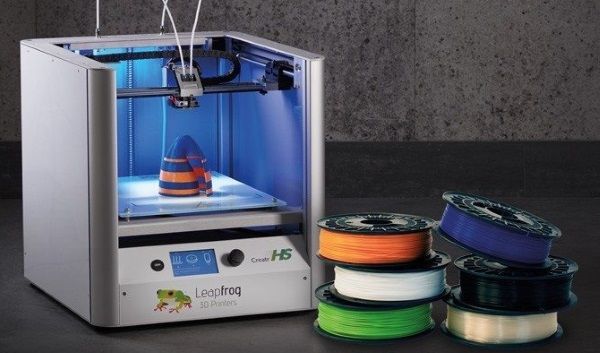
Can't find what you want online? Why not design and make it? Model-making software (for printing) is split into a few main categories, depending on your goal:
Full-resolution, printable copy here
CAD/ CAM/ Parametric Design is best suited to dimensioned objects, functional objects, fitted parts. Fusion 360 is the community favourite in this category (free for non-commercial use, startup exceptions available).
Some tutorials can be found here: Lars Christensen and Makers Muse
Sculpting is for making organic shapes, soft-surfaces, people, animals, terrain. Sculpt GL is the easiest (and free/open source) way to get started.
Hard-Surface Modeling is best for making non-functional inorganic shapes hard/ flat surfaces, controlled curves. Tinkercad is the easiest way to get started in this space, and Blender is another, more advanced (free/open source) way to go about making this style of mode. Blender Guru has made a good series of tutorials. 3D Printing Professor has created a series for the absolute beginner with a focus on designing for 3D printing.
Scanning and Photogrammetry are also popular methods of generating a 3D model from real life objects. The easiest to get started is using AliceVision.
Generative Design and Topology Optimisation utilise a computer to either generate or optimise a design based on various constraints such as load and fixing points.
These are just the top pics, more options are discussed below, please note that this list is not intended to cover every modelling application, only those that are free/popular with redditors. If you want a more detailed list you can check out the reprap software list or head over to /r/3Dmodeling.
This image explores many open source options, and /u/morphfiend put together a wonderful collection of tutorials for many of the programs discussed on this page.
CAD heavily excels with mechanical designs, where the object is defined by measurements, angles, tolerances, quicker to revision
| Program | OS | Price | Notes/Tutorials |
|---|---|---|---|
| Onshape | Browser | free for public documents with a paid option for private documents. | Some tutorials, Tech-Tips, and CadSessions |
| Fusion 360 | free for non-commercial use, startup exceptions available | Some tutorials can be found here: Make Anything, Lars Christensen, Makers Muse, Start with the basics, Quick Tips & Best Practices, Fusion 360 in 90 minutes, Autodesk Academy and Fusion 360 Parameters, how to make parametric Lego pieces in fusion 360 | |
| FreeCAD | free Open Source | Parametric CAD program in active development.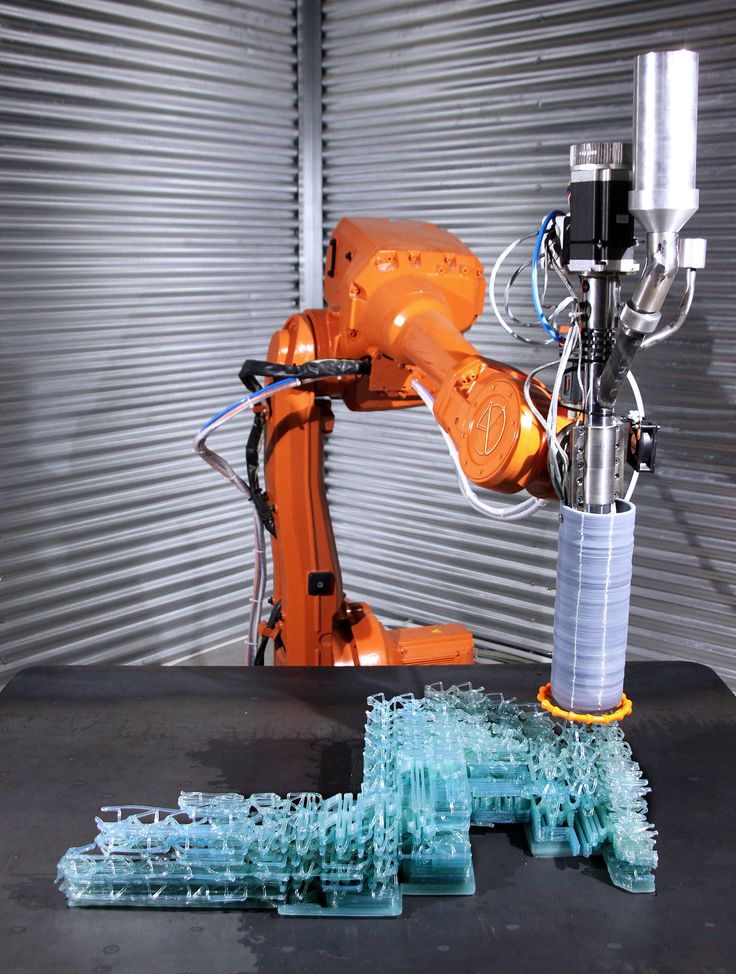 Works pretty much like Fusion360 but completely offline. Can be scripted with Python. Paul Randall, FreeCAD tutorials, cad1919, Invent Box Tutorials Works pretty much like Fusion360 but completely offline. Can be scripted with Python. Paul Randall, FreeCAD tutorials, cad1919, Invent Box Tutorials | |
| DesignSpark Mechanical | Free to use | mechanical modelling tool. | |
| OpenSCAD | Open source | Syntax based modelling (describe your model in a computer language, the computer renders it. Note: SCAD is not an NP-complete programming language). Cheat-Sheet, Beginners Tutorial, Paul Randall, | |
| SolidPython | Open source | Allows 3D models to be written as python programs, the output is OpenSCAD. The advantages of using python are that the full features of a modern language (including OO programming techniques) can be used. | |
| Autodesk Inventor | Natively supports STL's, but most often used for subtractive manufacturing methods | ||
| Rhino 3D | Windows, Mac | Paid | Tutorials: Basics, Preparing for 3D Printing, Prepare your model for 3D Printing with Rhinoceros, Advanced Rhino and Grasshopper recorded college classes |
| STLBuilder | Open source | Generate models using mathematical formulas for the position of points in space.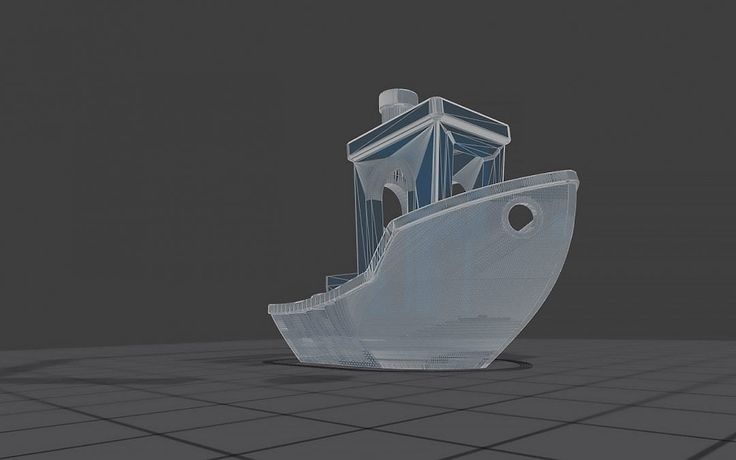 Then combine the model parts in a Javascript (the code blocks themselves are again model parts + recursion supported). STL download. Then combine the model parts in a Javascript (the code blocks themselves are again model parts + recursion supported). STL download. | |
| Solid Edge | Windows | Community Edition is free for non-commercial use. | Has the best symmetry and feature recognition for editing STEP files from other sources. Most editing is done in 3D space instead of traditional Sketch->Feature workflow |
3D sculpting, think of having a virtual ball of clay, your pinching it, smoothing it, pulling it to make something heavily organic looking such as a person, a creature, etc
| Program | OS | Price | Notes/Tutorials |
|---|---|---|---|
| Sculpt GL | browser | Free digital clay sculpting | |
| Sculptris | Beginner/kid friendly.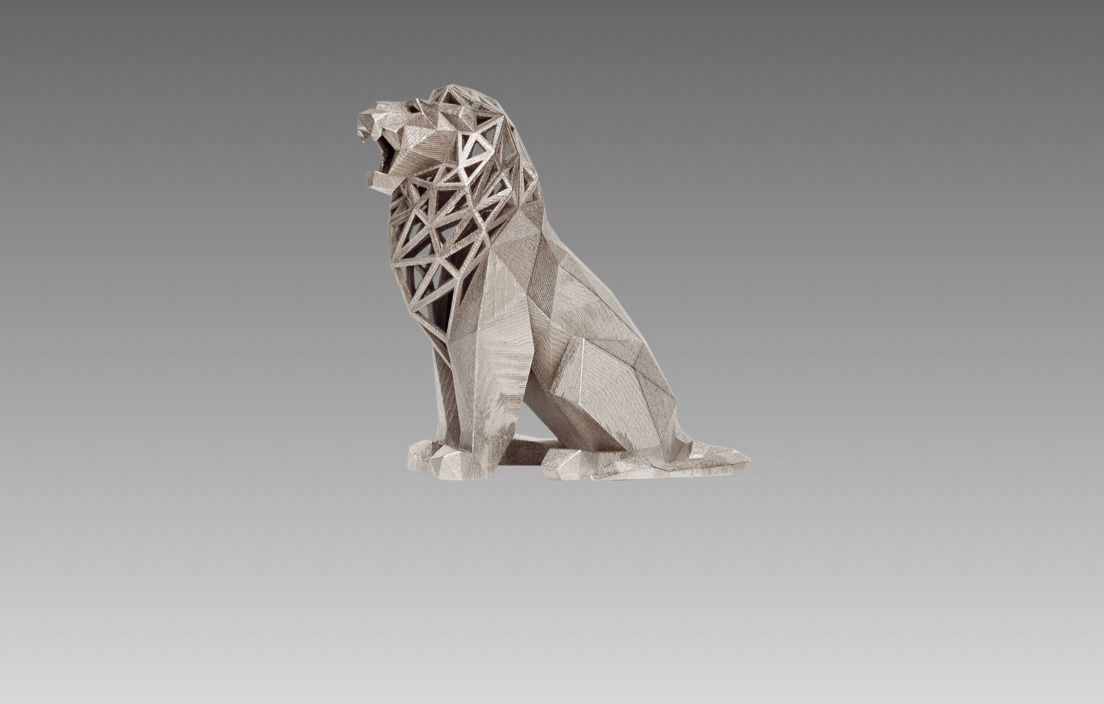 pixologic (near the bottome of the page), Mr.Brooks, Sculptris cheat sheet pixologic (near the bottome of the page), Mr.Brooks, Sculptris cheat sheet | ||
| Meshmixer | Free software to combine/modify models, generate custom support structures, and sculpt as though with clay. [Maker's Muse- https://youtu.be/C9VDKb3W4qA), Teaching Tech, Sculpteo | ||
| ZBrush | [ZClassroom- https://pixologic.com/zclassroom/), [Zbrushtuts- http://zbrushtuts.com/), [Zbrush for beginners- https://www.youtube.com/watch?v=PO--0h8XHiw), [Edge-CGI 3D tutorials- https://www.youtube.com/user/Edge3Dcgi/playlists), [Twitch for Pixologic- https://www.twitch.tv/pixologic), flippednormals | ||
| Blender | free and open source | Grant Abbitt -2.7, YanSculpts -2.7, Flipped Normals -2.8 | |
| 3D-Coat | alienminefield, 3dcoat learn, gamedev the pipline, Pluralsight (Paid) | ||
| Strata Sculpt3d | browser | free | Appears to be a spin-off of SculptGL? |
| Various Programs | Gnomon workshop (Paid) | ||
| Sculptura | Mac, IOS | Paid (low cost) | robust clay sculpting. Particularly recommended with iPad pro+ apple pen Particularly recommended with iPad pro+ apple pen |
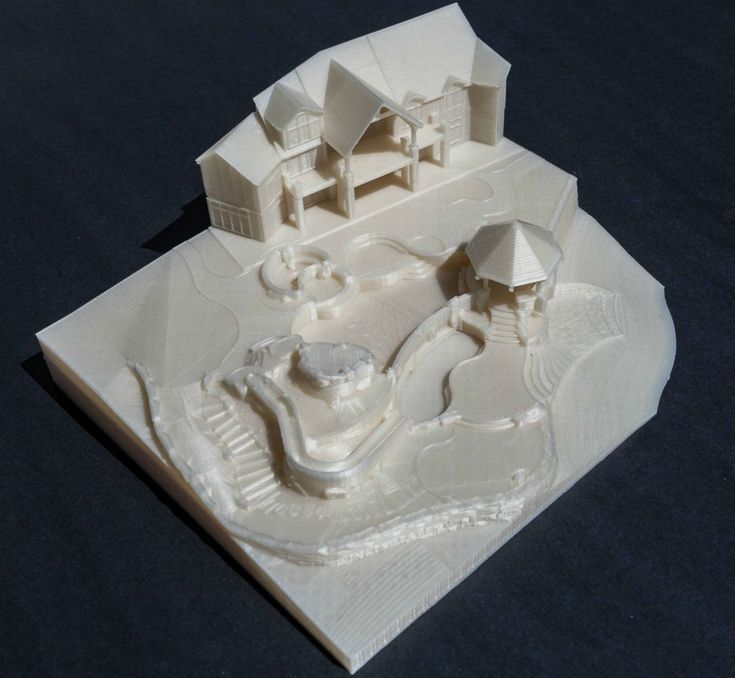
3D modeling when you think of those interesting artistic buildings or those pieces of terrain for on a game table, 3D modeling was behind the scenes, not as heavily defined process as CAD
| Program | OS | Price | Notes/Tutorials |
|---|---|---|---|
| Tinkercad | Browser | Beginner/kid friendly | |
| Blender 2.7 | free and open source | BlenderGuru, Blendtuts, CGCookies Blender Basics,GameDevTV Complete Blender Course(Paid),Blender Tutorial, Blender Fundamentals, Making Spiralised Vases | |
| Blender 2.8 | Fundamentals, gabbit comprehensive beginners guide, YanSculpts, BlenderGuru 2. 8, CG Masters (Paid), 3D Printing Professor, flipped normals, making a lightsaber, 3D Printing Professor Absolute Beginner's Guide 8, CG Masters (Paid), 3D Printing Professor, flipped normals, making a lightsaber, 3D Printing Professor Absolute Beginner's Guide | ||
| Orchard | Broswer | Beginner/kid friendly | |
| 3D Builder | MS 10 | Beginner/kid friendly piece of software which is also great for cutting or joining models. Great auto repair functionality and can convert images (such as logos) into 3D models | |
| Sketchup | Browser | Sometimes produces non-manifold models | |
| Makers Empire 3D | iPad/Android/Mac/Win. | Free to use with a premium option. | Touch-optimized software - usable by students as young as 4. |
| 3DS MAX | TopHATTwaffle, Autodesk 3ds max learning channel, Autodesk getting started in 3ds Max, Edge3Dcgi, Arrimus 3d |
3D Scanning and Photogrammetry are used to create digital 3D models directly from real-world objects.
| Program | Style | OS | Notes/Tutorials |
|---|---|---|---|
| Meshroom/ AliceVision | Photogrammetry | Windows, Linux | Tutorial, video tutorial |
| 3DF Zephyr | Photogrammetry | ||
| Lhun's solution | Photogrammetry | Windows, Linux | |
| FabScan | Laser | Raspberry Pi | Open source raspberry pi based laser scanning system |
| Strata Foto 3d CX | Mac, Windows | Free trial | |
| OpenScan | Lowcost, open source DIY scanner | ||
| Regard3D | Mac | ||
| AAScan | Photogrammetry | Android | Thingiverse page.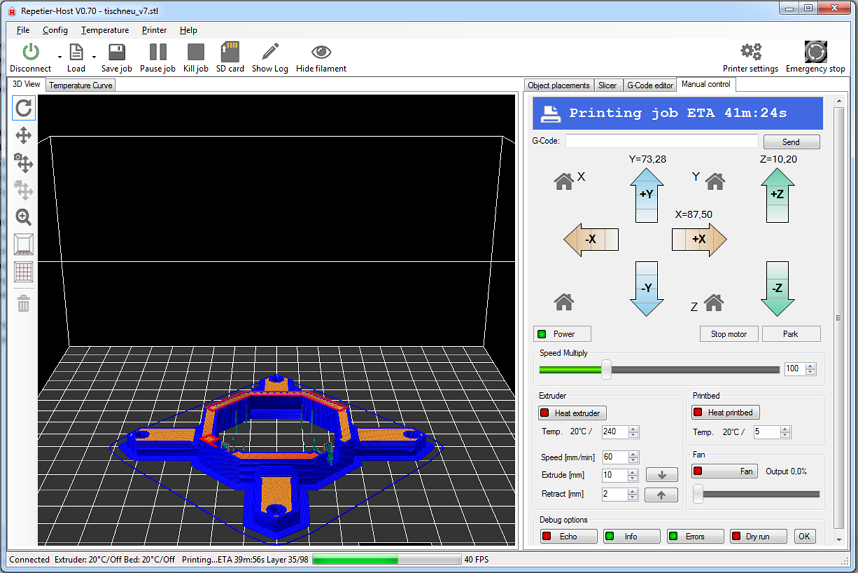 App and printable files made by /u/redditNewUser2017 App and printable files made by /u/redditNewUser2017 |
Generative Design and Topology Optimisation utilise a computer to either generate or optimise a design based on various constraints such as load and fixing points.
| Program | Style | OS | Notes/Tutorials |
|---|---|---|---|
| Fusion 360 | free for anyone earning less than 100k per yr | ||
| Altair | free for students |
When selecting a model you need to ensure they are manifold, meaning they don't have tiny gaps or reversed faces. Here and here are guides on fixing them. You can also try these free, automated services; Netfab, and Microsoft's tool to repair models. Or try importing it into Sculpt GL and voxel remeshing (manifold tris) under the topology category.
- Convert raster graphic or logo like a JPG or PNG into 3d model. Non-windows users can use this site
- Making Spiralised Vases
- Make topographic maps by using the height maps generated by jthatch and then importing the image into cura.
- Converting brain scans to stls. Tutorial and can also use InVesalius to convert the DICOM file
- Snap fit joins
- How to render sliced models
- Splitting large/difficult models to make them printable and adding connectors can be done in Meshmixer, and Netfab
Reddit User 3D Prints Wrist Brace After Breaking Hand in Cycling Accident - 3DPrint.com
When my oldest son was five or six, he fell down and injured his knee while running poolside in Florida. Although it seemed overkill, I followed obediently as the doctor referred me to a pediatric orthopedist. I will never forget the scene as I opened the door to his office and my two little ones peeked in and then looked back at me, eyes wide with hesitation upon seeing at least 30 seats, virtually all filled with little boys bearing broken arms in a variety of colorful casts. I looked around in horror, seeing my future, imagining falls off of bikes and out of trees and long hours in the emergency room.
As we left that day, the doctor laughed waving my two spirited little boys out the door, and said, “Oh we’ll be seeing you again!” That comment alone may have caused me to hover more than I should have, but up to this point it’s worked. So, while my children thankfully have survived without any broken limbs or even anything close, growing up I had a sprain, my brother had a broken arm, and of course, there was my best friend coming back from skiing in Vail over Christmas with the stereotypical broken wrist and the high school boyfriend with the leg broken during a soccer match (I’m still holding it against him that another girl signed his cast first in ancient history class).
In most of those cases, there seems to be a mysticism about the doctor’s office and ‘what they are going to do.’ From the X-rays and the serious discussion over what’s happened to a very important limb, to the slings and plaster or fiberglass casts, it’s almost exciting—until the pain medicine wears off. When you think about it though—and perhaps watch a few too many adventure movies—common sense would say that in a pinch you could pull together something on your own.
That’s exactly what Reddit user 3driven thought, upon breaking a fifth metacarpal (the pinkie). 3driven, or Paavo Pirhonen of Helsinki, Finland, is a radiographer and electrical engineering student. While any break is extremely painful, there are obviously much more serious fractures. Not to downplay 3driven’s injury, but if you were going to attempt to 3D print your own brace, this is probably one of the better breaks to experiment with. An active cyclist, 3driven broke the hand after colliding with a car.
“I was cycling back home from work and some guy decided to cross the main cycling path with an attitude ‘anyone that comes from the left side will stop for me.’ That took me by surprise and I hit his rear tire and fell on my left hip and both hands,” said 3driven on Reddit. “I don’t exactly remember how I didn’t notice him.
But I do remember flying in slow motion after the hit. Luckily only left hand broke with some bruises and blood here and there.”
3driven 3D printed a brace and wore it for four weeks. Originally being given a brace that was very uncomfortable and even painful, 3driven was highly motivated to make a device that would be more tolerable for a month—with the only feature missing being that of support bars. Bandages worked just fine to help add rigidity to the material, and were only needed for several weeks as the hand healed so quickly—and, notably, quite well. The first more traditional brace also served as a model for the improved 3D printed one.
“…the design was approved by my treating doctor,” stated 3driven. “I also work in the field myself.”
“My orthopedist approved my design saying that if it feels good, then it’s good. The fracture was stable and thus a fixed cast wasn’t needed. He also said that it was hard to prevent the healing process.
So it was safe.”
Using Autodesk Inventor Professional 2016 and then 3D printing with PLA, the brace was effective, but not durable in terms of holding up during activities like taking a hot bath.
“… the molding part with PLA was a time consuming process,” said 3driven. “It wasn’t enough to soak the PLA in ~80°C water, but I also had to use heat gun. Eventually I used (somewhat) heat protective clothing to help the molding process while the brace was on my hand. Softened the edges to make it more comfortable.”
“In radiotherapy they use plastics that mold better and slower on ~70°C so maybe a specialized plastic would suit this need more properly.”
With this particular design, also shared on Thingiverse, 3driven was able to remove the brace daily, wash it, and even go swimming. The ‘medical maker’ is planning on exploring the use of other materials in refining the design further, however, and even making some braces for other types of fractures.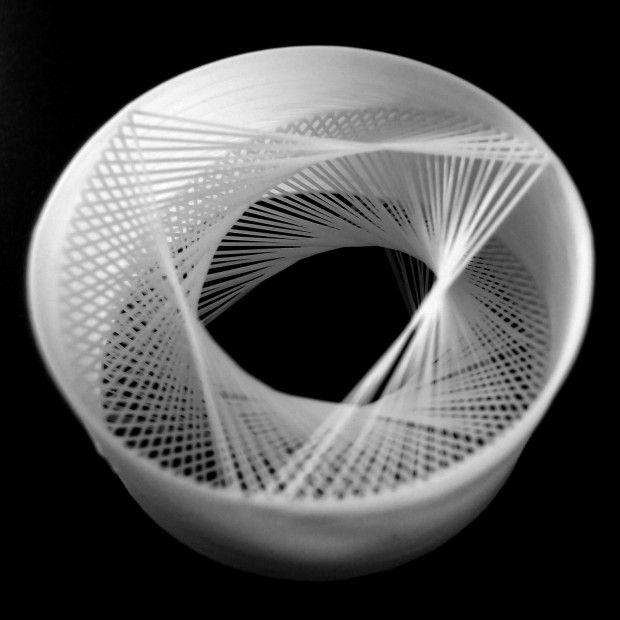 3driven received a great number of comments on the Reddit post. While most were concerned with the materials used and some even had some suggestions, such as using T-Lyne from taulman 3D or other alternatives, a number of the Reddit users commenting were concerned about the medical angle.
As stated, 3driven had the okay from a doctor, but concerns were still raised about individuals using an open-source design to make a brace, perhaps without attaining a doctor’s approval. One would hope that people are adult enough to take care of themselves properly, but as one nurse commented, many homemade medical devices do go ‘horribly wrong.’
This isn’t the only success we’ve seen, however, in ‘homemade medical devices,’ as resourceful 3D printing enthusiasts have taken it upon themselves to make everything from customized scoliosis treatments to 3D printed orthodontics and even orthotics. And while there may be medical concerns, those acting independently to make such devices enjoyed the rewards of great affordability, previously unheard of customizations, and self-sustainability in design, production, and turnaround.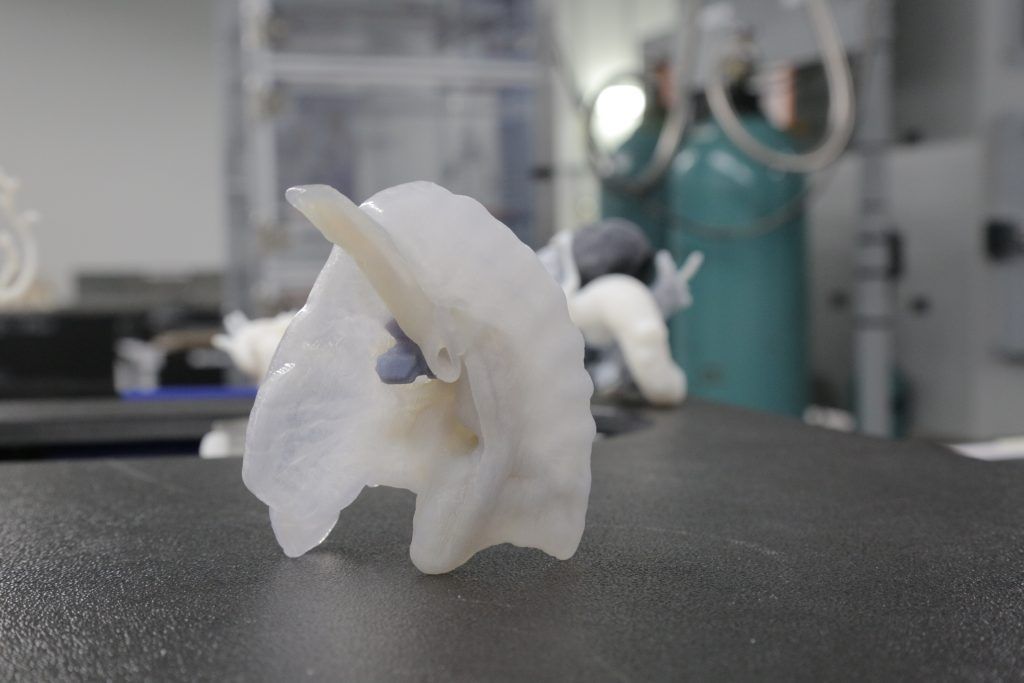 Is this something you would be comfortable with doing? Let’s discuss over in the 3D Printed Hand Brace forum at 3DPB.com.
Stay up-to-date on all the latest news from the 3D printing industry and receive information and offers from third party vendors.
Tagged with: 3D printed arm brace • 3d printed brace • 3d printed braces • 3d printed medical device • 3d printed splints and braces • 3D printed wrist brace • 3d printed wrist braces • autodesk inventor professional 2016 • medical 3d printing • PLA 3D printing filament • reddit
Please enable JavaScript to view the comments powered by Disqus.
A bit about 3D at the request of the workers: Pikabu
In a recent post (https://www.reddit.com/r/Pikabu/comments/ffzgke/%D0%B2_%D1%85%D0%BE%D0%BB% D0%BE%D0%B4%D0%BD%D0%BE%D0%BC_%D1%81%D0%B5%D1%80%D0%B4%D1%86%D0%B5_2_%D1%82%D1% 8B_%D0%BC%D0%BE%D0%B6%D0%B5%D1%88%D1%8C_%D1%83%D0%B2%D0%B8%D0%B4%D0%B5%D1%82% D1%8C_%D0%B2_%D0%B3%D0%BB%D0%B0%D0%B7%D0%B0%D1%85/ ) about reflections in the eyes of a cartoon character, I briefly touched on the topic of the fact that for 3D this is not at all achievement and dragging the norm. The comment aroused interest and some rebooters asked for a post. As I already said, a tri-dash is not a writer, he has polygons.
To begin with, I'll probably just touch on the topic of how 3D lives now, the main directions and opportunities, if interest continues, I'll tell you more.
So, what's up with tri-dash people. And tridashniks have the following areas of work there, at least I singled out 5 of them for myself: visualization, modeling, texturing, animation, special effects. Now briefly for each direction:
- visualization in the vast majority of cases is used for interiors / exteriors - in essence - sims at maximum speed, the visualizer does not need to think about how to model this or that sofa or bed ... He does not need to model anything at all , except for the room box itself, after which he simply begins to fill it with finished furniture models, adjust the light, sometimes edit or create textures to fit the finished model into the overall design. With exteriors it’s more complicated, but the principle is the same - you only need to model a small part on your own (for example, a territory and a house), the rest is filled with ready-made models, which are a dime a dozen on paid (and not very) sites. In general, the case is interesting, but personally I quickly got tired of it. Fun fact: 99% of all interiors / exteriors that you see on the Internet, in photos, in advertising, etc. are visualization - because it is easier than building an idea in reality, setting up a light, calling a photographer, and often the only possible option (when you need to present to the customer a view of a house that has not yet been built, for example). The second interesting fact is that creating one such image on an average computer at the moment can easily take a couple of hours.
- modeling. What it is - there is no point in telling, the essence is clear - you move polygons in order to create what you planned to create. The main feature of modeling is that there is no single package in which all trideshniki would work.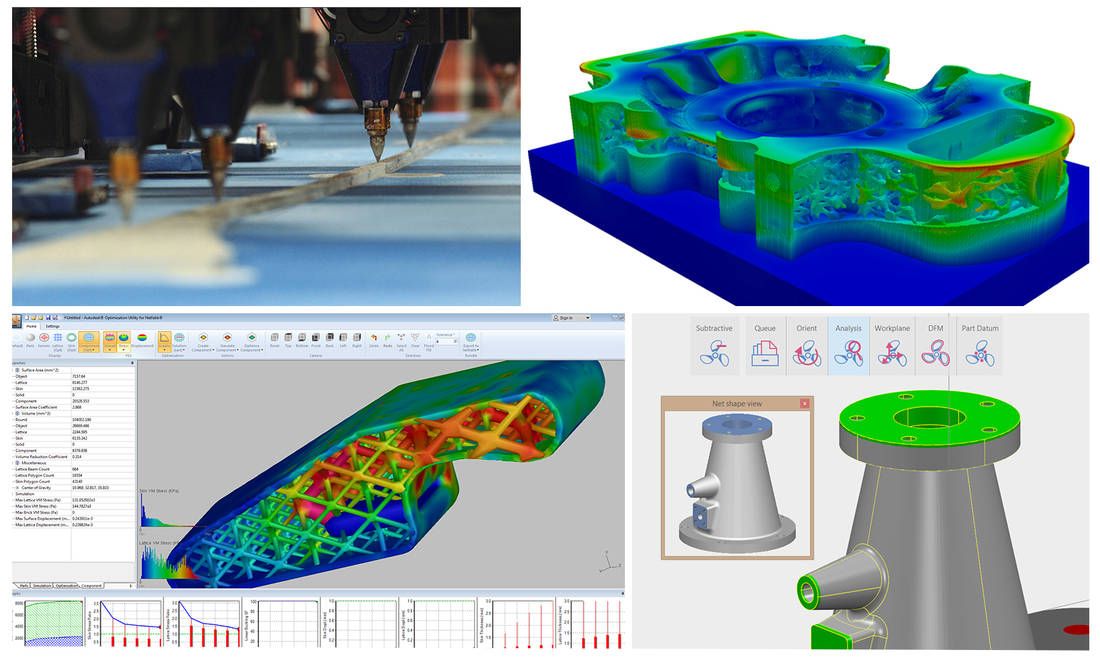 There are currently 3 major players on the market: Autodesk 3D studio Max, Autodesk Maya and Blender. The latter, unlike the first two, is free, is a relatively fresh, actively developing product, favorites of beginners and pros, and is a catalyst for srach in the comments when it is mentioned. The question may arise, but what for Autodesk 2 programs for 3D modeling? The answer lies on their website:
Still not clear? Read the description carefully. In one case, modeling comes first, in the second, animation. That's the whole difference. And you can sell both. If you dig deeper, both programs do a great job with all this (the areas of use do not matter). Personally, I work at Max, although I'm thinking of moving to Mike, because she is more common in vacancies (unless, of course, we are talking about visualization).
There are also more specific modeling programs, for example:
- programs for 3D sculpting - Zbrush, 3D Coat, Autodesk Mudbox - powerful tools for organic modeling, a distinctive feature - instead of polygons, they use their own algorithms for calculating the position of geometry in space, thereby limiting the freedom of creativity only to the power of the computer behind which the work takes place.
- Marvelous Designer fabric simulation software - used to simulate realistic fabric, be it clothes, bedding, curtains, etc.
- Yeti, Mari - programs for simulating realistic behavior of hair, fur, wool, feathers, etc.
Author Yuri Dulich, https://render.ru/ru/articles/post/17106
Modeling itself can be divided into 2 large areas: game development and cinema/advertising. Fundamentally, these areas differ in that in cinema and advertising, priority is given to a beautiful picture to the detriment of speed, while in games, the picture may contain simplifications for the sake of optimization and smoothness. Let me explain in numbers: the rendering of one second of a conventional Pixar or Disney cartoon can take several days, and in games, as we all know, it is necessary to display a real-time picture at least 30, and preferably 60 or more frames per second. Do you feel the swing?
- creating effects - VFX (from the English. Visual Effects) - smoke, fire, water, explosions, destruction, the guts were pissed off - all this is being created here. The main application in films and advertising at the stage of post-production. I don’t know much about this area, but the principle is that the software simulates an explosion, the destruction of a building, columns of water, after which it is superimposed on a pre-recorded video
It is clear that such things need to be viewed in dynamics, so here is an example of VFX effects in Ghost Recon Breakpoint https://www.youtube.com/watch?v=fCh76wQ8mt0
- animation creation - everything is also clear from the name. The essence of animation boils down to the fact that first a virtual "skeleton" of the character, called a rig, is created with a special logic of work, thanks to which subsequent animation is possible through the interaction of "bones" with each other and the environment.
- creating textures. Texturing is not as simple a topic as it might seem. At the moment, the software allows you to generate cool textures in just a couple of clicks, but really cool materials are obtained after many hours, or even many days of work on moving the sliders and catching that very glare and that very texture.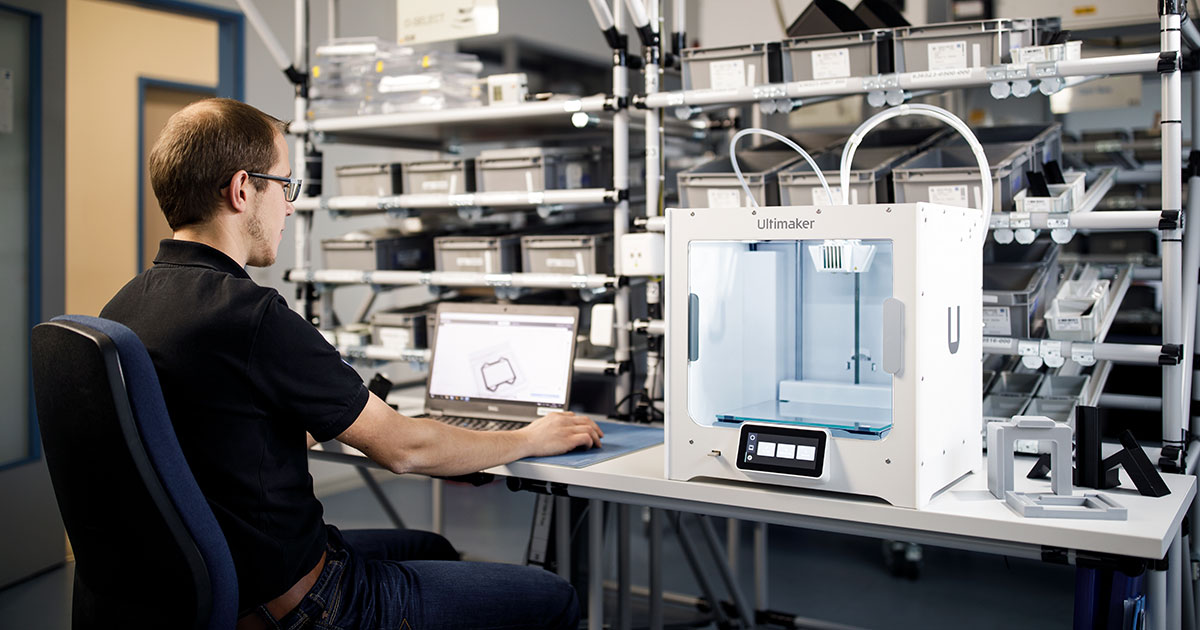 The core software is Adobe's Substance package, which includes Substance Painter, Designer, and Alchemist. The basis is the Painter, since the texturing itself takes place in it, the Designer and Alchemist are designed to create materials that will be used in the Painter. There is also the Quixel Mixer package and the 3D Coat already mentioned above, which also give good results, but still inferior to Substance.
As you have already understood, these directions often intersect, and one way or another, a tridash player must understand how each of them works. It also follows from this that to create any model, 2 or more software is used. For example, the above ostrich was created according to the following scheme: a base mesh was created - sculpting was done (in particular, texture on the legs was added) - texturing was done - feathers were created - animation was created to give the ostrich the desired pose - a render was made. Each step can be performed in a separate program and most of these steps were created in specialized software.
I deliberately do not go into details so as not to drag out an already lengthy post. My goal is just to pull back the curtain on this sphere a little to show everything that remains behind the scenes. I don't claim to be an expert, just an enthusiastic amateur. Obviously, I'm not the only tri-dasher here for almost 100k rebutyans - colleagues - correct, supplement, if you lied somewhere.
If there is interest, I can periodically issue similar posts. In particular, I myself am mainly engaged in the creation of models for games, if anyone is interested in the nuances of this process, I can tell you. Also, if anyone is interested in looking behind the scenes of creating games, welcome to ArtStation ( https://www.artstation.com/ ) - one of the largest 3D sites, with an emphasis on game development. You can get stuck for a long time, looking at models from familiar games.
Thank you to everyone who made it to the end!
100 days of 3D design. How I Learned 3D Modeling in 100 Days
It was a rainy weekend in Seattle.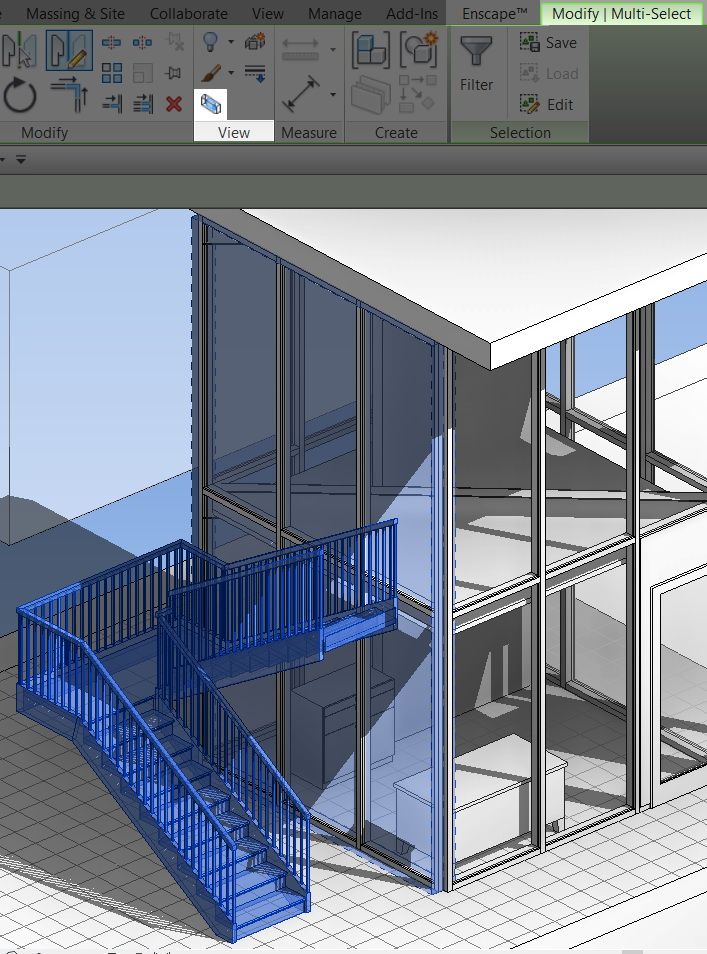 I drank some tea, watched a YouTube video and downloaded Blender 2.79. A year later, I completed my sixth 100 day project, 100 Days of 3D.
Since 2015 I have been working on 100 day projects. My past projects were: 100 days of doodles, 100 days of lettering, 100 days of watercolor, 100 days of vector illustration, and 100 days of motion design.
My previous projects in the 100 Days series
Although all of my previous projects were done in 2D, I have always loved the beautiful 3D work on the web. I looked at them with reverence and wanted to be their author.
As a product designer, I believe that 3D skills can broaden my horizons and open up opportunities in VR/AR, indie games and 3D printing.
In 100 days, I learned how to create amazing 3D works. I used a free program called Blender. It has an extensive feature set and a rapidly growing online community.
Below is my workflow, my 100 day journey of advice and reflections on the project.
My workflow
3D art is very technical. For this project, I developed a workflow and aimed to complete it in 2-3 days.
Step 1: Ideation
I looked at my collection of YouTube videos and Pinterest boards for inspiration. When I had an idea, I sketched it out on paper and started looking for a reference photo.
Collection of ideas and references
Step 2: Modeling
I modeled the 3D object in Blender using a technique called "Box Modeling". The process starts with a basic element (like a cube) that I've improved through editing.
Box modeling of Chinese dumplings
Step 3: Materials
I applied materials to the 3D model to achieve a cartoony look.
Material application in Node Editor
Step 4: Lighting
I used a lighting setup called "three-points lighting". It illuminates the object with three different light sources at different angles.
With three-points lighting you add a key light, fill light and backlight
Step 5: Rendering
I rendered the final scene using Blender's built-in Cycles engine. Sometimes, to give the final touch, I edited the image in Photoshop.
Final render
My 100 Day Journey
Day 1-5: Introduction to Blender
I spent the first few days learning how to navigate the Blender interface.
I created my first 3D model in Blender - a coffee cup - following a 10 minute tutorial from tutor4u.
Coffee cup
Then I created the 3D donuts by following the Blender Guru's beginner's guide. This series of lessons was so helpful that I often returned to it.
Donuts
Tip
Blender is a program with a complex keyboard shortcut. I recommend printing them out and memorizing common hotkeys that will allow you to work faster.
Day 6-70: Climbing the learning curve
Once I got comfortable with Blender's interface, I applied the following methods to climb the learning curve.
Method 1: 1-on 1-off
I used a method called "1-on 1-off" by Blender Guru:
- 1 lesson project
- 1 project created entirely by myself
- Repeat
I created a pink cupcake following Mr.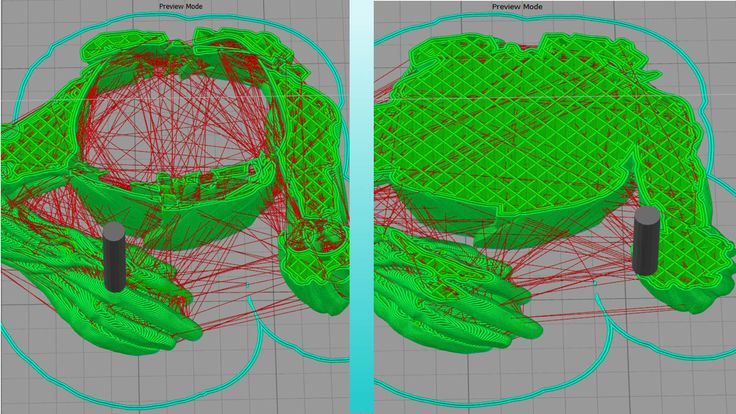 Sorbias. The next day I made my own blue cupcake.
Cupcakes
I created a glass of beer following the instructions from Blender Guru. Later, using the same methods, I made a cocktail.
Beer and cocktail
I learned how to simulate physics by following a tutorial by Oliver Villar. The next day I made a batch of popcorn.
Chocolate and popcorn
The 1-on 1-off method helped me intentionally reapply the methods I had learned earlier. It also motivated me to create something new on my own.
Tip
Be patient. The first render is not always good. It takes time to adjust the material and lighting to achieve the desired aesthetic.
Method 2: 1-Hard 1-Easy
Learning 3D can be mentally exhausting. To prevent burnout, I alternated between heavy and light projects.
I spent 3 days working on a snow globe following a complicated manual. After that, I created a simple popsicle model.![]()
Snow globe and popsicle
I spent 3 days making a minion. The next day I made a small pig.
Minion and pig
Advice
When things weren't going well, I found it easier to delete the unfinished work and start over - fresh start helps solve problems.
Method 3: Work on different topics
Modeling one type of object all the time can be boring. To make it interesting, I worked on different topics.
I created a series of abstract artworks following Ducky 3D's instructions. They introduced me to new techniques that I would never have known otherwise.
Abstract series
When I started to fill the apartment with houseplants, I decided to create a series of works.
Houseplant Series
I experimented with a low poly style following the instructions provided by Polygon Runway and Tiedie.
Land and Planet
Tip
Creating Abstract 3 D -objects as it does not require extensive modeling or texturing is a good starting point for beginners.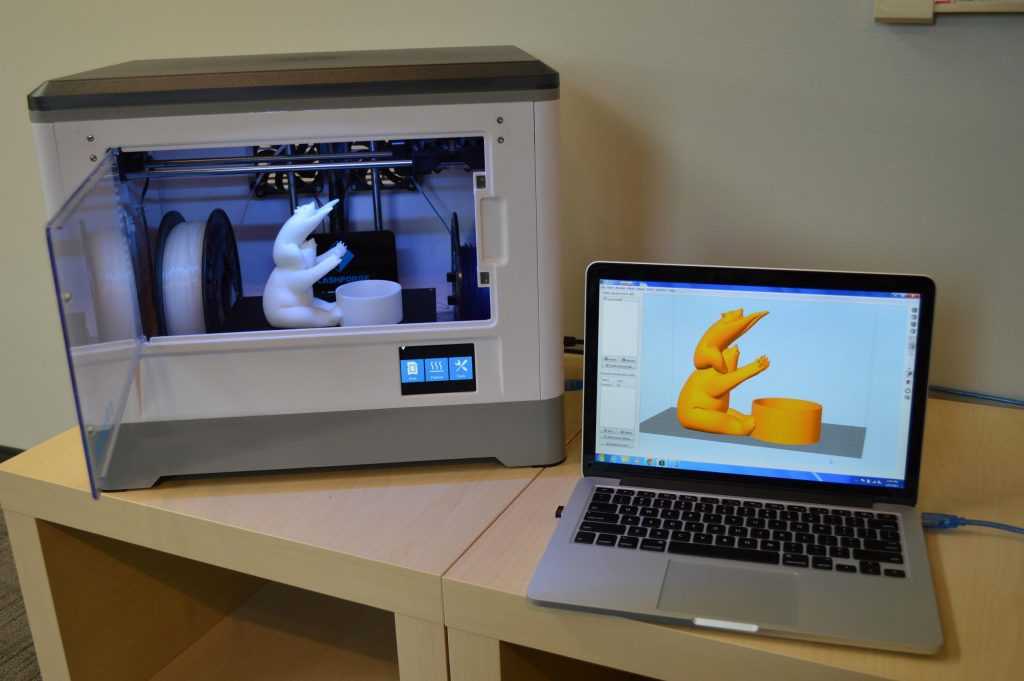
Method 4: attending classes and reading books
In the middle of a 100 day project, I signed up for the Blender Mesh Modeling Bootcamp. It solidified my knowledge and helped connect the dots.
I spent the weekend reading The Pushing Points Topology Workbook. This book taught me the best techniques for managing mesh topology.
I also discovered the Blender digital magazine published by the Chinese Blender community. I enjoyed reading a wide range of 3D case studies.
Tip
Store your knowledge and frequently performed activities in a notebook so you can return to them and work faster.
Days 71-100: Create your own work
As I became a more experienced Blender user, I had more creative freedom to bring my ideas to life.
Some of my work was inspired by my favorite games and movies.
Raven Man (Inspired by Monument Valley game)
Enchanted Rose (Inspired by Beauty and the Beast)
100 Days of 3D - Balloon House (Inspired by the animated film Up)
I also created a series of works with cartoon characters.
Gunther (Adventure Time Cartoon)
Cat (The Legend of Hay Cartoon)
Ghost
I redid my watercolor drawing of a whale from my previous 100 day project.
Whale Mountain
I love the low poly style so I created a series of floating islands.
Island with Low Poly Tutorial)
Island with a beacon (inspiration was Jeremy)
Island with a watchtower (inspiration was the game Firewatch)
9000 9000 V. At the end of this project, I redid my very first 3D model.
Dream in a cup
Tip
To overcome fear and start a complex scene, I always told myself to create a simple object first. The main thing is to get started.
Reflections
1. Create something yourself
In the beginning, I relied heavily on tutorials, manuals, and lessons. As I became more familiar with Blender, I forced myself to do things on my own.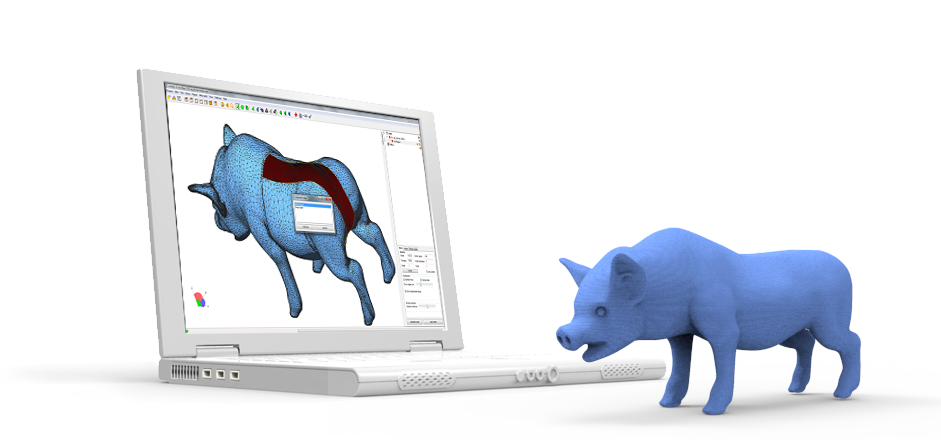
Building something on my own was much more difficult than following a tutorial. I spent hours looking for things and experimenting with different techniques. I often felt frustrated because I could not achieve the desired result.
However, as difficult as this process is, I have learned some of the most useful techniques.
The real learning happened when I switched to "problem solving" mode and tried to figure things out on my own. Passive learning forms knowledge. Active practice builds a habit.
2. Learn only what you need
As a beginner, I was amazed by the sheer amount of theoretical knowledge in the 3D industry. The more I learned, the more I realized that there was still a lot to learn.
In order to navigate the learning process, I took a "learn only what you need" approach.
Learning only what I need means I don't have to learn everything to feel good or get started. Instead, I need to learn only the necessary knowledge to achieve my goal.

Since my goal was to create simple 3D cartoon-like objects, I skipped the advanced texture tutorials and focused on learning basic modeling techniques. As a result, I was able to focus and complete this project.
3. Done is better than perfect
By the end of the project, my expectations increased. I hesitated to finish the work, fearing that it would not be perfect. I also had trouble getting started on a new model. I was afraid that the new model would not be as good as the previous one.
As I wrestled with this fear of imperfection, I stumbled upon the words of Elizabeth Gilbert: "A good enough novel is better than a perfect novel painstakingly crafted but never finished."
To paraphrase her words:
A reasonably good work of art is better than a perfect work of art carefully crafted but never finished.
Realizing this, I recognized the imperfection of my work, called it finished and moved on to the next model.