Sanding down 3d prints
A Comprehensive Guide to Sanding your 3D Prints
3D Insider is ad supported and earns money from clicks, commissions from sales, and other ways.
A project fresh off a 3D printer may look great from afar, but a closer look will likely reveal an uneven surface characterized by visible layer lines. Removing these rough details is practically a requirement if you’re looking for 3D prints with a more professional finish. This is going to take a bit of work.
One of the simplest options for post-processing, albeit tedious and labor-intensive, is sanding. Simply put, you take a piece of sandpaper and go to town on the surface of that finished 3D print. You’ll have to be a bit more refined, however, depending on what type of filament material you’re working with. Before you start sanding your 3D print, check out this detailed guide that we have prepared.
Which filament materials can be sanded?
If you’re looking for that professional look, the first thing you need to know is that not all filament materials take kindly to the mechanical smoothing process of sanding. Sandpaper basically grinds the surface of the print, removing a good deal of the plastic to produce a smooth surface. Thus, the hardness and density of the material play a role in how easily it can be sanded. Here are some of the filament materials that are good candidates for sanding:
PLA
Sanding is the go-to option for smoothing PLA prints, mostly because there really are no alternatives. It’s also one of the easier filament materials to sand because of its low strength characteristic.
The main challenge when sanding with PLA lies with its low glass transition temperature. Since the friction produced by sanding can generate significant amounts of heat, it’s possible to sand PLA so vigorously to result in deformation. The best way would be to take it slow and apply very light pressure.
PETG
PETG is a bit more flexible compared to ABS and PLA. This ductile or flexible nature means that PETG is a lot harder to sand. Still, sanding of PETG prints is easier than any of the alternatives – either heat treatment using a heat gun or a solvent bath using toxic solvents.
In terms of quality, sanded PETG prints are at par with any other filament material. PETG is a bit more heat-stable than PLA, so you won’t need to treat it as carefully during sanding.
ABS
Despite the acetone vapor bath method being the preferred technique for smoothing ABS prints, ABS actually reacts to sanding very well. ABS is known as a high-strength and wear-resistant material, so it’s going to take quite a bit of effort to grind down its rough features.
The best thing about sanding ABS is that it’s very stable when exposed to high temperatures. If you’re sanding by hand, it would be near impossible to generate the amount of heat that would lead to the deformation of ABS. This is fortunate because you’re likely going to need a lot of pressure to succeed in sanding ABS.
Composite PLA
By far, the easiest material to sand is composite PLA. These are basically PLA filament infused with solid materials such as wood, metals, marble, or carbon fiber.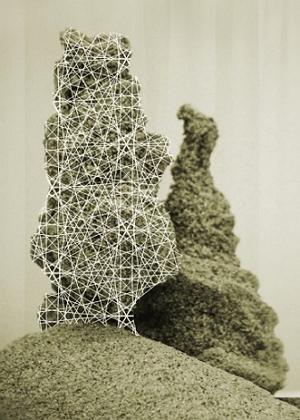 Composite filaments are extremely popular because of their unique visual appeal and appearances the defy the typical ‘plastic’ look.
What makes composite PLA filaments easy to sand is the fact that they retain the ease with which PLA can be sanded but are much less prone to deforming. Some of the composite filaments look downright gorgeous when sanded, especially those infused with wood powder.
If there’s a filament that’s impossible to sand, it would be the truly flexible ones like TPU.
A step-by-step guide to sanding 3D prints
Regardless of the material, the basic sanding process will take you through the same steps. You may have to adjust how much time you spend on each step as necessary. The idea is for you to move on to the next step only if you’re already satisfied with the results of the step you are currently in. All in all, expect to spend anywhere between two to five hours sanding a single 3D print depending on its size and the filament that you used.
Step 1: Prepare your materials
Much like any DIY project, you can save yourself a lot of headaches by preparing all the materials you are going to need before you start. You might not need all of these but it’s always better to over-prepare.
- Needle nose pliers
- Cutting pliers
- X-acto knife
- Chisel
- Goggles
- Gloves
- Respiratory mask
- Sandpaper (120, 220, 400, 800, 1200, 2000, 3000 grit)
- Plastic bin large enough to submerge your print
Step 2: Prepare your 3D print
Before sanding your 3D print, you need to remove any extraneous features on the model from the printing process. This includes support structures, mouse ears, or any rafts or brims that you had to use to help with bed adhesion. There’s also the fact that you have to be able to remove your finished 3D print from the bed.
The safest way to lift your print from the bed is to simply allow it to cool down to room temperature. In most cases, this cooling effect is enough to help the base layer pry off from the print bed with a moderate amount of force. You can also try to very carefully insert a flat chisel between your print’s base layer and the print bed. This is going to be harder if your print has a large contact area with the print bed or if you used a lot of support structures.
Speaking of support structures, removing them will probably take your whole arsenal of cutting tools. From experience, the two types of pliers and the X-acto knife should be more than enough. Take care not to cause any damage to your print while removing support structures – this happens more often than you would think. As a rule of thumb, it is better to leave very small nubs from the supports as you can sand them off later than to risk cutting off too much and leave visible indentations on the surface of your print.
Step 3: Rough sanding
Once you’ve removed most of the support structures, it’s time to start with the sanding proper. Before sanding, wear all your protective gear – gloves, goggles, and mask. Sanding can release particular matter in the air which you can either inhale or get in your eyes. The gloves are there to help you avoid friction burns.
You will start with the sandpaper with the lowest grit number. In our case, this will be 120-grit. Start with sanding any leftover nubs from the support structures, although you will have to go over the entire surface of the print anyway. Sand using slow and circular motion, making sure not to focus on one spot for too long to avoid heat buildup.
When starting with rough sandpaper, you will notice that the surface of the finished print will turn white. This is a result of the surface of the plastic undergoing a huge amount of stress. Don’t worry – this problem will get resolved later on.
Continue sanding with 120-grit until you can see no noticeable improvements, or you are satisfied with the results. The longest sanding session will always be the first one so be patient and know that the proceeding steps will be easier.
From here on, you will be progressing by sanding with sandpaper with the next higher grit number. Continue with 220, 400, and 800 using the same procedure. Remember to be gentle and use sand using circular and slow strokes. The process should be easier once you get to the higher grit numbers and you should see a noticeable disappearance of the white residue that was produced during the first sanding step.
Step 4: Wet sanding
Once you move on the fine sandpaper (1200, 2000, and 3000-grit), we will have to employ the wet sanding method. You will need to use your plastic bin and fill it with enough water to submerge about half the height of your finished print.
Basically, wet sanding paper will require you to wet either the print being sanded or the sandpaper periodically during the sanding process. There are two reasons for doing this. The first is to mobilize the plastic particles that come loose during sanding, preventing them from gumming up the sandpaper and speeding up the sanding process.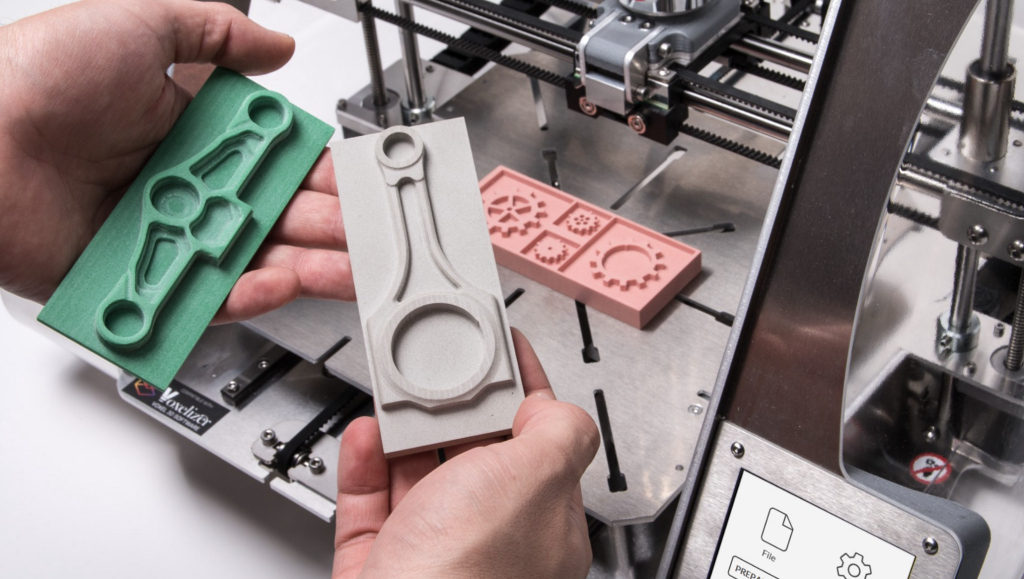
The second reason is to reduce the overall temperature of the print being sanded. As you move on to finer grit sandpaper, heat buildup becomes more apparent on account of the greater friction being generated by the fine grain of the sandpaper.
At this stage, you should start seeing a more polished appearance on the surface of your 3D print. The color of the surface will also go back to the color of the original filament. At the 3000-grit level, it’s perfectly possible to produce a mirror-like finish.
What else can you do after sanding?
The results of sanding are often stellar on their own. With the technique we have outlined above, it’s possible to create perfectly smooth surfaces with no perceivable rough edges or uneven features. However, there are several ways to take the finish quality to the next level. Here are some options:
Apply a polishing compound
If you want to retain the color of the filament but would like it to have metal-like luster, then you can simply apply any standard metal polish.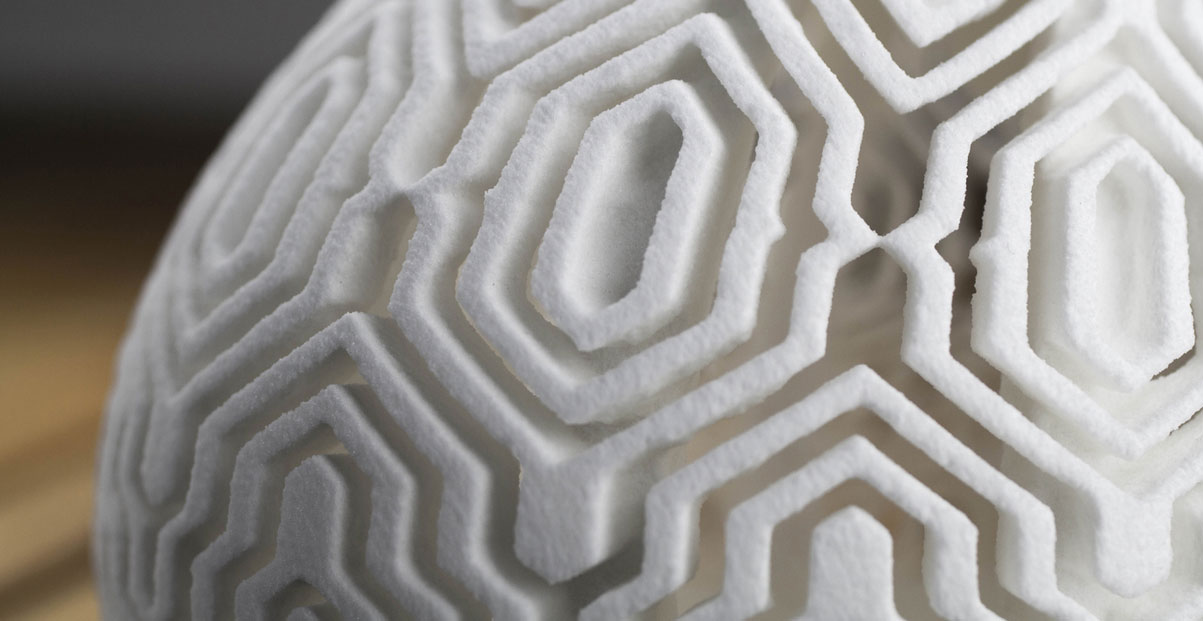 The polishing compound will permeate into any remain crevices on the surface of the print, thus enhancing an even smoother finish.
Apply a thin and even layer of the metal polish using a piece of cotton cloth. Again, use small circular motions to make sure that all the polish gets into the microscopic crevices on the surface. To polish the surface and develop some luster, get another piece of cloth (without the metal polish) and vigorously rub the surface of the print using the same circular motions. This should buff up the surface and produce an exceptionally shiny finish.
Apply wood stain
If you used the sanding method to finish a print made with wood filament, the most sensible next step would be to apply a wood stain. The sanding process should expose a lot of the wood particles on the surface of the print. These wood particles would readily absorb the stain, giving the finished print a color that more closely resembles real wood. This is a great way to add contrast to your composite wood print and highlights its contours.
Apply epoxy coating
Epoxy coating is an easy-to-apply compound that will help in achieving a smooth surface and provides a measure of protection for the 3D print against humidity and other erosive factors. As with a polishing compound, the epoxy coating will permeate into any micro-striations on the surface of the 3D print, thereby improving the surface finish to a degree that is not achievable by sanding alone.
Paint
Of course, it’s perfectly possible to paint your finished 3D prints if you don’t like the look of the original filament or you want your print to have multiple colors. Painting is often a two-step process that involves applying a layer of primer in preparation for the paint.
Once you have finished sanding the print, apply an even layer of filler primer. Just like a polishing compound, this will even out the surface of the print by filling in any minor imperfections. Upon drying, the filler primer also protects from the damaging effects of humidity and improves the adhesion of the surface to paint.
Just about any type of paint, applied in any of the usual ways, can be applied to a 3D print once filler primer has been applied. Spray paint is recommended for the application of a thin and even coat, but you can also use a brush if you are confident with your skills.
Ultimately, the goal of each one of these techniques is to enhance the visual appeal of your 3D print beyond what sanding can achieve. However, sanding is central to every one of them – there are simply no shortcuts unless solvent-based finishing is an option.
Final thoughts
3D printing a model is one thing, but the proper post-processing technique makes a huge difference in giving your 3D prints that professional look. By far, the most versatile post-processing method is sanding – it’s applicable to just about any filament material except those that are exceptionally ductile.
Sanding is the foundation on which all other post-processing techniques are built on. It doesn’t take a lot of skill to do sanding right, but you’ll have to be patient and well-prepared. With some time and effort, you’ll be well on your way to making better-looking 3D prints.
Warning; 3D printers should never be left unattended. They can pose a firesafety hazard.
Finishing 3D Prints — MadeByFjori
You’re here for one reason: you want to make your 3D prints look like they weren’t printed at all.
<<UPDATE APRIL 24, 2022>> This guide is always a work in progress, so please reach out to me if you have any specific questions or suggestions. Email me at [email protected] or contact me via social media @MadeByFjori.
I’ll go over what tools you can utilize for different projects, but not necessarily the only ones available. Whether you just bought your first 3D print or want to get better at finishing your own prints, I’ll show you a few ways to get them ready for painting.
While the techniques and tools here are viable with most filament types, there are some key differences between say PLA, ABS, and PETG:
ABS is the easiest to sand and also reacts with acetone, making it viable for vapor smoothing and acetone welding parts together.
PLA is arguably the easiest filament to print, but also the hardest to sand. PLA+ is a great alternative, as it has an additive to make it easier to sand. Acetone does NOT react with PLA.
PETG is a good medium, although it’s not nearly as easy to sand as ABS.
Most of the tools and techniques listed here can be used with a variety of filaments, even wood.
Acetone smoothing (whether through vapor or brush on) is 100% viable with ABS prints, albeit with some drawbacks. Details may get lost, so it’s mostly optimal for organic shapes. Also small amounts of acetone may get caught in corners and cause it to get gloopy. I will not be covering them in this particular guide.
CHAPTERS
i. Tools & Materialsii. Filling Gaps and Seamsiii. Dry Sandingiv. Wet Sanding
i.
 Tools & Materials
In this section I’ll be going over several choices for tools and materials I use throughout the entire process. What works best for me will probably work just as well for you, but in the end it’s your call what to use and when. None of these practices are written in stone – there are an infinite amount of options for each category. This is just what I happen to use because I like to balance between quality and being frugal.
SandpaperSandpaper can make a print really shine, figuratively and literally. It’s also the most time consuming process of post-production. There’s no shortage of grit numbers and forms available. Knowing what grit and type of sandpaper to use can get tricky. Below are a few examples:
Sheets
They usually come in rectangular form on different thicknesses of paper varying from 200-5000 grit. You can cut and apply them to any surface, like a popsicle stick. I generally don’t use anything above 2,000.
Sanding Sponges
Sanding sponges, much like sanding blocks, help ensure an even job over large surfaces. They come in a variety of grit numbers – I use these guys the most! Their corners can also be utilized for hard to reach corners. They last quite a long time, even after the original grit number has worn out.
Sanding Sticks
Sanding sticks are an excellent way to sand detailed parts or hard to reach areas. They come in a variety of grits and sizes to fit your projects needs.
Sanding Blocks
Sanding blocks have different shapes and forms, but the principle is always the same. A handheld block that can hold any sandpaper sandwiched between. This is ideal for large areas, like the blade of a sword.
Motorized SandersHandheld Rotary Tool
Usually even the lowest setting/high grit is too much power to directly sand PLA prints, but it works just fine with ABS since it’s heat resistant. With the ability to swap out attachments for a variety of uses, it’s a good tool to have even without 3D prints.
Orbital/Triangular Sander
Much like the dremel, orbital, triangular (or any motorized sander for that matter) is way too strong for PLA even on the lowest RPM setting. However, these types of handheld sanders can make ABS prints a breeze to sand broad areas versus doing it by hand. If you work with ABS prints a lot or have a large print to finish, I highly recommend investing in a handheld sander.
Filler PrimerThis is truly a godsend for finishing 3D printed parts – it does a fantastic job of filling in between layer lines making sanding much easier. At least a layer or two of filler primer is a necessity for post-production on 3D printed parts: it helps your paint job stick to the print.
On a budget Rustoleum brand filler primer will do the trick. If you can spend an extra $15~ then I would absolutely get 1k primer at the very least. It adheres to the print better, and is just better quality for everything overall. You’ll have to spray less, meaning you’ll use less. 2k Primer is the absolute best version and also comes in aerosol form.
I personally use Duplicolor for 1k and SprayMax for 2k.
XTC-3DXTC 3D is a resin designed specifically for 3D prints and nestles in between layer lines. It strengthens a print and adds structural integrity. If you’re working with PLA this is pretty much a requirement. It’s useful in ABS as well, but it’s not as needed. If you’re going to be working with 3D prints frequently, this item is definitely worth picking up.
It’s much better to mix small amounts several times rather than one big batch. This stuff cures fairly fast and a small amount goes a long way.
FillersAcrylic Spot Putty
It takes only minutes to dry and is fully sandable, making it a great candidate for filling in tiny cracks. Generally only ideal for small spots. It does not dry rock hard like an epoxy dough does.
Epoxy Dough
Regardless of what brand you choose, all epoxy doughs come in a soft, marshmallow texture that require 2 equal parts to be mixed. Despite it’s form while mixing, it cures rock hard and is fully sandable - wet and dry. This item is great for filling in large gaps in prints or anywhere else you need a hard surface. I use Free Foam Air as jackets for my molds too!
Apoxie Sculpt
For filling in large sections, Apoxie Sculpt is a good choice for most things. It dries rock hard and can be dry and wet sanded. Even polished!
ii. Filling Gaps and SeamsAt this point your parts should have already been assembled. If you’re looking for help on how to put together 3D parts, check out my guide on ‘Assembling 3D Prints’
You might have a part that looks like this. Or just want to fix a blemish. I’ll show you different ways to fix it! Depending on the 3D print you’re finishing, sometimes you’ll have gaps and seams to fill up between separate parts.
You have several choices, (but definitely not limited to):
1) Weld the pieces together with spare filament. >>This step is ideal for ABS prints<<
and/or
2) Use fillers to plug in the gap (although larger prints will still be prone to stress fractures).
Welding [ADVANCED] *Skip this step if working with PLAHow does welding work? And why do you need to do it?
Welding (at least in the context of 3D printing) works by creating a recess, then filling it with spare filament to create a full plastic bond/seal.
When you have a large print consisting of multiple parts, your print is prone to stress fractures and even breakage if the seams are not sealed properly.
Welding requires safety equiment – please make sure to use a respirator and gloves!
What you’ll need:
Want your large prop to last? Don’t skip this step!
It’s a finicky process, but can be made easier with a dedicated soldering iron. If you’re going to be working with 3D printed parts more than once, I highly recommend getting one.
Warm up the soldering blade (make sure to have the proper attachment – it makes a world of difference!) and then make a V shape between the 2 parts.
Now there’s a “trench” that you can fill in with the warmed up filament.
Use the flat head attachment to melt the filament into the recessed area.
Don’t worry if it looks uglier than sin. In the next section I’ll go over sanding over seams that have been filled with filler and how to get the surface of your print ready for painting.
Using FillersWhether you’re trying to fill in a seam, or just fixing some blemishes, fillers come in handy for a variety of projects.
Fillers come in many materials, colors, viscosities, and finishes.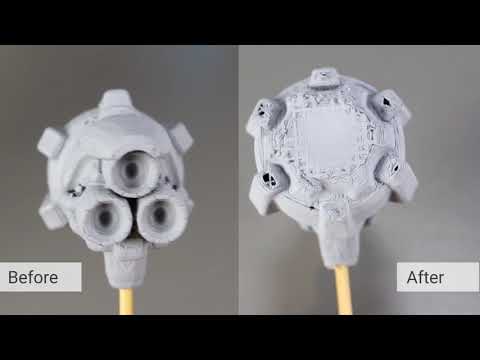
As an all-purpose filler, I cannot recommend 3M green Acrylic Putty enough. It dries within minutes and is a fairly durable filler for being a “soft” filler.
Fillers come in hard and soft varities and knowing which to use when mostly comes with experience. For now, let’s stick with one of each. As an example I’ll be using Free Form Air (hard) and green Acrylic Putty (soft).
What you’ll need:
For the rest of this tutorial I’ll be using Free Foam Air
Free Form Air (FFA) is a hard filler from Smooth-On. Mix equal Parts A and B and mix thoroughly (it’ll turn an even gray color) and it’s ready to go!
Apply to the desired areas. In this particular case I’m using it to fill seams and fix parts where the supports were rough.
Sculpting tools and palette knives can help clean out some filler in a tight spot.
You can also use it to fix blemished areas. While this could easily be fixed with some settings in the slicer software, why waste extra plastic to reprint it?
Mix together and apply liberally.
Once it dries it’s completely sandable. FFA takes 24 hours to fully cure before being sandable. Make sure to read the directions on whatever filler you pick.
Filling in Layer Lines with XTC 3D
XTC 3D is a resin specifically designed for 3D prints that nestles in between layer lines, minimizing the amount of sanding that needs to be done. If you’re working with PLA prints, I consider this an ABSOLUTE must.
Note: XTC 3D will smooth out your print quite a bit, so it’s not a good idea for hard edges, like mechanical parts, tight tolerances, or incredibly detailed areas.
What you’ll need:
Tip: XTC 3D has a working time of roughly 5-10 minutes depending on how much you mixed. If it starts feeling warm, that means you have less than 1 minute before it’s too hard to brush on. It’s better to work with small quantities and have to mix more, than wasting a large amount at once.
If you used fillers, make sure to sand down any bumps first! Do some preliminary sanding with 220~ grit to remove excess filler before applying XTC 3D. Go to Chapter iii if you applied filler first.
Mix two Parts A with one Parts B. Mix thoroughly.
A thin coat goes a long way! It’s better to layer on lightly if you need more rather than globbing it on.
You can cover large prints with only 10 ml. For detailed areas, use a thinner coat (or not at all) to avoid clogging up and losing detail.
Let that cure for at least 12-24 hours (depending on how thickly it was applied) before beginning the sanding phase. Even though it won’t melt your skin off or anything, it’s a good idea to leave it alone as it’s pretty sticky and irritating to the skin. Just have a gameplan on how and where it’s going to cure.
I’m serious - no touching!
Regardless of what filler or resin you used, it won’t look quite right yet. We’ll fix that in the sanding stage.
Now that the gaps and seams are filled, let’s move onto the most important part: sanding.
iii. Dry Sanding>> This section is a work in progress and has missing images! I am in the process of re-taking photos for everything below. Please message me if you have any questions <<
Sanding is a crucial step for finishing prints.
The goal of the dry sanding phase is to get all the seams flush with each other, as well as removing all layer lines.
What you’ll need:
Sandpaper/sponge/block grit from 100 to 400
Proper PPE (gloves, respirator etc.
 )
)Orbital Sander (optional) <– ONLY USABLE ON ABS PRINTS
First step is sanding off the excess filler (if you didn’t do this before applying XTC 3D) and making assembled parts flush with each other.
A sanding block or sponge will do the trick. Start with a 60-220 grit depending on how much filler you used and the print layer lines. I personally start with around 100 to 220 because ABS is easier to sand.
Spraying with Filler PrimerOnce the first round of dry sanding is complete, it’s ready to be sprayed with filler primer. Keep in mind that you’ll be spraying with primer several times over the course of dry and wet sanding. The process is rarely linear.
What you’ll need:
Filler Primer (rattle can, airbrush, or spraygun)
Drying Rack or a way to let your prints dry
Respirator
Gloves
Have a plan for how the print will be held up during spraying. Some people 3D model room for a rod so they can hold it while spraying, I’ve started putting in screws where the prop will be covered later anyway for easy access. The idea being able to reach all angles per coating session while not touching any painted surfaces.
Please remember:
Don’t spray indoors unless you have a heavy duty spray booth
Wear PPE including a respirator, eye protection, and gloves
Don’t spray too close to the print - about 10 inches/25 cm away is ideal
I personally use 1k filler primer. If you can afford to do so, the quality between 1k and 2k primer versus the Rustoleum type fillers is night and day. However, if you’re on a budget any regular filler primer from any home improvement will get the job done.
Once it has fully dried AND cured (yes, there is a difference!) then resume sanding if needed. There’s really no secret to it – it’s the same repetitive motion until it’s as smooth (or rough) as you want it.
Spray again when layer lines are starting to show again and you’ve sanded down the filler primer away.
Repeat as necessary until the surface is fairly smooth and the seams and imperfections are gone. Around 220~ grit or so, it’s time to move on to wetsanding.
If you see/feel layer lines, you’re not ready for the next step!
iv. Wetsanding
Wetsanding is the process of sanding under water. This process effectively eliminates buildup while sanding and helps bring your prop to a glorious, even surface. Are you going for a polished look? More weathered, worn and torn style? These are questions you should have answers to before starting.
What you’ll need:
To start, get a bowl or filling up the sink with water. I’ve even used a spray bottle in a pinch.
Start with 220-40o grit sandpaper depending on how detailed the piece is and how much it’s been dry sanded.
How high of grit should you work up to? Again, this all depends on your goals. If you’re going for a mirror polish, you’ll need to work up to around 2,000 grit, then you’ll have to polish by hand or with a buffing wheel with a polishing compound.
When the filler primer starts to significantly fade and reveal more layer lines, you can spray with filler primer. Refer to the previous section if needed. It’s okay to go back to the dry sanding phase if necessary, I often do.
Start back up again roughly around where you were before.
My average project ends with 800-1,200 grit and then some polishing compound, and elbow grease.
Now that your print is all shiny (or rough if that’s what you’re going for) coat with a final coat of primer and let dry – then it’s ready for painting or molding!
Need help with painting? Try Volpin Props eBook. It’s 90+ pages of tested wisdom and well worth the $8. I lovingly refer to it as The Manual because of how often I reference it.
Many thanks to the following artists as this guide would not exist without the knowledge they share:
@Shellshockedprops
@volpinprops
@fluxtidedesigns
Back to top
Post-processing of 3D printed parts (PLA, ABS, SBS, PETG)
Table of contents
- Removal of supports
- Remove Soluble Supports
- Sanding
- Cold welding
- Filling voids
- Polishing
- Priming and painting
- Pair smoothing
- Epoxy coating
- Metallization
Introduction
FDM technology is best suited for fast, low-budget prototyping. Layer lines are usually visible in FDM prints, so post-processing is essential if a smooth surface is to be achieved. Some post-processing techniques can also make a print more durable by changing the degree of its elastic properties, density, structural and textural features.
In this article, we will discuss the most common post-processing techniques in FDM.
Post-processed FDM prints (left to right): cold welded, void filled, raw, sanded, polished, painted and epoxy coated. Photo 3dhubs.com
Removing supports
Removing supports is usually the first step in post-processing for any 3D printing technology that uses them. In general, props can be divided into two categories: standard and soluble. Unlike other post-processing methods discussed in this article, the removal of props is mandatory and does not result in improved surface quality.
Initial printout with props, poor prop removal, good prop removal. photo 3dhubs.com
Removal of standard props
Tools
- Wire cutters, needle nose pliers, tongs
- Toothbrush, brush
| Finishing | ★ ☆ ☆ ☆ ☆ |
| Approvals | ★ ★ ☆ ☆ ☆ |
| Speed | ★ ★ ★ ★ ☆ |
| Suitable for | all thermoplastics FDM |
Process
Normally, backups come off the printout without problems, and hard-to-reach places (such as holes or cavities) can be cleaned of backup material with an old toothbrush. Proper placement of support structures and correct print orientation can significantly reduce the negative impact of supports on how the final printout will look.
Pros
- Does not change the overall geometry of the part.
- The process is very fast.
Cons
- Does not remove layer lines, scratches or other surface defects.
- If excess material or marks remain from the support structure, print accuracy and appearance suffer.
Dissolvable Support Removal
Instrumentation
- Solvent resistant container
- Thinner
- Ultrasonic cleaner (optional)
| Finishing | ★ ★ ★ ☆ ☆ |
| Approvals | ★ ★ ☆ ☆ ☆ |
| Speed | ★ ★ ★ ★ ☆ |
| Suitable for | all thermoplastics FDM |
Process
Soluble support standard materials are removed from the printout by immersing it in a reservoir of the appropriate solvent. Supports are usually printed:
- HIPS (usually with ABS)
- PVA (usually with PLA)
A glass container like a preservation jar is fine. Any non-porous vessel is suitable for water treatment. To quickly remove props from HIPS/ABS printouts, you will need a solution of equal parts D-limonene and isopropyl alcohol. Many other support structure materials such as PVA (with PLA) dissolve in normal water.
Pro Tips
Use an ultrasonic cleaner to shorten the solution time and change the solvent as it becomes saturated. A warm (not hot) solution works faster - heating is useful if there is no cleaner.
Pluses
- Complex geometry is allowed for which the standard method of removing props is not possible.
- Smooth surface at the support points.
Cons
- Improper dissolution of the props can cause discoloration and skewed printouts.
- Does not remove layer lines, scratches or other surface imperfections.
- May cause small holes or holes if soluble material seeps into the object during printing.
Cleaning with a skin
SHIP SHIC ABS ABS ABS Prints
Instrumentation
- EVERTICAL PREASE with grain
for 150, 220, 400, 600, 1000 and 2000 6666 - Cleaning cloth
- Toothbrush
- Soap
- Face mask
| Finishing | ★ ★ ★ ★ ☆ |
| Approvals | ★ ★ ★ ☆ ☆ |
| Speed | ★ ★ ☆ ☆ ☆ |
| Suitable for | all thermoplastics FDM |
Process
Once the props have been removed or dissolved, sanding can be done to smooth the part and remove any obvious imperfections such as smudges or prop marks.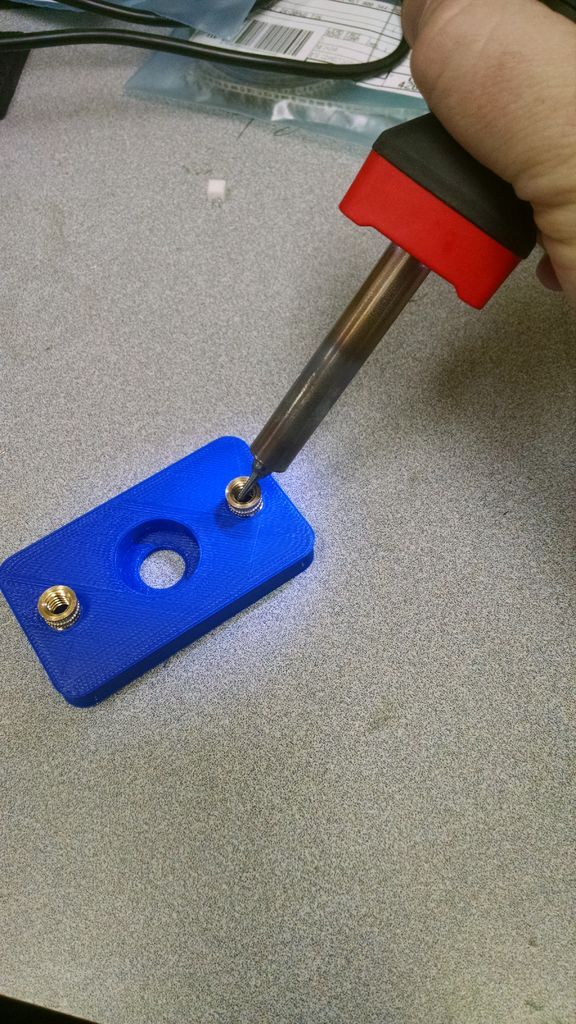 Which sandpaper to start with depends on the thickness of the layer and the quality of the print: for layers of 200 microns or less, or for prints without blotches, you can start with sandpaper at P150. If there are blobs visible to the naked eye, or the object is printed with a layer thickness of 300 microns or more, stripping should begin with P100.
The process can be continued up to P2000 grit (one approach is to go to 220, then 400, 600, 1000 and finally 2000). Wet sanding is recommended from the very beginning to the very end - this will avoid excessive friction, which can lead to an increase in temperature and damage the object, as well as contaminate the sandpaper itself. Between sanding, the printout should be cleaned with a toothbrush and washed with soapy water, then wiped with a cloth to remove dust and prevent it from sticking together. Even P5000 can be sanded to achieve a smooth, shiny FDM part.
Pro Tricks
Always sand in small circular motions - evenly over the entire surface of the part. It may be tempting to sand perpendicular to the layers, or even parallel, but this can lead to gouges. If the part is discolored or has a lot of scratches after sanding, it can be heated a little to soften the surface and allow some defects to smooth out.
Pros
- An exceptionally smooth surface is obtained.
- Further post-processing (painting, polishing, smoothing and epoxy coating) is greatly facilitated.
Cons
- Not recommended for double or single shell parts as sanding may damage the printout.
- The process is difficult in the case of sophisticated surfaces and the presence of small details in the object.
- If the grinding is done too aggressively and too much material is removed, the appearance of the part may be affected. Acetone for ABS. Dichloromethane for PLA, ABS
- Sponge Applicator
| Finishing | ★ ★ ☆ ☆ ☆ |
| Approvals | ★ ★ ☆ ☆ ☆ |
| Speed | ★ ★ ★ ★ ★ |
| Suitable for | all thermoplastics FDM |
Process
If the object is larger than the printer capacity, the object is printed in parts and then assembled. In the case of PLA and some other materials, assembly can be done with Dichloromethane or a suitable adhesive (the choice of adhesive depends on the plastic). In the case of ABS, it is possible to "weld" with acetone. The mating surfaces should be slightly moistened with acetone and squeezed tightly or clamped and held until most of the acetone has evaporated. So the parts will be held together by chemical bonds.
Pro Tricks
Increasing the surface area of the acetone contact increases bond strength. Tongue-and-groove to help.
Pros
- Acetone does not change surface color as much as most adhesives.
- After drying, the compound acquires the properties of ABS, which makes further processing easier and more uniform.
Cons
- The bonding of ABS parts by cold "welding" with acetone is not as strong as if the part were printed as a whole.
- Excessive use of acetone can dissolve the part and affect final appearance and tolerances.

Void Fill
Black ABS Print, Filled and Sanded
Tool Kit
- Epoxy (for small voids only)
- Automotive body filler (for large voids and joints)
- ABS filament and acetone (only for small voids in ABS printouts)
| Finishing | ★ ★ ☆ ☆ ☆ |
| Approvals | ★ ★ ★ ☆ ☆ |
| Speed | ★ ★ ★ ☆ ☆ |
| Suitable for | all thermoplastics FDM |
Process
Unusual voids may come out after the part has been ground or dissolved. These voids are formed during printing when the layers are incomplete due to any restrictions on the trajectory of the print head, which is often inevitable. Small gaps and voids can be easily filled with epoxy and no additional treatment is required in this case. Larger gaps or voids left by assembling a multi-part object can be filled with automotive bodywork filler, but the printout will then need to be re-sanded. Putty works great, is easy to process with sandpaper and can be painted. Moreover, the parts connected by such a filler, or voids filled with it, turn out to be stronger than the original plastic.
Cracks in ABS printouts can also be filled with ABS thinned with acetone, which reacts chemically with the ABS object and seeps into existing voids. It is recommended to make such a putty from 1 part ABS and 2 parts acetone, then it will not spoil the surface if used correctly.
Dichloromethane works on all plastics: ABS, PLA, HIPS, SBS, etc.
Epoxy is also useful if you want to make your 3D printed part more durable
Pros
- Epoxy filler is easy to sand and prime, resulting in an excellent surface for painting.
- An ABS solution of the same filament will give the same color so nothing will be visible on the surface.
Cons
- Auto body filler or other polyester epoxy adhesive is opaque when dry and will leave discolored areas on the printout.
- Additional processing required to achieve a uniform surface.
- If the grinding is done too aggressively and too much material is removed, the appearance of the part may be affected.
Polished
PLA model, polished. Photo rigid.ink
Tools
- Plastic Polishing Compound
- Sandpaper for P2000
- Cleaning cloth
- Toothbrush
- Polishing pad or microfiber cloth
| Finishing | ★ ★ ★ ★ ★ |
| Approvals | ★ ★ ★ ☆ ☆ |
| Speed | ★ ★ ☆ ☆ ☆ |
| Suitable for | all thermoplastics FDM |
Process
Once the part has been cleaned, a plastic polish can be applied to the part to give a standard ABS or PLA object a mirror finish. After the part has been sanded for 2000, it is necessary to remove dust from the printout with a cloth and rinse the printout under warm water using a toothbrush. When the object is completely dry, buff it on a buffing pad or microfiber cloth, adding a polishing compound as you go, such as polishing jewelry. They are designed specifically for plastics and synthetics and give a long-lasting shine. Other plastic polishes, such as those used to polish car headlights, also work well, but some of them contain chemicals that can damage the printout.
Pro Tricks
To polish small parts, place the polishing wheel on your Dremel (or other rotary tool such as a power drill). For larger and stronger parts, you can use a grinder, just make sure that the part does not stay in one place for too long, otherwise the plastic may melt from friction.
Pros
- The part is polished without solvents that can warp it or change its tolerances.

- When cleaned and polished correctly, a mirror-smooth surface is obtained, very similar to cast.
- Polishing and deburring plastics is extremely economical, making this a very cost-effective method of achieving a quality finish.
Cons
- If you want to achieve a mirror-smooth surface, the part must be carefully ground before polishing, which may affect tolerances.
- After polishing, the primer or paint no longer sticks.
Primer and paint
Gray PLA FDM print spray painted black. 3dhubs.com
Tools
- Cleaning cloth
- Toothbrush
- 150, 220, 400 and 600 grit sandpaper
- Aerosol primer for plastics
- Finish paint
- Polishing sticks
- Polishing paper
- Masking tape (only if multiple colors are expected)
- Nitrile gloves and matching face mask
| Finishing | ★ ★ ★ ★ ★ |
| Approvals | ★ ★ ★ ☆ ☆ |
| Speed | ★ ☆ ☆ ☆ ☆ |
| Suitable for | all thermoplastics FDM |
Process
Once the printout has been properly sanded (it is enough to reach P600 when painting), it can be primed. Aerosol plastic primer should be applied in two coats. This primer is intended for subsequent painting of models, provides an even coating and at the same time thin enough not to hide small elements. Thick primer, which is sold in hardware stores, can clump, and then you have to seriously work with sandpaper. Apply the first spray coat with short pressures from a distance of 15-20 cm from the object, trying to do it evenly. Let the primer dry and smooth out the unevenness with 600 grit sandpaper. Apply a second coat of spray with light, quick pressures, also very gently and evenly.
When the priming is completed, you can start painting. You can paint with artistic acrylic paints and brushes, but a spray gun will provide a smoother surface. Hardware store spray paints are thick and viscous and difficult to control, so use paints that are designed specifically for modeling. The primed surface must be sanded and polished (sanding and polishing sticks, which are used in nail salons, can be purchased online, they are great for our task), and then wiped with a cloth. The paint should be applied to the model in very thin layers, the first layers should be transparent. When the paint finish becomes opaque (usually 2-4 coats), let the model rest for 30 minutes to allow the paint to dry completely. Carefully polish the paint layer with manicure sticks, repeat the procedure for each of the colors (between each applied paint).
Separate parts of the model can be covered with masking tape so that the colors, if there are several, do not mix. When painting is complete, remove the masking tape and polish the object with polishing paper. Polishing paper, such as 3M or Zona, comes in a variety of grits and is a relatively new product. It is sold in packs in various online stores, and after processing with this paper, the ink layer or topcoat will literally shine - and nothing else can achieve this effect. Apply 1-2 coats of top coat to protect the paint and let it dry completely. The top coat is selected in accordance with the recommendations of the paint manufacturer. If the topcoat and paint are incompatible, it can render your entire painting job meaningless, so compatibility is very important here.
Pro Tips
Don't shake the can when spraying! It is important not to mix the pigment or primer with the propellant (propellant gas), which will cause bubbles to form in the spray. Instead, the can must be rotated for 2-3 minutes so that the mixing ball rolls like a pearl, and does not strum.
Pros
- Excellent result, if you take into account all the nuances of the process and practice.
- You can do anything with the final look of the object, no matter what material it is printed on.
Cons
- Primer and paint increase the volume of the model, which affects the tolerances and can be a problem when it comes to a part of a larger object.
- High quality aerosol paint or spray gun increases costs.
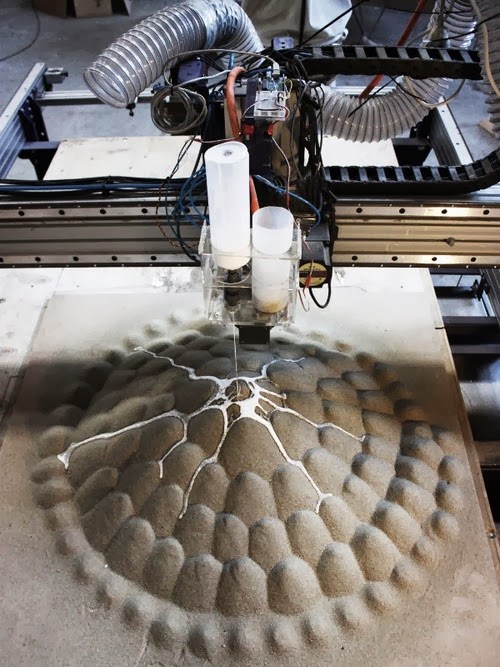
Vapor smoothed
Vapor smoothed black hemisphere, ABS printed
Tools
- Cleaning cloth
- Solvent resistant sealed container
- Thinner
- Paper towels
- Aluminum foil (or other solvent resistant material)
- Face mask and chemical resistant gloves
| Finishing | ★ ★ ★ ★ ☆ |
| Approvals | ★ ★ ☆ ☆ ☆ |
| Speed | ★ ★ ★ ☆ ☆ |
| Suitable for | all thermoplastics FDM |
Process
Line the bottom of the container with paper towels, if possible along the sides. It is critical that the vapors cannot damage the container and that the container itself is sealed. It is recommended to use a glass or metal container. Apply enough thinner to the paper towels so that they are wet but not soaked - this will also help them adhere better to the walls. Acetone is famous for its ability to smooth out ABS. PLA can be smoothed with a variety of other solvents (dichloromethane works well), but this plastic tends to be much harder to smooth than ABS. When working with any solvents, please follow the safety precautions for handling chemicals and always take appropriate precautions. Place a small "raft" of aluminum foil or other solvent-resistant material in the center of the paper towel-lined container. Place the printout on the "raft" (either side of your choice) and close the lid of the container. Steam polishing can take varying amounts of time, so check your printout periodically. To increase the speed of polishing, the container can be heated, but this must be done carefully so as not to cause an explosion.
When removing the printout from the container, try not to touch it in any way, leave it on the “raft”, take them out together. In all those places where the printout has come into contact with something, there will be defects, since the outer layer will be under-dissolved. Before working with it, let the printout completely “breathe” so that all solvent vapors have evaporated.
Many aerosols and/or solvent sprays are flammable or explosive and their vapors can be harmful to humans. Be extremely careful when heating solvents, always handle them and store them in a well ventilated area.
Pros
- Many small blotches, as well as many layer lines, are smoothed out without additional processing.
- The printout surface becomes exceptionally smooth.
- The procedure is very fast and can be done using commonly available materials.
Cons
- Doesn't "heal" gaps, doesn't completely hide layer lines.
- During the smoothing process, the outer layer of the printout dissolves, which greatly affects the tolerances.
- Negatively affects the strength of the printout due to changes in the properties of its material.
Immersion
PLA model immersed in dichloromethane. Photo 3dpt.ru
Tools
- Solvent resistant container
- Thinner
- Eye hook or cog
- Large wire for sculpture or landscaping
- Dryer or drying frame
- Face mask and chemical resistant gloves
| Finishing | ★ ★ ★ ★ ☆ |
| Approvals | ★ ☆ ☆ ☆ ☆ |
| Speed | ★ ★ ★ ★ ☆ |
| Suitable for | all thermoplastics FDM |
Process
Make sure the container you are using is wide and deep enough to completely submerge the printout in the solution. Fill the container with the appropriate amount of solvent - be careful not to splash. As with vapor smoothing, ABS dip smoothing can be done with acetone, which is easy to find in the store, and for PLA, dichloromethane can also work well with ABS, HIPS, SBS, PETG, and many other materials. PLA is quite resistant to solvent smoothing, so it may take several passes to achieve the desired result. Prepare the printout for dipping by screwing a hook or eye screw into it in an inconspicuous place. Pass the wire through the eyelet or wrap the wire around the screw so that the printout can be immersed in the solvent. If the wire is too thin, it will not be able to withstand the buoyant force on the printout, and it will be difficult to sink the object.
Once the printout is ready, use a wire to completely immerse it in the solvent for a few seconds. Remove the printout and hang it by the wire in a dryer or on a drying frame to allow the solvent to completely evaporate from the surface. After ejection, the printout can be gently shaken to facilitate the drying process and ensure that no solvent has accumulated in the depressions.
Pro Tricks
If an opaque whitish coating appears on the printout after drying, this can be corrected by holding the object over a solvent bath for a while so that its vapor slightly dissolves the surface. This restores the original color of the printout and achieves a shiny outer layer.
Pros
- The surface of the print is smoothed much faster than steam polishing.
- Significantly less fumes are generated than other solvent polishing methods, so this method is less hazardous.
Cons
- The surface is smoothed very aggressively, so you can forget about tolerances.
- Immersion for too long can result in complete deformation of the object and a significant change in material properties.
Epoxy
Black ABS printout, half epoxy coated, half uncoated
Tools
- two-component epoxy06
- Sponge Applicator
- Mixing container
- Sandpaper P1000 or finer
| Finishing | ★ ★ ★ ★ ☆ |
| Approvals | ★ ☆ ☆ ☆ ☆ |
| Speed | ★ ★ ★ ★ ☆ |
| Suitable for | all thermoplastics FDM |
Process
After the printout has been cleaned (preliminary cleaning gives the best end result), wipe it thoroughly with a cloth.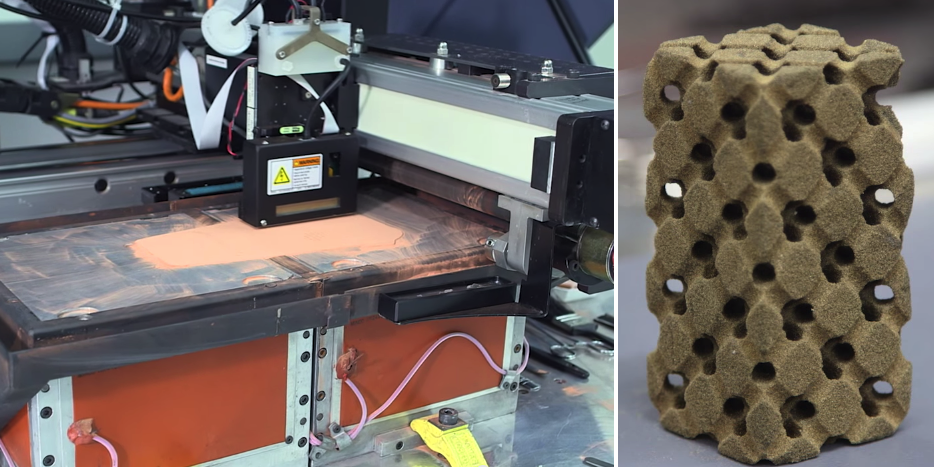 Mix the resin and hardener in the proportion indicated in the instructions, accurately measuring all volumes. The curing process of epoxy resin is exothermic, so glass containers and containers made of materials with a low melting point should be avoided. It is recommended to use containers that are specifically designed for mixing epoxy resins. Incorrect ratio of resin and hardener can result in longer curing time or no curing at all and result in a permanently sticky substance. Mix the resin and thinner as directed in the instructions - carefully, in smooth movements to minimize the amount of air bubbles remaining inside the mixture. Very little epoxy is needed, and most of these resins only work for 10-15 minutes, so plan accordingly.
Use the sponge applicator to apply the first coat of epoxy, being careful not to build up in crevices and small parts. When the printout is sufficiently coated, allow the resin to fully cure - as described in the instructions that came with it. One coat may be sufficient, but for optimum results it is best to lightly sand the printout with fine sandpaper (on P1000 and above) to eliminate any imperfections. Wipe off the dust with a cloth and, in the same way as before, apply a second layer of epoxy.
Pros
- A very thin coat of epoxy won't affect tolerance too much (unless the printout has been sanded too hard first).
- A protective shell is formed around the object.
Cons
- The layer lines will remain visible, they will only be covered by a smooth shell.
- If too much epoxy is used, it can flood parts and edges, and the surface can appear greasy.
Plating
FDM-printed structural element nickel-plated with Repliform RepliKote
Tools (for home use)
9
- Sacrificial anode. The anode material must match the metal of the solution: for example, if copper sulfate is used in the solution (with water it is copper sulfate), then the anode must also be copper. Any object made of the appropriate metal will do (for example, copper wire for copper plating), or you can buy special strips of metal for galvanization.
- Conductive paint or acetone with graphite. For galvanization, the surface of the printout must be electrically conductive, and this can be achieved with a conductive paint or a solution of equal parts graphite and acetone. Conductive paint will work with any material, but acetone with graphite will only work with ABS.
- Power rectifier. A simple battery can be used as this element, only it will not be as efficient and will not give a fast enough result than the rectifier itself (household current).
 The rectifier is safer in the sense that it can simply be turned off and thus cut off the current during the galvanization process.
 - Conductive screw or eye hook
- Non-conductive container
- Contacts
- Non-conductive gloves and goggles. Electroplating solutions are acidic and can cause injury if splashed into the eyes, so wearing glasses is very important. Solutions also irritate the skin and conduct electricity, so insulating gloves are needed.
- The metallized shell increases the strength of plastic printouts, which greatly expands the scope of their applications.
- Properly galvanized, the metal coating is very thin so that tolerances are generally maintained.
- The surface (again, if everything was done correctly) turns out great, no one will think that the object is printed on a 3D printer.
- In general, it is very expensive to get a professional result. Professional electroplating at home requires a fair amount of equipment.
- Electroplating at home can result in personal injury if safety precautions are not followed.
- A galvanizing solution can be obtained by mixing a metal salt, acid and water, but if the proportions are inaccurate and the substances are of insufficient quality, one cannot count on a professional result.
 If you buy a ready-made solution (as in Midas kits), you can be sure that the problems with plating are not caused by the solution.
 | Finishing | ★ ★ ★ ★ ☆ |
| Approvals | ★ ★ ★ ☆ ☆ |
| Speed | ★ ★ ★ ★ ☆ |
| Suitable for | all thermoplastics FDM |
Process
Electroplating can be carried out at home or in a professional workshop. To do everything right, you need to be well versed in the materials, in what is actually happening - and at home these opportunities are usually limited. In order to achieve excellent surface quality and to have more plating options, including chrome plating, it is best to use the services of professional workshops. The copper galvanization process will be described below as an example.
At home, you can galvanize with copper or nickel, and this coating will then serve as the basis for galvanizing with other metals. It is critically important that the printout surface be as smooth as possible before it is galvanized. Any bumps and lines in the layers will be enhanced as a result of the process. Prepare the sanded and cleaned object for plating by coating the plastic with a thin coat of high quality conductive paint, or with a graphite and acetone solution for ABS printouts. Allow the conductive coating to dry completely, sand if necessary to ensure a smooth surface. At this stage, it is extremely important not to touch the printout with bare hands or to wear gloves, because sweat marks on the object will certainly affect the quality of the galvanization.
Insert a screw or eyelet in an inconspicuous place on the printout and connect it to the negative terminal of the rectifier. This will be the cathode. Connect the copper anode to the positive contact of the rectifier. Fill the container with enough copper plating solution so that the printout is completely covered with it. Immerse the anode in the container and turn on the power. After the rectifier is turned on, immerse the printout in the container, making sure that it does not touch the anode anywhere. Beware! When the object is already in the bath, the galvanization system is active, and contact with the solution, cathode or anode can be traumatic. Set the voltage on the rectifier to 1-3 Volts, and the process will go to full metallization. To speed things up, the voltage can be increased, but not more than 5 volts. When enough metal has deposited on the printout, simply turn off the power and dry the object with microfiber towels. When it's dry, varnish the object to protect it from corrosion.
Pros
Cons
How to get smooth 3D prints・Cults
Surface smoothness is one of the most essential aspects of 3D printing, but it's not just an aesthetic need: very often smoothness is a functional requirement for end users.
Applications where smoothness may be a functional requirement include mating parts, moving parts, stress/load bearing surfaces, etc.
Below you will find a list of 3 key factors to ensure the smoothness of finished 3D printed parts, proposed by engineers at Xometry, a 3D printing on demand market with over 2,000 manufacturers in Europe.
Smooth 3D printing: the best of technology .
Due to the layering in FDM printing and nozzle diameter, FDM does not always produce a very smooth surface. However, modern industrial FDM machines are capable of creating much thinner surfaces. SLS, MJF and DMLS produce a grainy surface as a result of the powdery nature of the raw materials used in these technologies. Regardless of the 3D printing technology, a smooth surface can always be achieved in printed parts through post-processing operations.
There are several 3D printing technologies that produce smooth printed parts. They are reviewed below.
SLA 3D printing .
Stereolithographic 3D printing produces parts with the highest precision and smoothest surface of any 3D printing technology. Although this is a layered process, the starting material is usually in the form of a resin and is cured to give a smooth surface.
Polyjet 3D printing .
Like SLA, Polyjet prints with photopolymers. Most of the Polyjet parts are ready to use off the shelf in terms of look and feel. The main reason for this smoothness is the combination of ultra-thin layering and high quality resin.
Carbon DLS
Carbon DLS uses resin materials such as polyurethane. The surface of a 3D part produced by this method is as smooth as glass. This process produces flawless parts that can replace prototypes made with MJF or SLS. In addition to a high quality surface finish, Carbon DLS creates the perfect exterior and interior details.
Smooth 3D printing: the best materials .
Considering the material to achieve a smooth surface is usually accompanied by a consideration of the printing process, since in most cases the process is a much more significant factor. Thermoplastics, thermosetting resins, photopolymers, and polyurethane are generally smooth surface 3D printing materials.
But for an optimal choice, it is important to consider not only smoothness, but also strength, heat resistance and precision.
Smooth 3D prints: post-processing operations .
Post-processing is the most efficient way to achieve a smooth surface in 3D printing. In most cases, post-processing can be used to achieve this result, even if the technology or material is not as productive.
It's important to consider the geometry and material of our 3D printing to choose the right post-processing method, as it allows for different textures and looks.
Shot blasting
Shot blasting involves spraying a pressurized stream of small beads (plastic or glass) from a nozzle onto the surface of a part. This removes the layer lines, leaving a smooth surface. In addition, the final product resembles a uniform matte surface. One advantage of shot blasting over grinding is speed. The process takes 5 to 10 minutes for one part. However, the duration depends on the size of the part. Another advantage of shot peening is the preservation of part dimensions.
Comparison of MJF PA12 nylon parts: printed (left) and shot blasted (right) .
Vapor smoother
Industrial vapor smoother works with multi-stage technology. It relieves pressure in sealed chambers containing 3D printed parts. The injected solvent then enters a heated sump at the bottom, turning it into steam.
The air circulation system draws in the resulting steam and circulates around the surface of the part, causing condensation on the surface. This melts the surface of the printed part, leaving a smooth finish. This process takes about three hours.
Steam smoothing is commonly used in consumer products, but it does not allow the use of more difficult materials such as sanding or shot blasting.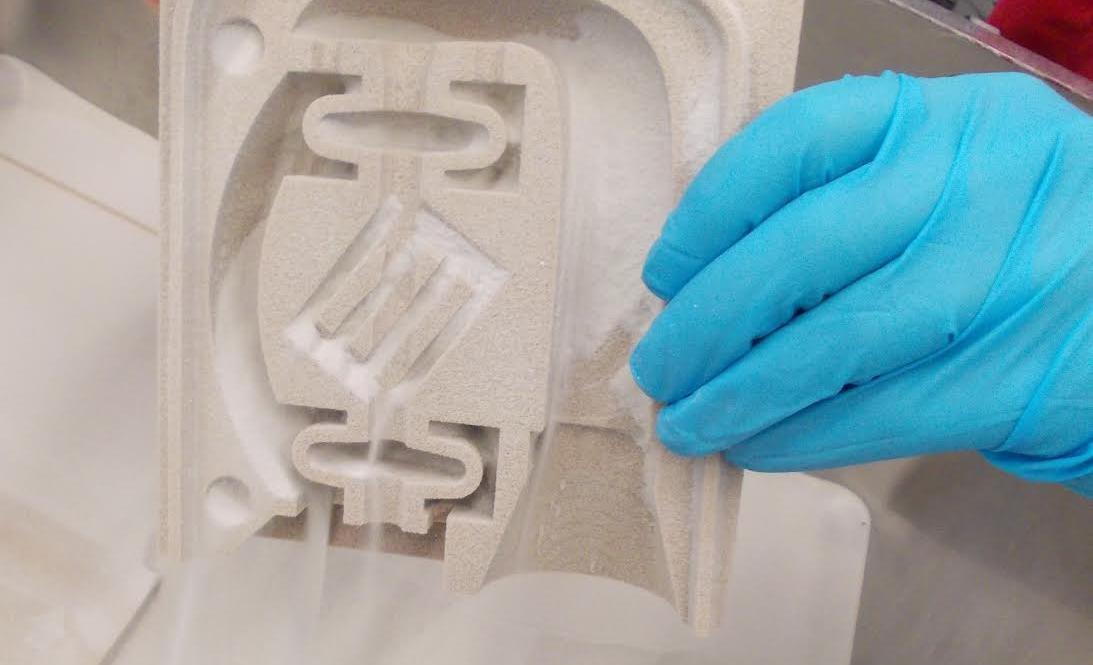
Comparison of MJF PA12 nylon parts: printed (left) and black dyed and steam melted (right)
Tumble finishing small details. It is very effective for parts containing a high percentage of metal powder.
In just one hour of polishing, the smoothness of metallic prints can be increased exponentially. The tumbling process uses a horizontal barrel filled with parts, medium, water or any other material. The vibrator rotates the barrel, causing the medium (stones) to continuously clean the parts and gradually smooth them out.
Comparison of SLS PA11 nylon parts: printed (left) and tumbled (right)
Sanding and polishing
Sanding is the process of gradually removing a very thin layer of material to obtain a smoother surface. A rough surface means that some points on the surface are more elevated than others. Sanding is the process of leveling a surface with relatively rough materials such as grinders or grinders.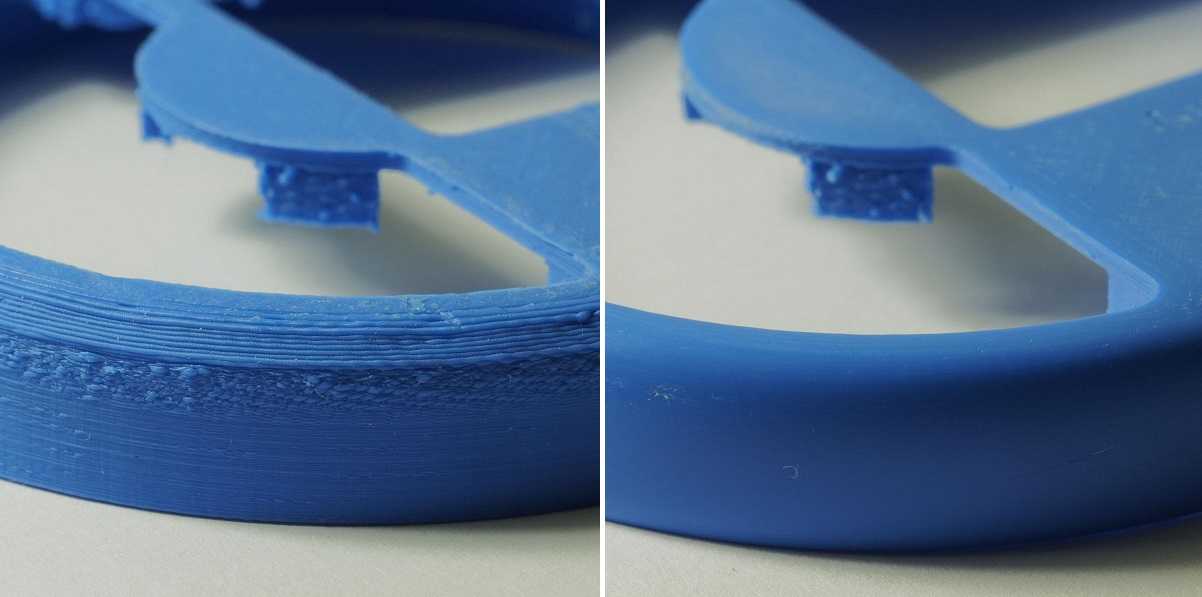
It can be done by hand or with belt sanders and is done gradually. Most often, grinding is performed in tandem with polishing.
One of the disadvantages of sanding is the difficulty of smoothing out small, complex geometries. In addition, grinding can affect the dimensions of the part. When very tight tolerances are required from a 3D part, grinding may not be the best option.
Comparison of post-processing options for smooth 3D printing
| Post-processing | Suitable 3D printing technology | Advantages | Considerations |
| Bead Blasting | SLS, MJF | • Preservation of the part's dimensions | • Requires the use of extra materials |
| Vapor Smoothing | MJF, SLS | Shiny surface | Lack of versatility |
| Tumble Finishing | DMLS, SLS, MJF | • Good for small parts | • Size limitations for large parts exist Time-consuming |
| Sanding and polishing | FDM, DMLS | • Good for bumpy rough surfaces • Polishing can produce a shiny surface | • Affects the part's dimension • Not suitable for parts with high tolerances • Not suitable for parts with intricate geometries |
Are you interested in testing the most efficient method to achieve a smooth surface for your 3D prints? Feel free to upload your Cults3D file to Xometry's Instant Quoting Engine, select the technology, material and finish you need and get an immediate quote.