Sandblasting 3d print
Can You Sandblast 3D Prints?
After seeing that my 3D printing parts weren’t printing smoothly, I did some research on how to make my 3D prints look like professional products. So, I thought I’d put together this helpful article to explain what I found.
So, can you sandblast 3d prints? Sandblasting is one of three ways to get a quality finish on your 3D prints. The others are sanding with sandpaper and vapor smoothing. Therefore, sandblasting is an effective way to get a professional-looking finish on your 3D printed items.
There is a range of sandblasting methods and each has its advantages and disadvantages. Also, there are different finishing techniques So, below I will discuss the different finishing techniques and how they work, as well as the different sandblasting mediums and when they should be used.
What happens when you sandblast a 3D print?
When you sandblast a 3D print, sand is shot very hard at the surface of the object. If you watch it happen the rough and uneven areas melt away leaving a rigid smooth surface.
Sandblasting is a quick and efficient method for smoothing surfaces of 3D printed objects. Because you don’t have to exert any elbow grease. It is very relaxing smoothing over the surface of you newly printed objects. It is solid method for enthusiastic hobbyists and manufacturing level production.
For testing the 3D print you won’t need to sandblast it, you can simply sand it down using sandpaper.
The individual particles of the medium hit the surface of the 3D print and break off tiny parts of it. Over many hundreds of particles, the surface of the 3D print wears down and the surface smoothens out removing any imperfections from printing.
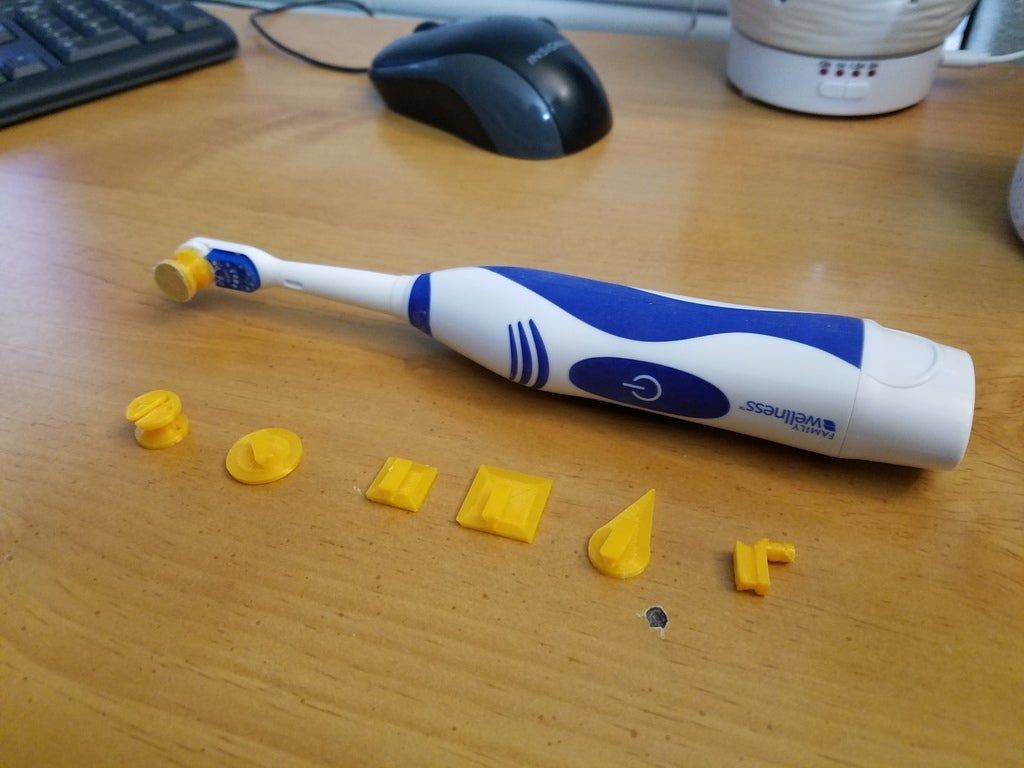
You should be careful around the corners or weak areas as you can sandblast them right off accidentally. You will want to take a gentler approach using sandpaper from hand on delicate parts.
There is some equipment that is needed to make a sandblaster, and commercial quality sandblasters are inappropriate for the hobbyist in most cases. So I will explain about how to make your own sandblaster. Often times, the simplest solutions are best.
Can you sandblast PLA 3d Prints?
Sandblasting is too abrasive for PLA 3d prints. This is because the plastic is too soft and will show indentations. It will also remove too much of the material at a time. This makes it hard to get a good finish using sandblasting. You can experiment and see, in some instances, it may make sense for the specific project.
How do you make a sandblaster?
You can make a sandblaster from a cheap $5 air gun kit and a few random tools. The one we liked was the [affiliate link], because [benefits the manufacturer lists]. The equipment you will need are:
- Air gun kit
- A plastic bottle
- A metal file
- A craft knife or box cutter as some people call it
- A drill
For how to put it all together check out this video below:
What are the different things you can shoot out of your sandblaster, what are the effects?
1. Glass beads
These beads produce a smooth matte finish. It is ideal for giving a professional look to parts that isn’t too glossy. It polishes the material slightly as it blasts it removing any unwanted shine. Some 3D print materials some out an unusual glossiness that is undesirable. So, many people use glass or metal beads to get a really nice finish.
The glass beads look like a beer bottle that has been crushed and ground into similar sized pieces. They come in varying grades.
2. Soda
Soda is good for sandblasting paint and rust from parts. The soda that is used is baking soda. You already have some of this sitting in a cupboard. It is sometimes called soda bicarbonate or bicarbonate of soda.
It is also good for delicate blasting where you want to smooth the surface slowly. Just make sure it isn’t too slow, and you fall asleep from boredom.
3. Silica sand
This is a popular medium. According to Wikipedia, these are categorized by their grain size. These are fine, medium, and coarse. However, silica can be known to cause respiratory issues.
Therefore, when using this for sandblasting, you should wear a respiratory device that doesn’t allow silica in. These should be avoided according to Sharrettsplating.com. Sand also contains water that can corrode sandblasting equipment quicker than other materials.
4. Silicon carbide
This is the most aggressive form of sandblasting and is very quick. It can remove too much material from the 3D print in some instances. It should be used on large areas that require a lot of time.
How do you finish a 3d printed object?
There are three primary methods for finishing a 3D printed object. These are sanding, bead blasting, and vapor smoothing.
Sanding
Sanding is a good option to and can be done either by hand or with a machine. Sanding machines can be big ones the size of a desk.
Ones, you used to see in woodwork class. By hand just grab a strip of sandpaper from your local hardware store. If you take the piece in they will really be able to help you.
There are also handheld sanders. You’ll want to use a different method for the different areas of the 3d printed object. Use an electric sander for large areas that you can’t be bothered to sand.
Alternatively, if you print a lot of objects and it would be too labor-intensive. Once you have finished with an electric sander you will still want to use sand some areas by hand to really finish it off well.
Bead blasting
Bead blasting also called sandblasting as we already talked about can give an even finish and smooth out all the printing lines. Depending on the material used you can get a nice matte finish relative to what some 3D printers produce.
They come in different grades
Some 3D printers finish the prints with a semi-gloss finish which looks a bit cheap. If you bead blast them they like a professionally produced product.
The different material types are silica, soda, metal beads, and glass. Glass produces the best matte finish, but you should tinker with the other ones and see which you like best. Be aware, however, that the silica in silica sand can cause respiratory issues, and you should consult with your doctor before using silica sand.
Bead blasting has a huge advantage in that you reach tight spaces that can’t be reached by sandpaper. Bead blaster nozzles come in many sizes. The size of the nozzle gets adjusted in order to reach tight corners that can’t be reached normally.
Vapor Smoothing
Vapor smoothing is where the item is placed in a vapor chamber. The vapor melts the surface slightly smoothing out all the imperfections. This leaves a shiny finish and can be sandblasted afterward to give it a matte finish.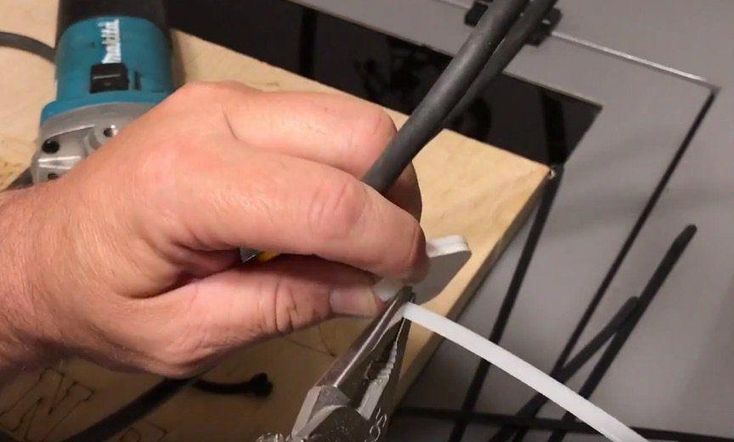
Due to the fact that only a small amount of material is adjusted (less than 2µm), the parts typically fit together. This typically doesn’t cause issues with parts fitting together but maybe a consideration in some instances.
This is the preferred method for consumer-level production of 3D printed items. Used in industries such as healthcare machines, building products, and car parts.
Conclusion
You can sandblast 3D prints. Sandblasting mediums come in a range of grades and materials. In most cases people should use glass beads. These strip away the imperfections on the surface. They also give a matte-like finish. If you have delicate areas on your print you should use sandpaper by hand. You can also use a sandpaper machine. They function similarly to a sandblaster but go more slowly and give you more control.
All about Sandblasting 3d Prints (Read This First!) - 3D Printing & Laser Cutting
by makemendel3d Staff
Are you struggling to get the perfectly smooth finish on your 3D printed models? Sometimes no matter what you do, you end up with prints that don’t look that professional. Even with all the correct settings and high-quality materials, this can happen. That’s when you have to think about sandblasting 3D prints.
Sandblasting your 3D models will give them that smooth finish and professional look you desire from your prints. It’s a great way to end up with perfectly printed 3D models that look exquisite.
If you don’t know anything about this, I will help you out. I will go through everything you need to know about sandblasting your 3D printed models. Let’s not waste any more time and get started with it.
Why sandblast your 3D models?
Well, it’s only natural that you would ask what’s the point of sandblasting 3D models. And what happens when you do so?
When you opt for sandblasting your 3D printed models, you are essentially removing or clearing out all the rough edges. This leaves the 3D models with a smooth surface area on them. It’s a great way to make sure the models you make are all of the professional quality.
Another reason for sandblasting is that it’s very easy to do. You don’t need to be an expert or don’t need any prior experience to get the hang of it. It’s pretty straightforward, and almost anyone can do it without any issues whatsoever.
However, you have to be aware that you shouldn’t sandblast some materials. One instance can be PLA filament material. This material is a bit too soft to bear the abrasive impact of the sandblaster.
Also, when you are sandblasting, you have to be very careful about the corners. They can be a bit weak, and you can break them off in the process. In those areas, you can use sandpaper to get a better finish on them.
Related: Best Cheap Resin 3D Printer
Making a sandblaster
Luckily, you can make a sandblaster yourself with some tools and equipment. So, if you want to go with the process of sandblasting your way through your 3D prints, this is the part you need to focus on. Let’s see how you can make a sandblaster at home.
To make your sandblaster, you will need the following things –
- An Air gun kit,
- A metal file,
- A drill
- A box cutter
- A plastic bottle
Once you gather all this stuff, you can begin with the following steps I will discuss right now.
- First, you will need an Air gun kit with an air compressor. Or you may need to buy an air compressor separately.
- Then, you have to use the metal file to create a hole in the air gun nozzle. The hole needs to be just a bit further from the joint.
- Then, you will need to drill a hole in the plastic bottle’s cap. You will also need to drill a spot at the top of the bottle.
- Next, insert the air gun barrel inside the tip of the bottle. Before that, you can fill up the bottle with your preferred sandblasting media.
- After filling it up, you can close the cap and connect the hose of the air gun to your air compressor.
That’s pretty much the gist of making your sandblaster for smoothening 3D printed models. Now, let’s check out the different things you can shoot out from a sandblaster that you make at home.
Related: Best 3d printer for flexible filament
Things to use for your sandblaster
You can use several things for shooting out of your sandblaster. Each of them has its effect on whatever you want to do. Let’s see which one you should be using for what purpose.
Glass beads
You can use glass beads when looking for a professional, smooth finish. It provides a matte feel by taking away all the unnecessary shine from the material.
You can use this one when you don’t want any glossiness coming out from the 3D printed model; you give a lovely finish to your 3D models. There are several grades you have to go through of this variety.
Silicon Carbide
When you have to remove a lot of material from your 3D printed models, this is the option for you. It’s pretty aggressive in action also works very quickly. So, if your goal is removing a lot of material very quickly, you can use silicone carbide as your sandblasting medium.
The ideal situation for using this is on larger models where you have to spend a lot of time getting a smooth finish.
Soda
Even though this may not be that useful for sandblasting 3D models, but still, it’s good to know about this. Using soda will help you get rid of paints or rust from materials.
Another purpose you can use this one for is getting a delicate sandblasting effect. This is perfect when you only need a bit of gentle sandblasting to get that smooth finish. However, it can be a bit too slow at times, so you have to be aware of that.
Silica sand
Well, I saved the most popular one for the last. You can use it for most material sandblasting. However, there are some things to be wary of when using silica sand.
The first is to take safety measures, like wearing a respiratory mask. Silica sand can impact your respiratory system, so you need to use a mask; otherwise, it can be risky.
These are the common mediums that you can use for your sandblasting operation. Depending on your needs and what results you want to get, you can choose any one of them.
Wrap up
All in all, sandblasting 3D prints is undoubtedly a great and quick way to get those smooth finishes on your 3D printed models. But if you feel like it’s not the right one for you, you can still go with the other two methods.
Sanding is a good choice when dealing with something delicate and challenging. And if you want a glossy finish on your 3D model, then going for vapor smoothing is perfect for you.
Contents
- 1 Why sandblast your 3D models?
- 2 Making a sandblaster
- 3 Things to use for your sandblaster
- 3.1 Glass beads
- 3.2 Silicon Carbide
- 3.3 Soda
- 3.4 Silica sand
- 4 Wrap up
Plastic post-processing after 3D printing: mechanical and chemical
3D printing post-processing
The most popular finishing methods for 3D printed objects are sanding, sandblasting and solvent vapor processing.
It is a misconception that 3D printing cannot produce objects that are as smooth and polished as traditional industrial technologies. Such claims can be countered with simple sandpaper, and this finishing technique is very common.
Which finishing technique is used depends largely on the geometry and material of the part. These factors determine both the level of aesthetics that can be achieved and its functionality, because different methods allow you to achieve different textures and appearances. Some methods are better suited for prototypes and exhibition models, while others are better for machine parts.
Post sanding
Sanding eliminates the disadvantages of 3D printing. For most 3D printer products, to give smoothness and in order to get rid of lines in the places where layers overlap, it is enough to finish with an emery cloth.
Everyone knows how to use the skin. A small piece of the skin is taken, the product is processed and mechanical grinding movements are carried out. The process itself is efficient and inexpensive.
There are not so many restrictions on post-processing with a scissor. The main thing is that the product is not too small.
Sandblasting post-processing
The next most common post-processing of products is sandblasting.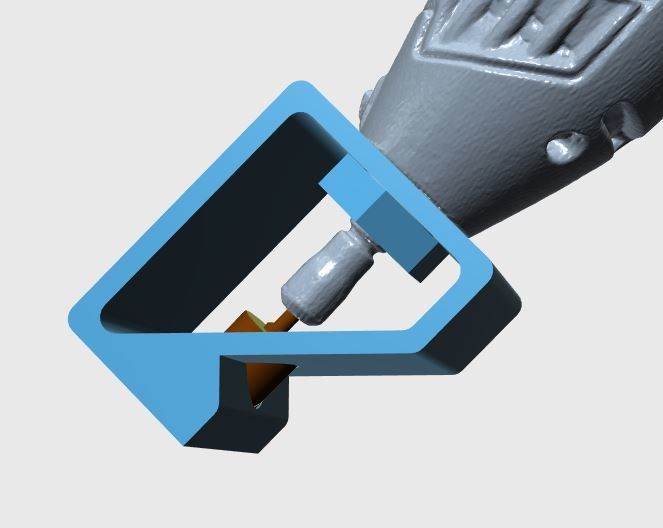 The operator directs the nozzle with the sprayed fine material. The process is short and takes only 5-10 minutes. The result is completely smooth.
The technology can be easily converted and completely different materials can be used. The technology can be applied at any stage of product production. The flexibility of the technology is due to the fact that the smallest particles are used to process the product.
The main limitation of "sandblasting" is the size of the object. The process is carried out in a closed chamber with dimensions of 60 x 80 x 80 cm - this is the main limitation. Also, it should be noted that you can only process one part at a time.
Steam post-processing
The most recent post-processing method in use is steam processing. The part is placed in the atmosphere of the evaporated substance. Vapor particles are fused into the surface of the product by about 2 microns, making it smooth and shiny in an instant. However, it is worth noting that if you like a matte surface, then it is better for you to carry out additional sandblasting after processing in pairs.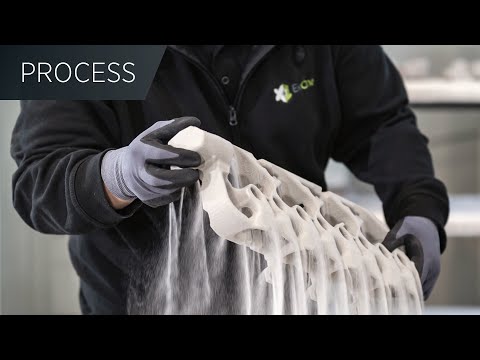
The steam treatment method does not greatly affect the accuracy of the part. The surface is smooth and therefore, this method is widely used in prototypes, medical provisions.
The main limitation is dimensions and materials Acetone is used to process ABS plastic. When processing PLA plastic, tetrahydrofuran or dichloromethane is used. Processed materials are quite practical and durable, created products retain their original strength and flexibility.
< Back to FAQ
Where do you get STL models for printing?
Model yourself
I order
Downloading on the Internet
Related videos:
Plastic 3D printing: how to make surfaces smooth
It is believed that plastic 3D printing cannot produce products with smooth surfaces. The layering caused by the peculiarities of FDM construction does not allow them to be used as final products in cases where the aesthetics of the object is important.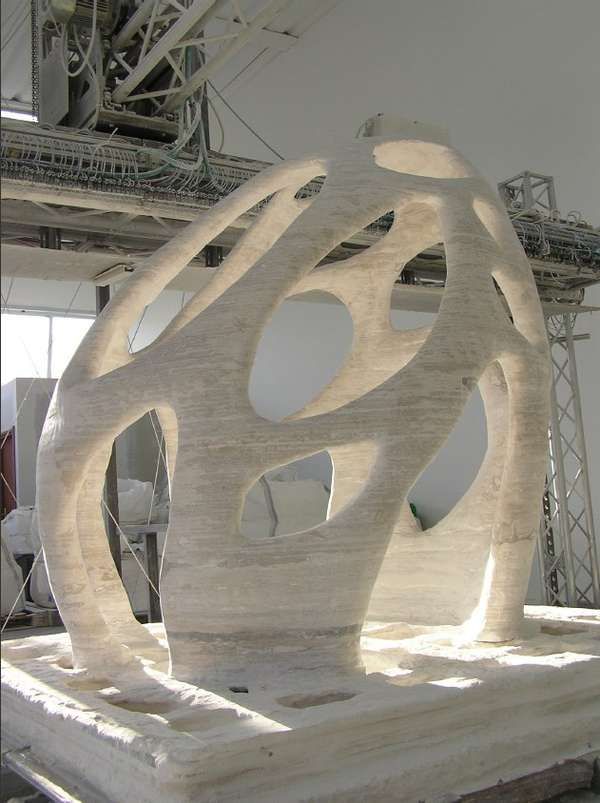 However, modern methods of post-processing plastic products make it possible to give finished products made on a 3D printer the desired qualities.
Grinding
The surface grinding process is one of the most affordable and common post-processing options for plastic products. Various grinding methods are used to prepare prototypes for presentation, check the assembly of structures, and process finished products.
Sanding can be done both manually and with the use of belt sanders (similar, for example, to wooden parts). It's a simple, cheap and effective way to give your plastic parts the right surface quality properties.
Generally all surfaces can be sanded well, except for very small parts. When it comes to very precise products, it is important to understand how much material you will remove in the process. Removing too much layer will change the structural features of the object. Therefore, before starting grinding, we recommend that you make control measurements and decide on the tool and intensity used for maximum accuracy.
Shot blasting
The process of blasting a surface with a stream of plastic (or metal) shot under the influence of compressed air. The operator directs the device nozzle to different parts of the product to eliminate layering and give the surfaces a uniform matte shade.
Sandblasting suitable for most FDM materials. The use of small plastic shot gives excellent results and does not harm products. Usually, it takes no more than 5-10 minutes to process one part. One of the disadvantages of this post-processing method is the limitation on the size of the product. Since the process takes place in a closed chamber, the maximum size of the product should usually not exceed 30-40 cm.
Sandblasting
Sandblasting differs from shotblasting only in the material used to affect the object. Sand grains allow processing faster. However, due to the geometry of the particles, they do not guarantee such a "delicate" approach to the impact on the surface, as is the case with plastic shot.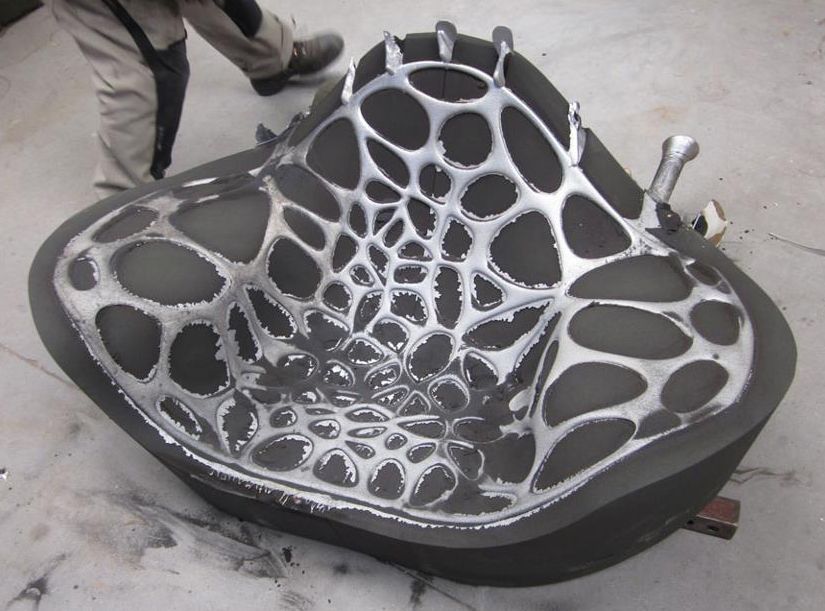
Acetone vapor treatment
The product is lowered into a closed tank, at the bottom of which there is a small amount of liquid acetone. The tank is then heated, causing the acetone to evaporate. Vapors interact with the surface of the object, dissolving about 2 microns. This allows you to make the surface of the plastic part smooth and shiny in just a few seconds.
This post-processing method provides a fast and uniform surface smoothing (without disturbing the geometry of the product). It is widely used in the production of consumer goods, medical instruments, and various prototypes. However, like shot blasting, pair smoothing has a size limitation.
Bulk mechanized post-processing of plastic parts
There are also automated methods for mass in-line surface treatment of plastic products. For example, various industrial grinding equipment is used for this.