How to use iiip 3d printer
How to 3D print? The Beginner’s Guide to 3D Printing
Learning how to 3D print has never been easier!3D printing is an ever-evolving and expanding field. If you’re a beginner at 3D printing, the number of possibilities and applications can seem so vast, it can be a bit overwhelming when you’re just starting to know how to 3D print and how to use a 3D printer.
In this beginner’s guide to 3D printing, we’ll explain what exactly 3D printing is, how it works, how to 3D print, the best materials for beginners, and what you need to get started.
What is 3D Printing?3D printing is the process of creating a three-dimensional object, usually done by systematically layering material on top of itself. The printer reads a digital file from the computer which dictates how to layer the material to build the object.
This is why 3D printing is also known as additive manufacturing. 3D printing and additive manufacturing are mostly synonymous, although you may hear additive manufacturing used more frequently in the context of mass consumption or mass manufacturing.
Depending on the specific print you are planning to do there could be more or fewer steps in your process. But in general, 3D printing involves the following actions:
Step 1: Create or Find a DesignThe first step of 3D printing typically starts on a computer. You must create your design using a 3D design software, typically a CAD (computer-aided design) software. If you are unable to create the design yourself, you can also find many free resources online with free designs.
Step 2: Export the STL FileOnce you have created or chosen a design, you must either export or download the STL file. The STL file is what stores the information about your conceptual 3D object.
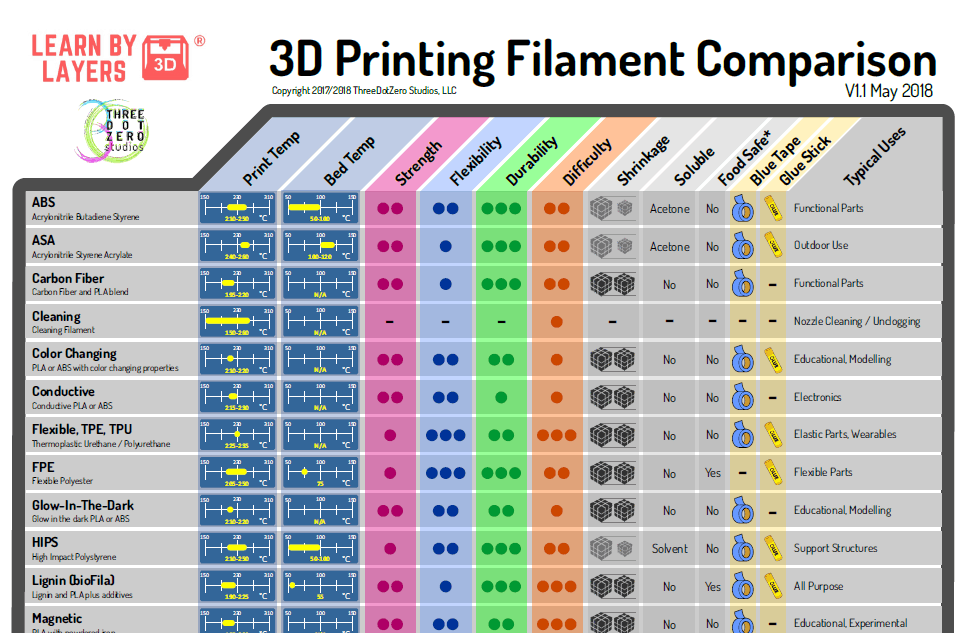
Step 3: Choose Your Materials Typically you may have an idea about what kind of material you will use before you print. There are many different 3D printing materials available, and you can choose them based on the properties that you want your object to have. We will discuss this more in-depth below.
The next step is then deciding on the different parameters of your object and the printing process. This includes deciding on the size and placement of your print.
Step 5: Create the GcodeYou will then import the STL file into a slicing software, like BCN3D Cura. The slicing software will convert the information from the STL file into a Gcode, which is a specific code containing exact instructions for the printer.
Step 6: PrintThis is when the magic happens! The printer will create the object layer by layer. Depending on the size of your object, your printer, and the materials used, the job can be done in a matter of minutes or over several hours.
Depending on what you want your final product to be or the material you used, there may be additional post-processing steps after printing, like painting, brushing off powder, etc.
What is 3D Printing Used For?3D printing can be used both recreationally and professionally, across various industries.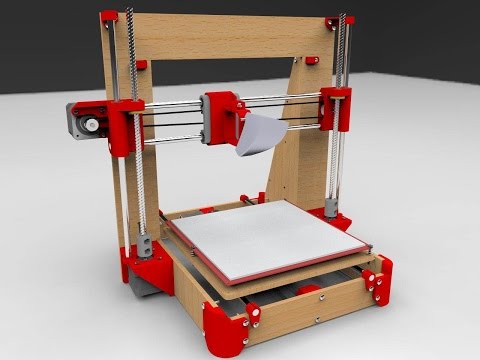 It has applications in many different fields and sectors, from the healthcare industry to engineering, and even fashion.
Increasingly, 3D printing is seen as a sustainable and cost-friendly solution for creating prototypes and tools for different manufacturing projects and processes. Traditionally, acquiring prototypes can be time-consuming and costly, requiring companies to depend on outside manufacturers. 3D printing allows companies to quickly make units of an object, tool, or prototype, all in-house.
A great example of this is shoe company Camper. In-house 3D printing has allowed them to transform their nearly month and a half long modeling and designing process into an operation that takes only several days.
3D Printing For Beginners: How To Get Started
So, what do you need to get started with 3D printing? Your specific needs will depend on why and what you want to print, but in general, there are three considerations for getting started:
- A 3D printer
- Filament
- Slicing software
If you plan on creating your own designs you will also need the appropriate designing software. But, as we mentioned earlier, you can also find many free resources online to download designs.
If you have not yet purchased a 3D printer, we have a guide that can help steer you through the most important considerations.
3D printer FilamentsThe material also called filament, you choose for your print will depend on many different factors:
- Do you want your object to be flexible?
- Heat resistant?
- Does it need to be very durable?
These are just some of the factors to consider when choosing your filament.
In general, most beginners start with PLA. This is because PLA is cost-effective and typically easy to print with a standard configuration. Depending on your specific project, PLA could be good starter material.
PET-G is also considered a beginner-friendly material, although it is a bit more technical than PLA. However, it is great for industries like engineering and manufacturing. It is a good material for functional prototypes because it can withstand higher temperatures and has a different chemical makeup that is ideal for these uses.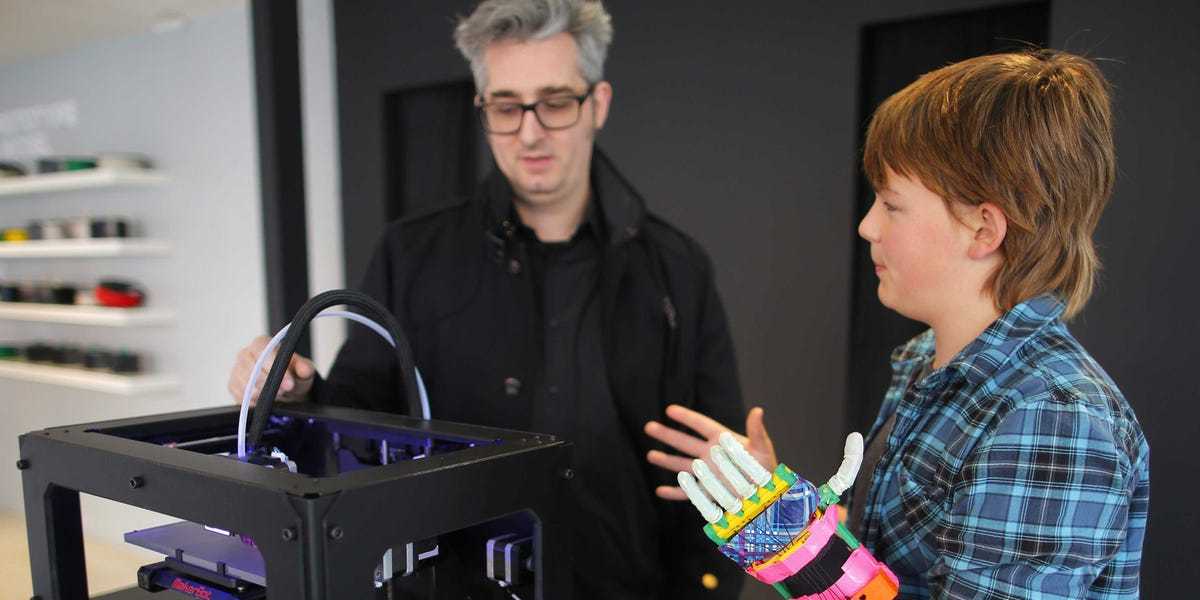
There are two important pieces of software for 3D printing: CAD and slicing software.
Typically, you can use any CAD system that can create a functional model. CAD is essential if you want to create your own models and objects. You must be able to export an STL file from your CAD software.
The slicing software is the second part of the equation. This software translates the STL file into a language that the printer can understand. The Gcode contains movement information that tells the printer how and where to move its axis, as well as how much material to deposit. The Gcode is sent to the printer via an SD card or wifi.
Final Thoughts3D printing is now more beginner-friendly than it has ever been. In the beginning, many people saw 3D printing as something inaccessible to the major public, but this sentiment is changing, and for good reason. While it takes practice to perfect your prints and technique, learning how to 3D print is an attainable skill.
MONOPRICE MAKER SELECT PLUS IIIP USER MANUAL Pdf Download
Table Of Contents
2-
page of 38
- Contents
- Table of Contents
- Troubleshooting
- Bookmarks
Advertisement
Table of Contents
Table of Contents
Safety Warnings and Guidelines
Introduction
Features
Customer Service
Package Contents
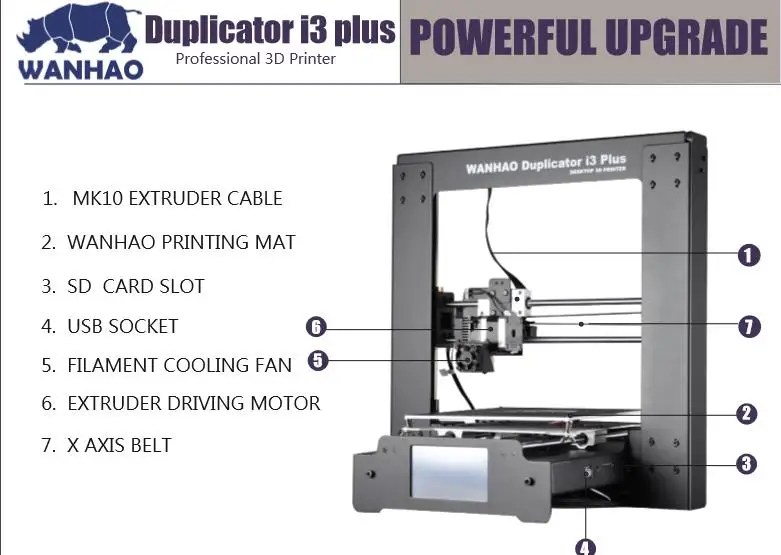
Product Overview
Front View
Rear View
Bed Assembly
Front and Rear Panels
Using the Menu System
Main Menu
System Menu (Main > System)
PID Menu (Main > System > PID)
Motor Menu (Main > System Motor)
Tools Menu (Main > Tools)
Preheat Menu (Main > Tools > Preheat)
Move Menu (Main > Tools > Move)
Print Menu (Main > Print)
Status Menu (Main > Print > Status)
Settings Menu (Main > Print > Status > Settings)
- Unpacking, Assembly, and Setup
Fine Tuning Platform Height
Maintenance
Nozzle Cleaning
Lubricating the Z-Axis
Lubricating the X and y Axes
Motor Connections
Print Mat
Installing Cura
Manual Cura Setup
Creating a Gcode File
Technical Support
Troubleshooting
Specifications
Regulatory Compliance
Notice for FCC
Notice for Industry Canada
EU Conformity with Applicable Directives
Table of Contents
Previous Page
Next Page
Table of Contents
Summary of Contents for Monoprice Maker Select Plus IIIP
This manual is also suitable for:
157112187124165
instruction how to work from scratch for beginners and dummies, how
looks like Three-dimensional printing has become increasingly introduced into our daily lives. Thanks to new technologies, it has become possible to easily print from a small detail to a large building. The range of products is also pleasing - today you can find a lineup that includes both affordable devices and more expensive ones. But how to work with a 3D printer? This is a completely normal question that any beginner will have, it is for this reason that we will try to answer it as simply and accessible as possible.
What is a 3D printer and how does it work?
The 3D device consists of the printer itself and a computer that controls all processes. The principle of operation of such a design is to create 3D models by superimposing layers of liquid material. There are a large number of printer models - from large industrial ones to compact ones, but they all have the same principle of operation and component parts:
- Extruder - the print head through which the thread passes. The head heats the thread to a semi-liquid state and evenly supplies the material to the working surface.
- Work surface - a printing platform on which a 3D model is formed.
- Motors - mechanisms responsible for the accuracy of movement and speed of printing.
- Sensors are electronic devices that limit moving parts to specified coordinates.
- The frame is the structure that connects all parts of the printer.
How a 3D printer works: features
Work with the aim of building a three-dimensional model begins with a sketch, which is created in a special program. After that, the software independently generates a plan for the movement of the print head and a print sequence. The 3D model is reproduced by strongly heating the plastic and distributing it evenly.
3D printers are used in many areas. Let's list some of them:
- Architecture - creation of models of buildings.
- Medicine - dental prosthetics, making models of organs for study.
- Construction - production of houses using 3D printing technology.
- Education - a visual aid for learning 3D printing.
- Automotive - creation of tuning parts, prototype layouts and other products.
This is a small list of industries where 3D printing is actively used. Today, almost every entrepreneur and just an enthusiastic person can afford a printer.
The following printers are distinguished by design features:
- RepRap - self-reproducing printers that can create their own copies.
- DIY-kit - the device comes disassembled with instructions, the assembly of which will take a sufficient amount of time.
- Completed - Models are delivered assembled and ready to use.
- Commercial and Industrial - devices capable of printing metal, concrete, polymers and other materials.
How to use a 3D printer: tips for beginners, where to start
Mastering the technique of 3D printing is not difficult if you follow the recommendations and tips.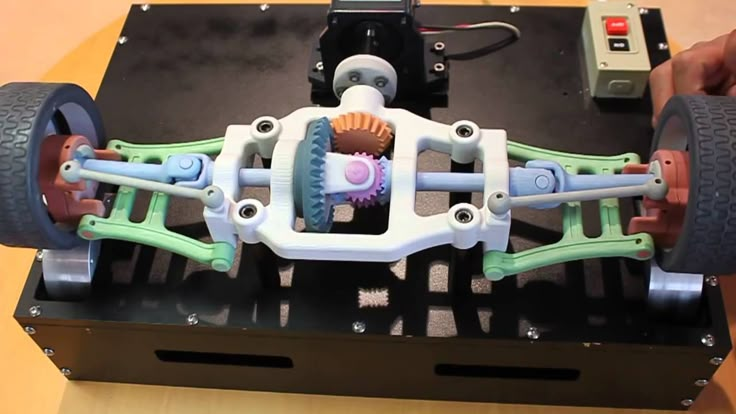 Especially for those who plan to learn the basics of 3D modeling, an up-to-date list of questions and detailed answers to them has been prepared.
Printer Installation
To begin, you will need to carefully unpack the box and remove any stops. The next step is to install the printer on the surface using the building level. This will allow you to place the device as evenly as possible, which will provide better printing.
Note. Some 3D printers come with a level for installation.
Next, you will need to connect the printer to your computer and install the necessary drivers. The software disc comes with the 3D device.
Preparation for work
To get started, you need to calibrate the working surface - without this, printing quality products is impossible. This process is carried out automatically or manually. The attached instructions have detailed information on how to perform manual calibration.
Extruder patency test
The next important step is setting up the extruder. First of all, you will need to check its nozzle. If the printer has already been used, the nozzle should be cleaned of solidified particles that will interfere with the throughput of the material. Refueling the 3D printer The thread is fed into the extruder directly from the spool. But there is one caveat - for this you must first warm it up. To thread the thread, you will have to make a small effort in order to loosen the presser mechanism.
Working with models
Models can be created using a variety of 3D modeling programs. The process of manufacturing three-dimensional parts is creative, requiring careful preparation. The better and more detailed the model is drawn, the better the 3D layout will be at the output.
Start printing
After creating the model in the program and preparing the printer for work, you need to send the file for printing and wait for the result. The print speed varies depending on the printer model and specifications, as well as the media used.
Processing the finished product
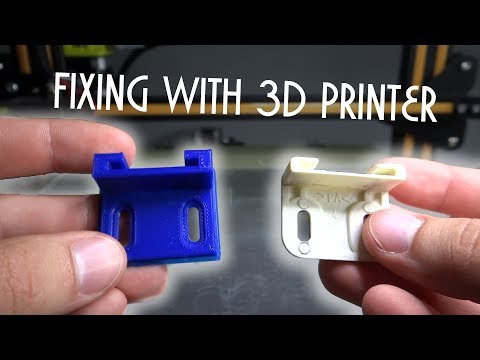
3D printed products usually do not please the user with an ideal appearance: the parts have an uneven surface. But this is typical for models of 3D printers on FDM, SLA and DLP devices, which are distinguished by higher print quality. Owners of FDM printers should not despair - a simple processing of products will give products an attractive appearance and make the surface smooth.
Several powerful ways to post-process 3D printed parts:
- Mechanical - carried out by sanding the surface with sandpaper or a special sponge for grinding.
- Chemical - Surface treatment with aggressive solvents such as acetone and dichloroethane.
- Mixed - In this case, the above two processing methods are used.
What are the possible errors and how to avoid them?
Even a novice can master the technology of 3D printing, but, despite this, the production of the first products causes excitement for the user.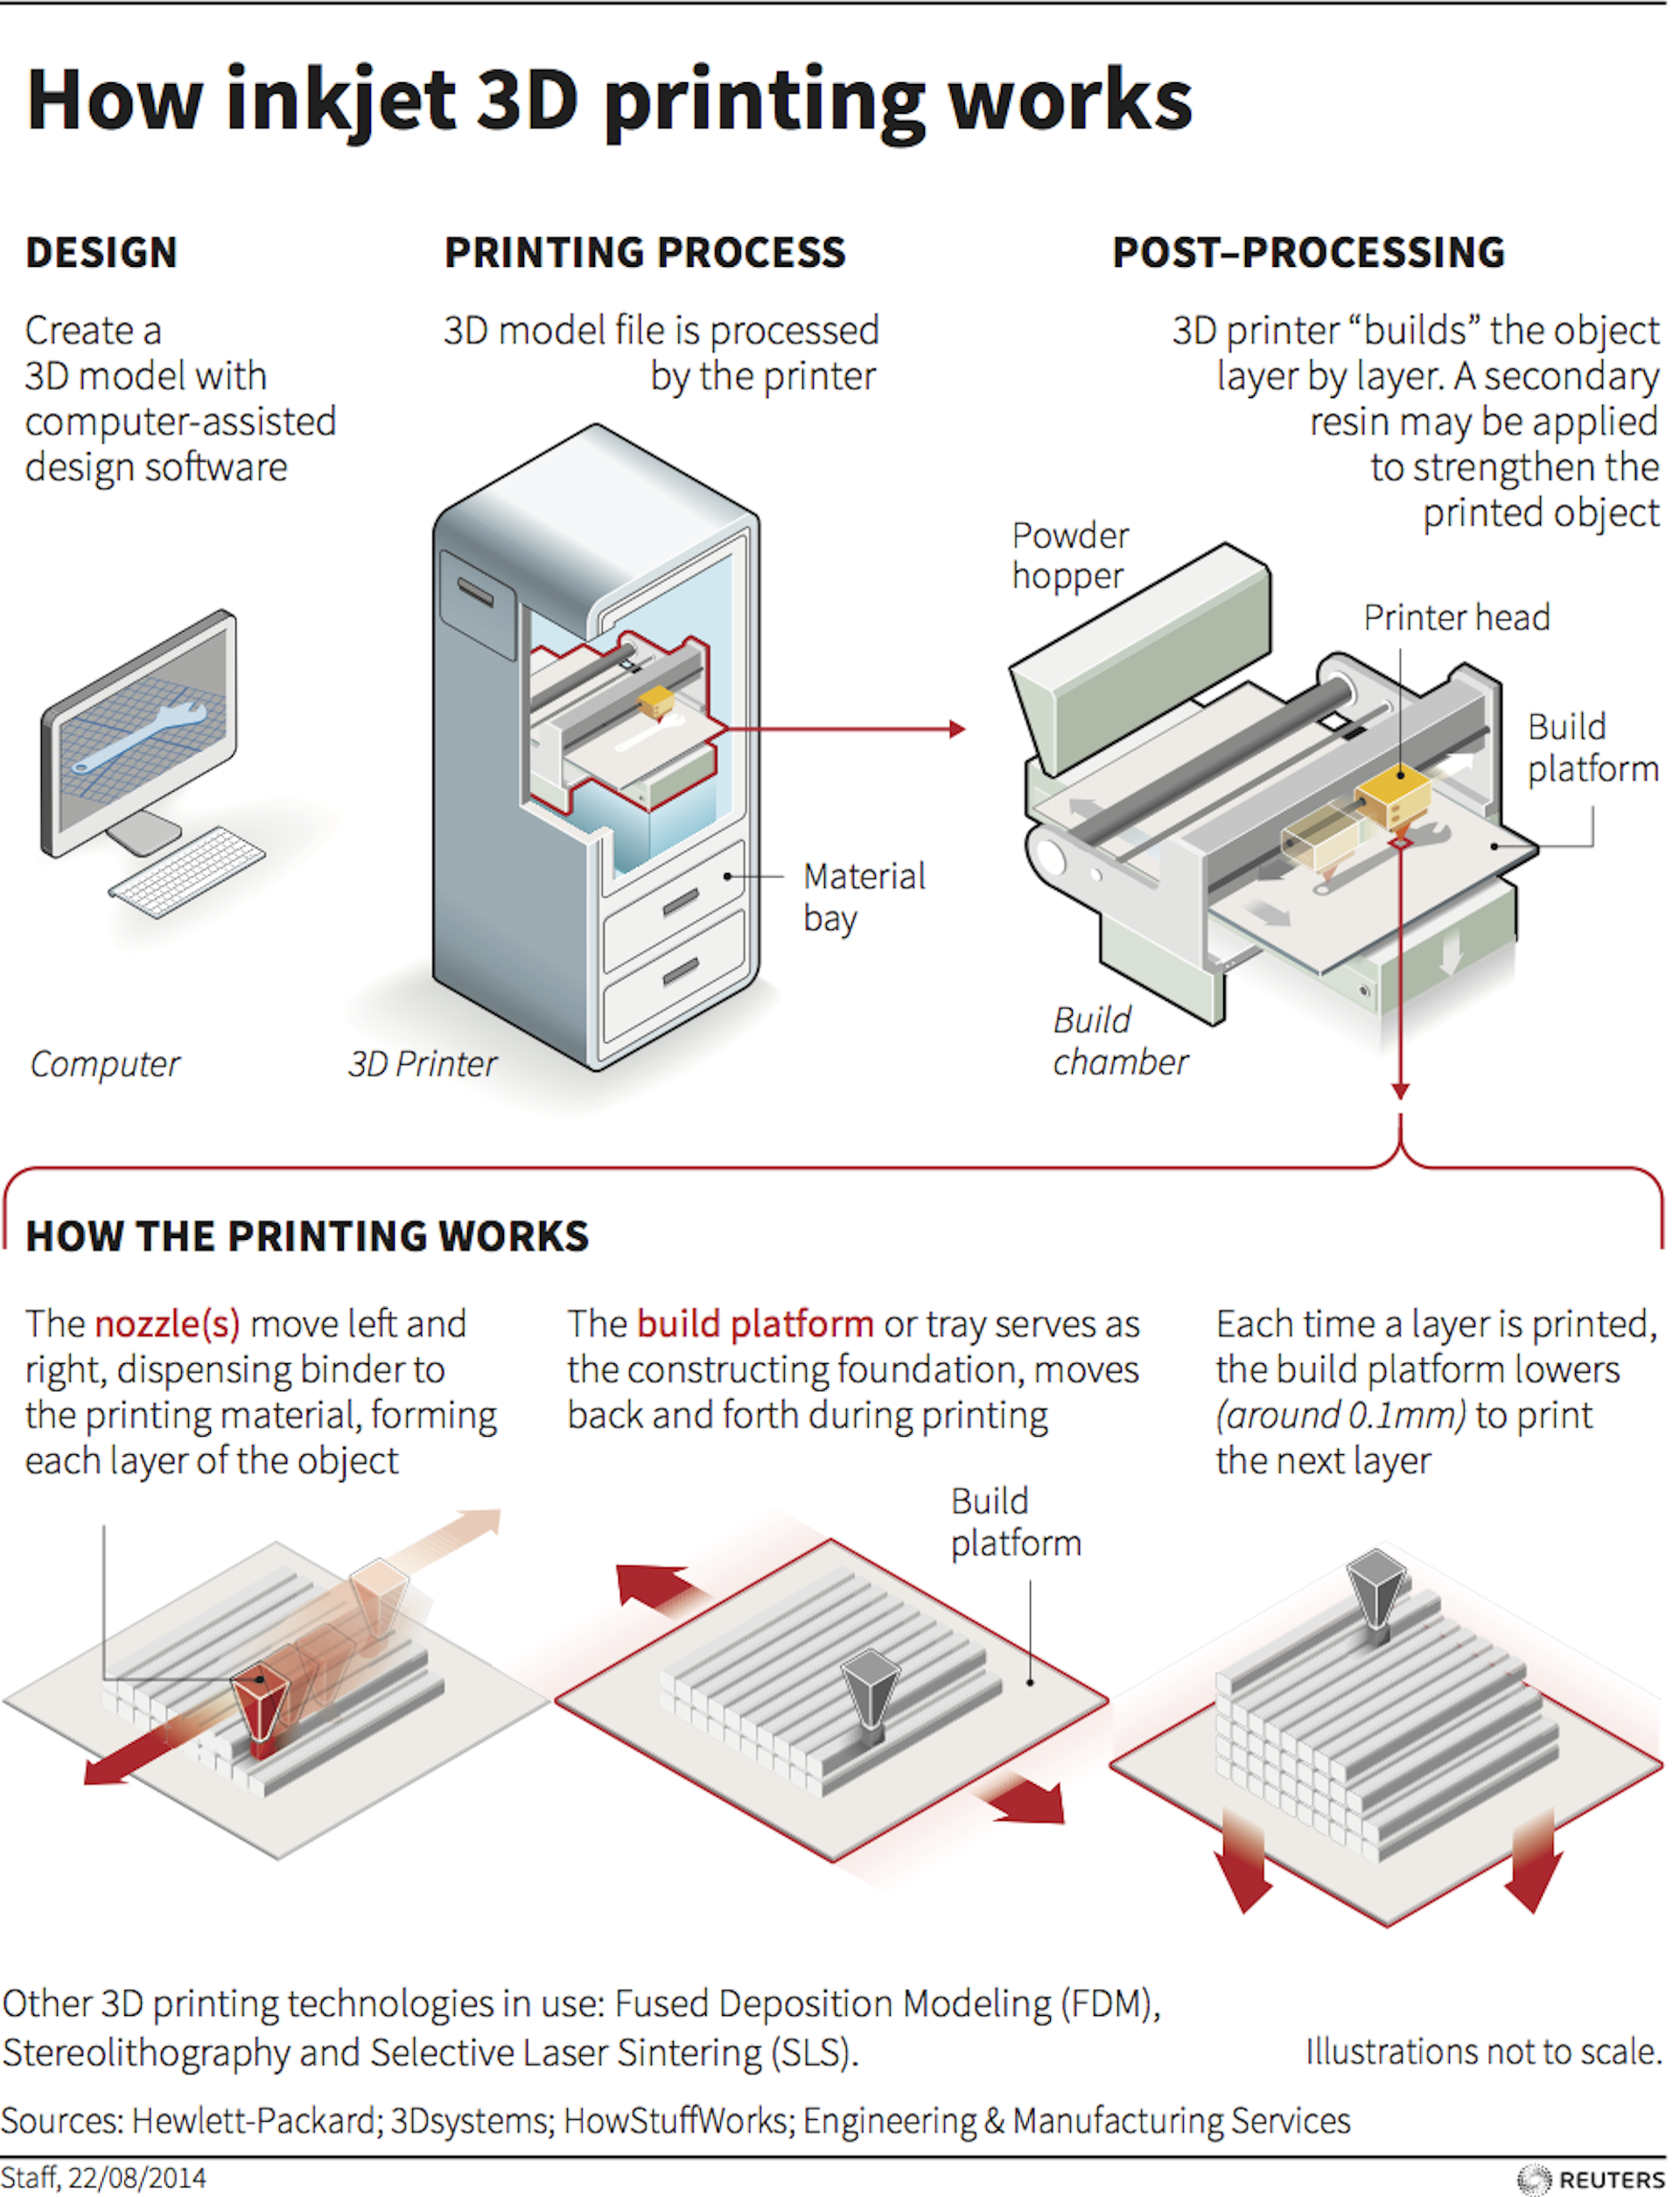 Simple operation, detailed instructions and recommendations on the Internet will allow everyone to deal with almost any printer model. But there are a few useful life hacks, the knowledge of which will help you avoid typical beginner mistakes:
- Calibrate and test the 3D printer before starting work.
- Be sure to use the correct file extension for quality printing.
- Do not remove the finished product from the printer immediately after it has been processed: this may damage the part and cause defects.
- If errors occur during the 3D printing process, try restarting the device - this usually helps.
- If restarting the printer still does not help, try changing the settings or re-entering the model.
- When assembling the 3D printing devices, follow the enclosed instructions carefully.
- Use only the correct materials for your 3D printer.
- Subscribe to useful 3D printing channels and articles.
Following the above tips will allow you to set up your 3D printer, get it ready for operation and, most importantly, print your first 3D products. Choose a model according to your budget and capabilities, and it will not be difficult to master the basics of 3D modeling and get the first details if you follow the instructions and recommendations.
- March 21, 2021
- 9700
Get expert advice
What is SLS 3D printing. How does an SLS 3D printer work? Overview of additive technologies.
What is SLS?
Hello everyone, Friends! 3DTool is with you!
In this article, we will talk in detail about one of the most promising technologies 3D print . Selective laser sintering.
Selective Laser Sintering (SLS) is an additive manufacturing process belonging to a broad family of wafer synthesis methods. In SLS, a laser selectively sinters polymer powder particles, fusing them together to create layer after layer. Granular thermoplastic polymers are used as construction material. Options for such devices can be considered in our catalog. For example, the Sintratec 3D printer.
This technology is used both for prototyping functional polymer products and for integration into small production runs, as it offers complete design freedom, high precision and produces parts with good and stable mechanical properties, unlike FDM or SLA .
Naturally, as in any other case, the possibilities of technology can be used to the full only if its key advantages and disadvantages are taken into account, so let's take a closer look at its features and principle of operation.
SLS printing process
How does SLS work?
The SLS fabrication process works as follows:
I. The powder chamber, as well as the entire printable area, is heated to just below the melting temperature of the resin, after which the leveling blade distributes a thin layer of powder over the build platform.
II. The CO2 laser scans the contour of the next layer and selectively sinters (melts) the polymer powder particles. The cross section of the component is scanned ( is sintered ) completely, so the part is monolithic.
III. When the layer is completed, the work platform moves down and the blade re-coats the surface with powder.
The process is repeated until the entire part is completed.
After printing, the part is completely sealed in the non-sintered powder, so the chamber and powder must cool before being removed. Cooling down can take a significant amount of time, up to 12 hours. Then the resulting part is cleaned of powder residues with compressed air. The unsintered powder is collected for further reuse.
Schematic diagram of an SLS 3D printer.
SLS printing specifications In SLS, almost all print options are set by the printer manufacturer. The default layer height for is 100-120 µm . For example, the Sintratec 3D printer we mentioned above allows you to print a much thinner layer, the layer thickness declared by the manufacturer varies from 50 to 150 micron.
The main advantage of method SLS is that the part does not need supports . In this case, the non-sintered powder plays the role of the necessary support. For this reason, the SLS method can print geometries of any shape that are impossible to print with any other additive or subtractive manufacturing method.
When printing with this method, it is very important to use as much of the printable area as possible, especially in small-scale production. Regardless of the amount of detail in the printable area, if the overall height is the same, printing will take the same amount of time.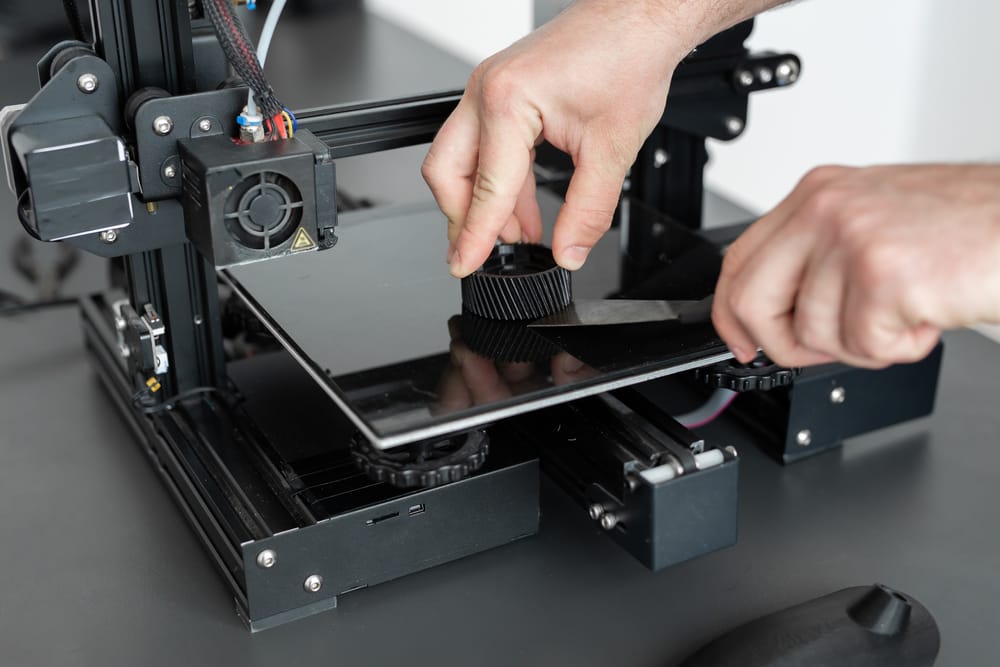 This is because it is the recoating step that determines the total print time ( the laser scanning and sintering itself is very fast ), and the printer has to cycle through the same number of layers. Also, you need to take into account the time for refilling the hopper with powder, because the same amount is poured into the chamber, regardless of the size of the printed part.
Layer caking
When using method SLS the sintering strength of the layers to each other is excellent. This means that printed on SLS printer parts have almost isotropic mechanical properties.
As an example, the mechanical properties of samples printed on SLS using standard polyamide powder ( PA12 or Nylon12 ), the most commonly used material in SLS printing , are shown in the table in comparison with the properties of solid nylon:
Parts printed on SLS have superior tensile strength and modulus comparable to solid material, but are more brittle ( their elongation at break is much lower than ). This is due to the internal porosity of the resulting part.
!A typical SLS part has a porosity of about 30%!
Porosity gives parts printed on SLS a characteristic grainy surface. This porosity also means that the parts can easily absorb water and are easy to paint. At the same time, such parts require special post-processing if they are to be used in a humid environment.
Shrinkage and deformation
SLS-parts are subject to shrinkage and deformation: when the newly sintered layer cools, its dimensions decrease and internal stress accumulates in it, due to which the underlying layer is pulled upwards.
Shrinkage of 3 to 3.5% is typical for SLS printing of and printer operators must take this into account during model preparation.
Large flat surfaces are most prone to deformation. This problem can be mitigated slightly by orienting the part vertically on the build bed. But still, the best way to reduce deformation is to minimize the thickness of the flat areas of the part, and add cutouts to the model where the design allows. These actions will also reduce the overall cost of the part, as less material will be used.
Finished sls-part with embedded embedded elements.
Excessive caking
Over-sintering occurs when excess heat around the contour of the part melts the unsintered powder around. This is fraught with loss of detail on small objects such as slots and holes.
Excessive sintering depends on both element size and wall thickness. For example, a slot with a width of 0.5mm or hole diameter 1mm will print successfully on a wall thickness of 2mm but will not print if the wall thickness is 4mm or greater. As a general rule, slits from 0.8mm and holes from 2mm in diameter can be safely printed in SLS without fear of excessive sintering.
Powder removal
Since printing method SLS no supports required, parts with hollow sections print quickly and accurately.
Hollow sections in this case reduce the weight and cost of the part, as less material is ultimately used. But you will need to make outlet holes in the part to remove unsintered powder from the internal cavities. The general recommendation in this case is to add at least 2 outlet holes with a diameter of at least 5 mm to your part.
If high rigidity is required, the parts must be printed solid. An alternative here would be to make the structure hollow, with no outlets. In this way, the powder will be compacted tightly into the part, increasing its mass and providing some additional support when mechanical loads increase, without affecting print time. Also, instead of one solid internal cavity, you can add a honeycomb structure ( similar to the infill patterns used in FDM ) to further increase the rigidity of the model.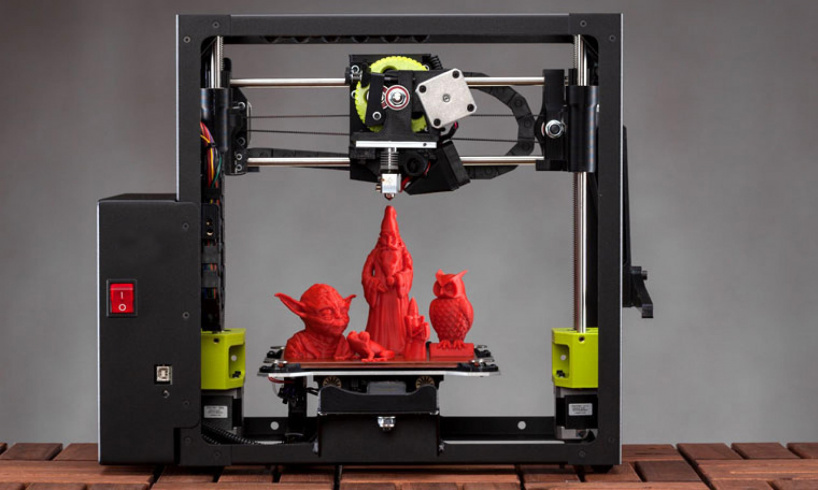 Laying out the part in this way will also help reduce warping.
Removing powder from an SLS part
General materials SLS
The most commonly used material for SLS is Polyamide 12 (PA 12) , also known as Nylon 12 . At the moment, there are more and more materials with different properties for SLS 3D printing every day, for example, elastic polymers are represented by TPE powder and its analogues. Other technical thermoplastics such as PA11 and PEEK are also available but are not as widely used.
As an example, you can see the list of materials used in our catalog: Sintratec Powder Sls.
Polyamide powder can be supplemented with various additives ( such as carbon fibers, glass fibers or aluminum ) to improve the mechanical and thermal properties of the printed part. Materials supplemented with additives are usually more brittle and have higher anisotropy.
Post-processing
SLS produces parts with a powdery, grainy finish that is easy to paint. The appearance of printed parts of SLS can be improved to a very high standard using a variety of post-processing methods such as polishing, classic painting, spray painting and varnishing. Their functionality can also be improved by applying a waterproof coating or metal coating.
SLS advantages and limitations
Summarizing the above, the key advantages and disadvantages of the technology are given below:
- SLS parts have good, isotropic mechanical properties, making them ideal for functional parts and prototypes.
- SLS does not require support, so parts with complex geometries can be easily printed.
- SLS manufacturing capabilities are excellent for small to medium series production.
- Only industrial SLS systems are currently widely available, so lead times are longer than other 3D printing technologies such as FDM and SLA.
Learn more