Pronterface 3d printer
pronterface [smoothieware.org]
Pronterface
Pronterface is a host software for Reprap electronics, originally developped by Kliment.
It is mostly oriented towards 3D printing, but can also be used to control laser cutters and CNC routers.
Pronterface's website is at http://www.pronterface.com/
The pronterface interface
Mainly for 3D printers, but very useful for debugging problems with any types of machine because it does communication very well and reports problems instead of ignoring them.
Pronterface is for 3D printers
Pronterface is designed for 3D printers and will do weird things for CNC mills and laser cutters ( like ignoring some commands ).
For CNC mills/routers, use bCNC and for laser cutters use Visicut.
Getting it
Pronterface's download instructions are located here.
There are pre-packaged versions for Windows and MacOSX
Linux users have specific instructions
Connecting to Smoothie
There are two ways to connect to Smoothie using Pronterface, via USB, or via Ethernet
USB connection
Everybody has USB, and Smoothie does too.
Smoothie uses serial over USB ( ACM ), allowing Pronterface to send commands and G-codes for execution, and even to upload files.
USB can be finicky
Contrary to Ethernet, USB can fail due to EMI and ground loop problems.
Those problems will mostly manifest as your board “disconnecting”, this means it would become un-responsive, the machine would stop moving, and sometimes your host computer may indicate that a USB disconnect occured.
Ways to fight those problems include :
Make sure your USB cable is as short as possible
It should be shielded
It should have ferrite at one end, or even better, both ends
The machine shouldn't be placed in an electromagnetically noisy environment.
The machine, and the computer controlling it, should be connected as close as possible in the electrical installation, ideally they should be plugged in the same power strip.
Windows drivers
Using a Smoothieboard with the Windows operating system, requires the prior installation of drivers.
Those drivers as well as instructions on how to install them, can be found at the Windows Drivers page.
Please make sure you install the drivers, and restart the computer, before you try to connect to Smoothie via Pronterface.
To connect to Smoothie, follow this procedure :
Click on Port, this refreshes the list of boards connected to the computer
Select your board in the drop-down menu next to the Port button. This can be something like /dev/ttyACM0 on a Linux machine, or COM1 on a Windows machine
You do not need to set a baud rate, Smoothie will use the fastest speed possible over USB, and any baud rate setting is ignored.
Click on Connect
If everything works correctly, the Pronterface log panel on the right, should show something like :
Connecting... Printer is now online.
Now, Pronterface will start reading and displaying temperatures, and will allow you to interract with your machine.
Ethernet
Smoothieboard has an ethernet connector, it exposes a web interface, but also a serial ( telnet ) interface.
You can use that interface to connect to Smoothieboard over Ethernet, using Pronterface
First of all, set up your Smoothieboard to activate Ethernet : see the Network page.
Wifi
It is not recommended that you talk to your Smoothieboard over Wifi, it introduces a certain lag, that can make the interface annoying, or even un-usable.
Make sure your computer is connected to your network switch and then to your Smoothieboard, using ethernet cable all the way
Streaming mode
Make sure you have the right option set in Pronterface. Go into the Settings > Options menu, then go to the Printer Settings tab, and check that the TCP streaming mode option is checked.
If it is not, you will probably experience slow transfers and streaming.
Once you have confirmed that the Network functionality works normally ( for example by accessing the Web Interface ), you can now try to connect using Pronterface.
First, find your Smoothieboard's IP adress, here we will for example say it is 192.168.1.10
Now, in the Port drop-down menu, where the USB serial port name usually is, enter :
192.168.1.10:23
And click on Connect
If everything works correctly, the Pronterface log panel on the right, should show something like :
Connecting... Printer is now online.
Now, Pronterface will start reading and displaying temperatures, and will allow you to interract with your machine.
Sending commands
In addition to all of the nice buttons and controls the Pronterface interface offers,
you can use the Send input box and button, to send G-codes and commands to your Smoothieboard manually.
G-codes
Sending G-codes requires no special treatement at all, simply input the G-code into the Send input box ( lower right ), and hit the Send button.
You can find a list of useful G-codes here.
Commands
In addition to G-codes, Smoothie understands a set of commands.
You can find a list of useful commands here.
However, sending commands is not as trivial as sending G-codes.
Because Pronterface is used to G-codes, but not commands, it will ignore commands if you input those as-is.
So, you need to add a @ character before the command to send it.
For example, to send the Version command, you need to actually send @version.
Sending files
Smoothieboard has a SD card, which is used to store configuration, but also G-code files.
You can use Pronterface to send G-code files to the Smoothieboard, which are then store, and which you can then play as you wish.
This is useful in particular if you have problems with USB connection errors, or insufficent USB speed ( both extremely rare problems ).
To send a G-code file to your Smoothieboard, follow this procedure :
Click on Load file
Select your file
Pronterface will load and analyze the file
Click on SD
Click on SD Upload in the menu that popped out
Enter a filename ( with Smoothie you can ignore the warning about using a 8.
 3-type filename and just use a normal filename )
Now the file will upload over the serial interface, you can monitor the progress in the bottom bar
Pronterface Software | REVOLUTION i3
www.Plastic Scribbler.com
Pronterface is a graphical interface for the host software supplied with your printer. It is part of a set of software from Printrun– a group of G-code utility applications. It is with Pronterface that you can control your 3D printer. This guide assumes you already have all the required software installed. If you do not already have the required software installed, please visit our guide on how to install it.
Connecting to your printer
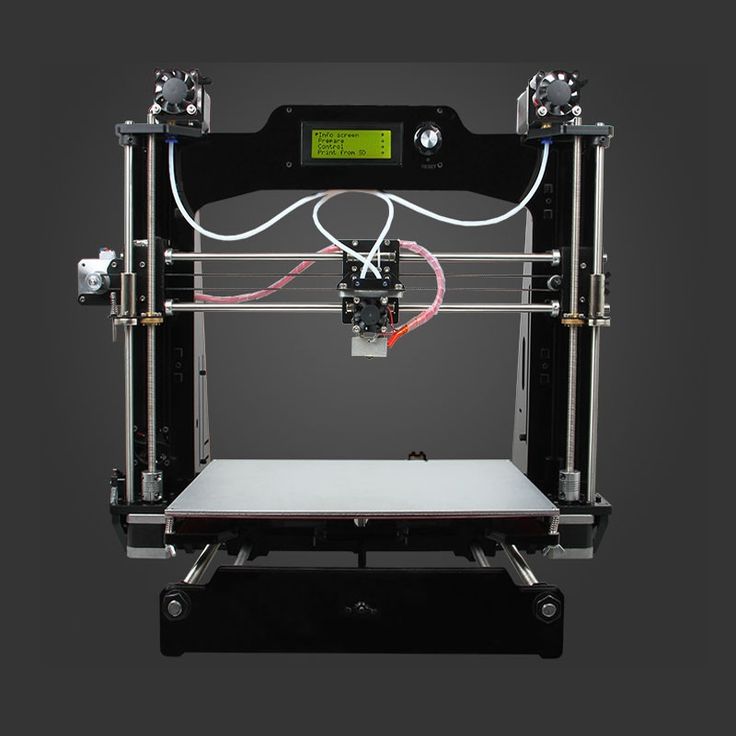
Start by connecting your 3D printer to you computer via a USB cable. Connect the provided power supply to the 3D printer and plug the power supply into a power outlet. Next open Pronterface by navigating to the directory you have installed Pronterface in (i.e. C:Pronterface ) and double click on the Pronterface.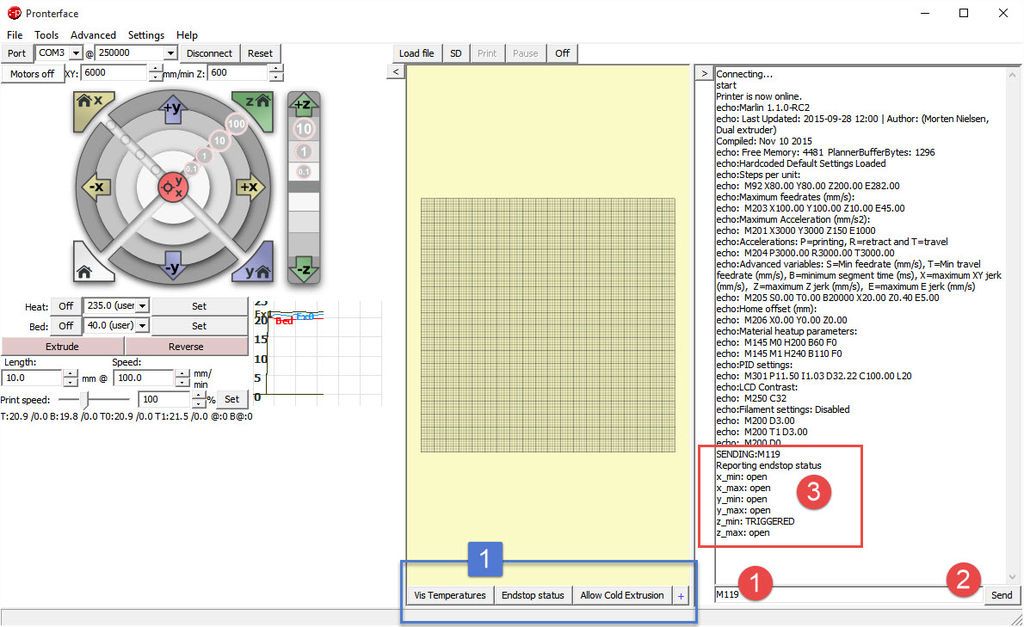 exe icon. After Pronterface loads select the com port your 3D printer is connected to and then set the baudrate to 250000. Next click on the connect button. You will see a message in the right column of Pronterface indicating that the printer has successfully connected .
Homing and Moving the X, Y and Z Axis and the Extruder
Once connected you can use Pronterface to manually control the X, Y, and Z axis plus the extruder. Before manually moving an axis, you may want to home the axis before hand to prevent the axis from over shooting its boundary. After the axis is homed it will not be able to travel past its maximum set limit of 204mm. To home an axis (moving the axis to its zero start position), press the X-home, Y-home, or Z-home icon to home the X, Y, or Z axis respectively. When a print is started (if you use the provided software and the predefined parameters to slice the model) the printer will automatically home each axis so it is not necessary to home the axis’ before printing.
After homing you may move any axis, X, Y, or Z by pressing the X+, X-, Y+, Y-, or Z+, Z- directional icons. The X and Y directions have 4 distances to choose from to move at a time—.1mm, 1mm, 10mm, or 100mm in either the plus or negative direction. The Z axis directions has 3 distances to choose from–.1mm, 1mm, and 10mm. When an axis is at its home position it is at zero. You can move each axis of your Asterid printer 204mm from the home position. Starting from zero press the icon in the positive direction. To move towards the home position move in the negative direction. You can also change the rate at which the X, Y and Z axis move by entering a value in the XY mm/min dialog box and the Z mm/min dialog box, however, we recommend using the default values of 2000 mm/min for the X and Y axis and 200 for the Z axis.
You can also manually control the extruder motor using Pronterface, but be sure that heater is turned on before doing so, see the instructions below for more information. The distance and speed of the manual control is set right below the extrude button. The default values are 5mm at 100mm/min.
Nozzle and Heated bed settings
Underneath the directional controls for moving an axis are the nozzle heater and heated bed controls.
To set the temperature of the nozzle use the pull down menu following Heater:, to select a predefined temperature or enter a temperature manually and press Set. To turn the nozzle heater off, press the Offbutton next to Heater:.
To set the temperature of the heated bed (if you model of printer has a heated bed) use the pull down menu following Bed:, to select a predefined temperature or enter a temperature manually and press Set. To turn the heated bed off, press the Off button next to Bed:.
You can monitor the temperature of the nozzle and bed by selecting the Watch option and then viewing the graph of real time temperature value. Or, you can press the Check Temp to view the actual temperature in the console on the right of Proterface.
Opening Slic3r from Pronterface
From the pull down menu in the toolbar select Settings then choose Slicing options. This will open the program Slic3r. Click here for a tutorial on using Slic3r for more information.
If this is your first time opening Slic3r then you will be prompted with the Slic3r configuration wizard. Select cancel on this wizard and Slic3r will now load the 3 pre-configured profiles for your Asterid Series 3D printer.
Opening a file to print
Your Asterid 3D printer uses G-code to know what to print. The slicing program will convert a stereolithography (.STL) file of a 3D model into the necessary G-code that your printer can understand. Once the file has been exported into the needed g-code format you can open that file in Pronterface for printing.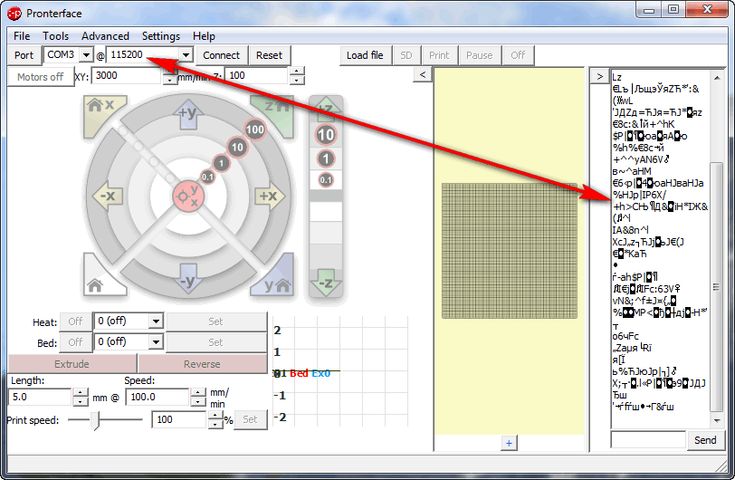 For more information and instructions on how to slice please visit our Getting Started with Slic3rarticle for more information.
To open the G-code, navigate to the pull down menu on the Pronterface toolbar and select File, open… Navigate to the folder you exported the G-code file into and select that file and then press OK.
When Pronterface loads the file it will appear on the graph in the graphical user interface.
Like this:
Like Loading...
(Solution available) What is the printer console/terminal?
There are several programs that could serve as a console to connect to a printer, but let's start with something: a USB connection.
USB connection
The first time we connect the printer via USB, we will be notified that some unknown element is connected. If we are using Windows, we can find out which device it has decided that we now have through the device manager ( Windows key , then typing in Manager and Enter ).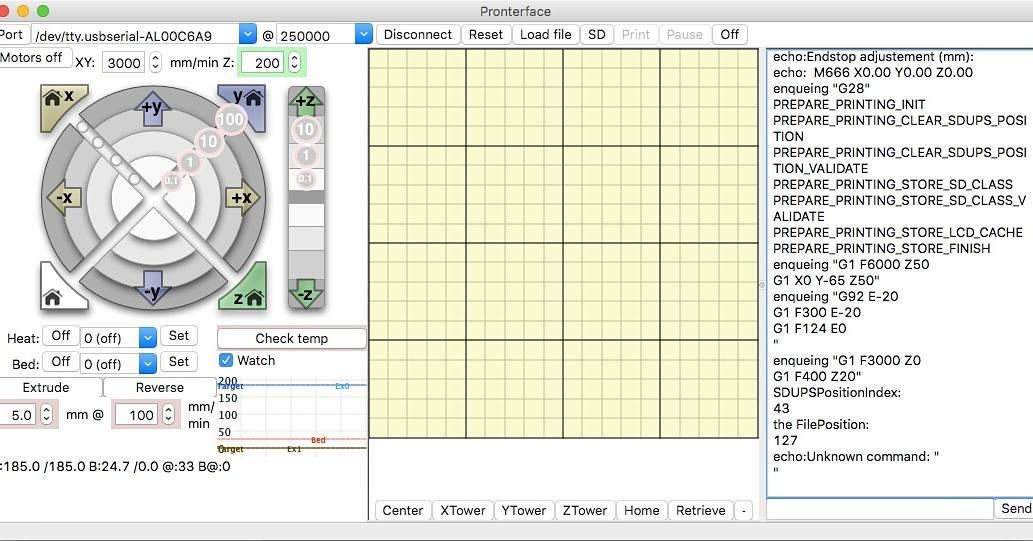 It must be a COM port as shown in the picture.
In this case, we connected to COM4 . To change the COM port, we can do so by right clicking -> property , then connection settings and additionally . In the new window, we can change the COM port number to anything from 1 to 256, but it is recommended to keep it a little lower.
Make sure you are using the printer power supply and USB connection as you cannot use motor control commands if you have the printer power supply turned off.
Using the COM port
Now we need a program that can use the COM port to connect to the printer. There are several of them, as I said. One of these is Repetier Host which comes with a slicer and a nice GUI. Other - Ultimaker Cura , which has the same capabilities, but does not have the registration of all exchanged commands. Since many are familiar with it as a cleaver, I will first consider it.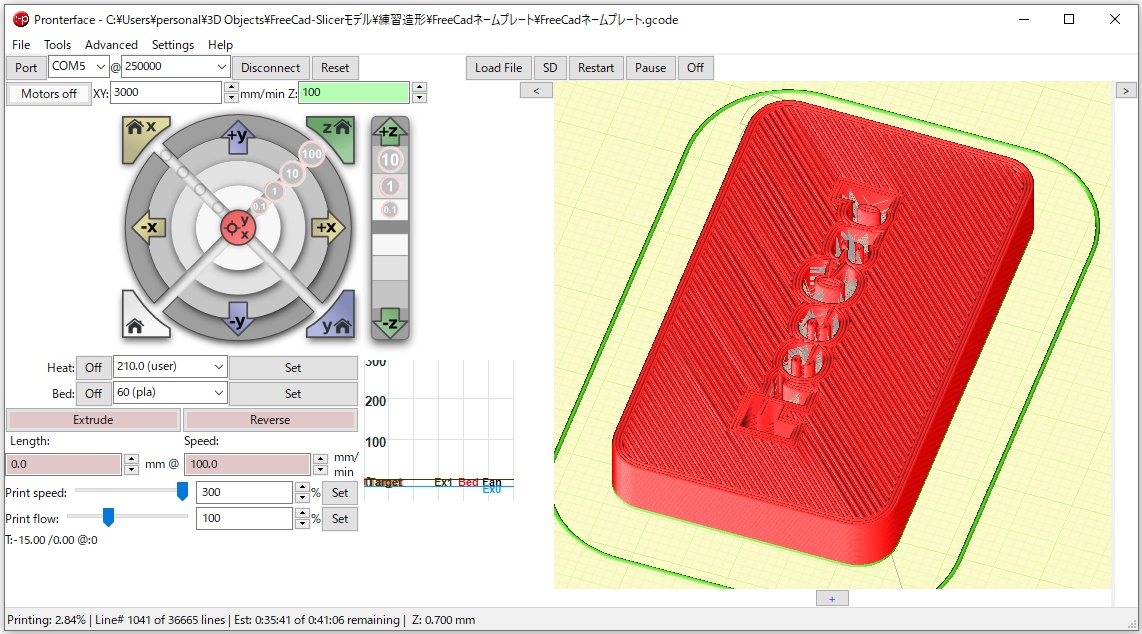 As a third option, I'll take a look at Pronterface .
WARNING: Only one program actively using the COM port can run at the same time, because the first program to gain access to it will claim all uses of the COM port until it is closed.
Ultimaker Cura
After launching Ultimaker Cura, select your printer. many printers are already available as presets, so just import your printer or create your own profile. At the moment the latest version of Cura is 4.1.0 and will look something like this:
After switching to Monitor it will automatically connect to the printer via the COM port, in my case 4.
Once again we test the connection via Home, and then use the Send G-Code request, confirming the lines after Enter .
Repetier Host
After starting the Repetier Host for the first time, you need to configure the printer. Ctrl + P opens the printer configuration window. We need to know our printer's baud rate, so I looked at my Ender3's documentation, which told me that 115200 is the correct setting. Most printers seem to work with this setting. Other tabs define the speed, extruder number and limits, as well as the shape of the table. The rest is not needed. My settings for Ender3 are:
OK, we have done our settings and saved via OK .
Now we click on the Connections button on the left side of the menu:
It should switch to the blue disconnect button and now display other parts of the print, showing that we are connected. Note that at the bottom of the screen, the log is filled with all commands and exchanges.
On the right side we can now select the tab Manual control
It is recommended to press the Home button before sending any commands. This also serves as an additional test to see if the printer is properly connected. Now we can use a quick G-code to send our commands. Commands will be logged below.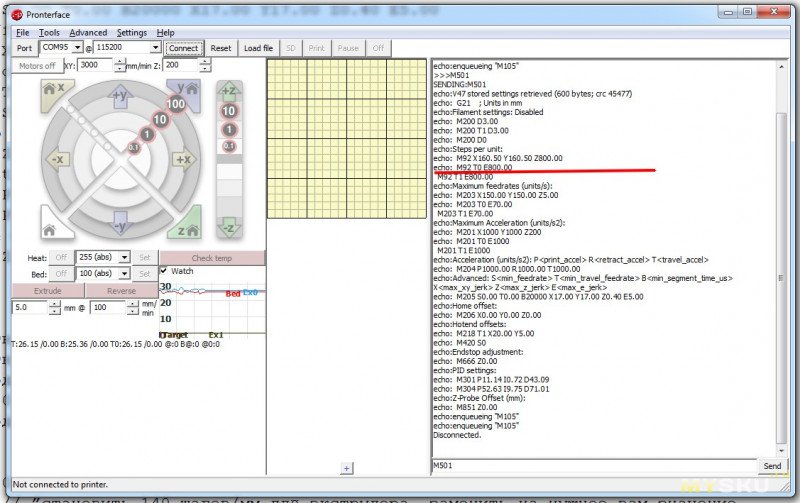
Pronterface
This is the first time I have used Pronterface. The first thing to do after downloading the Printrun package and running the Pronterface application is to press Port , then set the correct baud rate (115200 seems to work for many machines) and press connect .
The GUI will be saturated and the correct log will show a lot of things tested on the connection. Please note that there is a temperature curve log in the lower right corner of the GUI which can be very handy for troubleshooting as it shows changes for a short time.
Below the log we find the input data for the commands, and if we send a command, we get a log entry:
3D printer construction, through the thorns to dream with friends!
Comment
Strela_rosa
It remains to understand the value of the numbers in front of the star 😃 Milimolt or SOPR in OMOM .