Photopolymer 3d printing
3D Printing Photopolymer Parts | PolyJet, SLA | Stratasys Direct
Photopolymers utilized in 3D printing offer fine feature detail along with a final-product aesthetic realism unmatched by other technologies. With prototypes and concept models, simulating cosmetics and feel of the end-product is often essential. That’s where photopolymers really shine. With little finishing needed, photopolymer technologies (such as PolyJet or Stereolithography) make aesthetic parts rapidly, getting your idea into your hands and in front of your team that much quicker.
Photopolymers are thermoset materials, or polymers, that change properties when exposed to ultraviolet light. These materials can be clear or opaque, flexible and rigid, and can be specially formulated to accommodate unique application needs.
Suitable for models and prototypes that don’t require a long shelf-life, photopolymers have limited durability. They are not UV stable and can become discolored or deformed over time. These properties are essential considerations when working with photopolymers, but when testing a particular look or functionality of a prospective design, the material remains unmatched in fine detail and smooth finish. At Stratasys Direct, we offer a wide range of photopolymers for two technologies: PolyJet and Stereolithography.
PolyJet
PolyJet photopolymers have properties that range from rubber to rigid, transparent to opaque, neutral to full color. PolyJet technology also allows us to combine several materials in one model to fulfill specific requirements. We’re able to simulate over-molding with two different photopolymers to give prototypes exact product feel. Additionally, PolyJet prints in full color, adding another level of customization and possibilities for final product aesthetics.
PolyJet builds by jetting layers of liquid photopolymer as thin as 16 microns (0.0006”) layer by layer as a UV light cures simultaneously. PolyJet can print rigid and flexible materials in a single build to create over-molded parts without tooling.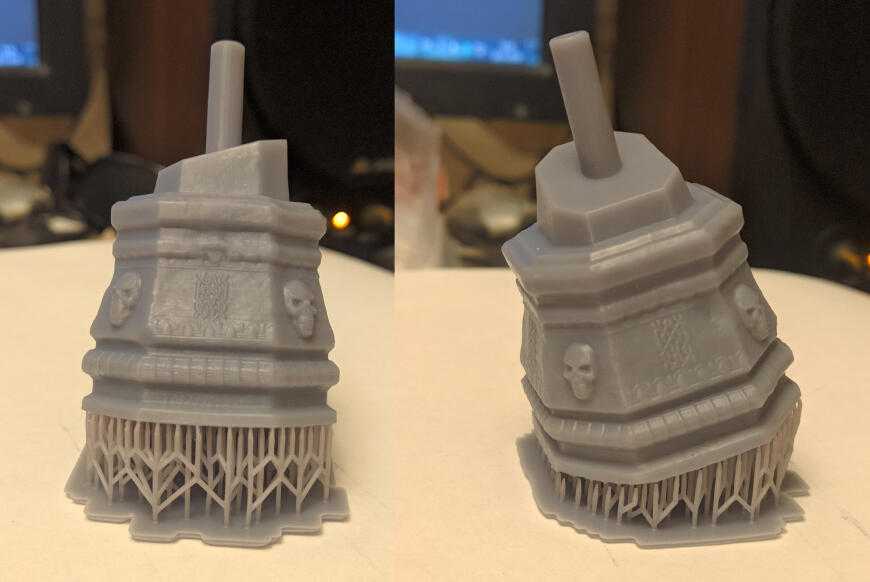 The technology delivers parts with shore hardness ranging from 27A-95A. Because PolyJet doesn’t require hard tooling to deliver an over-molded part, it is frequently used for prototypes requiring an elastomeric surface, such as grips or buttons, or for testing material hardness.
By blending two or three base resins to create nearly 1,000 composite materials with specific, predicable properties, PolyJet photopolymers expand your possibilities, because a range of hues, translucencies, Shore A values and other properties can be achieved for imaginative prototypes.
Stereolithography
Stereolithography (SL) photopolymers are epoxy or acrylate based resins that can create clear or opaque, strong and rigid parts. These materials mimic the properties of ABS, polycarbonate and polypropylene in layers as thin as 0.002”. At Stratasys Direct, we offer specially formulated SL photopolymers for applications like investment casting patterns.
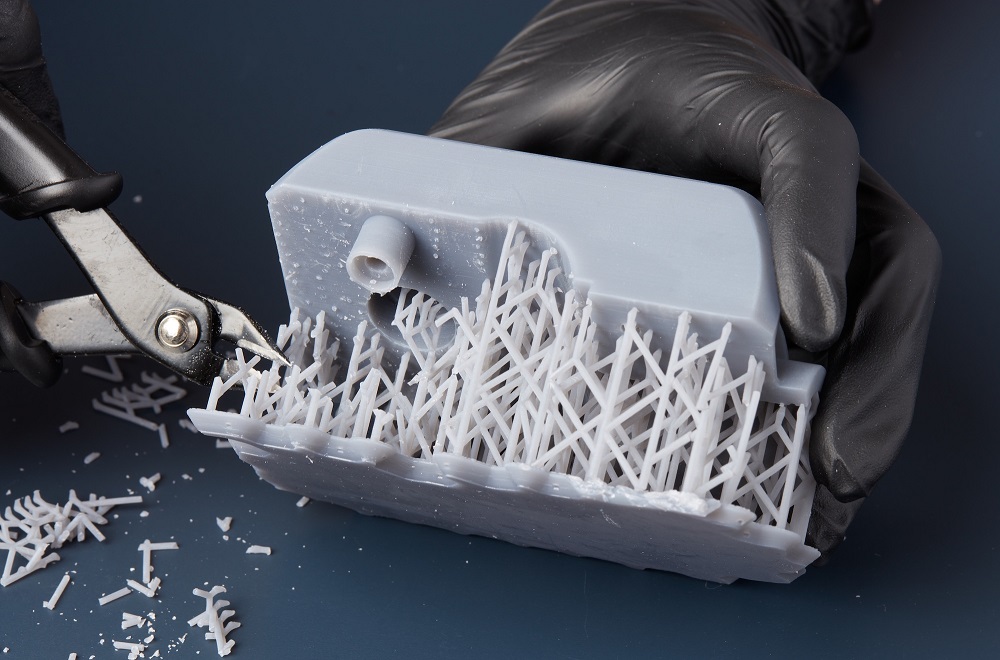
Stereolithography builds parts with a precise UV laser to cure and solidify thin layers of resin. Post-build, SL parts require some support material removal and further UV curing, and other requested post-processing. Our finishing expertise can take your SL prototypes and transform them into a replica of your finished product. Custom finishing, texture, color, artwork, EMI/RFI shielding, plating and other functional coatings can bring additional value to prototyping and models.
Stereolithography materials differ from PolyJet in that some offer higher impact resistance, heat deflection temperature and humidity resistance for functional prototyping or patterns. At Stratasys Direct, we offer a unique near-hollow build style with Stereolithography that allows us to build large concept models at the fraction of the weight. Use SL photopolymers to build light, large-scale parts in much faster and at less cost with this method.
Photo-Quality Finish with Photopolymers
The ultimate benefit of building parts with PolyJet and SL photopolymers is the ability to get your vision into your hands much faster than conventional manufacturing methods. PolyJet and SL offer highly-cosmetic, sometimes large and extremely lightweight models delivered right on time.
What Is Photopolymerization in 3D Printing? | Blog Posts
During operation, 3D printers often release heated material in a liquid or semi-solid state. Doing so allows the 3D printer to release an even and consistent amount of material, thereby reducing the risk of defects like ghosting. Finished objects, however, must be solid, which is where photopolymerization comes into play. Photopolymerization is used to harden the deposited material so that the finished object achieves a solid state.
The Basics of Photopolymerization
Photopolymerization is the curing process that’s characterized by the use of ultraviolet (UV) light. In 3D printing, it’s used to cure the deposited material. When exposed to UV light, the deposited material cures. Curing results in physical changes to the deposited material, turning it from a liquid or semi-solid state to a solid state.
Not all materials support photopolymerization. Rather, this curing process is used exclusively for photopolymer materials. A photopolymer material is a type of resin material that hardens under UV light. Other types of materials are generally unaffected by UV light. For photopolymerization to work, a photopolymer material must be used in the 3D printer.
How Does Photopolymerization Work?
Photopolymerization works by leveraging the UV-sensitive properties of photopolymer materials. For most 3D printing processes, layers of deposited material are cured via a UV light. After the 3D printer has completed a layer, a UV light is projected over it. The UV light triggers a reaction within the deposited material, essentially solidifying it. The cured material changes to a solid state, allowing for the production of a solid and finished object by the 3D printer.
Some of the most common 3D printing processes that support photopolymerization include the following:
- Digital light processing
- Continuous liquid interface production
- Stereolithography
Benefits of Photopolymerization
Of course, there are other curing methods available for 3D printing materials. Some 3D printing processes use a laser, for instance. The laser moves across the top of the print bed while curing the underlying material. When compared to lasers, as well as other curing methods, photopolymerization offers several advantages.
Photopolymerization is highly effective at solidifying deposited materials. It’s able to change the physical properties of the deposited material so that it’s stronger and better protected against damage.
With photopolymerization, entire layers of deposited material can be cured at once. This is in stark contrast to laser-curing methods, which generally only cure a small section of material at once. Because it’s capable of curing entire layers at once, photopolymerization can be performed very quickly.
Do you have a prototype that’s been stuck in your head, get it out of your head and into your hands. Let us help you with that.
No tags for this post.
Introduction to Resin 3D Printing and Overview Anycubic Photon S
Table of Contents
1. Introduction
2. Printer Description
2.1. Specifications Anycubic Photon S
2.2. Delivery set
2.3. Design description and comparison with the first generation
3. Operation
3.1. Starting the printer
3.2. Slicing programs
3.3. Photopolymer printing in general
3.4. Features of operation of photopolymer printer
3.5. Features of operation of Photon S
4. Conclusion and examples of printing
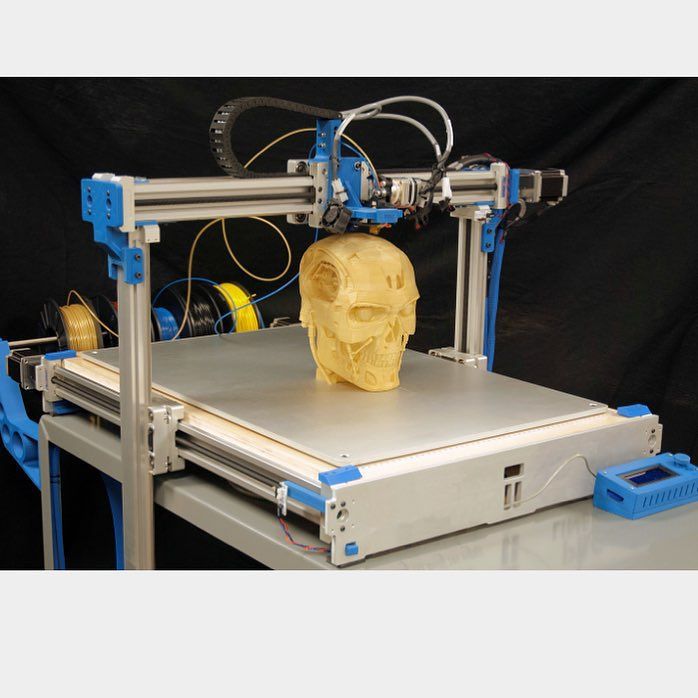
1. Introduction Your obedient entered / got into 3D printing (underline as necessary) back in 2014. After looking and reading well on almost the only forum at that time, Roboforum.ru, the topic of choosing and buying a printer and seeing that almost every first one there buys a kit of self-assembled Pryusha of a Chinese spill, after assembling which he begins to print parts on it for a new 3D printer, I made the only possible decision: in order not to fall into this inevitable vicious circle, I bought an already assembled clone of the second Makerbot - FlashForge Creator, which I have already mentioned more than once in my articles on 3D printing technologies (blowing dust).
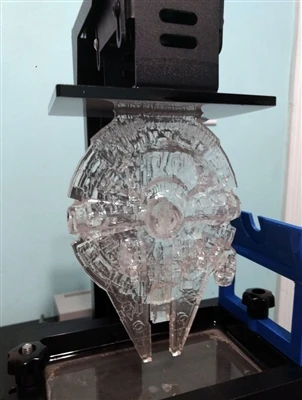
But the topic of photopolymer printing, which gives a completely different potential for the quality of the print, albeit at the price of a smaller size of the latter, inevitably “tickled the nostrils”, enticing the opportunity to get the result already without reservations “well, what do you want, this is 3D printing, not casting”. But the projector photopolymers that were available for purchase at that time did not attract at all with an exorbitant price.
Therefore, the first acquaintance with this technology took place on a self-made printer built on 15 mm rails and ball screws with a FullHD projector. It would seem that this is it - the brightness (light speed), the size of the tray for printing 192x120, the presence of a “nod” in the design, serious mechanics. But alas, all castles in the air stumbled over the harsh reality, as often happens: large size, fragile acrylic bath, dust on the projector optics, a milled platform and its bracket that do not provide for normal cleaning of the photopolymer, let's say politely, the unpleasant smell of Chinese photopolymer, which also turned out to be practically non-working (did not freeze even in the sun), and, as a control, poor sharpness at the corners of the used Acer P1500 projector at the required short focusing distances. As a result, one (ONE in capital letters) successful printout with FunToDo Castable photopolymer was made on this printer, which was later put into experiments. And the main reason why I completely closed the topic of a home-made projector printer for myself is the actual change during this time of technology from a cumbersome and expensive projector to LCD technology that has almost completely captured the market today, when it became clear that a photopolymer, especially a home one, simply must be much more compact, simpler and uniquely to have a closed print chamber. Moreover, the cost of a projector printer and an LCD are completely incomparable, not to mention the intricacies of calibrating the coaxiality of the optics of the projector of the Z axis of the printer.0004
Thus, the real entry into the photopolymer occurred already on the first generation Anycubic Photon bought a little later. This printer had an excellent film tension system, a durable aluminum tray and a platform well adapted for cleaning, but at the same time, due to the cheaper design, it had problems with the stability of the Z axis, so a year later I was already unpacking the Anycubic Photon S bought on occasion and at a discount, which will be discussed further (hereinafter I will call it Photon, indicating the first or second, which is S, generation if necessary).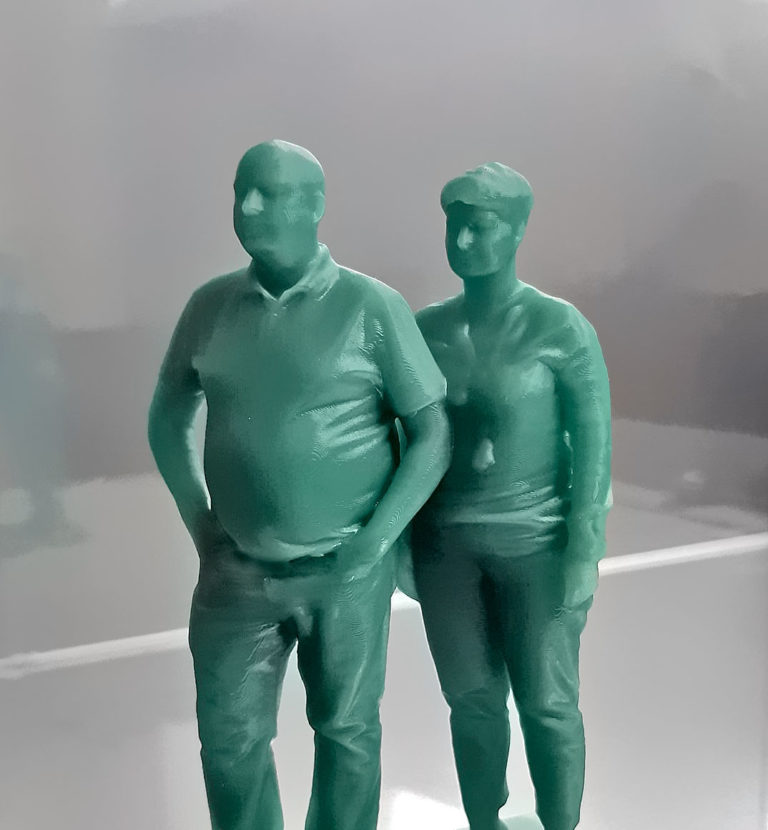
What is the point of doing a review in any form of an already morally obsolete printer, except, I confess, it’s a sin, participating in a printer review contest, when there are already more promising technologies for using monochrome matrices, and indeed, something, and even video reviews on YouTube on Is this printer enough? Firstly, it is still a very good and quite budgetary photopolymer, sold and relevant in terms of aggregate, secondly, “what we have from the goose” after a year and a half of operation are pitfalls that are difficult to stumble upon during the initial review, features of work, wear, etc. Thirdly, this is an opportunity, based on a review of this printer, to create, along with this, an article on an introduction to photopolymer 3D printing for beginners [the author wipes his hands first with isopropyl alcohol, then with a damp cloth, swearing quietly under his breath]. But I must say that this article reflects my own experience with photopolymer and therefore may be somewhat subjective.
2. Description of the printer
money change?
2.1. Characteristics of Anycubic Photon S For those who are not familiar with this printer, first I will give the main characteristics:
- a 5.5 "RGB matrix typical for photopolymers of this class with a resolution of 2560x1440, giving a dot pitch of 47 microns
- LED UV matrix, which gives better illumination uniformity and thus removes the problem of geometric distortion in the corners
- aluminum tray with groove for pouring out the photopolymer
- platform calibration system with one fixing screw - exhaust air filtering system with two charcoal filters
- Z-axis on two roller guides - ABS housing white versions, I chose black. I will give a photo from the official site, because. after a year and a half of operation, the printer no longer looks like it did when the box was first opened.
2.2. Scope of delivery
The printer itself is delivered in a cardboard box, padded around the perimeter with a sufficient amount of sealant, the print platform and tray are placed inside the case itself and individually packed in a sealant.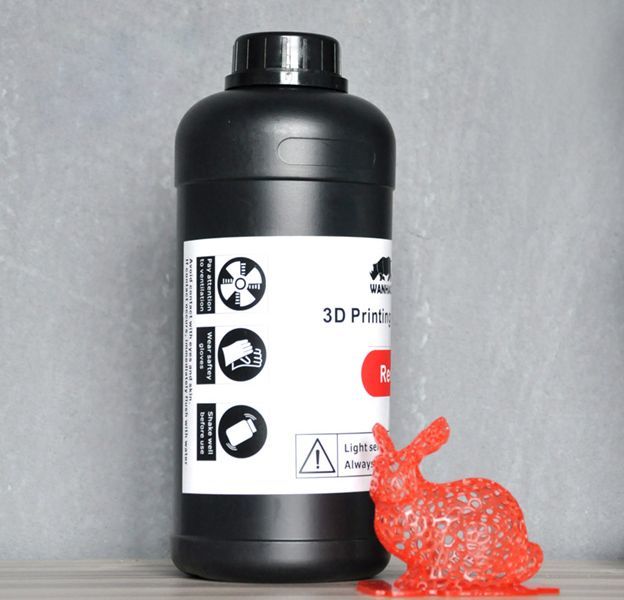 The printer also comes with a set of disposable paper filters for filtering the polymer (you can buy them at auto enamel stores), a plastic spatula, which I personally use to clean the walls of the bath from the photopolymer when draining it back into the container, a pair of gloves, a flash drive with test files and screwdriver. Also, the kit should include half a liter or a liter of branded Ekubikov photopolymer, but this already depends on the configuration of the printer.
2.3. Description of the design and comparison with the first generation
Now let's dwell on the design in more detail and conduct a comparative analysis of it with respect to the first generation, whether the printer has become a predecessor in everything. The first striking difference between the Photons of two generations is the case material. Those who were interested in these models, of course, know about it, but this article is primarily intended not for gurus who know all this, and have already eaten more than one dog on their own construction of 3D printers, but for people relatively distant . .. So, the case of the first generation Anycubic Photon is made of steel, the second one is made of ABS plastic. In a sense, this is even funny, because. this plastic is easily degraded, more precisely, it gradually dissolves upon contact with the photopolymer. If, in the case of a steel case with acrylic windows, it was clear that nothing would happen to him, then there are even doubts whether the walls will lead over time and whether, for example, the door will close with difficulty and stick it to body with this same photopolymer. And it's not that the metal case is a clear advantage, but for Photon, given the peculiarities of its design, unfortunately, yes. More on that below.
The second feature that, looking ahead a little, was decisive for me when buying, is the replacement of a single Z-axis roller guide with a double one. In the world of harsh homemade products, recognizing only the option with rail guides, when in every second homemade product you can see red-green ones similar to HIWIN (yes, in most cases they are similar, because they are ordered mainly from China, and the percentage of fakes of this fashionable home-made manufacturers, very high) rail carriages, the use of roller guides is not even bad manners, this is an excuse to lead a naked printer designer through a crowd of home-made workers, throwing rotten vegetables at him. Yes, yes, and someone's voice, periodically repeating "Shame!".
Indeed, the first generation with a Z-axis roller guide was very prone to wobble depending on how lucky the owner was with a particular instance. For those unfamiliar with the terminology, this means that the carriage, when lifting and lowering, “walked” horizontally by several tens of microns and deviated by small fractions of a degree. “And how many are these several tens of microns, these are pennies!”. Believe me, no. On all more or less even vertical surfaces or close to them, unpleasant and easily noticeable “waves” appeared, with which nothing could be done. Yes, these carriages have an adjustable tightness, but an attempt to adjust the print quality on the first generation of the Photon did not lead to significant changes. On the other hand, wobbles really catch your eye only on flat surfaces with a large angle of inclination. Why, even without trying this second generation in print, I immediately decided for myself that this was almost the main reason for replacing it? It's very simple: even two such "imperfect" rollers on individual guides, separated by a long distance, despite the seemingly simple solution, wobble removes almost completely.![]() This solution is in the “simple, blocky and works” category, and elementary geometry from high school guarantees “workability” here. These double guides are clearly visible here, as well as the Z-axis close to them (ideally, the location of this axis should be close to plane formed by vertical guides):
This solution is in the “simple, blocky and works” category, and elementary geometry from high school guarantees “workability” here. These double guides are clearly visible here, as well as the Z-axis close to them (ideally, the location of this axis should be close to plane formed by vertical guides):
The third difference from the first generation of Anycubic Photon S is the use of a backlight LED array. I repeat that, unlike the "bell"-diffuser and a single powerful LED of the previous generation of LCD photopolymers, this design makes the illumination of the entire screen somewhat more uniform, and also eliminates the geometry problems of the printout in the corners of the platform. As a nice bonus, this reduces the exposure time of the layer by approximately 15-20% due to the greater total backlight power. In this not very representative photo, I tried to show how such a block of individual LEDs, usually called “paraled”, shines through the matrix
Another feature that frankly surprised me, which is common to both generations of Foton, is the presence of a carbon filter with an exhaust fan (two fans and two filters in the second generation) of air from the printing chamber.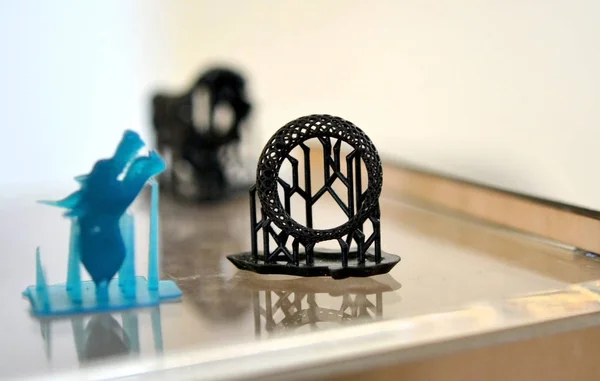 As conceived by the developers, this was to remove the inevitable smell of photopolymer during printing by absorbing it with a carbon filter. Namely, the air extraction from the chamber is necessary so that through the leaks of the body, mainly the doors, the air does not leak out, bypassing the filters, taking with it the smell of the photopolymer. At this point, I want to pause, look thoughtfully at the ceiling and say “Mdaa”. On paper, it might have looked good. But in practice, in my experience, it turned out something like ... Imagine the situation: you work in an office building, and on your floor, sorry, the sewer broke through in the toilet. And so that this toilet does not smell so much, for a while, until everything is repaired, at the exit of it, the “kind” administration put a large fan to blow air from the toilet into the common corridor along which people walk. I agree, the analogy is a little "smelly" in every sense, and not too "literary" for such an article, but it describes the printer's ventilation system well.
 The fact is that the carbon filter does not retain the smell of the photopolymer, and when the fan in the structure actively blows air out of the working chamber, the effect is much more pronounced than if this fan is simply turned off. On the first version, I, hesitantly, turned it off after a while, having previously asked technical support if something would “fall off” there, on the second version, I turned off the blowing fans even before the first turn on.
Here you can see the filter blocks located at the corners
The screen for controlling the printer itself has a small diagonal and is made a little smaller than on the first generation. It is sufficient to manage all the functions, when entering the print menu, each file carries an icon from the slicer, how the printouts will look, but the print icons are very small, smaller than on the first generation, and as a result, it is difficult to see them, what exactly will be printed there, basically you still have to focus on the file name.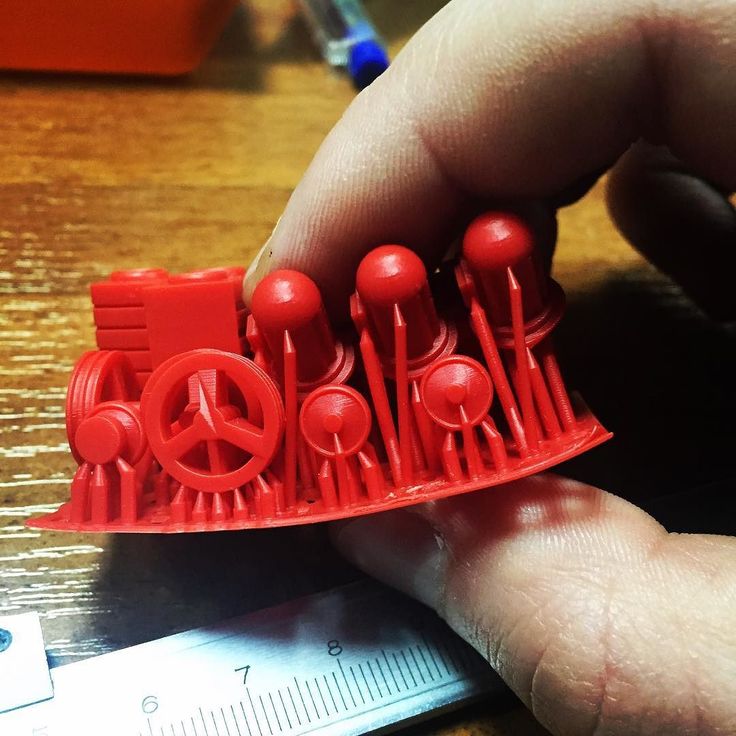
As you can see, in the file selection menu, the legibility of icons leaves much to be desired. When you select the desired file, the preview will open in full screen, but believe me, it will not get much better.
The lifting mechanism is powered by a NEMA 17 stepper motor, as in a large percentage of 3D printers, on a trapezoidal screw and the two roller guides already mentioned above. Engine noise during operation is very low. In general, the printer can be described as quiet.
The printer has only one optical limit switch at the bottom, so keep this in mind when working: in the first generation there was not even a software upper limit, so it was easy to mechanically rest against the upper limit by pressing the platform lift. On the second generation, I personally did not check for this limitation. But in any case, when you turn on the printer, it may not know how high the platform is, so be careful.
3. Operation
3.1. Starting the Printer Starting up the printer is quite simple: 1.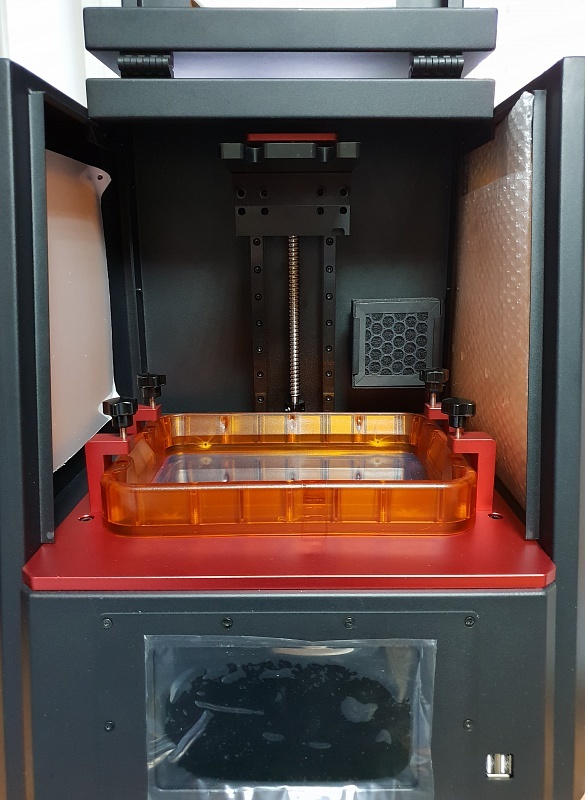 We check the tension of the fluoroplastic (hereinafter referred to as Teflon, since this is already an established term) film2. We remove dust from the screen and from the film on the back of the bath and put the bath in place, fixing it with the screws3 intended for this. We install the printing platform in the right place with a loosened screw that fixes the platform in the hinge4. We connect the printer to the network, turn it on and perform a zero and horizontal calibration of the platform, followed by fixing the hinge fixing screw - the calibration video is easy to find on YouTube5. Shake to mix and pour in the photopolymer. That's it, you can print the test "enicubic" that comes on the flash drive.
This turns on the cooling system of the LED (the LED block in the case of Photon S), the platform lowers until the optical zero limit switch is triggered, after which it drops to logical zero (when calibrating the printer, this same logical zero can easily be a millimeter below the limit switch), after which already turns on the illumination of the first layer.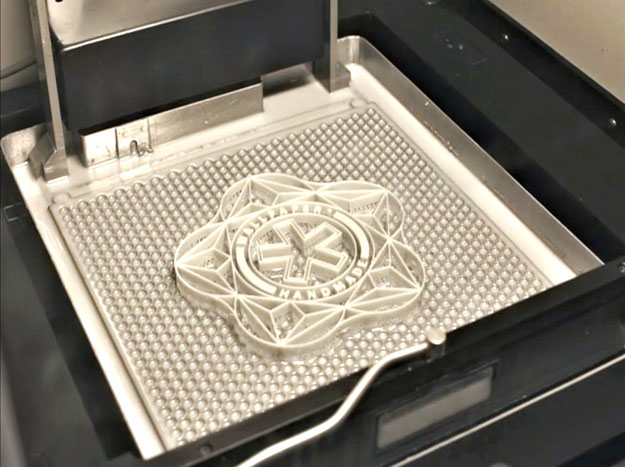
The general rule for printing photopolymer printers is reduced to a long (30-120 seconds) first few layers to compensate for the unevenness of the platform and to ensure that these very first layers “hook” well on it, the subsequent layers are printed with a regular exposure time (about 3 -12 seconds on average depending on printer, resin and selected layer thickness). After the layer is illuminated, the platform is raised to a certain selected height (usually around 4 mm) to tear off the Teflon film from the illuminated layer, after which the platform is lowered back by the same value minus the layer thickness, then a pause is made in the region of one second to “calm down” the photopolymer , after which the illumination of the next layer is turned on. After printing is completed, the platform rises to a height close to the maximum, after which the printer remains in standby mode with an inscription on the screen about the end of printing, and the backlight cooling fan turns off.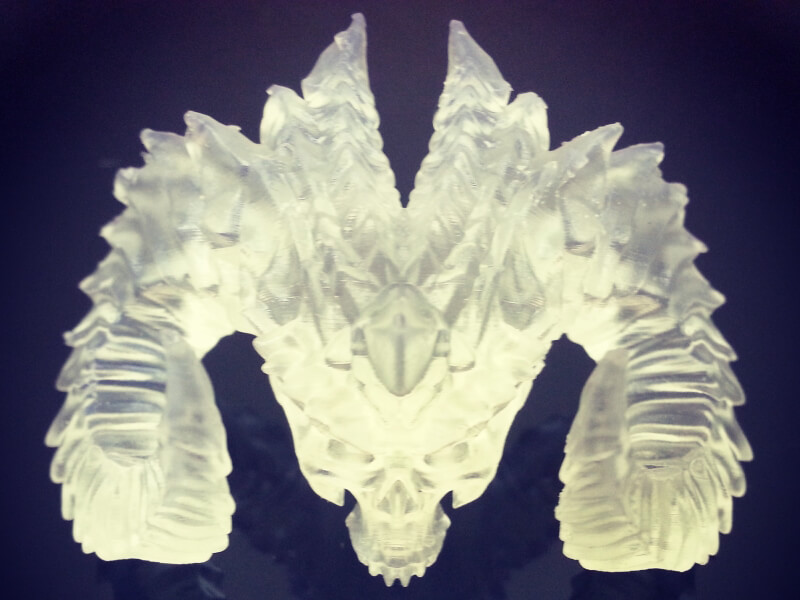
3.2. Programs for slicing
“So how to slice on a computer?”. Download the branded Photon Slicer, which already generates printable files in the proprietary Enikubika format. But from my point of view, it is better to use ChiTuBox, which, in fact, Photon Slicer is based on. ChiToo is updated more often than the Enikubik branded slicer, so the possibilities in it will be higher. In general, I can universally recommend this slicer to a novice owner of any photopolymer.
This is how the ChiTuBox interface looks like
And this is a preview of the already cut model, on which it is good to monitor the adequacy of the spaced calipers
3.3. Photopolymer printing in general
1. This has been said by everyone and everywhere, but I cannot but repeat it. The most accurate description is the English word "messy", i.e. dirty and tedious. This is the transfusion of the photopolymer that easily blurs the surroundings, the washing of hands, which are almost impossible to protect even with gloves due to some work features, the transfusion of the photopolymer again, draining the bath, cleaning it, isopropyl alcohol, acetone, conservatory, court, Siberia . .. um ... sorry, carried away . But the general meaning, I think, is clear. Unfortunately, this is not FDM printing, in which everything is much simpler in terms of work.
2. Low predictability of printing results, if you have everything in openwork or even not very calipers. Black box effect: you sent it to print, after which it’s hard to say what happens or not until you take the platform out of the printer and look at it point-blank. Yes, you can look into the windows, yes, you can see if nothing at all has appeared above the surface except for the platform itself, when you can unambiguously cancel printing, yes, you can pause with the simultaneous lifting of the platform, but the essence still remains: you are looking on the platform in the printer, and everything seems fine, but when you remove it and look at point-blank range, critical flaws are often visible there that could not be seen during printing.
3. In the same way, the required shamanism with the calibration of the exposure time and the thickness of supports for various cases, as well as the selection of scales, gaps and supports in FDM printing. This requires experience when you understand that here and here the calipers automatically set by the same ChiTu are superfluous, which will require subsequent excessive cleaning of the surface, but here and here they must be put, otherwise the output will be a marriage.
4. Corresponding to point 1. The processing cycle of the finished printout includes removal of the printout, washing in dirty isopropyl, washing in pure isopropyl, backlight-drying, preferably in an ultraviolet chamber, and washing in acetone. The latter removes that part of the photopolymer that remains even after washes with isopropyl and backlight. Some people use acetone directly instead of isopropyl, but personally I look at this approach with doubt: acetone destroys underexposed fragments more, which can lead to cracks in the model. But this is a debatable issue. In other words, post-processing of the model after printing is a separate procedure that requires time and effort.
5. Cheap photopolymers often smell.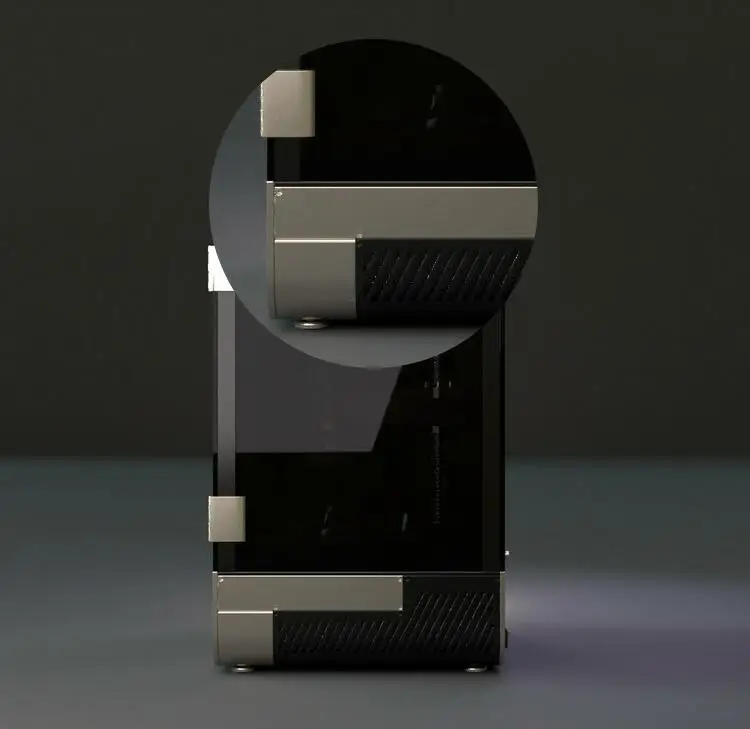 .. to be honest, especially during operation, when heating occurs as a result of the exothermic reaction during polymerization. For example, some Chinese, though not all. Our manufacturers (such as HarzLabs, but not only) initially tried to make the photopolymer not have a pronounced unpleasant odor, but now the Chinese have begun to pay attention to this, so it’s already possible to buy a photopolymer that will not carry some mixture of chemistry and fish, even Ali.
6. Most photopolymers are brittle. There are those that have some elasticity and do not prick when trying, for example, drilling, but they usually cost significantly more, at least at the moment. That is, despite the fact that these are essentially cast parts, they can often be inferior in strength to printed parts made using FDM technology.
7. Most prints require rubbing alcohol except for water washable photopolymers. Isopropyl alcohol is usually used because it evaporates faster. First, washing is done with already dirty isopropyl, after which a second washing is done in pure alcohol. Further, the printouts should be illuminated, for this you can use a special illumination camera, the sun, or even the printer's camera itself in the case of printers that have this function. After that, I would recommend doing another wash in acetone to remove the remnants of the photopolymer left after backlighting. Acetone is more aggressive to the photopolymer, but it is not dangerous for an already fully polymerized printout.
8. Can photopolymer printing already provide unconditional quality when the printout is almost indistinguishable from the cast part? Unfortunately, not always. Just like with FDM printing, there are problems with the bottom surface of the printouts, the photopolymer has the same problems. Yes, it allows you to print with large overhang angles, does not create frank porridge in the area of \u200b\u200bcalipers, but still, the printout needs to be finalized in these areas. And even after that, it is not always possible to get a level surface “like a real one”.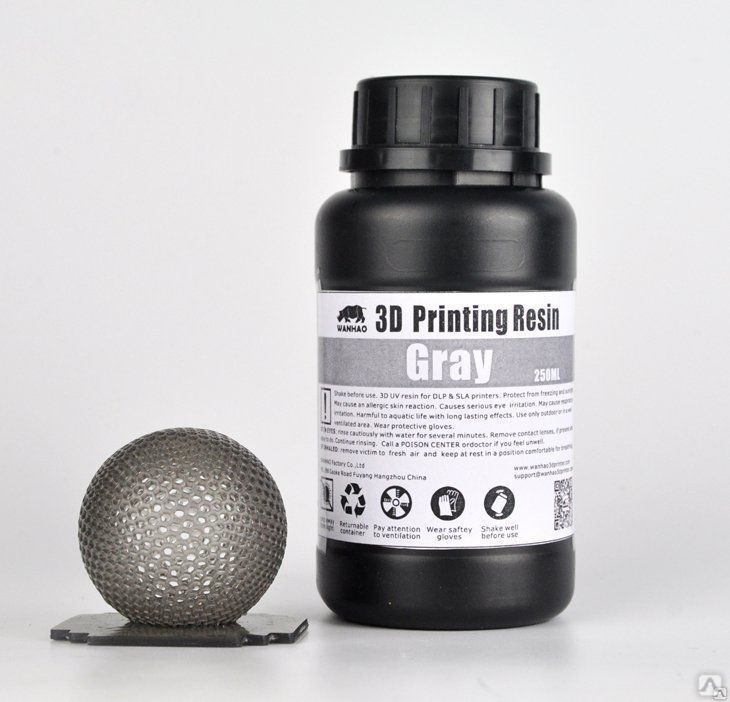 Also, photopolymers, like ABS plastic, have shrinkage, which must be taken into account both during printing and during subsequent exposure - in the absence of calipers, a thin part can simply be bent. But if there are no extreme angles and a large number of calipers, then it is realistic to achieve the quality “almost like casting”.
3.4. Features of operation of photopolymer printer
Here I will give the features of operation of photopolymer printers themselves, i. what applies to printers in general and which are relevant not only for Photon C, but also for any photopolymer built on a similar technology:
without additional manipulations. The duration of problem-free storage of the photopolymer without refilling depends on the specific brand of photopolymer.
2. Once every 10-30 hours of printing, although it is difficult to give an exact figure here, this is individual, and it also depends on the photopolymer used, it must be drained through the filter back into its original storage container. This is not related to the photopolymer itself, but is required to clean the Teflon film, which is the bottom of the bath. It could be said that during operation the Teflon film becomes contaminated, etc., but what exactly happens there, whether the film is contaminated, the photopolymer residue, or some other factors are to blame, but, simply put, the printer stops printing. Yes, something that a couple of seals ago was perfectly printed with this photopolymer and this very file is already coming out with a marriage. And yes, you just need to wipe the bottom of the bath with isopropyl alcohol, pour the photopolymer back in, and everything works fine further. I will illustrate this phenomenon with a specific example, where on the left (on the left photo), the first printout, one or two calipers were missing, as a result which part of the frame came off during printing, and on the second one there was enough of everything, but the tray that was not cleaned in time ruined the print in the bud, when not only the frame, but even the radiator was not printed.
 At the same time, after cleaning the bath, the printing was already without problems.
3. If it is suspected that part of the light remains at the bottom of the bath, during a failed print, it is also necessary to drain the photopolymer and clean the bottom. Best of all, the “blots” of the polymer smeared along the bottom are removed by simply pressing a finger on the film from the back. This "blot" is easily peeled off from the film, and the film itself is not damaged. It is necessary to do this cleaning so that when you start the next print you do not damage the film, or even the printer screen by pressing this “jellyfish” with the platform from above, especially since most likely printing in the presence of such an illuminated piece of photopolymer on the film you most likely still won't work.
4. Film needs to be changed periodically. This procedure is simple, but rather painstaking, plus you must have a supply of film. The film does not have a direct "timer" of life, its wear depends on the duration of exposure of the layers, the shape of the printouts and mechanical damage during cleaning. It can work for a very long time, and require replacement if mishandled and after 2-3 prints.
This is the process of replacing the film, shown by the manufacturer himself - an excellent and understandable video, in which, in particular, you can appreciate the genius of the bath design. Yes, it is difficult to establish who invented it first, but the fact itself does not negate it
5. Teflon film is strong, but even a careless swipe of an angle with a plastic spatula during cleaning can easily leave an indelible mark on it in every sense. Moral: clean the film carefully, it is better to let the photopolymer drain from it without external influences and then clean it with isopropyl alcohol in the bath already put in place.
6. The film on the side of the screen and the screen itself must be clean. Free of dust and grease. You can clean it with the same isopropyl and blow it with a "pear". Do not allow photopolymer to get on the screen. And, moreover, do not turn on the backlight if there are at least small traces of photopolymer on the screen, otherwise you will change the screen.
7. Do not print hard and thick parts directly on the platform itself without supports. Then you will remove such a "bar" from the platform with a hammer and a chisel, and not with a metal blade.
8. My experience is that it is easier to remove parts from the platform, for example with a knife, rather than a plastic spatula - the latter is more likely to break itself than to actually remove any part.
9. An important question that a person who has had a glimpse of photopolymer printing might ask is: "Is it possible to get a print that feels tactile like a molded part, without any signs of stickiness, slipperiness and other residual effects" I once was goo"? Yes, you can: obligatory illumination and washing in acetone after. There are still a couple of minor reservations here, but in general the answer is positive.
this greatly increases the wear of the Teflon film. The rate of its wear can be indirectly heard by the sound of a layer tearing away from it when the platform is raised. Ideally, this should be almost inaudible.
11. To select the exposure time specifically on Photon C, it is possible to use the r_e_r_f.pws file located on the flash drive, in which the printed surface is divided into fragments horizontally, each fragment is illuminated for one second more than the previous one. Thus, a sufficient exposure time can be selected. Also, on the sites of photopolymer manufacturers often publish tables of exposure time settings for different layer thicknesses, as well as rise speeds and delay times before printing.
This is how the standard Enikubik calibration model looks like. There are four elements printed at the same time with different exposure times.
3.5. Features of operation of Photon S
The main feature and, frankly, the disadvantage is the use of a one-piece body with a door, in contrast to the use of a "hood" in most printers (also in newer Enikubik printers). Thus, you do not have an insulated sealed hood with work area seals. Those. your printable area is leaking. And this means that all the same, when printing, you will get the smell of photopolymer around. Not too strong, but anyone will notice it. The fact is that the design of the door is made unsuccessfully and does not provide for seals that would hold back the evaporation of the photopolymer through leaks. Structurally, this seems to me the biggest miscalculation of the Foton developers. The lack of a normal handle is added to the disadvantages of the door already described, as a result of which the door sometimes becomes difficult to open without fear of simply breaking it. In addition, the entire top of the printer would benefit from a resin-resistant material. In this regard, even the same unsuccessful design of the upper part of the first-generation Photon printer was better, because. there was steel, plus a handle to open the door.
When printing, a small amount of photopolymer drops falls on the bottom of the door, so I would recommend immediately tape it with black tape from the inside - the standard width of the tape just fits the width of the grooves needed for pasting - if you look at the door from the inside, you will immediately understand , "about where" I'm talking about.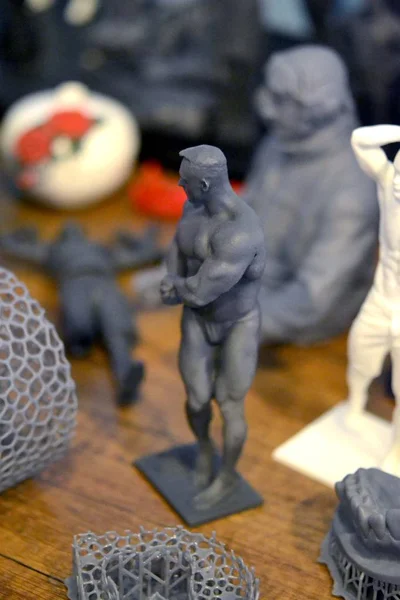 This will reduce the chance that your door will just start to stick when you miss the photopolymer drops on it.
In addition, I did not notice any other noticeable flaws that would complicate the operation of the printer. Oddly enough, it is difficult for me to describe any specific shortcomings of this printer that affect its operation, which would not be on others. Aside from the questionable case design and the rather odd chamber purge solution, this printer is a perfectly normal workhorse, printing fairly consistently within the limitations of technology and design. Such limitations, for example, include the missing easy layer separation mechanism that FormLabs Form 3 has, but such technologies rarely wander into budget and extra-budget solutions, to which Photon S belongs.
Double roller guide mechanism avoids wobble - please note that wobble is a very likely evil for all printers with a single guide, which is often found in budget solutions.
RGB screen, unlike monochrome ones specially released for photopolymer printers, has slightly less detail for equal screen resolution and longer exposure time of the layer, but do not forget that the total time per layer is the sum of the exposure time, rise time, fall and pause before turning on the illumination of the next, i. e. even a 100x increase in flash speed will not give you even a 10x increase in print time.
The LED matrix cooling fan is quite quiet, it is noticeably quieter than on the first version, it will not even interfere with sleep if it turns out that the printer is in your room, because the sound of the lifting and lowering of the platform is even a little louder than the cooling system. The only caveat: because. I immediately turned off the chamber purge fans, I can’t say about the noise of their work. But, remembering the design of the case, I would not recommend sleeping in a room with a working photopolymer without good ventilation.
i.e. the only limitation, but quite important for a certain number of potential buyers of the printer, is the leakage of the case during operation. So, to reiterate, when working, you cannot completely avoid the smell of photopolymer in a room, unless the room is large enough and well ventilated.
4. Conclusion and printing examples
Can you recommend buying Anycubic Photon S as a budget solution? Yes.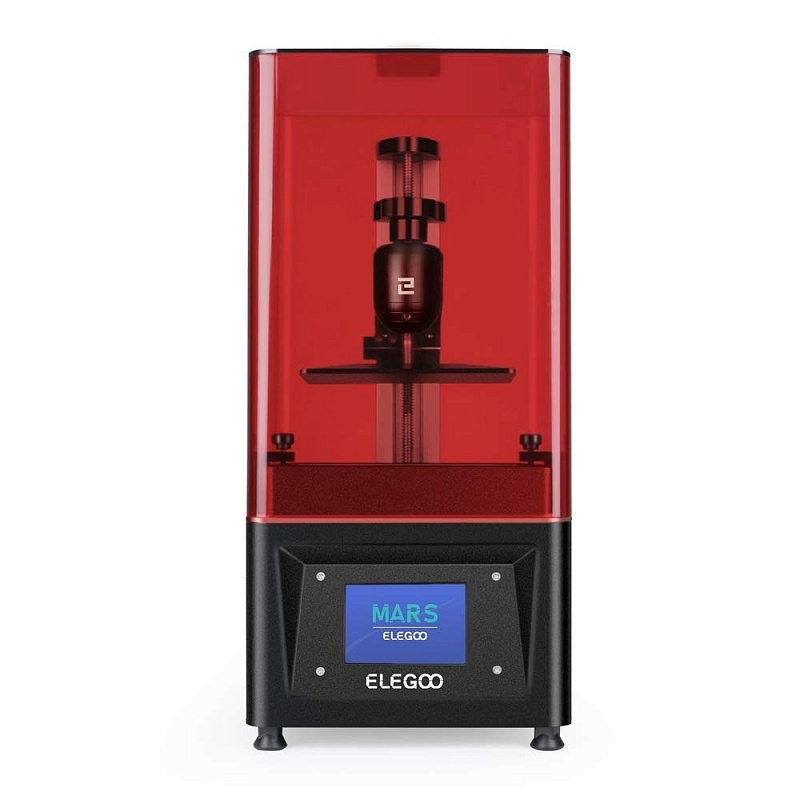 It gives quite good print quality, and at the same time it is very inexpensive by today's standards. When choosing, you should pay attention to how critical the absence of a conditionally sealed print chamber will be for you, which other printers can boast of, in particular in the budget segment, but which the Photon lacks. On the other hand, I recommend paying attention to the double roller guide and the close-mounted lifting axle, which eliminates wobble, which is often not found in many other budget photopolymers. Also, the use of a matrix of LEDs can be attributed to the pluses, which is also not available for all budget solutions. This makes, with the reservations already indicated, this printer quite successful, and I can recommend it for purchase and operation.
And as for the question posed at the beginning of the article, was the game worth the candle, was it worth changing one printer for another that is so different from it? Yes ... The fact is that the quality of printing on the first Photon, unfortunately, did not suit me. Yes, it was possible to replace the standard Z-axis with a double rail guide, but the replacement kit at that time cost the same as the cost of an “upgrade” by replacing the entire printer with a second generation, taking into account the sale of the old one. Therefore, for me personally, the choice was obvious.
At the end of the article, I will give examples of what can be obtained on this printer, so to speak, from personal stocks.
Feed augers made for testing in slightly different configurations
Models of pumps made from a photograph
Made for a co-worker a plinth for the head of a character from Warhammer.
Pay attention to the print direction. Printing on calipers allows you to easily separate the printouts from the platform later, and the slope of the surface reduces the wear of the bath film by changing the position of the boundary in layers. You can see that the calipers on the first layers still moved away, this required subsequent grinding of the base.
Cartridge cover and platform. The second one was also made for the already mentioned comrade.
One of the teeth had to be removed and placed separately for subsequent gluing, because. it just didn't fit in the printable area.
A gift for the 8th of March - a simple but quite nice one
A couple of playful medals
And finally, a couple of frames from one rather long project to create a truck model.
Thank you for reading
Custom resin 3D printing from Sprint 3D.
Resin
Resin 3D printing is a rapid prototyping technology for highly detailed, smooth-surfaced, durable polymer plastics with layer thicknesses up to 16 microns. The material is excellent for creating cast master models and high quality prototypes.
Sprint 3D manufactures products in clear, white and black photopolymer.
Application.
Photopolymer is widely used in the foundry industry as a material for creating master models for molds for future casting with plastic or metals.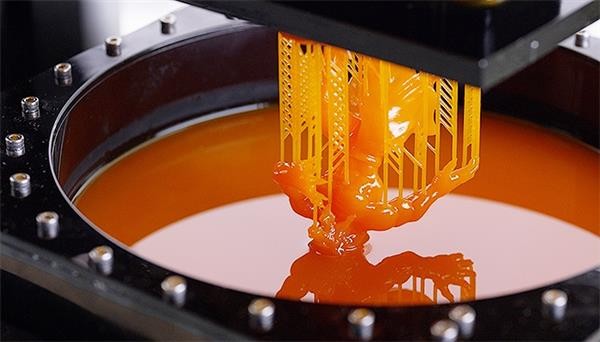
Products convey all precise dimensions and complex geometries, serving as a quality prototype. 3D printing from photopolymer allows wall thicknesses of less than 1 mm, which makes this material unique in the plastics line.
The chemical-physical properties of this polymer make it possible to print complex parts of moving mechanisms and successfully use them as prototypes in complex assemblies of parts. Photopolymer (light polymer) perfectly interacts with water and can be used in thematic areas.
3D printing by photopolymer at SPRINT 3D
3D 3D-printing on its own 3D printers
The largest working area is 600x600x400 mm
The thickness of the layer up to 16 microns
Vister 902 Delivery throughout Russia and CIS countries
Photopolymer resin and 3D printing process
light and each layer of the future model hardens, making it durable and resistant to various environmental factors, allowing you to obtain products with an accuracy of 0.