Pepakura to 3d print
How to Use : Pepakura Designer
An overview of the process for making paper craft models from 3D data with Pepakura Designer.
Click the items to see details.
Make 3D data (with other 3DCG software)
Import the 3D data to Pepakura Designer
Unfold it (by just pressing a button)
Edit the unfolded pattern
Print out the pattern
1. Make 3D data
Pepakura Designer does not have features required to design 3D data.
The 3D data of the model you want to create has to be prepared before using Pepakura Designer.
Pepakura Designer supports common 3DCG file formats, including OBJ, 3DS, and STL. You can use your favorite 3DCG software.
The most recommended 3DCG software is Metasequoia. You can use it for 3D model design at no charge.
Pepakura Designer is highly compatible with Metasequoia's file format.
Screenshot of Metasequoia.
2. Import 3D data to Pepakura Designer
Select [File]-[Open] to import 3D data to Pepakura Designer.
The imported 3D model will appear in the left 3D Window. The view is changed with the following mouse operations.
| Rotation | Right Drag |
|---|---|
| Translation | Wheel Drag or [Ctrl] + Right Drag |
| Zoom | Wheel or [Shift] + Right Drag |
To cut along certian edges when unfolds, click on the edges in the editing mode [3D Menu]-[Edit Mode]-[Open Edge].
Orange edges are specified as to be cut.
Nearly flat edges are not shown initially.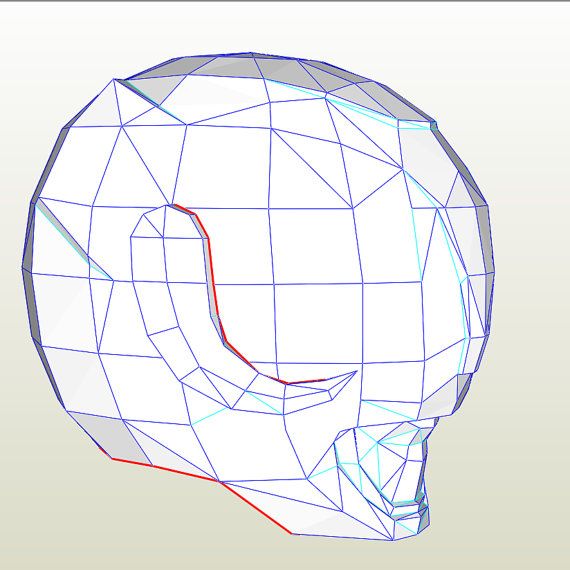 To show them, uncheck the option [Settings]-[Other Settings]-[Line Style]-[Hide nearly flat folding lines].
3. Unfold
Press the Unfold button to generate the unfolded patterns.
The size of the patterns can also be specified if you uncheck the checkbox [Auto] next to the unfold button before the unfolding.
4. Edit the unfolded pattern
You can edit the layout of the unfolded pattern as well as connecting/disconnecting parts and change the width of flaps (tabs).
The editing mode is changed through [2D Menu]-[Edit Mode] (or the right-click menu) .
The view of the 2D window is changed with following mouse operations.
| Translation | Right Drag or Wheel Drag |
|---|---|
| Zoom | Wheel or [Shift] + Right Drag |
4.
 1 Translations and Rotations of Parts ([Select and Move] mode)
A left mouse click-and-drag moves the selected parts. To select multiple parts at the same time, you can either hold down the [Shift] key and click the parts, or draw a rectangle to enclose the parts within it by a left mouse click-and-drag. Dragging a green point at the top of a part rotates the part.
4.2 Connecting and Disconnecting Parts ([Join/Disjoin Faces] mode)
To join two parts together at a certain edge, click on the edge. The direction of which part will be moved to glue to the other one is indicated by an arrow. It changes as the mouse cursor moves on the screen. Click anywhere to join the parts.
4.3 Change the color or visibility of lines ([Edge Color] mode)
To change edge colors, select the color, then click on the edges one by one.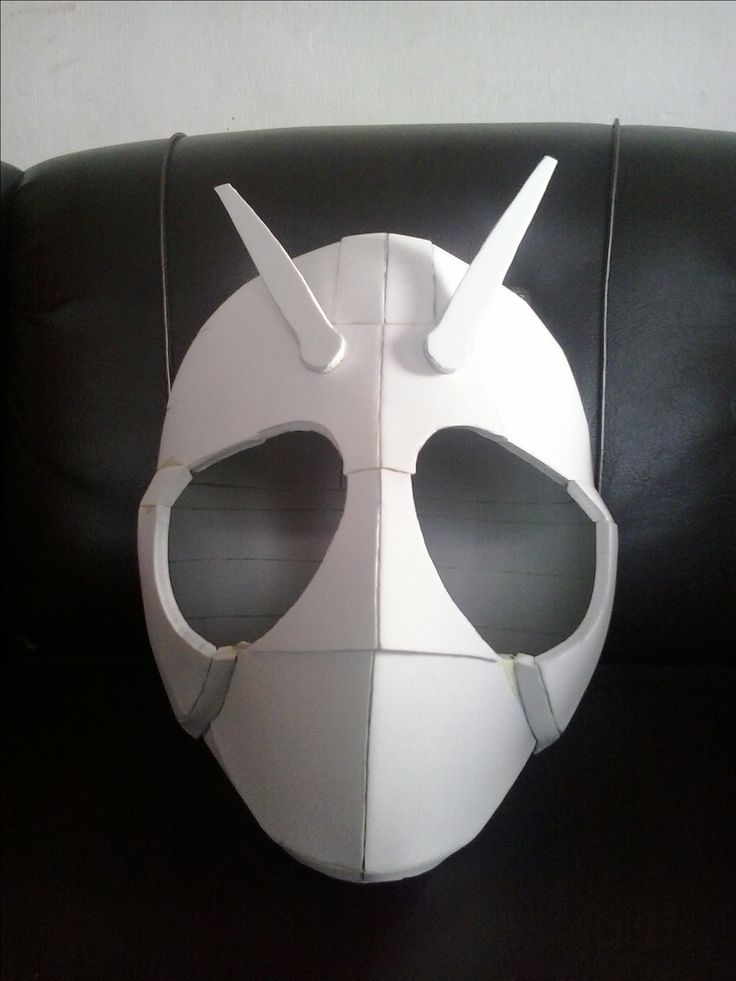 You can use a left mouse click-and-drag to select multiple edges and color them at a time).
When Eraser icon is pressed, clicked edges would be hidden.
4.4 Edit Flaps (Tabs) ([Edit Flaps] mode)
There are two sub-modes, [Switch] and [Change Shape].
Clicking on an edge switches the location of flaps when [Switch] mode is selected.
Clicking on a flap changes its shape as specified in the dialog when [Change Shape] mode is selected.
5. Printout
Printout the unfolded pattern through [File]-[Print].
The settings of the sheet size and the line thickness can be changed through [File]-[Print and Paper Settings].
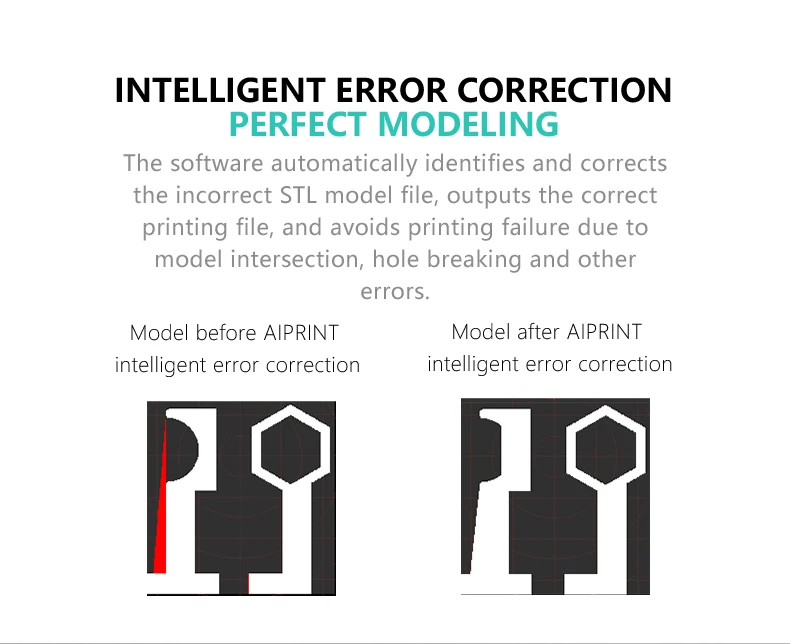
Check [2D Menu]-[Add Outline Padding] to make offsets of the boundaries. This feature may be helpful to assemble nice-looking models.
The effect of [Add Outline Padding] option.
>> back to top
Pepakura to 3d print - vgseovcseo
- PEPAKURA TO 3D PRINT FULL
- PEPAKURA TO 3D PRINT ISO
- PEPAKURA TO 3D PRINT FREE
First part: raw recon Helmet print, to fully finished recon Helmet print.
PEPAKURA TO 3D PRINT FULL
× I work full time on OctoPrint and can only continue thanks to funding by people like you. They are separate, but a lot of guys in the pep community have made some 3D models printable.
PEPAKURA TO 3D PRINT ISO
Our technology has been validated in FDA-cleared workflows and we develop and manufacture our own biocompatible materials in an ISO 13485 certified facility. 405th Halo Costume and Prop Maker Community. 1 24 Scale Hoonicorn Mustang 3d Printed Mustang Car Model 3d Printing. “Icon exists as a response to the global housing crisis and to put our technology in service to the world,” company co-founder and CEO, Jason Ballard, stated in the news release.
Most Halo costumes are made in Pepakura so this is a really good resource Electronics/hacks Resources Electro Tech 405th Fighter-Bomber Wing Republic F-84F-35-RE Thunderstreak 52-7043, Langley AFB, Virginia, 1955.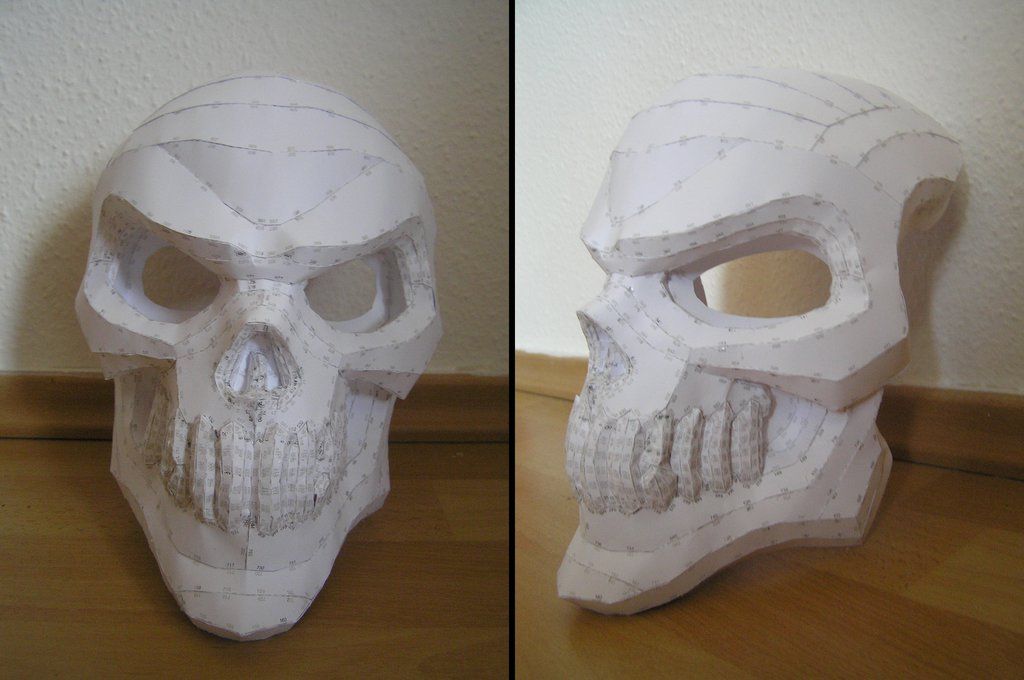 Spray filler is a good option for the finishing layers, to get it very smooth, but not to cover the whole roughnes of a 3d print (not resin 3d print) unless you spend lots of cans. Some of the Germans immediately to the front of the 405th’s line had pulled out of their defenses, which permitted limited gains down the road toward Linnich, and elements of the 3d Battalion moved forward during the morning. Simply mirror both parts for the other arm.
PEPAKURA TO 3D PRINT FREE
From frontline replacement parts to quick-build bunkers, the military relies on 3D printing to get the job done faster, better, and anywhere. Find something 3D printable or sell/share your designs today! Find Something To 3D Print. Cant wait to do this next year with new cosplays and potential returning ones Oh! Cant forget to mention for helping me out today and meeting up with him ^_^. Low poly versions of which will be attractive to game designers or vr ar applications developers others to film makers animators or advertisers. “Construction-scale 3D printing not only delivers higher-quality homes 76 "405th" 3D Models.
405th Fighter-Bomber Wing, 8 October 1957 – 1 July 1958 405th Fighter Wing, 9 April 1959 (attached to Joint Task Force 116 16 May–8 June 1962) 3d Tactical Fighter Wing, 16 March 1964 – 15 November 1969 (attached to 405th Fighter Wing c.
OFF-WORLD CONSTRUCTION Printing Mars Dune Alpha to simulate Martian life. The GrabCAD Library offers millions of free CAD designs, CAD files, and 3D models. To prepare for long-duration missions to Mars, ICON uses additive construction to 3D print a Martian analog habitat designed by BIG at NASA's Johnson Space Center. See 405th Fighter-Bomber Wing Republic F-84F-35-RE Thunderstreak 52-7043, Langley AFB, Virginia, 1955.
#405th #405Infantry #buildyourcharacter #honorarmorunity. Just print your custom templates and get Armorsmithing in the medium of your choice! 76 "405th" 3D Models. If you love to build Halo centric armor and/or weapons, or would like to learn to do so, we highly recommend becoming a member of the 405th! To do so, just visit 405th.
It has a removable mag, spring bolt and a working bipod! It has been designed to print smart with no supports and it assembles easily in a way that hides most of the joins. Currently, it is believed that the 405 AEW is inactive. 405th 3d print Scan of GMFlex from the 405th at RTX2014 - Spartan Cosplay - GMFlex 405th - 3D model by captureddimensions This file pack was produced for and with help from the 405th Infantry Division in preparation for new Halo Infinite cosplays! Files included are recommended to be scaled to your costume and may require splitting to fit on different printers.
Papercraft to 3d printing
About a year ago I became the proud owner of two Russian-made printers.
I will write about the second one later, now we will talk about Hercules Strong.
The need to buy a printer was after I became interested in paper modeling. The process is interesting, but very long, because. I didn't have much time, so I decided to try my hand at 3d printing.
The printer in the shipping box was really huge, upon arrival it was immediately unpacked and the study began ...
The first thing I liked about the printer is its accessible menu, the movement of the extruder - the X Y axis and the supply of plastic, as well as the movement of the table, this is in a separate menu, it’s really very convenient, but it’s worth noting that inserting plastic is not very convenient, because the hand rests against the glass cover of the printer, it interferes, but not really.
The first print was not long in coming, I decided to print the Predator mask, the settings are standard, I liked the quality in general.
Everything was fine, this printer was a workhorse, it printed with high quality, it used to be 20-25 hours of printing, but at some point the extruder stopped showing temperature. and stopped heating up.
I called technical support, sent the printer to Krasnoyarsk, they confirmed it, the wire was unsoldered, it doesn’t matter, 4 weeks back and forth, but to my surprise, technical support went to a meeting and printed out a burning order and sent it to me along with the printer.
No, don’t think that this is an advertisement and everyone will get hurt, no, it’s not, but the fact that they went to a meeting and helped with the order, it was nice, besides, during the time the printer was there, they updated the extruder and printer software , now the menu has become more convenient, the list of preheating by materials has become wider.
And so a little more than a month passed, and I received the printer, I immediately decided to try it out, putting it on print, because I was given nozzles of large diameters in the kit, there were nozzles of 0. 3 mm each, they reported 0.4 and 0.8 mm. to say that the print speed soared on a 0.8 mm nozzle, to say nothing, it was gorgeous, it began to print 2-3 times faster, but .... as always, happiness did not last long, at the next start of printing I heard a loud rattle and saw that the corner of the glass is higher than the rest, and the nozzle clings to the glass, making a terrible screech.
I stopped printing, it turned out that the thread on the table was torn off and the fixing screw just flew out, thereby the spring raised the glass up.
I was angry, more like angry, because a day has passed since the arrival of the printer from the repair and again a breakdown, called support and said that patience was running out, since Dmitry asked to wait a minute, and then sent the file, fasteners for the table, in principle, the problem was solved, while it does not cause any particular inconvenience.
What can I say about the updated extruder?
The quality is excellent, it suits me, it doesn’t take so much time to process, a larger nozzle speeds up printing, everything seems to be fine, and as always there is a but . .. burner.
The huge print area never ceases to please
Of course, there is still something to work on, but if we compare the printers that I have seen, then perhaps I would buy 2 Hercules better, because. with the second printer I still can not establish a common language.
And finally, a couple of models,
By the way, at the upcoming expo I'm going to make some costumes for cosplay, so Muscovites and everyone who will be, you can write, I'm ready to meet there and discuss eternal questions!
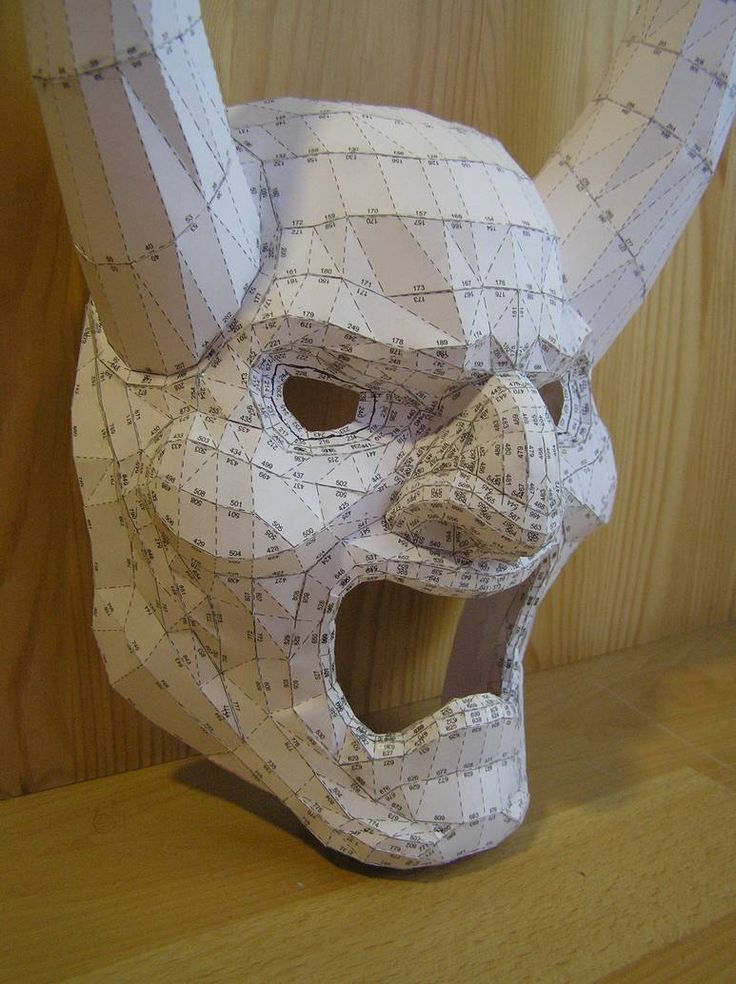
P.s. has been a dream since childhood. When I saw the movie 'Guyver' one day, I dreamed about Guyver's armor and helmet.
Well, dreams come true, so far only a helmet, and then with a translation from Pepakura, but the beginning is done
Autodesk Fusion 360 + Pepakura. We print 3D on a regular printer / Software for an electronic engineer / EasyElectronics.ru Community
Software for electronics
How can I print a 3D model on a regular printer? That's right, we create a sweep from the model, print it on paper, glue it and get a three-dimensional detail.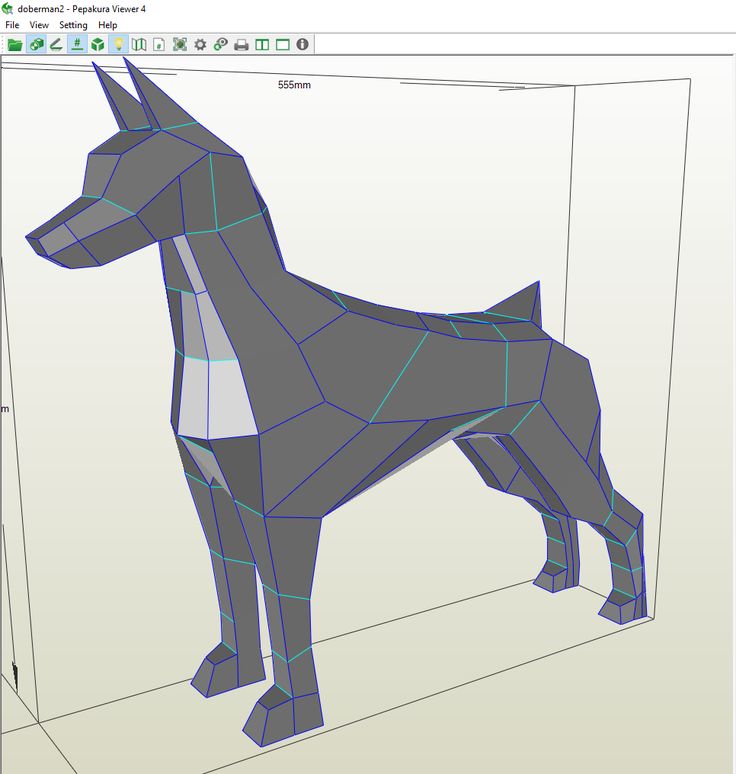 It is clear that it cannot be filled with water, nor ... ahem ..., in general, this is not plastic for you. But plastic is long and expensive. But an extra 30-40 minutes - and you have a paper (cardboard?) layout in your hands, which will help save both time and money. They turned it over in their hands, liked everything - they sent it to a 3D printer. What will be needed for this?
1. Autodesk Fusion 360
DiHalt, after an infectious post about a 3D printer, has already filed a course on this program, so if you have never held 3D modeling programs in your hands, then this can be a good start, the program itself is relatively free and quite intuitive, the basics lay down quickly and without special brain strain. We will assume that you have already drawn something:
The next step is to export to the STL format. To do this, click the right eye of the mouse on tab Bodies → Body1 → Save As STL :
Done! On this, you can collapse the fusion and move on to another, no less interesting program .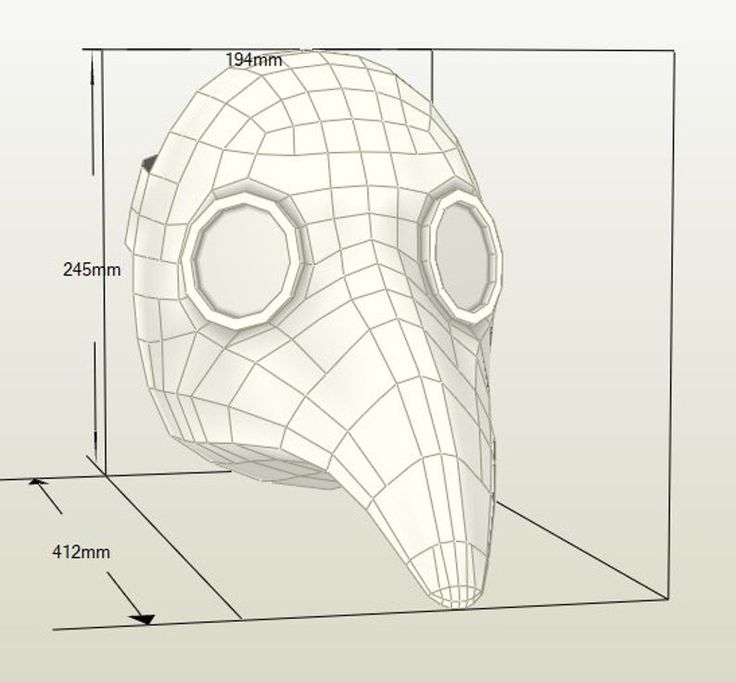 ..
..
2. Pepakura Designer
Downloadable from the official website. The program is paid, but for organizations $ 38 is hardly a lot of money, and the rest know where to get the key :) You can try the program for free, but there are a lot of unpleasant restrictions (you can’t save the project, the maximum scale is something like 30%, etc.). We will assume that you have already bought / found a key, and therefore we move on: File → Open → your STL file. The program will ask a bunch more questions, you can just press Enter and not bother. The result will be something like this:
Now press the button Unfold (uncheck [ ] Auto before that), the following window will appear:
The most interesting thing here is the Scale field. Set it to 1 (which means the scale is 1:1) and click OK. A pattern will appear in the window on the right:
Dotted lines separate A4 sheets.