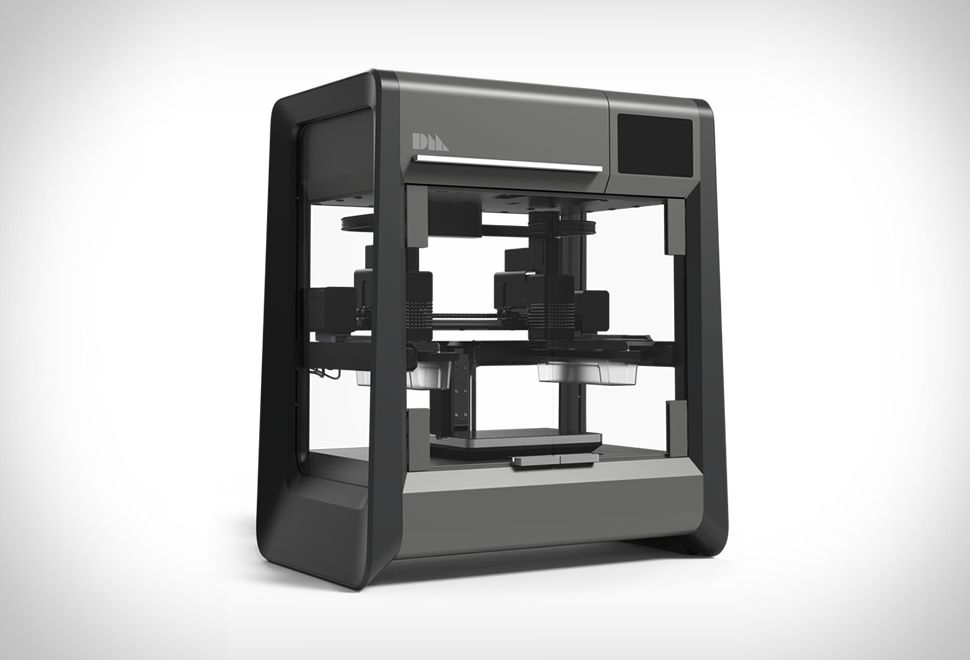
Anet n4 resin 3d printer
Hands On With the ANET N4 LCD 3D Printer, Part 1 « Fabbaloo
A brand-new ANET N4 LCD 3D printer [Source: Fabbaloo]An ANET N4 showed up in our lab, so we thought we’d run it through some tests.
This is part one of a two-part story on the ANET N4 3D printer. Part two is here.
The ANET N4 is an LCD-Resin 3D printer that can produce high-resolution prints with greater detail than can typically be obtained from common filament-based devices. It uses a 2560 x 1440 pixel LCD screen to solidify photopolymer resin in layers as small as 0.03mm.
Unboxing The N4
Unboxing the ANET N4 LCD 3D printer [Source: Fabbaloo]The ANET N4 is actually quite a small device. It measures only 380mm tall and weighs about 10kg. This is somewhat a function of the relatively small build volume of 120 x 65 x 138 mm, but that volume is quite typical for inexpensive resin-based 3D printers.
The device comes fully assembled, and there’s little to do other than remove the copious amounts of packing foam that keeps it secure during shipping — and plug it in.
There are some interesting bits included with the package:
Accessories accompanying the ANET N4 LCD 3D printer [Source: Fabbaloo]Here we see the entire slate of extras that come with the ANET N4, including two pairs of disposable gloves — you will need plenty more, and I strongly recommend buying a large package of them. There’s also two scrapers for removing prints from the plate. One is plastic; the other is metal. I used only the metal one as it seemed far more useful.
There’s a USB stick containing half a dozen pre-sliced files you can print, as well as a power supply and cable.
You’ll notice the resin vat at bottom right. This is where the resin lays during printing, and it includes a clear bottom sheet through which the LCD pixels will shine to solidify the photopolymer resin. It’s imperative to keep this plastic sheet clear and free of debris, as any stray bits will disturb the LCD light passing through that location, and therefore can corrupt the print.
The sheet will eventually wear out after many prints through a gradual degradation as it repeatedly peels freshly printed layers off of it during printing. However, ANET has very conveniently provided a set of replacements that you can install when necessary. During my printing I had no need for this, as I suspect you probably have to print a huge number of models and layers to wear it out.
Setting Up the ANET N4
Rear view of ANET N4 3D printer showing power cable, power on switch and USB-A port [Source: Fabbaloo]Once you’ve ripped off all the foam, what is there to do before printing? Unlike many 3D printers that keep you busy for a while, there are only two things to do with the N4.
The first, and most important, is to level the print plate. The N4 uses an upside-down printing process, in which the plate gradually rises as layers are solidified. The printed models are upside down, as well.
But consider the very first layer: the print plate must be uniformly spaced from the transparent sheet at the bottom of the resin tank in order for all parts of the first layer to stick to the plate. This requires leveling.
Getting ready to level the bed on the ANET N4.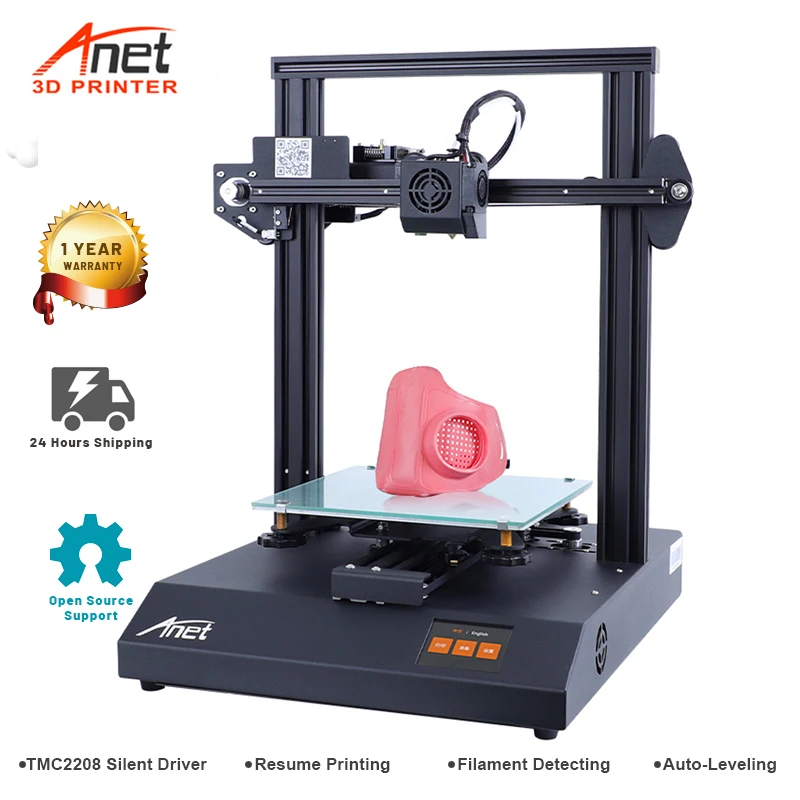 Note swivel joint on build plate [Source: Fabbaloo]
Fortunately, the leveling process is ridiculously simple: you loosen a bolt holding the plate, which turns out to be on a swivel joint. The plate can then twist freely. Then, place a sheet of paper on the still-dry resin tank.
On the ANET N4’s control panel, you then invoke the leveling process, which slowly lowers the loose print plate to the bottom. When it hits the paper layer, the swivel joint automatically twists into a fully flat position — because it’s loose, remember? Then you simply tighten up the bolt and it’s ready to go.
In my testing I found I never needed to routinely re-do the leveling procedure, although I also did not remove the resin tank. I simply filled and re-filled the resin tank as prints proceeded. I suspect that if I were to remove the tank, for example to clean it when changing resins, I’d likely have to re-do the leveling. But it’s very easy to do nevertheless.
You will also have to re-level the build plate if you happen to drop it on the floor when moving it to the cleaning station after a print completes. Do not ask why I know this.
The second thing you need to do before printing is pretty easy: put some resin in the tank. This is done by simply pouring some carefully from a bottle. In my testing I used some Elegoo gray photopolymer resin.
I should point out that the N4 is actually an open materials machine. That is to say, it does not require any particular company’s resin, as do some other resin 3D printers. You are free to use literally any resin that solidifies when exposed to 405nm radiation, which is what the LCD panel does.
That’s important, because if you happen to attempt use of a resin that does not work with 405nm resin, no 3D printing will occur. Be very cautious when buying resins for this (or any) open materials resin 3D printer.
ANET N4 Printing
3D printing on the ANET N4 is very straightforward. On the color touchscreen are three prominent buttons, one of which is labelled “PRINT”. Upon striking that button you’ll get a list of files present on the USB stick (which you presumably plugged into the back of the machine). Touch one of the file names and then you can preview — although in a very tiny view — to ensure it’s the correct file, and then hit the check mark to get the print started.
Printing proceeds by the device lowering the plate deep into the liquid resin to rest at the bottom, where the first layer is solidified by illumination from the LCD panel. The first few layers are typically exposed for a longer duration to ensure they are strong and fully attached to the plate.
ANET N4 build plate submerged in resin tank during printing [Source: Fabbaloo]Unfortunately you cannot see the action for a while, as all activity takes place submerged in resin. Only when the print is large enough do you see some of it gradually emerge from the resin during printing. At job completion, the N4 will lift the print up for full view and removal.
Larger print emerging from the ANET N4 as the job proceeds [Source: Fabbaloo]Subsequent layers are printed with the “normal” exposure and can be done much faster than the first few.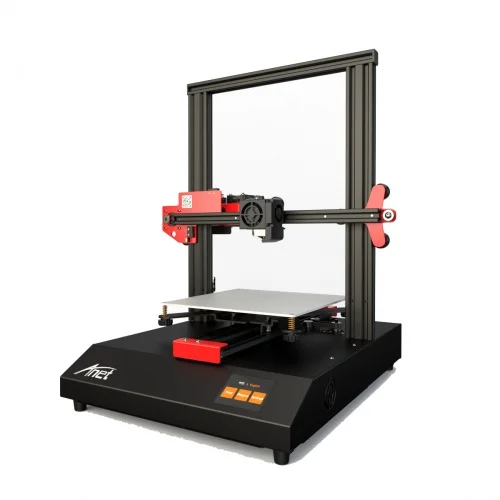 Each layer’s illumination pattern is displayed on the screen as they occur:
The LCD panel offers an interesting advantage, and that is speed. The LCD panel illuminates ALL the pixels required for a full layer, all at once. This is quite different than a filament machine, for example, which must laboriously trace each and every solid part of each layer. Thus, the N4 can print pretty fast.
It’s also different from other resin 3D printers that use lasers. Like filament machines, these devices must trace each and every portion of the layer with the laser. LCD (or DLP) resin 3D printing is almost always faster.
The other effect is that the printing process speeds along independent of the model’s geometry. That’s because the entire layer is done all at the same time. The only factor determining the print duration is the number of layers to do. A laser-powered resin 3D printer would take longer to 3D print a complex layer, but in the N4’s LCD system each layer takes exactly the same time.
This is part one of a two-part story on the ANET N4 3D printer. Part two is here.
Via ANET
Anet N4 3D Printer | UV Photocuring LCD Printer
Price match guarantee:
We work very hard to ensure that we offer the absolute best prices online for all of our printers including Tevo 3D printer kits. If you find another online store that offers a lower price than us on Tevo 3D printers for sale, please let us know and we will refund your original payment for the difference. Read More
30 day price assurance guarantee:
We want you to feel confident that you are getting the absolute best price for the product. If you find that our own website has a lower price for the same item you have ordered within 30 days of your purchase date, we will refund the difference! Read More
Full manufacturer direct warranty:
We are an authorized dealer for all our products and comes with the full manufacturer warranty.
Tax free (except California and Nevada):
The price you see is the price you pay but because we operate in California and Nevada we must charge tax in California and Nevada.
Safe & secure online ordering:
We are certified Level 1 PCI DSS compliant. What this means is that we meet all the requirements defined by the Payment Card Industry Security Standards Council. For additional information on PCI Compliance, visit the PCI Compliance Guide website. We also accept payment via Pay Pal, a leader in secure online payment processing.
Best customer service:
We strive to offer the best customer service we can. If you have any questions please let us know by phone or email.
Exclusive deals:
We appreciate each and every customer that comes to our store. We know you have a lot of choices when it comes to your 3D printing purchase. That's why we'd like to show our appreciation by periodically sending out exclusive coupons and deals to our past customers!
Order Confirmation:
As soon as you place your order you will receive an order confirmation e-mail. This means that we have received your order in our system and pre-authorized your credit card for the purchase. As soon as we receive your order we automatically reach out to our suppliers to confirm that it is in stock and available for immediate shipment. If your item is on backorder or unavailable we will void the pre-authorization and reach out to you via e-mail. If your item(s) are available for immediate shipment (within 5 business days) we will process the charges and submit the order for shipment.
Order Shipment:
If your order is in stock and we process the charges to your credit card, it will ship within five business days from the date of your order. We will send you tracking information within 24 hours of your order leaving the warehouse to the e-mail address you provide when checking out. If you do not receive tracking information from us within six business days of your order feel free to follow up with us at [email protected]
Domestic Shipping:
We do not ship to P. O. Box.
International Shipping:
Please contact us for international shipping rates
We work very hard to ensure that we offer the absolute best prices online for all of our printers including Tevo 3D printer kits. If you find another online store that offers a lower price than us on Tevo 3D printers for sale, please let us know. We want you to feel confident when you buy a Tevo 3D printer or any of our other printers that you are getting the absolute best price for the product.
To request your partial refund simply e-mail us a link to the same product on our website, or on our competitors’ website and we will process the credit accordingly.
Our 100% Price Guarantee has some limitations:
- You must purchase the item from our website before requesting your Price Match Guarantee
- Promotions such as rebates and buy one, get one free offers are not eligible
- The item must be in stock on the competitors website
- The competitor must be an online store, they may not have a retail location
- The item must ship from the same country.
- The website cannot be a discounter or auction website (ie; eBay, overstock, etc..)
- The competitor must be an Authorized Retailer for the product in question
- The Price Match Guarantee includes the item price and the shipping charges, it excludes sales tax or any customs and duties
SLA printer ANET N4 - Stepline.kz
Quiet, fast and high-quality printing, as well as excellent assembly with a minimum number of moving parts - all this makes Anet N4 one of the best options in its price category
Recently 3D- printers operating on the basis of SLA technology have become available not only for large enterprises, but also for hobbyists: quite affordable models can already be found on the market costing up to $ 600. USA. SLA printers are noticeably different from the more well-known FDM-models (both in terms of the principle of operation and the result of printing), so we decided to devote this review to this issue. We chose Anet N4 SLA 3D printer as the most suitable example. FDM (Fused Deposition Modeling) . Since only one layer of material can be placed and applied at a time, the printing process is quite slow. Of course, this also depends on other features (for example, the complexity of the design and the size of the object), but speaking in general, then FDM printers noticeably lose to their competitors in terms of print speed. In addition, if the maximum speed is enabled, the FDM print head creates unwanted vibrations that can significantly reduce the print quality of the 3D object .
SLA
The principle of operation of the SLA printers also lies in the layer-by-layer application of the print material, but they give a better result, and the printing process itself takes less time. 9 is often used as the base material for SLA 3D printing.0005 is a liquid resin that gradually hardens when exposed to a light source such as a laser beam (in the case of SLA laser printers). Separately, LCD SLA printers are also distinguished, in which light, on the contrary, is blocked so that the material does not harden in areas where it is not needed. The Anet N4 3D printer works on the first principle and uses a light source to cure the material (on average, one layer takes about 8 seconds).
Print time
If we evaluate FDM and SLA printers in terms of print speed, then the latter win noticeably. The fact is that when using SLA technology, the printing time depends only on the “curing” time of the current layer and their total number. In other words, the number of objects produced on the build plate at the same time plays absolutely no role. In the case of FDM printers, the number of objects directly affects the print speed, so when several objects are produced simultaneously, they noticeably lose to SLA printers in this parameter.
Print Quality
Print Quality 3D Objects is another way SLA printers outperform their competitors. Because they have fewer moving parts, they create fewer unwanted vibrations during printing. As a result, each layer is better, more uniform and smoother, and the final print result more closely matches the virtual 3D model.
SLA Disadvantages
Like any other technology, SLA also has its weaknesses. First of all, these are high requirements for the materials used for printing: they must be sensitive to light and quickly harden under its influence. Thus, the list of materials from which you can choose is significantly narrowed, and they themselves cost an order of magnitude more expensive than the same PLA filament used in FDM printers. It’s not going to save much here, because cheap and low-quality resins for SLA printing can be toxic or have an unpleasant odor. If you are going to print a 3D object on an SLA printer, then choose high-quality materials.
Material properties
A variety of materials can be used for FDM printers, including PLA, ABS, PETG and many more. Since each of them has its own characteristics, it is possible to choose the material that best suits specific tasks or fits into the available budget. In the case of SLA printers, there is much less room to maneuver. Sometimes there are even color restrictions, but some manufacturers solve this problem by selling a transparent UV resin, to which you can add the appropriate pigment to get the desired color of the material.
Unpacking Anet N4
We pass from theory to practice, namely, to the printer Anet N4 ! It comes in a fairly sturdy box so that the device is in no way damaged during transportation. The package includes almost everything you need, of course, with the exception of the printing material - the resin will have to be ordered separately.
Software
The basic package includes a memory card on which you can find all the software needed to set up and operate the 3D printer, as well as a user manual and several test files with 3D models in the proprietary “N4” format.
First print
Before proceeding to the printing process, it is recommended to study in detail the user manual (manual) for the printer itself and the software used, as well as purchase the appropriate printing material (we remind you that it is not included in the basic package). Then you can proceed to the process of setting up and calibrating the printer.
Calibration
Carefully follow the instructions in the manual to calibrate the Z-axis "zero point" and properly align the print head. Otherwise, the printer may not work properly and the print result may be poor quality. Even if you perform an initial calibration and save the settings in the device memory, it is recommended to repeat this process periodically to ensure that the settings are correct.
Add media and start printing
After calibration is complete, you can add the media container (cartridge) to the printer. Do not forget to securely fasten it (for this, special fasteners are used, which are supplied in the basic package). Then put on latex gloves to protect your hands from exposure to toxic UV resin (caution does not hurt). Actually, for the same reason, it is recommended to perform 3D printing in a ventilated area. To prevent the resin from hardening ahead of time, a special lid is provided on the printer itself - we close it immediately after filling the container with material. After that, we proceed to work with the software: open a special program, select a test file and turn on printing.
Next up is the printer! The first three coats may take a little longer to apply and harden than expected, as to begin with, a reliable base of the object is formed, but starting from the 4th layer everything is done much faster (no more than 8 seconds per layer).
Printing process
The printing process itself can be described by the word "smooth": the printer is literally silent for 7-8 seconds, then the build platform rises / falls and this cycle is repeated for each layer. Separately, it is worth noting the noise level of ANET N4 - it is quite low, so the printer itself works almost silently.
During printing, the printer screen shows all the necessary information: the type of the current layer, its index, the total number of layers required to print the 3D object you selected, as well as the predicted time to complete the print. It is also possible to change the curing parameters of the resin, but in most cases it is better not to touch these settings.
Post-processing
After printing is finished (in our case it took about 2.5 hours), you can extract the 3D object from the printer. For this, a special “spatula” is used, but wearing gloves will also not be superfluous. It is possible that there will be resin residues on the object after printing, which must be removed (for this, isopropanol or methyl alcohol is used). After that, the process of making a 3D object is almost complete, and you just have to make sure that the resin is completely cured. If this is not the case, you can always use an ultraviolet lamp or ordinary sunlight.
Slicer ALPrint software
As you may have noticed, the Anet N4 printer uses its own file format with a resolution of “. N4” for printing. For test models, it comes "by default", but if you decide to create and print your own 3D object, then the file will have to be converted to the appropriate format. To do this, we need the ALPrint software, which was originally developed only for Windows. However, with the help of simple manipulations, you can convert a file with a 3D model on other operating systems (MacOS X or Linux).
VirtualBox is another helper
So what if you want to run ALPrint software on Mac OS X or Linux? To do this, you can download the free Virtualbox program, which will allow you to run another OS on your host system (in other words, run Windows on MacOS X). Thus, you will be able to install ALPrint on your PC or laptop without reinstalling the OS.
Installing AlPrint via VirtualBox
First, download VirtualBox and install it on your computer (make sure you have enough space on your hard drive to install the program). Then in the settings of the virtual machine we find "Display" and put a tick on "Enable 2D / 3D acceleration" (Enable 2D / 3D Acceleration). We copy the contents from the USB flash drive to the local drive and in the "Shared Folders" section specify the path to it by opening "Full Control" and activating "Startup". Now you can start the virtual machine (if you need to enter a password, it will be standard - "Passw0rd!"). After these simple manipulations, you can run ALPrint and convert the file with the 3D model to the desired format (N4). This is done quite quickly, although, of course, on Windows everything is much faster and more convenient.
AlPrint Slicer software
If you have worked with 3D printers before, then you can quickly master the AlPrint Slicer interface, because similar programs often have similar functionality. The only noticeable difference between AlPrint Slicer and other similar programs is one additional feature that allows you to more accurately control the structure of a 3D object. For example, you can set an “empty” internal content of an object - thus, it will require fewer materials to manufacture it, and the 3D printing object itself will turn out to be lighter.
Comparison of SLA and FDM print results
We chose our Anet N4 (SLA) and Tevo Tarantula (FDM) as the printers to compare two key 3D printing technologies. The result is more than obvious! Tevo Tarantula produced quite a good print result, however, the structures of the fused layers are visible even to the naked eye, while Anet N4 created a really coherent and more durable 3D object, in which it is difficult to notice the "joining" of different layers, even if you look very closely. This leads to the first conclusion: SLA printers are definitely better suited for printing small 3D objects.
Another important advantage of the Anet N4 (SLA) is its relatively simple design with a minimum number of mechanical parts. On the one hand, this minimizes the risk of printer breakdown, and on the other hand, it improves the quality of 3D printing (again, fewer moving parts - less unwanted vibrations).
As expected, one of the main disadvantages of the Anet N4, like any other SLA printer, was the materials used.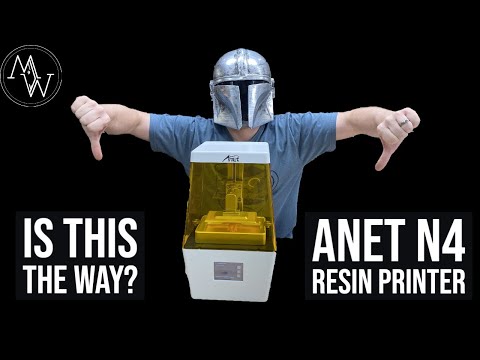 Not only are they expensive, they can also be hazardous to health (if used incorrectly or carelessly). UV resins have a not very pleasant smell, and you can only work with such a printer with special gloves. However, if you follow all the rules and perform 3D printing in a ventilated room, then these disadvantages are minimized. In any case, the high quality of the produced 3D object compensates for all this.
Summing up
Anet N4 3D printer is a prime example of why many manufacturers and users prefer SLA technology. Quiet, fast and high-quality printing, as well as excellent assembly with a minimum number of moving parts - all this makes the Anet N4 one of the best options in its price category. The only drawback is the material used (UV resin), however, this applies to absolutely all SLA printers, and not just Anet.
Can SLA completely replace FDM? I think no. When it comes to printing small objects, SLA has an undeniable advantage, but for printing large objects, a high-quality FDM printer is also quite suitable. It all depends on the tasks and requirements for the 3D object. In our opinion, both of these technologies (both SLA and FDM) have their place. As for the specific model Anet N4, it is really good!
Order on STEPLine.kz!
Anet N4 print settings setting
The part is slightly larger and the small holes are closed. How to fix?
Support:
In your case, the model is overexposed. It is necessary to reduce the exposure time of the layer by 20-30%. Print a test model to find the optimal settings for further printing. The test model can be downloaded here.
Small parts did not print, what should I do?
SUPPORT:
To avoid gaps when printing models with thin walls or fine details, increase the exposure time by 20-30%. Then repeat the test print.
Model breaks off supports. How to arrange support?
SUPPORT:
There can be several reasons for the detachment of the model from supports:
- Insufficient number or too small thickness of supports.
 We recommend using supports 1.2 mm thick, with a contact thickness of 0.8 mm and a contact depth of 0.4 mm.
 - Position of the model relative to the printer desktop (XY axis). When a large area layer is printed, it adheres quite strongly to the bottom of the bath. When the platform is raised, a moment occurs that can disrupt the supports. We recommend placing the model at an angle of 30-60 degrees.
- Lifting speed too high. In order for the model to come off the bath smoothly, we recommend setting the speed to 100 mm/min or less. The softer the material, the slower the lifting speed should be. Sufficient lifting height of 2-4 mm.
The side surface of the model is rough. What could be the reason?
SUPPORT:
This problem is most likely due to insufficient delay time before printing. It takes time for the polymer to spread evenly over the bottom of the bath after the table is lowered. If the delay is too short, then the resin will continue to flow out from under the model at the moment when the printing of the next layer has already begun.