Pitta color 3d print
PITTA Multi Color 3D Printing
PITTA
The PITTA_Multi-Color Module is priced at 399 USD and includes PITTA Base (339 USD) + Adaptation Kit (60 USD).
Shipping started in January 2022.
PITTA is only applicable Ender3 V2, Ender3 pro 32bit(4.2.2 or 4.2.7 main board used, SKR2.0 for Ender3 pro) and CR6 SE.
We are working for another, but not finished, so be careful to get PITTA.
Becasuse of logistics(cost and delivery), available shipping country is not enough at first.
If your country is not included in the list, mail us([email protected]), we will add those first.
Plan to expand the model using PITTA
1. Direct support will continue by selecting models with a large user base. (ex, CR6 SE etc)
2. In the case of a specific model, there are difficulties in support because the user base is not thick or the composition of the stock model does not go well with PITTA
-> Direct support is not available for models using 8-bit main boards (sufficient performance cannot be implemented due to insufficient memory, etc. )
In this case, if the user upgrades to a 32-bit motherboard, we provide the necessary firmware and information to support it. (cr10, ender5 plus etc with the mainboard like creality 4.2.7, skr2.0 etc)
Adaptation module will be supported for each possible model, or STL will be released so that the user can use it for a specific model with slight modifications.
3. Model support plan other than creality model
Since we started with ender3, support for this is easy at the moment, but expansion to other brand models will not be too difficult, so we plan to support it as soon as possible, and related news will be updated through blogs or user groups.
In this regard, if there is a request from users, we would like to review and proceed first, so please give us your opinion.
→ SHOP
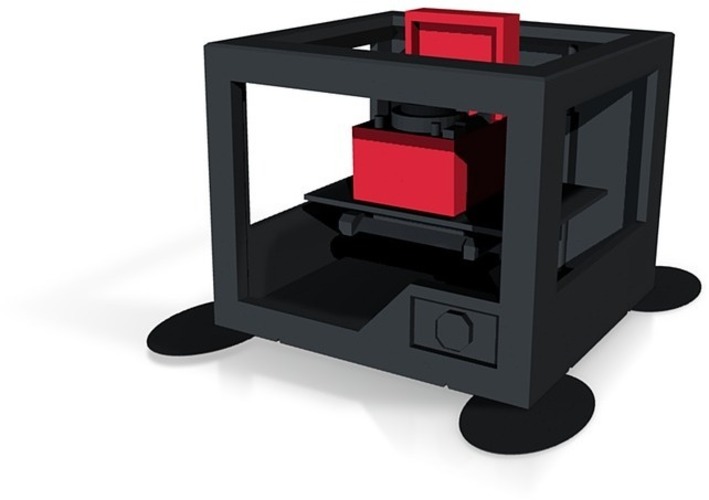
PITTA consists of 3 parts as shown above.
※ PITTA Base is assembled with NC processed parts, 3D printed parts(PLA Pro), and SUS processed parts. ADAPTATION KIT consists of 3D printing parts(PLA Pro).
The ideal ambient operating temperature is from 15 - 30 °C (60 - 86 °F).
② is an ADAPTATION KIT that transfers material between PITTA and 3D printer. It will be provided in a suitable form according to the type, size, and structure of the 3D printer.
Currently, the adaptation module is configured to use Ender3 V2 and Ender3 Pro. As models are added, we will sell suitable modules, and we will also share their .stl so you can make your own.
③The splitter bobbin prevents the material from kinking and keeps the spool running smoothly. Although not required, its use is strongly recommended. We will share the .stl file of the splitter bobbin, please print and use it yourself.
Import stl to slicer
Painting
Slicing
And Printing
Pencil Holder 8 color. - 1/20/2022
With the release approaching, the final performance tests are in progress.
These are tests to see how stable printing is possible with respect to the large size and 8 colors that can be printed in Ender 3 and retraction errors.
In addition, it shows the inside of the purge tower, which many people are curious about. (12/09/2021, PITTA will be launced on the market within next 2 weeks.)
Prusa Slicer is great. It is much more convenient to use for multi-color 3d printing and PITTA supports completed. (squid game 001 o il nam)11/13/2021
Prusa Slicer can be used. 10/26/2021
Test - Buzz lightyear 8 color. - 10/13/2021
Supporting BuildTech SKR main board.
Development to support the skr board is proceeding without much difficulty.
If it is a 32-bit main-board equipped with marlin, it is expected that various support will be possible without any major issues.
Now, first release will include stock 4. 2.2, 4,2,7 and SKR 2.0. - 10/07/2021
And the timelapse.
About Kickstarter funding failure
There were a lot of thoughts, and I could organize them into a few main reasons.
First, there were not many supported printer types.Basically, it was designed for the purpose of making it applicable to almost all FDM printers, but for actual application, necessary tasks and tests must be performed on the hardware specifications of individual printers.
First of all, it is true that there were time and physical constraints to do more of these things.
In the future, not only should efforts be made to support more machines, but also a method of allowing users to directly apply some design modifications to open source-based devices is being considered.
In addition,I need the information of more commonly used printers. It is important to know which printers are being used by as many users as possible.
Second, the price.Some commented that it was a bit expensive. This is a really difficult problem.
If PITTA sales are high, it is possible to lower the price as the quantity increases. However, we are not in a position where we can expect such a thing in haste.
We tried to present the best price considering the price of similar products and various costs including our material cost, but I think it would be better if it was cheaper. In fact, all costs of development are not taken into account here. It's something I can't even think about right now.
However, I am wondering if there is a part that can be lowered even more.
As with the price itself, I am thinking about making the configuration more flexible.
This will be posted in more detail on this blog later.
And the third, lack of publicity.There was too little publicity. We made a good machine, but not many people know about it.
This is the part that we need to be more aware of from now on.
The help of many people who are interested in PITTA is also desperately needed for this part.
I would be very grateful if you could give your opinion and help many people know about the photos, videos, and useful contents delivered through the blog.
We will try to sort out the big reasons for this and improve them.
Although the Kickstarter failed, the sale of PITTA is planned to proceed similarly to the Kickstarter schedule.
A shopping mall is also being prepared, and perhaps through pre-orders, we are thinking of offering additional benefits to those who apply for pre-sale.
For the time being, the blog plans to update the progress and contents in a relatively free format like writing this article.
The content will also include some technical considerations for PITTA.
Also welcome your opinion.
Best Regards.
by Hyungkwon Kim
Regarding Stress Testing.Stress testing is very important.
If it goes well for the first 10 hours, I think it will be something.
Also, it seems that anything will happen in about 30 hours after I figure out the problem. It is also a wrong idea.
After about 50 hours, something else seems to happen.
However, I think it should be around 100 hours, so that it can be used moderately without any major problems in actual use.
So, I keep repeating testing until close to 100 hours. Of course, we don't just test, we have to continuously improve and reflect the problems raised here. This will increase the reliability of the product.
45 hrs test completed without any single issue (10/03/2021)
Heavy stress test. (At least over 80hrs continuous color 3d printing 10/02/2021)
Introducing PITTA - 8 color upgrade module
PITTA adds multiple color printing capacity to single nozzle FDM 3D Printers. We are working tirelessly to make PITTA compatible and optimized for a wide variety of accessible consumer 3D Printers that are open source based.
In our initial release, we will be supporting Ender 3 pro 8bit, 32 bit, and Ender3 v2.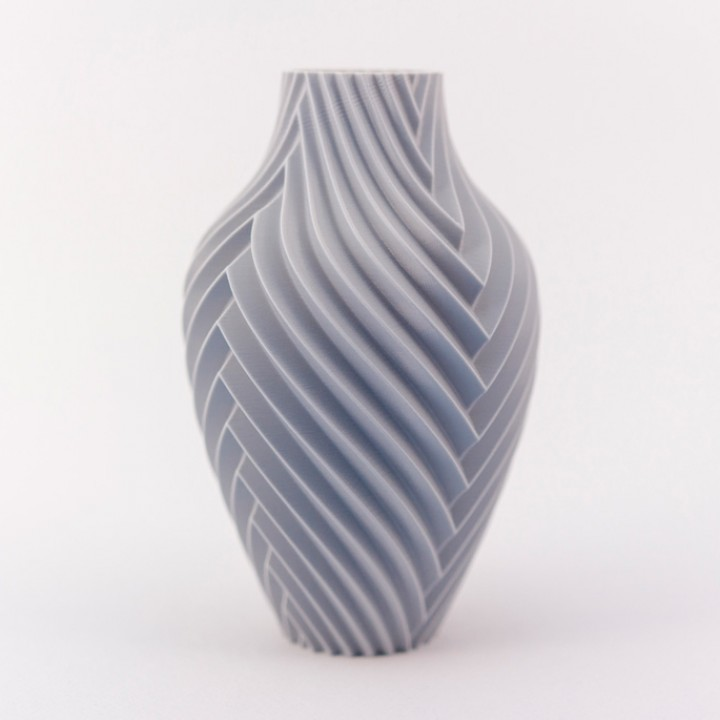
PITTA will be on Kickstarter soon. We’ve worked on PITTA for past 2 years and we finally have a working product(not prototype). Now we need your support to get it to production and widen support for wider range of 3D printers.
We will continuously post more updates on PITTA including videos, pictures and technical information. So, please subscribe to our mailing list.
PITTA Hardware Configuration
① Replace Extruder Motor bracket with PITTA muti combiner module and detect-switch.
② Upgrade the PTFE tube with PITTA PTFE tube and tube grip connector.
③ Connect the command cable to the extended cable of LCD flat cable.
- Upgrade your 3D printer firmware with PITTA supported version.
Multi-Color 3D Printing
Tiger Box - 8color
Faberge Eggs - 8color
Fruit - 8 Color
Cradle - Time Lapse
Owls - 6color
Owls - Time Lapse
Candy Box - Time Lapse
PITTA Hardware Configuration
Car - Time Lapse
by Stellamove
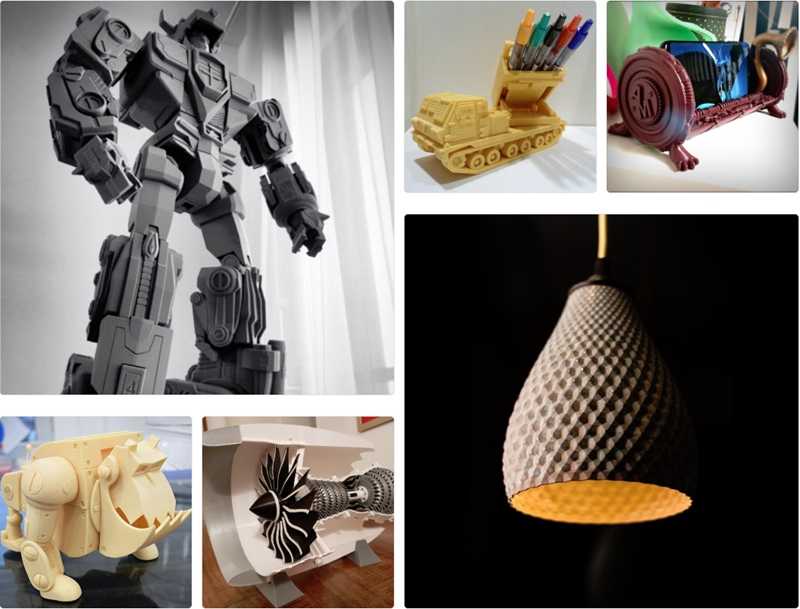
OUR TECHNOLOGY
We have been working on our own line of 3D Printers for the past decade. Our core products are Large Scale FDM printers and Multi-Color 3D Printers for industrial and commercial customers. Here are some examples of our prints using our own line of printers.
Now with PITTA, we are super excited to bring our technology to consumers and 3D printing communities.
FAQ
1. What is the price?
- We are expecting it to be somewhere around US$399 + shipping cost and tax
2.
 What is the supported model?
- Initially, we will start out supporting Creality Ender3 Pro 8bit & 32 bit, and Ender3 V2 printers.
- We want to support more printer models and we can with more resources and time. However, we won’t be able to add more models to our initial Kickstarter campaign. However, we will continue to add more supported models in the future. And with your support, we should be able to speed it up.
3. When can I receive the goods?
- You should be able to receive PITTA approximately 3 months after the Kickstarter campaign is completed. Delivery will also vary depending on the pledge tier.
- Most of the 3 months will be spent on setting up the manufacturing line and production.
4. Open Source Related.
- It is open source based on Marlin. You will be able to download it to your 3D printer. We will provide specific details of how to upgrade your firmware.
- If you want to tune your printer to improve performance, you can edit the source code. However, the code for the PITTA is not open source, and a binary downloadable will be provided instead.
- PITTA is designed to be compatible with any FDM 3D Printer. PITTA exchanges color change information directly with the printer to make the multi-color printing smooth and effortless. So, no modification of PITTA is needed.
- Further performance improvements and data for any required parts upgrade will be provided.
Home
Subscribe to: Posts (Atom)
PITTA Builds on Desktop Multicolor 3D Printing with Eight-Color Module - 3DPrint.com
Fused deposition modeling (FDM) is getting a new eight-color makeover. The PITTA 8-color 3D printing module for Ender3 V2 Stock Model and the Ender3 Pro 8bit/32bit Stock Model makes it possible to 3D print with eight different filaments.
While 3D printers offer a host of versatility, most hobbyist systems have one extruder, which limits the print to a single color. There are other machines on the market that have dual extruders and print in two colors. If you are looking for more heterogeneity in color, several add-ons are available for different printers.
Prusa desktop FDM 3D printers are regarded as some of the most innovative printers on the market. Prusa offers the unique Multi Material Upgrade 2S (MMU2S) add-on for their Prusa i3 MK2.5S or MK3S/+ machines, which enables your 3D printer to print with up to 5 colors at the same time by swapping filament. Aside from standard filaments like PLA, ABS or PETG, the MMU 2.0 also supports soluble materials like BVOH or PVA, giving it ever greater flexibility. The add-on also uses a direct-drive mechanism which makes the filament loading process more reliable and less susceptible to jamming. The retail price for the MMU2S is $299.00.
The Prusa MMU2S multicolor add-on. Image courtesy of Prusa.
Of course, if you don’t own a Prusa, you can always manually swap filament by hand mid-print. This technique requires you to pause a job at a particular point and can also be tricky, as you need to cleanse your nozzle of any of the old material before resuming your print. It can be an easy solution for multicolor signs or plaques, but overwhelming for more complex objects.
The company Mosaic has been in the field of multicolor 3D printing since 2014 with its line of Palette products. The Palette 3 is engineered to strategically splice up to four filaments while the Palette 3 Pro can handle eight materials and reach up to 10% faster splicing and cooling speeds. The Palette 3 Pro can combine flexible and rigid filaments to produce high-quality and functional parts. Two of the key facets Palette 3 improves on are user experience and reliability.
The Palette 3 Pro module. Image courtesy of Mosaic.
With their Canvas Hub S integrated technology, you’re able to connect the Palette3 (Pro) to your printer, and access easier loading, connected calibration and a simpler printing workflow. The Canvas interface also allows you to heat up your printer, start prints and monitor your print jobs. The Palette 3 retails for $599.00 and the Palette 3 Pro is $799. 00.
00.
Which brings us to the latest entry, the PITTA 8 color 3D printing module for Ender3 V2 Stock Model and the Ender3 Pro 8bit/32bit Stock Model. The PITTA uses a slide selection technology with two motors for material selection and supply. It enhances Bowden tube connectivity, called TUBE GRIP, which prevents the tube from moving. This easy and effective Bowden tube configuration amplifies the extruding performance, prevents nozzle clogging, and diminishes tube damage. The PITTA is limited in a way that the other addons are not. Only PLA filament is supported for multicolor printing. You can use most materials for single material printing, such as ABS, Flexible, etc.
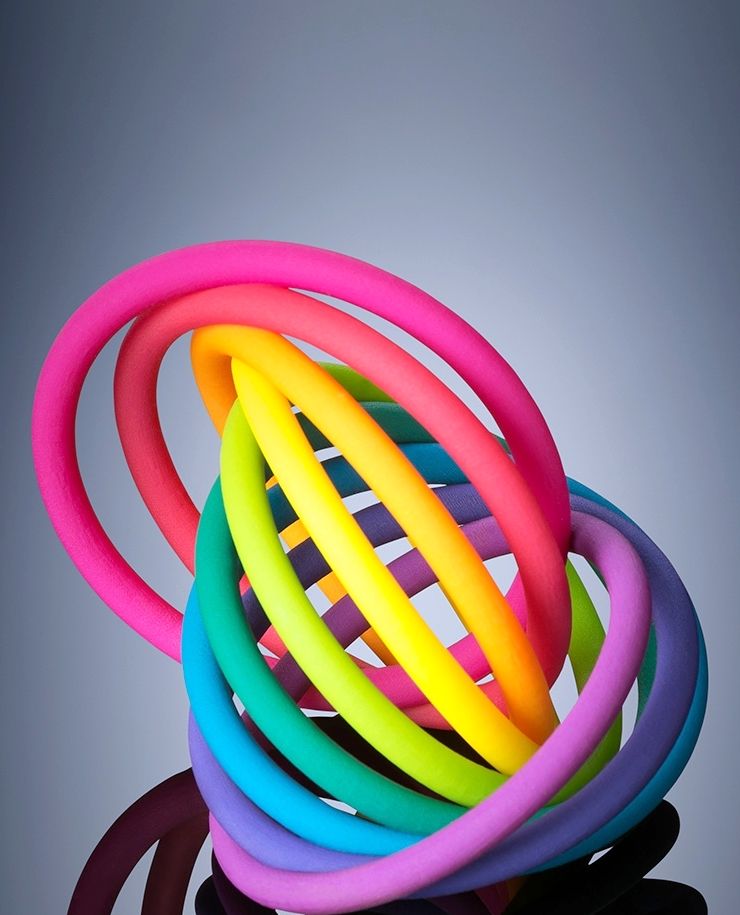
The PITTA module with eight colors of PLA filament. Image courtesy of PITTA on Kickstarter.
PITTA can be installed in three rather simple steps, which makes for a very attractive feature. The slicer software, CuPitta, is based on Cura, but it’s unclear at this time how much of a learning curve it will require to operate as no details were released regarding the software.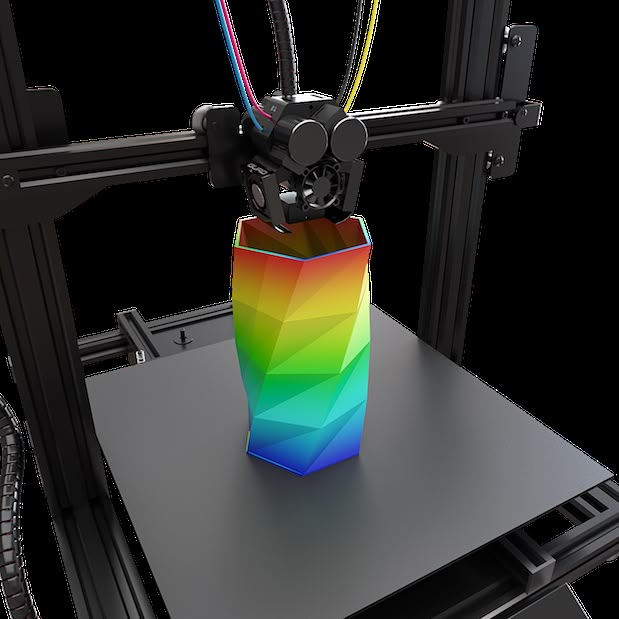 PITTA is limited to just the Ender 3 models now, but depending on how much is raised through its Kickstarter campaign, various models, vendors and printing mechanisms (Delta, Core XY, etc.) will be supported. With up to eight filaments to choose from, you can design some truly stunning works of art. If funded, the retail price with be $570.00, with various discounts available if supported through the Kickstarter campaign.
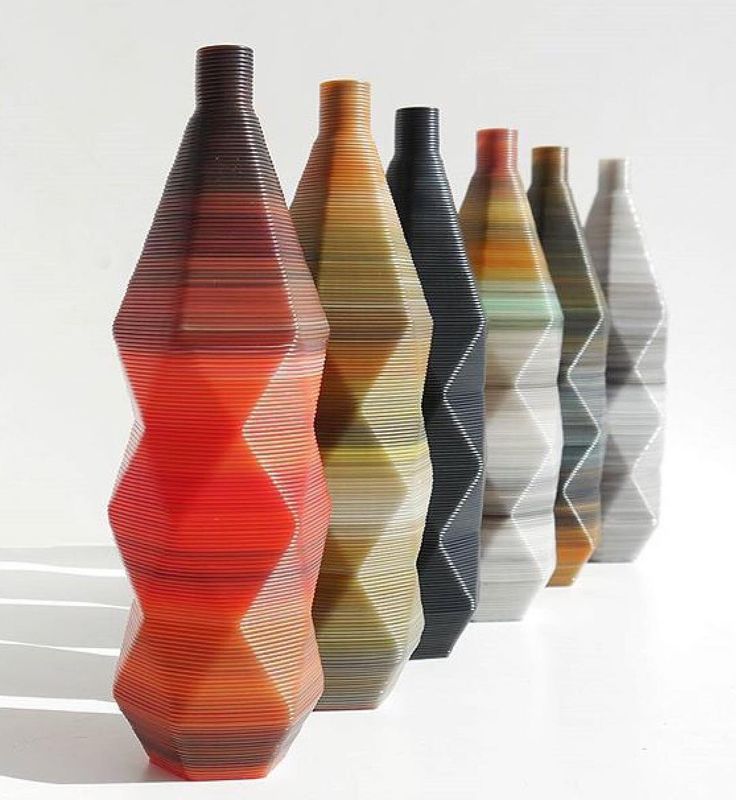
A vibrant 3D printed vase created with the PITTA module. Image courtesy of PITTA on Kickstarter.
Whether you are looking for four-, five- or eight-color prints, the add-on multicolor market is constantly expanding, provided you have the right brand of 3D printer.
Stay up-to-date on all the latest news from the 3D printing industry and receive information and offers from third party vendors.
Tagged with: 3D color printing • 3D printer module • crowdfunding campaign • desktop 3d printing • ENDER 3D printer • kickstarter • multicolor 3D printing • multicolor desktop 3D printing • PITTA
Please enable JavaScript to view the comments powered by Disqus.
Free STL file PITTA MULTICOLOR KEYCHAIN・3D printing template for download・Cults
Multicolour Danchong Pencil Holder
Free
Colorful Easter eggs
Free
Best 3D Printer Files in Jewelry Category
Skull Vial
2.44 €
ring
0,60 €
Spock During
1.51 €
clamp ring
15 €
Vintage Ring
19.53 €
Charm Ring
Free
Necklace Fibonacci & Gold Triangle
Free
Heart Clover - Lucky Clover
Free
Bestsellers in Jewelry category
Loki horns
1. 19 €
19 €
Ouija hoops/hearts.
€0.90
6 coasters Christmas
2,50 €
keyrings / keychain , CHAINSAWMAN
2,44 €
Turkey earrings
0.63 €
lord of the rings
1 €
Keychain with Guy Fawkes mask
1,27 €
heart-shaped web earrings
0,60 €
Aegon's Iron Crown - Show Exact: House of the Dragon - Game of Thrones
7.80 €
DISNEY LOCK - BOX FOR RINGS
2,37 €
Ear pads for Airpods Max
20 €
Hanger rack with hoops
3 €
Viserys Targaryen's Crown - an accessory corresponding to the series
9. 75 €
75 €
Christmas holly leaf - polymer cutter (clay cutter)
2.63 €
snowflake clay cutter, christmas clay cutters, mini clay cutters 3 sizes
2,50 €
Medusa Crown
2.99 €
Do you want to support Cults?
Do you like Cults and want to help us continue our journey on our own ? Please note that we are a small team of 3 people, so it is very easy to support us in maintaining activities and creating future developments of . Here are 4 solutions available to everyone:
-
AD: Disable AdBlock banner blocker and click on our banner ads.
-
AFFILIATION: Shop online with our affiliate links here Amazon.
-
DONATIONS: If you want, you can donate via PayPal here.
-
* INVITE FRIENDS: * Invite your friends, discover the platform and great 3D files shared by the community!
Color 3D printing: some theory and practice
Technique
Subscribe to the author
Subscribe
Don't want
27
Briefly about RGB and CMYK color schemes. A little practice of mixing colors without a printer. We measure the color after mixing the plastics.
A bit of theory
Many are already familiar with the RGB scheme - it consists of three components, each of which is responsible for a certain part of the visible spectrum (red, green and blue). This scheme is more applicable to radiation sources in the visible spectrum. Depending on the spectrum and its level of radiation, we perceive the total radiation in the form of some kind of color. For example, if the spectrum of all three ranges is present in the radiation, then we see white.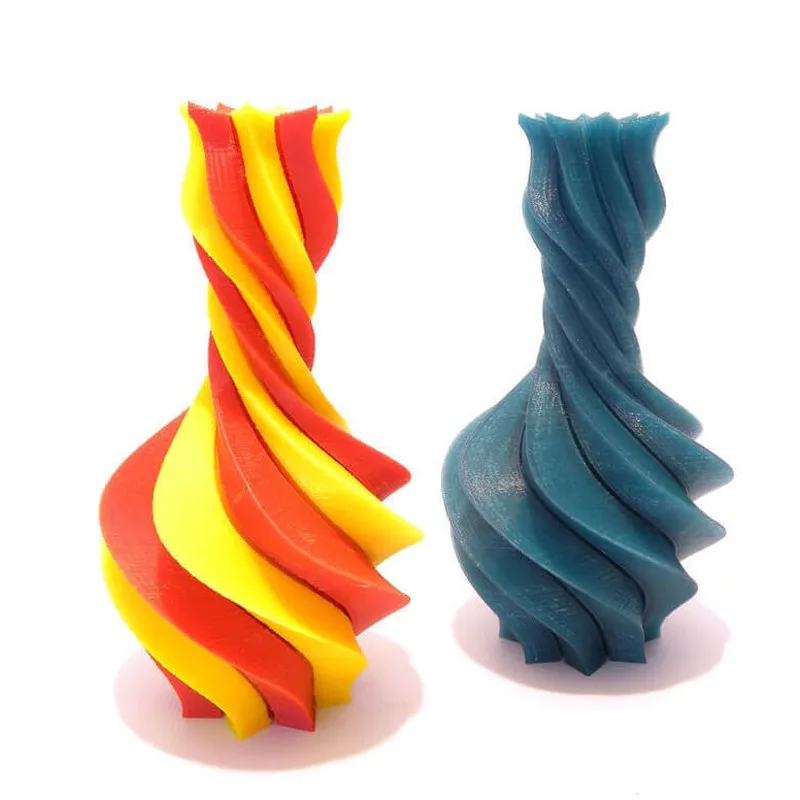 If the spectrum contains only red and green, we perceive it as yellow. Everything is simple here.
Now CMYK (the picture is taken from the same site) - many people are familiar with this scheme too. Only this scheme is no longer applicable to radiation sources, but to objects that reflect or absorb a certain part of the visible spectrum. These objects are all that we see around us in the presence of lighting. And, as we see it, it depends on the lighting. What is the fundamental difference? Yes, the difference is just in the difference ... Components C yan, M agenta, Y ellow, K ey color (Blac K ) actually describe the color that is obtained when a certain part of the radiation spectrum is completely absorbed. Cyan is a color that has no red component in its spectrum, i.e. There is only blue and green part of the spectrum. Magenta - the green part of the spectrum is missing. Yellow - the blue part of the spectrum is missing. The surface from which light is reflected absorbs part of the radiation, which goes into heating the surface of the object (most of it). Therefore, a black object (absorbs all radiation) heats up more than a white object (reflects all radiation) under the same illumination.
Colored plastic contains dyes that are responsible for the absorption of one or another part of the radiation spectrum. If you mix two plastics of different colors, you get a third color. If you mix plastics with dyes that absorb red, green and blue radiation, you get black (ideally).
A bit of practice
For mixing, you need plastic of different colors, cut into pieces of the same length, for a more convenient conversion of the percentage of a particular color. You also need a manual “mixer” - a soldering iron with a clean tip and temperature control is suitable here. Well, in order to “measure” the color, you need a spectrophotometer, which will show what part of the white spectrum is reflected from the surface. I have an X-Rite ColorMunki Photo and use it.
I must say right away that for proper mixing you need the “correct” CMYK plastics, and I don’t have them, so I took them from the BestFilament PLA 3D pen kit.
To begin with, I chose colors close to CMYK and checked their color. It was necessary to check all the colors, but I did not see the point in checking the color that I did not need.
The result can be seen on the pictures:
Here I checked the mixing of white and black - the result is expected. The result is an almost even (R, G, B almost the same) gray color.
Yellow - in theory there should be only R (203) and G (179) components, but we see the presence of the blue (47) component.
It was supposed to be magenta, but in practice we observe the presence of a green (93) component.
I thought that cyan is blue, but after reading a little and understanding it, I realized that it should be blue-green. Taking the blue plastic, you can see a good absorption of the red component. It's almost blue-green, only twice as much blue as green.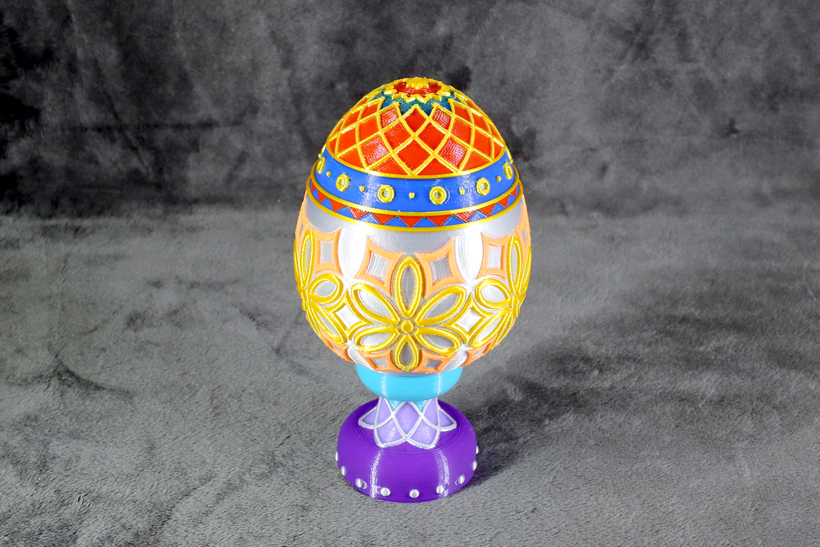
Now I'm trying to mix different not true CMYK…
It almost worked out - I got green color, mixing yellow and not cyan, but blue.
Here I added all the colors and a little black - I got almost gray. Too much blue.
I added less blue - I got almost pure gray.
I mixed blue and pink and got some kind of blue.
Conclusions
- Mixing turns out - you have to try (measure the color) different plastics and look for real CMYK.
- Plastic makers will need to tinker a bit to get pure CMYK.
- If you learn how to mix plastics in the printer, you will only need CMYK and white in order to get a model of any color. Here, in fact, not every color can be obtained. Yes, and all sorts of transparent and luminous plastics will be mixed in different ways.
- Color printing requires color calibration, ie.
 you will need to create color profiles for each combination of CMYK plastics. At least for different manufacturers of plastics.
Follow the author
Follow
Don't want
27
More interesting articles
fifteen
Subscribe to the author
Subscribe
Don't want to
Probably, many have already heard about the charms of the Klipper firmware, but after trying to install it, they broke the ambi...
Read more
nik_vr
6
6 Loading
11/18/2022
533
3
Subscribe to the author
Subscribe
Don't want to
Someone probably remembers the story of how 42 schools in the Kirov region were brought.