Octoprint 3d print
OctoPrint.org - Download & Setup OctoPrint
Guy Sheffer maintains “OctoPi”, a Raspbian (and thus Debian) based SD card image for the Raspberry Pi that already includes OctoPrint plus everything you need to run it:
- OctoPrint plus its dependencies
- MJPG-Streamer for live viewing of prints and timelapse video creation, compatible with various USB webcams and the Raspberry Pi camera
Recommended hardware: Raspberry Pi 3B, 3B+, 4B or Zero 2. Expect print artifacts and long loading times with other options, especially when adding a webcam or installing third party plugins. Setups not using recommended hardware are not officially supported.
Please note that the Raspberry Pi Zero and Zero W are not recommended explicitly since severe performance issues were observed, caused by the WiFi interface when bandwidth is utilized (e. g. the webcam is streamed), negatively impacting printing quality. See also here. The Zero 2 however is recommended.
Installing OctoPi
OctoPi is available through the Raspberry Pi Imager, which you can use to download and setup OctoPi. You can install it yourself, or alternatively simply buy one of the available
Installing OctoPi using the Raspberry Pi Imager
🤚 Before you begin
Read and follow these instructions precisely. Most importantly, leave the system username as “pi”, do not change it to anything else or OctoPrint won’t work!
-
If you haven’t already, download and install Raspberry Pi Imager on your computer
-
Find the OctoPi image under “Choose OS”, by selecting “Other Specific Purpose OS” > “3D printing” > “OctoPi” and then the “stable” version.
-
Open advanced options by clicking on the button with the gear, or by using the keyboard shortcut
ctrl+shift+xand then:-
Configure your wifi options: Set your SSID, password and WiFi country:
-
Change the system password in “Set username and password” by entering a new password to use for the system user “pi”.
 This is not the password you’ll use for logging into OctoPrint but one that you’ll have to use to log into your Pi via SSH should you ever need to. Leave the username as “pi”, do not change it to anything else!
 -
Optionally: Change the configured timezone in “Set locale settings”
-
Optionally: Change the hostname in “Set hostname”
-
-
Install the image to your SD card, then plug everything in to your Raspberry Pi and boot it up. Do not format the SD card after installing, even if prompted to do so. This will break the installation and you will have to start over!
-
Access OctoPrint from your browser via
http://octopi.localor the hostname you chose (if your computer supports bonjour) orhttp://<your pi's ip address>.httpsis available too, with a self-signed certificate (which means your browser will warn you about it being invalid - it isn’t, it’s just not recognized by your browser).
Please also refer to OctoPi’s README, especially the “How to use it” section.
Alternative Initial Setup
If you decide against using the Raspberry Pi Imager, here are some alternative steps to get started:
-
Flash the image to your SD card through whatever alternative means you’ve chosen.
-
With the SD card still attached to your computer, set up the Wifi connection using the
octopi-wpa-supplicant.txtfile on the root of the installed card when using it like a thumb drive. Important: Do not use WordPad (Windows) or TextEdit (MacOS X) for this, those editors are known to mangle the file, making configuration fail. Use something like Notepad++, Atom or VSCode instead or at the very least heed the warnings in the file. If your computer doesn’t see the card right away after flashing, try ejecting and inserting it again. Do not format the SD card after installing, even if prompted to do so. This will break the installation and you will have to start over!
Please also refer take a look at the full WiFi setup guide in the FAQ that also includes troubleshooting tips.
-
Plug everything into your Raspberry Pi and boot it up
-
Log into your Pi via SSH (it is located at
octopi.localif your computer supports bonjour or the IP address assigned by your router), default username ispi, default password israspberry. Runsudo raspi-config. Once that is open:- Change the password via “Change User Password”
- Optionally: Change the configured timezone via “Localization Options” > “Timezone”.
- Optionally: Change the hostname via “Network Options” > “Hostname”. Your OctoPi instance will then no longer be reachable under
octopi.localbut rather the hostname you chose postfixed with., so keep that in mind. local
local
You can navigate in the menus using the arrow keys and Enter. To switch to selecting the buttons at the bottom use Tab.
You do not need to expand the filesystem, current versions of OctoPi do this automatically.
You also do not need to manually enable the RaspiCam if you have one, that is already taken care of on the image as well.
-
Access OctoPrint through
http://octopi.local(if your computer supports bonjour) orhttp://<your pi's ip address>.httpsis available too, with a self-signed certificate (which means your browser will warn you about it being invalid - it isn’t, it’s just not recognized by your browser).
Please also refer to OctoPi’s README, especially the “How to use it” section.
Image Downloads
Raspberry Pi Imager will download the latest version of OctoPi for you, but if you want to download the images yourself you can do so here.
Stable OctoPi
OctoPi 0.18.0 & OctoPrint 1.8.6 SHA256: 851573629147ec5385b9168a78377b8ed51af0a1d76c2174fe0e4ccb4f637a9d
Raspberry Pi 3B, 3B+, 4B or Zero 2 strongly recommended, Raspberry Pi Zero/Zero W not officially supported!
Image compatible with Raspberry Pi A, B, A+, B+, 2B, 3A+, 3B, 3B+, 4B 1/2/4/8GB, 400, Zero, Zero W and Zero 2.
OctoPi Release Candidate
The current OctoPi Release Candidate 1.0.0rc3 can be found here:
OctoPi 1.0.0rc3 & OctoPrint 1.8.6 Raspberry Pi 3B, 3B+, 4B or Zero 2 strongly recommended, Raspberry Pi Zero/Zero W not officially supported!
Image compatible with Raspberry Pi A, B, A+, B+, 2B, 3A+, 3B, 3B+, 4B 1/2/4/8GB, 400, Zero, Zero W and Zero 2.
OctoPi Nightlies
You can also get the 32bit nightlies here or the highly experimental 64bit nightlies here.
Further resources
- For customizing OctoPi, take a look at CustoPiZer.
- Scripts to build the image yourself can be found in OctoPi’s Github repository.
Filip Grzywok maintains “Octo4a”, an Android app that allows you to use an Android based smart phone as an OctoPrint host. Root is not required!
Check out the Octo4a README for information on how to obtain the app, install and run it.
Video
There’s also a video guide on how to get Octo4a up and running by Thomas Sanladerer.
There’s also an official OctoPrint Docker image, octoprint/octoprint. It is maintained by Brian Vanderbush and team on GitHub.
Please refer to its entry on dockerhub for more details on usage and configuration.
octoprint_deploy is a guided script for creating multiple OctoPrint instances. This enables control of multiple printers on a single piece of hardware. It is compatible with OctoPi and also functions as a general Linux installer for OctoPrint, video streamers, haproxy, etc.
The related octoprint_install serves as a single instance Linux installer.
Both are maintained by Paul Paukstelis.
The generic setup instructions boil down to
- Installing Python 3, including pip.
- Creating a virtual environment somewhere:
python -m venv OctoPrint - Installing OctoPrint into that virtual environment:
OctoPrint/bin/pip install OctoPrint - OctoPrint may then be started through
./OctoPrint/bin/octoprint serveor with an absolute path/path/to/OctoPrint/bin/octoprint serve
More specific setup instructions for the most common runtime environments can be found below.
Linux
For installing OctoPrint on Linux, please take a look at the setup instructions for Raspbian on the forum. They should be pretty much identical on other Linux distributions.
Windows
For installing the OctoPrint server on a Windows system, please take a look at the setup instructions for Windows on the forum.
Mac
For installing the OctoPrint server on a Mac, please take a look at the setup instructions for MacOS on the forum.
OctoPrint.org - Media about OctoPrint
Selected Articles & Interviews
- “OctoPrint With Gina Häußge”. The FOSSPod S1:E13, September 2022.
- “From a 3D side project to the dream job”. The ReadME Podcast, Episode 01, May 2021.
- “Gina Häußge and OctoPrint. How to make a living off of your pet passion projects - An Interview”. KDE.news, August 15th 2020.
- “HackSpace magazine meets… Gina Häußge”. HackSpace magazine, Issue 32, July 2020.
- “Set up a 3D printer with Raspberry Pi”. The MagPi, Issue 69, May 2018.
- “3D-Druck mit Raspberry Pi. Interview mit Gina Häußge”. Magpi: Das offizielle Raspberry Pi Magazin, Ausgabe 01/2017.
- “Unchaining your 3D printer with OctoPrint”. The MagPi, Issue 36, August 2015.
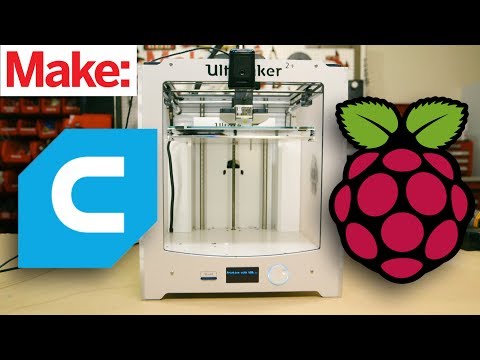
- “Interview with OctoPrint’s Gina Häußge”. Make, December 9th, 2014.
Slides
- “Raspberry Pi image customization with GitHub Actions” at Universe 2021 on October 27th/28th 2021 (english talk, english slides)
- “How to deal with toxic people” at Upstream 2021 on June 7th 2021 (english talk, english slides)
- “Abenteuer Open Source Entwicklung” at Grazer Linuxtage 2021 on April 10th 2021 (german talk, german slides)
- “A very brief look at OctoPrint 1.5.0” at VERRF2020 on October 11th 2020 (english talk, english slides)
- “Adventures in Open Source Development” at Akademy 2020 on September 5th 2020 (english talk, english slides), that talk is also available on YouTube
- “Driving 3D Printers with Python - Lessons Learned” at PyConDE 2019 on October 11th 2019 (english talk, english slides), that talk is also available on YouTube
- “Developing OctoPrint” at 3D Meetup Sweden 2019 on April 27th and 28th 2019 (english language, english slides), that talk is also available on YouTube
- “OctoPrint in a Nutshell” @ Webmontag Frankfurt #77 on January 11th 2016 (Ignite talk, german language, german slides), that talk is also available on YouTube
- “OctoPrint - 3D printing unchained” @ Makerfaire Hannover 2014 on July 5th 2014 (german language, german slides)
- “OctoPrint - 3D printing unchained” @ FabCon.
 3D 2014 on May 17th 2014 (that talk is also available on YouTube, german language, english slides)
 - “OctoPrint - 3D printing unchained” @ OS3DC 2013 on September 21st 2013 (english slides)
Videos
“How to deal with toxic people” (Upstream 2021)
“Behind the scenes of OctoPrint (with Gina Häußge)” (The Meltzone Podcast, episode 39, 2020)
“Adventures in Open Source Development” (Akademy 2020)
“3D Drucker Online Lab Night” (Freie Maker e.V., 2020)
“Driving 3D Printers with Python: Lessons Learned” (PyConDE, 2019)
“Developing OctoPrint” (3D Meetup Sweden, 2019)
“OctoPrint wouldn’t exist without Open Source - here’s why!” (Thomas Sanladerer, 2018)
“OctoPrint in a Nutshell” (Webmontag Frankfurt #77, 2016)
“OctoPrint: 3D printing unchained” (FabCon.3D, 2014)
Smart printer. Improving Octoprint / Sudo Null IT News
While developing an open project for a 4-extruder Z-Bolt printer, we faced the problem of choosing a screen to control the printer.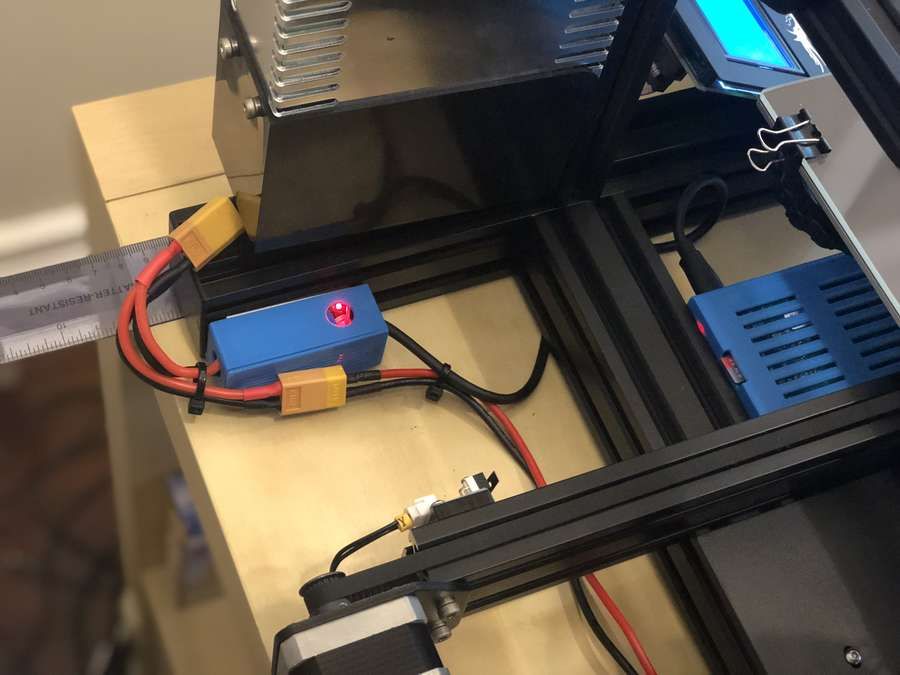 Of the available screens, only the Duet Wifi solution can control more than 2 extruders. The solution, to put it mildly, is not a budget one, and the interface is not for everybody. So we decided to look for an alternative with preference and courtesans. This story is about him…
On the Internet, there is a lot of information about the use of Octoprint. A little more than half a year ago, we became users of this solution, immediately appreciating its advantages. The ability to manage the printer through a web face is really hard to overestimate. Octoprint has a lot of plugins, and the main thing for us is that Octoprint handles well with more than 2 extruders. But there was one more issue to solve.
Many fans of Octoprint confidently assert that they no longer need the screen from the word “absolutely”, that this is an absolutely superfluous part of the printer, which only interferes with them.
However, I am convinced that there is another part of OctoPrint users. Everyone has their own habits and requirements for everyday use of a 3D printer, and there are operations that are more convenient to perform with a screen:
- Filament replacement
- Table level calibration
- Start printing a file that has already been printed before
- Printer preheating on
- Ability to see print status
- …
Now the default screen in Z-Bolt printers is MKS TFT. You can put TFT24, TFT32 or TFT35. These are good screens, but they can't integrate with Octoprint. If Octoprint has started printing, the screen will not know anything about it. They use different file repositories, etc. And the MKS TFT screens don't want to work with 3 or more heads 3D printers.
My goal was to find/make/configure a screen for Octoprint capable of controlling more than 2 extruders.
Googling a bit, I came across the TouchUI plugin.
The first impression was: this is the solution!!!
I immediately installed the plugin and opened Octoprint from my phone. The TouchUI interface was dumb :/. Sometimes the buttons were pressed normally, sometimes they slowed down, and sometimes they didn’t press at all the first time. From the connected screen, TouchUI behaved just as badly as from the phone.
Another solution was found in parallel.
The description was encouraging, unlike TouchUI, this is an independent application that runs without a browser, which means it requires much less computing resources.
Installation and configuration did not cause problems. The interface really worked much more predictably and more responsively.
But even here, not everything turned out smoothly. The application regularly crashed when printing started. There was an issue on github for this error, created almost a year ago and actively discussed, but not closed.
The main problem turned out to be that the author of the application, apparently, has lost interest in it and is no longer developing it at the moment.
Since, in my opinion, the application is written quite well and has potential, it was decided to make a “hard-fork” and take on the project thoroughly.
Here's what we got:
- Optimal screens for project were selected
- Made “hard-fork” from Octoprint-TFT
- Revised view of printer hardware and software architecture
- Created own theme for Octoprint interface
But first things first…
Screen selections
We started with the TFT 3.5 screen, which, to put it mildly, did not stand up to scrutiny. No viewing angles, the picture is faded. Therefore, it was decided to choose a better solution.
The main criteria were:
- IPS matrix
- size 4 - 5"
- capacitive screen (preferred)
- reasonable price
As a result, we settled on two options:
1. The option is simpler. 4'' IPS Resistive Touchscreen
2. Richer option. 4.3” IPS Capacitive Touchscreen
Both screens have a resolution of 800x400. Both have a great picture, color reproduction and viewing angle. Their main difference is the capacitive touchscreen. You get used to it (like everything good) very quickly and it is much more pleasant to use it than resistive ones. However, a resistive touchscreen is also viable.
It's Hard-Fork, baby!
The application has been seriously improved. And almost ceased to resemble his parent. Therefore (and also because the creator of Octoprint-TFT officially froze the development of his offspring), it was decided to make a hard-fork and call the new project Octoscreen.
- First of all, the screen freeze problem that plagued Octoprint-TFT was completely eliminated.
- - Significantly changed design and layout:
- The screen has learned to understand printer states (waiting/printing):
- Added the function of fast preheating / heating off by pressing the icon of the extruder or table, while the screen highlights the status:
- Manual table calibration screen added:
- Item “Menu” moved to a separate screen:
- Added WiFi management function:
- The application itself now supports up to 4 extruders, which is exactly what it was created for:
You can download the application and find a brief installation guide from our GitHub.![]()
There is also a detailed instruction for screen 3.5, for which special thanks to our colleague Denis (@negativ72rus).
Rethinking printer hardware architecture or changing shoes on the go
Initially, we planned to use Marlin in our multi-extruder printer, but in the end the choice fell on Klipper. There are several reasons:
1. One of the main reasons for us as developers is its flexibility. Marlin and his "pasta" code make it a real challenge to make improvements to it, and even more so to maintain them further.
Klipper is the opposite of Marlin in this respect. Firstly, all Klipper configuration is taken out of the program code. The code itself is well structured. But most importantly, Klipper is modular!!! You can add your own logic to the firmware without making changes to its core, and thus greatly simplify the further support of your code.
2. All firmware settings can be done directly through the OctoPrint web interface. And at the same time, the tuning capabilities are much more powerful than those of Marlin or Smootheiware.
3. How can we not say about beats, which everyone is chasing lately)). The Klipper architecture itself assumes that the computational load falls on the Raspberry PI. The function of the MKS Gen L control board (in the case of Z-Bolt printers) remains to transmit signals to/from peripherals (motors, sensors, heaters, controls).
But the Raspberry Pi 3 Model B+ is equipped with a 64-bit, 4-core Broadcom BCM2837B0 A53 1.4GHz chip.
Essentially Octoprint + Klipper running on Raspberry Pi + the same MKS Gen L -
an order of magnitude more functional and progressive solution than Marlin running on some 32-bit chip.
Configuration files for Klipper for Z-Bolt printers can also be found here.
A small bonus in the end!
We also made our own theme for the Octoprint interface:
The header can be customized with a native color picker in the Appearance section:
You can find instructions on how to install the theme on our GitHub.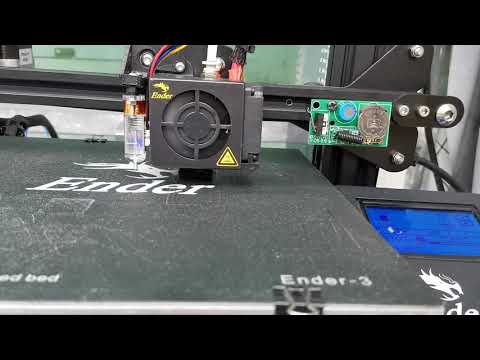
Write in the comments what features of the screen you consider the most useful and necessary to be added.
All the best, positive and good blowing of overhanging elements!
TB and Octoprint
Miscellaneous
Subscribe to author
Subscribe
Don't want
5
X190816: Overview of the Octoprint-PSUControl plug-in to ensure your security when using the printer remotely
Greetings!
Translate for the Author of the proposed video:
{
Octoprint can make 3D printing so much better!
In this video, I have five more great plugins to make your typing experience more efficient and secure.
When using a Raspberry Pi with Octoprint to control printer power via a relay, we can add
a 'redundancy layer' to cut off power in the event of an unplanned and potentially dangerous situation.
This video shows the mod specifically for the Creality Ender 3, but it will work with almost any 3D printer.
Important note: set your 'failsafe max' only under 'maxtemp' in firmware.
If 'maxtemp' is run first (first), the printer will shut down and Octoprint will not be able to read the temp temperature to cause a 'warning' error.
Disclaimer:
Just like enabling the security features in the Marlin firmware, by following the steps in this video, you can make your 3D printer more secure, but never 100% secure.
Treat him with respect!!! and leave it 'unattended' - only at your own peril and risk.
}
The charm of Octoprint is obvious: Malinka as the Governor of the 'brains' of your Printer deserves even independent battery power (such as this).
Links to other mods - at the beginning of the video and in the description under the video of the Author.
Regards,
Ski.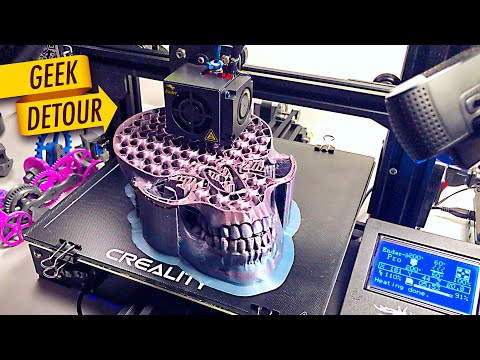
P.S.
#3dprinting #octoprint #safety
Octoprint plugins for better and safer printing - PSU relay control
Teaching Tech
Posted: 15 Aug. 2019
https://youtu.be/ozCqqlPJ3a0
[]
Follow author
Subscribe
Don't want to
5
More interesting articles
nik_vr
Loading
11/18/2022
930
eighteen
Subscribe to the author
Subscribe
Don't want to
(Earlier in the series...) This story began back in January 2021, when 42 schools in the Kirov.