3D print layer lines
Lines on the Side of Print
Lines on the Side of Print
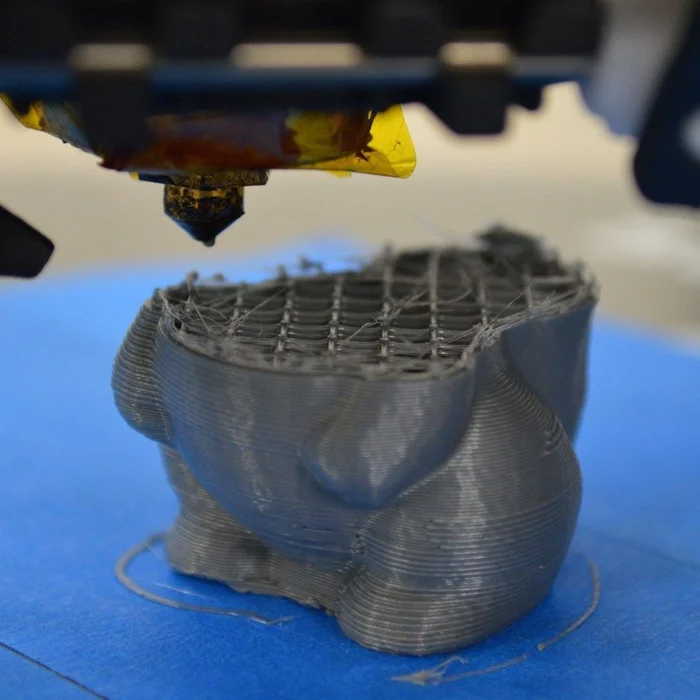
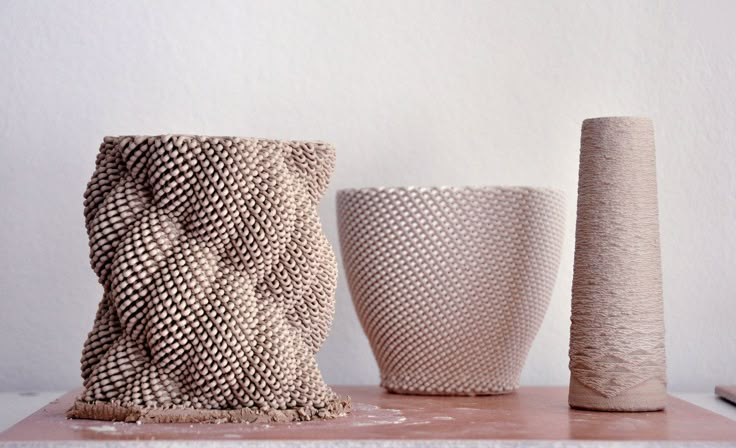
The sides of your 3D printed part are composed of hundreds of individual layers. If things are working properly, these layers will appear to be a single, smooth surface. However, if something goes wrong with just one of these layers, it is usually clearly visible from the outside of the print. These improper layers may appear to look like lines or ridges on the sides of your part. Many times the defects will appear to be cyclical, meaning that the lines appear in a repeating pattern (i.e. once every 15 layers). The section below will look at several common causes for these issues.
Common Solutions
Inconsistent extrusion
The most common cause for this issue is poor filament quality. If the filament does not have very tight tolerances, then you will notice this variation on the side walls of your print. For example, if your filament diameter varied by just 5% over the length of the spool, the width of the plastic extruded from the nozzle could change by as much as 0. 05mm. This extra extrusion will create a layer that is wider than all the others, which will end up looking like a line on the side of the print. To create a perfectly smooth side wall, your printer needs to be able to produce a very consistent extrusion which requires high-quality plastic. For other possible causes of variation, please read the Inconsistent Extrusion section.
Temperature variation
Most 3D printers use a PID controller to regulate the temperature of the extruder. If this PID controller is not tuned properly, the temperature of the extruder may fluctuate over time. Due to the nature of how PID controllers work, this fluctuation is frequently cyclical, meaning that the temperature will vary with a sine wave pattern. As the temperature gets hotter, the plastic may flow differently than when it is cooler. This will cause the layers of the print to extrude differently, creating visible ridges on the sides of your print. A properly tuned printer should be able to maintain the extruder temperature within +/-2 degrees. During your print, you can use Simplify3D’s machine control panel to monitor the temperature of your extruder. If it is varying by more than 2 degrees, you may need to recalibrate your PID controller. Please consult your printer manufacturer for exact instructions on how to do this.
Mechanical issues
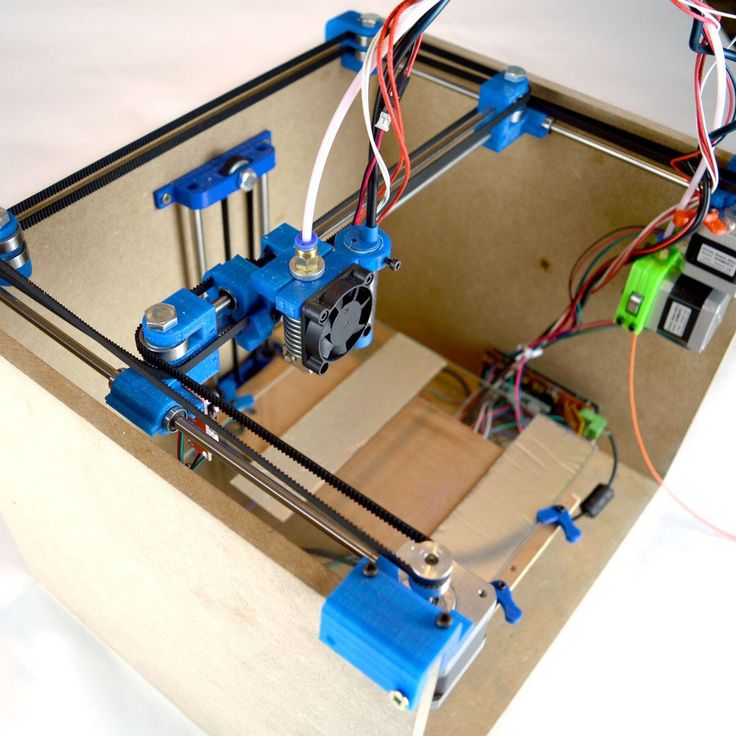
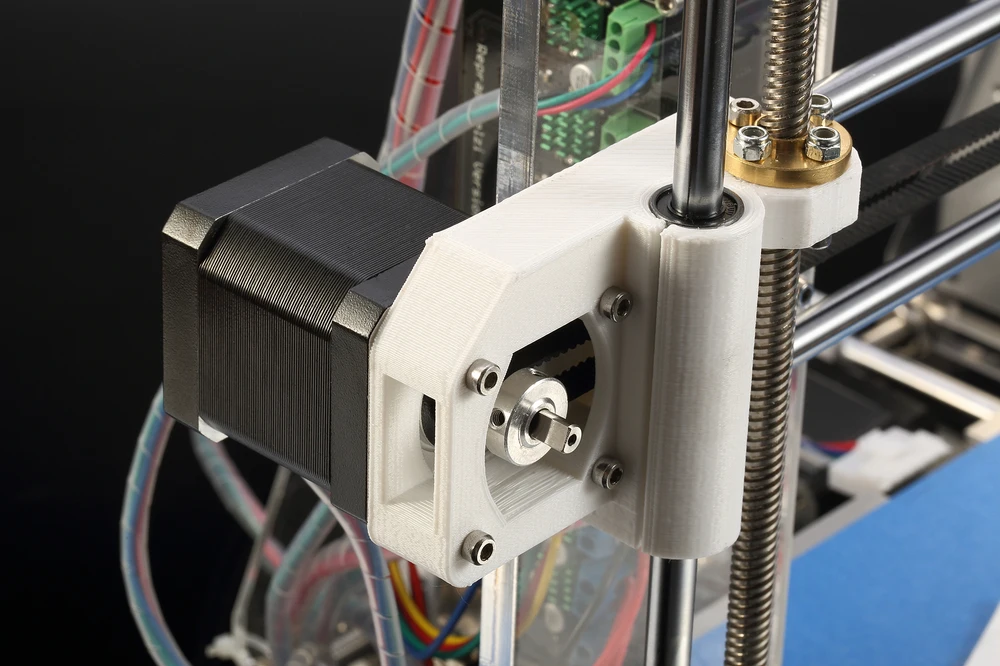
If you know that inconsistent extrusion and temperature variation are not to blame, then there may be a mechanical issue that is causing lines and ridges on the sides of your print. For example, if the print bed wobbles or vibrates while printing, this can cause the nozzle position to vary. This means that some layers may be slightly thicker than others. These thicker layers will produce ridges on the sides of your print. Another common issue is a Z-axis threaded rod that is not being positioned properly. For example, due to backlash issues or poor motor controller micro-stepping settings. Even a small change in the bed position can have a major impact on the quality of each layer that is printed.
Related Topics
8 Ways How to 3D Print Without Getting Layer Lines – 3D Printerly
3D print quality is one of the most important aspects of 3D printing, especially when creating objects for aesthetic looks. Learning how to 3D print without getting layer lines is an important skill to have in your 3D printing journey.
To 3D print without getting layer lines, you should reduce your layer height to around the 0.1mm mark. You can really smooth surfaces with layer heights of 0.1mm or below. You should calibrate your temperature, speed, and e-steps to make sure your 3D printer is optimized for 3D print quality.
Unfortunately, it can be pretty difficult to get 3D prints that don’t show layer lines. I decided to do some research to 3D print without layer lines for the highest quality prints.
Keep on reading through this article for some great tips, tricks, and pointers to achieving this useful ability.
Why Do 3D Prints Get Layer Lines?
Some of the many reasons which can cause layer lines are listed below.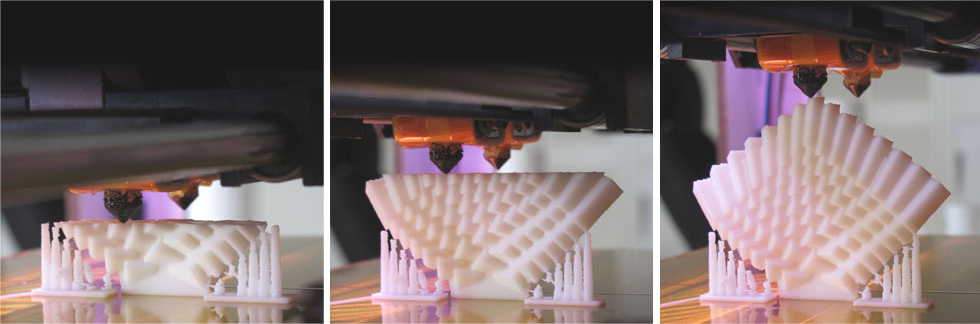 I will be explaining all these reasons in the next section of the articles so, keep on reading.
- Using a large layer height
- Using a large nozzle diameter
- Looseness or slack in 3D printer parts
- Incorrect printing temperature
- Low quality filament
- Bad model orientation
- Printing in a cold room
- Over-extrusion
How to 3D Print Without Getting Layer Lines?
1. Reducing the Layer Height
One of the best things that you can do to 3D print without getting layer lines comes down to your layer height. There aren’t really many ways around this in terms of improving your print quality to the point where you are getting a smooth exterior surface.
When you are 3D printing an object, you see that they are built up of several layers. The larger the layer, the rougher the feel and more visual the layer lines become.
You can think of it as a staircase. If you have very large steps, that’s a rough surface in terms of 3D printing.
If you have tiny steps, it’s going to be a smooth surface. The smaller the ‘steps’ or layer height in your objects the smoother it will be, up to the point where you can’t see the layer lines.
What you should do is:
- Reduce the layer height in your slicer
- Use the ‘Magic Numbers‘ which are now default in Cura (e.g. 0.04mm increments for the Ender 3)
- Run several test prints and see which layer height produces the least visible layer lines
- You may have to adjust your nozzle diameter and temperature to account for the reduction in layer height
I’ve written a detailed post about the ‘Best Layer Height for 3D Printing‘ which goes into how reducing your layer height makes the most significant difference in 3D printing without layer lines.
2. Adjust Nozzle Diameter
Following on from the previous method, if you want to reduce your layer height small enough, you may need to change your nozzle diameter to account for that change.
The general rule for nozzle diameter and layer height is that your layer height should be no larger than 80% of your nozzle diameter. It also works the other way where your layer height should, at minimum be 25% of your nozzle diameter.
I’ve been able to 3D print with my 0.4mm nozzle and get some great Benchy prints at a 0.12mm layer height, which presented a print which barely had any layer lines showing and was very smooth to the touch.
You’ll want to use a smaller nozzle if you are printing miniatures or just small objects in general which have a lot of detail. You can do an amazing job of 3D printing without layer lines with a small nozzle, which I’ve seen go down to 0.1mm.
- Adjust your nozzle diameter relative to your layer height
- Try out many nozzle diameters and see which one works best for your projects
- You can purchase a set of nozzles which range from 0.
 1mm to 1mm in nozzle diameter
3. Fix Mechanical Issues
Even after reducing your layer height there are other factors which may hold you back from creating 3D prints without layer lines, one of these factors is mechanical issues which relates to the physical parts of your 3D printer.
Mechanical issues also include the surface in which you are printing on, any slack within the moving parts and so on. Many imperfects and defects in 3D prints arise from this factor, especially with vibrations from the movements of your printer.
I actually wrote an article about How to Fix Ghosting/Ringing in 3D Prints, which are wavy lines throughout your print exterior.
- First, I would put my 3D printer on a sturdy surface
- Implement anti-vibration mounts and pads to reduce these movements
- Make sure there aren’t any loose screws, bolts or nuts throughout your 3D printer
- Keep your lead screw lubricated with a light oil such as sewing machine oil
- Make sure your lead screw isn’t bent, by removing it and rolling it on a flat surface
- Ensure your filament is being fed through the extruder smoothly, and without obstructions
- Use Capricorn PTFE Tubing which gives a smooth, tight grip on extruded filament
4.
 Find Your Optimal Printing Temperature
If you’ve ever printed a temperature tower, you can see how small differences in temperature makes a significant difference. Having the wrong temperature can easily contribute to creating 3D prints that show layer lines.
Higher temperatures melt your filament quicker and make it less viscous (more runny) which can give you print imperfections. You want to avoid these imperfections if you are after some good print quality.
- Download and 3D print a temperature tower to find the optimal printing temperature for your filament.
- Each time you change filament, you should calibrate the optimal temperature
- Keep your surrounding environment in mind in terms of temperature, as you don’t want to 3D print in a cold room.
5. Use High Quality Filament
You’d be surprised how much the quality of your filament can make a difference in your final print quality. There are many users who have changed filament to a reliable, trusted brand, and seen their 3D printing experience really turn positive.
- Purchase some high quality filament, don’t be afraid to spend a little extra
- Order a number of highly rated filament and find the one which works best for your projects
- Get filament which has a rough texture like marble, or wood which hides layer lines better
The smooth filament will actually make the surface smooth, which will reduce the appearance of lines.
6. Adjust Model Orientation
Model orientation is another key factor that can help you in reducing the layer line in 3D printing. If you don’t know the optimal orientation for your models, this can result in layer lines showing up a lot more visibly.
It’s not as effective as reducing your layer height or nozzle diameter, but once you have implemented the previous factors, this one can give you that extra push for 3D prints without layer lines.
Another thing to keep in mind is the best resolution we can get in certain directions, whether it is the XY plane or the Z axis. The resolution in the XY plane is determined by your nozzle diameter because material is extruded in lines from that opening.
On the Z-axis, we are looking at each layer, or the layer height, which can go down as far as 0.07mm in most home-owned 3D printers, so that resolution is a lot finer than in the XY plane.
This means that if you want to reduce layer lines as best as you can, you want to orient your model in a way where the finer details are going to print along the vertical (Z) axis.
- You want to try to use an orientation which creates the most level planes rather than arching shapes
- The less angles in your model orientation, the less layer lines should show up
- It can be quite difficult to balance optimal orientation factors since there are conflicting orientations
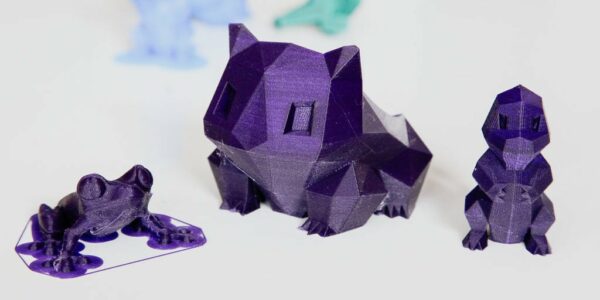
An example would be a model of a sculpture, with facial features. You would want to print this vertically because the facial features require serious detail.
If you 3D printed this diagonally or horizontally, you would find it hard to get that same level of detail.
7. Avoid Temperature Fluctuations
Avoiding temperature fluctuations is another important factor, especially when printing materials like ABS.
Filament reacts to heat by expanding and shrinking, so if you have wide enough temperature fluctuations, you can reduce your print quality, where layer lines may be more visible.
As they would not be getting the right temperature to cool down, and the surface would stay rough with visible lines.
- As mentioned previously, ensure your printing environment has a steady running temperature that isn’t too cold.
- Check that your PID controller is working, which controls temperature fluctuations (shown in the video below)
If the temperature fluctuation problem gets solved, you will start to see more smooth prints with less visible line patterns.
8. Correct Over-Extrusion
This can happen when the temperature is too high and the filament is melting more than usual. Another cause is from your extrusion multiplier or flow rate being changed, at a higher value than normal.
Anything that can cause your filament to be pushed faster, or more liquid can lead to over-extrusion which doesn’t fare too well for your 3D print quality, and especially 3D printing with no layer lines.
This over-extrusion will start depositing more filament on the print surface.
You can start to see more visible layers as your layers won’t have enough time to cool down before the next layer is extruded.
What you need to do is follow the following steps:
- Reduce your extruder temperature gradually until you have the optimal printing temperature
- You can implement a temperature tower to test different temperatures with your filament
- Make sure your cooling fans are working properly
- Speed & temperature are closely related, so if your temperature is high, you can also increase the speed
Other Methods to Remove Layer Lines
Post-processing is a great method of removing layer lines from your 3D prints.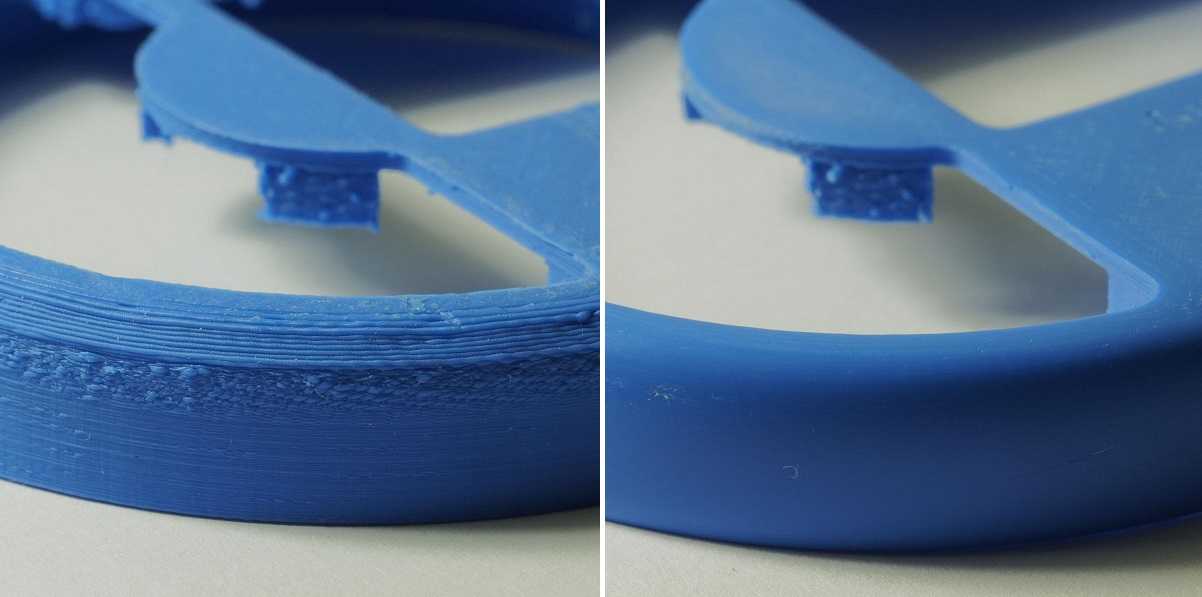 When you see those seriously smooth 3D print models on YouTube or just around the internet, they are usually smoothed other using various techniques.
Those techniques usually boil down to:
- Sanding Your Prints: This does an amazing job at getting rid of layer lines and just making your parts very smooth. There are many different levels of sanding paper to give you a finer finish. You can also use a wet sanding method for extra shine.
- Covering it Polish: You can polish the 3D print to make it look smooth. One of the most widely used polish sprays is Rustoleum, which you can get from any hardware stores.
Just to bring the article together, the best method to reduce your layer lines is to decrease your layer height and use a smaller nozzle diameter.
After that you want to dial in your temperature settings, control your overall temperature settings in the room, and use some high quality filament.
Make sure your 3D printer is well-tuned and maintained so mechanical issues don’t contribute to bad print quality. For that extra push, you can implement post-processing methods to really smooth your prints over.
Once you follow the action points in this article, you should be well on your way to 3D printing without layers.
3D print layer height: how important is it?
3DPrintStory 3D printing process 3D print layer height: how important is it?
Layer height is actually the height of each layer of plastic, extruded, vulcanized or sintered on a 3D printer. This setting is configured with your slicer and has a much larger impact on the final 3D printed model than it might seem at first glance. When used correctly, this setting will increase the speed, resolution, and quality of 3D printing in general.
The height of a 3D printed layer is usually measured in microns. One micron is equivalent to 0.001 mm.
Things to watch out for when playing with layer height on FDM printers: a thinner vertical layer results in a thicker horizontal line, and a thicker vertical layer results in a thinner horizontal line. This can reduce horizontal accuracy, especially in small moving parts.
Different printers have different maximum layer height resolution. The standard minimum height is typically 50 to 100 microns (0.05 to 0.1 mm). Cheaper 3D printers usually do not have such high accuracy. In printers such as the Anet A8, the minimum layer height is 100 microns (0.1 mm). Therefore, when buying a 3D printer, you should consider the minimum layer height.
SLA and laser 3D printers typically have a much lower minimum compared to FDM printers, which explains the insanely detailed models they can print.
Optimizing 3D print speed
One of the most common reasons for changing 3D printer layer height settings is to increase 3D print speed.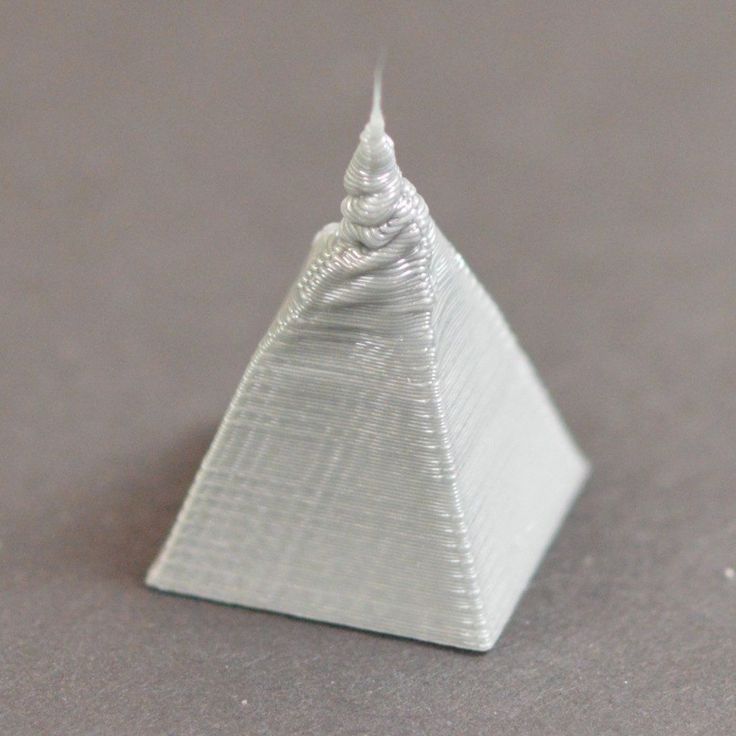 The higher layer height means the printer doesn't have to print multiple layers to achieve the same overall height, resulting in much faster 3D printing.
In general, increasing the layer height reduces the resolution and print quality. Thus, this "trick" is best suited for large 3D models, where close-up details will either be ignored or corrected during any post-processing.
The layer height can be optimized for each model separately to achieve maximum print speed while maintaining a specific resolution. However, this is something that should be judged individually for each 3D printer, as effective 3D printing will require some play around with the settings.
Increasing resolution
A little-known fact in the 3D printing community is that most 3D printers have higher vertical resolution than horizontal resolution. Why? The lead screws provide your 3D printer with a much more precise vertical position than the drive belts used for other axes. Thus, the printer can create sharper patterns in the vertical plane than in the horizontal plane.
This is one of the reasons why aaskedall's "Fillenium Malcon" model is so popular (among Star Wars enthusiasts). It is because of the presence of such amazing details that can be implemented on a huge number of 3D printers.
A lower layer height on your 3D printer will, of course, slow down printing, but the printer will apply more layers for a given height, resulting in much higher detail.
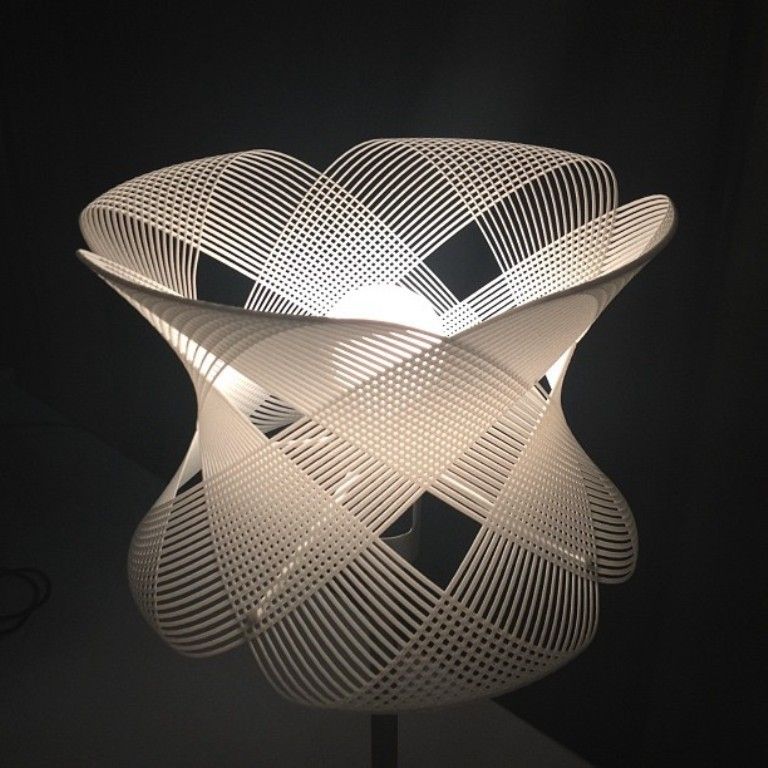
Smoothing out a surface
Another use for the extreme detail available at lower layer heights is to smooth 3D models. With a lower layer height, they become less noticeable, and the details become smoother. As the layer height increases, the surface of the model becomes rough, and the layers are clearly visible.
With this knowledge, you can ensure that parts that require a very smooth finish (such as axles or shafts) are as smooth as possible by reducing the 3D print layer height. As you might have guessed, this increases detail but reduces 3D printing speed, so keep this in mind when printing large 3D models.
Slicer developers have noticed this point and the PrusaSlicer software has even added a setting to increase the smoothness of the print by changing the layer height. For more information on how to anti-alias models, you can check out this PLA anti-aliasing tutorial.
Problems with the first layer in 3D printing: how to make it perfect
The first layer of 3D printing plays a huge role in the success of the project. If you follow simple procedures and use the experience of professionals, there will be no problems.
Expert Tips
Printing the first layer with a 3D printer is important because this step forms the base, requiring more plastic. If the starting layer does not adhere well to the work surface, the model may move before it is completed, resulting in scrap. Excessive adhesion should also be avoided, as it will then be difficult to separate the finished object from the table. The first layer should strike a balance between print stability and ease of removal of the model from the desktop plate.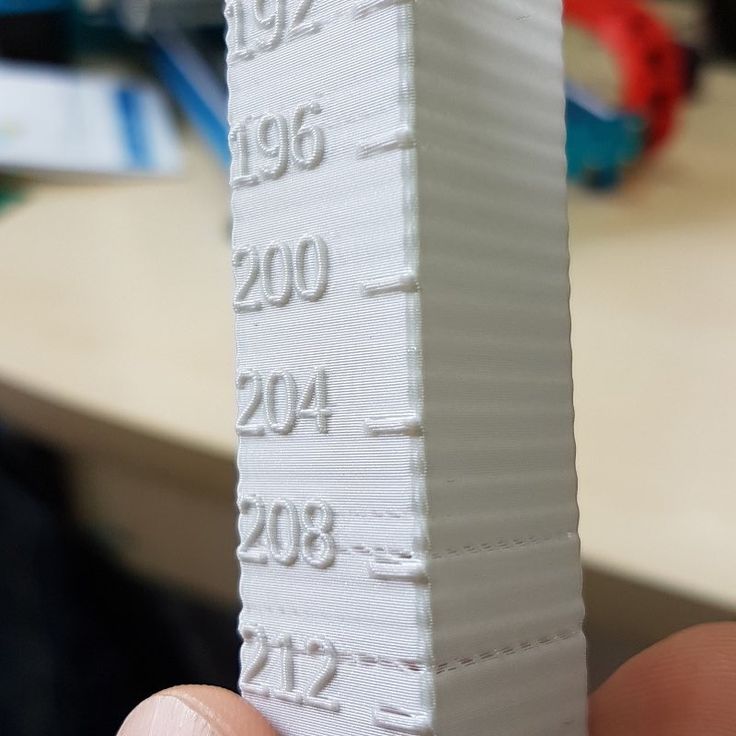
Setting the first layer settings
First you need to properly level the surface to build. Many new printers already have built-in auto leveling technology.
The key to a successful first coat is optimizing your print settings. By adjusting the settings in the slicer, you can ensure that the initial level is successful and the appearance of the rest of the printed product remains unchanged.
Most useful settings:
• Extrusion and table temperature. Higher heat levels will allow the plastic to melt and adhere better to the plate, so it's worth trying to raise the heat of the nozzle and table by about 5°C each.
• The line width of the first layer. Setting this value higher will allow the layers to cling to the platform and hold well, reducing the chance of failure. You can often set this to twice the nozzle size of a 3D printer (which is typically 0.4mm).
• First layer height. A higher level will mitigate the effect of small leveling errors, effectively increasing reliability. Usually the thickness can be increased up to 0.3 mm using a standard nozzle.
• First layer print speed. A slower build process will give the plastic more time to melt, which will have an effect similar to raising the print temperature. It is worth trying this adjustment if the layer height or line width is increased.
• Auxiliaries for the first layer. The rafts, supports and margins help with adhesion by refilling the nozzle to ensure a smooth flow of plastic. In the case of rafts and boards, they also increase the surface area for better traction.
When the first layer settings are ready to work, care must be taken to care for the plate to "grow" the object.
Cleaning the build platform
If the printable surface is dirty and greasy, then correctly set first layer settings will not help. The base layer will most likely not stick, and the print will fail.
To avoid these problems, you should wipe the platform before each print cycle, or at least between several cycles.
The procedure can be performed with isopropyl alcohol (regular rubbing alcohol or IPA) and a paper towel. It only takes a couple of seconds, but it will be an excellent preparation for work.
IPA can also be used to clean models when ready, so it's a good idea to keep the liquid in an accessible place.
Material selection
Finally, you need to make sure that all available resources are taken into account. This applies to both the filament, which is built, and the print surface of the printer. The following tricks will help you avoid trouble:
• Apply a thin layer of adhesive to the platform to improve adhesion to the table plate. This can be hairspray, blue masking tape, or standard household glue. This will help tough materials stick, and will also act as a spacer for materials that adhere too well, preventing damage to the surface.
• Avoid printing directly on the TPE and PETG board. These filaments are notorious for sticking unnecessarily to the print bed and can rip out pieces of any surface, including PEI, Kapton tape, and even glass.