Blender for 3d printing course
Blender Training for 3D Printing
It’s time to learn an advanced 3D design software for 3D printing; let’s try a 4-week Blender course. Why Blender? Because it’s powerful, free, and one of the most popular 3D design tools out there. Blender has been around since the early 90’s. This software may appear hard to handle, with moderate-to-hard difficulty to be able to use it like a PRO. Luckily, there are plenty of Blender training courses and YouTube tutorials.
Table of contents
- 4-Week Blender Training Introduction
- What’s included?
- Browser-Based Interactive Platform
- Discussion tool
- Cloud
- Weekly live meetups
- Online Interactive Course vs YouTube Tutorials
- Workshop Schedule
- Week 1
- Week 2
- Week 3
- Week 4
- Blender Tutorial – Extra Notes
- Source and Links
In this post, we will talk about a 4-week Blender course by PTT, a fellow 3D designer who understands better than just about anyone the modeling requirements for desktop 3D printing. In addition, we will explain why this online interactive training course is far more valuable than a random YouTube tutorial.
(Image: 3DWithUs)
4-Week Blender Training Introduction
It is important to follow PTT’s tutorial step by step. Students are asked to create models and then use their imaginations to customize them. There are several models to design each week. Both functional and decorative models are thoughtfully chosen to highlight the important aspects of 3D design for 3D printing at home. PTT Jason teaches us to utilize 45-degree angles in order to avoid the support placement and to make a model “solid” and “manifoldable” (i.e. 3D printable). There are many different aspects to take into account when creating the models. This is where the file management comes in handy. It allows you to return and further customize for different purposes. It might mean adding an extra curve to the vase or a new text to the ring.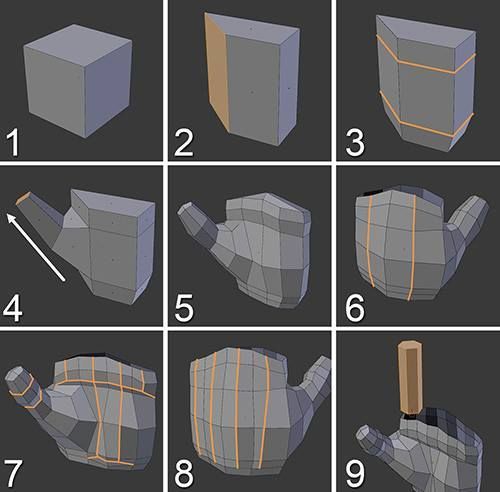 Here are a few pointers from the 4-week Blender course for beginners by PTT.
(Image: 3DWithUs)
Blender Training 4-Weeks Tutorial – What’s included?
– Browser-Based Interactive Platform. A well-organized chain of short videos that students have to follow step by step completing all tasks. If you manage to achieve the same results as on the tutor’s screen, mark as completed and move to the next task. If you get stuck at some point, then you can visually compare your Blender view with the tutor’s screen. PTT Jason keeps his tutorial videos up-to-date and reloads them if there were any updated on the software development side.
– Discussion tool. This is a great tool where it is possible to ask the questions. Write down the exact time when you got stuck. Use Windows Snipping Tool for mini screenshots and copy/paste them into discussions. The tutor will then have a clear picture of where you got stuck and will be able to act to help you accordingly.
– Cloud. Upload your result (a design) onto the cloud. The links are provided. The tutor asks to add a student’s full name to the file name when uploading the model. Further, he checks the models in a slicing software to see if it is 3D printable.
– Weekly live meetups. At the end of each week, PTT holds a live Workshop Meetup. He then looks through his students’ files and discusses the possible faults, admires the originality and gives advice on how the improvements can be implemented. Also, there is an opportunity to meet some active 3D printing community members. These meetups have a very friendly atmosphere.
VR Chat Room – Discussing Freshly Designed Models(Image: 3DWithUs)
– VR Chat Room. A VR Chat room is open to join at any time. It is similar to a game world, where instead of the monsters and buildings, there are 3D models, freshly designed by PTT’s students. Sunday meetups in the VR Chat room are super fun. Students can use funny-looking avatars while walking around in a 3D world. This is great for shy students. Good to note here that it doesn’t require any headsets or super-fast internet, neither a special VR gear, only a laptop. The future is NOW.
Online Interactive Course vs YouTube Tutorials
A year ago, as part of the New Year’s resolution, we learned to 3D sculpt. As a result, we managed to create a beautiful model (Easter Bunny). But it took us so much effort and patience that we dropped the idea of further progress, but kept coming back to the subject multiple times. We had to spend a lot of time on Googling and searching for tips and guidance in connection to that 3D design software, even as simple as for the navigation. And this was unsettling for us, especially when being used to TinkerCAD. PTT’s Blender training course provided a smooth transition here.
– Disruption. Advertisement and clickbait thumbnails that come up together with YouTube tutorials will tear your FOCUS to nothing.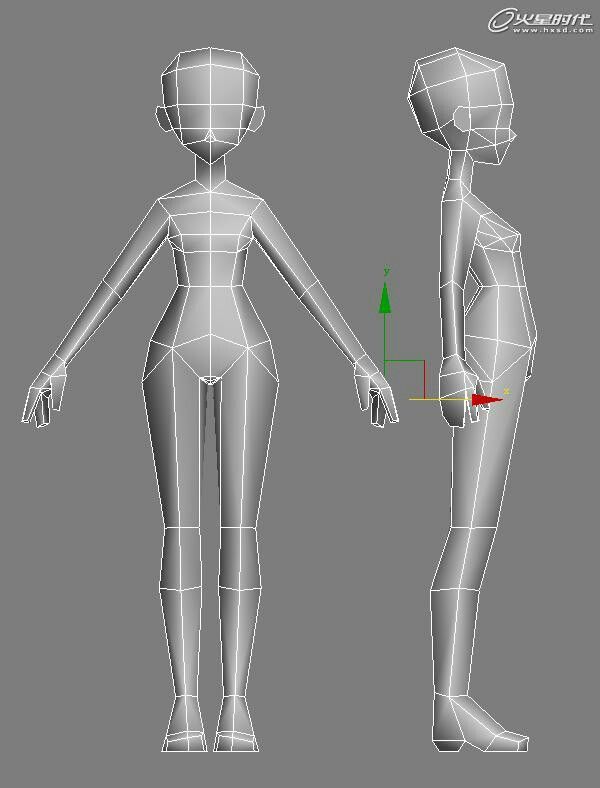 And procrastination will sit deeper in. In PTT’s 3D design tutorial course, it only takes two clicks to get to the subject, with no disruptors.
– Updates. The interactive course gets updated regularly. You cannot say this about random YouTube tutorials. Any well-edited and to-the-point tutorial may be irrelevant in a few months as the software developers publish a newer version.
– Organization. Blender has a lot of different tools and functions which any person may forget about. Short videos provided in a course are like a well-organized bookshelf. It is great to have the opportunity to use these recordings as a refresher and to come back for a particular hint or two.
– Grinding Game Effect. It reminded us of grinding games’ effect. Some time ago, we used to play grinding games like World of Warcraft and Guild Wars 2. We noticed that on the completion of a quest we felt a so-called Dopamine rush. The same achievement satisfaction comes from completion of the tasks in the course. And no doubt, the biggest satisfaction comes when a freshly designed model is finally 3D printed.
(Image: 3DWithUs)
3D Printable Models & Customizable Variations
During the 4-week course, you learn how to design and to 3D print the models listed below. Simplistic at the first glance, these designs actually teach us how to use all the tools and the mods we may need. Is it a Boolean tool or a Bisect Knife? Edit Mode or Object Mode? Also, Jason encourages us to use the short keys on a keyboard – which greatly fastens the workflow.
Blender Course – Week 1
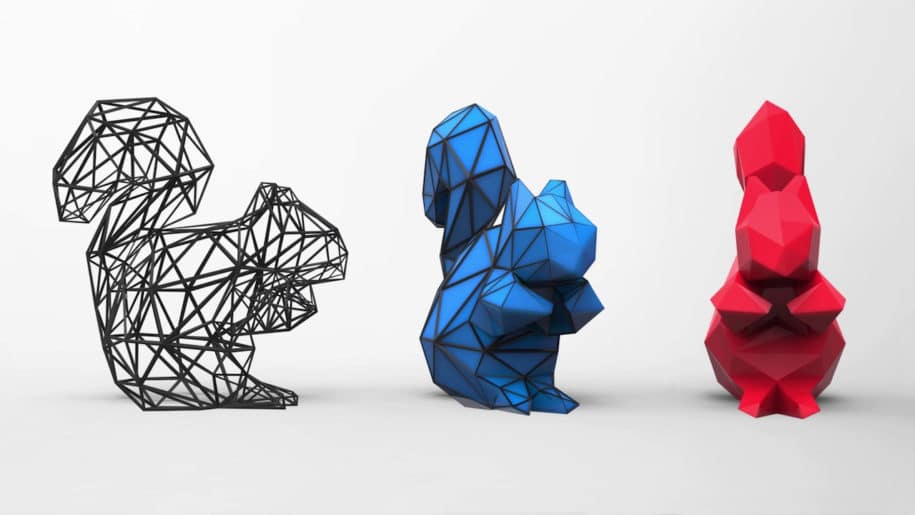
Suzanne in Different Mods – Low Poly, Smooth, Blocky, Voronoi – just in a few clicks.
Cheese Wedge – a Functional door stopper. Bool tool. It is so easy to be original here, just use different objects for boolean function.
(Image: 3DWithUs)
Blender Course – Week 2
Lithophanes – An art picture from the past. 3D Printed photo with the stand. How to add pictures and play with settings.
Pottery – Customized shapes. Flowerpot with a hole or thin wall vase? It’s up to you. Drawing then thickening the object.
Rings – With customizable text – With a file ready to get back anytime and customize further for friends or even for clients.
(Image: 3DWithUs)
Blender Course – Week 3
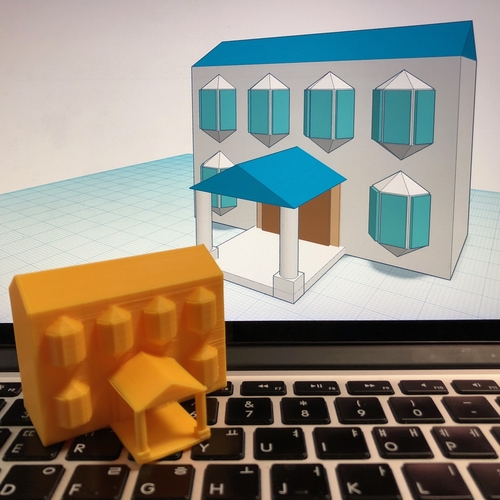
Box animal – Simplistic designs from the box. How to use Extrude and Insect tools. Vertex, Edges, and faces. Adding the eyes.
Toy Car – How to design and 3d print a car with functional wheels. Without supports.
Slicing Large Models – Knife, Bisect tool. Complex model cutting, patching the holes.
(Image: 3DWithUs)
Blender Course – Week 4
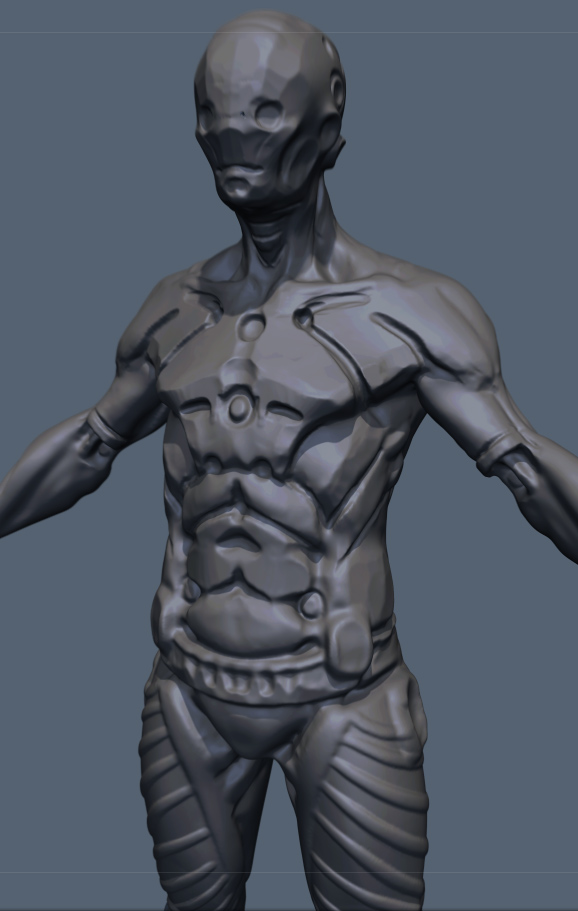
Snowman – 3D Sculpting mode. Brushes. Dynamic Topology. Symmetry
Cell Phone Amp – Basic design of a phone holder. Measuring and fitting.
- In the beginning of the specific months, PTT Jason gathers approx 30 students for a 4-week beginner workshop course. Next specific month is approx. January 2022
- All Access Blender Training Course by PTT (50% Discount Code: POWWOW)
Blender Tutorial – Extra Notes
Collections – It is important to learn how to preserve a collection for future editing – it is much easier and quicker than modeling from the beginning or remodeling from the solid model.
Eevee Studio – a brilliant built-in studio for model rendering and showcasing.
Name Your Files Well – By coincident Jason teaches how to name your models properly. It will come handy if you start sharing your STL on file repositories.
It is easy to design all listed models following step by step guidance. Jason encourages to realize our own idea in the designs. When improving the skills while creating your own designs, and it will be harder to forget them in the long term. Also, if you plan to start your own or your brand focused account on any file repository website, you can start with these models – just customize them a little bit more, add a key ring hole to Suzanne, or put the holes of different shapes in a door stopping wedge.
Blender Course – Live workshop
Live workshop – can be considered as Sunday fun. PTT Live is a weekly gathering of all students with their teacher. Then they discuss the printability of the freshly designed models. On week two we also set up our mics and video to fully interact in this session. The good part that Jason uploads it to YouTube, and everyone can get back to it as a point of reference. Good to have a recording to go back to as a refresher.
Blender Training – Additional Notes:
It is recommended using Google Keep or Microsoft Notes in order to save the pointers for a few short keys. For example: Shift+Alt+Q = 4 Windows, etc. So all 3D design software notes are in one place and can be reached from a laptop or a mobile phone easily.
Blender Tutorial Notes – Example – In Microsoft OneNote(Image: 3DWithUs)
Special Thanks
Special thanks to Jason D Wall aka PrintThatThing, the tutor and the creator of this course. We earlier followed Jason and his tutorial videos on YouTube. Back then he helped us with TinkerCAD, in using the blocks, and with Meshmixer, in 3D sculpting. Now here with Blender, Jason helps us to master this software to create great 3D models.
Blender 2.9 Software Source & Links:
Download Blender Software
Blender Software – Wikipedia
All Access Blender Training Course by PTT (50% Discount Code: POWWOW)
3D Modeling & Printing with Blender | Online Course
- Price: Starting at $60/lesson
- Age: 10 - 19
- Skill Level: Beginner–Advanced
- Format: Online Private Lessons | 1-on-1, Online
- Duration: 1, 4, 8, 12 lessons, 1 hour per lesson
Have you ever wanted to see something you design come to life? Get your very own 3D Printer, then learn to print whatever you desire! In this course, you'll use Blender, a free and open-source modeling software, to design and create intricate 3D models. Whether your goal is to make a fantasy creature or a practical device, this is the course to get you started with 3D printing.
- Complete the entire 3D printing process
- Use best practices for effective 3D print creation and troubleshooting print
- Use polygon and curve modeling tools
- Translate visual inspiration into successful 3D models
- Unleash your creativity with your very own
Monoprice Cadet 3D Printer
Choose a lesson package
Select your desired number of lessons per month! The more you buy, the more you save—and the faster your child advances in 3D printing. Explore the benefits of each package.
Ideal for students who are new to the world of 3D printing or are very busy with other extracurricular activities. The perfect way to try out personalized STEM learning!
Ideal for students who are already interested in 3D printing, looking to build a solid foundation in STEM, or are somewhat busy with other extracurricular activities.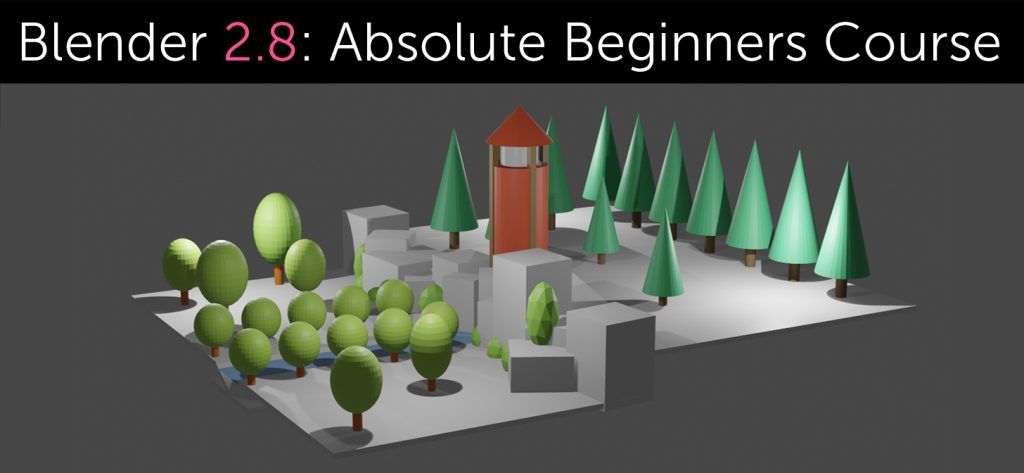 Our most popular package, designed for weekly learning!
Ideal for students who are very engaged in 3D printing, looking to prioritize their STEM skill development, and are primarily involved in STEM activities. Optimal for students seeking immersive, twice-weekly learning!
Ideal for students who are extremely engaged in 3D printing, looking to prioritize their STEM skill development, or plan to pursue STEM in college and future careers. The ultimate package to maximize progress, fun, and savings!
Learn from the best
Passion for tech. Unmatched expertise. Personality that brings out the absolute best in your child. With 23 years of experience, we know there's no replacement for the best teacher. It's no surprise that iconic companies like Google, EA, Microsoft, and Disney hire the same talent we do. Our iD Certified instructors possess the whole package of skills that top employers seek.
-
100% USA-based, adult instructors
-
Recruited from top universities like Stanford, Caltech, and NYU
-
Rigorous background and reference checks
-
Robust training programs and certification
-
Adherence to American Camp Association accredited guidelines
Instructor Highlights
Chris M.
Software Engineer
at Google
Instructor Highlights
Chris M.
Software Engineer
at Google
“My time as an iD instructor was really formative. I stayed with STEM in college as a Computer Science and Electrical Engineering major, and now I’m working at Google in Chicago. If you find yourself thinking about STEM-related things outside of school, follow that passion. Major in it. Keep pursuing it.”
“My time as an iD instructor was really formative. I stayed with STEM in college as a Computer Science and Electrical Engineering major, and now I’m working at Google in Chicago. If you find yourself thinking about STEM-related things outside of school, follow that passion. Major in it. Keep pursuing it.”
Instructor Highlights
Aspen C.
Associate Designer
at Bethesda Softworks
Instructor Highlights
Aspen C.
Associate Designer
at Bethesda Softworks
“The spirit of innovation and creativity I felt around my students while teaching Unity led me toward my career as a professional game designer. My time at iD Tech taught me that no dream is too big, and that brilliant ideas can come from anywhere.”
“The spirit of innovation and creativity I felt around my students while teaching Unity led me toward my career as a professional game designer. My time at iD Tech taught me that no dream is too big, and that brilliant ideas can come from anywhere.”
Instructor Highlights
Brian M.Software Engineer
at Disney
Instructor Highlights
Brian M.Software Engineer
at Disney
“The opportunity to create an environment of collaboration, inclusion, and creativity was a truly special experience. The skills I honed while teaching at iD Tech led me to my software engineering roles at ESPN and the Walt Disney Company.”
“The opportunity to create an environment of collaboration, inclusion, and creativity was a truly special experience. The skills I honed while teaching at iD Tech led me to my software engineering roles at ESPN and the Walt Disney Company. ”
”
Select your lesson package
Continue
Select lesson package
Frequently Asked Questions
Blender is a creative software that creatives can use to make amazing visuals, stop motion films, animations, and special effects.
The applications of Blender to gaming, the arts, and film can ignite kids’ passion for STEAM. As they progress, they’ll discover the potential of the software to bring their imagination to life!
With digital art and 3D modeling skills in hand, kids can pursue careers and college studies as animators, game designers, digital artists, and 3D printers.
Absolutely! Because our Online Private Lessons are 1-on-1 with an instructor, the curriculum is customized to meet your child's skill level, unique interests, and long-term goals.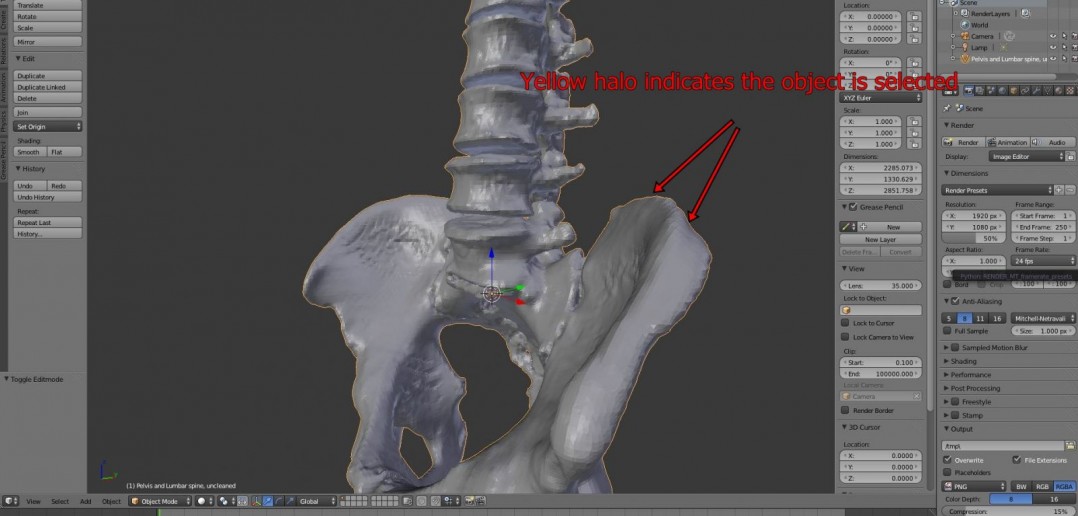 Whether they are just starting out or super advanced, our experienced instructors will engage them to bring out their best!
Our Online Private Lessons offer live, 1-on-1 learning with an experienced, USA-based instructor and curriculum tailored to your child's interests and skill level! Once you select a topic and purchase a lesson package, you can easily choose your instructor and schedule a 60-minute lesson for the date and time that works best for you.
Once scheduled, you can share notes about your child and any specific goals they might have. When it's time for their lesson, your child will connect with their instructor via Zoom. You will receive a post-session progress report via email so you can track your child's success!
Each child will need a Windows or Mac computer with audio and video capabilities. We do not recommend tablets or Chromebooks, as the multi-tasking ability between Zoom and other required software is often unreliable or nonexistent.
Other Topics Students Love
Online Private LessonsPrivate Lessons
3D Printing with Autodesk Maya
Ages 10-19
Beg-Adv
3D Printer Included!
Online Private LessonsPrivate Lessons
3D Modeling with Blender
Ages 10-19
Beg-Adv
Online Private LessonsPrivate Lessons
3D Modeling with Autodesk Maya
Ages 10-19
Beg-Adv
Online Private LessonsPrivate Lessons
Young Entrepreneurs
Ages 10-19
Beg-Adv
3D printing with Blender
3D printing with BlenderWhat is 3D printing?
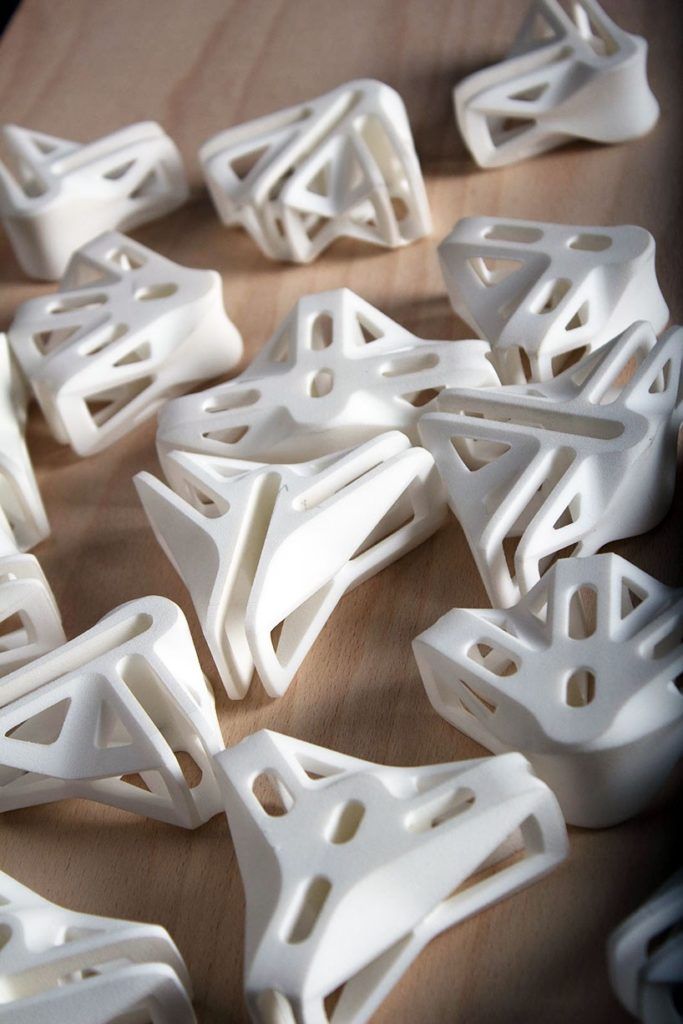
3D printing is a way to create a specific object from scratch according to a given three-dimensional drawing using the layer-by-layer deposition method (if we talk about FDM technology). In metallurgy or mechanical engineering, parts are obtained by turning, using various cutters and cutters. With this approach, a significant part of the material is wasted. When using 3D printing, maximum material savings are achieved.
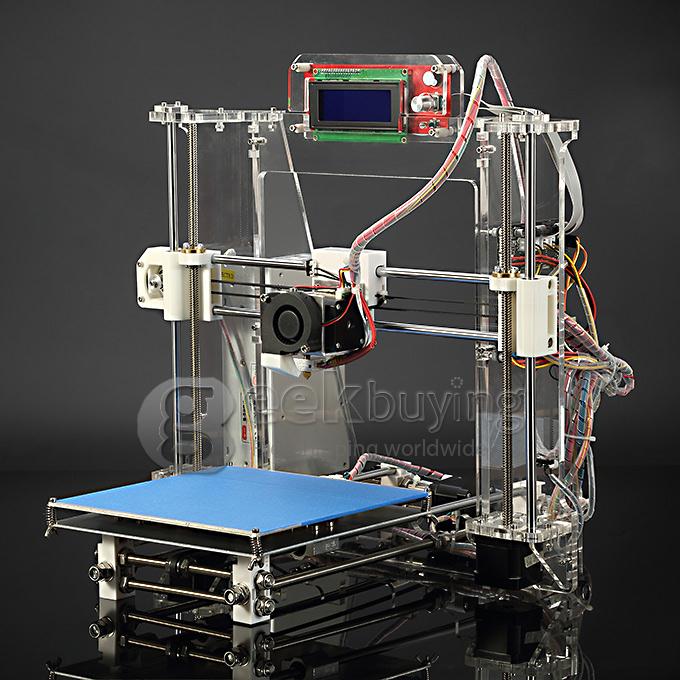
3D printing technology is far from new. It has existed for more than 30 years, but only recently has it made a significant leap forward and has become widespread. This happened mainly due to its significant reduction in price and in connection with the spread of home 3D printers. Along with this, a lot of services have appeared that provide 3D printing services, in case the capabilities of a home printer are not enough, or it does not exist at all.
List of lessons
- 1 Introduction
- 2 3D printing applications
- 3 Printer types and companies
- 4 3D printing technologies
- 5 Blender setup and units
- 6 Scale parameter
- 7 Basic model check (non-manifold)
- 8 Version overview 2.
 67
67 - 9Solid and bad contiguos edges checks
- 10Intersections
- 11 Bad edges and edges (Degenerate)
- 12 Distorted
- 13Thickness
- 14Edge sharp
- 15 Overhang
- 16Autocorrect
- 17 Model information and size
- 18Hollow models
- 19Export models
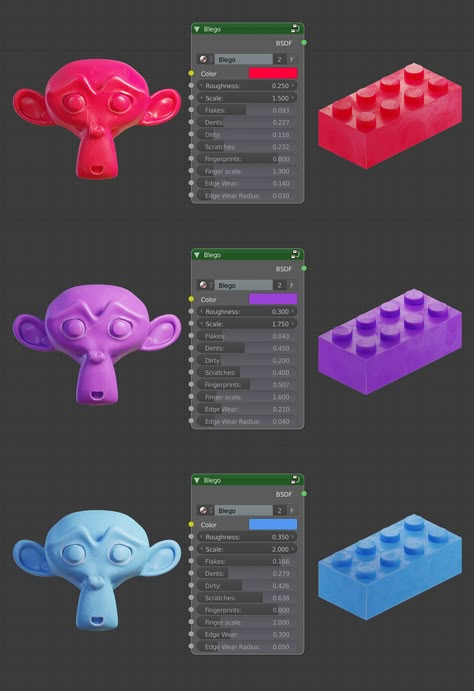
- 20Color model (vertex color)
- 21 Texture paint
- 22 External texture model
- 23 Texture baking (bake)
- 24 Tiger model overview
- 25 Tour model overview
- 26 Pirate model overview
- 27 Factors affecting accuracy
- 28Myths
- 29 Recommendations
- 30Conclusion
Excerpt from lesson
Blender Version
This course is written in Blender 2.73! The differences from Blender 2.8+ are only in the location of the buttons, not their functionality.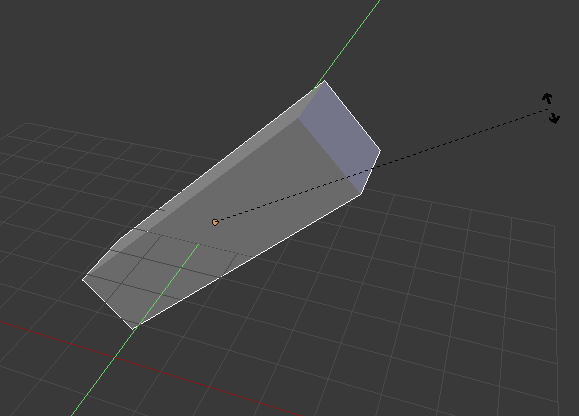 Therefore, the course is subject to a 33% discount (due to version differences).
Frequently Asked Questions (FAQ)
- 1 What level of knowledge is required to complete this course?
- 2 Where can I contact if I have problems with payment/download?
- 3 On what OS can I watch this course?
- 4 Is there a physical version of the course?
- 5 What payment options are available for this course?
- 6 Can I pay for the book with PayPal?
By and large, advanced knowledge of Blender is not required to successfully complete this course. All actions are explained in detail and difficulties should not arise. But I recommend that you before purchasing this course, take a free course on the basics of Blender. Information about it can be found at the very bottom of this page.
If you have any questions, please send an email that describes the problem in as much detail as possible.
This course can be run on any OS (Windows, Linux, Mac).
No, the course is only distributed electronically.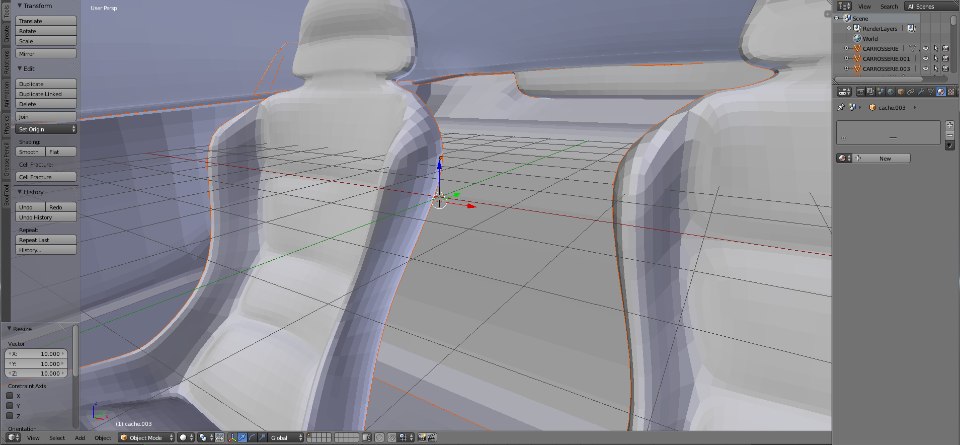 Course size ~ 2.4 GB.
You can pay for the course through a Visa/MasterCard bank card or from an electronic wallet in the Yandex.Money system. You can also pay for the goods using the 4 most popular cryptocurrencies, namely: Bitcoin, Ethereum, Bitcoin Cash and Litecoin.
Yes. Send me an email and I'll show you how to do it.
What you will learn from this course
The goal of this course is to teach you how to create printable 3D models with Blender. Most of the lessons are devoted to the topology of the created objects. This is the most important part when designing a model for 3D printing as not every model can be printed and certain rules must be followed. This will help to avoid errors in the work of slicers, additional costs and unpredictable results of the final models.
In addition, you will learn a little about what 3D printing is and in what areas it is used.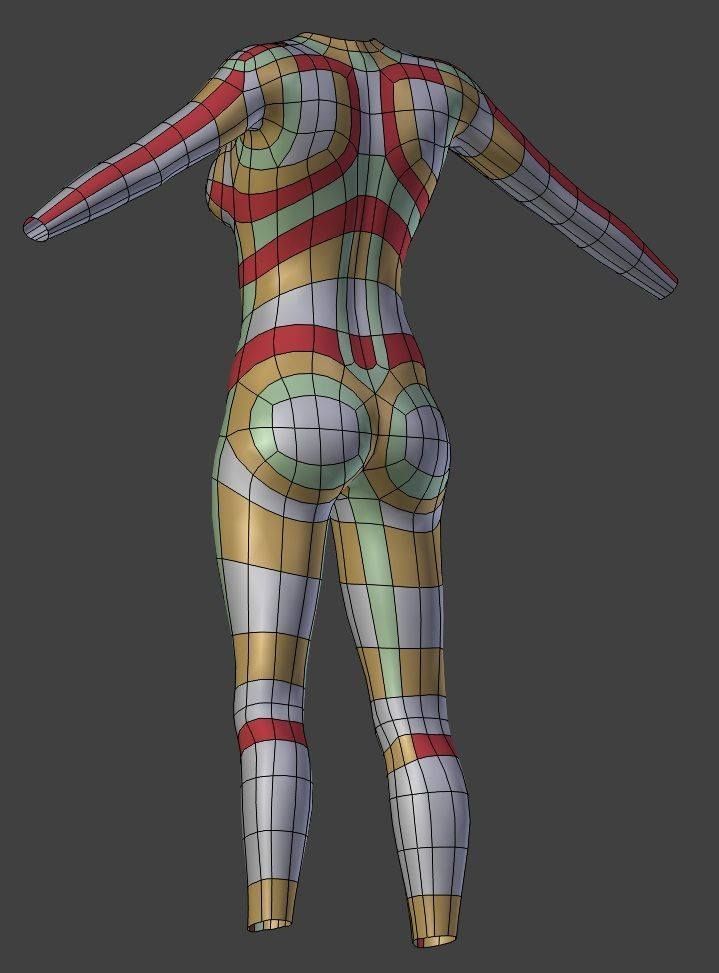 Recommendations will be given to improve the quality of printed models and reduce the cost of their creation. Consider typical errors when printing on ready-made models and much more.
After completing this course, you will be able to create models for your own use or start earning on their sales. There are a huge number of services and stocks that sell 3D models for printing, and every day there are more and more of them. You will also save a significant amount of money by avoiding typical beginner mistakes and using the techniques and recommendations from this course.
Blender Basics Course
If you are not familiar with the Blender program, I recommend that you take a free course on the basics before studying the 3D printing course.
In this course you will learn about the main features of Blender. The course consists of 39 lessons, divided into 7 chapters, which show the basic principles of working with Blender. It is designed for absolute beginners and people who got acquainted with Blender relatively recently.
Blender 3D for 3D printers / Sudo Null IT News0001
Polygons are considered unsuitable for things in the physical world.
Correct position! But some problems can still be covered by polygonal modeling.
Gathered here the answers to the four most common and non-obvious problems.
Dimensions
When I first tried to order 3D printing from a company about seven years ago, it was like this:
— Igor! You sent an empty file!
- No! Here's a screenshot, well!
One meter in Blender is equal to one millimeter in Slicer, nothing has changed in these seven years.
Designing in meters is wonderfully inconvenient, so when exporting to STL/OBJ, set the Scale value to 1000:
Closed geometry The ability to create open geometry is both a scourge and a bonus of polygonal modeling.
In the modern world, slicers (not all) have learned to work with this, but there may be surprises: want a hole? get a blank wall!
If you don't like surprises, you should use Blender's geometry analyzer.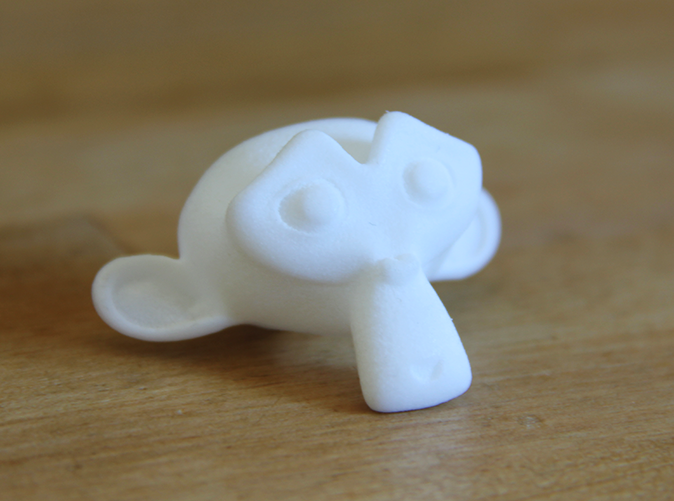
In the mesh edit mode, select the vertex selection, and click Select → Select All By Trail → Non Manifold
To eliminate such trash as on the right ball, there is a Merge By Distance tool. Lives in Mesh → Clean Up → Merge By Distance.
In other cases, it is necessary either to give the wall thickness by extruding, or to close up the hole, or is this geometry really necessary?
And now for the good news: in Blender 2.8 the 3D printing addon is built right into Blender, hooray! Geometry analysis just got easier. You just need to turn it on, and in the edit mode in the N-panel everything will be (and even the preliminary volume of the model!).
Flying geometry
As unclosed, only flying. So the slicer can still try to shove it into the G-code!
The annoyance is that if the volume of the walls was made by a modifier, these mesh pieces can no longer be found with the Non Manifold tool.
Select any polygon on the target mesh, and use the Ctrl+L hotkey: it will add all physically connected polygons to the selection.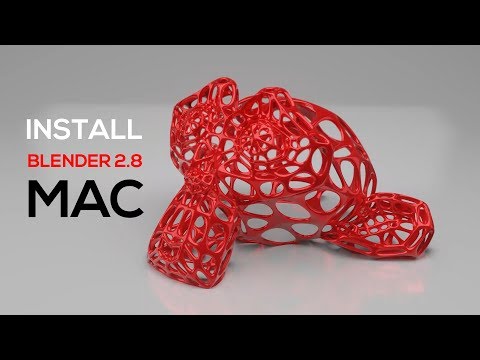 After that, invert the selection with the Ctrl+I hotkey and delete everything you don't need.
Normals
Roughly speaking, the polygon has a "face". When the polygon enters the slicer, the slicer looks at where the polygon has a “face”, tries to fill the wrong side with plastic, and at the same time checks for overhangs.
Accordingly, a cube with normals inside will be perceived clumsily. In fairness, in modern slicers this is no longer so important.
The solution is super-simple: turn on the display of normals:
Flip in the right direction: select the polygon with the normal turned inside out and press Alt+N. Hoba! and the slicer no longer panics about negative angles where they cannot exist.
General
Blender, indeed, is not developed as engineering software, and you should not try to solve furious tasks with it in the spirit of multicomponent kinematic systems.