Name something you wish 3d printers could print
3ders.org - 3D Printing Basics | Beginner's guide
Table of contents:
- What is 3D printing?
- 3D printing technologies
- 3D Printing history
- 3D printing applications
- What is a 3D printer?
- Whats the difference between rapid prototyping machine and a 3D printer?
- What can you make with a 3D printer?
- Who make 3D printers?
- How much cost a 3D printer?
- How to build a 3D printer?
- What are the materials used to print 3D objects?
- What 3D modeling software is suitable for a beginner in 3D design?
- I have no 3D design experience, how long does it take to learn 3D modeling?
- Where can I get 3D models online?
- Where can I find online 3D printing service?
_________________________________________________________________________________________
1. What is 3D printing?
3D printing is also known as desktop fabrication or additive manufacturing. It is a prototyping process whereby a real object is created from a 3D design. The digital 3D-model is saved in STL format and then sent to a 3D printer. The 3D printer then prints the design layer by layer and forms a real object. Read more..
2. 3D printing technologies
There are several different 3D printing technologies. The main differences are how layers are built to create parts.
SLS (selective laser sintering), FDM (fused deposition modeling) & SLA (stereolithograhpy) are the most widely used technologies for 3D printing. Selective laser sintering (SLS) and fused deposition modeling (FDM) use melted or softened materials to produce layers.
This video describes how laser-sintering processes melt fine powders, bit by bit, into 3D shapes.
This video shows how FDM works.
The video below explains the process of Stereolithography (SLA).
Generally, the main considerations are speed, cost of the printed prototype, cost of the 3D printer, choice and cost of materials and color capabilities.
3. The history of 3D printing
October 5, 2011 - Roland DG Corporation introduced the new iModela iM-01.
Sep, 2011 - Vienna University of Technology, a smaller, lighter and cheaper printing device has now been developed.
This smallest 3D printer weighs 1.5 kilograms, it costs around 1200 Euros.
Aug, 2011 - The world's first 3D printed aircraft created by Engineers at the University of Southampton.
Read more..
4. 3D printing applications
One of the most important applications of 3D printing is in the medical industry. With 3D printing, surgeons can produce patient-specific 3D printed models of patients' body parts or organs. They can use these models to plan and practice surgeries, potentially saving lives.
3D printing makes it possible to make a part from scratch in just hours. It allows designers and developers to go from flat screen to exact, physical part.
Nowadays almost everything from aerospace components to toys are being built with the help of 3D printers. 3D printing is also used for jewelry and art, architecture, fashion design, art, architecture and interior design.
Here are some extraordinary examples of 3D printing:
- The World's First 3D-Printed Car
- World's first chocolate 3D printer
- World's first 3D printed bikini
5. What is a 3D printer?
A 3D printer is unlike your standard, 2D inkjet printer. On a 3D printer the object is printed in three dimensions. A 3D model is built up layer by layer. Therefore the whole process is called rapid prototyping, or 3D printing. Read more..
The resolution of the current printers is around 328 x 328 x 606 DPI (xyz) at 656 x 656 x 800 DPI (xyz) in ultra-HD resolution. The accuracy is 0.025 mm - 0.05 mm per inch. The model size is up to 737 mm x 1257 mm x 1504 mm.
The biggest drawback for the individual home user is still the high cost of 3D printer. Another drawback is that it takes hours or even days to print a 3D model (depending on the complexity and resolution of the model). Besides above, the professional 3D software and 3D model design is also in a high cost range.
Alternatively there are already simplified 3D printers for hobbyist which are much cheaper. And the materials it uses is also less expensive. These 3D printers for home use are not as accurate as commercial 3D printer.
6. Whats the difference between a basic rapid prototyping machine and a 3D printer?
3D printers are the simple version of rapid prototyping machines. It is lower lost and less capable.
Rapid prototyping is a conventional method that has been used by automotive and aircraft industries for years.
In general 3D printers are compact and smaller than RP machines. They are ideal for use in offices. They use less energy and take less space. They are designed for low volume reproduction of real objects made of nylon or other plastics. That also means 3D printers make smaller parts. Rapid prototyping machines have build chambers at least 10 inches on a side, a 3D printer has less than 8 inches on a side. However a 3D printer is capable of all the functions of rapid prototyping machine such as verifying and validating design, creating prototype, remote sharing of information etc.
Consequently 3D printers are easy to handle and cheap to maintain. You can buy one of those DIY kit in the market and build up yourself. It is cheaper than the professional rapid prototyping, for $1000 or less you can have one 3D printer. While the professional rapid prototyping cost at least $50,000.
3D printers are less accurate than rapid prototyping machines. Because of its simplicity the material choices are also limited.
7. What can you make with a 3D printer?
In 3D printing area, people say "If You Can Draw It, You Can Make It". In the video below shows many items can be made with a 3D printer. However complicated objects can only be made by professional 3D printers, they are not yet affortable for common family.
8. Who make 3D printers?
Industrial 3D printer manufacturers:
- Stratasys
- 3DSystems
Home 3D printers manufacturers:
- Reprap.
 org
org - Makerbot Industries
- Ultimaker
- Fab@Home
9. How much cost a 3D printer?
Here are list of DIY 3D printer price comparison and list of fully assembled or commercial 3D printers price comparison (less than $25,000).
10. How to build a 3D printer?
The MakerGear Mosaic 3D Printer
Part I: The Frame
Part II: The Y-Axis
Part III: The X-Axis
Part IV: The Z-Axis
Part V: The Extruder
Part VI: The Build Platform
Part VII: The Electronics
Reprap
How to build a reprap 3D printer - RepRapOneDarwin (1st generation)
How to build a reprap 3D printer - Huxley (mini-reprap, portable)
How to build a reprap 3D printer - Mendel (RepRap Version II)
How to build a reprap 3D printer - Prusa (easy to asembly)
More...
11. What are the materials used to print 3D objects?
Many different materials can be used for 3D printing, such as ABS plastic, PLA, polyamide (nylon), glass filled polyamide, stereolithography materials (epoxy resins), silver, titanium, steel, wax, photopolymers and polycarbonate.
12. What 3D modeling software is suitable for a beginner in 3D design?
If you’re just getting started you can try some of 3D modeling software which can be downloaded for free.
- Google SketchUp - This Google SketchUp is fun and free, and is known for being easy to use. To build models in SketchUp, you draw edges and faces using a few simple tools that you can learn in a short time. With with Push/Pull tool you can extrude any flat surface into a 3D form. Furthermore, it works together with Google Earth, that you can import a scaled aerial photograph directly from Google Earth, or use SketchUp to build models which can be seen in Google Earth.
- 3Dtin - The simplest 3D software. You can draw directly from your browser.
- Blender - Blender is the free open source 3D content creation suite, available for all major operating systems under the GNU General Public License. Blender was developed as an in-house application by the Dutch animation studio NeoGeo and Not a Number Technologies (NaN).
 It is a powerful program contains features that are characteristic of high-end 3D software.
- OpenSCAD - OpenSCAD is a software for creating solid 3D CAD objects. It is free software and available for Linux/UNIX, MS Windows and Mac OS X. it does not focus on the artistic aspects of 3D modelling but instead on the CAD aspects.
- Tinkercad - Tinkercad is a new and faster way of creating designs for your 3D printer. With only three basic tools you can create a wide range of useful things. Once your project is ready simply download the STL file and start your 3D print.
Check out the more software in the free software list.
Commercial software such as CAD software AutoCAD and Pro Engineer, software packages Rhino, Maya, and SolidWorks are all pretty good for designing 3D models.
13. I have no 3D design experience, how long does it take to learn 3D modeling?
You can learn how to 3D model by learning how to use 3D modeling tools such as Rhino, Blender or SketchUp. It will take you some weeks to be familiar with 3D modeling tools such as SketchUp, Rhino and Blender. To become a professional user will take you at least half a year to study and practice.
14. Where can I get 3D models online?
Here are some website with 3D models database:
- 3D Marvels
- 3D Via
- GrabCAD
- Google 3D Warehouse
- Ponoko Product Plans
- Shapeways 3D Parts Database
- Thingiverse
- Turbosquid: Free objects
15. Where can I find online 3D printing service?
Companies like Shapeways, i.Materialise, Sculpteo and Ponoko provides online 3D printing service. More to find here: List of 3D printing service
pp big man wrote at 6/6/2019 5:17:02 PM:
i really like 3d print bra make me go ooo ahhh
greg wrote at 6/6/2019 5:08:56 PM:
i like the way the 3d print in the printer it look so cool
80Fik wrote at 5/20/2019 4:56:00 AM:
Fully sick
paul wrote at 4/5/2019 7:22:09 PM:
hi how are u
Human from the future wrote at 3/19/2019 2:58:15 PM:
I shall check this site in a couple years, 3d printing lives on!
you bum hole wrote at 2/4/2019 6:35:43 PM:
hola my peps wass good? im 3d printing right now and it is amazing!!!
Kaunna wrote at 12/11/2018 7:52:51 PM:
HAHA! Creating the first over the top coffee mug for me!!
the one the only wrote at 11/28/2018 12:02:06 AM:
the comments are lit
Epic memer danklord wrote at 11/20/2018 9:34:55 PM:
my name is jeff lol hahaha im so funny because i said a meme very dank :sunglasses:
Ralph Wiggum wrote at 10/22/2018 3:35:55 PM:
My cat's breath smells like cat food
GOD wrote at 9/24/2018 8:38:37 AM:
Westworld is real . . we all are in a theme park called earth
Peener wrote at 8/1/2018 9:44:40 PM:
Give me a reason to live, please.
dcdffd wrote at 7/26/2018 6:58:53 AM:
kaitlyn likes lewis!!!!
rip wrote at 7/26/2018 6:58:14 AM:
Kaitlyn loves KYale REEves
vevd wrote at 7/26/2018 6:56:21 AM:
kaitlyn likes lewis
sruba137 wrote at 7/1/2018 3:01:47 AM:
Nice!! Side :>
Hot stuff wrote at 4/23/2018 6:44:37 PM:
Hi
hi wrote at 3/17/2018 3:40:19 AM:
hi
A random user wrote at 2/27/2018 3:58:06 AM:
Leedle Leedle Leee
big plant gregsed wrote at 1/6/2018 5:18:00 PM:
wiser
POLISHUK AMNON wrote at 10/24/2017 9:43:25 AM:
HI I WANT TO KNOW IF YOU HAVE INFORMATION ABOUT 3D PRINT ELECTRONICS THANKS AMNON
Albert Einstein wrote at 9/19/2017 10:38:53 PM:
Lit
y a wrote at 5/29/2017 2:47:02 AM:
awsome ifno like the choc 3d printer
8===D wrote at 5/1/2017 3:25:22 AM:
Dick Cheese is the tastiest cheese
Barry Bogtrotter wrote at 4/12/2017 10:31:05 AM:
OKAY my mum likes herbal tea
BANANAMAN wrote at 3/6/2017 8:11:40 PM:
I like bananas in the sunshine.
bobbydebobon wrote at 1/5/2017 11:35:39 PM:
NOOO>.
WHO? wrote at 1/5/2017 11:34:39 PM:
fuuuuuu...
MALIAN AND GEORGE wrote at 11/2/2016 2:25:57 AM:
MALIAN AND GEORGE AND MALIAN SAYS GREAT INFO BRO
awesome wrote at 10/31/2016 3:19:27 AM:
horibble info
YOULL NEVER KNOW wrote at 8/26/2016 7:25:44 PM:
VERY nice :)
OluOdun Aliu wrote at 8/22/2016 4:05:05 PM:
What does it take to set up my 3D printing workshop in Nigeria?
sally higgins wrote at 8/22/2016 7:56:34 AM:
hi, i love this info but could you maybe add information about the impact the 3d printer has? thanks!
beam wrote at 7/19/2016 12:46:48 PM:
wow
Yes wrote at 5/3/2016 10:57:54 AM:
Step one: buy printer with money *tear rolls down cheek "damn"
snipermania wrote at 4/19/2016 6:18:08 PM:
hitler was a good man
kkk wrote at 4/14/2016 10:11:40 PM:
niggers
NIKKIE wrote at 3/14/2016 8:11:36 AM:
IT MAKES ME LEARN MANY THINGS. THANK YOU.
Angel Pam wrote at 1/13/2016 1:26:08 AM:
Regarding 3D printers for home use, I was wondering if those of you design people working in this field would create a recycling chamber, in which everyday, household plastics, wrapping, bags, plastic bottles, etc, can be put into a chamber to be prepared (with no off gassing) for use in the 3D printer. I dislike the amount of plastic I see going off to garbage and it would be great to have an all purpose home recycling device so that we can turn our own plastics into other items we need. Just an idea...
Girish wrote at 1/4/2016 10:43:59 AM:
good for those who want to understand the basics of 3d print machine
Shrek Devotee wrote at 12/30/2015 3:10:43 PM:
Accept Shrek as the one true saviour in your heart! Otherwise you will feel his wrath of onions and will never make it to his swamp...
2nd amendment wrote at 12/22/2015 9:15:46 PM:
It's awesome for making high capacity magazines. Thank you all so very much for putting freedom back into the American people.
AGKISTRIWTHS wrote at 12/17/2015 4:44:35 AM:
GAMW TO XRISTO SAS
bryce wrote at 11/12/2015 7:44:07 PM:
what came they make medically
James Park wrote at 11/11/2015 6:22:54 AM:
Hello Sir,
This is James Park from Luvantix/Fospia in Korea. How have you been?
We are the only patented manufacturer in South Korea for various kinds of resins.
Actually, we started developing 3D printing resin as well and finally, we succeeded in completing SLA type 3D printing resin.
so, I am very happy to introduce our 3D printing resin.
I am attaching the TDS and MSDS and some product pictures for your reference.
If your company have some interests in our 3D resins, we will send the samples for the test.
Please let me know your opinion.
I am eager to support you and your company with the best solutions and prices.
I look forward to hearing from you!!
jwpark@fospia. com / [email protected]
www.fospia.com
com / [email protected]
www.fospia.com
James Park wrote at 11/11/2015 6:21:58 AM:
Hello Sir, This is James Park from Luvantix/Fospia in Korea. How have you been? We are the only patented manufacturer in South Korea for various kinds of resins. Actually, we started developing 3D printing resin as well and finally, we succeeded in completing SLA type 3D printing resin. so, I am very happy to introduce our 3D printing resin. I am attaching the TDS and MSDS and some product pictures for your reference. If your company have some interests in our 3D resins, we will send the samples for the test. Please let me know your opinion. I am eager to support you and your company with the best solutions and prices. I look forward to hearing from you!! [email protected] / [email protected] www.fospia.com
bill nye the meme guy wrote at 10/5/2015 3:23:52 PM:
lovin this dank meme
Essam Refaai wrote at 10/4/2015 12:34:34 PM:
Is this chocolate & foods 3D printer for sale . .and how much the price if so ?
and the cost of shipping to Egypt ?
please e-mail me on below address for more details :
[email protected]
Mob. 01000100355 (+02)
.and how much the price if so ?
and the cost of shipping to Egypt ?
please e-mail me on below address for more details :
[email protected]
Mob. 01000100355 (+02)
David Brewer wrote at 8/31/2015 12:21:35 AM:
This makes me all hot and sweaty, like a fat kid watching candy porn.
CP Tan wrote at 8/14/2015 11:09:21 AM:
I am searching for a 3D Printer which can help me to print parts which can be placed in an environment which is about 250 to 300 degrees C. Do you have such 3D Printer? Please email me to discuss. My email is [email protected] Contact is (65)-98109522 Thanks!
George wrote at 8/7/2015 10:23:02 AM:
useful gadget to convert 3D printer into CNC device Endurance L cheapo laser cutter / engraver. Can cut and engrave!
AKSA wrote at 7/30/2015 9:27:30 AM:
THIS WEBSITE HELP ME DO MY PROJECT
Aksa wrote at 7/30/2015 9:25:31 AM:
like this website very much i got many informations only from this website
Barack Obama wrote at 7/4/2015 3:19:18 PM:
Well done
Eric Birkemeier wrote at 6/22/2015 11:18:55 PM:
My name is Eric Birkemeier and I am emailing you to inform you of the FIRST EVER headlights for skateboards that were made possible entirely with 3D printing through San Diego State University. Our company is called 'ShredLights' and we just launched our Kickstarter campaign (http://kck.st/1K4xFkX) yesterday. Check out our page and see how beneficial 3D printing has been for us! We would love to get on on featured your site and show potential customers the possibilities of 3D printing in our everyday lives. Thanks for reading!
lol lol lol wrote at 5/14/2015 7:47:51 PM:
Lollollollollollollollol lol lol lol lol lol lol lol lol lol
Casey wrote at 5/4/2015 9:01:09 PM:
Im doing this for a science experiment and I find this information helpful.
Amy wrote at 4/29/2015 11:18:52 AM:
This is good information. Have you heard of CreoPop 3d pens? They're taking pre-orders now at goo.gl/izSIHt. What do you think?
lewis wrote at 4/21/2015 4:44:50 PM:
Handy article. Lots of useful information. Needs proofreading, though.
Junji wrote at 4/10/2015 5:33:34 PM:
I make 3D modeling language for begginer. This is building cube like lego.
https://github.com/junjihashimoto/cube
What do you think?
This is good idea or bad idea?
This is building cube like lego.
https://github.com/junjihashimoto/cube
What do you think?
This is good idea or bad idea?
Julee wrote at 4/6/2015 6:38:26 PM:
can you buy stock shares in this industry yet? If so where?
Georgelolsicakes wrote at 3/25/2015 2:18:21 AM:
HI
I wrote at 3/22/2015 5:34:05 PM:
Lol
aidan stocum wrote at 3/16/2015 3:53:40 PM:
thanks
Kelman wrote at 3/16/2015 12:02:01 AM:
Thanks for creating a one stop site for 3D printing info. Cheers.
Charles Scruggs wrote at 3/5/2015 9:05:48 PM:
why are we learning this about 3D printers?
Bill Nye wrote at 3/3/2015 6:31:42 PM:
dank
H. Mahmoudi wrote at 2/28/2015 6:27:30 AM:
Hi dears,
I work in a company which manufactures wellhead equipment. The mentioned equipment is generally cylindrical shapes with several discontinuities. We are going to purchase a 3D printer. It will be appreciated if any of you recommend for appropriate 3D printer for such applications.
Fodil wrote at 2/13/2015 7:59:19 PM:
I would like to thank you for giving us this opportunity to learn more about 3D PRINTING, which will help us to discover other area of printing.
boo wrote at 1/31/2015 10:15:38 PM:
this is some cool stuff
someone wrote at 1/27/2015 11:06:17 PM:
hi
yea wrote at 1/8/2015 4:59:39 AM:
%3Cscript%3Ealert(%27hello%27)%3C%2Fscript%3E
klark wrote at 1/8/2015 12:58:34 AM:
4riXwr http://www.FyLitCl7Pf7kjQdDUOLQOuaxTXbj5iNG.com
The Fruit wrote at 1/6/2015 5:40:20 AM:
I am a banana
Kristen wrote at 12/26/2014 2:46:39 PM:
Very, very good source for information. Thank you for being so thorough in your descriptions. It's wonderful to have people who take the extra step to help those in need!
Revell Cornell wrote at 12/20/2014 11:55:18 PM:
Thank you, thank you, thank you. At last, a website that explains 3D printing so simply. I've searched for days for a site like this, but, it just goes to show, you only have to ask Google the right question, and the right answer comes up.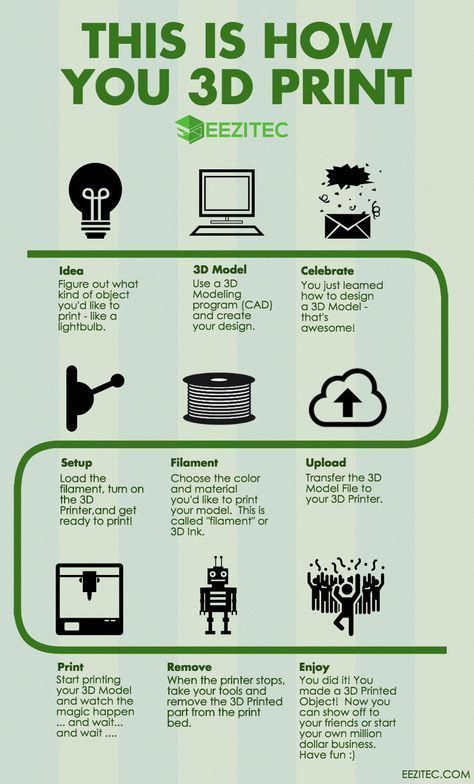 Brilliant site.
wooden wrote at 12/19/2014 8:12:58 AM:
Buy 3D model, Please. I want to build a house
dfdf wrote at 12/10/2014 2:38:31 AM:
I found the web site that i was looking for!
Kris wrote at 12/2/2014 7:17:00 PM:
Try this to make designs :) https://play.google.com/store/apps/details?id=com.tdcp.threedc
bjj wrote at 11/23/2014 6:08:09 PM:
jhjhjg
matt wrote at 11/13/2014 10:24:09 PM:
where do I get the fails for modio for my ipad
Nathan wrote at 11/12/2014 7:48:29 AM:
Good work
dorkmo wrote at 11/4/2014 10:40:53 PM:
you might add youmagine to you list
Jamie Sebastian wrote at 10/19/2014 5:55:27 PM:
Hello, I have an idea for the 3d printer please contact me at [email protected]
Raymond wrote at 10/1/2014 4:58:54 PM:
bob the builderr can fix anything
Pavan wrote at 9/20/2014 7:27:18 PM:
Hi,
Greetings from Workbench Projects!
We are a very young makerspace in Bangalore, hosting and conducting a lot of workshops and events for all age groups to introduce the DIY culture and promote it
. We have recently collaborated with Intel Education and are conducting some 3D printing demo’s in the K12 segment.
We are interested in hiring a couple of 3D printers (4 to 5 printers) for our events. This will be a regular exercise.
We are encouraged to write to you as we found your company on several forums talking about giving 3D printers on rent.
We are based out of bangalore and are looking to get these 3D printers in the month of October. If you do not give 3D printers on rent, but know someone who might, we would appreciate if you can lead us to them. If you do rent them out, please provide a quote for 5 printers to be rented for 2 days.
Looking forward to hearing from you soon.
Regards,
Anu and Pavan
We have recently collaborated with Intel Education and are conducting some 3D printing demo’s in the K12 segment.
We are interested in hiring a couple of 3D printers (4 to 5 printers) for our events. This will be a regular exercise.
We are encouraged to write to you as we found your company on several forums talking about giving 3D printers on rent.
We are based out of bangalore and are looking to get these 3D printers in the month of October. If you do not give 3D printers on rent, but know someone who might, we would appreciate if you can lead us to them. If you do rent them out, please provide a quote for 5 printers to be rented for 2 days.
Looking forward to hearing from you soon.
Regards,
Anu and Pavan
Tanner wrote at 9/12/2014 8:24:14 PM:
How does the three d printer do with making toy parts?
Asswipe555 wrote at 9/12/2014 6:05:22 PM:
this page sucks
JN wrote at 9/9/2014 6:30:18 PM:
How much detail can the 3D printer into making something, like a cup
journeyman toolmaker wrote at 8/17/2014 5:13:23 AM:
thanks great job.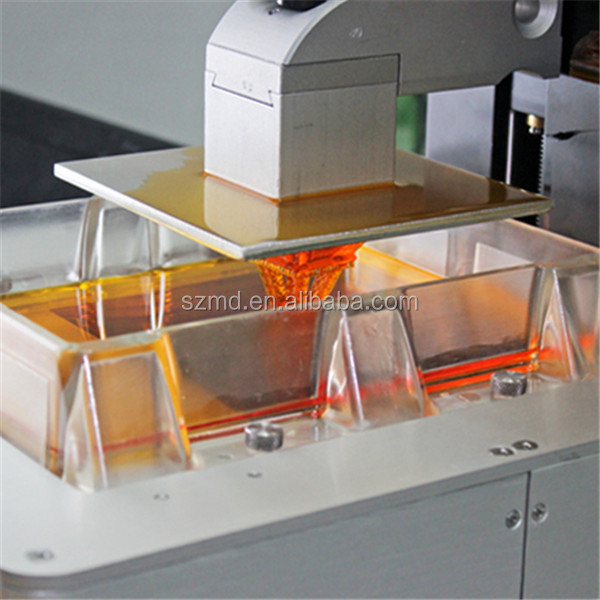
Young K Kim wrote at 8/7/2014 8:13:48 AM:
This is 3Dprintguy Corp. in Korea. Now, in Korea, 3D printing market is going up fast. If you are interesting for korean market, please let us know. Thanks. Young K Kim for 3Dprintguy Corp. in Korea
Naresh Kumar Gupta wrote at 7/12/2014 2:26:06 PM:
I am Naresh Gupta from New Delhi, India. We are looking for a decent tie-up to start training on 3D for the masses in India. We have a network of 28000 service points touching around 30 million population. We would like to impart training in all the regional languages in India. There will be a huge market for entry level 3D printers due to this training. Kindly let us know how we can work together and on what terms. Best Regards, Naresh Kumar Gupta +919810162469 [email protected]
nikhil sarma wrote at 7/1/2014 10:29:21 AM:
kaha milega 3d printer bhai
Debbie LeGrair wrote at 6/22/2014 3:04:10 PM:
How big is the 3D printer? I heard that car manufacturers are using it, will the printer be able to produce a car that I could actually drive? I know it will have to be done in sections. What is the cheapest and which is the most expensive printer?
Thank you
qnbee1116
What is the cheapest and which is the most expensive printer?
Thank you
qnbee1116
Brittany wrote at 6/10/2014 8:57:00 AM:
Wow, thanks so much. It is such an interesting topic. Great job.
amir rafiq wrote at 6/1/2014 8:41:28 PM:
send me dates of 3d printers exhibitions in different parts of world in 2014
Chandan wrote at 5/27/2014 3:04:32 PM:
Hi, As a classic car enthusiast I would like to make 3D printed 1:18 scale models. How can I scan a real car and get the detailing right?
Piyush wrote at 5/22/2014 1:09:22 PM:
very useful informations for beginners.
James wrote at 5/19/2014 6:21:33 PM:
good site for understanging 3D Printers......Thanks.
Mary . K . Rolls wrote at 5/19/2014 5:14:16 PM:
Dear Sir or Madam 3D Printer Can Help Me to Recreate Classic Rolls-Royce Phantom V 1960 James Young Best Regards From Mary . K . Rolls [email protected]
Callum Kinzett wrote at 5/19/2014 11:32:46 AM:
your a poo guy Aha
Hamid wrote at 5/15/2014 7:28:59 PM:
Thanks a lot for complete information , how can I buy this machine in Iran ?
David A. Amrhein wrote at 5/15/2014 6:18:02 AM:
Outstanding information! Thank you for the compilation of this!
Patrick wrote at 5/12/2014 6:01:49 AM:
This is fantastic, thank you so much.
Mary . K . Rolls wrote at 5/8/2014 5:54:51 PM:
Dear Thank You For Your Beautiful Information I want Know By 3D printer possible ReCreate Classic Car Rolls-Royce Phantom V James Young Build All Parts Metal By 3D Print Engine Gear Box Chassis Frame And How Much Price This Project Best Regards From Mary . K . Rolls
braeden miner wrote at 5/5/2014 1:02:57 AM:
Awesome!!!
la la naughty boy wrote at 4/29/2014 3:15:20 PM:
thanks I love this website
Goopta wrote at 4/29/2014 6:29:42 AM:
This is Rubbish stuff!
pragya nagori wrote at 4/27/2014 5:57:04 PM:
very helpful infromation...! good work.. :)
Amit Savla wrote at 4/23/2014 1:02:00 PM:
thanks a lot........ :-)
Frank wrote at 4/23/2014 2:41:34 AM:
okay so I've done a 3d model for printing however how do I apply dimensions and sizing, proper measurements like my own measurements so by the time I'm done cutting up and slicing up the parts that i want I can go and print individually, and at the assembly point I can just snap on together and put it on and I know it's going to fit cuz i just input my own dimensions and measurements.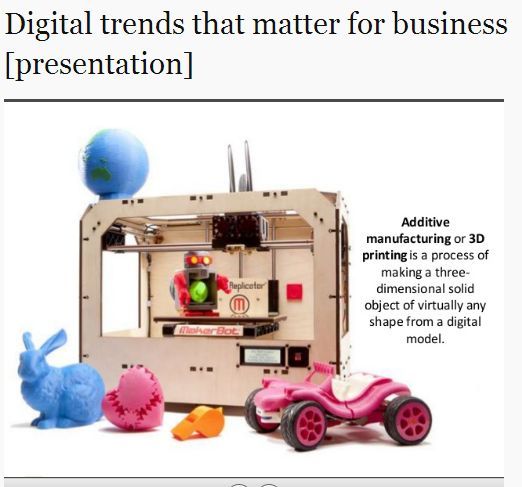 how can this be done any help?
Ammara wrote at 4/13/2014 9:35:02 AM:
Nice.Thanks for sharing.
Janob_Lee wrote at 4/9/2014 11:50:54 PM:
Thanks a lot!
Binu ic illicka wrote at 4/8/2014 9:20:43 PM:
Thank you for this great information :-) .
Richard wrote at 4/7/2014 6:32:43 PM:
THANK YOU FOR THIS BEAUTIFUL INFORMATION!
duck wrote at 3/31/2014 12:10:28 AM:
thanx i ate pie
Julie Reece wrote at 3/28/2014 4:59:44 PM:
This section should include SDL, selective deposition lamination technology. SDL was invented by Mcor Technologies. In this technology, ordinary paper is used as the build material. It is lowest printing/operating cost, full color and most eco-friendly 3D printing technology. This white paper explains it in detail http://www.mcortechnologies.com/resources/resources-white-paper/
I AM DAH REEL SPUDRMIN wrote at 3/26/2014 2:39:37 AM:
i pooped in my pants while dancing to numa numa hhaahaaha.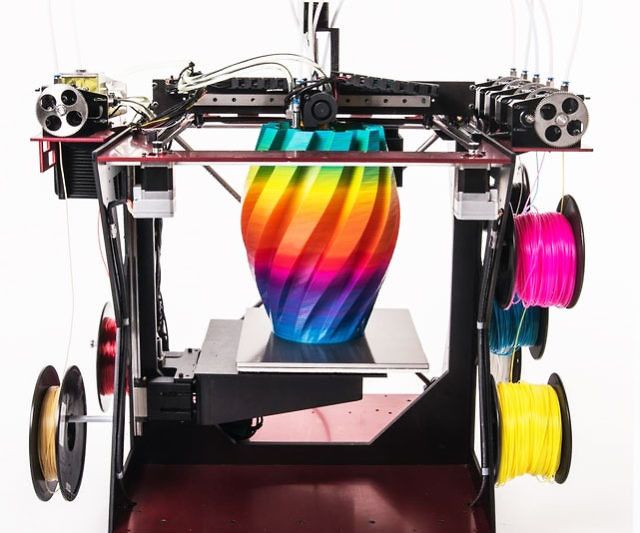 ..
..
Anonymous wrote at 3/25/2014 10:00:33 PM:
I Am Getting so much crazy about the idea of 3D printer for My Project... Please Tell me about the criteria and steps to learn and work on it.... please any 1 guide me...
srinivas ch wrote at 3/19/2014 9:54:19 AM:
thanks very useful
Nico Van Der Merwe wrote at 3/9/2014 3:59:07 AM:
This is Awesome and Stunning. The Future.
3R wrote at 3/5/2014 9:18:02 PM:
Thanks, great!
guru wrote at 2/27/2014 1:29:57 PM:
Thanku ......this was very usefull to me........
Richard wrote at 2/26/2014 12:14:10 AM:
THANK YOU FOR THIS BEAUTIFUL INFORMATION!
ROSS wrote at 2/20/2014 4:54:40 AM:
WAY TO MUCH INFORMATION CUT DOWN JUST A LITTLE THANKS
Min Lwin wrote at 2/20/2014 1:31:30 AM:
i don't know clearly yet.can a printer print both by melting and forming layer by layer?plz answer me...
Adrien wrote at 2/14/2014 5:38:26 AM:
3D printers are definitely the future, they even print entire buildings!! http://nusteel.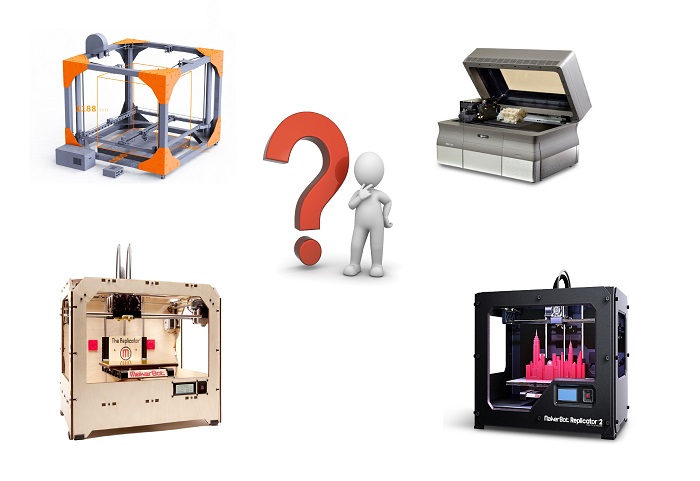 com.au/3d-printing/
monisha e m wrote at 2/11/2014 2:18:43 PM:
it is verry informative for my seminar repror on 3d printing
Tim Hutchens wrote at 2/7/2014 8:59:29 PM:
What sort of materials costs are there?
Karan wrote at 2/6/2014 10:34:26 AM:
Hello Guys I wish to make a 3D printer . Where I can get DIY kit in India?
ZmartPart wrote at 2/4/2014 9:26:08 AM:
Mostly well done. We might link some of those videos from our website to yours, for informational purpose for our clients! Our website is www.zmartpart.com ! Best wishes, ZmartPart Team
joshua livingston wrote at 1/29/2014 8:40:18 AM:
REALLY AWESOME.............PRECISE INFORMATIONS. THANK YOU.
Edjolyn Enriquez wrote at 1/22/2014 7:38:00 AM:
This is one great way of presenting 3D technology to many. Just like here in the UAE, not everyone is well-spooned with such great technology. Therefore our company Abaad is making countless effort to reach and share what 3D potentials can bring. Thanks for sharing this.
Tim Skillman wrote at 1/20/2014 1:40:13 AM:
Sorry to say, but we were printing in chocolate at our company, AspexSoftware, at least 5 years ago! - see www.aspexsoftware.com/fab_at_school.htm
Tim wrote at 1/20/2014 1:38:34 AM:
Sorry to say, but we were printing in chocolate at our company, AspexSoftware, at least 5 years ago! - see www.aspexsoftware.com/fab_at_school.htm
FH wrote at 1/15/2014 6:52:35 AM:
VERY... VERY... VERY... GOOOOD and CLEEEEAAR INFORMATION ABOUT 3D PRINTING BASICS. HOW TO CONTROL THE FLOW OF INK (or fluid) from the gun/cartridge? THANKS FOR ALL.
Dinesh Upadhyay wrote at 1/6/2014 1:53:30 PM:
Hi Guys,
I am new to this forum , however I am an Engineer and a PG in CAD/CAM.
Located in Mumbai. Currently working for a Jewelry company and using cad and cam extensivly. have used different type of Rapidprototyping machines in past, but never used the PLA/ABS kind of home printers.
Dinesh Upadhyay wrote at 1/6/2014 1:49:30 PM:
Hi ,Raghuram Prabhakaran, the best people in Mumbai for prototyping jobshop is Imaginurim, In MIDC Andheri. I know them and are great people to learn from and work for.
James Kang wrote at 12/25/2013 9:24:38 PM:
모든 정보를 주신 분들에게 감사한 마음을 전합니다.
tom wrote at 12/23/2013 4:51:10 AM:
New site http://3dstuffzone.com
Kevin wrote at 12/17/2013 6:06:22 PM:
Soap
Mike Moncrief wrote at 12/3/2013 11:52:16 AM:
Where can I learn how to do 3D printing? I live in St. Paul, Mn.
urniga wrote at 11/28/2013 12:27:10 PM:
can you show a concept map of 3d printing? :P
vybil wrote at 11/22/2013 3:33:22 PM:
ftrfrdtrfyjf
Johnnt boy wrote at 11/20/2013 4:52:47 PM:
Zebras
Adam wrote at 11/20/2013 4:46:06 AM:
Hi, most of the 3D printing materials are ABS & PLA. Any reason why polypropylene not being used for 3D printing?
YYYY wrote at 11/11/2013 7:33:30 PM:
WHAT SI THE GRPWTH OF THIS INDUSTRY IN INDIAN MARKET
jz wrote at 11/1/2013 1:35:29 AM:
this was very helpful for a research paper i was doing
C Cooper wrote at 10/27/2013 4:59:23 AM:
Stay away from anything offered by the mixshop. .. I bought a mix g1 back in March and besides printing a cube or two, nothing stayed together long enough to print what I wanted as part of a project I had been working on. To boot, the damn extruder was printed out of PLA! As soon as the extruder bed temperature gets any warmer that 50 degrees, the damn thing starts to melt. Dont'get me started on the extruder platform either... Looks like something a grade school kid designed (the bearing holders on the platform came loose after about three prints... You have been warned.
dodood wrote at 10/25/2013 5:02:59 PM:
Tis is the best thing eva turnip
Farhang Karimzadeh. wrote at 10/22/2013 6:48:48 PM:
To Whom It May Concern:
I am writing this email to find a university to learn modeling and prototyping.
I am an industrial design student in bachelor degree and I am very interested to learn modeling and prototyping in relation with the industrial design but not as a short-term semester or just part of a different line of knowledge. Looking for a university that at the end I will be able to get bachelor degrees or even higher.
During my web searching I found few signals that I can ask you, that’s why I am I'm bombarding you with lots of requests and questions.
Thanks a lot in advance of your support, cooperation, and contribution.
Your confirmation of receiving this email will be greatly appreciates.
Looking forward to hearing from you.
[email protected]
Looking for a university that at the end I will be able to get bachelor degrees or even higher.
During my web searching I found few signals that I can ask you, that’s why I am I'm bombarding you with lots of requests and questions.
Thanks a lot in advance of your support, cooperation, and contribution.
Your confirmation of receiving this email will be greatly appreciates.
Looking forward to hearing from you.
[email protected]
MPL wrote at 10/18/2013 7:44:38 PM:
Thank you for this beautiful and concise introduction.
Manas wrote at 10/4/2013 6:37:22 AM:
Thank for the preliminary info.
kari wrote at 10/4/2013 12:35:37 AM:
So my husband does 3D design and is trying to make a model for a symbol to be cut out. They say the edge should resemble a cookie cutter but so far nothing he has done is working. He is using sketchup I believe can anyone give me advice to relay to him?
Pancho Nopales wrote at 9/27/2013 6:25:37 AM:
Gracias por la informacion fue de gran utilidad!
Jeewel wrote at 9/26/2013 5:16:18 PM:
Hi,
I use shapeways.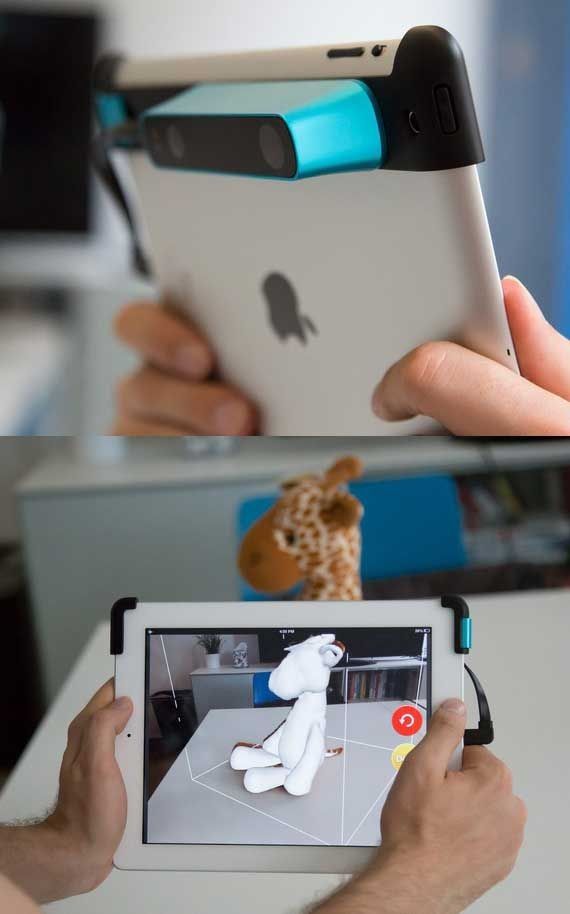 com and I'm quite happy about the service!
This is my last project
https://www.shapeways.com/model/1337943/jumping-frog-wire-32-mm-1-25-inches.html?li=shop-results&materialId=6
Bye!
com and I'm quite happy about the service!
This is my last project
https://www.shapeways.com/model/1337943/jumping-frog-wire-32-mm-1-25-inches.html?li=shop-results&materialId=6
Bye!
Chad wrote at 9/25/2013 10:58:04 PM:
Can you please add 3d printer hardware
jimmy wrote at 9/19/2013 8:55:43 PM:
boobiies
l wrote at 9/12/2013 6:42:11 PM:
wat r teh materials tu bild 1
Jeremie Pate wrote at 9/10/2013 2:38:11 PM:
It's pretty cool. Thanks for info
Raghuram Prabhakaran wrote at 8/21/2013 11:39:51 AM:
I really want to work on 3 D printing services. I am looking for an opportunity to work in 3 D printing house in India especially in Mumbai to gain thorough practical knowledge. Currently I am employed as 2 D / 3 D Animator, specialized in Texturing and Lighting. Will you please let me know any renowned 3 D Printers available in Mumbai, India? Or If I want to start it what would be the cost?
Scott wrote at 8/12/2013 3:51:32 PM:
Excellent Insight into 3D printing keep up the quality journalism.
Llewellyn King wrote at 8/10/2013 1:34:49 AM:
I am interested in exploring the potential impact of 3d printing in society in general and particuloarly in the nergy industries which may not know they need it --yet. Llewellyn King
Bruno wrote at 8/4/2013 6:30:56 AM:
Thanks for share! Somebody know which printers brand and model are showing in the video about Stereolithography (SLA) printers? tks
Aaron wrote at 7/30/2013 11:33:13 PM:
This is some great info for those getting acquainted with 3D printing and where to find the right resources.
I have recently started a website where we provide 3D graphic design services for those who want to get into the 3D printing without having any specialized knowledge about the 3D modeling process.
As part of our launch, we were wondering if we could have an arrangement where our website is featured as on of the resources mentioned on this page. The website is Triaxisart.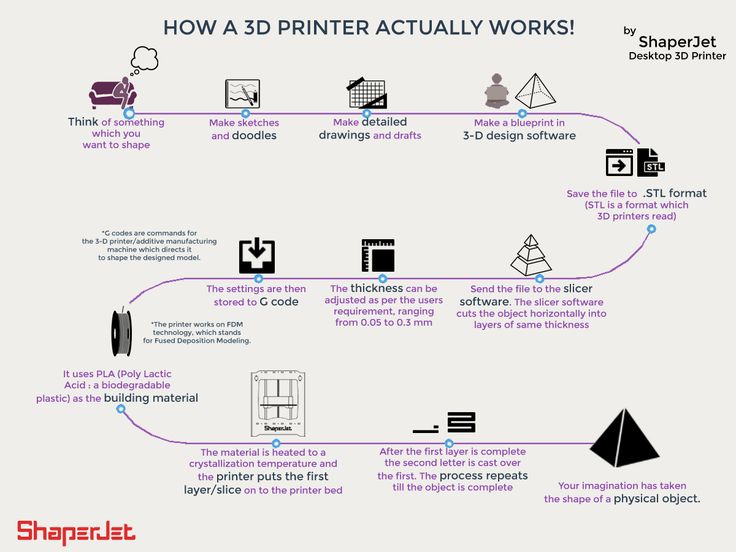 com. Please check it out and let me know what is needed to make that possible.
Keep up the great work with this page!
I can be contacted at [email protected]
com. Please check it out and let me know what is needed to make that possible.
Keep up the great work with this page!
I can be contacted at [email protected]
Aybuke wrote at 7/24/2013 3:54:53 PM:
Thank you for the great support you provide! I've been searching the suitable material and printer kit the whole day; however, I had not got to any point until I encountered your site.
G. rodriguez wrote at 7/11/2013 4:31:29 AM:
What 3d printers accept AutoCad designs...???
Ken Cummings wrote at 7/10/2013 4:02:16 AM:
As a Mining Engineer I learned to nitrify cellulose ( a starch/sugar polymer) to make a basic low grade explosive known as gun cotton. I just learned that the PVA used to print soluble supports for print overhangs can also be nitrified to create a compound prone to rapid decomposition. Will some polymer chemist please explain how to nitrify PVA just enough to make it go away rapidly without blowing my hand off?
Rajib wrote at 7/9/2013 10:42:48 AM:
Where to order? Please provide sales info. We would like to collaborate with you for our business growth using 3D Gigabot
mailto [email protected]
We would like to collaborate with you for our business growth using 3D Gigabot
mailto [email protected]
Ezu wrote at 7/4/2013 8:06:10 PM:
The technology is still in primary phase with high expectation in future. 3D printers are already available on the market but the list with objects that can be built with these is still very low.
RobotDigg wrote at 6/14/2013 8:06:16 AM:
Good knowledge
Bonitum wrote at 5/23/2013 10:50:11 AM:
Wonderful write-up. Thank you 3Ders team!
Carlos wrote at 5/22/2013 11:56:02 PM:
Mucho Cool!
coolkid wrote at 5/13/2013 9:38:26 AM:
:0
Maggie L. wrote at 5/12/2013 9:31:17 PM:
reallly coool info.
surendranath wrote at 5/12/2013 5:19:27 AM:
Hello sir thank you very much for good explained about 3d printer
[email protected] wrote at 5/7/2013 5:16:37 AM:
Great article, well written and highly informative. I can create a 3d model on my computer and I have been considering having some of my 3d models, like statues, lovers, turned into real 3d models by an outside, affordable source.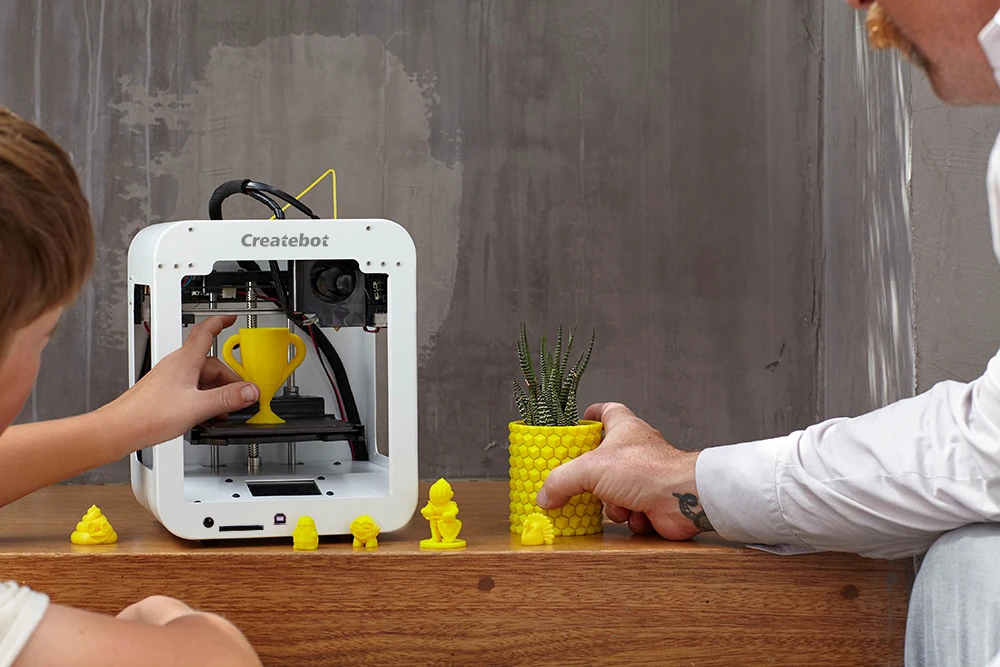 You see the statue, Thinker, I would like to create love statues about 24 inches tall. That is something I'm still thinking about.
21leftcenter wrote at 4/30/2013 9:45:13 PM:
MY HUSBAND LOVES YOUR SITE! :-)
bob wrote at 4/17/2013 2:05:53 AM:
awesome info, i really need to buy one thanks
uli wrote at 4/10/2013 10:07:33 PM:
any online school for 3d design and printing?
~LB wrote at 4/10/2013 7:01:11 PM:
You Rock!
Ruby wrote at 3/21/2013 12:44:04 PM:
How can I order prototypes from you
Sarah C. wrote at 3/15/2013 5:27:34 PM:
Great, clear info! Thanks
Anja wrote at 2/25/2013 6:07:15 PM:
Thanks David.
David Snell wrote at 2/25/2013 5:32:42 PM:
#8 needs a little correction due to consolidation in the Industrial space: Objet has merged with Stratasys Z Corp. has merged with 3D Systems
Chirag Patil wrote at 2/20/2013 1:07:24 PM:
Great place to find info!
sayli dethe wrote at 2/14/2013 6:29:14 AM:
its incredible
Jimmy wrote at 2/11/2013 10:17:40 AM:
Thank you! This technology is pretty incredible. I found some cool 3D printing news articles here: www.about3dprinters.com/3d-printing-news.html
Chris Morris wrote at 2/10/2013 7:33:11 PM:
Great site, and very complete information. Thank you.
Jackson wrote at 2/2/2013 2:50:53 PM:
Durham3d is also a great service. I got a high-quality print from them at an incredibly low price. @Durham3d, [email protected]
R. Weekley wrote at 1/22/2013 9:49:14 PM:
Hand-in-hand with 3D printing is scanning.
The pinch point is scanning. How to get a software model that can be converted into a part.
There are many scanning means. The easiest is photo scanning - taking a series of photographs at various angles, and combining them to yield a virtual model. Fortunately, there is help.
My 3D Scanner is free. http://www.my3dscanner.com/
PhotoModeler is $2500 http://www.photomodeler.com/
... and everything in-between http://www.scannerkiller.com/welcome.html
This means that the only special equipment you really need is a
camera.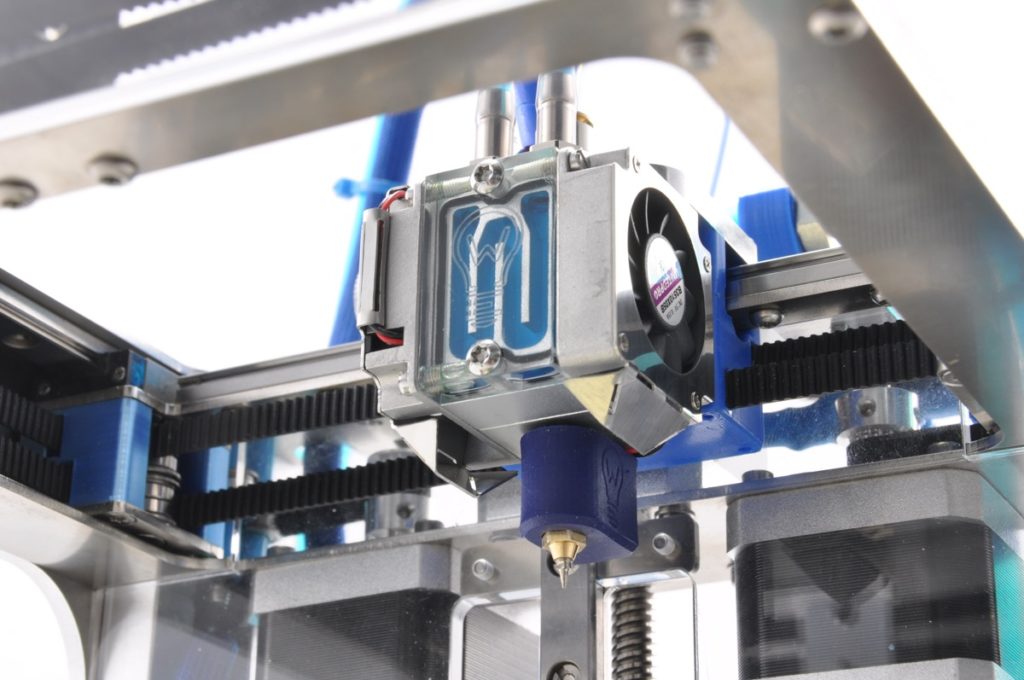
Dienye A. Atemie wrote at 1/22/2013 6:35:51 AM:
We have been following the exciting developments of the 3D printers and now desire to take a more purposeful step in the investment of this amazing product, additive manufacturing. We'll appreciate if you provide us with all the contact details of the manufacturers of the 3D printers. We intend to partner with them to create enormous markets beyond the shores of US. We might as special cases agree to have us as their committed representative even outside the US. Thank you as we look forward to hearing from you.
Mitch Bupp wrote at 1/15/2013 5:12:50 PM:
Thank You, This the future of manufacturing production. I hope that I am not too late to get in on the ground floor of the technology. Thank You Ann Marie, I will check it out. I am trying to find out where the best place is to get an education on this.
Siwek wrote at 1/11/2013 2:02:02 PM:
I never see any discussion of the SURFACE texture, options or post processing. What are surface treatments and how do they effect the accuracy?
d wrote at 12/9/2012 1:29:05 PM:
Wonderful write-up. Thank you 3Ders team!
Kevin wrote at 11/20/2012 9:57:59 AM:
Revolvon offer a 3d print service at very competitive rates. Just send a stl file through via the web site and receive a price back within a few hours. Typical delivery for finished parts is 2-3 days. For technical discussions call in and ask for sales. www.revolvon.com
Carla Ehrenreich wrote at 9/15/2012 8:18:22 PM:
Thanks for bringing this information all together like this.
mirza aslam wrote at 8/28/2012 3:18:28 AM:
Thax bro
Leon wrote at 8/16/2012 11:00:50 AM:
Great website. Thanks for making 3D printing seem so accessible.
Dcell_1t wrote at 8/13/2012 8:23:43 PM:
thanks, it will help me for my project!!!
Anja wrote at 4/19/2012 11:37:56 PM:
Cube is announced to be the first home 3D printer. But no one has one yet, so also no review available. All the existing 3D printer are for sure not easy for beginners.
Dee. B wrote at 4/19/2012 8:17:30 PM:
Who presently makes the easiest 3D printer for home use? Does HP have one on the market yet? Thanks for reply.
Ann Marie Shillito wrote at 2/18/2012 12:50:04 AM:
Please add Cloud9, a 3D modelling package http://anarkik3d.co.uk/ which is very quick and easy to learn and to get into being creative - bit like a pencil: easy to use straight away with scope for skilled mastery with practice. It is easy to learn to use because it exploits a haptic (3D virtual touch) device which replaces the standard mouse to give movement in 3 dimensions and force feedback for sense of touch, tapping our natural ways of interacting in the real world!
Richard wrote at 2/16/2012 7:49:58 PM:
THANK YOU FOR THIS BEAUTIFUL INFORMATION!
The 4 Best 3D Printers for 2022
We independently review everything we recommend. When you buy through our links, we may earn a commission. Learn more›
- Office
- Printers & Scanners
UpdatedSep 2022
Updates
We’ve updated this guide to include the Artillery Sidewinder X2 as a pick, revised the Prusa Mini+ and Prusa i3 MK3S+ sections with new details, and added a section discussing Ender-3 printers.
What can you make with a 3D printer? Almost anything you want—from vases to GoPro mounts to phone cases—provided you don’t mind that it’s made out of plastic. Whether you’re a tinkerer interested in prototyping or a tabletop-gaming enthusiast seeking to expand your arsenal of miniatures, a 3D printer might be the manufacturing tool you need. We recommend the Prusa Mini+ printer because it’s the most reliable printer we’ve tested, and we find it to be an especially good value at $400 or so. It’s also easy to use and relatively inexpensive to operate.
Our pick
Prusa Mini+
This printer consistently cranked out high-quality prints in our tests and has a huge print volume.
The consistency and the thoughtfully chosen, repairable parts of the Prusa Mini+ will please more advanced users who need a dependable 3D-printing machine. It’s also a bargain, with unusual features at this price such as a large, 7-by-7-by-7-inch printing area (also known as the print volume, or the total space you can print within) and a color display, as well as 24/7 customer support. Prusa printers are the quietest models we’ve tested, too, and they’re compatible with a wide range of plastic types.
Advertisement
Upgrade pick
Prusa i3 MK3S+
This model offers the reliability and quality of a Prusa printer plus the largest print volume available.
The Prusa i3 MK3S+ is a worthy upgrade from the Mini+ for its 9.9-by-8.3-by-8.3-inch printing area, more stable z-axis, and better extruder. It comes with parts that are likely to last longer (though no color screen as on the Mini+) and an upgraded motherboard that can better detect and correct errors while the machine is printing. Its setup is also faster and easier than that of the Mini+.
Budget pick
Monoprice MP Cadet
The MP Cadet is cheap, reliable, and small enough to fit on any desk.
If you’re a total beginner who doesn’t want to invest too much, or if you’re looking for a printer that’s safer for children to use (similar machines are advertised for kids as young as 8), the Monoprice MP Cadet might be a better option. In our testing, it consistently turned out flawless (though less detailed) prints as long as the designs weren’t too complex. It has a small, desk-friendly footprint. It’s also less than half the price of the Prusa Mini+, but it doesn’t offer as many features or produce the same level of detail, and it has a smaller, 3.9-by-4.1-by-3.9-inch print volume.
Also great
Artillery Sidewinder X2
This model is best for larger or taller printing jobs, such as cosplay or art pieces.
If you’re trying to print a sci-fi helmet or custom shelving brackets, a larger printer allows you to make the entire part in one shot rather than splitting it into smaller components and gluing them together. The print bed of the Artillery Sidewinder X2, an 11.8-inch square with a height of 15.7 inches, gives you a lot more room for bigger jobs. This model also offers easy setup and an intuitive menu, and in our tests it produced fantastic prints.
Everything we recommend
Our pick
Prusa Mini+
This printer consistently cranked out high-quality prints in our tests and has a huge print volume.
Upgrade pick
Prusa i3 MK3S+
This model offers the reliability and quality of a Prusa printer plus the largest print volume available.
Budget pick
Monoprice MP Cadet
The MP Cadet is cheap, reliable, and small enough to fit on any desk.
Also great
Artillery Sidewinder X2
This model is best for larger or taller printing jobs, such as cosplay or art pieces.
The research
- Why you should trust us
- Who should get this
- What you should know about 3D printers
- How we picked
- How we tested
- Our pick: Prusa Mini+
- Upgrade pick: Prusa i3 MK3S+
- Budget pick: Monoprice MP Cadet
- Also great: Artillery Sidewinder X2
- Care and maintenance
- What about the Ender-3 and other Creality printers?
- What to look forward to
- The competition
- Sources
Why you should trust us
Dave Gershgorn is a senior staff writer at Wirecutter and an avid 3D-printing enthusiast. He has printed through dozens of rolls of filament, has owned multiple printers, and has designed custom 3D-printable models for home improvement, product testing, and cosplay.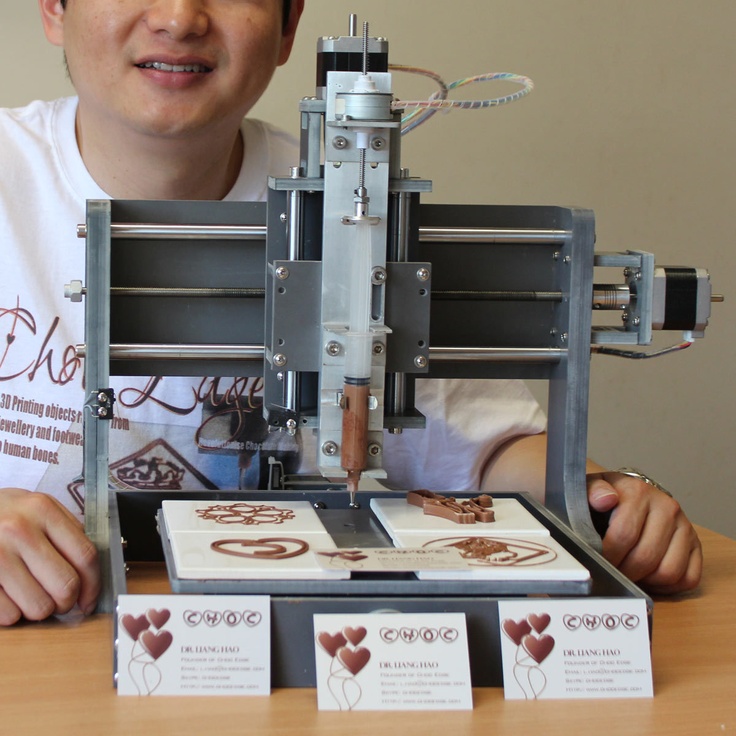 His current personal printers are the Prusa i3 MK3S+ and the Elegoo Mars 3.
Signe Brewster has been researching, studying, and testing 3D printers for tech publications including Gigaom, TechCrunch, and now Wirecutter since 2013. She has printed hundreds of 3D models, and through that experience she has learned how to spot the annoyances that can come with using an emerging technology.
In the course of researching this guide, we interviewed several 3D-printing experts, including Sean Charlesworth, a 3D-printing specialist for Tested, and Justin Kelly, an entrepreneur who founded LaserGnomes and Proto House.
Who should get this
People who need to quickly make prototypes or custom plastic parts can get the most mileage out of a 3D printer. These machines are also useful tools for anyone who likes tinkering or teaching children about STEM concepts. You can find plenty of downloadable designs online at 3D-model libraries such as Thingiverse. The range of possibilities is even wider if you know how to use CAD (computer-aided design) software. And anyone can work with a 3D printer: Most printers are easy enough to use that a child (with adult supervision) can print any of the endless variety of toy designs available.
What you should know about 3D printers
Be warned that no 3D printer is unbreakable. A day will come when you’ll need to replace a part or get your hands dirty in some other way. Replacement parts are available for the Prusa Mini+ and MK3S+, but not all 3D printers are equally easy to fix. You might want to avoid 3D printing altogether if you aren’t confident that you’d be able to perform a minor repair on the equivalent of a household appliance.
Prospective buyers should also be aware that the 3D-printing industry is in a constant state of upheaval. MakerBot, which was long considered the frontrunner among home 3D printers, stopped marketing to hobbyists and home users several years ago in order to focus on commercial and educational institutions. Many of the printers we have tested have come and gone within the span of a year or two. So it’s not out of the question that you might someday find yourself without much support from the company that made your printer. It’s also possible that a new breakthrough will suddenly leave you with outdated technology.
In addition, a 3D printer brings health and environmental concerns. When a printer melts plastic as part of the extrusion process, it releases volatile organic compounds and other particulates. The CDC recommends (PDF) using printers in a “negatively pressured area with a dedicated ventilation system,” which is not a feature found in your average home. It’s a good idea to weigh how comfortable you are with exposure to some fumes before buying.
On the environmental side of things, consider that you’re investing in a machine that works primarily with plastics. It’s possible to recycle or compost certain types of 3D-printed plastics (polylactic acid, or PLA, being the most sustainable of the common varieties), but the process can be complicated. There’s also the option to invest in a spendy recycling system of your own.
How we picked
The Monoprice Maker Select v2 at work. Video: Signe BrewsterWe turned to articles from 3D Hubs, Make, PCMag, and Tom’s Guide, plus customer reviews on sites like Amazon, to develop a short list of the best 3D printers for beginners. We then interviewed our experts on what to look for in a printer.
You could spend anywhere from $200 to $1 million on a 3D printer. The best options for hobbyists are priced at $1,000 or less. As with any piece of technology, printers in different price ranges offer different mixes of features. Printers really do get better the more you spend—and sometimes they’re also easier to use. Some higher-priced machines offer specialty features such as dual-color printing or a webcam for monitoring your print remotely, while other expensive units are known for their exceptional reliability.
We skipped 3D printer kits, which are less expensive but require a great deal of assembly, in favor of machines that print good-looking parts straight out of the box with as little maintenance required as possible.
No matter what price range you’re considering, we’ve concluded that the best 3D printers offer the following features:
- High-quality prints: Without too much tweaking, the printer should put out smooth-looking models with layers that are 0.1 mm or thinner and barely visible.
- Easy-to-use hardware: Even a complete beginner should be able to put the printer together, load filament, start a print, and remove a finished model from the print bed. The bed should also level itself or be simple to level manually (a sloping print bed can cause printing errors).

- Ample connectivity options: Ideally, you should be able to start a print over Wi-Fi or transfer the file over a USB cable. Loading files onto an SD card that you plug into the printer is also okay. A design that requires you to keep a computer tethered to the printer at all times via USB is a serious flaw but not necessarily a dealbreaker.
- Intuitive software: Beginners should be able to jump right into using a printer’s software, including making adjustments to models before printing. The software should come preloaded with print settings but provide options for more experienced users to fine-tune. It’s a big plus if a printer is compatible with Ultimaker Cura, which has become somewhat of an industry standard and a favorite of ours.
- Large-enough print volume: It would be nice to have the ability to print objects as large as you want, but the reality is that most models found in libraries like Thingiverse are designed for small 3D-printer beds, with workarounds for combining several printed pieces to create a larger object.
 As a result, beginners need only a print bed that’s large enough to print models about the size of a small tissue box.
 - Heated bed: Heated beds prevent prints from warping, help models stick to the print bed, and allow you to print using a wider range of materials. (ABS, one of the two most common types of plastic used for 3D printing, and other materials shrink as they cool. Without a heated bed, you are limited to PLA, the other main type of plastic.)
- Compatibility with any brand of filament: Some companies embed chips in the spools of plastic that feed into their 3D printers, requiring you to buy refills directly from the printer manufacturer. Proprietary filament is generally more expensive, and if the company that makes it goes out of business, you won’t be able to use the printer.
- Suited to everyday life: The machine should look at home sitting on a desk. Ideally, it isn’t too big or heavy, and it’s relatively quiet so you can’t hear it from every corner of the house.
 Although some printers are marginally faster than others, large prints can take days; even small prints take hours. A quiet printer is much easier to live with. Printers should also be able to print in polylactic acid, or PLA, plastic. While melting any type of plastic releases volatile organic compounds and other particulates into the air, the CDC considers PLA to be safer (PDF). PLA also has a sweet, inoffensive smell—still, it’s best for both children and adults to use a 3D printer in a well-ventilated room.
 - Enclosed printing chamber: Enclosing the print space keeps prints at a consistent temperature to prevent warping and other printing imperfections. It’s an especially good idea to have an enclosed chamber if you are printing with acrylonitrile butadiene styrene, or ABS—one of the two most popular printing materials—which is more prone to warping because it shrinks when it cools. Although enclosed printing chambers are nice to have, they’re not essential, and they’re actually fairly rare among inexpensive 3D printers.
How we tested
Photo: Signe BrewsterWe time how long we take to get each printer from the box to set up on our desk, and we jot down notes on the initial software installation and navigation process. Then we get to printing. We allow each printer eight attempts to produce as many acceptable models as possible. We rate each print as either a success, a mediocre effort, or a failure. Successful prints look smooth, with no obvious imperfections. Mediocre prints have readily visible layers or imperfections but still look like a completed model. Failure takes many forms—everything from broken filament string that causes the print to stop to wild spaghetti-like misprints due to software or hardware errors.
Witness the terrifying results of two prints that did not stick to the Monoprice MP Cadet’s print bed correctly. Photo: Signe BrewsterPrinters usually come with several models preloaded; we always start by printing one of these because they’re carefully optimized for the printer. Errors in these prints indicate that there is likely something wrong on the hardware end that we need to adjust. After the first successful print, we move on to designs we’ve found on Thingiverse. For our 2020 and 2021 testing, that group included “Low-Poly Bulbasaur” and “Low-Poly Charmander” by Thingiverse member flowalistik, “Curved honeycomb vase” by eggnot, and “Skull lamps - Voronoi Style” by shiuan. Our 2022 test added the “3DBenchy” model by CreativeTools and the “Nano All In One 3D printer test” from Printables member Steeveeet. These models had a range of detail, overhangs, and scale that would give us an impression of the printers’ strengths.
Almost any 3D printer is capable of putting out successful models—experienced users know (or can figure out) how to tweak settings and hardware to get such results. But beginners (or even intermediate users like us) aren’t as likely to know what to do or to care enough to spend time fine-tuning. For the purposes of our testing, we give the printers the basic care they need to function—an initial bed-level check combined with factory-recommended settings—but we don’t tweak the printer or software to get better prints unless something goes wrong.
We also note how many times we have to repair the printers, how often each machine needs its print bed leveled, and how difficult it is to remove completed models from the print bed. These are general issues that pop up for any tier of 3D printer, but some printers are better than others at reducing the time you have to spend cleaning and repairing them.
Our pick: Prusa Mini+
Photo: Sarah KobosOur pick
Prusa Mini+
This printer consistently cranked out high-quality prints in our tests and has a huge print volume.
The Prusa Mini+ offers the best overall 3D-printing experience thanks to its combination of print quality, reliability, and desk-appropriate size, all offered at a relatively low price. It produced some of the best-looking prints among the machines we tested, it works with a wide variety of filament brands and types, and it comes preassembled. (You can save some dough and buy a kit to assemble the Mini+ yourself instead, though we didn’t test kits because of the added skill involved.) Prusa printers are the quietest we’ve tested, which makes them especially bearable to work alongside in an office.
Across eight test prints, the Mini+ produced eight perfect models, the best result from any printer we’ve tested. It can print layers as thin as 0.05 mm, half the thickness that most of the printers we’ve tested can achieve. As a result, it prints objects that look especially glossy and smooth. Unlike with most of the other printers we’ve tested, we’ve never seen an obvious error in printed models from the Mini+.
We decided to use the free PrusaSlicer software program to prepare files for printing. We still prefer the detail packed into Ultimaker Cura, another free program compatible with a wide range of printer types, but we found PrusaSlicer easy to use and reliable in how it prepared files for the Mini+. It has plenty of customization options for the average 3D-printer owner.
We used a USB stick to transfer files from our computer to the printer, but Prusa has published a guide to a DIY upgrade that allows you to send files over Wi-Fi. Once you plug in the USB stick, you can use a knob to scroll through the menu and file list on the Mini+’s color screen, which we found to be much easier to parse than the blue and white, text-only screen of the Prusa i3 MK3S+.
Although the MK3S+ has a larger, 9.9-by-8.3-by-8.3-inch PEI print bed, the Mini+ is no slouch with its 7-by-7-by-7-inch print volume. (For an even larger print bed, check out our also-great pick, the Artillery Sidewinder X2.) Most free models you’ll find available on library websites like Thingiverse are made for this size of print bed, so it’s not often that you’ll max out its abilities. We were able to remove the bed and bend it to pop off prints, but usually we used a scraper and gentle pressure instead. The Mini+ isn’t flashy, but it’s especially practical. It automates as many quality checks as possible, so there’s less manual setup each time you print. It’s also built out of replaceable parts; that’s useful if you plan to run the printer continuously and want it to have as long a lifespan as possible. And Prusa’s printers are upgradable, whether you want to add nicer parts or swap in features from the latest printer.
The Mini+ can print in layers as thin as 0.05 mm, which aids in its ability to print finely detailed models. Photo: Sarah Kobos
Although the Mini+ is small enough to fit on a desk, it can still print models as large as 7 by 7 by 7 inches. Photo: Sarah Kobos
The Mini+ can print in layers as thin as 0.05 mm, which aids in its ability to print finely detailed models. Photo: Sarah Kobos
The Mini+ can print in standard plastics such as PLA and ABS, plus materials like nylon and wood blends. If you’re interested in even more exotic materials, the MK3S+ is a better choice. Prusa makes a line of reasonably priced filament in many types of materials that we have enjoyed using, but the Mini+ is compatible with filaments from other brands, too. We have used Hatchbox filaments with good results in other printers in the past, but we haven’t tested them on the Mini+.
The Mini+ has a decidedly old-school look among 3D printers. But we actually prefer its exposed components to the sleeker looking printers we’ve tested because the design makes the printer easier to repair.
Flaws but not dealbreakers
It took us just over an hour to assemble the “preassembled” version of the Mini+. That’s the longest process for any printer we’ve tested. From ensuring that we attached wires in the right place to fiddling with screws at awkward angles, the experience was more of a headache than we expected after the relatively easy assembly required for the MK3S+. The instructions are sometimes vague, so we recommend a close read. However, once we had the Mini+ assembled, it was quick and easy to get ready for printing.
Spending more on a 3D printer gets you, well, more: Touchscreen controls and the ability to print over Wi-Fi are two features we’ve enjoyed on more expensive printers. One benefit of using a USB stick instead of Wi-Fi is that you can save multiple prints to the stick at once; that way, when the first job finishes, you can remove the print and start the next one without having to go back to your computer. But we look forward to Prusa’s addition of Wi-Fi abilities in the future.
The Mini+ has a totally open design, which means that it releases the VOCs and particulates that it produces while using certain types of filament like ABS. You might notice a maple-syrup or plastic smell from the melting filament. If you’ll be using the machine in a home environment, it’s a good idea to use a “healthier” plastic such as PLA. It’s also a good idea to print at the lowest temperature possible for your chosen material; the lower the temperature, the less bad stuff the printer releases into the air. If you plan to spend time in the same room as a running 3D printer and don’t have a ventilated hood or HEPA air filter, turn on a fan or crack a window to improve ventilation (PDF). It’s also a good idea to wear gloves to prevent skin transfer.
Upgrade pick: Prusa i3 MK3S+
Photo: Signe BrewsterUpgrade pick
Prusa i3 MK3S+
This model offers the reliability and quality of a Prusa printer plus the largest print volume available.
The Prusa i3 MK3S+ offers the reliability and print quality of the Mini+ along with a larger print bed, a more stable design for greater printing detail, and a better extruder that can handle a wide array of materials. It also comes preassembled or in a DIY kit, though we found the preassembled kit much simpler to set up than the Mini+.
In eight test runs, the MK3S+ made five perfect prints, second only to the Mini+. Like the Mini+, it prints layers as thin as 0.05 mm, creating more detailed models than most competitors in its price range. Of the three jobs that were failures, two were due to setup error and one was due to a clog that we were able to resolve. Unlike with most of the other printers we tested, we never saw an obvious error in the printed models. The print quality of the MK3S+ can be attributed to its sturdy frame and dual z-axis lead screws, which keep layer lines tight and consistent.
It took 32 minutes for us to set up the MK3S+, about average for the printers we’ve tested. Our test unit came assembled, but we took some time to run through the initial setup wizard. Although most of the setup is automated, you should pay close attention during the bed-level calibration; using the knob next to the printer’s computer screen, you need to lower the print nozzle until it nearly touches the bed, slightly squishing the melted filament. We made some mistakes the first time we booted up the printer. We recommend carefully reading the messages on the screen while the setup wizard is running, as well as studying the printer’s instruction manual. The manual is wordy at times, but we prefer that to the minimal or confusing instructions that other printer makers tend to include.
Several software options are available for the MK3S+; we used Cura, downloaded directly from the Ultimaker website. Cura is compatible with a wide range of printers, so during setup you should pick the MK3S+ profile to ensure that the software is tailored to your machine. We’ve used Cura for years without issue. Beginners can start a print quickly, without much thought, or drill deeper into the settings in the software’s intuitive menus when they’re ready to do more fine-tuning. It’s also worth checking out PrusaSlicer, which, as the name implies, is Prusa’s version of slicing software; there, the company offers expertly tuned profiles for its printers and filaments, as well as helpful features like variable layer height based on where your model has the most detail. It also has great features for generating custom support material, which is like scaffolding around your print that helps your printer lay down material at gravity-defying angles. In PrusaSlicer you can “paint” the areas on your model where you want support material, and the slicer will build that scaffolding up from the build plate to meet those specific areas, making the print less prone to failure.
You can print on the MK3S+ over Wi-Fi directly from PrusaSlicer if you install a Raspberry Pi Zero W into your machine, or you can save your file to an SD card and insert it into the machine. Using a knob, you can scroll through the black-and-white menu on the MK3S+’s small screen to select which model you want to print. It isn’t the flashiest or most intuitive system, but it is similar to what you’ll find on most other $1,000 printers.
The MK3S+’s controller is functional but barebones. Higher-end printers often have color touchscreens. Photo: Signe BrewsterThe MK3S+ has plenty of cool features, our favorite of which is the removable 9.9-by-8.3-by-8.3-inch PEI print bed. Its direct-drive extruder allows you to print with flexible filaments like TPU to make custom phone cases, for example, or rubbery feet for gadgets. The extruder also includes a filament-runout sensor, which automatically pauses a print if you don’t have enough filament to finish. And this machine is modular and built out of replaceable parts, so you can swap in the latest upgrades.
The MK3S+ can print using standard filaments such as ABS and PLA, as well as more interesting materials like nylon or those that contain carbon fiber. It’s compatible with a wider range of filaments than the Mini+ (its hotend, the structure that melts and extrudes plastic, can reach 572 degrees Fahrenheit, compared with the Mini+’s 536 degrees), though most people don’t need to take advantage of its more unusual filament options.
Although this machine doesn’t look as stylish as some of the other 3D printers we’ve tested, its 15-by-17-inch footprint is small enough for it to fit on a desk. It’s also impressively quiet (though you’ll still know it’s on when you’re in the same room). As people who have each tried to sleep within earshot of 3D printers whirring and singing in their robotic tones, we can attest to the importance of a printer that is seen and not heard. As is the case with the Mini+, we recommend cracking a window to avoid inhaling the fumes that the MK3S+ releases due to its open design.
Budget pick: Monoprice MP Cadet
Photo: Signe BrewsterBudget pick
Monoprice MP Cadet
The MP Cadet is cheap, reliable, and small enough to fit on any desk.
If you aren’t sure you want to commit to using a 3D printer regularly, or if you just want to spend a bit less, the Monoprice MP Cadet is a good budget option. In our testing, this $200 printer made prints that looked just as good as the results from printers that cost several times more, and its small size makes it especially desk friendly. Its removable, unheated bed is also more suitable for little fingers and releases finished prints with ease (though it puts your prints at risk of warping). However, this machine lacks the relatively advanced features you get from more expensive printers such as the Prusa Mini+ and i3 MK3S+.
Among the eight test prints we attempted, the MP Cadet produced four great-looking prints, one mediocre print, and three failures. The MP Cadet can print layers as thin as 0.4 mm; they’re eight times thicker than the MK3S+’s 0.05 mm layers but still thin enough that prints look tidy (even if you can see each individual layer). This machine did a mediocre job of printing the skull lamp file, which has lots of small details and overhangs that ended up looking a bit sloppy but still came out intact.
The first failed print happened right away, as the print head immediately dug into the print bed, damaging its soft surface. We discovered that we had readied the print in Cura with a profile for the Monoprice Mini. Once we downloaded a version of Cura directly from Monoprice and selected the MP Cadet profile, the printer operated normally. The next two failures occurred when we tried to print the pack-of-gum-sized Charmander: Partway through the print, the Charmander figure lifted off the bed and adhered to the print nozzle instead, creating a half pocket monster, half spaghetti nightmare creature.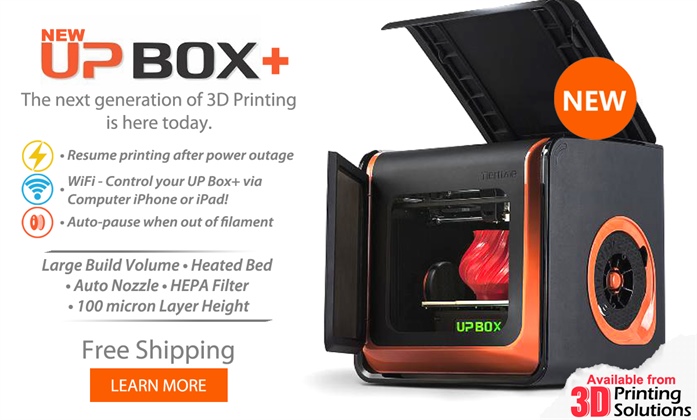 Because the MP Cadet’s print bed is unheated, prints don’t adhere as well as they could. Using a layer of painter’s tape and dabbing at it with a glue stick before starting prints solved the problem. The upside of an unheated bed is that you can remove models as soon as the print job is done. We didn’t find any sort of scraping or bending necessary to pop off prints—another advantage of an unheated bed.
Setting up the MP Cadet took us 30 minutes. It arrived assembled, but we ran into some kinks with Monoprice’s instructions. First, the company advertises that you can print from an iOS or Android app called PoloPrint, but the app is difficult to use, and owners complain of connection issues. Second, during our tests the printer offered the option to start printing the models loaded onto the microSD card in the printer—our hitting the print button did nothing, though, and we found the interface confusing. Instead, we recommend using Cura to load files onto the microSD card and then initiating prints on the printer’s screen.
As with the MK3S+, you can prepare models for printing on the MP Cadet with Cura. Despite the initial snafu we had in downloading the correct version, we appreciate that all of Cura’s features are available even when you’re working with such an inexpensive printer.
The MP Cadet’s print bed is relatively tiny, at just 3.9 by 4.1 by 3.9 inches. That’s big enough for it to print game pieces, toys, and some household parts; many downloadable designs also allow you to print them in several pieces and then assemble them to create a larger object. However, if you want to print big designs on a regular basis, a printer with a larger bed is worth the investment.
The MP Cadet is noticeably smaller than most printers, with an overall footprint of just 8.3 by 8.3 inches. However, because its print bed is not enclosed and it doesn’t have a heated bed, you need to keep it away from open windows and in an area with a relatively constant temperature so that the air doesn’t warp prints.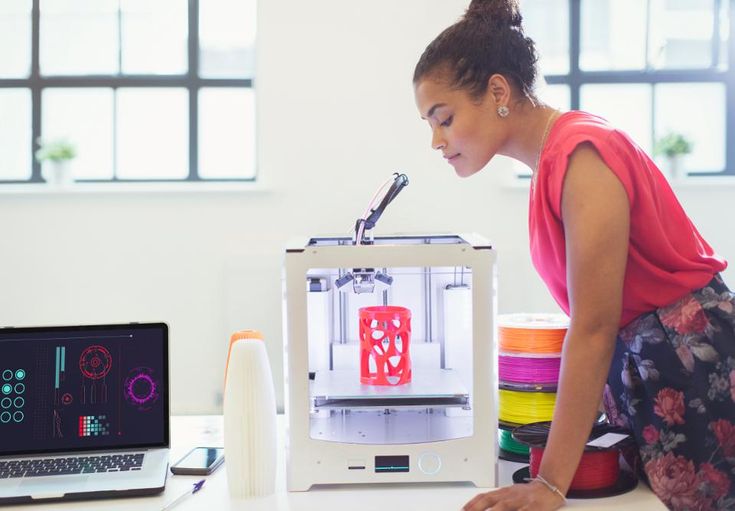 The work area should also have good airflow, such as a small fan nearby. The melting filament gives off a maple-syrup or plastic smell, so in addition to having airflow in the room, you should avoid sitting right next to the printer as it operates to avoid inhaling the fumes. The MP Cadet is noisier than the Prusa i3 MK3S+, too, though it isn’t unbearably loud.
Also great: Artillery Sidewinder X2
Photo: Dave GershgornAlso great
Artillery Sidewinder X2
This model is best for larger or taller printing jobs, such as cosplay or art pieces.
For larger prints, the Artillery Sidewinder X2 offers a great balance of size, ease of use, and premium features for just about the same price as our top pick. Its 11.8-by-11.8-by-15.7-inch print bed gives you lots of space for 3D-printing cosplay helmets or lampshades, for example, and its direct-drive extruder makes it great for flexible filament, as well.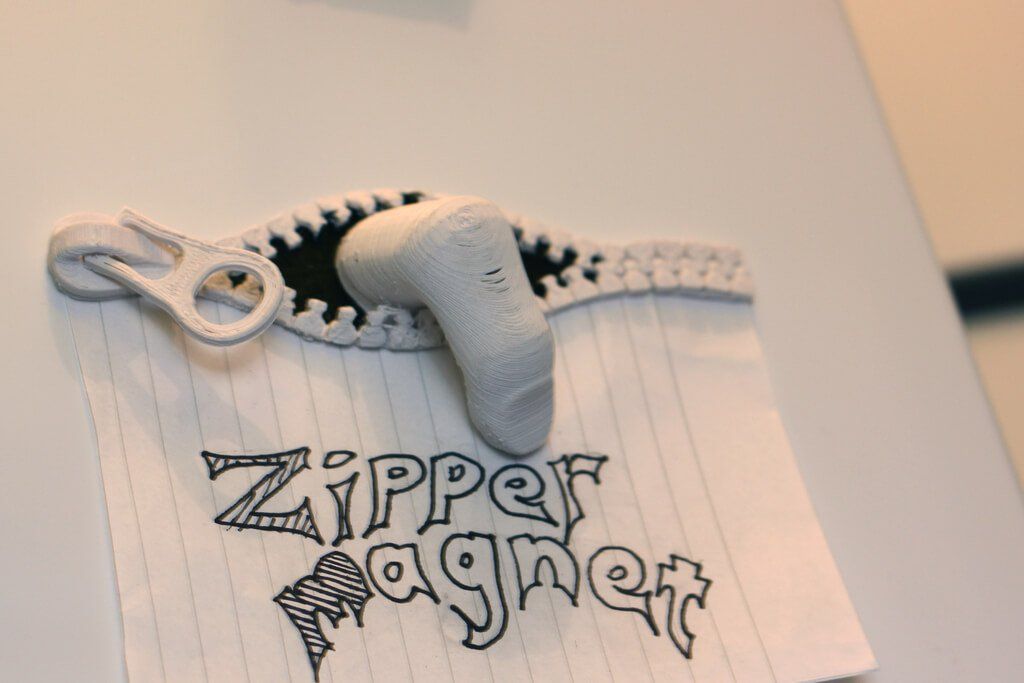 This machine isn’t for everyone, though, due to its size and impracticality for most everyday prints. It’s physically much larger than all of our other picks, so you need a dedicated space for it that’s at least 24 inches deep, 18 inches wide, and 36 inches tall. A larger print bed also means a tougher time leveling that bed, compared with the experience on our smaller picks. But if you want a printer that can keep up with your Mandalorian cosplay idea, the Sidewinder X2 can do it.
The Sidewinder X2 has an easy setup process similar to that of many other partially assembled 3D printers. You simply need to mount the printer’s gantry, a fancy word for the tall part of the printer that moves the extruder around, to the base. Doing so requires inserting four screws to secure the printer’s gantry to the base and then plugging in a few well-labeled cables. Much of the wiring is located inside the printer’s frame, so cable management wasn’t an issue in our tests, and there are no cables to snag while the machine is printing. However, the manual that comes with the Sidewinder X2 is not translated perfectly and can be a bit confusing. The internal wiring can also make the printer more difficult to repair compared with our other picks if a part breaks after dozens or hundreds of hours of printing.
In our tests, the initial calibration was a slightly more manual process than for our other picks, as the Sidewinder X2 has a Level menu that moves the extruder to preloaded points around the print bed. You tap the touchscreen to move the extruder to a specific point, slide a piece of paper between the nozzle and the bed, and then turn a knob on the underside of the printer to raise or lower the bed until you feel only slight resistance from the nozzle when moving the paper. You repeat this step at four other points around the bed. It takes a bit of experience to dial in this process, but the Sidewinder X2 makes it easier and faster than most other manually leveled printers do. Printers with larger beds are always more difficult to level, since a larger area is more prone to warping or slight imperfections. Despite that, we found the Sidewinder X2 to be even across its entire bed surface.
We prepared models for the test prints in Cura, though a profile in the software for the Sidewinder X2 isn’t readily available. Instead, we used the included profile for the Sidewinder X1 and modified the build volume to match that of the X2. While Cura profiles and similar resources exist online for our other printer picks, the Sidewinder X2 generally has a smaller community of users, so it’s a bit tougher to find people with similar problems and solutions if something goes wrong.
The Sidewinder X2 produced excellent test prints and did especially well on the taller prints that were larger than anything possible from our other picks. For instance, we scaled the honeycomb vase test model up to 10.5 inches tall, and the resulting print had equally smooth surfaces from bottom to top. Longer prints, such as a 34-hour print we ran for a colleague’s cosplay outfit, ran without issue or incident and produced nearly perfect results. (The imperfections were due to user error when we set it to generate supports.)
However, this printer is best for people who know they want to print a lot of large objects. It’s physically very large and would commandeer the kind of desk found in a bedroom or a small office. The Prusa models are even easier to set up and maintain, have much better support communities, and are more repairable.
Care and maintenance
A 3D printer can be a finicky machine. Performing basic maintenance can go a long way toward preventing breakdowns and print flaws.
If your printer doesn’t automatically level its print bed, periodically check the print bed and adjust it if necessary. The Monoprice MP Cadet is self-leveling, while the Prusa Mini+ and MK3S+ have a calibration option (called the Wizard) in their menus. Most of the time, if your print isn’t sticking to the bed or is otherwise failing, it’s because the bed isn’t correctly leveled.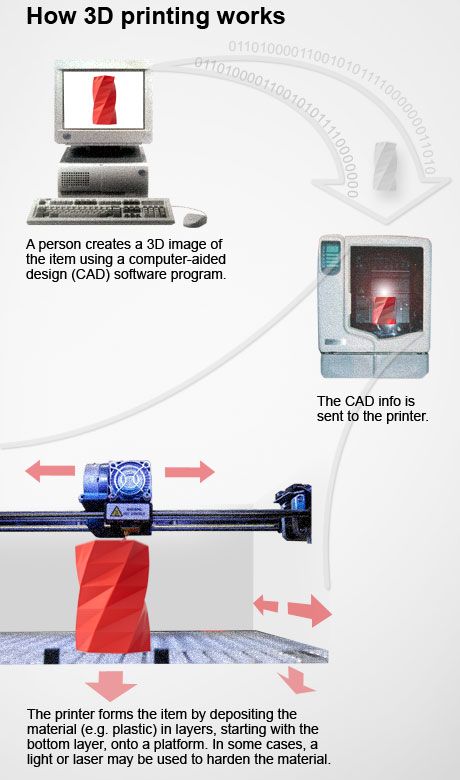
Some printers have print beds made of materials that prints adhere to extremely well—and judging from our experience, maybe a little too well. Adjusting print temperatures and a few other settings can help prevent sticking, but such tweaks aren’t always enough. Many printers now come with removable, flexible print beds; if your printer has one, remove the bed and carefully bend it to release your model. Don’t force it, or you’ll risk damaging the bed’s finish. If the print is still stuck, heat the bed back up to its printing temperature and see if the model pops off easier. Next, use a scraper to carefully unstick the edges of the print and then move in a sawing motion toward the center. If you’re still stumped, one final trick is to remove the print bed and stick it in the freezer for an hour. This should shrink the print a little and make it easier to remove.
Plastic remnants can build up over time on the print bed. A cloth and warm water are usually enough to remove them; more-stubborn grime should come away with a bit of rubbing alcohol that’s at least 90% isopropyl alcohol.
If you’re having trouble with uneven layer lines on the sides of your print, this is often caused by loose axis belts, or a lack of lubrication on the screw that raises and lowers the z-axis. Many printers allow you to tune the tension of the printer’s belts, and you can clean the z-axis screw with 90% isopropyl alcohol and lubricate it with a dry-film PTFE lubricant.
Finally, be sure to follow each printer maker’s rules for heating up and cooling down the printer, which will help to prevent clogs.
What about the Ender-3 and other Creality printers?
If you read 3D-printing forums and subreddits, you’ll see many experienced 3D-printing enthusiasts recommending the Creality Ender-3, Ender-3 V2, or Ender-3 Pro as a first printer. The Ender-3 Pro can be often found on sale at Microcenter for just $100, and it’s a better printer than our budget pick, the Monoprice MP Cadet, on nearly every metric. There’s also an avid community of Ender-3 owners who post DIY upgrades and guides on how to use the machine, a crucial aspect of learning to operate the printer and troubleshooting when things go wrong.
So why don’t we recommend it as a top pick or even a budget pick? In our experience, we’ve found that the Ender-3 line requires more setup and more maintenance, and in comparison with our picks it poses a much more difficult learning curve for those who are just getting into 3D printing. As an example, crucial tasks like leveling the print bed on the Ender-3 require using separate calibration files that might have to be run multiple times or manually moving the print head across the bed, in contrast to Prusa’s and Monoprice’s easier, more automatic workflows. This manual work adds many minutes of pre-print setup for a 3D-printing newcomer versus seconds for our top picks, and in turn it leads to a higher chance of the machine sitting in the corner gathering dust. These processes become rote after time and are made easier by optional upgrades, but initially they require some dedication to learn.
Prusa models also earned the top-pick and upgrade-pick spots due to the company’s excellent support and fantastic forum filled with helpful printer owners. Ender-3 owners are more likely to find someone with the same problem, but owners of Prusa models are more likely to find a solution.
That doesn’t mean we don’t like the Ender-3 line. They’re actually great machines for those who are already mechanically adept or who don’t get easily frustrated learning a new, complex hobby. However, they’re not the best 3D printers for most people.
What to look forward to
We’re testing the Anycubic Kobra Max against the Sidewinder X2 as a printer that’s also great for its large bed size. Shipping delays prevented us from including the Kobra Max in this version of the guide, but we’ll include its test results and any potential changes to our recommendations in the next update.
The competition
The Creality Ender-3 S1 Plus is an addition to the Ender-3 line with a high-resolution display and a larger print volume. We found it to be louder, more complicated to set up, and more difficult to level in comparison with the Artillery Sidewinder X2.
The Creality Ender-2 Pro, a $170 competitor to the Prusa Mini+, seems built to look nearly identical to that model. However, in our tests its menus were confusing and made the printer more difficult to operate than any of our picks. Its fans were also drastically louder than those of any other printer we tested.
In some ways, the Dremel DigiLab 3D40 impressed us: For about 50% more than you typically pay for the Prusa i3 MK3S+, you get an enclosed print area, a huge print bed (though not quite as large as that of the MK3S+), a touchscreen, and cloud-based printing. However, its prints in our tests didn’t look quite as nice as those of the MK3S+. We also found removing prints to be difficult, and we managed to ruin two flexible beds when the top layer ripped off during print removal. Finally, we dislike that the 3D40 prints only with proprietary spools of PLA—if you want to use other types of Dremel filament, you have to spend several hundred dollars more on the Dremel DigiLab 3D45.
The Tiertime Up Mini 2 was a top pick in a previous version of this guide because of its consistently nice-looking prints. However, when we tested the updated Up Mini 2 ES, software issues got in the way of producing a single print. We tried updating the printer and then “activating” it several times, including with the help of customer support and a press-relations representative. But we continued to get a pop-up telling us to activate our printer and alerting us that slicing had failed. Even if we had resolved the software issue, the difficulty it added to setup was enough to leave a permanently sour taste in our mouths.
The Monoprice MP Cadet narrowly beat out the Monoprice Maker Select v2, our former budget pick. Although the MP Cadet was much easier to set up and produced better-looking prints in our tests, we still think the Maker Select v2’s comparably huge print bed makes it a bargain if you can find it these days. If you don’t mind tinkering a bit to get the right settings, the Maker Select v2 could be a better option. However, setting up the Maker Select v2 took us 45 minutes, and it suffered from a clog after just a few prints.
Once our upgrade pick, the LulzBot Mini has been discontinued and replaced with the LulzBot Mini 2. The new machine addresses some of the qualms we had with the original Mini by adding an onboard controller and an even larger print volume. However, a North Dakota entrepreneur recently acquired its parent company, Aleph Objects, and moved operations to Fargo. We have not yet tested a Mini 2, and the company did not reply to our requests for information.
If you’re looking for a printer that can print in two colors, the FlashForge Creator Pro is one of the best-reviewed options. However, in our tests it printed only one great-looking model, along with six okay-looking models and one failure. We liked the printer’s streamlined software, which made it easy for us to select what parts of a model to make which color. You load models onto the printer with an SD card, so queuing up a few prints at a time is also easy, and it has a large, 8.9-by-5.8-by-5.9-inch print volume.
We decided to test the Monoprice MP Select Mini v2 based on feedback from our readers and positive reviews. It’s inexpensive, equipped with a color screen, and easy to set up. But we had problems with print quality, and the printer sometimes stopped altogether in the middle of a job.
The easy-to-use MakerBot Replicator Mini+ restored our trust in the brand after MakerBot hit a rough patch with reliability. However, the company discontinued the printer as it further narrowed its focus on education. The MakerBot Replicator+ combines the advanced features of the Mini+ with a more impressive build volume (11. 6 by 7.6 by 6.5 inches), which makes it an ideal choice on paper, but we decided against testing that printer due to its $2,000 price. Most hobbyists should start with a more affordable machine.
The Qidi Tech I is a near-exact copy of the FlashForge Creator Pro that cost a bit less at the time of our research. It offers a massive print bed, dual extruders, and a solid design. It also had hundreds of positive reviews on Amazon when we checked. However, we were unable to get this printer for testing.
This article was edited by Ben Keough and Erica Ogg.
Sources
Sean Charlesworth, Tested, phone interview, 2016
Justin Kelly, Proto House, phone interview, 2016
Dan Ackerman, The best 3D printer in 2020 for beginners and budget creators, CNET, February 28, 2020
Tony Hoffman, The Best 3D Printers for 2020, PCMag, February 7, 2020
Matthew Mensley, 2020 Best 3D Printers, All3DP, January 2, 2020
Anatol Locker, 3D Printing With Kids: What You Need To Know, All3DP, November 5, 2015
About your guides
Dave Gershgorn
Dave Gershgorn is a senior staff writer at Wirecutter. He’s been covering consumer and enterprise technology since 2015, and he just can’t stop buying computers. If this weren’t his job, it would likely be a problem.
Signe Brewster
Signe Brewster is an editor on Wirecutter's PC team. She also writes about virtual reality. She previously reported on emerging technology and science for publications like Wirecutter, MIT Technology Review, Wired, Science, and Symmetry Magazine. She spends her free time quilting and pursuing an MFA in creative writing.
Further reading
The Best Robotics Kits for Beginners
by Signe Brewster
Our favorite robotics kits have a few things in common: a satisfying building experience, easy-to-understand coding instructions, and a friendly face. They also won over our discerning kid critics.
The 27 Best Gifts for 3-Year-Olds
by Caitlin Giddings and Wirecutter Staff
Many of the best gifts for 3-year-olds encourage role-play and make-believe—or help teach cooperative play.
Learning Toys and STEM Toys We Love
by Courtney Schley
We spent more than 30 hours trying 35 recommendations from experts, educators, and parents to pick the best learning and STEM toys. Here's what we found.
Wirecutter is the product recommendation service from The New York Times. Our journalists combine independent research with (occasionally) over-the-top testing to save people time, energy and money when making buying decisions. Whether it's finding great products or discovering helpful advice, we'll help you get it right (the first time). Subscribe now for unlimited access.
- About Wirecutter
- Our team
- Staff demographics
- Jobs at Wirecutter
- Contact us
- How to pitch
- Deals
- Lists
- Blog
- Subscribe to our daily newsletter
Dismiss
How to 3d print another 3d printer
Already have a 3D printer? Want another one?!
Why is this needed?
Well, let's say you have your own large printer and you can print fairly large objects. Do you believe in the idea of the reprap movement, the printer should be able to reproduce itself!
Or you want to challenge yourself and finally understand how the 3D printer works.
Or your current 3D printer is just sitting around gathering dust in the corner of the room, because you have already printed everything that came to mind, and the most difficult task that worries all 3d printing professionals is how to clone existing equipment on itself.
Step 1: Preface
Let's be honest... the is not the ultra cheap printer. This is not Chery 3D printer for $60. This not is a way to save money or time. This is not first printer.
Now let's talk about what is .
B 3Dtje mini 3D printer is:
- Damn easy to print
- Printed parts from PLA
- Everything fits within 200x200 print volume
- Most parts can be printed in 100x100 print volume
- Most parts are printed without supports , only in some cases they may be needed to improve quality
- Very few few needed tools
- Unlike most crafts that require a laser cutter, CNC
- You can probably get away with a drill and a hacksaw to prepare 2 rods of the required size
- No source of MDF, or wood, or acrylic sheets or aluminum profiles, which can be expensive
- A Prusa i3 Clone
- This design is not new, nothing revolutionary, but it is reliable, prints well and works with any slicer
- Open source
- All model files can be downloaded free of charge
- You can download them and modify them as you like
- You can even sell them if you need to!
- Simple and interesting printing
- 19 models
- All parts are different and look very interesting together
- Easy to assemble
- All parts are connected with M3 screws and nuts.
- Cutting 2 to 4 metal rails
- Some 3d printed parts are assembled intuitively , you can even ignore photo
- All parts are connected with M3 screws and nuts.
- Really fucking cool!
- Small, portable, low moving parts! This printer can print fast! (when properly configured)
- This 3D printer you will DIY , completely!!
Let's get started!
Step 2: Prerequisites
You will need a 3D printer , well, or find someone with this device.
- Printable area must be at least 200x200mm XY and maybe 200mm Z if you want to print with refills
- PLA 1 kg, can be different, but this is the most convenient option
- I honestly don't know how much it will take. Likely 500g or so
- Tools
- Screwdrivers for screws
- Pliers, cleaning tools for printed objects (a clerical knife is enough)
- Metric drills for opening / cleaning the printed hole (you can also use a screwdriver)
- Knowledge on how to build a 3D printer from scratch
- These are not hard requirements, but knowing how to deal with common printer problems will reduce the amount of swearing when things aren't perfect the first time.
- If you understand firmware Marlin it would be very cool to talk about this, as there is a desire to improve some things.
- These are not hard requirements, but knowing how to deal with common printer problems will reduce the amount of swearing when things aren't perfect the first time.
Step 3: Parts
Right off the bat, I've made a list of exactly what you need and what you can buy to make the best possible quality. But it will be more expensive. Therefore, you choose which set to buy - in principle, they will not differ. In addition, you can order all this from China, it will be cheaper, but the wait will be longer. In any case, you need to look for all the components in English, so we take them from the table and, for example, insert in alliexexspress search .
The table is located at this link.
Step 4: Printing Parts
Now let's move on to the most interesting part, in my opinion - prototyping models. To be honest, I really like to print different things, you feel that you can handle any task when you have a 3d printer at hand. Okay, it's all lyrics.
Here is the project itself, where you can download 3d models for printer for free . Download and start preparing for printing.
The most important thing is to arrange the parts correctly on the table . The idea is to make the models have as few parts hanging in the air as possible. This will allow to drop support for . After all, they spoil the quality very much if you do slicing through Repetier Host with their auto-generation, and not draw them yourself.
You can watch a video showing the optimal arrangement of parts. Print settings I think you know how to do it, if not - there are articles about it with configuration files.
Step 5: Mounting
Let's assume that we have printed everything. Someone may have decided to use metal guides, buying them, for example, from IKEA, and cutting them into sections of the desired length. In any case, writing how to assemble this 3d printer does not make much sense, and it's too lazy, to be honest. In my opinion, there is nothing better than pictures!
Frame assembly
First, I'll lay out how our miracle should look like at the moment of medium readiness. Then we will see how the modules were assembled.
Assault Axis Y
This Axis drives The so -called bed . First we need to install the motor, put a pulley on it . Then we install a freely rotating pulley on the other side and measure 9 for them0003 belt .
And now we will install the bed itself, which will fasten the two ends of the belt to us. Just don't forget to tighten the pulleys and anything that isn't tight yet. The substrate will be massive and it will be inconvenient to crawl there already. The connection will require 200mm x 6mm bolts, so have them ready right away.
It should be noted that the belt must be very tight . This will greatly affect the print quality of . If you cannot do this at the time of assembly, you can use special tensioner . It's basically a simple spring. As for the axes, in this case they are printed, although this is far from mandatory, just the name of the project obliges))
X-axis assembly
Depending on your printer, you may need to make a hole with a 3mm drill in the belt tensioner. This hole should be quite free.
- Attach the motor to the end of the x axis with the connector down
- Attach 20T gear
- Insert 6mm rods 6mm x 180mm into the holes on the motor side. You need to cut these rods if you bought 200mm.
- Assemble the x-axis tensioner with either your own or printed tensioner bearing.
Make sure the m3 nut is in the tensioner before proceeding.
- Pass the belt from the left side (engine side), through the gearbox, through the idler bearing to the right side
- At this point, install belt tensioner to the right of the x-axis on the rods
- If you are happy with the length (make sure the x-axis of the tensioner is recessed quite a bit) you can cut the belt. Don't forget to leave extra belt length
- Attach LM6UU bearings in bottom bracket x
- All assembled, attach the straps to the carriage x
- Then it remains to adjust everything a little to make sure that nothing touches each other
Assembling the Z axis
Now we assemble the Z axis. If you have not installed the engines in the course of past work, it's time to do it. As you understand, they should stand on the left and on the right. We will install adapters for screw rods on them, where we will put them, holding them with a hexagon.
We stick the guides (parallel to the screw rods). We can say that we have finished assembling the case.
Step 6: Assembly of the electrical circuit.
How to lay the wiring is everyone's business. Here the options will be shown in the photo, but it's up to you to decide. The most important thing is to connect everything correctly. I'll also lay out the scheme, but it's better to see how this is done in ordinary 3d printers. For example, in order not to go far, you can go over the following articles directly on this site:
-
Exploring the features of a 3D printer
-
3D printer setup and calibration
-
Ramps 1.4 connection in 3d printer
It is not necessary to read everything - you can see the key places from the pictures and delve into their study.
The picture below shows the green power terminal. This is a very dangerous and unreliable thing that sometimes ignites - it is dangerous to leave a working 3d printer unattended at home. Therefore, in an article about Ramps, it is better to read how to be in this case.
Step 7: Firmware
Since you will (most likely) have an Arduino Mega as the brain of a 3d printer, uploading firmware to it will be quite simple. All you need is the Arduino IDE. The most standard firmware from Marlin. The main thing is to choose the correct configs for the board. I have not seen an article about the firmware on this resource, but it can be easily found on the Internet. Here are useful links:
- Firmware Marlin manual
- May be useful to someone info about reprap electronics, how is it functioning
Step 8: Testing
Finally time to print something! We note right away that the table must be covered with molar tape or Kapton, since we have it without heating. Otherwise there will be no adhesion. Also, before printing, be sure to correctly adjust the distance between the nozzle and the bed . How to do it correctly is discussed here. 3d printer calibration - our everything!!!
Since you were able to print parts for this printer, you can also slicing your own models for its small copy, assembled by yourself. Therefore, we will not talk about the slicer, just do not forget to reduce the print area!
And so that's what each of you can have at the end of this article!
3D printing technologies - FDM, FFF, SLA, DLP, PolyJet, CJP, SLS, SLM
FUSED DEPOSITION MODELING PRINT TECHNOLOGY – + FDM
One of the most popular, simple and cheap 3D printing technologies is Fused Depsition Modeling. The technology was invented more than 20 years ago and implemented by Stratasys, and still it remains the most popular. The principle of building a prototype using this method is simple and clear. The simulated 3D object in STL format is transferred to the 3D printer software. After placing the model in a virtual working chamber (automatically or manually), cutting the model into horizontal layers, the 3D printing process begins. The extruder print head melts the filament, laying down layer by layer according to the model data. If necessary, before starting printing, auxiliary structures (supports) are automatically or manually placed on a virtual 3D model, which, after printing, can be removed with a special solution or manually.
There are many types of equipment that print using this technology. They differ in terms of accuracy, the number of printheads, the size of the working platform, the presence or absence of a closed working chamber, consumable options, etc. There are models that support the ability to use different materials when printing. There are also industrial FDM 3D printers and personal ones.
The following materials can be used in FDM 3D printing:
- ABS
- PLA
- SBS plastic
- Nylon
- Polycarbonate
- HIPS support material
- PVA support material
- PETG plastic
- FLEX rubber-like plastic
- RUBBER plastic with rubber properties
The most popular materials are ABS and PLA. Products printed using FDM technology are characterized by elasticity, strength and stable physical characteristics, depending on the selected material. The construction accuracy varies from 0.027mm to 1mm. As a rule, the printed object has a layered (ribbed) surface, the severity of which depends on the thickness of one layer. This effect can be eliminated by post-processing with chemicals or grinding.
The advantages of FDM 3D printing technology include sufficient speed and ease of manufacture of products, safety, high accuracy, a wide choice of materials, as well as ease of use and maintenance of equipment. In addition, consumables for printing in this way are affordable. All this together makes this technology the most highly competitive and affordable in economic terms.
FDM 3D printing technology can be used for rapid prototyping and even small series production. Depending on the selected consumable material, this technology can be used to create parts of mechanisms, toys, interior items, jewelry, souvenirs and much more. The use of high-strength engineering thermoplastics makes it possible to apply this 3D printing method to products used in the aerospace industry.
Our company has several 3D printers working on this technology. You can order high-quality 3D printing using FDM technology from us with any of the available materials and in any available color option. We guarantee you the quality and efficiency of order execution of any degree of complexity.
To order 3D printing using FDM technology, you need to send us a file in STL format. Trust our professionalism and take advantage of the most affordable 3D printing.
STEREOLITHOGRAPHY PRINT TECHNOLOGY – + SLA
SLA 3D printing technology or laser stereolithography is based on the layer-by-layer curing of a liquid photopolymer under the action of a laser beam. The technology was invented in 1986 by Charles W. Hull, who founded 3D Systems, which manufactures 3D printers that print using this technique.
Photopolymer, which in this case acts as a consumable, is a resinous substance that changes its properties under the influence of ultraviolet radiation - it polymerizes and hardens. In this case, the wavelength and time of exposure to radiation will depend on the environmental conditions and the specific material.
The principle of building a model using laser stereolithography technology at the initial level is similar to any other - the modeled object in STL format is loaded into the 3D printer software, placed in a virtual working chamber and cut into layers. Photopolymer resin is poured into a special container. It contains a working platform on which the part will be built. Initially, the working platform is set so that it is covered with the thinnest layer of photopolymer (0.05-0.13 mm). This will be the size of the layer when printed. Then the laser is turned on, it irradiates the areas that will later become parts of the finished product. As a result of irradiation, the material hardens and the working platform sinks to the extent of the layer. The algorithm repeats again until all programmed layers are exhausted. Then the finished product is immersed in a special bath, into which a composition is poured to remove excess elements. And at the end, the product is again irradiated so that it gains maximum strength.
Stereolithography, like most other 3D printing technologies, requires supports. After printing is completed, they are removed manually.
The main advantages of stereolithography technology are the highest precision and the ability to create the smallest and thin-walled objects. The technique is distinguished by easy post-processing of products and their almost perfect surface. The disadvantage of this technology is the impossibility of using several materials at once. Color printing is also not possible. The properties of the model and its color will determine the initial characteristics of one photopolymer. In addition, the cost of such printing and equipment is not cheap.
Due to the fact that stereolithography allows you to get a model of almost any degree of complexity, the main scope of this 3D printing is research. And due to the highest accuracy and detail, this technique is used in medicine, in particular in dentistry. Also, printed models are in demand in art, jewelry, museum work and restoration. There are photopolymers that can be used to print molded models. The model printed on a 3D printer, in this case, is poured with molding sand and placed in an oven for annealing at a temperature of 1000 degrees. As a result, the polymer burns out without leaving a trace, and the resulting form can be used for pouring metal under vacuum. As the metal cools, the mold breaks and the metal part is removed.
In our company you can order 3D printing using SLA technology. We have in our arsenal professional 3D printers using this technology and a wide range of photopolymer resins with various characteristics for 3D printing. We guarantee you high quality and prompt execution of the order. To order 3D printing using the laser stereolithography method, you need to provide us with a file in STL format.
Get the most out of high-precision and highly detailed stereolithographic 3D printing.
DIGITAL LIGHT PROCESSING PRINT TECHNOLOGY – + DLP
DLP 3D printing is one of the most accurate and fastest 3D printing methods. It is based on the technology that Larry Hornbeck invented for multimedia projectors. The peculiarity lies in the use of a special mirror matrix. Each individual pixel of this matrix is a microscopic mirror.
DLP stands for Digital Light Processing, which means "Digital Light Processing". Thus, this technology is one of the varieties of photopolymer 3D printing and photopolymer resin is used as a consumable. This resin is irradiated with projected light from the LEDs and hardens. The technology is very similar to stereolithography. However, with SLA 3D printing, each layer is, as it were, loomed with laser beams. And in DLP technology, the layer is completely projected onto a photopolymer using the same matrix with micromirrors, that is, this method is more like stamping. Thus, while maintaining the highest accuracy of 3D printing, it was possible to significantly increase its speed. At the moment, the speed of DLP printing is several times higher than FDM, SLM and SLA printing. For this reason, the DLP 3D printing technique is one of the most promising.
The thickness of one layer when printing using DLP technology is 10-15 microns, which is basically similar to the indicators for SLA 3D printing technology. For comparison, the FDM method implies a minimum thickness of at least 50 microns.
Since DLP printers are the main competitors of SLA printing, their application is about the same. They can print products for dentistry, jewelry, complex designs and even souvenirs. The technology is also in demand in the research area.
Photopolymers used in 3D printing with this method are diverse, and you can choose a material with the desired characteristics. For example, there are materials that mimic the properties of ABS plastic, hard engineering plastics, and even rubber. However, it is important to know that in some cases, under the influence of light, photopolymer products can crack and become brittle. This technology implies the impossibility of using several materials at once. Color printing is also not possible. The properties of the model and its color will determine the initial characteristics of one photopolymer.
However, there is also a drawback to DLP technology - as in the case of SLA 3D printers, the cost of equipment is very high, as in principle the price of photopolymers. Not every, even a large company, can afford such a 3D printer.
But this does not mean at all that you will not be able to take advantage of the speed and advantages of DLP printing, because you have the opportunity to order 3D printing on such a 3D printer in our company. To do this, you just need to provide us with an STL file with the desired model. We guarantee you prompt execution of the order and high quality.
Enjoy high-quality, fast, high-precision DLP printing.
PRINT TECHNOLOGY LED DISPLAY – + LED
One of the varieties of DLP 3D printing technology is LED 3D printing. That is, this method is based on the same digital light processing (as Digital Light Processing stands for). However, in devices for LED 3D printing, instead of a mirror chipped matrix, there is an LED display that immediately highlights a whole layer on the material, like a kind of light stamp. Using an LED display allows you to increase the speed of 3D printing. So it takes about 10-15 minutes to 3D print 2.5 cm along the Z-axis, and it's really fast. Although the print speed in any case will directly depend on the thickness of one layer.
As a consumable material, a photopolymer resin is used, which polymerizes under the action of ultraviolet light, that is, it changes its qualities, passing from a semi-liquid state to a solid one. There are many options for photopolymers, among which there are materials that, after the polymerization process, imitate the characteristics of solid, including engineering plastics. There are also those that are very similar to classic rubber after hardening, that is, they have the same strength and elasticity indicators. You can also choose biocompatible photopolymers. When choosing a material for printing, you should be guided by the technical characteristics and scope of a particular photopolymer.
Like any other photopolymer 3D printing, LED technology is characterized by the highest precision and detail. The thickness of one layer is only 10-15 microns. With its help, you can print thin-walled products, objects with complex geometry. Photopolymers practically do not shrink and do not change their geometry after hardening, and this is also an advantage, especially when it is necessary to print anatomically accurate models. The DLP LED 3D printing technology itself, although it provides for a layer-by-layer method for creating a model, still does not differ in pronounced layering of the finished model. The surface is almost perfectly smooth, requiring no additional processing.
If complex objects are being printed, support must be used. They can be set in automatic or manual mode immediately before printing during the positioning of the model in the virtual working chamber. These supports are subsequently removed manually.
LED technology implies the impossibility of using several materials at once. Color 3D printing is also not possible. The properties of the finished prototype and its color will determine the initial characteristics of the photopolymer used.
The scope of LED 3D printing does not differ in principle from the scope of DLP printing, since this technology is, in fact, its improvement. The technology is in demand in the production of hearing aids and earmolds, in dentistry and orthodontics, as well as in jewelry. Due to the high accuracy and detail of 3D objects printed using this technology, products will also be in demand in the field of research and engineering activities.
LED 3D printer is very expensive. However, this does not mean that its benefits are not available to you. You can order 3D printing using LED technology in our company. We offer you a large selection of photopolymer resins for printing and guarantee the high quality of models, in full compliance with the provided STL-file, and the prompt execution of the order.
Take full advantage of LED technology with our help.
POLYJET PRINT TECHNOLOGY – + PJ
PolyJet is a revolutionary 3D printing technology that is a powerful tool for high performance additive manufacturing. The technique was invented and patented by Stratasys. The operation of a PolyJet 3D printer is very similar to a conventional, well-known inkjet printer, but printing is carried out not on paper and not with simple ink, but on a special substrate in the chamber, and an acrylic-based liquid photopolymer acts as a material. 9The 0416 PolyJet-enabled 3D printer is equipped with a special print head with nozzles. There can be several printheads, which allows you to print faster and even prototyping several objects at once. The printing process is carried out by dosed deposition of a photopolymer. One layer of 16 microns is sprayed at a time. Then this layer is exposed to an ultraviolet lamp and the photopolymer turns into a hard plastic. After that, the working platform with the substrate is lowered, and the algorithm is repeated again. When printing complex geometric shapes, a support material is used. For this technology, a special gel-like material has been created, which is easily removed with plain water or hands.
A key feature of PolyJet 3D printing technology is the ability to use multiple materials in one print run. At the same time, there are models of 3D printers that can mix photopolymers in various proportions, obtaining a variety of composite materials with certain characteristics. Also, this technology is characterized by the possibility of complex color reproduction. That is, it is possible to use color printing, the palette of which includes about 1000 colors and shades. In fact, it is the only additive manufacturing technology that supports these capabilities.
Other advantages of the method include: high printing speed, high accuracy and detail, perfect surface and generally excellent quality of printed objects. In addition, a wide range of materials allows you to create objects of almost any kind. More than 100 different photopolymer resins can be used as a base, mixing of which allows obtaining materials from transparent to completely opaque, from hard to elastic and rubbery. This is truly a new standard for realism in the most complex prints. PolyJet technology allows you to achieve perfect surface smoothness and imitate any even the most subtle texture. The camera of the PolyJet 3D printer is quite large, but if you need to print a large object, then it can be broken into parts, which are then simply glued together.
The only disadvantage of the technology is its high cost. The equipment is very expensive, and photopolymer resins are not cheap. But this does not mean that you cannot use this technology, because you have the opportunity to order 3D printing using PolyJet technology in our company. In a short time, we will implement your project on our own 3D printer. All you need is to provide us with the STL file.
PolyJet 3D printing technology is truly limitless.
COLOR JET PRINTING TECHNOLOGY – + CJP
Color inkjet 3D printing - CJP (ColorJet Printing) technology - a patented technique invented by 3D Systems. It consists in layer-by-layer gluing and coloring of the powder gypsum composite. 3D printing of this type is based on a technique called 3DP, which is its improvement.
3D printing by this method is based on the use of two materials: base and binder. To create the base layer, a consumable of the main type is used. It consists of gypsum mixed with a polymer. And the binder is used for gluing and staining the layers. The
ColorJet Printing 3D printer has two cameras. A gypsum composite is poured into one of them, and the second chamber is used to remove excess material. The model is "grown" in layers. A special roller distributes a thin layer of material on the working platform. The print head applies the adhesive and colors the main consumable particles. All this is carried out in accordance with the loaded mathematical 3D model. The working surface is lowered by the amount of the layer (0.1016 mm), and the roller again applies a layer of gypsum composite powder, and so on until the model is printed to the end.
ColorJet Printing technology has a relatively low cost of printed models. Its advantage is the absence of the need for supports, since the non-glued material will act as supporting structures. In addition, the material that was not used during printing can be reused. It turns out that this method of additive manufacturing is waste-free.
CJP technology is the only one that uses the CMYK printing color palette. This palette includes 390 thousand colors and shades. The material is dyed during the gluing of the layer, resulting in details with excellent color reproduction.
The accuracy of building a model by this method is very high, the minimum printed element has dimensions of 0.1-0.4 mm. The thickness of the walls of the prototype, which will not collapse under their own weight, is 0.102-0.089 mm.
Models printed using ColorJet Printing technology have a typical gypsum rough surface, characterized by a high degree of hygroscopicity. The strength of the models is average. However, finished models are easy to sand, paint and glue. To improve the characteristics of the model and protect them from moisture, you can cover the surface with varnishes, waxes, resins, as well as all kinds of fixatives.
The technology can be used for 3D printing of architectural models, product presentations, souvenirs, miniatures, etc. Despite the fact that the products are of low strength, they allow you to visually evaluate the prototypes.
CJP 3D printer has impressive dimensions and is quite expensive, despite the fact that the cost of printed prototypes is low, not everyone can afford such pleasure. In our company, you can order 3D printing using ColorJet Printing technology. We guarantee you prompt execution of the order and full compliance of the prototype with the modeled object. All you need is to provide us with an STL file with a 3D model.
Take advantage of CJP 3D printing technology with our help and appreciate all its advantages in practice.
SELECTIVE LASER SINTERING PRINT TECHNOLOGY – + SLS
Selective, that is, selective, laser sintering is a 3D printing technology that was created back in 1979. However, for a long time it was not available to the market until DTM was created in 1996. In 2001, 3D Systems bought this company, and in 2014 the patent expired, and now this technology is available to a wide range of consumers.
The SLS 3D printing technique consists in the fact that the material is heated by a laser beam until the particles are sintered, that is, not completely. As a result, the model turns out not to be solid, but as if “sintered” from individual tiny particles. If we consider the structure under magnification, then individual particles of the material will be visible, as if glued to each other.
The operation of a 3D printer that prints using SLS technology is as follows. Powder material is poured into the chamber. A 3D model in STL format is loaded into the software. The working platform is exposed and a thin layer of material (thickness about 120 microns) is applied to it, leveled with a roller. The laser sinters the powder particles according to the loaded model. After the layer is completed, the platform is lowered and a new layer of material is applied. The procedure will be repeated until the very last layer is completed.
Since there is unused material in the working chamber, the need for supports simply disappears, because complex and overhanging parts will be supported by unused material. This allows you to get models of any, even very complex geometry.
Powder polymers, metals and their alloys, ceramics, glass, composite materials can be used as consumables. But in any case, the material must be in powder form. Due to the fact that the power of laser radiation can be adjusted, the degree of melting of the material can change, and, accordingly, the strength and uniformity of the structure of the resulting model. Currently, the most popular material for 3D printing using SLS technology is polyamide. This is a versatile powder material that can be used in almost any field. If powdered metal is used for printing, it is preheated to make printing faster and easier.
As a result of 3D printing, models are obtained with a surface that requires processing, in particular grinding. Models made of polyamide are sensitive to moisture, so they must be coated with a protective compound, such as moisture-resistant paint, if outdoor use is planned.
Selective laser sintering shows excellent results in small batch production as well as for making master models. This 3D printing technology is in demand in the aerospace industry, in manufacturing, etc.
The disadvantages of SLS 3D printing technology are the high cost of equipment. In addition, the powder material is potentially harmful to the human body, so a separate room with air conditioning and an air filter is equipped for such 3D printers. All this imposes difficulties for additive manufacturing using this technique. But this does not mean that you cannot take advantage of the possibilities of selective laser sintering technology, because our company provides professional 3D printing services on such equipment. You can order 3D printing using SLS technology from us. All you need is to provide us with a file with a 3D model in STL format. We guarantee you high quality printing in full accordance with the provided 3D model.
SELECTIVE LASER MELTING PRINT TECHNOLOGY – + SLM
Selective (selective) laser melting - SLM is a 3D printing method from a mathematical CAD model, which is used to create 3D objects by melting metal powders. For this, high-power lasers are used.
Using this technology, it is possible to create precise metal parts that will later be used in various units and assemblies, including non-separable structures that change their geometry during use. This type of printing is becoming more and more widespread, because the parts created by this method are in many ways superior in their mechanical and physical characteristics to products produced by traditional methods.
The advantages of 3D printing using SLM technology are: the ability to solve the most complex production problems, including in the aerospace industry, where parts and assemblies have a hard load and serious requirements are imposed. Also, SLM printing is used in experimental and scientific and technical activities, where it is possible to significantly reduce the R&D cycle, because the most complex mechanisms and products can be created without serious equipment.
The technology also allows you to print objects with internal cavities, which can significantly reduce the weight of products.
The essence of the method lies in the layer-by-layer application of metal powder on a special heated platform and its subsequent processing with a high-power laser, in accordance with the CAD model. The working chamber of the 3D printer, where the melting process itself takes place, is filled with argon or nitrogen. The choice of gas will depend on which consumable is selected for printing. Inert gas will be mainly consumed in preparation for printing, when the chamber is purged, because it is necessary to achieve conditions so that the percentage of oxygen in the chamber is no more than 0.15%. This is a necessary condition in order to avoid the oxidation of metals. Consumables can be: powdered metals and alloys. It can be tool or stainless steel, titanium and its alloys, aluminum, platinum, gold, as well as cobalt-chromium alloys.
The model is fused layer by layer. After the printing of the prototype is completed, it is removed from the chamber with the working platform and separated from it mechanically. In the future, it may require processing, because the surface of the product may not be ideal. However, the product will be very strong and uniform in structure, similar to cast.
One of the advantages of the technology is its economy and non-waste. After all, unsintered material can be reused. The thickness of one layer is 20-100 microns. Thus, SLM 3D printing is a very precise and highly detailed additive manufacturing technique.
The cost of 3D printers using this method is very high. And in general, their operation is by no means a simple matter, requiring special conditions. But you have a great opportunity to use 3D printing using selective laser fusion technology with the help of our company. All you need is just to order 3D printing using this technique in our company. To do this, you need to provide us with an STL file with a CAD model for printing.
Take advantage of the innovative method of creating high-precision metal products - SLM printing.
ELECTRON BEAM MELTING PRINT TECHNOLOGY – + EBM
One of the most reliable metal 3D printing methods is EBM printing or electron beam melting. This is an additive manufacturing technology that is used to create high-strength, comparable to cast, metal products. Pure (without impurities) metal powder acts as a consumable. Printing is carried out in a vacuum chamber, which minimizes the oxidation of the material, such as pure titanium.
Electron beam melting is very similar to SLS 3D printing technology, i.e. selective laser melting. However, it does not use powerful lasers, but electron emitters, which serve as sources of powerful energy used to melt metal. So-called electron guns fire high power electron beams that fuse metal powder. The method is similar to other 3D printing methods - the layering of consumables. A layer of metal powder is applied, and electron beams, following the contour of the model, fuse the material. Then the algorithm is repeated again until all layers are created and a finished three-dimensional object is obtained in accordance with the mathematical 3D model.
As a result of such 3D printing, a high-density metal model is obtained, and the porosity of the structure is absent. This means that additional processing by the method of firing for a strong fusion of the material in the model is not required. And the model itself will have high strength characteristics initially, that is, it will not differ in any way from cast products.
Electron beam melting is printed at high background temperatures of 700-1000 degrees Celsius. This avoids a strong temperature difference between the already cooled printed layer and the fresh hot layer.