Comparison of 3d printing materials
Ultimate Materials Guide - Tips for 3D Printing with PETG
Overview
PETG is a Glycol Modified version of Polyethylene Terephthalate (PET), which is commonly used to manufacture water bottles. It is a semi-rigid material with good impact resistance, but it has a slightly softer surface which makes it prone to wear. The material also benefits from great thermal characteristics, allowing the plastic to cool efficiently with almost negligible warpage. There are several variations of this material in the market including PETG, PETE, and PETT. The tips in this article will apply to all of these PET-based filaments.
- Glossy and smooth surface finish
- Adheres well to the bed with negligible warping
- Mostly odorless while printing
- Poor bridging characteristics
- Can produce thin hairs on the surface from stringing
Hardware Requirements
Before 3D printing with PET / PETG make sure your 3D printer meets the hardware requirements listed below to ensure the best print quality.
Bed
Temperature: 75-90 °C
Heated Bed Recommended
Enclosure Not Required
Build Surface
Glue Stick
Painter’s tape
Extruder
Temperature: 230-250 °C
No special hot-end required
Cooling
Part Cooling Fan Required
Best Practices
These tips will help you reduce the chances of common 3D printing issues associated with PET / PETG such as stringing, oozing, and poor bed adhesion.
Invest In a Good Build Surface
Some 3D printers come with a glass bed or blue painter’s tape installed on the bed. Although these surfaces might work fine for PETG, we recommend using a heated build platform for best results. The heated bed can significantly improve the first layer adhesion, making things much easier for future prints. Many of these heated beds come with a glass surface, allowing you to print directly on the bed without needing to apply any additional layers of tape or glue.
Calibrate Retraction Settings to Reduce Stringing
One of the few common issues that we see with PETG is stringing.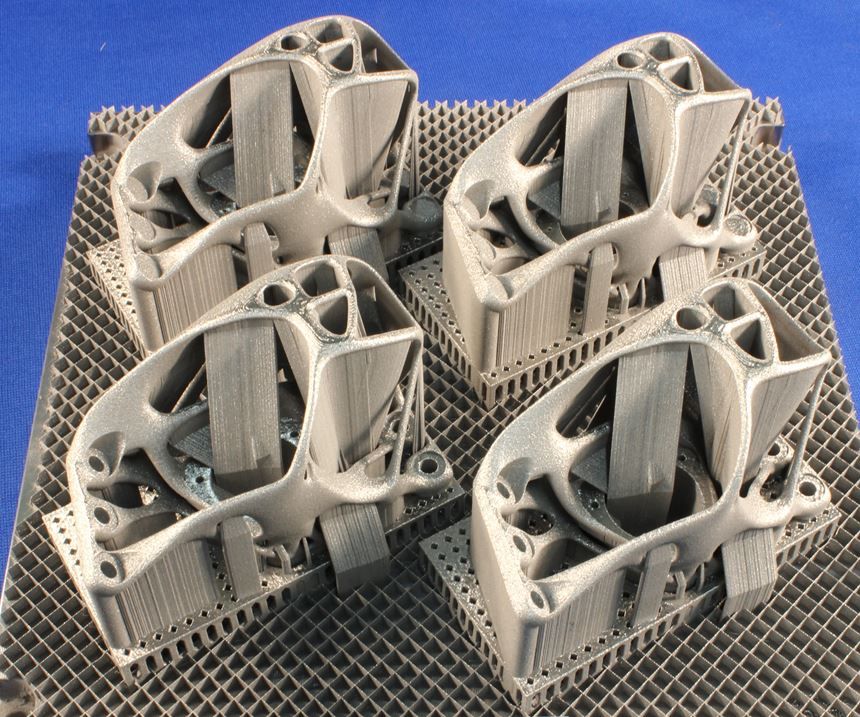 These strings are thin hairs, similar to a spider web, that run between the different surface of your 3D print. Preventing these strings requires precisely calibrated retraction settings, so make sure to adjust your retraction distance and speed for the best results. Simplify3D also includes several useful features that can further reduce stringing. The first is called Coasting, which works by reducing the pressure in the nozzle right before the end of a segment. This way, when moving to the next segment, there is less pressure in the nozzle, so you are less likely to see stringing and oozing during that move. Another great option can be found on the Advanced tab of your Simplify3D process settings. By enabling the “avoid crossing outline for travel movements” option, the software will automatically adjust the travel movements of your print to stay on top of the interior of your model as much as possible. This means that the strings stay inside of your part where no one can see them, instead of being on the outside of your model.
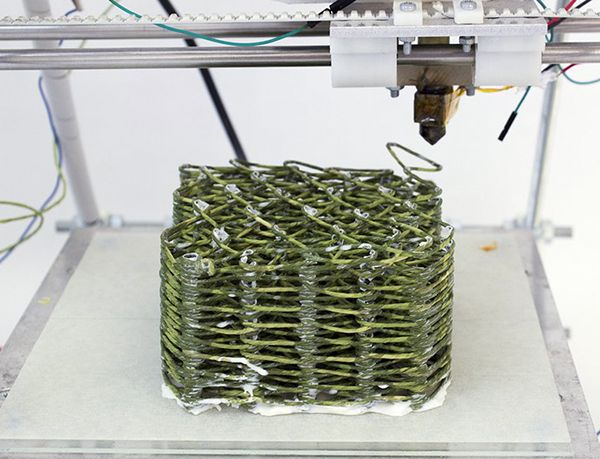 If you are looking for more tips to reduce stringing, we have an entire section dedicated to this issue on our Print Quality Guide: How to Reduce Stringing and Oozing.
Optimize Extruder Settings to Prevent Blobs and Zits
When 3D printing at higher temperatures associated with PETG, you may notice small blobs or zits on the surface of your model. These print defects typically occur at the beginning or end of each segment, where the extruder has to suddenly start or stop extruding plastic. There are several ways to eliminate these print defects such as enabling “Extra Restart Distance” or “Coasting” options located in the Extruder tab. Simplify3D also includes an option to perform a dynamic retraction, where the filament is retracted while the extruder is still moving. This completely eliminates blobs that are typically formed from a stationary retraction. To learn more about these features and other tips for reducing blobs on the surface of your print, please refer to our Print Quality Guide.
Pro-Tips
- The glossy surface of PETG is especially useful when using rafts. The part separates easily from the raft and maintains a clean surface finish.
- Try disabling your part cooling fan for the first few layers of the print to prevent warping. This trick especially works well for larger prints.
Get Started with PET / PETG
Now that you are ready to start printing with PET / PETG, here are a few ideas to help you get started – from common applications to popular filament brands.
Common Applications
- Water proof applications
- Snap fit components
- Planter Pot
Sample Projects
- Self-watering Planter
- Water Bottle
- Snap Fit Parts
Popular Brands
- ColorFabb PETG
- eSun PETG
- E3D Spoolworks Edge
- Hatchbox PETG
- HobbyKing PETG
Ultimate Materials Guide - 3D Printing Flexible Filament
Overview
Flexible filaments are made of Thermoplastic Elastomers (TPE) which are a blend of hard plastic and rubber. As the name suggests, this material is elastic in nature allowing the plastic to be stretched and flexed easily. There are several types of TPE, with Thermoplastic polyurethane (TPU) being the most commonly used among 3D printing filaments. In many cases, these terms are used interchangeably, along with popular brand names such as Ninjaflex. The degree of elasticity in the plastic depends on the type of TPE and the chemical formulation used by the manufacturer. For example, some filaments can be partially flexible like a car tire but others can be elastic and fully flexible like a rubber band. This guide will cover tips to help you with both of these variations of flexible filaments.
- Flexible and soft
- Excellent vibration dampening
- Long shelf life
- Good impact resistance
- Difficult to print
- Poor bridging characteristics
- Possibility of blobs and stringing
- May not work well on Bowden extruders
Hardware Requirements
Before 3D printing with flexible filaments, make sure your 3D printer meets the hardware requirements listed below to ensure the best print quality.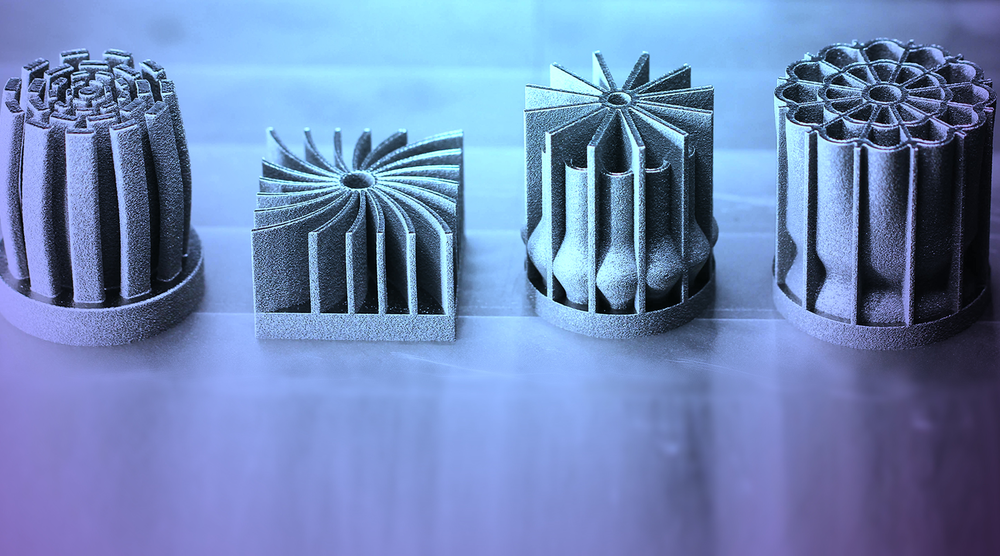
Bed
Temperature: 45-60 °C
Heated Bed Optional
Enclosure Not Required
Build Surface
PEI
Painter’s Tape
Extruder
Temperature: 225-245 °C
Direct Drive Extruder Recommended
Cooling
Part Cooling Fan Required
Best Practices
Flexible filaments come with many unique challenges that you want to be aware of. These tips will help you reduce the chances of common 3D printing issues such as clogging, kinking, and stringing.
Use Direct Drive Extruders
While some partially flexible filaments work fine with Bowden Extruders, most fully flexible filaments require a Direct Drive extruder for best results. The distance between the drive gear and the melt zone of the hot-end needs to be as short as possible to efficiently feed the filament into the nozzle. Additionally, the pathway through which the filament travels into the melt zone should have tight tolerances to prevent the filament from kinking or coiling inside.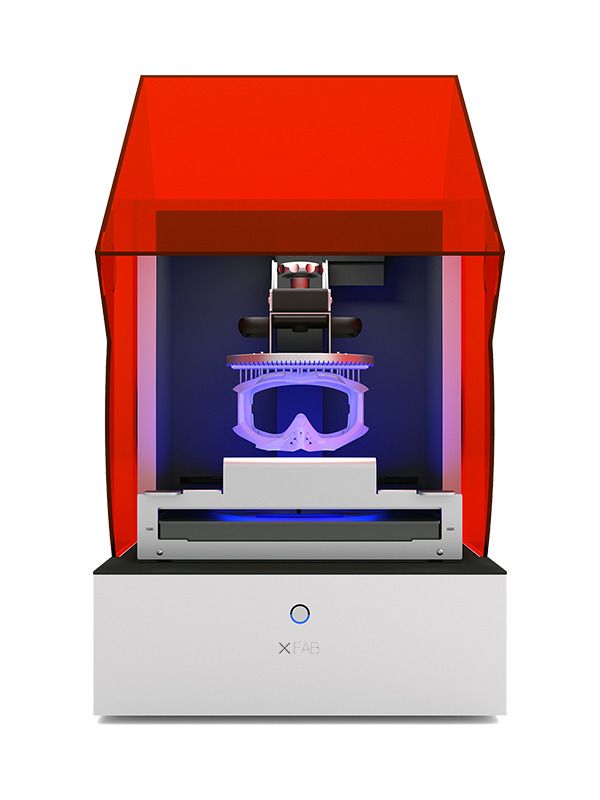 For these reasons, it is typically much easier to print flexible filaments with a Direct Drive extruder versus a Bowden extruder. If you are unsure about your 3D printer’s capabilities, you may want to check with the manufacturer to see if the extruder has been approved for use with flexible filaments.
Use Slow and Consistent Feed Rates
Flexible filaments typically print best using a slow and consistent feed rate. Because the material is elastic, it can be very difficult to control sudden changes in the print speed. Higher print speeds can cause the filament to compress and will most likely result in a jam. Slow and steady is the best approach. Simplify3D provides all of your feed rate settings on the Speeds tab of your process settings so that you can easily configure these values. Finding the optimal print speed for your material can take several attempts based on trial and error. We have seen that speeds of 1200 mm/min (20 mm/s) can be a good starting point for most materials.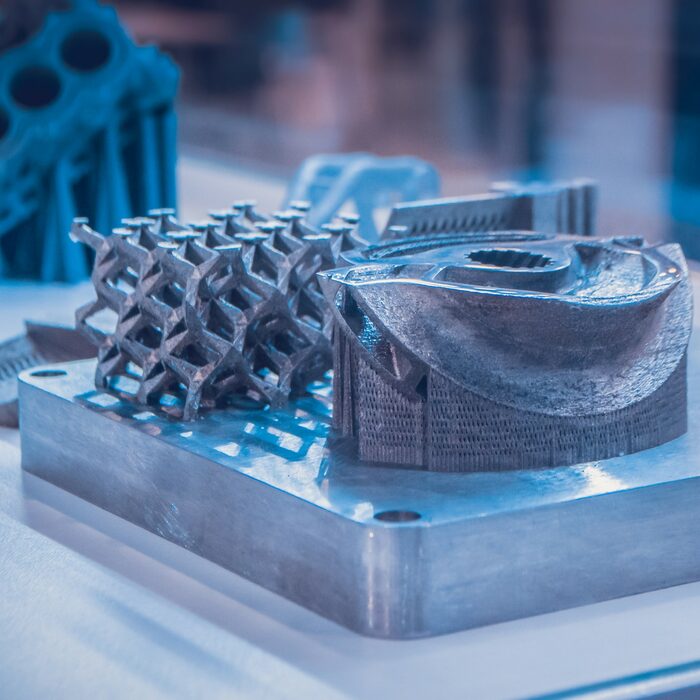
Reduce Resistance from the Filament Spool
A few tweaks to your material spool can also make a big difference with flexible materials. Typically, your extruder will pull the filament into the nozzle, forcing the filament spool mounted on your printer to unwind a bit of plastic in the process. However, because flexible materials are elastic, this will stretch the filament out as it is being pulled in and can actually result in under-extrusion. Try mounting the spool above your printer so that the filament unwinds in a downward direction which can reduce the resistance. It can also be incredibly helpful to mount the spool’s hub on a bearing to allow the spool to spin as freely as possible.
Tune Your Retraction Settings
The elastic nature of flexible filament makes it sensitive to quick movements such as retractions. In order to successfully print the filament, you will need to optimize your retraction settings to reduce these movements. While you are first starting with this material, we would recommend disabling retraction completely. You can make this change in Simplify3D on the Extruders tab of your process settings. With retraction disabled, you can focus on finding the perfect speed and extrusion rates that allow you to reliably print your models. After you are more confident in these settings, you may wish to add a very small amount of retraction with a slower retraction speed to help with any potential oozing from the hot-end. Simplify3D also includes a unique option called Coasting, which will automatically help lower the pressure in the nozzle when you approach the end of a segment, which can significantly reduce blobs and stringing with these materials. If you want more information about other options that can help reduce hairs and stringing on your prints, we have an entire section on our Print Quality Guide dedicated to that issue: How to Reduce Stringing and Oozing.
Optimize Your Travel Movements
Retractions can be particularly troublesome for flexible materials, so it is typically best to minimize the number of retractions required for your print. Simplify3D has a great feature that was built specifically for this situation. Instead of moving in a straight line from point A to B, the software will actually choose a completely new path when moving between these points, with the goal of staying within the interior of your object so that there won’t be any oozing or stringing. With this unique feature enabled, you can greatly reduce the amount of retractions required for your print and significantly improve your print quality. To use this feature, click on the Advanced tab of your process settings, and enable the “Avoid crossing outline for travel movement” option.
Pro-Tips
- Optimize the feed rate by printing at lower layer heights in the 0.1mm – 0.2mm range. The lower layer height requires less plastic, so it allows your extruder to use a lower feed-rate, relieving the burden on the filament.
- Try to avoid using rafts with flexible materials, as the base layers of the raft have higher extrusion rates which may create issues.

- If you are designing a flexible part that needs to fit on top of another object, try using a negative tolerance between the parts so that the flexible part will need to stretch to fit over the other object snugly.
Get Started with Flexible Filaments
Now that you’re ready to start printing with flexible materials, we have a few tips to help you get started. View some typical applications below, try out a few of our sample projects, or choose a popular filament brand to purchase for your next project.
Common Applications
- Vibration dampening
- Grip Sleeves
- Phone cases
Sample Projects
- RC Car Tire
- Phone case
- Bike Handle
Popular Brands
- NinjaTek Ninjaflex, Armadillo, Cheetah
- Polymaker PolyFlex
- eSun TPE
- Sainsmart Flexible TPU
3D printing material comparison
3D printing material comparison
3dunitprint2022-02-07T14:43:04+03:00
3dunitprint Knowledge base 0 comments
ABS - PLASTIC
Acrylonitrile butadiene styrene (ABS) is one of the most popular plastics. It is an easily accessible, durable and lightweight material. ABS plastic comes in a wide range of colors. Its strength and ease of processing have led it to become the most popular of the engineering polymers.
Manufacturing techniques: FDM
- Rugged
- Flexible
- Easy to process
- Resistant to everyday chemicals
- Temperature resistant
- High print shrinkage
- "Plastic" smell when printed
- Not suitable for food contact
Strength
90%
Cost
20%
Moisture resistance
70%
Ultraviolet resistance
40%
Chemical resistance
9000 varieties of sugar cane and tapioca), which makes it biodegradable. This is a simple material for 3D printing, when heated, it releases a pleasant sweet aroma. For this reason, many people prefer its ABS.Manufacturing techniques: FDM
- Eco-friendly, biodegradable
- Food contact
- Hard, durable
- Low shrinkage
- High surface quality
- Low softening point 50°C
- Narrow temperature range (-20 to +40°C)
- Short-lived
- Fragile
Strength
75%
Cost
20%
Moisture resistance
20%
Ultraviolet 6,000,0007,000,0006 9000 (polyethylene terephthalate glycol) is a modified Polyethylene terephthalate (PET), most of the people on the planet know this plastic as a water bottle material. This material is the second alternative to ABS, it does not emit caustic fumes when melted, while remaining strong and flexible.
Manufacturing techniques: FDM
- Odorless printing
- UV resistance
- Wide operating temperature range.
- Good slip and impact resistance
- Non-toxic, can be printed on products intended for contact with food.
- Strength and softening point lower than ABS.
- High printing temperature quickly destroys the PTFE insert in the hot end
- Scratches more than ABS.
- Absorbs moisture from the air
Strength
90%
Cost
30%
Moisture resistance
75%
Ultraviolet 60% 9000% 9000% 9000% 9000 9000 9000 9000% 9000,000 9000 9000 9000 9000 9000 9000 9000 9000 PolyCarbonate (PC) - PLAC 9000 Polycarb (polycarbonate) is a high strength material designed for harsh environments and engineering applications. It has extremely high thermal deflection and impact resistance. Polycarbonate also has a high glass transition temperature of -150° Celsius. This means that it will maintain its structural integrity up to this temperature, parts made with this material show significantly improved mechanical strength compared to ABS and PLA.
Manufacturing techniques: FDM
- Impact resistance
- High temperature resistance
- Naturally transparent
- Flexibility
- Durability
- Tendency to warp
- Very high print temperature required
- High tendency to shrink during printing
- Absorbs moisture from the air, which can cause print defects
Strength
%
Cost
45%
Moisture resistance
55%
Ultraviolet 9000% 9000% 9000% 9000% 9000 9000 is a dissolvable support material commonly used with ABS. When used as a support material, it can be dissolved in d-Limonene leaving the print free of any defects caused by the removal of supports. HIPS has many of the same printing properties as ABS, making it a logical partner for dual extrusion. This material is more stable and slightly lighter than ABS, making it an excellent choice for parts that wear quickly or are used to print lighter products.
Manufacturing techniques: FDM
- Low cost
- Impact resistant
- Waterproof
- Lightweight
- Soluble with d-limonene
- Heated deck required
- Closed chamber recommended
- High Print Temperature
- Ventilation required
Strength
80%
Cost
10%
Moisture resistance
80%
Ultraviolet 6,0006
70%
Chemical resistance
9000% %Flexible - plastic
flexible (flexible threads) are elaborated from thermopias (TPE), which are a mixture of hard plastic and rubber. This material is elastic in nature, which allows it to stretch and flex easily. There are several types of TPE, with thermoplastic polyurethane (TPU) being the most commonly used among 3D printing filaments. The degree of elasticity of the plastic depends on the type of TPE and the chemical composition used by the manufacturer. For example, some threads may be partially flexible, like a car tire, while others may be elastic and fully flexible, like a rubber band.
Manufacturing techniques: FDM
- Flexible and soft
- Excellent vibration damping
- Long shelf life
- Impact properties
- Hard to print
- Difficulty in removing supports
- Not suitable for all 3D printers
Strength
80%
Cost
60%
Moisture resistance
80%
Dustyness to ultraviolet
70%
Chemical resistance
70%
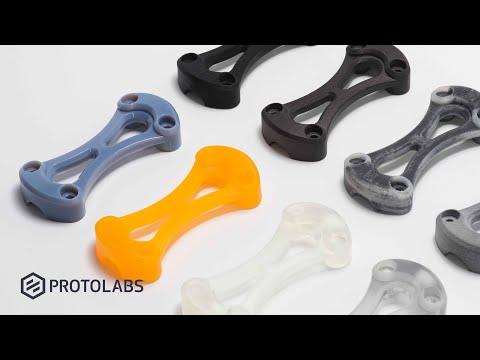
% Photopolymers are liquid resins, they usually consist of epoxy resin or a combination of acrylic and metakril monomers . When exposed to UV radiation, these monomers quickly form molecular bonds with each other and turn into a solid polymer. The main modern technologies where photopolymers are used are SLA/DLP and PolyJet. Resin 3D printing is also an additive process, just like FDM printing. This means that the process is based on a layer-by-layer building process, where one layer forms molecular bonds with the next layer. This process is repeated until the entire model is recreated.
Manufacturing techniques: SLA/DLP , Polyjet
- High detail
- Smooth surface
- Faster printing process
- Finished product uniform in all axes
- High material cost
- More labor intensive removal of supports
- More limited choice of materials
Strength
80%
Cost
75%
Moisture resistance
80%
Dustyness to ultraviolet 9000,000% 9000% 9000% 9000 9000 is one of the most popular 3D printing materials used by professional 3D printing companies. Polyamide is the reference material in the technology of SLS-laser sintering of plastic powder. This technology is used for rapid prototyping and rapid production. With this technology it is possible to create complex three-dimensional objects that can be used as prototypes or as functional parts.
Given its flexibility and strength, nylon is an indispensable material for a wide range of applications from engineering to art. Nylon (polyamide) parts have a rough surface that can be polished to a smooth finish. Nylon is stronger than all other types of plastics, making it an ideal material for 3D printing products that require good tensile strength and mechanical strength.
Manufacturing techniques: SLS
- High detail
- High strength
- Finished part flat surface
- Supports not required
- Fast printing process
- High material cost
- Rough surface (can be removed with post-processing)
- Limited materials
- Available in one color (white)
Strength
90%
Cost
90%
Moisture resistance
65%
Ultraviolet resistance
9000% 9000 nickel, titanium) are metals that are ground to particles and are pre-base materials for most 3D printing processes that produce metal parts. The characteristics of the metal powder and the type of 3D printing process determine the properties of the final product. The characteristics of the powder depend on the method of its preparation, which can lead to different particle morphology and purity. There is a wide range of powder materials that can be used in 3D printing, depending on the desired properties of the final product and the printing method used. Some of the common metal powders include nickel, steel, cobalt and titanium alloys. Metal printing is suitable for creating low-cost prototypes, functional models such as engines, in the automotive and aerospace industries. This, in turn, allows engineers to make components thinner, leading to more fuel-efficient aircraft, for example.
 Manufacturing techniques: SLM
- Minimum number of supports
- Wide choice of materials
- High detail
- Finished products strong and light
- High cost of materials
- Special storage conditions for powders
- Long print time
- Mandatory post-processing
- High power consumption
strength
100%
Cost
100%
Moisture resistance
100%
Dustyness to ultraviolet
9000 9000 9000Author
3dunitprint
comparison of PLA, ABS, PET/PETG, HIPS, PP, ASA, nGen, PC-ABS, Flex, nylon and composites - qbed
| What material should I choose for my printout and what should I pay attention to when printing? |
|---|
3D printing spools
There are several types of plastics on the market for FDM printing, each of which has its own advantages and disadvantages, is used to print certain models and requires different printer settings before printing. This article will focus on the key and most popular consumables for desktop FDM printing.
Article content:
PLA
About
Where is PLA used?
Prusa printer settings for PLA printing
ABS
About
material Where is ABS used?
Prusa Printer Settings for ABS Printing
PET/PETG
Material Information
Where is PET/PETG Used?
Prusa printer settings for PET/PETG printing
HIPS
About
material Where is HIPS used?
Prusa printer settings for printing from HIPS
PP
About
Where is PP used?
Prusa printer settings for printing from PP
ASA
About
material Where is ASA used?
Prusa printer settings for printing from ASA
nGen
About
Where is nGen used?
Prusa printer settings for printing from nGen
PC-ABS
About the material
Where is PC-ABS used?
Prusa printer settings for printing from PC-ABS
Flex
About material
Where is Flex used?
Prusa printer settings for printing from Flex
Nylon
About the material
Where is nylon used?
Prusa Nylon Printer Settings
Composites
About Composites
Where are Composites Used?
Prusa printer settings for composite printing
PLA
About the material
PLA (polylactic acid, or polylactide) is the most widely used filament. Its main advantages are ease of use, strength, biodegradability and versatility (the plastic's low thermal expansion allows large models to be printed with little to no deformation, and its low melting point of about 175°C allows small objects to be printed). Like ABS plastic, which will be discussed below, PLA can be repeatedly melted and crystallized without pronounced deterioration in material properties.
The downside of PLA is its brittleness — PLA printouts are easy to break. And the low melting point of this material means low temperature resistance - PLA printouts are not recommended for exposure to temperatures above 60°C. In combination with 's biodegradability of and 's modest UV resistance of , polylactide's low melting point hinders the use and storage of PLA prints outdoors and in direct sunlight.
Also, post-processing PLA is quite tricky : you need chemicals like chloroform or hot benzene to dissolve this plastic.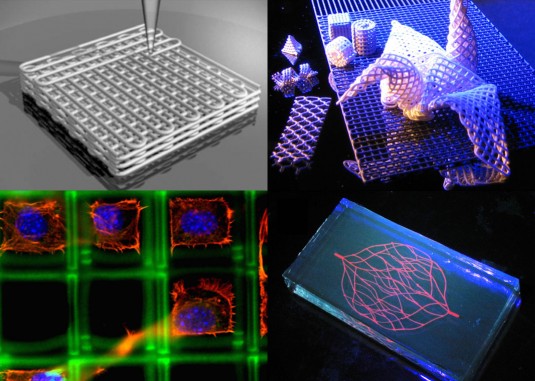 If when printing ABS to connect several parts, you can process the desired areas with acetone, then with PLA you will have to use glue for this purpose. To post-process the surface of the PLA print and make it smooth, you will have to resort to wet grinding: water will prevent the material from heating up from friction and, as a result, its melting.
The minimum layer height of recommended when printing PLA is 50 microns .
Where is PLA used?
PLA is most commonly used for printing concept models, prototypes, low wear toys, etc. Although PLA is biodegradable, it is safe to store food and drink in it, eating and drinking from PLA items however, it is not recommended, as bacteria can accumulate in the recesses on the surface of the printout. To avoid this, you can treat your printouts with a food-safe coating.
Prusa printer settings for printing from PLA
Before printing from PLA, warm up the printer to the following values:
-
Extruder temperature: 215 °C.

-
Platform temperature: 50°C to 60°C.
-
Platform treatment: Don't forget to clean the platform before printing!
Settings may vary as each material manufacturer produces a slightly different PLA filament. Don't forget to experiment with your printer's print settings and print and compare samples with different print settings!
Back to content
ABS
About the material
ABS (acrylonitrile butadiene styrene, or acrylonitrile butadiene styrene) is a very strong and versatile material with high temperature resistance. Just like PLA, this plastic is a thermoplastic polymer that can be repeatedly melted and crystallized without visible damage to its properties. One significant difference between ABS and PLA is that ABS requires a higher temperature to melt, but it is this high melting temperature that gives ABS prints higher thermal resistance (your printouts will withstand temperatures up to 98°C).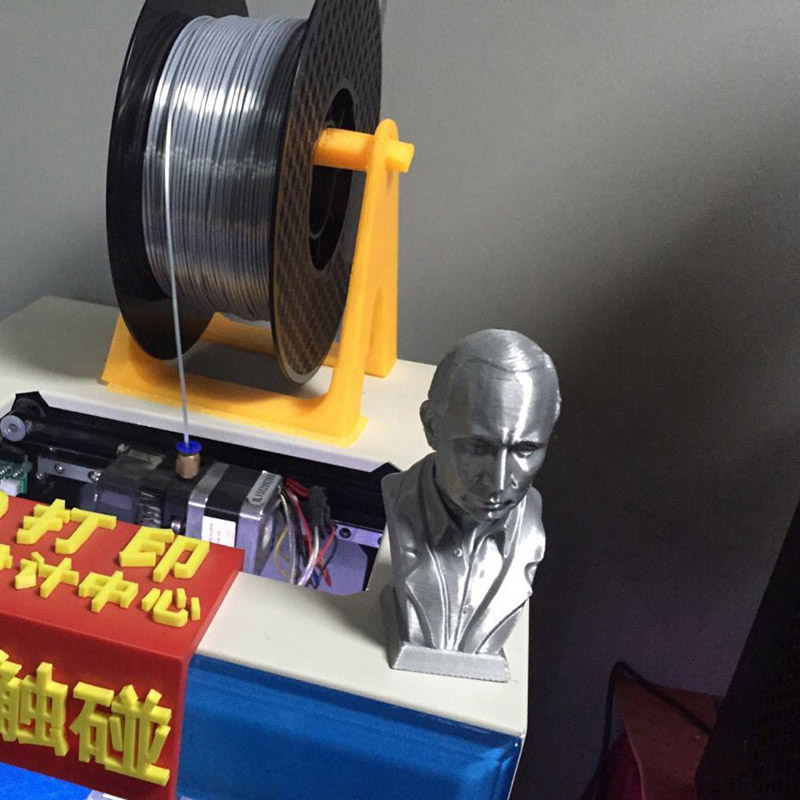 ABS printouts can be used and stored both indoors and outdoors. It is from ABS plastic that everyone's favorite LEGO constructor is made!
Another advantage of ABS is its solubility in acetone. If you want to give your printouts a smooth finish instead of the typical FDM ribbed surface with distinct layers, you can easily do this with ABS by spraying the printouts with acetone vapor . Also surface treatment with acetone will allow you to join together different printouts and their parts. PLA plastic solvents are much less harmless than acetone, so post-processing with PLA prints is much more difficult.
ABS contains wear-resistant synthetic rubber , which makes the material quite strong and impact resistant.
Now a few words about the shortcomings. ABS plastic suffers from shrinkage on cooling. That is, your printout can shrink when temperatures drop, break away from the print platform (even when it is heated to 100 ° C) and deform, which, of course, negatively affects the quality of the printout.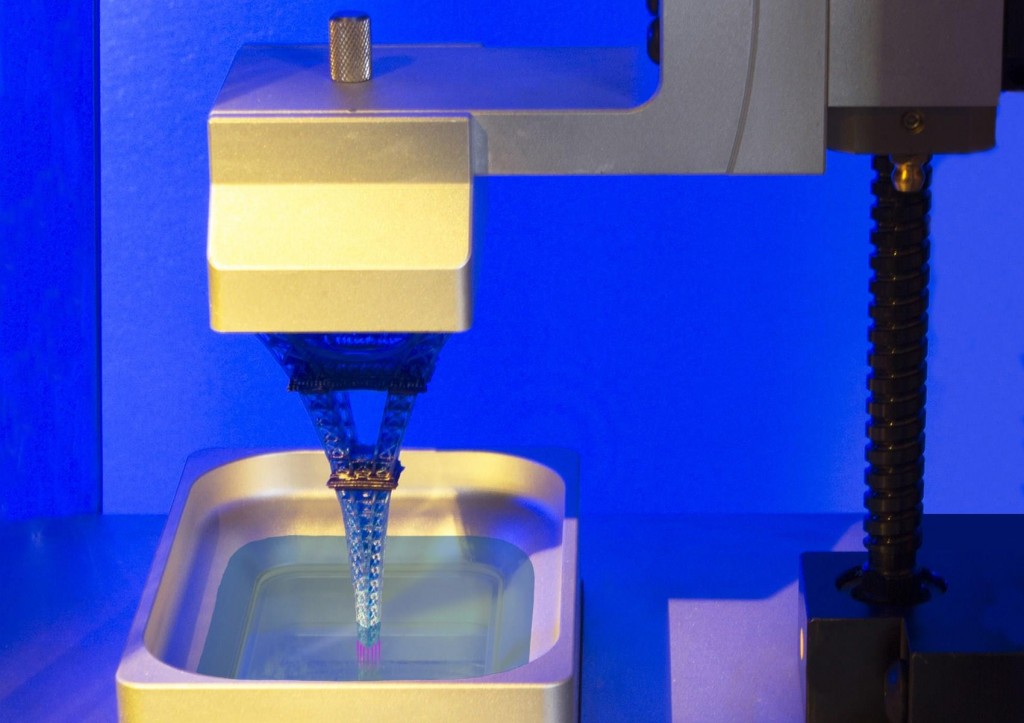 Try to keep the printer in a warm environment when printing from ABS, especially if you are going to print a large model.
Another disadvantage of ABS is an unpleasant smell when melted. The printer must be kept in a well-ventilated area or come up with some kind of isolation chamber for it.
Where is ABS used?
ABS is used where print strength is important. ABS is much stronger than PLA. ABS should also be preferred if you will be storing printouts outdoors or at high temperatures. ABS is often used to create architectural and concept models, spare parts (e.g. car interiors), smartphone cases, etc.
Prusa printer settings for printing from ABS
Before printing from ABS, warm up the printer to the following values:
-
Extruder temperature: 255 °C.
-
Platform temperature: 80°C to 110°C. The larger the print object, the higher the platform temperature should be.

-
Platform treatment: Don't forget to clean the platform before printing!
Settings may vary as each material manufacturer produces a slightly different ABS filament. Don't forget to experiment with the print settings in your printer and print and compare samples with different print settings!
Back to content
PET/PETG
About the material
PETG (polyethylene terephthalate glycol) - very strong material with good thermal resistance and strong layer bonding. Prints made from this material can be used and stored both indoors and outdoors. When printing from PETG, there is practically no deformation of the model when printing from PETG, so this material can be safely used for printing large objects. Also PETG is quite elastic material , which reduces the risk of model breakage under pressure.
Glycol is often added to PET during production (hence the G in the name), which makes the material easier to use when printing, less brittle, and makes the translucent varieties of the material more transparent and clear.
One of the properties of PETG is 's low thermal expansion of , which reduces the chance of prints coming off the platform and deforming during printing, so there is no need to use isolation chambers as is the case with ABS.
Now about the cons. Unlike PLA or ABS, PETG tends to will bleed out of the extruder in unwanted places and may leave unwanted strands of plastic on the printout. To solve this problem, you need to experiment with the temperature settings of the extruder and / or increase the retraction, and the finished printout itself can be quickly heated with a hot air gun. PETG, like PLA, does not dissolve with acetone , which complicates post-processing. PETG printouts can be easily scratched .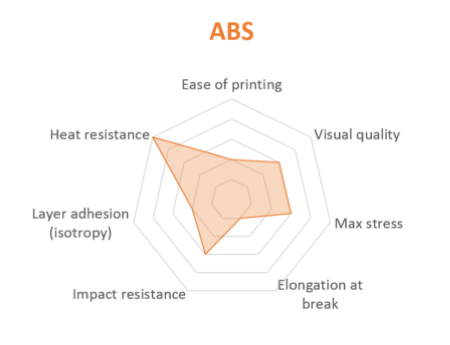
Where is PET/PETG used?
PETG is widely used for printing mechanical parts and other objects where durability is of great importance.
Prusa printer settings for printing from PET/PETG
Before printing from PET/PETG, warm up the printer to the following values:
-
Extruder temperature: 240 °C.
-
Platform temperature: 80°C to 100°C.
-
Platform Treatment: Do not use isopropyl alcohol to clean the platform before printing with PET/PETG, otherwise your printout may stick quite strongly to the platform. It is better to use any window cleaner. If you have nothing but isopropyl alcohol on hand, treat the platform with glue after cleaning to reduce the risk of the model sticking to the platform.
Settings may vary as each material manufacturer makes a slightly different PET/PETG filament. Don't forget to experiment with the print settings in your printer and print and compare samples with different print settings!
Back to content
HIPS
About the material
HIPS is a high strength plastic with high temperature resistance. He is easy to use and behaves like ABS when printed. But like ABS, HIPS produces an unpleasant smell when heated , and models made of this material when cooled can deform and lag behind the platform.
HIPS - versatile and durable material that produces smooth layers. Dissolves HIPS using limonene.
Where is HIPS used?
HIPS is suitable for printing mechanical parts and producing heat-resistant objects. HIPS is also widely used to create toys, packaging, signage.
Prusa printer settings for printing from HIPS
Before printing from HIPS, warm up the printer to the following values:
-
Extruder temperature: 220 °C.

-
Platform temperature: 80°C to 110°C. The larger the print object, the higher the platform temperature should be.
-
Platform treatment: Don't forget to clean the platform before printing!
Settings may vary as each material manufacturer makes a slightly different HIPS filament. Don't forget to experiment with the print settings in your printer and print and compare samples with different print settings!
Back to content
PP
About the material
PP (polypropylene, or polypropylene) is an elastic and durable material with excellent physical and mechanical characteristics, which produces strong and durable items.
PP - physiologically inert material which may come into contact with food. PP products are used in food factories, kitchens, bakeries, etc. PP prints are easy to clean due to their resistance to many chemical solvents and acids. However, precisely because of this chemical resistance of , gluing printouts of from polypropylene is practically impossible , so joining different parts into a single object will be very problematic.
A huge minus of PP is, like ABS with HIPS, shrinkage during cooling and deformation of printouts. The solution to the problem is to create an isolation chamber for printing for the printer, which maintains a high temperature.
Where is PP used?
PP is used to create heat resistant and durable objects.
Prusa printer settings for printing from PP
Before printing from PP, warm up the printer to the following values:
-
Extruder temperature: 254 °C.
-
Platform temperature: 95°C to 100°C.
 The larger the print object, the higher the platform temperature should be.
-
Platform treatment: Don't forget to clean the platform before printing! Before printing, you can stick adhesive tape on the platform for better adhesion of the printout to the platform.
Settings may vary as each material manufacturer produces a slightly different PP filament. Don't forget to experiment with your printer's print settings and print and compare samples with different print settings!
Back to content
ASA
About the material
ASA (acrylonitrile-styrene-acryl) is very similar in properties to ABS. Its main advantages over ABS are 's increased UV and weather resistance of , and 's dimensional stability of printouts. ASA retains the gloss, color and mechanical properties of when stored and used outdoors. To achieve a smooth surface, you can process printouts with acetone.
As with ABS, the disadvantages of ASA are an unpleasant odor during pyrolysis and curling of printouts when cooled. ASA may be slightly hygroscopic - Recommended to dry before printing.
Where is the ASA used?
ASA is widely used for the production of mechanical parts. Its weather resistance makes it suitable for printing vehicle exteriors, outdoor furniture parts and signage.
Prusa printer settings for printing from ASA
Before printing from ASA, warm up the printer to the following values:
-
Extruder temperature: 270 °C - 280 °C.
-
Platform temperature: 100°C to 110°C. The larger the print object, the higher the platform temperature should be. In some cases, it is necessary to add edges to the digital model in Slic3r Prusa Edition to improve the adhesion of the model to the platform.

-
Platform treatment: Don't forget to clean the platform before printing!
Settings may vary as each material manufacturer produces slightly different ASA heads. Don't forget to experiment with the print settings in your printer and print and compare samples with different print settings!
Back to content
nGen
About material
nGen is a low styrene material developed by colorFabb based on Eastman Amphora™ AM3300 3D polymer. This material has several advantages: the almost complete absence of an unpleasant odor during pyrolysis , and the high heat resistance of (almost 2 times more heat resistant than PLA), and the dimensional stability of printouts created from it. nGen allows to achieve a stable flow of material even at lower extruder temperatures than other polymers, and allows you to work with more than over a wide temperature range , producing consistent quality and durable printouts.
Where is nGen used?
nGen's unique combination of relatively low thermal decomposition temperatures with its high thermal stability results in functional, durable and heat resistant products. nGen can produce prints with a beautiful glossy finish.
Prusa printer settings for printing from nGen
Before printing from nGen, warm up the printer to the following values:
-
Extruder temperature: 240 °C.
-
Platform temperature: 80°C to 100°C. The larger the print object, the higher the platform temperature should be.
-
Platform Handling: Do not use isopropyl alcohol to clean the platform before printing from nGen or your printout may stick quite firmly to the platform. It is better to use any window cleaner. If you have nothing but isopropyl alcohol on hand, treat the platform with glue after cleaning to reduce the risk of the model sticking to the platform.
Don't forget to experiment with your printer's print settings and print and compare samples with different print settings!
Back to content
PC-ABS
About material
PC-ABS (polycarbonate ABS, or polycarbonate ABS) - is an improved version of traditional ABS plastic. Compared to classic ABS, this material is easier to process and has greater strength, stiffness and heat resistance.
PC-ABS printouts feature sharp details and excellent surface quality.
Where is PC-ABS used?
PC-ABS is often used to create durable plastic parts such as TV and computer frames, as well as to create functional prototypes and fixtures. This thermoplastic is often used in small-scale production.
Engineers and designers use PC-ABS for power tool prototyping, industrial equipment manufacturing and other demanding tasks. Durable and heat-resistant PC-ABS prototypes perfectly mimic the properties of final products. When printing from PC-ABS, you can create soluble supports to the model, which will allow you to print models with deep cavities.
Due to its strength and heat resistance, PC-ABS is ideal for printing appliance cases, handles, connectors, fans and turbines.
Prusa printer settings for printing from PC-ABS
Before printing from PC-ABS, warm up the printer to the following values:
-
Extruder temperature: 270 °C - 280 °C.
-
Platform temperature: 100°C to 110°C. The larger the print object, the higher the platform temperature should be.
-
Platform cleaning: don't forget to clean the platform before printing!
Settings may vary as each material manufacturer produces slightly different PC-ABS heads. Don't forget to experiment with the print settings in your printer and print and compare samples with different print settings!
Back to content
Flex
About material
Flex - very strong and elastic material. Flex layers have a strong grip. Flex has excellent abrasion resistance, remains flexible even at low temperatures and is resistant to many solvents.
Flex printout does not shrink much when cooled , so it is convenient to print high precision models from it.
Recommended to print slowly from Flex.
Where is Flex used?
Flex is great for printing flexible objects such as phone cases, action camera housings or RC car wheels. FLEX is used for both rapid prototyping and small-scale production of finished products.
Prusa printer settings for printing from Flex
Before printing from Flex, warm up the printer to the following values:
-
Extruder temperature: 230 °C. Prior to printing from Flex, the extruder must be thoroughly cleaned of previous material. Load the printer with PLA and heat up the extruder to remove any remaining material.
 When loading Flex filament, loosen the extruder screws. Be aware that when printing from Flex, the automatic filament change function may not work properly.
-
Platform temperature: 50°C to 65°C. The larger the print object, the higher the platform temperature should be.
-
Platform treatment: Don't forget to clean the platform before printing! Glue stick can be applied to the platform before printing, as some types of Flex adhere too tightly to the platform, and if the printout is separated from the platform, the coating of the platform can be damaged.
Settings may vary as each material manufacturer produces a slightly different Flex. Don't forget to experiment with your printer's print settings and print and compare samples with different print settings!
Back to content
Nylon
About the material
Nylon is a material with for high wear and temperature resistance. Nylon printouts are quite strong (their strength is comparable to injection molded counterparts). This is because the layers of nylon have excellent grip. Nylon printouts can also be dyed with acid-based dyes.
Like ABS, nylon can warp and warp when cooled unevenly , so printing with nylon involves having a heated bed at the printer, printing in warm rooms, or even creating an enclosed chamber for the printer to maintain a high temperature (as well as printing from most of the materials listed in this article). Nylon parts are almost impossible to glue together , making it difficult to create large models from multiple prints.
Nylon is highly hygroscopic , which means it easily absorbs moisture. It is recommended to dry the nylon filament before printing, so that the possible release of water vapor from the nylon does not damage your printouts.
Taulman is the most popular nylon filament for desktop 3D printers.
Where is nylon used?
Nylon has a high coefficient of slip and is widely used in bearings and similar machinery, often without the use of lubrication.
Prusa Printer Settings for Printing Nylon
Preheat the printer to the following values before printing Nylon:
-
Extruder temperature: 240 °C.
-
Platform temperature: 80°C to 90°C.
-
Platform treatment: Don't forget to clean the platform before printing! Before printing, you can stick adhesive tape on the platform for better adhesion of the printout to the platform.
Settings may vary as each material manufacturer makes slightly different nylon. Don't forget to experiment with your printer's print settings and print and compare samples with different print settings!
Back to content
Composites
About Composites
There is a wide variety of 3D printing composites available, from metal simulants such as bronze and copper, wood simulants, sandstone simulants, glow-in-the-dark materials, as well as carbon and aramid composites.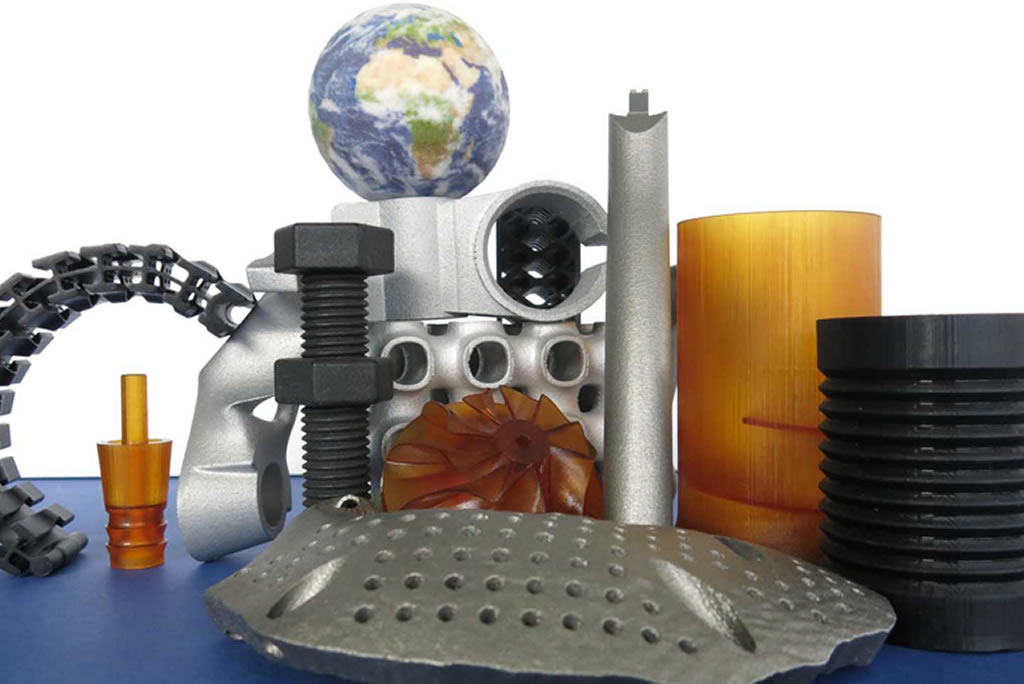 Composites are plastic-based materials with the addition of auxiliary powder material : in wood simulants it is microscopic wood chips, in metal simulants it is microparticles of copper or bronze.
Sandstone and wood simulants are very easy to use when printing. Prints made from these materials are almost indestructible , so these composites can be printed without a heated bed. Different extruder temperatures allow you to achieve different shades of the material when printing with wood imitators: the higher the temperature, the darker the material becomes. And when printing with simulant sandstone, the temperature of the extruder sets the texture of the surface: the lower the temperature, the smoother the printouts, while the higher temperature will create a rough surface.
composite printouts are highly machined, - sanded, drilled, etc. - and are easy to color. The first step in polishing printouts is sanding: start with coarse sanding (80) and gradually reduce the grit size.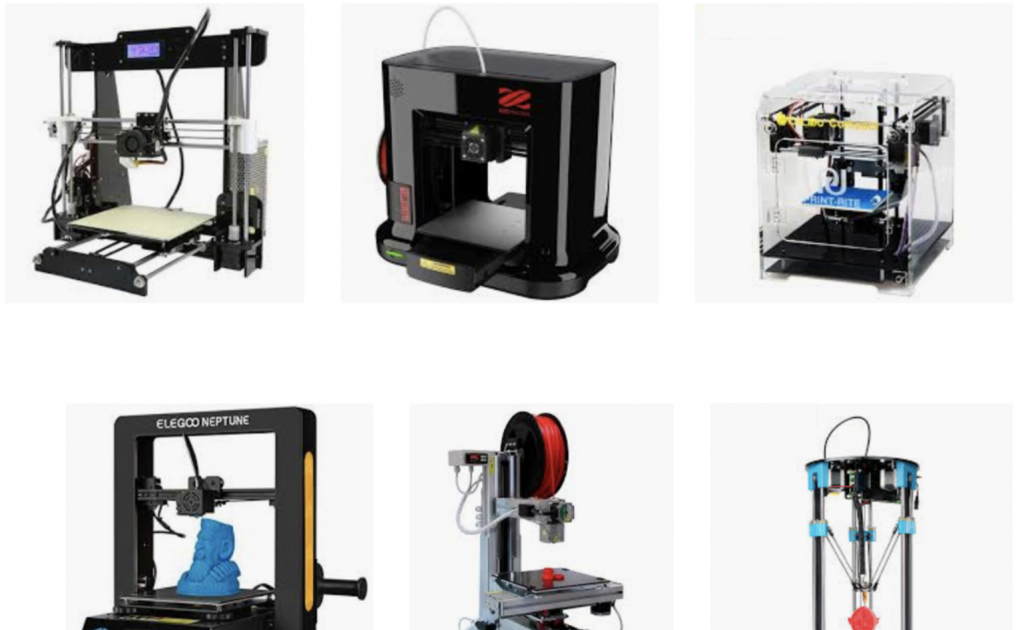 For best results after sanding, sanding with a steel wool or copper brush can be used. Wet sanding with very fine grit (1500) can be used to achieve an ultra smooth surface.
Composites tend to be very abrasive (with the exception of wood composites), with frequent use they can easily scratch and damage the extruder. The solution is to print with a high-strength nozzle. When printing with wood composites (0.5 mm and above), it is recommended to use a large nozzle.
Another disadvantage is that composites are quite an expensive material.
Where are composites used?
Composites are used to achieve certain visual characteristics of the printout. If you want to create something that looks like wood or metal, or get glow-in-the-dark printouts, then composites are just right for you.
Prusa printer settings for printing from composites
Before printing from composites, warm up the printer to the following values:
-
Extruder temperature: 190 °C - 210 °C.
Learn more