Moi 3d printer
moi: redefining manufacturing by 3D printing composites
Published on May 29, 2019 by Carlota V.
Composites manufacturing is a form of additive manufacturing that enables more structural efficiency for the finished part. Instead of creating a part layer by layer on a flat surface as you would with a 3D printer, this method manufactures in the Z direction too, giving the object more strength. The startup moi composites has developed its own composites fiber manufacturing process also known as CFM – it allows for composite fibers to be placed precisely where they are needed in the direction of the load paths to manufacture high-performance, three-dimensional structures. We sat down with Michele Tonizzo, CTO of moi composites to discuss the company’s technology and the sort of applications that could benefit from it.
3DN: Could you present yourself and your link with 3D printing?
My name is Michele Tonizzo and I am the CTO of moi composites, a spin-off company of Politecnico di Milano University in Italy developing Additive Manufacturing processes for composite materials. I started using 3D printing while working in architectural offices to realise scaled models of designs, and one day, by chance, I came across +LAB, the 3D printing lab of the “Giulio Natta” department at the university where I worked for two years as a researcher before founding moi and where I met with the other two founders: Gabriele Natale and Prof. Marinella Levi.
Michele Tonizzo (left) and Gabriele Natale (right) at the James Dyson Award
3DN: How did the idea of creating moi come about?
The CFM (Continuous Fiber Manufacturing) process behind moi came from Gabriele’s thesis in Design and Engineering and his desire of realising a boat without the currently tight design restrictions of fiberglass manufacturing. After his graduation, we started working together at +LAB on the development of the CFM technology, as well as other processes for different types of composites, with the idea, one day, of providing new solutions for the additive manufacturing of composite materials enhancing the performances of the fibers without design limitations. Three years after we decided it was time to go on the market and we founded our company moi.
Photo Credits: moi
3DN: Could you tell us more about your CFM technology and its benefits?
Moi’s Continuous Fiber Manufacturing – CFM – process is able to merge the high mechanical performances of composite materials with the benefits offered by robotic additive manufacturing systems: the use of a multiple-axis machine magnifies the aptitude of additive manufacturing technology. Since composites are anisotropic materials, the performances of these objects strongly depends on the fiber orientation. By using a multiple-axis machine it’s possible to orient fibers in function of maximum stress lines. This allows the creation of 3D objects in composite materials starting from a CAD file, without using any other tool, such as moulds. This leads to a better utilisation of the material, depositing more or less, or none, depending on the stress and strain distribution, which is a typical bio-inspired approach.
3D printed (using robotic arm) lower limb prosthesis | Photo Credits: moi
3DN: You produced a BMX, a lower limb prosthesis and a riser to showcase the capabilities of using a robotic arm, can you tell us more?
All those objects showcase the key potentiality of CFM technology, that is the deposition of the fiber aligned to the principal stress lines, which is able to achieve high performances, by exploiting the anisotropy of the fibers, and cutting weight by avoiding placing material where it is not needed. The BMX is the first project we realised together with Autodesk, after meeting at JEC 2017 where we won the Innovation Award with the Atropos project, and showcased at Formnext 2017.
The prosthesis, as well as the riser, are two thesis projects made in collaboration with +LAB and Politecnico di Milano, by Sara Schiavo and Alberto Riganti.
The riser project | Photo Credits: moi
The BMX also showcased the ability of a multiple axis machine to free itself from depositing material only layer by layer, in fact, the back forks are curved in the Z direction in order to accommodate the back wheel.
The prosthesis, instead, was an example of an application where customisation is fundamental, in fact not only the shape can be tailor-made on the person but also, by optimising the internal shape, the mechanical behaviour can vary.
The riser was also tailor-made for the athlete’s preferences and achieved a final weight similar to, or less than Olympic risers. We were also able to simplify and cut the costs of production of a single part removing the tooling needed for the manufacturing (e.g. moulds).
BMX Fiber Frame from a collaboration with Autodesk. The weight of the frame was reduced by 40% compared to the steel frame | Photo credits: moi
3DN: For which applications and sectors do you see your technology having the most use?
Continuous fiber composites are materials with some of the highest mechanical performance in the world and they are used in a wide range of sectors, such as Aerospace, Automotive, Architecture, Biomedical, Marine, Oil and Gas, etc. By merging the manufacturing capabilities of 3D printing to produce unique parts without having a break-even point, with the mechanical performances of composite materials we found that CFM technology can provide cross market solutions to industries where high performance objects that are tailor-made or unique (small series) are a must. In this first year of moi we’ve already worked with different industries: Aerospace, Marine, Oil and Gas and Biomedical, with new projects coming in the near future.
Propeller blade | Photo credits: moi
3DN : What is your vision of the additive manufacturing industry?
I believe that additive manufacturing is already responding in a great way to a problem that traditional manufacturing methods always struggled with, that is the production of single parts. Until recently, it unfortunately lacked high performance materials able to produce employable parts that made people see AM as a prototyping technology, which is actually one of the reasons we developed CFM technology back then.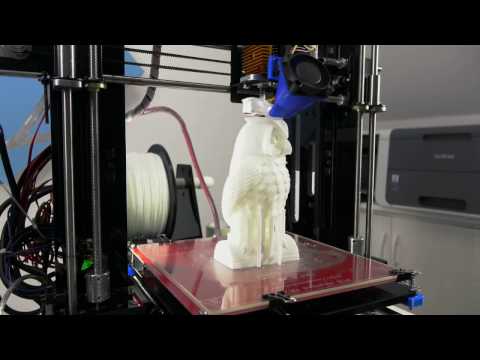 Now things are changing, and in the last few years, I have seen many new promising materials and AM technologies being developed that I am sure will allow additive manufacturing to find its place next to the other technologies and expand the manufacturing possibilities by opening new ways of designing for many industries.
Skateboard | Photo Credits: moi
3DN: Any last words for our readers?
I am a strong believer of the motto “new is always better” since it can lead to unprecedented discoveries and revolutions. Therefore, I will suggest to never stop experimenting with new technologies, like Additive Manufacturing, because you’ll never know where it might take you.
What do you think of moi’s technology? Let us know in a comment below or on our Facebook and Twitter page! Don’t forget to sign up for our free weekly Newsletter, with all the latest news in 3D printing delivered straight to your inbox!
Software for 3D Printing - 3D Modeling Software/Slicers/3D Printer Hosts
An Overview Of The Best 3D Printing Software Tools
Every 3D print begins as a 3D model generated in a modeling program. Years ago, we had to spend lots of money and time to acquire and learn modeling software. Now, there are many easy-to-use modeling software options available, many of which are free. This list includes some of the best options and is sorted by price, with the free ones sorted alphabetically.
The list also indicates whether the software uses solid modeling, a type of 3D modeling that always generates models that are “manifold” or “water tight.” A manifold model is one in which all walls of the model have some thickness, which is necessary for 3D printing. By contrast, software that uses polygon modeling can generate walls that have zero thickness; that’s fine for creating computer graphics for games and movies but not useful when 3D printing the models. Manifold models can be created with polygon modeling software, it just takes more steps and experience. All the software in this list can create 3D printable models, but every model that comes out of solid modeling software is 3D printable.
Additionally, we’ve noted what skill-level of user each software is designed for: beginners, amateurs, advanced users, and professionals. In general, the easiest to use options are near the top and the most powerful options tend to be near the bottom, though there are some outliers found throughout. Most of these software can be tried for free and there are free tutorial videos available for all of them.
Quick jump to:
3D Modeling Software
- Shapr3D
- Tinkercad
- Blender
- BRL-CAD
- DesignSpark Mechanical
- FreeCAD
- OpenSCAD
- Wings3D
- 3D Slash
- SketchUP
- Fusion 360
- MoI 3D
- Rhino3D
- Modo
- Cinema 4D
- SolidWorks
- Maya
- 3DS Max
- Inventor
Slicers & 3D Printer Hosts
- Ultimaker Cura
- Simplify3D
- Slic3r
- Repetier
- KISSlicer
- ideaMaker
- OctoPrint
- 3DPrinterOS
3D Modeling Software
These tools are all about creating models for 3D printing.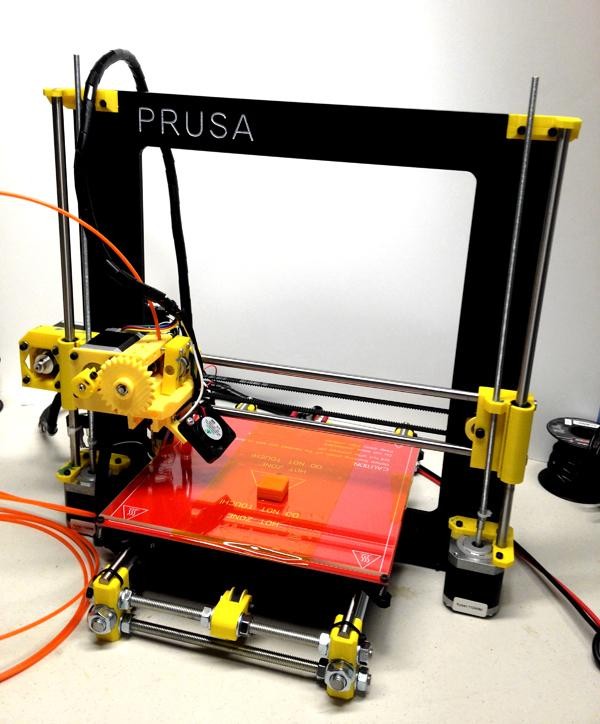 Some of them are pretty easy to use while other programs are only suitable for professional users with years of experience.
Shapr3D CAD Modeling
- Price: Free, $239/year for professional
- Solid modeling: Yes
- Intended for: Beginners and Professional
- What makes it special: An intuitive multi-device CAD experience allows you to design anywhere with ease.
Shapr3D is superb for professionals and hobbyists alike. It has an extremely intuitive and innovative user interface which will allow you to create models faster with the same high level of precision.
With their Visualization feature you’ll also be able to preview models in AR to ensure that your print will be perfect in its intended location.
Shapr3D is available on iPad, Windows, and Mac – and it will keep your files synced between them! I would 100% recommend checking them out.
Tinkercad
- Price: Free
- Solid modeling: Yes
- Intended for: Beginners
- What makes it special: It’s designed to allow anyone to create 3D printable models and serves as an introduction to solid modeling.

This is a browser-based 3D design app geared towards beginners. The software features an intuitive block-building concept, allowing you to develop models from a set of basic shapes. Tinkercad is full of tutorials and guides to aid any aspiring novices get the designs they’re looking for. It even allows you to share and export files with ease.
With a library of literally millions of files, users can find shapes that suit them best and manipulate them as they wish. It also has a direct integration with 3rd party printing services, allowing you to print and have your print at your door-step at the press of a button. Even though it can be a bit too simple to the point of limitation, it serves as a great way to learn about 3D modeling.
Blender
- Price: Free
- Solid modeling: No
- Intended for: Amateurs and advanced users
- What makes it special: It’s open source, feature-rich, and includes tools for sculpting, animation, simulation, rendering, motion tracking, and video editing.

In essence, Blender covers many facets of 3D creation, including modeling, animation, and simulation amongst others. This open-source software has a steep learning curve and is ideal for users who feel ready to transition to designing complex 3D models. Check out our Blender tutorials for 3D Printing page.
Blender is actually a free 3D modeling software which was originally for 3D animation and rendering using polygonal modeling techniques. Despite its origins as a software for artists, it is considered quite accessible. One of the software’s interesting features is the photorealistic rendering option. This gives the models an air of realism that few free software can achieve.
BRL-CAD
- Price: Free
- Solid modeling: Yes
- Intended for: Advanced users
- What makes it special: Developed and used by the US Army to support ballistic and electromagnetic analyses.
 Also includes ray tracing and geometric analysis tools.
This open-source software is an advanced solid modeling system with interactive geometry editing. It is apparently used by the U.S. military to model weapons systems, showing that it is quite dependable but also very advanced. BRL-CAD offers a high level of precision due to its use of specific coordinates to arrange geometric shapes.
It offers a large library of simple and complex shapes users can implement into their own designs. They can take multiple shapes and combine them at their leisure, as well. The software used to be quite costly, however it was converted to open source a few years ago. It includes over 400 tools in its arsenal. It also runs at great speeds, especially considering how dense its features are.
DesignSpark Mechanical
- Price: Free
- Solid modeling: Yes
- Intended for: Amateurs and advanced users
- What makes it special: A library of 3D models from industrial suppliers and the ability to generate a bill-of-materials for designs.
 Electrical and PCB CAD tools are also available.
This nifty and free CAD software is ideal for professionals and advanced hobbyists alike. The user interface is relatively straightforward and the software runs quickly, meaning efficient designing. You also have the capability to generate a bill-of-materials that calculates the cost of printing potential 3D design projects.
DesignSpark Mechanical allows users to utilise an in-built library to mix with own drawings. Another feature that new users might find useful is the pull feature that allows users to create 3D models from only a surface. It is feature-rich for a free software and quite beginner-friendly.
FreeCAD
- Price: Free
- Solid modeling: Yes
- Intended for: Amateurs and advanced users
- What makes it special: Models are fully parametric and recalculated on demand with an undo/redo stack. Other features include robotic simulation, architectural tools, and a path module for CAM (Computer Aided Manufacturing).
A parametric 3D modeling tool that is open-source and enables you to design real-life objects of any size. The parametric component makes editing your design a piece of cake. Simply go to your model history and change the parameters, and you’ll have a different model. As the name suggest, it is in fact totally free. The upside of this is that none of the tools are blocked behind a pay wall, so you can tweak your models to your heart’s desire.
It’s not the best for professional purposes, but it’s a great training tool. Despite it’s basic options and design elements it’s worth a try if you’re new and don’t want to have to invest in something before you dip your toe in the water.
OpenSCAD
- Price: Free
- Solid modeling: Yes
- Intended for: Amateurs and advanced users
- What makes it special: Designed for programmers, models are generated through typing scripts.

OpenSCAD is a free software with a ton of features and a unique way of creating models. This software takes a programming approach to 3D modeling, making it a unique addition to this list of 3d printing software tools. Instead of the traditional interactive modeling interface, users write code in a script file that describes the parameters of the 3D object. Once you’ve entered your code, you can view the shapes you’ve created by clicking a “compile” button.
Another great feature that OpenSCAD has is the ability to import 2D drawings and extrude them as 3-dimensional. It uses a part profile from drawings made in a standard sketching software and use the SXF file to do this. With its stronger focus on programming, OpenSCAD may appeal to some while alienating others. Regardless, it is still a powerful tool.
Wings3D
- Price: Free
- Solid modeling: No
- Intended for: Amateurs and advanced users
- What makes it special: Polygon modeling enables the creation of more organic shapes.
 Standard tools can be accessed through a right-click menu.
Wings3D is another open-source polygon model tool. Despite being freeware, it comes with a wide range of mesh and selection tools. Tools like mirror make symmetrical modeling a breeze. Seeing as it is a program for beginners, it is very user-friendly and the learning curve is quite steady. Features like the customisable hotkeys and easy to use interface are indicative of its status as an ideal tool for starters.
Despite the ease of use, it has no shortage of useful features such as plane cut, intersect, inset, bend, sweep, circularize, and sheer, making it capable of some very impressive models. It also supports a very wide range of file formats for both import and export. Despite its simple and plain looks, it is definitely worth checking out if you’re just starting out.
3D Slash
- Price: Free web version; Premium license is $24/year and a Commercial license is $240/year
- Solid modeling: Yes
- Intended for: Beginners and amateurs
- What makes it special: Models are created through “slashing” 3D blocks away to shape them as desired.
3D Slash focuses on providing design software with a uniquely fun user interface and enough advanced features to work with a high level of precision. You can also make logos and 3D text with this software. 3D Slash is free to use and ideal for beginners, however there a range of price packages that add in features for cooperative use or commercial use depending on the needs of the consumer. Additionally, the free versions has limitations in terms of functions, higher resolutions and colours you can apply. It’s intuitive interface with a block cutting style to create shapes makes it simple enough for anyone to use.
Even if you can’t find the creative spark to start a design from scratch, there are a multitude of files available for download that you can import and then cut apart into something new. Novel features like the cursor mode that makes interior designing much easier are great additions. Aside from its ability to run on standard mode, it an can also be used with VR head sets. While the blockish style can be limiting in terms of range of shapes one can make and less pleasing to the eyes, it is nonetheless efficient and practical. There are few software that are as quick from concept to finish as 3D slash.
SketchUp
- Price: Free web version; Pro version is $299/year
- Solid modeling: No
- Intended for: Beginners to advanced users
- What makes it special: Intuitive and powerful, with a library of user-generated and manufacturer-produced models.
SketchUp is another good modeling software because it maintains that balance between usability and functionality, making it ideal for most skill levels. The software has an easy learning curve and there are advanced features available for professionals at an extra cost. It is especially good for designing interior and exterior architectural projects but also has tools for a diverse range of other purposes.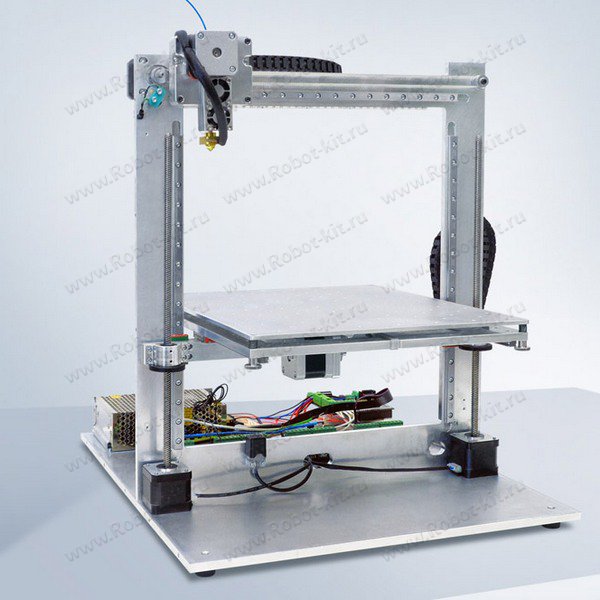
Anything complex can take quite a while, but simpler designs aren’t too time-consuming. A freeware version, SketchUp Make, and a paid version with additional functionality, SketchUp Pro, are also available.
Fusion 360
- Price: Free for personal use and startups, $595/year for commercial license
- Solid modeling: Yes
- Intended for: Amateurs to professionals
- What makes it special: Lots of features, such as tools modeling and sculpting, generative design, simulation, assemblies, collaboration, 3D printing, and CAM.
This is a unique addition to the list of 3d printing software tools. Fusion 360 is a cloud-based 3D CAD program that utilizes the power of the cloud to bring design teams together and collaborate on complex projects. Another advantage of the cloud platform is that Fusion stores the entire history of the model including the changes to it. Numerous design options are available, including freeform, solid, and mesh modeling.
Fusion 360 operates on a monthly payment subscription basis. The developers also regularly update the features, making it better as new instalments come along. It runs on multiple platforms and allows users to access their information wherever they want.
MoI 3D
- Price: $295
- Solid modeling: Yes
- Intended for: Amateurs to advanced users
- What makes it special: Can create smooth meshes from CAD models and is pen-tablet friendly.
Short for Moment of Inspiration, MoI offers a sleek UI and powerful range of CAD tools for users specializing in polygonal modeling. The program comes with advanced boolean functions that enable quick design of “hard surface” models. It is a user-friendly software that uses the NURBS modeling system.
While it isn’t free, it is cheaper than some of its competitors. It has a good amount of functions in it, yet avoids being too cluttered with pointless features.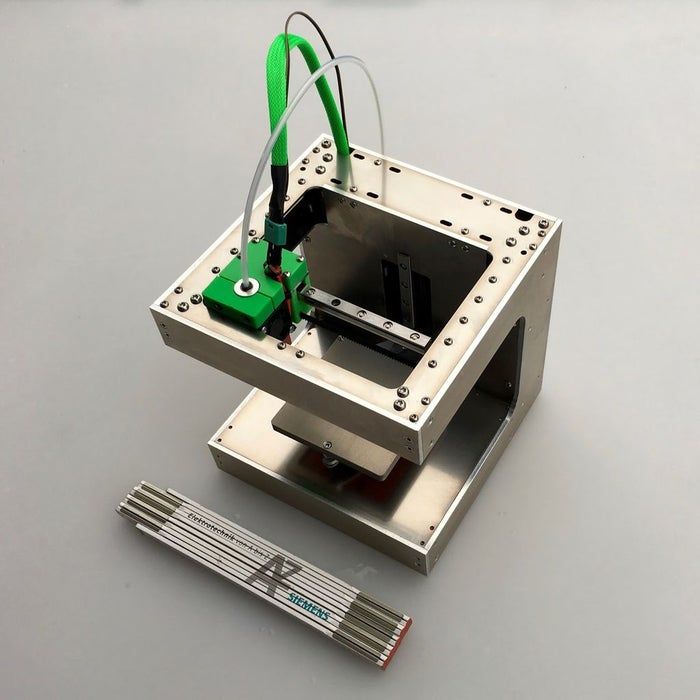 The system which uses curves and booleans makes workflow quicker as well.
Rhino3D
- Price: $995
- Solid modeling: No
- Intended for: Advanced users and professionals
- What makes it special: Very powerful and full of features for modeling, analysis, rendering, 3D capture, CAM, and 3D printing.
The company behind this software markets it as the world’s most versatile 3D-modeler. The software is available for download in a variety of bundles on their website at various prices. The program uses a precise and mathematical model known as NURB, allowing you to manipulate points, curves, meshes, surfaces, solids, and more in all sorts of ways. Ultimately, given the range of design features available with Rhino3D, it’s hard to argue against its claims about unrivaled versatility in creating complex 3D models.
Users have commented on how the software can be very difficult to learn.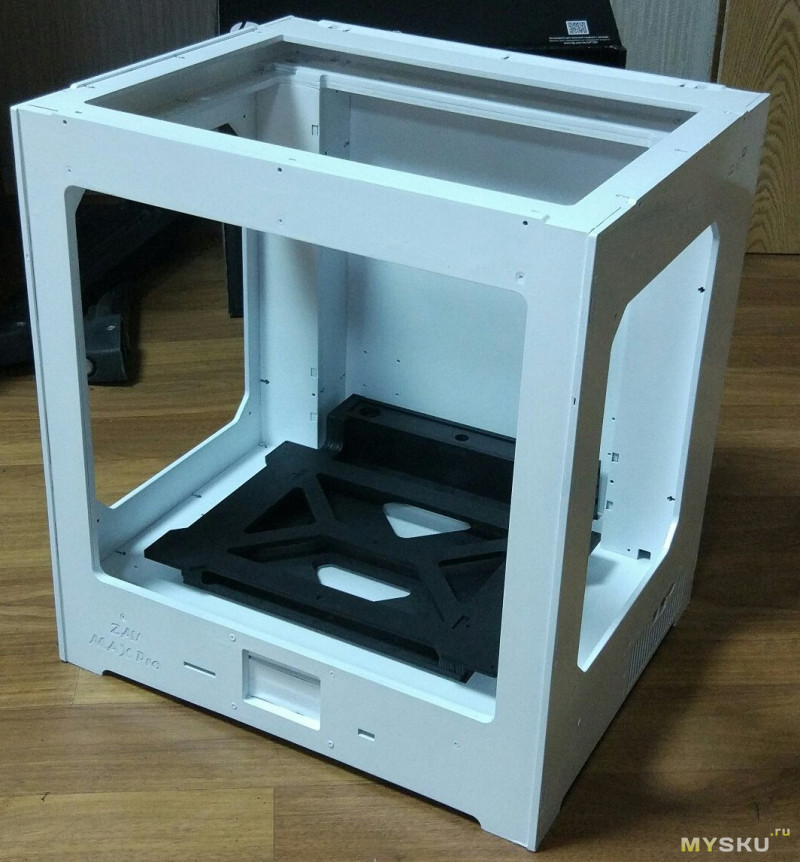 This is a natural trade-off between capabilities and user friendly many designers have to make when creating a detailed software. While it is not the most accurate software at capturing user intent, it is one of the best on the market.
Modo
- Price: $599/year or $1,799 for Perpetual license
- Solid modeling: No
- Intended for: Amateurs to professionals
- What makes it special: Procedural modeling and artist-friendly tools for modeling, animation, texturing, and rendering.
Modo provides creative 3D polygon and subdivision surface modeling tools with a lot of flexibility, allowing you to create both freeform organic models and precision meshes using the same software. This is a professional-grade program with a range of features designed for advanced 3D designers, and the price reflects this.
Even though it isn’t the most user-friendly software, it hosts a large set of features while running smoothly. The speed of the software is particularly evident in terms of baking textures. It also works with partner software and extensions as additional customisations.
Cinema 4D
- Price: $720/year or $3,945 for Perpetual license
- Solid modeling: No
- Intended for: Amateurs to professionals
- What makes it special: An intuitive interface, parametric modeling, and procedural workflow.
This is an extremely powerful 3D modeling tool that lets you create complex 3D designs. Cinema 4D’s quite flat learning curve makes it approachable for beginners intimidated by software with advanced features. The program is regularly updated with free service packs, which help to optimize how it runs on various operating systems.
The user friendly options present the prints in very accessible ways. Scaling and shading options make modeling far easier. It’s sculpting tool is a great example of why this software is ideal for editing models and pre-existing files.
SolidWorks
- Price: $1,295/year or $3,995 for Perpetual license
- Solid modeling: Yes
- Intended for: Amateurs to professionals
- What makes it special: Powerful editing tree and tools for manufacturing, assemblies, simulation, cost estimates, CAM, and 3D printing.
Now we move on to SolidWorks. This is a CAD program often used by professional 3D designers. There are a plethora of advanced features included, such as design validation tools and reverse engineering. Solidworks comes in three distinct packages, depending on the exact features you need.
Solidworks tends towards the industrial side of things. It is practical and detailed. While most software, mimic curves through gently inclining flat structures, Solidworks uses a system of nurbs that create averages of the edges to produce fantastically detailed curvatures. It only does away with polygonal modeling, opting instead for dimensional sketching. As a result, resizing becomes far less of a hassle.
Maya
- Price: $1,545/year
- Solid modeling: No
- Intended for: Advanced users and professionals
- What makes it special: Procedural effects and powerful world and character creation tools.
Primarily marketed at animation professionals, Maya is useful for many aspects of 3D modeling, especially in terms of mathematically smooth surfaces and shapes. Maya was originally slated as a 3D animation software, but is very useful in 3D printing as well. Thus, a lot of the interface options are more reminiscent of sculpting and animation.
Maya is more applicable to artistic printing requirements. It has a fast rendering engine and is best for highly detailed models with many intricacies. The downside is that it is very expensive (it is, after all, the same software used for high-budget movie CGI|). Nonetheless, it allows for realistic representations of reflection and colour on a software with smooth operation.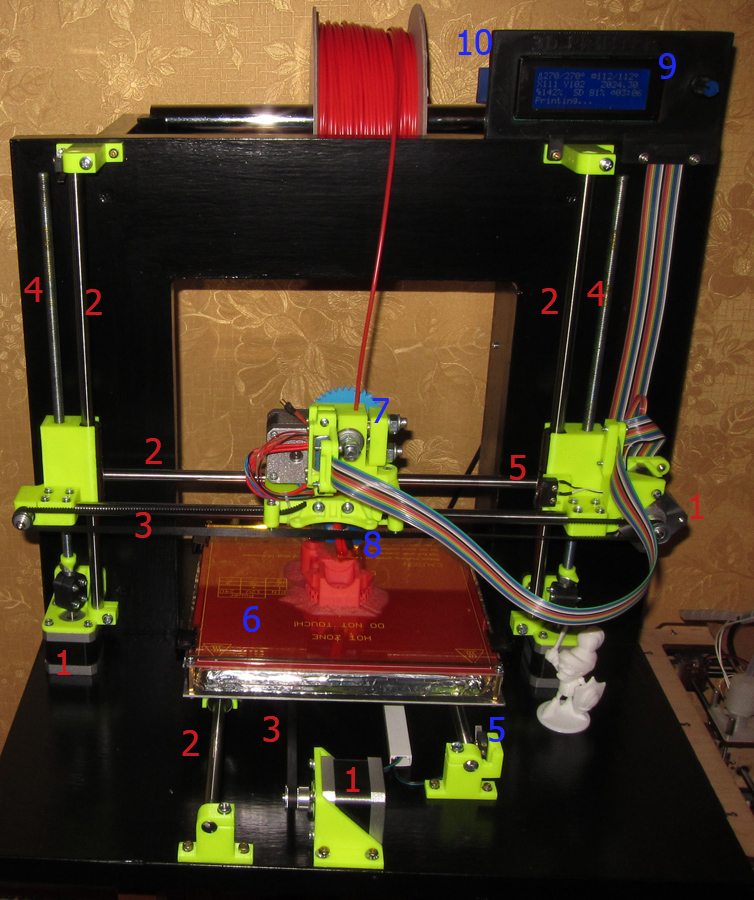
3DS Max
- Price: $1,545/year
- Solid modeling: No
- Intended for: Advanced users and professionals
- What makes it special: Advanced users and professionals
Another program that focuses on animation, 3DS Max offers some great 3D modeling features such as shading tools, parametric mesh modeling, and polygon modeling. This Windows only software is a favourite among video game developers, many TV commercial studios and architectural visualization studios.
Inventor
- Price: $1985/year
- Solid modeling: Yes
- Intended for: Advanced users and professionals
- What makes it special: Tailored specifically for product design and engineering applications and loaded with tools for simulation and manufacturing.
Inventor 3D CAD software offers professional-level 3D mechanical design. The program comes with freeform, direct, and parametric modeling choices. Furthermore, you also get automation and simulation tools.
Developed by Autodesk, Inventor comes in different packages depending on level of proficiency (student, professional etc.). One of the great things about Inventor is how they improve the software with user feedback. New versions include improvements to visual data representation and the ability to easily reference 3rd party designs without the need to convert file formats.
Slicers & 3D Printer Hosts
The second section of this list of the best 3D printing software tools focuses on programs that help you to execute a 3D print. Slicers are the easiest way to go from a 3D model to a printed part because they take a CAD model, slice it into layers and turn the model into G-code. The slicer software also includes 3D printer settings like temperature, layer height, print speed, etc. to the G-code. The 3D printer can read this G-code and make the model layer by layer following the instructions set in the G-code.
Ultimaker Cura
Despite its name, Cura can be used with almost any 3D printer because it is an open-source slicer. The program is ideal for beginners because it is intuitive and fast. Most of all, it’s easy to use. More advanced users can access a further 200 settings to refine their prints.
Simplify3D
Simplify3D is an extremely powerful premium slicing tool that helps you drastically improve the quality of 3D prints. Not only does Simplify3D slice your CAD into layers, it also corrects any problems with your models and allows you to preview the end result, helping to further identify any other issues. Advanced users will need to decide if the premium features are worth paying for compared to open-source slicers.
Slic3r
This open-source software includes real-time incremental slicing, 3D preview, and more. It is one of the most widely used 3D printing software tools. The incremental real-time slicing ensures that when you change a setting, the slicing doesn’t need to start from scratch. Only the G-code for affected parts is recalculated. The end result is a fast, flexible, and precise slicing program.
Repetier
This open-source slicer software supports three different slicing engines; Slic3r, CuraEngine, and Skeinforge. Repetier can also handle up to 16 extruders with different filament types and colors simultaneously, and you can visualize your end result before printing. There is a lot of customization and a lot of tinkering involved, making Repetier ideal for more advanced users. You also get remote access to your printers with Repetier host.
KISSlicer
This slicing software does its job well, although the user interface is somewhat basic. Still, if you just need a slicer that delivers great results, use KISSlicer. Note that the basic version is for single-head machines only. You’ll need a PRO version for multi-head machines.
ideaMaker
This free slicer is distributed by Raise3D and provides fast, simple slicing for most 3D printers. Team members can share print profiles and supports can be automatically or manually placed. The adaptive layer height tool allows the software to adjust layer height depending on the level of detail in the model, maximizing print quality while minimizing print time. Remote monitoring and control is also available.
OctoPrint
A free open-source web-interface that allows for remote control and monitoring of 3D printers. It’s compatible with most 3D printers and allows users to watch their prints with an embedded webcam feed. Prints can be started, paused, and stopped remotely, and plugins are available to track print statistics and send push notifications on job progress.
3DPrinterOS
This nifty cloud 3D printer management software comes at a cost. The essential idea is the management of the entire 3D printing process with one platform. Users can edit and repair designs, slice STL files from the cloud, and even send files for printing from anywhere in the world.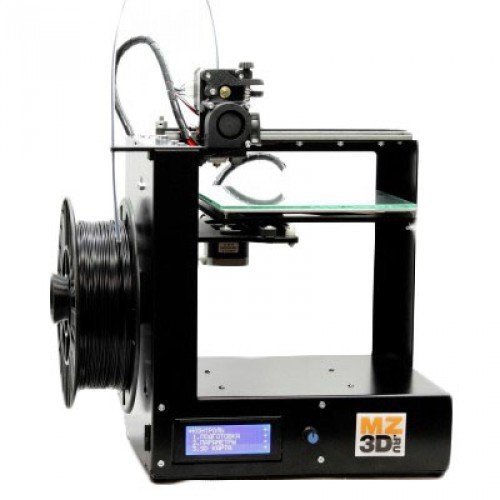 The software also features the capability to share CAD files.
Story about my 3D printer
Reviews
Hi all! I decided to participate in the mini-competition 'A story about my 3D printer'. since I personally assembled more than one printer. Please don't judge too harshly. A year and a half ago, I somehow did not hear about a 3D printer. Having learned about the 3D printer, I began to hatch the idea of creating a printer costing up to 100 USD. Having surfed the Internet, I came across a printer assembled from a CD-ROM. Digging through my gold reserves, I found the right amount of spare parts, ordering something from the Middle Kingdom. Having my own CNC machine, I began to make drawings of my own design, there is no creation process, there are several finished photos left,
And then the nightmare began, firmware, tuning, calibration. Having made a lot of manipulations with these printer parameters, I still could not start my unit.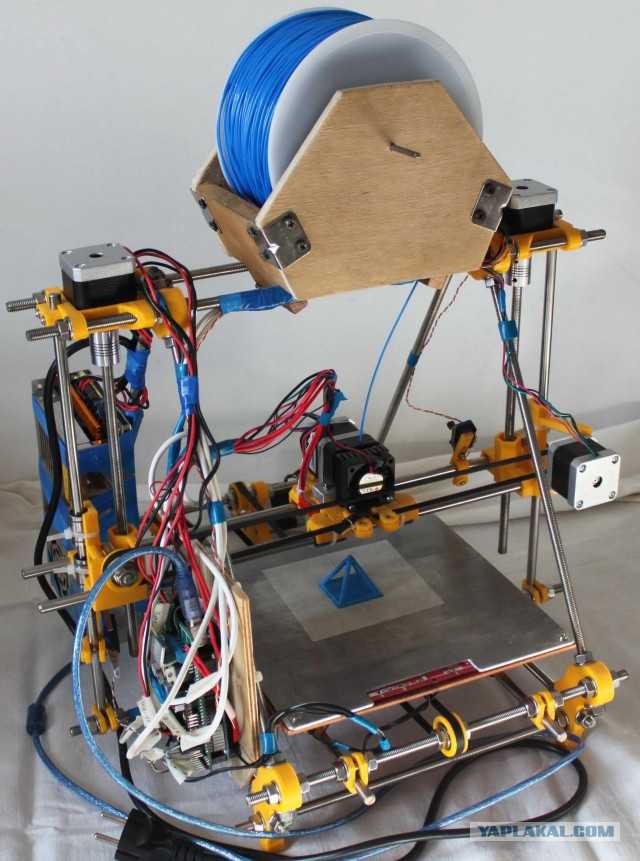 Faced with the fact that, with an increase in current on the engines, they begin to overheat, with a decrease, they stop, in the end I could not find that golden mean. Patience ran out and I took it apart. Immediately began to comprehend a new project. Having bought a profile, shafts and bearings, he began to design a new printer. And this is what I got...
on the way to creating a printer, I encountered various problems, alterations of the same node several times, according to the principle, it could have been better. As a result, it turned out pretty well, it's time for firmware, settings, calibration. Two weeks later, I printed the first cube on it, it was like a baby's joy))). And then the print quality race began. A huge plus of this printer is the rigidity of the design. I used 12mm shafts. the printer is very heavy, stepper motors from industrial printers (very quiet compared to nema17, in total it turned out to be very quiet. Problems started when printing more serious objects than a cube, it was a wobble, melted corners, the workpiece constantly came off the table, I eliminated the melting additional cooling of the filament at the exit from the node, I eliminated the unevenness of the layers by freeing the ends of the Z-axis screws on one side. The screws arrived a little bent, I tried different types of PLA 1.75 plastic on the printer, even a Belarusian manufacturer. I don't use it, it's very capricious! after all this housework, some engines came to me17, which were lost somewhere along the way. And then I said to myself (why not) and started building another printer. I wanted to make a printer with a closed case and print ABS plastic.The creation of the printer took about a month, since there was already something to print finished units on. there was a lot of spoiled material in the hull
this was the first option. After standing for a couple of days, I sawed again and this is what happened
after printing the cooling snail on the extruder, the body was immediately thrown away. The problem was the noise, which is infernal there
the print quality of the printer was better than that of the previous one. The lack of a printer in rattling bearings, I use the printer for business, to create equipment for my own production, well, I’ll attach a couple of photos.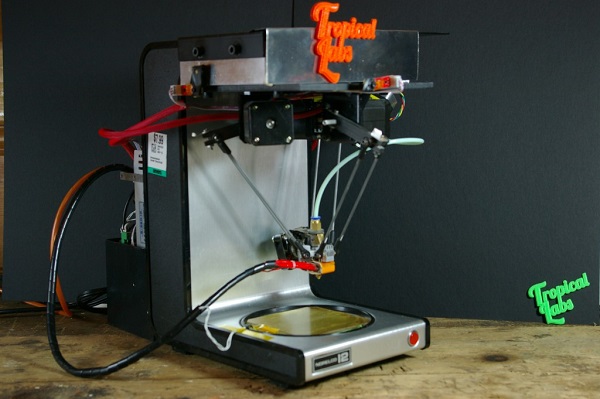 1 master model barna chair zebra( 9kg plastic REC) 2 weeks and 184 parts in this design)))
there was a long and tedious assembly process, then puttying with kilograms of
and the finish line
a month later the chair is finished. And finally, a couple more pictures
and finally
))) do not judge too harshly!
Follow author
Follow
Don't want
20
More interesting articles
Fox
Loading
07.10.2022
2607
23
Subscribe to the author
Subscribe
Don't want
A long time ago, you can say in another life, I got excited about buying a photopolymer printer.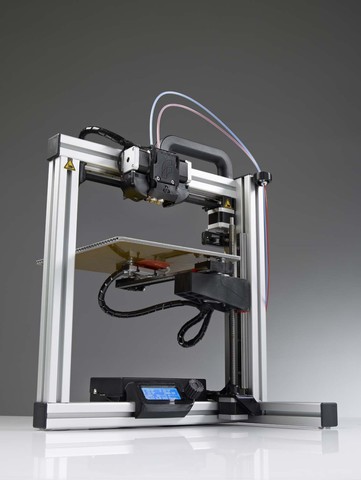 From one...
Read more
one
Subscribe to the author
Subscribe
Don't want to
Again Anycubic and again Photon, but with the subtitle M3 - what will surprise the initial device in the new l...
Read more
113
Subscribe to the author
Subscribe
Don't want
The review is a continuation of the story about the practical use of laser engraving at home...
Read more
8 nuances to pay attention to late
learn about 3D printing. And only a few lucky people, imbued with the opportunities that 3D printing opens up, catch themselves thinking that they want to purchase a 3D printer. The desire gradually develops into a serious decision and the search for the right option begins. And here the potential buyer is faced with the fact that he does not fully understand what to choose among the whole variety of 3D printers. We will try to answer this question in as much detail as possible. What to look for, and how to make a choice? We want to offer a small checklist of the nuances that you need to pay attention to when choosing a 3D printer. You need to decide for yourself for what tasks you will use this technique? What features should a 3D printer have to solve your problems?
Tip 1 : Decide on 3D printing technology
The first step is to decide on the technology of 3D printing. There are two main paths here. If you are faced with the task of manufacturing high-precision and miniature products, such as jewelry, then 3D printers using SLA or DLP technology are suitable for you. Such printers are specially designed for the manufacture of high-precision models. 3D printing in these printers occurs using a laser beam that illuminates the photopolymer resin. Hence the accuracy of the models. Prominent representatives of this segment: Form 2 3D printer or B9 3D printercreator If you are faced with a wider range of tasks, and functionality, part size, and low manufacturing cost are more important, then an FDM printer will suit you. 3D printing on this equipment involves layer-by-layer melting of plastic. If according to SLA printers everything is clear. The scope of their application is jewelry, dentistry, high-precision prototypes of small parts. Then we will dwell on FDM printers in more detail. There is a lot more variety of different options for implementing printers.
Nuance 2: Evaluate your needs
Of course, you always want to get all the best and with maximum opportunities. Do you need all this to solve your current problems? What can be cited as an example? For example, the size of the working area of the FDM 3D printer. There are printers on the market with a large print area (1m x 1m x 1m), and with a very small one (100mm x 100mm x100mm). But for most tasks, a certain standard has already developed. This is the printable area within 200 x 200 x 200 mm. With slight fluctuations in size in one direction or another. Most 3D printers have exactly this size of the working area. This volume is enough to solve 95% of any tasks. But options are possible ... If you plan to manufacture small parts, then a smaller size will probably be enough for you. But if your work will be related to manufacturing, for example, a master model for casting, or large prototypes, then only then it makes sense to pay attention to a printer with a large print area. In other cases, the size of the print area larger than the standard is nothing more than a nice bonus. But as they say, you have to pay for everything. Therefore, most often it makes sense to focus on the “standard” print area. And even if the part you need to print is larger than the working area of your 3D printer, you can always cut it in a special editor, and then print 2 parts of the model and glue them together.
Nuance 3 : Decide on the complexity of the products
You should decide for yourself how complex models you will print on a 3D printer. If you plan to manufacture complex prototypes, or complex art models, then you need a 3D printer that can print with two materials. This is necessary so that your printer can print supports from soluble material. If the models are not the most complex, then you can get by with one extruder and save the budget. A complex model is a model with a large number of elements suspended in the air, or a model whose elements have angles of more than 30 degrees.
Point 4: Decide on the list of materials to be used.
Another important point. You must immediately determine for yourself a list of possible materials with which you are going to print. This primarily applies to materials with a high degree of shrinkage, such as ABS and Nylon. In order to print with such materials, a heated table is clearly required in a 3D printer. And it is very desirable to have a closed case to provide a thermal circuit around the model. If you plan to print only with PLA plastic. You don't need a heated table. But still it is better that the printer has a heated table. Now the difference in the cost of printers with a heated table is practically the same as the cost without it. But you get a universal solution with which you can perform the full range of tasks facing a 3D printer. One more moment. Ability to print with flexible materials Quite a number of 3D printers face the problem of printing with flexible materials. Of course, printing with various Flexes and Rubbers is very interesting at first glance. But the use of these materials in life is not very common. Usually, for most people, this happens like this: A couple of models are printed, and the understanding comes that this is not a fast and rather complicated process. And this is where the acquaintance with flexible materials ends.
 Therefore, it makes sense to demand such an opportunity from the printer if printing with such materials is very necessary.
Nuance 5: Construction and kinematics
Next, you need to pay attention to the design of the 3D printer. Even if you are not a great specialist in technology, you can immediately see that some printers have an open design. And others are closed. As they like to be called in the Russian-speaking community "cubes". What does the appearance say? Printers with an open design, usually have kinematics with a horizontally moving table (based on Prusa 3D printers). This kinematics has some inherent flaws. Such as, not the highest print speed and possible print quality problems associated with the complexity of the settings. First of all, this is the so-called wobble. Also, the lack of a closed case can cause print quality problems with high shrinkage plastics (ABS, Nylon).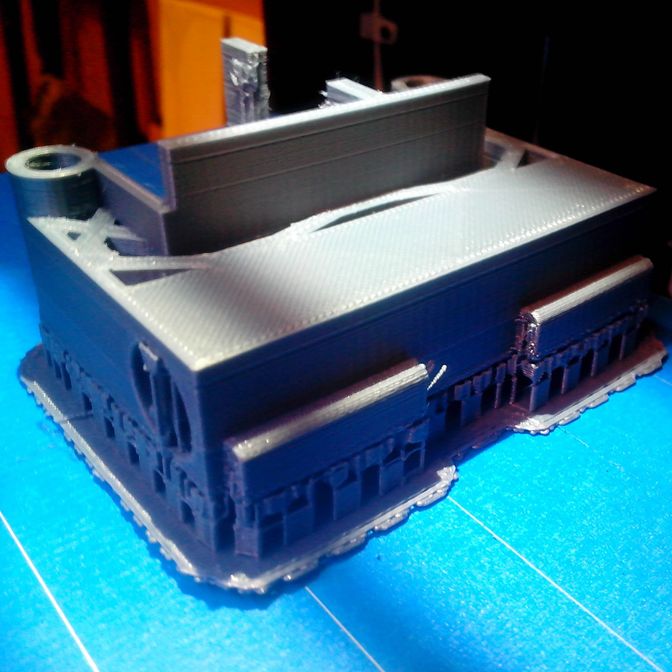 The main advantage of printers of this design is their price. It is usually lower. But as you know, you have to pay for everything. In this case, the worst performance. The so-called "cubes" today, is the main design, which is represented by leading manufacturers on the market. Such printers are built according to the lifting table scheme. And they lack most of the shortcomings that are inherent in printers from the previous group. “Cubes” usually have a closed body, which allows the highest quality printing with plastics with a high degree of shrinkage. Closed case printers are more rigid. This results in better quality printing. The kinematics of moving the print head is represented by various designs. They have their pros and cons. But most of them have advantages over moving table printer circuits.
Nuance 6: Diameter and changeable nozzle
Most 3D printers on the market come with 0. 3-0.4mm nozzles. This is enough to solve the vast majority of tasks facing a 3D printer. Some of the printers have the ability to install a nozzle of a different diameter, others do not. As we wrote above, the need to print with nozzles with a diameter other than 0.3-0.4 mm arises very infrequently. This mainly concerns, or personal experiments, or some very specific tasks. If you do not plan to do this, then this opportunity is not so necessary. What do we mean by specific tasks? This is especially true for printing large items, where it is very important to reduce the printing time. This can be achieved by using large diameter nozzles. For example, with a diameter of 0.6-0.8 mm, or even a diameter of 1 mm. For printers with a large printable area, the ability to change nozzles is already a vital necessity. Therefore, here, as in the case of a heated table, the ability to change nozzles is a good bonus. It is not mandatory, but very useful if you do not have to pay extra for it.
Nuance 7: Print thickness
It is important to understand that most models on a 3D printer are printed with a layer of 0.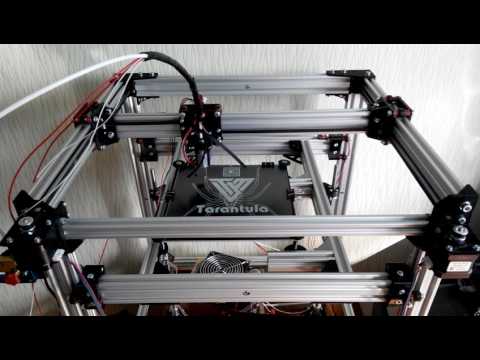 1-0.2 mm. These are the optimal values that allow you to achieve quality and acceptable print speed. There are a certain number of printers that allow you to print with a layer of less than 0.05 mm, and get very high quality prints. But then there is the problem of a sharp increase in print time. And if such print quality is important to you, then it probably makes sense to turn your attention to 3D printers, which we talked about at the very beginning of the article. These are 3D printers using SLA or DLP technology.
Nuance 8: Extruder type
Today there are two main types of extruder. This is a direct extruder in which the bar feed motor is located in the printhead itself. And the so-called Bowden extruder, where the plastic feed motor is located on the body. And the plastic itself is fed to the extruder through a fluoroplastic tube. What are the advantages and disadvantages of each type of extruder? Bowden extruder, due to the lack of a motor on the print head, has less weight. And therefore, it has greater positioning accuracy, which affects the print quality. And a higher speed of movement, which, accordingly, has a positive effect on the speed of printing. But it has one drawback. It is usually difficult to print with flexible plastics on a Bowden extruder. Such as Rubber or Flex. All its positive features, this extruder reveals when using plastic with a diameter of 2.85-3.00 mm. But this type of plastic is less common than the now standard plastic with a diameter of 1.75 mm. And therefore, users of printers with such plastic are often deprived of the opportunity to use new types of materials. Which are primarily produced in the most common form factor of 1.75mm. The direct extruder usually doesn't have such big problems with flexible plastics. Easier to set up, but due to the greater mass of the print head, it is inferior to the Bowden extruder in terms of speed and positioning accuracy. What to prefer? This is the user's choice. We just wanted to talk about the pros and cons of these extruder types.
 Of course, there are many more nuances when choosing a 3D printer. But we think that even our small list will force you to look and study some points that you may not have thought about more closely. And it will save you time and money when choosing a 3D printer. 3Dtool company has extensive experience in the 3D equipment market. We work with leading Russian and foreign manufacturers, offering high-quality equipment for a reasonable price. Our service center is staffed by highly qualified specialists who are able to solve any problem in the shortest possible time, and all offered 3D printers come with a 1-year warranty.
In our assortment you can always find 3D printers for your tasks:
1) Budget 3D printers
2) 3D printers for business
3) Large area 3D printers
4) SLA and DLP 3D printers
Do you have any questions?
Call: +7 (495) 324-07-90 (Moscow) and 8 (800) 775-86-69 (toll-free in the Russian Federation) or write to the mail: sales@3dtool.