Buy form 2 3d printer
Form 2 Review 2022 - Why This 3D Printer Is NOT Worth $3499!
4
See Price
When you’re searching for a high-end 3D printer, you’ll find that it gets harder and harder to find models that justify their price. Sure, they might come with advanced features, but are you actually going to utilize any of them?
Today we’ll be looking at a premium printer: the Formlabs Form 2. As such, we’re not going to pull any punches; if it has problems, we’ll let you know. However, we’ll also be sure to highlight any areas in which it excels. This will allow you to decide whether the Form 2 is right for your needs or not.
| Printer Type | SLA |
| Supported Materials | Various resins |
| Connectivity | Ethernet, WiFi, USB |
| Build Volume | 5.7 x 5.7 x 6.9” |
Table of ContentsShow
Design
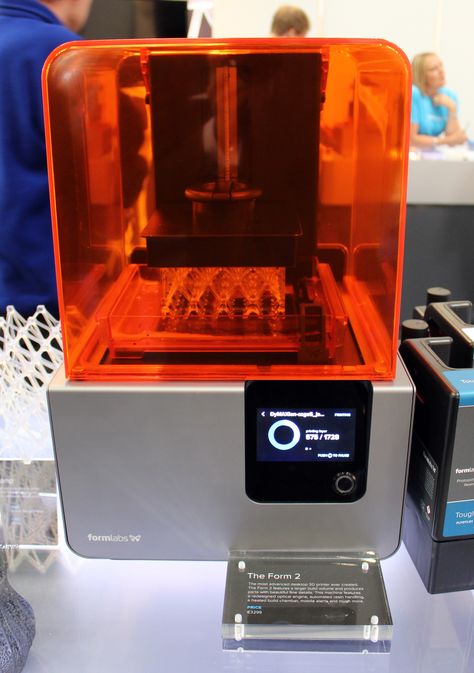
The Form 2 has a futuristic appearance, with an orange translucent cover and a clean, simplistic design. It’s different from most other 3D printers on the market, though, as it uses SLA printing instead of FFF. This means that it doesn’t use filament and build layer by layer – it uses a laser to solidify the resin.
Now, this resin is more expensive than regular filament, but the Form 2 can produce highly detailed models where the layers are all but indistinguishable. As such, it’s great for producing complex items. With a larger than average build area, there’s very little this printer can’t do.
Formlabs have taken steps to allow this printer to be used commercially. You’re not limited to proprietary resins, although there are specialized materials available for everything from jewelry to dentistry. Simply put, you’ll have a hard time finding a 3D printer that’s more versatile than the Form 2.
Printing
SLA printers almost always have higher overall quality than FFF ones, and the Form 2 is no exception. We found that it does an amazing job at creating extremely complex models, and there’s very little extra material left hanging off. Even sharp edges and overhangs pose very little threat to this printer.
The Form 2 goes out of its way to make things easier for you. It automatically finds the best orientation for any given print, and the user interface is very easy to get the hang of. It even provides a progress meter and displays the estimated remaining time, which is impressive.
It’s also worth mentioning that this is among the fastest printers we’ve seen. A 5” tall model takes around seven hours to print, so you can build working prototypes very quickly, safe in the knowledge that you won’t be wasting time on a failed print or a model with severe distortion.
Features
One of the best things about this printer is the Quick Print function. This not only orients your model properly, it automatically builds any supports needed to hold it in place. The kit comes with all the tools you’ll need to finish your models too – including plastic snips for eliminating these supports after building.
While there’s no SD card support, there is a Gigabit Ethernet port for local connections, and you can also choose to send files via WiFi if you’d like. To be fair, this feature is to be expected from a high-end printer. There’s always the option to print from a USB stick if all else fails, though.
Not only does the resin refill automatically, but you can experiment with all sorts of things. Want to add things into the middle of a print? No problem! Want to etch things mid-print? That’s okay too! Obviously, these features are intended for experts, but if you’re buying this model, it’s likely you’re already pretty experienced.
Cost
Now, here’s the kicker: this product retails for around $4,000. This is probably too expensive for most hobbyists, but for medical or manufacturers, it represents a good way to reliably create professional-level objects that can be customized on demand. There are some extra costs involved, however.
If you’re using this commercially, you’ll likely want to wash and cure the finished products to clean them and maximize their strength. Formlabs sells two accessories for this, but they’ll set you back a further $1200. They do allow you to automate the process though, so you could save a lot of time.
There’s also the cost of the resin to consider. One liter of basic resin costs about $200, so it’s not really worth it for creating simple models. In these cases, a basic FFF printer would be superior. As such, we’d advise using the Form 2 only for the most critical prints.
Support
The Form 2 comes with a one-year limited warranty, which is fairly standard. However, this can be extended by two years if you’re willing to pay around $550 more. Also, you can choose a service plan for around the same price. But what does this do?
Essentially, Formlabs will train you to use and maintain the printer yourself. They’ll also prioritize your queries over other customers, and hot-swap broken parts out so your business can keep running in case of any problems. This is a must-have for 3D printing businesses, even at this price.
Support is available via email, live chat, phone, or the user forums. The staff can give advice in English, German, French, and Italian, and Formlabs claims you’ll hear back in a matter of hours. This is clearly a premium support service for a premium product, and we’re glad the company pays such good attention to you even after they have your money.
Summary
To be brief: the Form 2 is a printer that boasts exceptional resolution and build quality. It allows you to fully automate the process, and the support team is absolutely fantastic. If you work in manufacturing or a medical field, there’s a lot of potential here.
That said, only large organizations will be able to afford this model. The printer, its add-ons, and support options are all prohibitively expensive. If there’s room in the budget, though, and you really need finely detailed models, we’d advise going for it – simply, there aren’t many printers better than this one.
Formlabs Form 2 3D Printer review: An excellent 3D printer for a hefty price
You want a great 3D printer? First off, make sure you have a good specific reason for one, like the need to make something that you can't buy. Secondly, be prepared to spend a lot of cash.
The Formlabs Form 2 is a prime example of an all-around good 3D printer. At $3,500 or £2,449, this is quite an investment. (Formlabs will ship to Australia from its international store, where the Form 2 costs the equivalent of AU$5,740.) On top of that, the print material, a liquid called resin, starts at $149 per one-liter cartridge (about 1kg or 2 pounds) and isn't cheap. In addition, as a stereolithography (SLA) printer, the Form 2 can only print solid forms with no ability to hollow out the thick parts of prints. This means it uses more material compared with the more popular and affordable fused filament fabrication (FFF) 3D printers. So yeah, it's costly.
Read more: The best 3D printers in 2019 for beginners and budget creators
In return, the printer worked well in my tests and was consistently reliable. It was also flexible -- supporting USB, wired network and Wi-Fi -- and easy to use with a large, helpful touchscreen. What's more, it includes a Finish Kit that comes in handy when cleaning the printed objects. (All SLA prints need to be cleaned before use.)
Despite its cost, the Forms 2 is easily one of the best 3D printers I've used, with excellent performance -- albeit a bit slow -- and stellar print quality. Sure, you can find cheaper 3D printers, such as the XYZprinting da Vinci Jr. or the XYZprinting Nobel 1.0, but you'll also have to deal with a downgrade in the quality of the prints. The Form 2 consistently delivers high-quality prints. Just make sure you really have a specific need for it. For more options, check out this article on other 3D printers we've reviewed.
The Formlabs Form 2 3D printer.
Josh Miller/CNETStereolithography 3D printing technology
The FormLabs Form 2 is the second SLA 3D printer I've worked with. Though it's a big step up from the first, the XYZPrinting Nobel 1.0, it shares the same 3D printing technology called stereolithography (SLA). This technology is completely different from another popular 3D printing technique, called fused filament fabrication (FFF).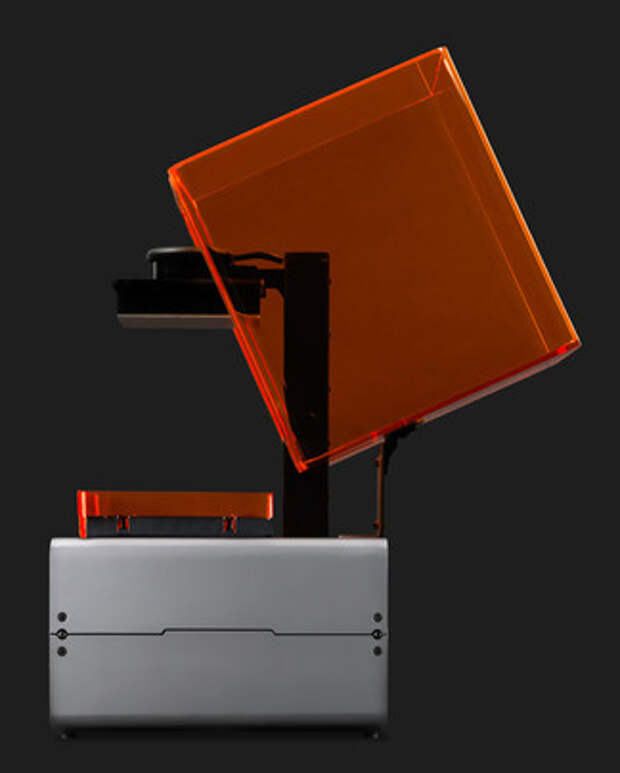
With FFF, the printer builds an object layer by layer from the bottom up on the print platform, similarly to icing a cake or using caulking. With SLA, however, the printer's print platform dips itself into a container full of liquid resin and slowly pulls up a solid 3D object, upside down. More specifically, as the print platform lowers itself into the resin glass tank, an ultraviolet laser light, from underneath the see-through tank, shines on it. (For this reason, SLA is sometimes called the laser 3D-printing technology.) Exposed to the laser light, the resin cures, solidifies and sticks to the platform. As more resin is exposed to the laser light, the pattern is created and joins the layer above. As more and more layers are being created, the build platform slowly -- very slowly -- moves upward, finally pulling the entire object out of the tank as the print process is finished.
A freshly printed chess set that took some 20 hours to create.
Josh Miller/CNETAnother big difference between FFF and SLA 3D printing is that, while FFF produces a lot of heat during a print job (which is required to melt the plastic filament), SLA remains cool the whole time. Instead, you have to deal with the sticky resin, which can be messy. Also, while an FFF 3D object is ready to be used as soon as it's through printing, an SLA 3D object needs to be washed with strong solvent (75 percent or higher alcohol) afterwards; otherwise, it will remain wet (and sticky) for weeks.
To help with the cleanup, the Form 2 is bundled with a Finish Kit that includes enough tools for the job.
Formlabs Form2 3D printer specs
| Technique: | SLA (Stereolithography Apparatus) |
|---|---|
| Printer dimensions: | 13.5 × 13 × 20.5 inches (35 × 33 × 52 cm) |
| Weight: | 13 pounds (28kg) |
| Display: | Interactive touchscreen |
| Light source: | EN 60825-1:2007 certified Class 1, 405nm, 250mW violet laser |
| Connectivity: | USB wire, Ethernet, Wi-Fi |
| Build size: | 5.7 × 5.7 × 6.9 inches (145 × 145 × 175 mm) |
| Power requirements: | 100–240 V |
| Layer thickness: | 0. 001, 0.002, 0.004, 0.008 inches (25, 50, 100, 200 microns) 001, 0.002, 0.004, 0.008 inches (25, 50, 100, 200 microns) |
| Print material: | Photopolymer resin |
| Resin supply: | Auto-refilling |
| Resin cartridge capacity: | 1 liter |
| Software: | Formlabs Preform |
| Operating system: | Windows 7 or later, Mac OS X 10.7 or later |
| File types: | STL, OBJ, FORM |
Excellent design, expensive resin
The Form 2 comes mostly preassembled and looks like a rectangle box standing upward. Like most SLA 3D printers, it has a large see-through orange plastic hood on top that keeps its resin tank from the the outside world during a print job. This hood is attached to the printer, but you can easily open it up to access the inside.
Out of the box, you just need to open the hood, install the included print platform, resin tank (which is directly under the print platform) and resin cartridge; the printer is now complete. The Form2 is well-designed; all of its parts snap into its body quite easily. During a print job, the printer automatically detects the type of resin and draws it from the cartridge to fill the resin tank before the print platform lowers itself into the tank as the base for the resin to adhere to.
The printer includes one print platform, one resin tank and one resin cartridge. If you just want to print one type of resin, there's no need to get an extra resin tank. However, if you plan to print multiple types of resin, or resin of different colors, it's a better idea to get an extra resin tank (and even an extra print platform) for each resin type/color. This is because you don't want to mix resin types and colors together (which would lead to undesirable print results) and since the resin is very sticky, it takes a long time to clean the parts. Not only that, but cleaning the tank is not recommended since you might accidentally scratch its bottom which will interfere with the laser beam during a print job.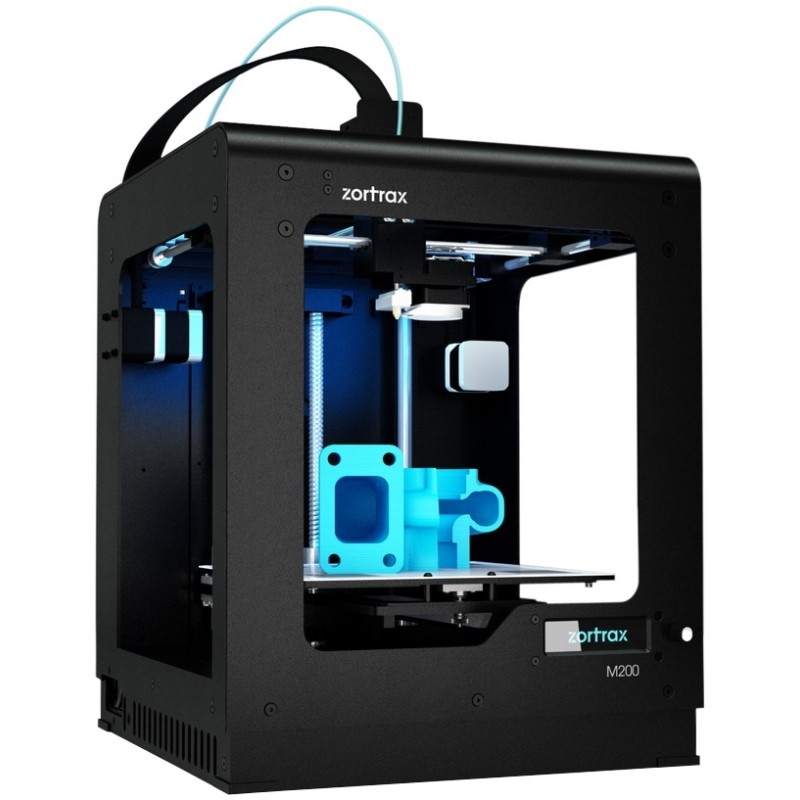
Formlabs sells extra resin tanks for $60 each and the resin cartridges costs between $150 and $300 each, depending on the type, be it regular, tough, castable or flexible. Considering each cartridge contain 1 liter of resin (about 2 pounds, or 1kg, worth of material), in addition to the high initial cost, the Form 2 is also quite expensive to use over time.
The printer's touchscreen includes a virtual bubble level to help with getting the printer leveled.
Josh Miller/CNETEasy setup
Getting the printer up and running is mostly a simple job, thanks to the large touch screen on the front.
The only tricky part, which is the one thing you have to do, is to get the printer leveled on its four adjustable feet, which is why it's tricky (it's easier to get a plane with three feet.) To help with this, the touchscreen includes a bubble level that visually shows how the printer is positioned. In the end, it took me just about five minutes to get the printer up and running out of the box.
The printer can be connected to a computer via its USB port on the back. It also supports network printing via a network port also on its rear side. Or you can use the touchscreen to connect it to a Wi-Fi network. Whichever way you decide to connect the printer, it's recognized right away on a computer after the software, called PreForm, is installed. You can download the software from FormLabs, which has two versions: one each for Windows and Mac.
The printer's resin cartridge is well-designed and can be easily replaced.
Josh Miller/CNETStraightforward software
The PreForm software is very similar to that of most other printers I've reviewed. It's straightforward and easy to use. Its interface consists of large and self-explanatory buttons that allow you to view and manipulate 3D model files. Once the print command is invoked, depending on the size and complexity of the 3D model, the software takes anywhere from a few seconds to several minutes to transfer the data to the printer. After that, you need to use the printer's touchscreen to select the job you want to print, then push the button to initialize the print process. Once that's done the printer will print on its own, without having to be connected to a computer.
The printer will retain the print jobs you've sent to it. You can always use the touchscreen to scroll between jobs to delete one or to print it again. As you pick a job, the screen even shows a preview image of the 3D object, making it very convenient to know what job you're selecting, in case you can't recognize it by name.
The Form 2 supports standard and popular 3D model files. There's a huge collection of free 3D object models at Thingiverse that you can use, or you can make your own using software, such as SketchUp or Autodesk 123D.
The touchscreen can render a preview of the print job's object prior to printing.
Josh Miller/CNETPerformance
Like the XYZPriting Nobel 1.0, speed isn't the forte of the Form 2.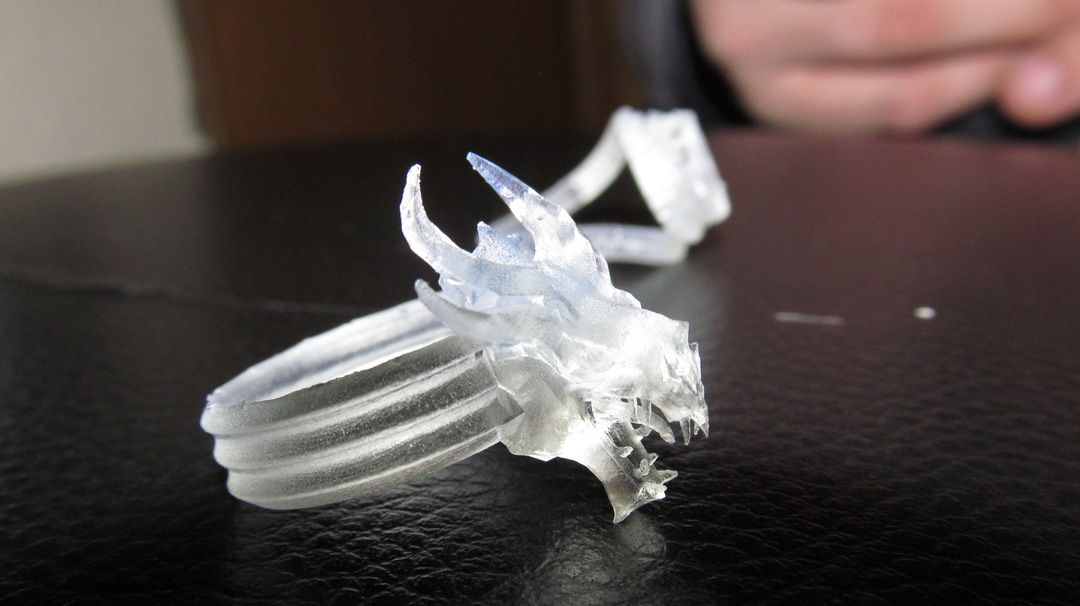 The printer is quite slow, taking about an hour to print an iPhone 5 case, which is about the same as an FFF printer. However, if you print something with thick portions, such as a ball, or a model puppy, the Form 2 will be much slower than an FFF printer. This is because as an SLA printer, it can't hollow out the middle. Instead it prints everything as a solid form.
It's important to note that there will always be residual resin left in the tank after each job and that means if you don't print another job for a long time, you will likely waste that resin. And even if you print frequently, in order to save resin, you will need to get a separate tank for each type and color of resin because there's no way to pour the resin in the tank back into the cartridge.
This printer can make incredibly detailed objects.
Josh Miller/CNETThe Form 2's strength, however, is in its consistency and quality. During a couple of weeks of testing, I never ran into a failed print. In fact, it was very hard to mess up a print job, even when I tried. Once I deliberately tilted the printer during a job; the printer paused the job immediately and prompted me via the touch screen to relevel it. Once the printer was releveled, the job automatically resumed and completed without a hitch.
The Form 2's print quality is superior to that of any 3D printers I've reviewed. Its printed objects look just like those you buy from a store, with a smooth surface and great details. And the fact that it supports special types of resin (tough, castable and flexible) means its prints that can be used in many real-life applications, instead of just something to look at.
Note that you need to clean the object with high-concentration solvent before you can use it, and make sure you use a pair of protective gloves for the job. Generally, using an SLA printer like the Form 2 can get quite messy, so don't use it in your living room but rather in a separate office or workshop.
Conclusion
At $3,500, the Form 2 is too expensive for most users, and the high cost for the resin means you can certainly buy ready-made items from the store for much less. If you've drawn up something unique that you want to make, however, the Form 2 is an excellent machine to literally turn that idea in to reality.
The truth is, until the price of 3D printing comes down, the only reason to get a 3D printer is because you have something specific to make; something you can't necessarily buy, such as a customized set of chess pieces or the logo of your own business. And among all 3D printers I've reviewed, the Form 2 is actually the first that shares the same level of reliability and consistency as most regular non-3D printers. On top of that, its print quality is unmatched by any other 3D printer in its price range. I've seen other printers that can print even higher quality objects, but they're also significantly more expensive.
That said, if you can live with print quality a notch lower, there are other 3D printers that also work quite well and don't dig a hole (or at least, will dig a smaller one) in your pocket, such as the Da Vinci Jr, the Da Vinci AiO 1. 0 or the 3D System Cube 3. These FFF printers are much cheaper than the Form 2. And if an SLA printer is what you want, also consider Nobel 1.0. It's not as good, but it's also $2,000 cheaper than the Form 2.
How a 3D printer works, what can be printed on a 3D printer
The 3D printer is a technology that allows you to create real objects from a digital model. It all started in the 80s under the name "rapid prototyping", which was the goal of the technology: to create a prototype faster and cheaper. A lot has changed since then, and today 3D printers allow you to create anything you can imagine.
Contents:
- What is 3D printing?
- How does a 3D printer work?
- What can be printed?
The 3D printer allows you to create objects that are almost identical to their virtual models. That is why the scope of these technologies is so wide.
What is 3D printing?
3D printing is an additive manufacturing process because, unlike traditional subtractive manufacturing, 3D printing does not remove material, but adds it, layer by layer—that is, it builds or grows.
- In the first step of printing, the data from the drawing or 3D model is read by the printer.
- Next is the sequential overlay of layers.
- These layers, consisting of sheet material, liquid or powder, are combined with each other, turning into the final form.
With limited production of parts, 3D printing will be faster and cheaper. The world of 3D printing does not stand still and therefore there are more and more different technologies competing with each other on the market. The difference lies in the printing process itself. Some technologies create layers by softening or melting the material, then they provide layer-by-layer application of this same material. Other technologies involve the use of liquid materials, which acquire a solid form in the process under the influence of various factors.
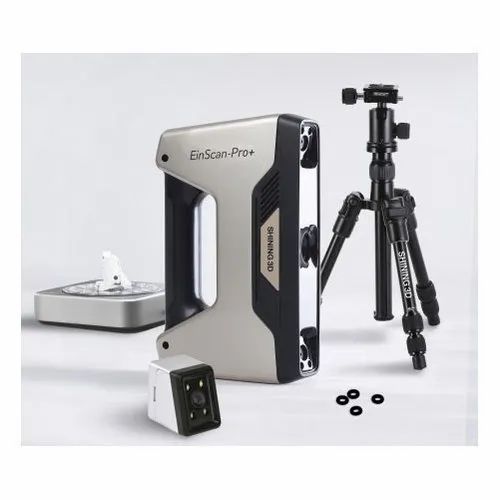
In order to print something , you first need a 3D model of the object, which you can create in a 3D modeling program (CAD - Computer Aided Design), or use a 3D scanner to scan the object you want print. There are also easier options, such as looking for models on the internet that have been created and made available to other people.
Once your design is ready, all you need to do is import it into the Slicer, a program that converts the model into codes and instructions for a 3D printer, most of the programs are open source and free. The slicer will convert your project into a gcode file ready to be printed as a physical object. Simply save the file to the included SD card and insert it into your 3D printer and hit print.
The whole process can take several hours and sometimes several days. It all depends on the size, material and complexity of the model. Some 3D printers use two different materials. One of them is part of the model itself, the other acts as a prop that supports parts of the model hanging in the air. The second material is subsequently removed.
How does a 3D printer work?
Although there are several 3D printing technologies, most create an object by building up many successive thin layers of material. Typically desktop 3D printers use plastic filaments (1) which are fed into the printer by the feeder (2) . The filament melts in the print head (3) which extrudes the material onto the platform (4) creating the object layer by layer. Once the printer starts printing, all you have to do is wait - it's easy.
Of course, as you become an advanced user, playing with the settings and tweaking your printer can lead to even better results.
What can be 3D printed?
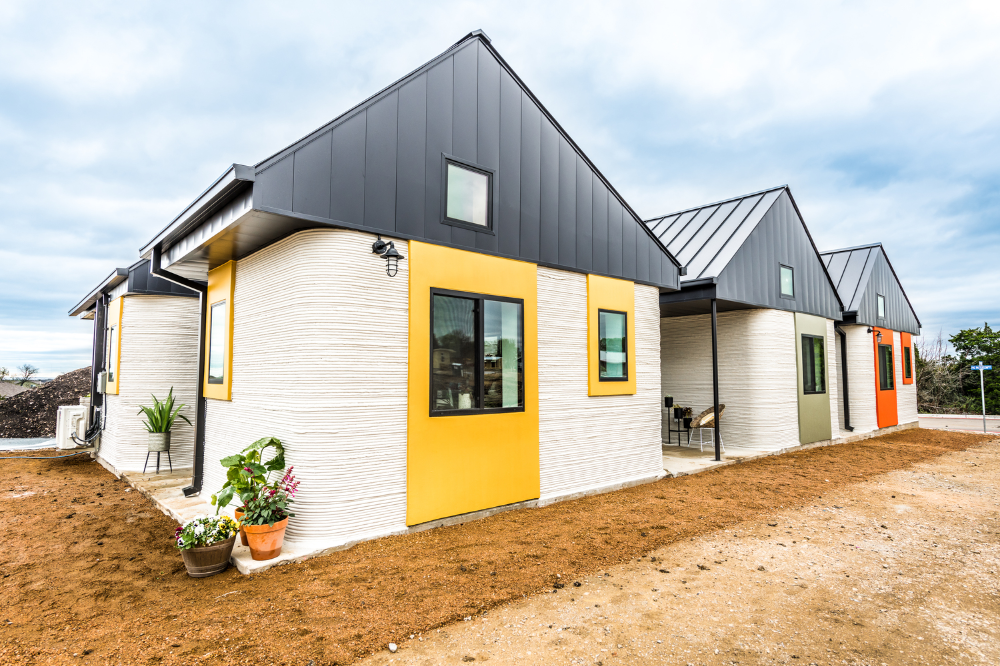
The possibilities of 3D printers are endless and they are now becoming a common tool in fields such as engineering, industrial design, manufacturing and architecture. Here are some typical usage examples:
Custom Models
Create custom products that perfectly match your needs in terms of size and shape. Do something that would be impossible with any other technology.
Rapid Prototyping
3D printing allows you to quickly create a model or prototype, helping engineers, designers and companies get feedback on their projects in a short time.
Complex geometry
Models that are hard to imagine can be easily created with a 3D printer. These models are good for teaching others about complex geometry in a fun and useful way.
Cost reduction
The cost of 3D printing end-use parts and prototypes is low due to the materials and technology used. Reduced production time and material consumption as you can print models multiple times using only the material you need.
How to choose and buy a 3D printer? →
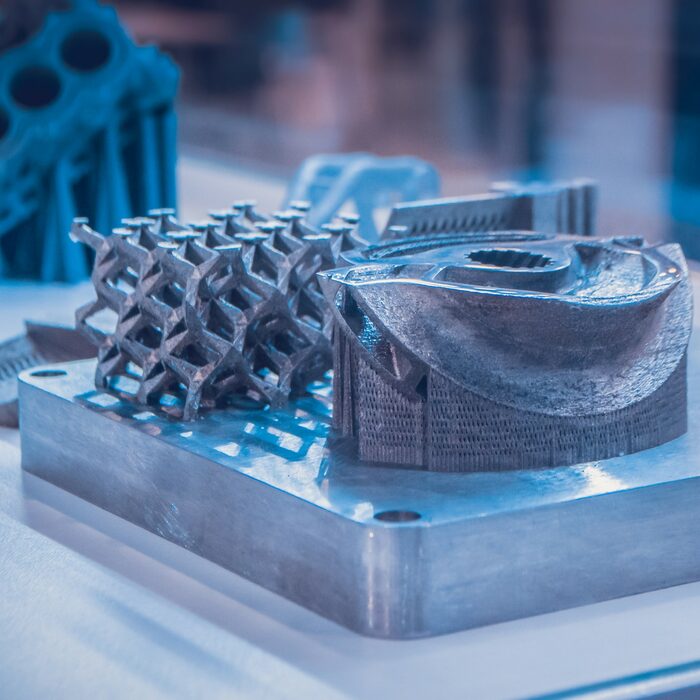
3D printing mold making
Desktop 3D printing molding allows engineers and designers to get more functionality out of a 3D printer beyond prototyping. Molding opens up a world of production materials and provides the opportunity to produce small batches and sample molds before using expensive
tools.
This booklet covers the following three mold making strategies: injection molding, high temperature molding and injection molded elastomers. Typically, molds are made from Formlabs clear resin, which is preferred for its transparency, although any standard resin can be used, and high temperature resin is ideal for processes with high temperature requirements.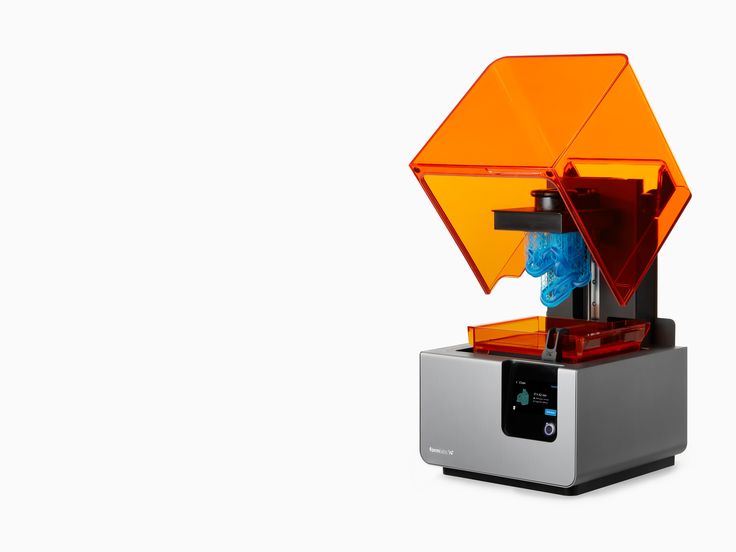 It should be noted that these processes are best suited for stereolithographic 3D printing (SLA) because the printed parts are isotropic and waterproof.
Prototyping and small-scale production with 3D printing tools
| Process | Equipment | Run time | Material cost (for example: 300 ml / cm3) |
| Do-it-yourself mold making and parts making | Form 2 and injection molding machine | 5 to 24 hours (form print time) | Approximately $50 for High Temperature Resin |
| Third Party SLA Form | injection molding machine | 3-5 days | Approximately $700 for back office printing on industrial SLAs |
| Outsourced metal mold | injection molding machine | 1-2 weeks | Approximately US$6,400 for office desk, aluminum finish |
| Outsourced mold Creation and production | no - full outsourcing | 1-3 weeks | $4,000 to $15,000 depending on volume and materials |
Silicone molding and some desktop molds are available using Formlabs Standard Resins High Temp, which has the highest HDT at 0. 45 MPa for any 3D printed media currently on the market and allows print parts that can be used for high temperature forming such as thermoforming and injection molding of materials with higher melt temperatures
Injection molding
High-resolution SLA 3D printing on the Form 2 can be used for rapid prototyping of inexpensive injection molds that can be used to make real parts from a wide variety of
thermoplastic materials. Injection molds can be used to test mold designs prior to metal tooling or to produce low-volume parts
3D printed mold injection molding covers injection molding using Formlabs clear resin printed molds. Following the release of Formlabs High Temperature Resin, designed to achieve higher heat resistance and stiffness, the booklet has been updated to describe the benefits of High Temperature Resin plates that are less likely to break due to thermal shock or temperature-related deformation
USB Device Enclosure Mold, 3D Printed on Form 2 High Temperature Resin
This mold contains a core, a cavity and two "gates" leading to the two halves of the enclosure. High temperature resin molds can be used to mold a wide range of thermoplastics without thermal stress or temperature-related deformation
Formlabs High Temperature Resin can be used to injection mold a wide range of plastics.
3D printed mold tools reproduce the exact quality of the SLA print finish on the Form 2. Forms can be printed at 100 microns for faster prototyping or the recommended 50 microns for fine detail and smoothness
electronics molded in HDPE with a High Temp tool.
This shape of the USB case has been adjusted over three iterations to remove pits, entrapped air, and partial shrinkage. Total cost of materials for prototyping this high temperature resin mold tool: $25
Thermoforms
Form 2 3D printed thermoformed dies are a fast and efficient way to create high quality vacuum formed parts for low volume production. Printed thermoformed dies can be used to make packaging prototypes, clean orthodontic retainers, and food-safe molds for chocolate confectionery.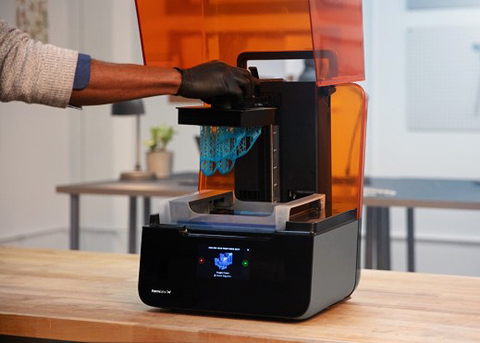
Thermoforming dies experience less pressure than injection molds, but still reach high surface temperatures.
High temperature polymer resists deformation and surface degradation from the combined heat and pressure of thermoforming for most plastics. Standard resins may also be suitable for thermoforming with some low temperature plastics such as vinyl.
APPLICATION EXAMPLE
Formech thermoformed prototype packaging.
Thermoforming a thin sheet of polycarbonate over a high temperature polymer matrix produces a transparent detail by matching the geometry and detail of the matrix. Thermoformed packaging can be easily prototyped and incorporated into the design process along with 3D printed product prototypes, and all this is achievable on the Form 2. The printed matrix was used without additional processing and the need for UV curing. Texture is recommended in thermoforming design to prevent air trapping under the sheet - layer lines on the printed thermoforming die can be helpful in this regard.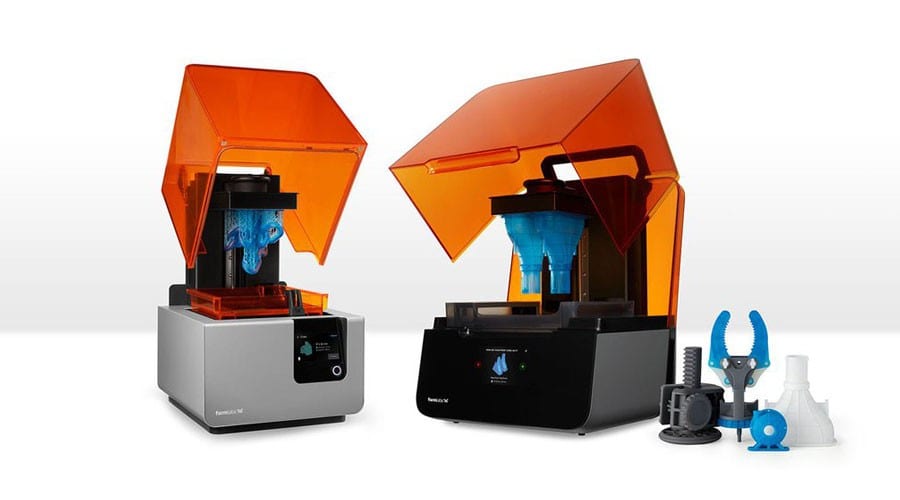
TEMPERATURE CONTROL
High Temperature Polymer Cycle Thermoforming
The surface temperature of the die reaches 130°C. The high temperature resin is highly resistant to deflection, whereas with standard resins you must allow the print matrix to cool between cycles, otherwise warping and degradation may occur.
If temperature rise becomes the limiting factor in molding efficiency, cooling channels are an effective way to remove heat from the print. When used in conjunction with an automated thermoforming machine, the water-cooled die can produce more parts with shorter cycle times.
Conformal water channels visible in the thermoforming high temperature die.
Thermoforming die surface temperature
Conformal cooling channels are easy to implement when designing for SLA 3D printing and print successfully without any internal supports to interfere with flow. After printing, the channels are flushed with uncured resin using isopropyl alcohol. The mold is connected to a pump and a source of cold water.
Integrated water cooling as a strategy can also be applied to standard and rigid polymer parts to reduce heat dissipation when used in higher temperature environments.
Elastomer casting
Precision molds for most flexible elastomers, such as silicone and urethane rubbers, can be printed on the Form 2 using standard resin. The transparency of Clear Resin allows the material to be observed during the pouring or injection process. Flexible materials can be easily removed from rigid SLA printing plates, and applications from model production to functional molding can be obtained. Silicone molding can also be used to quickly replicate master prints, greatly reducing production time when multiple rigid parts and objects are needed.
APPLICATION EXAMPLE
Forms printed on Form 2 are used to create composite parts with advanced built-in features. Assembly subcomponents such as electronic, metal and SLA printed elements can be embedded and sealed in soft surface molds.
RightHand Robotics used the Form 2 to create the production blocks of their robotic gripper using urethane molding. The forms were printed in clear resin, with black resin inserts forming the internal structure.
The Form 2 printer allowed RightHand Robotics to move from prototypes to small-scale production without the need for expensive tooling. The rapid transition from original printed prototypes to production materials that have longer flex cycle life was done with 3D printed plates on the same Form 2 hardware they used for initial prototyping.
The first layer applied from RightHand Robotics' multi-stage process includes urethane compounds that can withstand multiple flex cycles while still providing the high elasticity needed to securely return the gripper to its open state.
The outer layer provides improved tactile grip and control, as well as sealing the sensor electronics with softer, lower durometer rubber.
SLA 3D printed parts can also be encapsulated inside molds to provide a rigid structure for flexible materials.